Compact steam room with your own hands. How to make a steam room in a wooden bath
The main functional room of any bath will be the so-called steam room or, as it is also called, the steam room. Her high-quality arrangement allows you to make wellness procedures more effective, high-quality and enjoyable for a person and significantly increase the popularity and demand for a bath as such. And it is simply impossible to imagine that the Russian bath does not have a steam room.

Device Features
The device of this room should be not only simple, but at the same time as comfortable and convenient as possible for those who will use it. Most importantly, it must contain right amount shelves and racks. It should be said that the stove is the main component of any steam room, because it is precisely the role assigned to it to ensure the correct microclimate, as well as the comfortable required temperature in this room. Today in the steam room it is possible to easily install any type of stove: stone, electric, or made of metal and brick.


If we talk about shelves, they are formed from boards and leave a small space between them, thereby forming a drain. By the way, it is better to use any wood for shelves, except for conifers. Shelves should be fixed in such a way that free space there was as much as possible and there was an opportunity to carry out a quick cleaning after visiting this room. Under them, you can place various kinds of bath accessories such as various ladles, buckets, as well as brooms. In general, the distance between the floor and the shelves should be maximized, because cold air masses accumulate under them.
The steam room should have ideal proportions so that it warms up well to the required temperature level.
It is best to design an option with an area of 2 by 2.5 meters. Its height should be 2.10 - 2.15 meters. This size is enough for both brick and wooden steam rooms.


Its walls must also be sheathed with special insulation, which will for a long time retain heat inside and at the same time under the influence of high temperatures will not emit harmful substances into environment. If speak about flooring, then usually it is made either from boards or from tiles, which are quite easy to care for.
The door must have minimum dimensions, because it can become a source of additional heat loss. It is better if it is located near the furnace. It should not have constipation and be easy to open and close tightly. The latter is extremely important due to the fact that it is not uncommon for such doors to jam due to swelling of the tree due to high humidity. There can be no windows in such a room at all, but if you still want to make them, then they should be very small, deaf and located as high as possible to the ceiling.


Mandatory element, without which effective use such a room is not possible, is ventilation system, which will bring out excess moisture and will provide a constant supply of fresh air.

materials
Such a room can be built from various materials - brick, stone (natural), foam and gas blocks. But of course, the best material there will be a tree. As a rule, rounded or planed logs are taken for a steam room. There are cases when you can use a bar. Glued laminated timber can also be a good solution due to maximum moisture resistance. But it also has a corresponding cost.


The most convenient in laying and the most affordable can be called a profiled beam, which is also quite resistant to deformation effects of various kinds. For the construction of a steam room, wood species such as aspen, birch or larch and linden are perfect. The mentioned species of these trees do not emit any resins at all. You must be extremely careful if you decide to choose a pine tree. It is better to make only walls from this wood, but it is better to finish them inside from non-coniferous wood.
Also for the steam room as a whole great solution is linden, because it has wonderful cleansing and diaphoretic agents. In addition, this material has excellent strength, durability and hardness, besides, its price is attractive.


Project and calculation
You need to create a project before starting construction works. Dimensions will vary due to a large number of nuances. First you need to understand how many people will be steaming here at the same time. This indicator will directly depend on overall dimensions premises. If we talk about the norms, then at least 0.7 m2 should be allocated for each person.
To calculate the height of the room, you can choose the height of the tallest family member and add 20 centimeters. During the calculations, you need to understand that the ceiling will receive additional insulation, which means that its level will be slightly lower than originally expected. Making the steam room too high is also not the best solution, as this can cause not only insufficient heating, but also extra energy costs to compensate for this shortcoming.

Hot air masses will simply go up to the ceiling and will not have any necessary effect on those who are in the steam room. It is best if the height of the steam room is 2.2-2.4 meters.
The placement of people in the sauna can be either recumbent or seated. The seated arrangement in the steam room will make it possible to make it more compact. The shelves on which it is supposed to lie require significantly more space. In this case, the minimum length indicator will be 20 centimeters more than the height of the tallest member of the family.
It is imperative to work out the issue of the ventilation system. Since this room is not a washing room or a rest room, steam will accumulate here so much that, in the presence of permanent and constant humidity, everything wooden elements quickly become unusable, it will also cause mold, which will make the microclimate unfavorable for humans.


Where to put the oven?
Another important question which we will try to answer in this article. If you refer to SNiP under the number 41-01-2003, then the stove in the bath should be located at a distance of at least 32 centimeters from wooden structures. If the walls are protected by materials that do not burn, then the distance can be reduced to 26 centimeters. These norms are very important, since any steam room has its own central element - the stove.
Its location is very important, because the efficiency of the entire system will depend on it. It is usually installed next to outer wall, which allows you to bring the chimney through the wall on the street without damaging attic floor and roof.


But there is an option to create a traditional design with vertical pipe passing through the entire construction of the bath. To do this, a special hole is made in the ceiling ceiling, which is carried out through the attic, which is passed through the roof. After that, the gaps between the pipe and the roofing material are covered with waterproofing. This option is more difficult to implement in terms of installing a chimney. But if you give preference to him, then this will significantly save space in the steam room due to the indentation from the wall. But here we should not forget that the oven should be compact.
By the way, on the market today you can find quite small options that have great efficiency and will be a great solution for any steam room.


Tools and accessories
In order to make a steam room, we need:
- beams for the construction of walls, as well as partitions;
- concrete-based mortar;
- clay, sand, gravel;


- reinforcement for creating a foundation;
- boards for creating formwork;
- waterproofing materials;


- refractory brick;
- tile;
- lining;


- mineral wool or any other insulation;
- slate and galvanization;


- antiseptics;
- fixtures, cable, junction boxes, switches and fans.


If we talk about tools, then we will need:
- shovel or small excavator;
- saw (electric or gasoline);
- axe;


- electric drill;
- hammer;
- electric screwdriver;


- construction stapler;
- caulk;
- mallet;
- level and rule.


After all of the above is at hand, you can proceed directly to the construction.
Installation and insulation
After the project has been fully drawn up, and the calculations you have made have been checked for inaccuracies and errors, you can begin building the foundation of the future steam room and walls with your own hands. This will help the following step-by-step instruction.
So, the first stage of work will be laying the foundation. To do this, you must first dig a pit in the shape of a rectangle. Its depth should be at the level of 1/2 of the freezing of the earth. The height above the ground should be 17-19 centimeters. If there is no base, then you can raise the structure by 60 centimeters. It is also important that the width of the foundation be 10 centimeters greater than the width of the beam itself. After that, we install the reinforcement on which the first crown will be fixed. Next, we make the formwork and fill the foundation with prepared concrete. If bubbles appear during pouring, then remove them with special tool. Now we dig under the sink drain hole with dimensions of 1.8 x 1.8 x 1.5 m and its walls are poured with concrete.

After this, the foundation must be allowed to settle for 6-7 days. In the upper part, it is necessary to make ventilation holes, which should be located on walls opposite to each other. At the next stage, we build a blind area around the foundation. To create it, we take clay and mix it with rubble, pouring a layer 5-10 centimeters thick.
Now, along the perimeter of our foundation, it is necessary to lay roofing material. It will be best if it is laid in several layers. It should extend beyond the dimensions of the base by 50 millimeters. In order to build walls, you can use factory wall kits if desired. You can also cut the timber into blanks of the length we need. They need to make special spikes and grooves. After that, in the initial row, we make markings in accordance with the installation of the reinforcement and drill holes 25 millimeters deep, after which you can proceed with laying the first crown of the bath walls. To do this, we put it on the pins, we connect the bars, after which we seal the connection points.


Then we put the second row, drill holes that will go half the height of the first row. Now we pull out the second row and drive dowels into the holes of the first at 1.5 parts of the height of the timber. After that we fill the next row. Now we connect the crowns with dowels, and we insulate the grooves with jute. We also leave room for doorways. And thus we build a bath with a steam room up to a certain level of height.
Now we cut into the upper crown beam ceilings, and in their lower - rafter ends. The upper ends should be connected in the ridge. Between the rafters we take steps of 1–1.2 meters, after which we nail a board for the ridge and a crate to them. A vapor barrier and waterproofing are laid on top, which can be foil, after which we put some roofing material on top, for example, slate. Also, it is necessary to foresee the presence of embedded pipes in advance. After that, we can say that the frame of the bath with a steam room is ready.


Ceiling: proper ventilation
In order to reduce high humidity in this type of room, as well as to prevent the appearance of mold and fungus, the steam room in the bath should have a really effective and reliable mechanism exhaust ventilation. Such a system will be the best solution for the timely removal of excess moisture and the supply of clean air from the street. According to experts, it is best to make a supply and exhaust ventilation mechanism in rooms of this type, which will have a built-in air duct.
In this case, the supply channel should be located near the firebox in the lower part of the steam room. The hood in this case should be installed in the upper part of the opposite wall almost under the ceiling. The size of the exhaust duct should be twice the diameter of the supply duct.
And you can regulate the air flow with the help of the most common built-in valves.


Floor
The installation of the floor can be done immediately after the frame of the room has been built. If we are talking specifically about the steam room, then here the floor level should be significantly higher than in other rooms. Consider how to properly lay the floor.
On a pre-prepared foundation we put logs from wooden beam, after which we nail boards on them. The distance between them should be 6-9 millimeters, and between the floor and the ground, the distance should be at least half a meter. After that, we make holes for ventilation.


It should be said that the concrete floor will be more durable and stronger, but its cost will be significantly higher. In the washing room, where the shower cabin will stand, and in the steam room we tear out a pit 12 cm deep for water to drain. We make its walls from concrete mortar. On top we lay a crate of metal. From here the water will flow into sewer drain. When it is ready, we make a screed. To begin with, we need to mark the points to which the floor level will be brought, after which we measure the distance from them in order to fill the screed. Now it is necessary to level the ground and remove a little of the top layer, after which we pour a layer of sand up to 45 centimeters, moisten it with water and tamp it well, making a slope towards the drain.
Now pour the first five-centimeter layer of concrete mortar. After the screed dries, we roll out glass isol or roofing material on it, after which we lay a layer of thermal insulation half a centimeter thick. On all this we put metal reinforcement from the mesh, on top of which we pour the second concrete layer already 10 centimeters thick. Now we level the concrete and remember the slope of the drain. A tile or other floor covering is placed on top of the entire structure.


Walls: "pie"
If the walls of the steam room are made of foam blocks or according to the so-called frame technology they need additional insulation. In fact, inside we should receive a thermos, where it will not fall cold air and which will retain the heat coming from the oven. This will make it possible to significantly save the resources that will be spent on heating, as well as maintaining a certain temperature regime. In fact, you need to create a "pie" of the wall. So it is called because the materials are stacked in layers, which makes it look like a pie.


Before starting, a hole is made in the wall where the stove will be installed. After that, a windproof film is fixed on the walls and bars 5 centimeters thick and 4 centimeters wide are screwed. The step between them should be equal to the width of the insulation tiles. After that, a basalt insulation, which belongs to the category of non-combustible, is quite tightly laid between the mentioned bars. Now you need to nail the waterproofing to the bars. It is best to do this with galvanized staples. As protection, you can use one of three options:
- waterproofing bath membrane;
- high density foil;
- penoizol based on foam type foil.


Strips of one of these materials are nailed using the same staples with an overlap of at least 15 centimeters. All joints must be sealed with a special adhesive tape, and only then slats with a thickness of 25 mm and a width of about 40 mm are fastened with galvanized screws every 70 centimeters from each other. Now we evenly install the crate using a laser level.
Its installation starts with 2 rails along the edges, between which a cord is pulled, which serves as a guide for nailing other crate elements. After that, the lining board is already attached. To fix it, you can use special galvanized nails. After that, it remains to make holes in the wall for ventilation, which must be masked with plugs or dampers.


If necessary, you can in one of ventilation holes install a fan.
Installation of windows and doors
As mentioned above, construction separate steam room does not provide for the installation of windows, so artificial lighting will be more than enough. By the way, we should not forget that for all windows it is required to make thermal insulation of the blocks, which will entail additional costs. Alternatively, you can mount 1 blind window measuring 50 by 50 centimeters. In order to make a steam room of really high quality, you should definitely buy the best double-glazed windows, which have maximum efficiency in matters of heat and sound insulation.


Naturally, you need to make doors in the steam room. It should be understood that door frame is at a level below normal, and the threshold is slightly higher. Such a solution will reduce heat loss and prevent drafts from forming. Optimal height threshold is considered an indicator of thirty centimeters. The door is installed in such a way that people entering it cannot get burned from the material heated during the operation of the steam room.
The tree has good thermal conductivity, which is why it is better to sheathe the door on both sides with foil and special insulation. And from above they can be disguised with the same clapboard.
An alternative to such a solution would be to simply purchase and then install glass doors. Outwardly, they look great and will be perfectly used in any conditions that may arise.


Finishing and arrangement
For finishing, choose suitable tree. We are talking about oak, cedar, larch or linden. Sheathing should not be made of resinous wood such as pine. Before installation inside the wood, it is better to treat it with oily substances. Such impregnation will reduce the hygroscopicity of the material. Clapboard decoration starts from the ceiling. It is mounted on the crate using the mechanism of spikes and grooves or fastened with the help of clamps.
When the lining is mounted on the ceiling, work begins with the walls. Sheathing will go in parallel with the installation of shelves and occur in a certain sequence. First, with the help of a level, we mark the surface of the walls. At the same time, markings are underway on how the sunbeds will be placed with all the elements, including the backrests.


After that, the side and front of the shelves are sheathed. After that, the rest of the walls are sheathed. Now it remains to carry out the installation of skirting boards, both ceiling and floor. Sheathing details are usually used only in a special case, if it is fitted at the joints very inaccurately one under the other. It should be said that to present moment you need to be careful, because moisture can begin to collect in the gaps, which can cause the development of fungus and mold in these places.
Already at the end of the work, doors are mounted, as well as various lamps and fixtures. The wires must be carefully insulated so that moisture does not get on them and there is no short circuit followed by fire.
In addition, after that, you can, for example, make a couple of hangers or additional shelves to place some accessories.

It should be noted that the most beautiful bath is obtained by those who want to introduce some of their own ideas into it and do something non-standard. Yes, and the steam room is a room where any material can become a work of art, whether it be wood, stone or metal. The main thing is that imagination and finances allow you to realize your ideas.
You can make a steam room with your own hands, although this requires a considerable amount of knowledge. At the same time, if everything is done really correctly, then you can be sure that it will turn out just as well as if you ordered the development of the project and its subsequent implementation from professional builders. In addition, technology self-creation such a building has already been tested by more than one person and proved its high quality and vitality. In general, if you want to build a steam room with your own hands, then thanks to the knowledge described above, you can implement such an idea without any problems.
The steam room is traditionally considered the key room in the Russian bath, because. the functionality of bath procedures, famous for their useful and healing properties, depends on it. In the article we will talk about how to properly make a steam room in a bath with your own hands, how to equip ventilation, floor and shelves.
The manufacturing process of a steam room can be divided into several work operations of the following content:
- thermal insulation of the room;
- arrangement of the furnace and ventilation;
- finishing.
thermal insulation
 The main indicator of the efficiency of the steam room is a consistently high temperature, which is almost impossible to maintain without high-quality thermal insulation. That is why the warming of the steam room is considered the most important procedure in the entire process of its arrangement.
With poor-quality insulation of the steam room, the air in the room will heat up very slowly and cool quickly, and the steam will have a very low concentration.
When insulating the steam room, the most various materials, each of which performs a specific function, and the absence of any of them leads to a sharp decrease in the quality of insulation. As a result of this distribution of functions, a multilayer protective covering, which includes the following sequentially placed layers:
- waterproofing layer;
- insulation layer;
- vapor barrier material;
- inner lining.
Waterproofing of the surfaces (walls and ceiling) of the steam room is carried out by closing them with a layer of waterproofing material such as foil, for example, or polyethylene film.
It is recommended to begin the arrangement of the heat-insulating layer by attaching unpainted clean paper to the surfaces of the walls and ceiling, on top of which a frame of wooden blocks is stuffed, which serves as the base for placing plates of heat-insulating material. From above, the insulation material is covered with a layer of vapor barrier, which is most often used as ordinary aluminum foil. Then a frame is made from wooden bars, which is subsequently sheathed with clapboard.
The ceiling must be better insulated than the walls, so the layer of thermal insulation material on it must be thicker.
Video
An example of a heat and vapor barrier device:
Furnace and ventilation

 The "soul" of any Russian bath is, of course, its stove, thanks to which steam procedures are famous for their healing properties. For the construction of the furnace, it is recommended to use materials from the following list:
- red oven or fireclay brick;
- natural stones;
- cast iron plates.
If desired, all these materials can be used in combination, since brick is a good accumulator of stove heat, stones will allow you to get steam, and heated cast-iron stoves have a high heat transfer. With this use of heat storage properties source materials the resulting oven can "keep" heat for 12-15 hours (at temperatures up to 85 degrees). But this, of course, depends on the quality of thermal insulation.
In the room itself, a special window for ventilation is usually not made. It makes sense to make a ventilation window in the dressing room, and already from it Fresh air will go to the pair department.
Video
Here are considered typical mistakes ventilation and the most versatile scheme of working ventilation:
Finishing

The internal finishing of the steam room is carried out immediately after the completion of the main construction operations and is usually carried out using wood materials that are resistant to high humidity and temperature. For decoration, you can use a variety of tree species, but it is best to close the walls with linden or alder, and cover the floor with larch material. Shelves made of linden, when heated, will release a unique aroma containing various natural enzymes. They have a beneficial effect on a person.
After finishing wooden walls steam rooms are carefully polished and left in their natural form.
Steam room design

When deciding how to properly make a steam room, due attention should be paid to its design. When designing a steam room, the following tips from experts should be taken into account:
- walls, floor and ceiling in the steam room are best left in in kind without resorting to the use of any coatings. In this case wooden surfaces will heat up much faster.
- shelves and benches in the steam room look more aesthetically pleasing if placed on different levels. This is also convenient from the point of view of their functionality, since different heights you can choose the temperature that suits you;
- in order to stylize the interior of the steam room, you can add elegantly designed hangers for towels and brooms, as well as decorate the doors of the steam room with original frames and beautiful handles;
- As light sources, it is best to use lamps with a soft and soft glow, placing them above the front door.
The central place of the classic Russian bath is, as you know, a steam room or steam room, the issue of manufacturing which requires special consideration. Naturally, the efficiency of the procedures carried out in it, as well as the quality of the entire washing process as a whole, will largely depend on the arrangement of the steam room.
Before you make a steam room with your own hands, you need to familiarize yourself with the materials of this article, in which you will find answers to the following questions:
- steam room layout, taking into account the size of the room and the objects located in it;
- reliable insulation of the steam room;
- decoration and decoration of the ceiling and walls;
- selection of the type of oven installed in the room and providing the necessary efficiency for the adoption of steam procedures.
Project implementation
The main element of the layout of the traditional steam room is, of course, the stoking stove (the so-called heater). You can find all the details of the self-production of such a furnace in a separate article, given in the corresponding section.
In addition, when preparing the layout of the steam room, it will be necessary to work out the following issues:
- order of installation of entrance doors;
- the need and conditions for the design of small windows in the wall;
- number and location of shelves (shelves).
Regarding the dimensions of the steam room you are equipping, the following should be noted. His typical dimensions must comply with the generally accepted standard that determines the length and width of the steam room (these values \u200b\u200bare usually 2.5 and 2 meters, respectively); while the height of the steam room is set equal to 2.2 meters. It is believed that in a room with such dimensions, a family of 3-4 people will feel quite comfortable.
Note! small size heated room will ensure economical use of heat generated during the combustion of a given amount of fuel.
Door installation

When installing a door in a room Special attention should be given to minimizing heat loss through them when entering and exiting the steam room. To do this, it is enough to provide a high entrance threshold and a low-lying upper lintel at the door.
Note! As for the question of using windows in the steam room, their presence in the room you are equipping is not at all necessary. If they are present, the likelihood of heat leakage zones (due to poor-quality sealing of window joints, for example) increases.
In the steam room, artificial lighting can be provided, created by special lamps that have a moisture-proof design.
In the event that you cannot do without windows, you will have to worry about the reliable thermal insulation of the window blocks you have chosen with dimensions of no more than 50 × 50 cm.
Warming and decorating a steam room

This section of the article provides step-by-step instructions for organizing measures for warming and decorating a steam room.
At the initial stage of work, the walls and ceiling of the steam room are insulated, which involves the following operations:
- in a pre-prepared structure of embedded bars 50 × 50 mm, a vapor barrier layer is first laid;
- plates of your choice are placed on top of it insulation material(mineral wool, for example),
- covered with a layer of special protective foil;
- the joints formed during the laying of the insulation are glued with a special aluminum tape (adhesive tape).
At the final stage of work, the surfaces of the walls and ceiling are finished with the type you have chosen. decorative material(lining, for example). The most suitable material for finishing is considered to be a lining made of coniferous trees, which ensure the distribution of fragrant healing odors through the steam room.
Making benches and shelves

The interior design of the steam room should be made taking into account your personal tastes and preferences. In this case, you should always remember that for the manufacture of shelves and benches, it is necessary to use well-dried wood boards that do not have traces of resin secretions (ordinary aspen is best suited for these purposes).
In order to save space, it will be possible to provide for mounting benches and shelves not on the floor, but on the walls of the pair room. In this case, the choice of their place of installation should be made taking into account safe removal seats from a steam source (special incandescent stones laid on the base of the furnace).
The main factor determining the quality of the arrangement of benches and shelves for a steam room in a bath is maximum level comfort provided by them when taking wellness procedures. That is why the final finishing of the surfaces of these products must be done with great care, using manual methods of wood processing for this purpose.
Photo

Agree, it is very convenient to have a mini-steam room right in your house or in the country, and not just on personal plot? The ability to take bath procedures at any time of the day or night, reducing energy costs, quick warm-up - this is only a small part of the benefits compact bath before traditional. But most importantly, it is much easier to equip it with your own hands. If you are thinking more and more about a mini-steam room, to your attention stepwise technology its constructions with detailed photos and useful videos.
Steam room project and assembly
The first stage of the device mini-steam room in the house or in the country - drawing up a project. It will save you from mistakes at all subsequent stages of construction. The project must contain:
- general drawing of the steam room;
- frame dimensions;
- location and wiring diagram heater and ventilation;
- internal filling of the steam room.
Determine the size of the mini steam room at your discretion: depending on your needs and the available space. Practice shows that the optimal dimensions for a home bath are 2x2 or 2x1.6 m. As for the location, most often the steam room is equipped in the bathroom, since all the necessary communications are already there. Although, if square meters allow, you can allocate a loggia or even a separate room for it.

Steam room in the bathroom
The second stage is the installation of a steam room:
- Pour the floating concrete floor into the marked work area.
- Assemble the frame of the bath from vertical bars. Install the elements in increments of 60 cm and fix them with self-tapping screws and corners.
- Install a door between a pair of bars: a compartment, a hinged or Velcro canvas, a structure - everything that your budget and imagination allow.
- Lay on concrete floor ceramic tiles. Subsequently, it will need to be closed with wooden bars.
- Sheathe the frame with outside wooden panels. It can be boards made of coniferous or hardwood, or. Install the panels horizontally and fasten to the frame with screws and dowels.
Advice. To prevent the penetration of moisture into the casing, mount wooden panels with little overlap.
Wall insulation
Advice. It is better to refuse foamed polymers - they are very flammable, therefore, when high temperature can not only begin to decompose or release bad smell but also burn.
The recommended layer of mineral wool is at least 5 cm. It is laid with inside frame between the bars. But pre-wooden cladding sheets are covered with aluminum foil - it will serve as an intermediate layer between thermal insulation and outer skin and protect the wood from condensation.
Mineral wool is overlapped on the foil. A layer of waterproofing is again arranged on top of the insulation - aluminum foil can also be used here. In this case, the reflective layer of the material should not be directed towards the mineral wool, but towards the steam room. The foil should be fixed with a construction stapler on frame bars. And between themselves, the sheets of the waterproofing must be connected with adhesive tape.
After laying the thermal insulation, sew up the walls of the mini-steam room from the inside. You can use the same wood materials that for and for exterior walls.

Electric oven for mini-bath
Heating and ventilation
To heat a mini-steam room in the house, it is easiest to use an electric heater stove. Its power is calculated according to a simple scheme: 1.5 kW per 1 sq.m. area. That is, for a home bath 2x2 m, a device with a power of 4-6 kW will suffice. It can even be connected to a standard single-phase power supply.
The electric furnace is located either on the wall or on the floor, but always near the door - this is necessary so that the cold air coming from outside is immediately captured and heated by hot air currents. The stove is equipped with a compartment for stones - when poured with water, they form steam, which increases the humidity in the mini-steam room.
Also, the electric furnace is equipped with a thermostat, thanks to which the required comfortable temperature is maintained in the steam room.
Another mandatory stage in the arrangement of a mini-bath in the house is the organization of ventilation:
- At the bottom of the floor near the stove in one of the walls of the steam room, make an air inlet.
- Make an exhaust hole as far as possible from the air inlet and from the door in the wall.
Both openings must lead to the same room, which, in turn, must have a ventilation exhaust duct facing the street. An electric fan should be installed in the hood.
Interior arrangement
Finally, the final stage of creating a mini-steam room is its internal filling. For the convenience of using the bath you will need:
- benches;
- footrests;
- headrests;
- shelves.

To finish the steam room, it is better to choose natural wood.
This minimum set, which, with the correct calculation of dimensions, will fit perfectly in a mini-steam room. In order not to miscalculate with the dimensions, all filling elements must be included in the drawing at the stage of creating the steam room project.
All bath components must be made of wood that does not contain resin and is characterized by low thermal conductivity: linden, spruce, aspen. You can make benches and shelves with your own hands, but it is better to buy footrests and headrests in special stores.
Also an important component of filling a mini-steam room - lighting. It should be only heat and moisture resistant lamps. To ensure safety, switches must be placed exclusively on the outside of the bath.
Thus, a mini-steam room in a private house or in the country is not at all a hard-to-reach exotic, but a completely feasible idea. For its successful implementation, you need to think through every moment: project, size, finish, heating, ventilation, internal arrangement- paying maximum attention to each of these moments, you will get a functional and comfortable mini-bath, which will give you a lot of pleasant moments.
Steam room in the house: video
Mini steam room in the house: photo


The steam room is the heart of the Russian bath. It is here that a person experiences the healing power of steam and a birch broom, therefore, despite the simplicity of this small room, its arrangement should be taken very seriously. A do-it-yourself steam room, the step-by-step instructions for which are given below, is carried out in accordance with numerous strict requirements.
Steam room design
A steam room is a relatively small room, usually without windows, which includes several mandatory characteristic elements:
- stove-heater - only this option allows you to get steam in the bath, water, breaking on the surface of hot stones, crumbles into tiny splashes, they create the so-called light steam;
- shelves - wooden platforms on which they sit and lie during the procedure, their size affects the size of the steam room;
- ventilation - air flow is provided by ventilation holes, if the size of the steam room in the bath is large, it is allowed to install an exhaust hood, but this solution is considered unprofitable.
Important! The steam room in the bath is finished only with a tree. Moreover, only wood that does not heat up to critical temperatures is suitable for this, for example, aspen, linden or cedar.
The optimal size of the steam room in the bath
When planning a bath, first of all, the dimensions of the steam room and dressing room are determined. Doing this "by eye" is not recommended. There are a number of rules that must be followed:
- the dimensions of the steam room in the bath are determined the maximum number users - according to the norm, for each person in the steam room there are 0.7 square meters. m, a deviation is allowed for small-sized baths, if they have seating shelves;
- the optimal size of the steam room also depends on the height of the tallest member of the family, the height of the room should exceed this value by at least 20 cm, even the tallest user should not hit the ceiling with his head if he sits on the top shelf;
- excessive height is also disadvantageous: warm air rushes up and if the steam room is too high, then too much power will be required to warm it up, the steam room height of 2.2–2.4 m is considered optimal;
- the location on the sunbeds also matters, if sitting shelves are supposed, then the steam room can be made smaller, but if the steamers are lying, then the area of \u200b\u200bthe shelves should be sufficient to accommodate everyone, the minimum width of the steam room will be 20 cm more than height the highest user;
- another factor that determines the size of the steam room is the dimensions and nature of the stove, the metal stove is quite compact, but its body literally heats up, so it is positioned so that a certain distance is maintained from the stove to the shelf and walls, the stone stove does not burn, but noticeably more in sizes, an electric heater requires a lot of electricity - this option is not suitable for a large steam room.
Important! In calculations of this kind, the final, custom dimensions of the premises in the bath are determined. When planning, the thickness of the finish and thermal insulation should be taken into account.
Dimensions of the steam room for 2 people
Based on these factors, you can calculate the optimal size of the steam room for 2 people:
- experts believe that at least one side of even the smallest steam room should reach 2 m, thus compensating for the impression of a cramped and uncomfortable room, the size of the second wall is determined by the owner;
- The "usable" area of the steam room, that is, the shelves, should be at least 1.4-0.7 square meters. m per person, the total area of the steam room includes free space in front of the shelves at least 50 cm wide and a place for a heater, the dimensions of the latter are decisive;
- in general, the recommended size of a steam room for two people is 1.8 m by 1.4 m.
Important! You can’t put a metal stove in such a small bath: it radiates too much heat, the steam room will turn into a sauna. An electric stove in a bath is unprofitable, as it uses a lot of electricity. The stone oven is the best choice, but it is large, so for a steam room for two people, its dimensions are decisive.
Dimensions of the steam room for 3 people
If for 2 people sunbeds can be placed one above the other, saving space, then for 3 people they will have to be installed in the shape of the letter “L”, which immediately increases the size of the steam room by 3 people. The configuration and dimensions of the steam room in the bath are calculated taking into account the following parameters:
- it is best to install along 1 wall of the bath 2 shelves one above the other and 1 shelf along the second wall;
- if the height of each user is 1.7–1.8 m, then the length of each shelf in the steam room must be at least 1 m, while the width is at least 50 cm;
- placement in the shape of the letter "G" is very convenient because it automatically frees up space even for a brick heater in the bath - at least 1 sq. m.
The optimal dimensions of the steam room are 2 * 2 m, that is, at least 4 square meters. m.
Dimensions of the steam room for 4 people
In this case, the shelves can be placed in different ways, which allows you to vary the size of the steam room for 4 people:
- if you mount the sun loungers also in the shape of the letter "G", then the dimensions of the steam room in the bath do not change - 2 * 2 m;
- you can arrange 2 shelves one above the other on opposite walls of the steam room. In this case, the heater is placed between the benches. That is, with a shelf width of 50 cm and oven sizes up to 1 sq. m, the length of the second wall of the steam room will be 2.5 m, since according to the norms, the furnace body should not come into contact with wooden walls and benches, in this case optimal dimensions steam rooms are 2 * 2.5 m.
In such a steam room, the arrangement of windows is allowed. They should be placed as low as possible so that the warm air in the bath cools less.

Important! The height of the steam room is calculated according to the height of the tallest user, but must reach at least 2.1 m. Otherwise, it becomes impossible to use shelves located in 2 tiers.
DIY steam room: photo
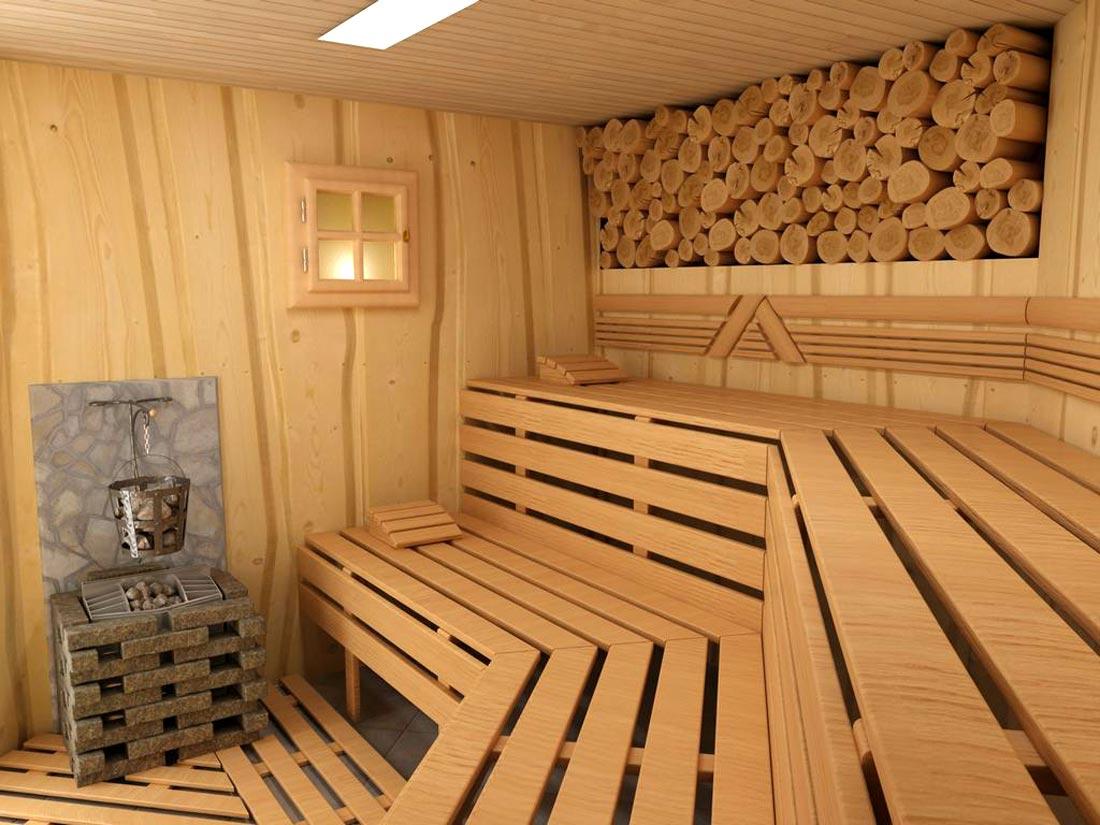
The design of the steam rooms is not too diverse - this is a functional sauna room, always finished with wood, since no other material is suitable for a steam room. The difference in design is the configuration and placement of shelves, lighting fixtures, dimensions and, of course, the shape and design of the heater.
The steam room in a real log cabin looks the most authentic. In this case, there is no additional decoration, and the highlight of the design is made up by themselves. log walls. Shelves and benches in the bath are chosen deliberately rough, a brick stove is erected.

The steam room looks less ethnic, finished with linden or cedar smooth boards with a sunbed made of the same material. The design of the bath is complemented by wooden decorative elements with lights, brooms and wooden buckets. Here the heater can be both brick and metal.
Bath in the Art Nouveau style includes a decorative panel of log cabins, wooden brick, chips.

The most exotic view of the steam room in the bath is given by the backlight. By varying the color of the radiation and the location of the lamps, amazing results can be achieved.

Arrangement of a steam room
In order for the steam room to serve for a long time, and the bath has always been beneficial, reliable materials should be used in the arrangement. There are many requirements here and they must be strictly followed:
- sheathing - polished boards, lining, imitation of timber, it is allowed to use only wood in the bath and something that can withstand steam well and does not heat up too much: linden, aspen, black alder, ash, only cedar is suitable for a bath from coniferous varieties, since the rest, when heated, release resin too actively;
- thermal insulation is an absolutely necessary element for a bath, mineral wool is most often used, when arranging a steam room it is better to use foil mineral wool, since it better protects the material from the action of water, it is not recommended to use foam plastic in a steam room, since under the influence of temperature it releases harmful substances and quickly collapses;
- waterproofing - preference is given to foil materials: aluminum foil, foil penoizol or glassine, this option not only protects against moisture, but also reflects heat back into the steam room, which allows you to heat the room at a lower cost;
- vapor barrier - allows air to escape, but prevents contact with water. For a bath, you can use polypropylene film or kraft paper. However, it is better to use modern developments: membrane variolation, foil based on kraft paper or fiberglass based;
- bath ventilation pipes– absolutely necessary for supplying air to the furnace and ensuring its circulation in the room, ventilation pipes plastic ones are installed in the steam room, the main thing is to correctly calculate their dimensions.
When arranging a steam room in a bath, the future owner independently chooses optimum material taking into account the size of the room, the material of the structure and its capabilities.
How to make a steam room in the bath
The arrangement of a steam room in a Russian bath includes several stages:
- the layout of the steam room - the choice of the heater, the location of the shelves, the method of lighting, etc.;
- calculation and ventilation device - its type is determined by the size of the steam room in the bath;
- waterproofing and thermal insulation of walls and ceilings in the bath;
- installation of a heater - if a brick stove is being built, then the work is done even before the thermal insulation of the walls of the steam room, in addition, for a stove of such a mass, it will be necessary to make a concrete base;
- finishing of the steam room - sheathing with clapboard or edged boards.
Lastly, shelves are placed, the bath is decorated in the chosen style. The backlight is mounted according to the type. For example, the side fiber optic is laid on top of the trim, and the built-in or LED is up to the skin.
Floor installation
Standard most reliable option for the floor in the bath is a concrete base, covered wooden deck. It is also allowed to finish the concrete floor with tiles or porcelain stoneware. In this case, wooden ladders are laid, because the tile heats up and cools too much.
First of all, you should choose the type of floor for the bath - dry or pouring:

A pouring floor in a steam room is much easier to arrange. However, this option can only be performed on sandy soils, since such soil easily absorbs large volumes of water.

A dry floor in a bath is much more difficult to arrange.

Important! The dry floor in the bath must necessarily have a slope, so its design should be carefully calculated.
Vapor barrier and ceiling finish
In a steam room, the thermal insulation of the ceiling is more important than the insulation of the floor. The heated air rises, and if there is no barrier in the form of a heat-insulating layer, it transfers heat to the cold roof.
- Finishing the ceiling surface in the bath begins with laying wooden crate in increments of 2 cm less than the width of the heat-insulating material. Reiki for her needs to be treated with antiseptics. Waterproofing is fixed to the crate - film, penoizol.

- Mineral wool is laid between the bars.

- The insulation is covered with a vapor barrier, preferably foil. Joints are sealed with metal tape.

- A crate is fixed on top of the vapor barrier. The direction of the rails is perpendicular to the direction of the bars in the crate.
- Boards or lining are fixed to the crate. A layer of air remains between the vapor barrier layer and the finish.

- When finishing a steam room, the presence of a chimney should be taken into account. For him, a hole is made in the rough flooring, heat-insulating "pie" and trim. In addition, it is necessary to arrange fire protection here: thermal insulation of the chimney pipe, branch pipe for the transition of the ceiling.
If the bath has an under-attic space, you can insulate the ceiling with reverse side, filling the floor in the attic with expanded clay.
Efficient ventilation
The ventilation device for the Russian steam room and sauna is very different. For a Russian bath, salvo ventilation is quite enough: if the door is open between procedures, then this is enough. But then a window should be arranged opposite the sash.
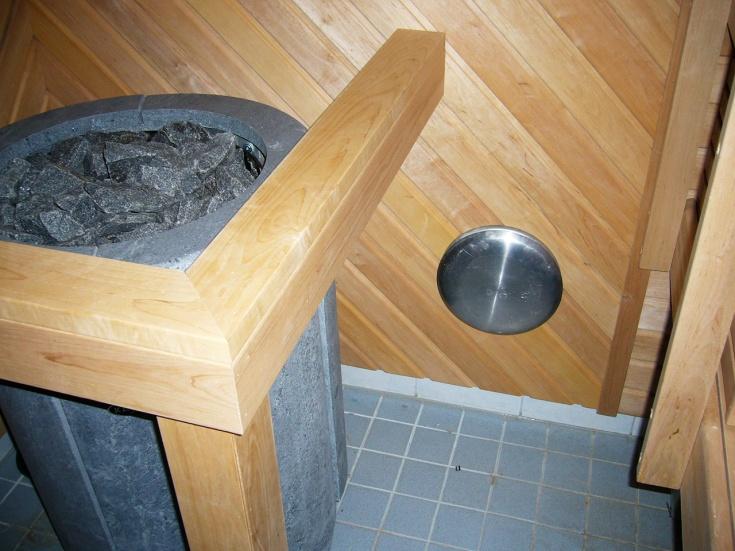
Otherwise, it is worth forming ventilation using two pieces of asbestos-cement pipe. To do this, at the level of the blower of the heater, a hole is made in the nearest wall for air flow. It is better to install a pipe, as it is more resistant to moisture.
The outflow hole in the steam room is made at the level of the shelves in order to improve air circulation and achieve traction.
As a rule, forced ventilation in the bath is required only in cases where the preliminary calculations were made incorrectly.
Electricity
When arranging a steam room with your own hands, you should also take care of the lighting. If an electric fireplace is used, cable laying becomes a necessity.
This problem is solved in 2 ways:
- ideally, there should not be a pair of electrical wiring, since the contact of the cable with moist air unacceptable, therefore the best solution is to lay the wire through the wall to the point where the lamp is fixed or the electric furnace is installed;
- if this option is not feasible, the cable is laid along the wall behind the steam room, while using special heat-resistant wires and additionally protecting them with PVC corrugation.
The characteristics of the cable are determined by the needs: for lighting, for the heater.
Wall insulation
The thermal insulation of the walls in the bath is determined by the material of the structure.
If we are talking about a log house or a structure made of profiled timber of good thickness, then the walls do not need special thermal insulation. It is quite enough to fix a layer of thermal insulation or foil foam insulation on the walls. Then the crate is fixed, fixed on top of it finishing boards or lining.

If the bath is frame, for example, then the insulation is organized according to the same scheme as the process of ceiling insulation described above. The difference is only the number and size of the holes: you will need to form ventilation vents and an opening for the stove in the steam room, if it is built-in.
The thickness of the heat-insulating layer is calculated depending on the load: colder than winter in the region, the thicker the thermal insulation is made.
Furnace installation
The installation of the oven depends on its type.
The electric heater is installed on the floor or mounted on the wall in any chosen place in the steam room. In this case, a chimney is not needed, but a cable must be laid through the wall to connect the appliance.
A brick oven is laid at the stage of laying the foundation of the bath. With your own hands, such a structure can be made only with a certain experience.
The metal furnace is installed as follows.
- A metal sheet is laid on the floor of the steam room, exceeding the perimeter of the body by 20 cm.
- Stir the oven and cover with bricks. If this option is not suitable, the wall around this area is closed with a brick. On average, the dimensions of the cladding exceed the dimensions of the body by 20 cm.
- A hole is formed in the ceiling for the chimney. The section of the ceiling in the steam room and in the attic space is covered with metal. The pipe must be placed in a metal pipe with thermal insulation to avoid contact between the chimney and the wooden material.
- Then a gate and a chimney are mounted on the furnace.

If necessary, a heating tank is fixed to the pipe. In this case, you will need to make holes in the ceiling of the steam room and for pipes that supply and discharge water.
Door installation
As a rule, in a steam room they install wooden doors, although in modern interior often used and glass. However, such a model is very difficult to install and will require the participation of specialists.
The main task of the sash is to ensure tight closing so as not to release heat from the steam room. Installing it includes several steps.

If desired, the opening can be decorated with decorative platbands.
How to make shelves
A steam room in a do-it-yourself bath cannot do without shelves. The shape and dimensions depend on the area of the steam room and the number of future users. The length and width of the sitting shelf is 40 cm. More convenient option assumes a length of 60 cm. If it is supposed to be located on the sunbed with bent knees, its minimum length is 150 cm. The dimensions of the recumbent reach 2 m.
- Build either two- or three-tier shelves. The distance between them is 35 cm.
- According to the size and the chosen shape, the frame is assembled, as a rule, from larch. The design is fixed to the wall of the steam room. For reliability, inclined supports are installed.
- Shields are assembled from linden or aspen boards 5 cm wide. There should be a gap of 1 cm between the boards.
- Shields are attached to the frame.

Can not use conifer tree for shields, unlike the frame, since it releases a large amount of resin.
How to make a steam room in the bath with your own hands: video
Organizing a steam room in the bath with your own hands is not easy. But if you follow all the recommendations and advice experienced craftsmen, this task is quite feasible.
Conclusion
A do-it-yourself steam room, step-by-step instructions for which include arranging the floor, installing a stove and thermal insulation requirements, allows you to cope with this work in sufficient simple conditions. If, for example, complex materials are used to finish the bath, and the room should play the role of both a steam room and a sauna, you will need the help of specialists and more sophisticated equipment.

