An extension to a wooden kitchen house. Expanding the frame house: the nuances of building an extension to the house
The extension requires a building permit issued by the municipality
Is it important for the honor to legitimize the project?
- Urban planning legislation regulates the placement of buildings on the site, because you live next to your neighbors, and they also have their rights.
- With the addition to the house, its design changes, the area, finally, the size of the shares, if the house has several owners.
- Besides legal aspects protecting the interests and rights of others from the side of the law, there are also security issues, they primarily concern the residents themselves. After all, wanting to make an extension, you interfere with the construction of the house, its communications, make other changes that are not in the project.
- Finally, if you do not receive permission to build an extension, you will not be able to subsequently sell, exchange or conduct other transactions with the house. In addition, an illegal construction may be required to legalize or demolish sooner or later, obliging you to pay a fine as well.

What could be the extension?
- veranda;
- balcony;
- terrace;
How to legalize a non-capital annex?
The package of documents and the application are submitted to the local government (architectural or construction bureau or department of the municipality). If there are no violations, local self-government bodies will issue consent.
How to legalize an extension to a private house
There are many reasons why people make an extension to the house - for example, there may be a need to increase living space, fix some architectural design flaws or just protect the wall from the wind. Not everyone knows that the annex is in need of paperwork as well as the construction of the main house. Therefore, contrary to the law, the owners sometimes build additional structures without permits, and after the completion of the construction they think about how to legalize the extension. This is not always possible and sometimes ends with the demolition of a new structure. We will tell you how to properly draw up documentation during construction or how to legalize an extension that has already been built.
Is it important for the honor to legitimize the project?
There is a widespread and erroneous opinion that if you are the owner of the site, then it is your own business, what exactly you will attach to your private house. Legal requirements are not at all a whim of the legislator, but urgent need... And there are several points that limit the independence of the owner of the house. Including:

What belongs to the category of annexes?
An extension is a reconstruction of an existing structure. When it is carried out, you make an addition to the house that was not planned by the previous project, attaching a secondary building to one or more common walls main house. An extension can be of any number of storeys, size, etc. In any case, like any reconstruction, it requires a building permit issued by the municipality.
What could be the extension?
Outbuildings may be of an auxiliary nature and do not require additional land. Such buildings are called non-capital, they include:
- veranda;
- balcony;
- terrace;
- other structures of these characteristics.
All other structures attached to a private house are capital, if additional land is required for their construction and they are planned for living.
How to legalize a non-capital annex?
Non-capital structures are easy to legalize at any time, even if they were made long ago. To do this, you need to take the documents to the home to the local BTI and write an application for amending the technical documentation. The same should be done if you have just completed construction. An acceptance committee will come to you and draw up an act stating that you have completed the reconstruction of the house.
When there are documents on hand with all the indicated additions and changes, the issue can be considered resolved.
Important: In order to legalize an extension in a house for several owners, you will need to obtain their written consent for your work.
The procedure for registration of house reconstruction
Now about how to legalize an extension of the capital type.
You can issue it after construction, but in this case you will have to issue it in court as an unauthorized building. Therefore, in order to avoid problems, it is better to take care of this at the preparation stage.
To do this, you need to prepare the following documents:
- confirmation of ownership of the building land and the house in which reconstruction is planned;
- home ownership plan and registration certificate, cadastral plan land plot;
- extension project (in the form of a plan or sketch);
- written applications from other home owners for reconstruction;
- written consent of neighbors for an extension to your house;
- conclusion of resource-supplying organizations (gas, water and sewage services, energy enterprises, etc.), confirming the safety of connection to communications. If no connections are made, therefore, no permissions are required.
In addition, in some cases, permits may be required from the SES, the architectural department, firefighters, etc.
The package of documents and the application are submitted to the local government (architectural or construction bureau or department of the municipality). If there are no violations, local self-government bodies will issue consent.
This document gives you the right to start construction. After completing it, you will have to invite the state commission to draw up an acceptance certificate, in which specialists will assess whether the structure corresponds to the project, sanitary standards and rules. You will be given an opinion on compliance, with which you will go to the BTI and again make changes to the technical documentation for the house.
The procedure for legalizing an unauthorizedly erected extension
Despite the fact that it is easier to make documents for an extension at the very beginning, many homeowners solve this problem after it occurs. And sometimes years later, when you suddenly need to formalize an inheritance or perform other manipulations with real estate. All this is impossible without registration of permits for construction. Therefore, the owner has to formalize the extension as unauthorized by a court decision, where he acts as a plaintiff, and the municipal authority acts as a defendant.
Important: In a judicial proceeding, it is possible not only to legalize an unauthorized building, but also to appeal against the decision of the local administration to refuse to issue a permit for the planned construction of an annex. This is possible even if the local authority has given a written refusal indicating the reasons for the refusal.
Documents for filing a statement of claim must be collected almost the same as described above, with the attachment of a properly completed statement of claim.
The court decides on the recognition of the legal extension, built earlier. To do this, the court must make sure that the case has all the necessary permissions and approvals.
In conclusion, having in hand a positive court decision, the owner of the house registers the extension and pays the fee.
How to avoid problems with legitimizing an unauthorized extension?
The court may refuse to recognize the unauthorizedly erected structure, respectively, then the owner will not acquire ownership of it, and the building must be demolished, and at the expense of the developer himself. The owner will also pay a fine. At the same time, the court comes to a similar opinion in situations where the new annex is unsafe or violates someone's legal rights. Another reason for refusal can be corny poorly prepared documentation. Therefore, when starting to prepare documents for the court, pay attention to the following points:
- for the completeness of the package of documents with permits from various controlling and resource-supplying organizations;
- availability of all documents for property rights;
- try to eliminate all possible violations of architectural norms and sanitary rules, if any were allowed during the construction of the extension;
- use materials in construction that meet safety requirements and are certified.
Reading time ≈ 10 minutes
Do-it-yourself construction of extensions to wooden house becomes very popular in Lately, as can be seen from a huge number of projects with photos. Indeed, the owners of private houses often face the question of expanding the space, and an extension is the best solution in this case. Among other things, the extension is able to radically transform the look of the house, making it more modern, cozy and attractive.
Option of a closed glazed annex
Types of extensions in form and purpose
In appearance and, accordingly, functional purpose extensions are divided into several types:
- Additional full room at home.
- Open / closed veranda.
- Porch.
Let's consider each of the types in more detail with their advantages and disadvantages.

Various options for annexes to a residential building.
Full room
In this case, an additional full-fledged room is being erected, suitable for year-round residence... It can also be used as:
- utility room;
- garage;
- pantry;
- winter Garden;
- summer cuisine;
- additional bathroom;
- guest house.

An annex used as a garage.
For construction, a wooden beam, brick or foam block with insulation is most often used.
The advantages of this type:
- a significant increase in the usable area of the house;
- ease of communication (electricity, heating) from the main building;
- ease of converting the premises, if necessary, for a different function.

Construction of an extension from timber.
A well-executed, beautiful extension can complement the exterior of a home in an advantageous way. However, there is also a downside to this solution. For example, you need to do solid foundation and spend money on high-quality insulation, which will be reflected in the cost of the entire project.
Also, for the extension of a full-fledged room, you will need to allocate quite a lot of space, which is not always possible for owners of small plots.

An extension made of logs in the form of a full-fledged living room.
Closed veranda
Usually this is an unheated room with brick or timber walls, fully glazed. Due to the lack of heating, it is used only during the warm season.

Spacious glazed room.
Design advantages:
- the ability to implement almost any design;
- glass buildings look very impressive and advantageous;
- in summer, on a closed veranda, you can relax even in strong wind and rain;
- glazing protects from annoying insects.
There are few disadvantages of this design, but still they must be taken into account:
- large glass area means the need for frequent and thorough cleaning;
- the glass-enclosed construction does not give the feeling of being in the fresh air that many expect from a veranda.

The fully glazed veranda looks very original and stylish.
Another example of an all-glass veranda in the photo:

A glass terrace can be a real highlight of a home.
The construction of a terrace and a house from different materials can also be turned into an advantage. For example, in the photo below, the extension is made of other materials in a different colors, but it looks just magical:

Snow-white covered terrace near the gray house.
Open veranda
A simple, practical and functional frame construction, which has been very popular lately. Open veranda looks great in tandem with a wooden house.

Outdoor terrace with beautiful lake views.
Benefits of an open design:
- significantly lower financial investments for construction due to the minimum material;
- the possibility of being outdoors;
- the need for a smaller building area than for a full-fledged living room;
- ease of installation;
- functionality and convenience.

Open terrace with one glazed wall.
Of the shortcomings, it is worth remembering the strictly seasonal possibility of use. Moreover, in too cold summer weather, with strong wind or rain, the veranda will be uncomfortable. In addition, insects will torment you in the evening.

The veranda completes the exterior of the house.
Porch
Looks like several support pillars and roofing material and serves to protect the space from rain and snow. The porch is the simplest, but also the least functional option extension, which performs on by and large decorative role. However, if you install chairs on it, coffee table, a small shop, a porch may well replace a gazebo.

A miniature porch with a bench and an armchair.
Pluses of the design:
- ease of construction;
- small financial costs;
- no need for a solid foundation;
- transformation of the facade of the building.
Obviously, in bad weather conditions, resting on the porch will not work, and it will be possible to use it only in warm time of the year. Together with a small functionality, these are all the disadvantages of this type of extension.

Spacious porch front door.
Most often, the porch is located from the front of the building, through which residents and guests of the house get inside. However, it is not necessary to build a porch at the front door. Placing the extension in your backyard creates a cozy, enclosed patio. The space can be supplemented with comfortable furniture, a table, a hammock and turned into a place for a summer dining room, a playground, a space for friendly gatherings and romantic dinners.

The porch in the backyard of the house serves as a favorite place to relax.
Materials for the construction of the annex
You can build a terrace or a room from various materials- it with wooden structure at home, even modern materials will look harmonious thanks to the decoration.
When choosing materials for an extension, it is worth moving away from the common stereotype that the house and the extension should be made of the same material. Of course, the extension is a harmonious continuation of the house, but the combination of various materials can look more advantageous and interesting.
Most often, the following materials are used for the construction of an extension:
- Bar. Practical, eco-friendly, aesthetic and very durable material. Thanks to a special impregnation, the wood is resistant to pests, rot and fungus. When building from a bar, it is necessary to have an expansion joint between structures. Walls and roofs are erected in the same way as for the main living area.
- Brick. Natural, durable material for the construction of outbuildings.
- Foam block. Extremely common now, durable, affordable material with excellent thermal insulation properties... An additional plus is the quick construction of the premises due to the large block sizes. It is convenient to build additional rooms from foam blocks and closed verandas... The disadvantage is the obligatory need for external finishing due to the unaesthetic appearance of the blocks.
- Frame. This option is the least costly in terms of finance and time resources. With the help of the frame, you can build a terrace, veranda or porch. The method consists in the manufacture of a wooden or metal frame, which is then finished with chipboard (OSB) plates, and insulated with a special material (foam, mineral wool, etc.). Frame constructions due to their lightness, they are excellent for the construction of two-story buildings.
- Polycarbonate. This material is used in the construction of frame buildings. This material is extremely popular now due to such properties: ease of use, lightness and strength, aesthetics, the ability to build any extension geometric shape... It can only be used for
An extension of foam blocks does not require such a solid and powerful foundation (columnar enough), but a brick and cobbled structure without fail presupposes laying of high-quality strip foundation in order to avoid distortions and deformations under the weight of the brick.

The roof of the annex, made of polycarbonate, provides high natural illumination of the annex.
The main stages of the construction of a building
Before proceeding with the construction of an extension to a wooden house with your own hands, it is worthwhile to study in detail the finished projects with photos and draw up a work plan. What it should include:
- location of the extension;
- type and design of the extension;
- type of foundation (based on the previous paragraph);
- list of required building and finishing materials;
- connection of communications (minimum, electricity);
- calculation of the budget (which, in addition to the cost of materials, also includes transportation costs and wages of employees).
When drawing up a project for a future building, it is imperative to indicate the following aspects: soil composition, the level of freezing and moisture absorption, the condition of the walls and foundation of the main building.
Laying the foundation
For verandas, the columnar type of foundation is most often used, and if the building is quite large, the pillars need to be laid every 60 cm around the perimeter.
Work progress:
- Pits are dug to a depth of 100 cm. The depth of the pits should exceed the depth of freezing of the soil.
- A pillow made of layers of sand and gravel is placed on the bottom.
- The pits are filled with concrete.
- Since the veranda is being built for wooden house, we erect support posts from the bars.

Veranda foundation with finished bottom rail.
Frame erection
After laying the foundation, you can proceed to the frame of the building:
- First, the bottom rail is mounted, the corners of which are held together with a dovetail joint. To fasten the entire structure, pins or nails are used. The lower harness can also be made double and the racks of the future veranda can already be placed on it.
- Support beams are mounted. At the wall of the veranda adjacent to the main room, the racks should be higher for the construction of a pitched roof.
- If the veranda is to be closed, the crossbeams will determine the height of the windows.
- The installation of the frame is completed by the installation of the upper strapping.
Keep in mind that a roof angle of 45-60 ° almost doubles the consumption of roofing material. At such an angle, the resistance of the coating to the wind is expressed, but, on the other hand, the roof is well cleared of precipitation.

The frame of a wooden veranda.
When using a bar, its section should be 10 * 10 or 18 * 8 cm, but if a log is used, then the section should not be more than 12 * 12 cm.
Roof and flooring
For verandas attached to the house, they are most often used pitched roofs... If the extension is located at the end of the building, it is advisable to use gable roof... Rafters and lathing are attached to the upper strapping, on which the roofing material is then laid.
Roof types:


Practical roof made of asbestos-cement slate.
To equip the floor, logs are installed on the lower strapping with a distance of no more than 1 m, on which the board is placed. Self-tapping screws are used for fastening. The board must be impregnated with a special solution to prevent fungal infections.
If the veranda is supposed to be open, the floor should have a very small angle for water to drain.
In the end, the building needs to be furnished with furniture, decor, flowers to your taste.

After arranging furniture and decor, the veranda looks very nice and cozy.
As you can see, building a beautiful, modern extension to a wooden house with your own hands is actually not so difficult, focusing on ready-made projects and photos. If you have certain knowledge and skills, you can do it on your own and hire professionals in their field. But in any case, the extension is a great opportunity to expand the space, transform the house and make it even more comfortable!
You can watch the video on how to build an extension:
The desire to improve their living conditions by increasing the number of square meters appeared at every owner of a private house. The owners of the apartments do not lag behind in this and would also gladly attach at least one room for themselves.
There is nothing impossible in this, extensions to apartment buildings- a dime a dozen, you just need to know how to do it correctly, and not only from a legal point of view. The key to successful construction and comfortable living is correct organization work and adherence to process technology.
Extension layout
They begin the construction of the extension from the most, perhaps, the main thing - with permission for this very construction. Without an appropriate piece of paper, you can run into a serious fine, and the money spent will be wasted.
The next stage is also theoretical. Determine what purpose the extension being built will have. Whether it will be a living space or a winter garden, a storage room or just an emergency exit porch. Cash injections into construction directly depend on the purpose of the structure.
It will logically be correct to draw up a drawing, the drawing helps to understand how to make an extension to the house, to make approximate calculations in count necessary material... Then they go to the place of future construction and transfer the drawing to the place, indicating the dimensions of the extension with a cord and metal or wooden pegs. It is on the spot that they carefully examine how the new foundation will be combined with the existing one and whether the future annex fits into the architecture.
Material selection
The material of the extension and the house is usually the same.Experts advise to approach this issue simply: from what material the main house is built, the same should be used for an extension. Simply put, if the house is wooden, then it should be attached to it. wooden extension... The same goes for brick and concrete. But technological progress in the field building materials does not stand still, and now appeared universal materials, for example, foam and gas blocks. In addition to its versatility, it is an environmentally friendly and heat-saving material. Such an extension can be faced with decorative plates imitating the material of the walls of the main building, which will create the appearance of execution in a single style.
But there are also exceptions. In some climatic zones, it is possible to make an extension of wood to a concrete building if it is used as a storage room or garage. Even a bathhouse can be built from logs and attached to your apartment. The flight of fancy in such cases is limited only by financial possibilities.
Construction of the foundation
The most important stage of construction is. Even the strongest walls made of modern and expensive materials will turn out to be useless on a bad and flimsy foundation, so the answer to the question of how to make an extension to a house correctly is to choose the right foundation. There are three main types of foundations:
- monolithic from reinforced concrete,;
- columnar.
 Foundation for an extension
 The first option is universal, it is suitable for all types of buildings, the same applies to the columnar foundation. The pile version is suitable for the addition of a light veranda or utility room, which is insignificant in its weight and massiveness. This option is distinguished by its ease of implementation and the pace of construction.
The first step to pouring the foundation should be research work on the study of soil. This is done by specialized enterprises, it is extremely difficult to do it on their own, and the costs of the services of these specialists are incomparably small compared to the cost of losing the entire extension.
After issuing recommendations on the type, depth of the foundation and the need to tie it to the main building, they begin to mark on the spot. The contour is measured out very carefully, observing the geometry of the corners, so as not to adjust the trench during work.
Start digging the trench from the lowest angle, maintaining the required depth. It is best to immediately put temporary supports to prevent the walls from collapsing. When excavation completed, a cushion of sand and rubble is being placed at the bottom of the trench. Sand layer 100-150 mm thick. well compacted, and the same layer of rubble is poured on top. Since we are building an extension to the house with our own hands, all work is done efficiently and conscientiously.
 Floor device
 The construction of frame walls will be relatively versatile. The technology is little known to a wide circle of the population, so many treat it with distrust, and completely in vain.
Popular frame walls
A frame wall is not a simple structure. It is complex and multi-layered. Those who wish to apply this particular method often do not know how to make an extension using walls of such a structure. Wooden frame consists of an upper and bottom strapping walls. Auxiliary beams and racks are used to obtain the required structural rigidity, and doors and windows are placed between the crossbars.
The finished wall frame is sheathed on both sides with boards, forming a void, which is filled with insulation, a protective membrane and, without fail, a vapor barrier. A vapor barrier is required. It prevents moisture from getting inside together with warm air from inside the room. Wet insulation loses its properties, and besides, moisture is very destructive for the wooden base of the house.
The problem of insulation can be solved by all kinds of mineral and glass materials, which now offer a large assortment construction market materials.
The erection of frame walls begins with the fact that the horizontal beams of the strapping are fastened to the foundation. This is usually done with metal anchors. It is worth noting that the waterproofing layer of the foundation must already be laid, and the lower beam must be attached on top of it. Next, the corner and supporting frame posts are mounted on the lower strapping, which are fixed to stiffen with braces.
The top harness is laid on top of the posts, which are attached with straight spikes. Sheathing and internal insulation produced from inside the house. Moving outward, the installation sequence is as follows: first the inner lining, then the vapor barrier, glass or mineral insulation, and finally the windproof layer. All this is closed with an outer cladding.
The outer sheathing must have good qualities moisture protection, be resistant to wind and all kinds of weather conditions. Usually such material is "lining" or not profiled planed board. They must be nailed horizontally. "Lining" is fastened with an internal ridge upwards, and regular board with overlap and overhang one above the other. This scheme allows you to reliably protect the inner layer of insulation from moisture, slanting rain and blizzards.
When building an extension to a house, you can use almost any material. It is important to remember that some of them are toxic and unsuitable for interior cladding... Fiberboard, plywood or drywall will be an excellent base for further interior enhancements.
Roof construction
Usually, a single-pitched version is chosen for the roof of the extension. With this option, the angle of inclination should be at least 25-30˚. Having determined the angle of inclination, the timber is fixed on the main part of the building. The lower support will be the wall, its outer edge, or the laid ceilings of the new structure. The roof edge should protrude at least 300 mm. from the wall, for maximum protection from precipitation. After installing the rafters, the main roof is being installed, if it is a rigid roof. When choosing shingles additionally, a base is laid, in the form of plywood or similar material.
Floor arrangement and interior work
The choice of the floor will be dictated by the purpose of the structure. For the residential option, insulation is necessary, by installing a wooden beam and laying insulation, it is also possible to install a warm floor. For a garage or storage room, a concrete floor is fine. You need to approach this issue purely individually. The same applies to interior decoration.
Having studied the materials of this article, there should be no questions left on how to make an extension to a wooden house correctly, since both the choice of material and the stages of construction are similar and are suitable for such a construction.
Very often, you want to attach a veranda or a terrace to a finished home in order to increase the available living space and simply transform the appearance of a residential object. In such cases, an extension to a wooden house is being erected, the designs of which can be very different depending on the size of the new object and the materials from which it will be built.
An annex to a wooden house of a veranda and a terrace can be erected different ways from point of view design features... This is most often done in several ways:
- The annex is erected from the side and has a single roof with the house.
- The annex is located on the side, but under a separate roof.
- The veranda is located on the second and higher floor or in the attic.
Of course, most often the extension is made from the side of the house. Option with common roof more convenient and more profitable, but for this it is important that a roofing system common with the house can be made. As for the add-on, the process is not easy. So, first of all, it is important to take into account the possibilities of the foundation of the house, which may simply not withstand the load under the influence of the built-on terrace.

What material to choose
The veranda extension to a wooden house can be built using different materials. Most often, this is a bar, a log or frame technology, since these options look harmoniously against the background of the general exterior of the cottage. But no less popular are brick or foam block extensions. We note right away that each of the options has its own nuances in terms of construction. Let's consider the features of the construction of each material in more detail.
Bar extension
Is the most common material. This is due to the peculiarities of the material itself:- Its production is carried out in a factory setting, so the wood is of high quality.
- Thanks to special processing the material is highly resistant to rotting, fungus.
- Environmental friendliness and naturalness are the main advantages of any type of timber.

But before making an extension, you need to solve a number of questions for yourself. The most important thing is the foundation of the future home. There are a lot of options for its creation, but any foundation must be firmly "tied" to an existing building. Ideally, an extension needs the same foundation as that of the house. Therefore, it is important to study the condition of the soil, its type, think over what the load from the extension will be. After that, it is necessary to solve the second question: the veranda will be combined with the general perimeter of the house or will be erected as a separate structure. It is not easy to combine structures, since it will shrink, and even experts will not answer what it will be.
Frame extension
Out of the frame is budget option, since significant investments in its construction are not required. In addition, the construction of a veranda or terrace itself will be much faster with minimal expenditure on materials. The construction of the structure is carried out on the basis of a frame consisting of a wooden beam or metal profiles. The frame is being erected along the entire perimeter of the future veranda.
After the frame is ready, you can start decorating the walls from the outside and inside. To do this, chipboard or OSB plates are used, and between them, a lining of insulation material is required - mineral wool, sawdust, expanded polystyrene. A more time-consuming process is a brick extension to a wooden house with your own hands. The solidity and durability of the future house, together with the veranda or terrace, can be ensured if you follow a few rules: An extension from foam blocks to a wooden house is in great demand for several reasons: The only negative is the need to protect the material from the effects of factors environment... For these purposes, foam blocks are often finished with siding or faced with bricks. Before building a terrace or veranda, you must first decide on their location in relation to the house. For example, for cozy breakfasts on the terrace it is better to place it on the east side, as there will be more sun in the morning. And if, on the contrary, you need a shadow, you should look for the most shaded place on the site. The dimensions need to be thought out so that the extension looks harmonious against the background of the overall structure. The foundation for the veranda needs to be well thought out. Depending on the materials from which it will be erected, the base can simply be in the form of compacted soil, or it can be erected from concrete. It can be erected from foundation blocks and slabs, corner posts, which are fixed in the ground and carefully concreted. The foundation necessarily requires waterproofing using, for example, hot bitumen, cold mastic. At the very last stage, backfilling of the base is performed.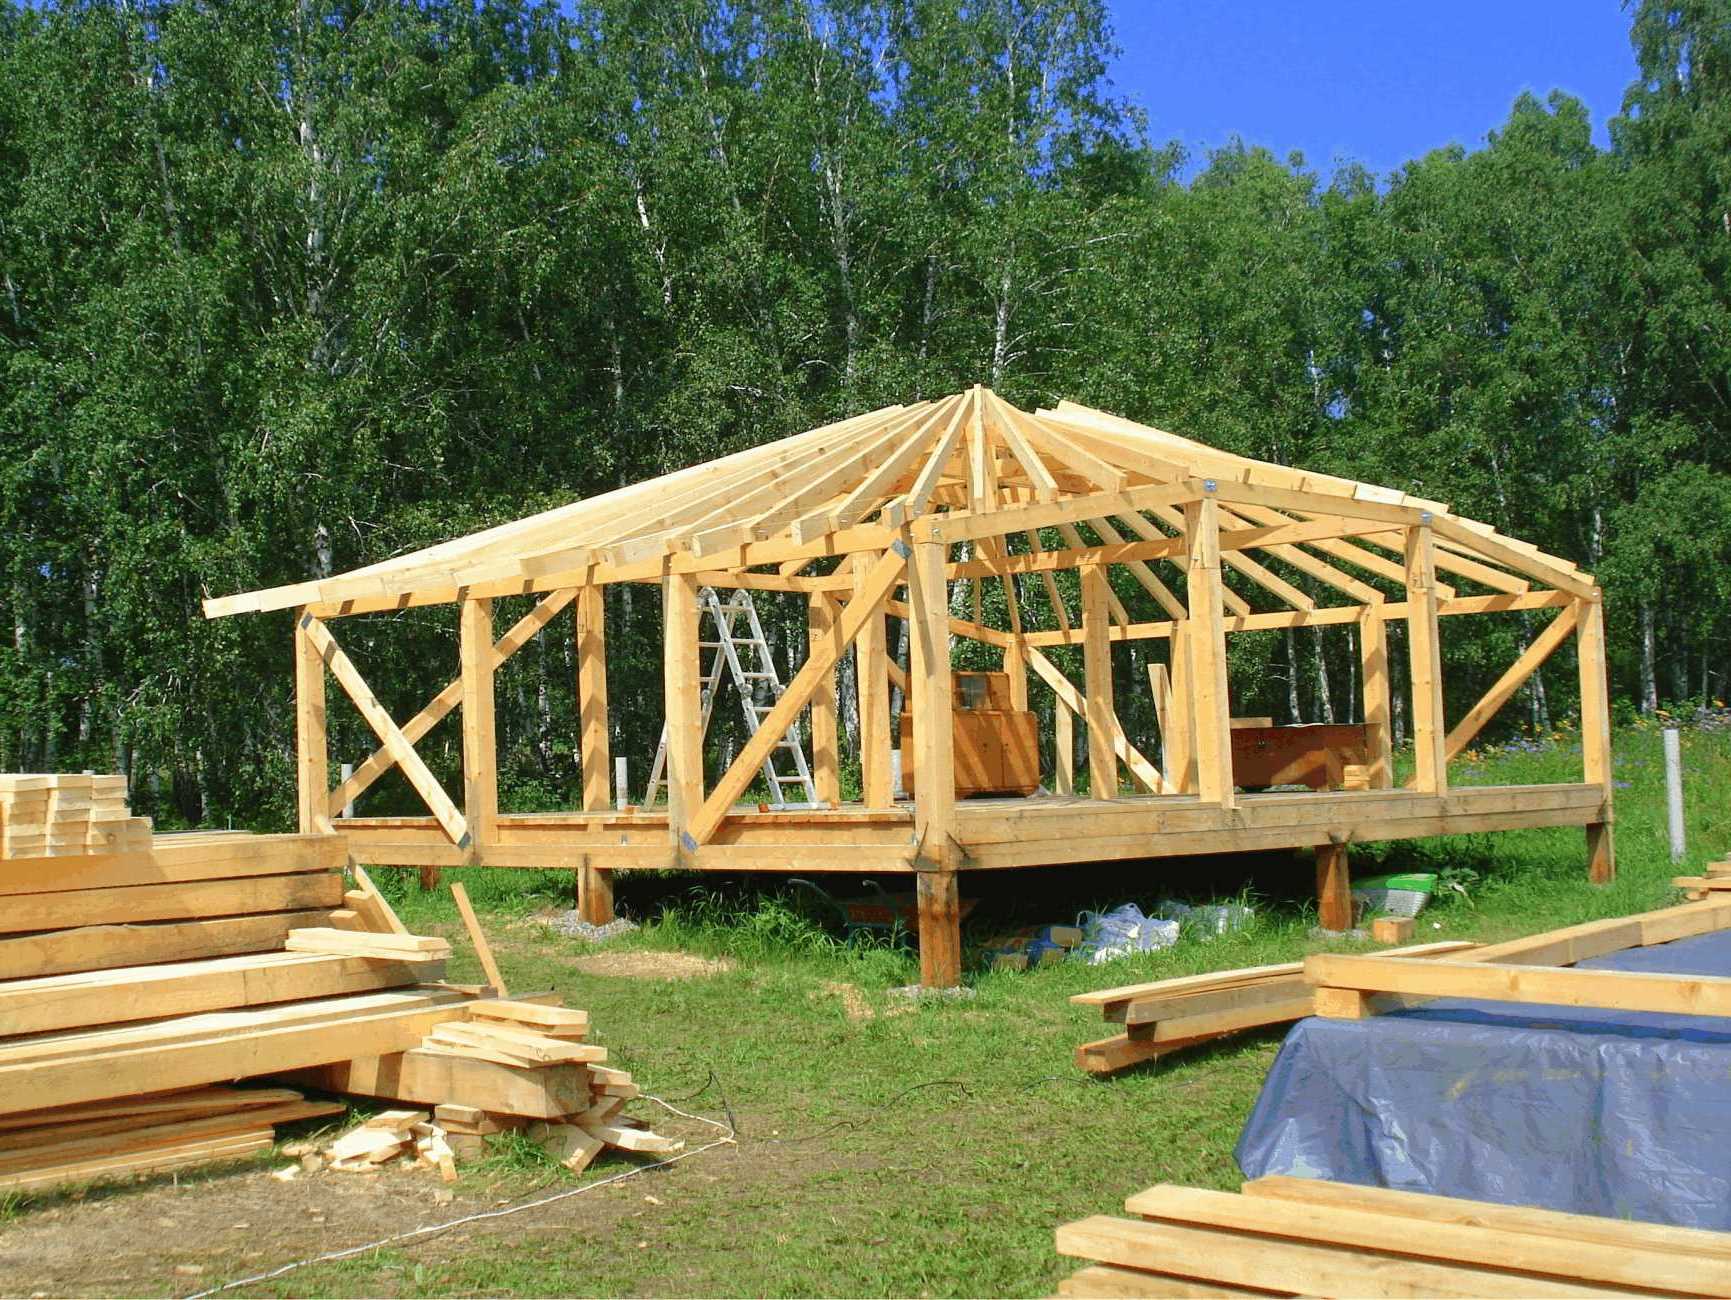
Brick
Determine the location and size
Second: foundation
Over time, the owners of private country houses and cottages with a year-round mode of residence are faced with the need to increase the usable area of their home. For example, one of the reasons may be the birth of a child or just a desire for space, since the available area is too small. In this case, the frame extension is seen as one of the best solutions... The features of the construction of such a structure, the procedure for its legalization will be discussed in this short article.
Features of the extension
A big advantage of the frame extension is the ability to interface it with a house built from any material, be it logs, bricks, blocks or bars.
Design features in general view presented in the diagram below, however, they are almost completely identical to the nuances of building a full-fledged frame house.
How to make a frame extension to a brick or wooden house?
For DIY construction, you need some set of tools. The figure below shows standard variant such a set.

The presence of at least one assistant is also desirable, since a number of works cannot be done alone, and working with someone is always more fun.
Interfacing with the main house

Regardless of the quality of the foundation, due to the difference in the magnitude of the load that the cottage and the extension put on the ground, there is still a possibility that over time they will move relative to each other. For this reason, experts strongly discourage the rigid type of junction of the extension to the old house; it is more expedient to use a junction similar to the principle of a “groove-comb” connection. To install it on the wall of a capital structure, you need to fix two beams, and between them install a vertical beam, which is an element frame wall outbuildings. This type of abutment will ensure the leveling of mutual movements. Of course can be used instead of wood metal carcass, then all embedded elements will also be metal. Alternatively, a bolted linkage must be used.
However, the connection of the extension is not limited to the walls alone; it is also important to connect the two roofs correctly. To do this, the rafters at one end must be docked with the upper trim of the frame, and at the other end must be fastened to the rafter system of the roof of the old house. The lathing under the roof is mounted in such a way that the joint between the old and the new roof is between the elements of the lathing.
Only one that has a certain degree of flexibility should be used as a roofing material, for example, soft tiles or corrugated board with a wave height of no more than 10 mm. But the slate or ceramic roof tiles for these purposes are no longer suitable.
Step-by-step instruction
1. Installation of the foundation

The first stage of construction is foundation work. Usually they arrange for an extension separate foundation, which must be connected to the base of the old house with the help of special embedded fittings.

Of course, the most preferable option is a common foundation, laid even at the stage of construction of the first house, however, very few people look so far from our compatriots, which, however, is quite understandable and understandable in everyday life. When laying a new foundation, it is necessary to ensure maximum identity not only in shape, but also in the depth of both structures.

If it is impossible to achieve full-fledged solidity, then between the two foundations you need to leave the so-called expansion joint so that when the soil moves in the spring, cracks do not form on the walls of the extension and in the base itself.
Strapping is the second stage in the construction of the extension. The wall thickness of the frame frames is usually 20 cm. In extensions, however, they rarely place living rooms, which allows you to reduce the thickness of the wall to 10 cm. Therefore, the diameter of the strapping beam and the cross-section of the vertical posts will also be 10 cm.

The figure below shows possible scheme installation of the lower trim of the extension:

When assembling the frame, the greatest attention should be paid to the fastening of the racks. The figure below explains its features.

The fastening of the upper harness is carried out according to the same principle as the lower one. The side view is shown in the figure below.
5. Sheathing and insulation of the ceiling
The ceiling, like the walls inside, is best sheathed with clapboard. This is the most favorable option from a price and aesthetic point of view. Pine lining will last at least 30 years, and with proper care, even more. To insulate the ceiling, in order to save money, you can use expanded clay, pouring it on top with a layer of 10-12 cm.

Possible variant mounting rafter system shown in the figure below:

The process of fastening the roofing material does not differ in any nuances, except for one thing: the upper part of the sheets should provide under roofing material the main building. To do this, it may be necessary to remove some of the fasteners. An approximate diagram of the roofing "pie" is shown in the figure below.

The ultimate goal of any construction work is the creation of a durable structure, which will be comfortable and cozy to live in. The quality of the wall cake has the most direct and decisive influence on achieving this goal. When insulating the walls of a frame house or an extension, you need to remember that correctly laid steam and wind insulation is a guarantee of a long service without loss performance characteristics any kind of insulation. If you forget about this, then the insulation will very quickly absorb moisture from the environment and become unusable.
If we consider the layers of the wall "pie" from the inside of the frame extension, then they should go in this order:
1. Internal cladding,
2. Air gap(10–20 mm),
3. Vapor barrier,
4. A layer of insulation,
5. Wind insulation,
6. External finishing.
Traditional roofing felt or glassine can be used as wind protection.
The second option is more preferable, since it does not deform when exposed to high ambient temperatures. When installing vapor barrier membrane materials, it is necessary to place them with a smooth surface towards the thermal insulation layer, and a fleecy surface towards the room. The villi prevent condensation from forming on them, which prevents the insulation from getting too wet.

Insulation of the annex is one of critical factors comfortable stay in it in the future. In fact, all the nuances concerning the warming of a frame annex completely coincide with the peculiarities of warming full-fledged houses built using frame technology. For insulation, you can use the most different materials both traditional and more modern: ecowool, sawdust, basalt mineral slabs, extruded polystyrene foam and much more. In terms of speed and simplicity installation works the optimal is still, perhaps, a mineral slab insulation.
Such insulation should be tightly laid between the frame racks in several layers, but without bends and pinches, which over time can lead to the formation of "cold bridges". An important feature in the course of work, it becomes necessary to displace the joints between the slabs relative to each other in adjacent layers. This principle must be observed not only when insulating walls, but also ceiling and floor.
Possible mistakes
Completing and replanning an existing structure is always more difficult than building "from scratch", so it is worthwhile to once again pay attention to possible mistakes in the process of erecting a frame extension.
First and foremost, many inexperienced builders rely on factory processing of all lumber. However, this is wrong, all elements of the frame must be well dried and treated with fire-retardant impregnations before assembly. Window frames and the doors must be installed strictly according to the level and fixed to the already installed vertical posts, that is, the dimensions of all openings must be calculated at the planning stage.
How to legalize an extension to a house?

When all construction works on the construction of the frame extension have been completed, many of our compatriots are beginning to think about the need to legitimize the resulting masterpiece of architecture. However, it is better to think about this before the start of work, since the process of legalizing an unauthorized construction is a little more complicated, you will have to go to court, besides, the result may not be in favor of the plaintiff, and then you will have to demolish all the resulting beauty, and at your own expense. Of course, you can not go through the circles of bureaucratic hell and leave everything as it is, but this will entail the impossibility of selling, renting, bequesting or donating the whole house, and not just an extension.
When applying to the courts, you will need a whole set of all kinds of documents, among which the most important are the following:
- Certificate of ownership of the land plot;
- Certificate of ownership of a residential building (dacha);
- Help from the BTI;
- Permission from the organization of housing and communal services;
- Extract from the house book on the number of registered citizens in a residential building;
- Frame extension plan;
- House project;
- Control survey of the extension on a scale of 1: 500;
- The consent of neighbors if the extension borders on their site;
- Epidemiological Service Act.
In some cases, you may need a photo of the site, living quarters and annexes to it.
The preparation of a statement of claim must be taken with full responsibility, since the process can be lost due to mistakes made in it. Most courts will provide an application form and help complete it.
After filing a claim, you need to wait for a response, which must be sent by mail. To make sure that the application has been accepted, you can call back in 10 working days and clarify the information. It should be borne in mind that the judges have only 2 legal reasons for rejecting the acceptance of the claim: the presence of a court decision on the legalization of this building or an incorrectly drawn up document of claim. In the second option, you must reapply.
The municipality will become the defendant during the court session, and the owner of the house to which the annex is made, respectively, will be the plaintiff. When the court makes a decision in favor of the plaintiff, he will need to receive a payment receipt from Rosregistratsia for paying the state duty and make a payment, after which the owner will be given all Required documents, legitimizing unauthorized construction.
As for other monetary expenses, about 10,000 rubles will be spent on collecting all the necessary information (consultations with lawyers, etc.), the price of the state duty is currently 500 rubles, 20,000 rubles are recorded in the Town Planning Cadastre, about 60,000 rubles will be demanded by specialists for a forensic construction and technical expertise. Thus, in addition to direct construction costs, about 100,000 rubles will be needed for all the bureaucratic delays.
Video
Watch a video on how the construction work was carried out on frame annex To home.

