Finishing the pool with PVC film - welding technology. PVC film for a swimming pool: selection criteria and features of installation of the material Installation of swimming pools from PVC film
Until recently, it was believed that building a swimming pool at the dacha with your own hands from film or any other material was the privilege of wealthy people. Today, literally anyone can afford a pond, because construction market offers a huge range of materials and tools at affordable prices, with which you can easily build such a structure of any size, shape and depth. The easiest way would be to make a pool from film - minimal financial and labor costs are required, but the result will exceed all expectations. Below we will look at what this material is, how to install it correctly, as well as what types of pools can be built from it and where it would be best to place it on your summer cottage.
What is PVC film?

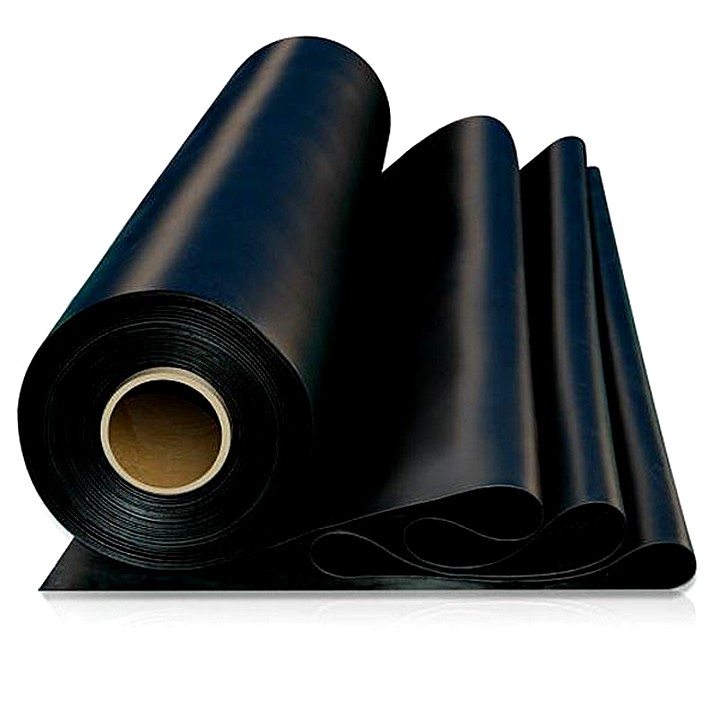
PVC film intended for swimming pools is a waterproofing material that not only retains water, but also has high aesthetic characteristics. It is this that gives the reservoir that familiar blue tint that we are used to seeing in all pools, from inflatable country pools to public sports pools.
Therefore, this material combines two functions at once - waterproofing and decorative, which allows you to save money.In itself, it is inexpensive, but at the same time it is perfect for a reservoir of absolutely any configuration and size. True, it is not without its drawbacks, for example, its service life usually ranges from five to ten years, depending on operating conditions, and the color range is limited. When joining layers of film, the seams remain visible, plus, it cannot be laid if there are passages close to the surface on which the film pool is installed. groundwater. However, if the listed disadvantages do not scare or stop you, then you can safely use PVC film in construction, because this method is the most economical for people who want to create everything with their own hands. Installation is simple, the main thing is to follow the instructions, which are described step by step below.
How to build a swimming pool with your own hands at your dacha from film?
First you need to make planning, which takes into account the dimensions of the pool, its location, purpose, appearance and pool construction diagram.
Then select Construction Materials and equipment for the normal functioning of the reservoir (filters, pumps).
Then preparatory work is carried out: this includes excavating the soil (if the structure is planned to be “sunk” into the ground) and creating a drainage system, after which it is necessary to create technical niches and piping.
After this, installation work begins. This includes pouring concrete mortar, forming the walls and bottom of the reservoir, as well as PVC finishing film and installation of all purchased equipment.
The last step is to check the system for functionality.
This is roughly what a step-by-step diagram of building a swimming pool with your own hands looks like. Let's take a closer look at some of the key points.
Selecting the type of reservoir and its location

First, you need to decide whether you want to build an indoor or outdoor pool at your dacha. Based on this, you will choose materials and equipment - the price for each type is different. U open type It is best to choose steel as a filling material; in an indoor pool you can save money on such equipment, but you will have to spend money on a pavilion.
Next, we select the type of structure - adult, children, family, and its purpose - for training or recreation.
As for the location of the reservoir, it is best to place it on a flat, empty area where there is no excess vegetation that could clog the water with leaves or damage the frame with the developing root system. Ideally, a swimming pool in a country house is best located close to the water supply to make it easier to use, if, of course, there is one on the site.
Design and arrangement

At this stage, you need to decide what is more important - appearance or cost savings. The most economical option would be to build a simple rectangular pond at your dacha with your own hands from film without any additional corners or bends; the smaller it is, the cheaper it is. Be sure to draw up a diagram according to which you will later build a pool with your own hands. You can do this yourself, or contact specialists and order a project, as a result of which you will receive ready-made drawings and diagrams that ensure the accuracy of the construction of the pool and the installation of its equipment.
There are three types of pool film; choose the most suitable option based on your own design requirements and its type:
- Non-reinforced film: cheap, but not very durable;
- The reinforced fabric is equipped polyester fibers, which increase its strength characteristics, thanks to which the material copes with high pressure of the water column, temperature changes and mechanical load;
- The anti-slip surface is equipped with a ribbed surface, thanks to which you will not slip and get injured, which is ideal for the bowl of family and children's ponds.
Some of the films also have an additional acrylic coating, which provides additional durability as well as antibacterial properties, which is very important for a home pool.
At the stage of choosing equipment, you need to decide which filtration system is best for you - skimmer or overflow. The filter and pump are selected based on calculation of the amount of water in the reservoir.
Preparation and installation

A pool in a dacha made from film does not require any complicated preparation. All you need to do is dig a pit required size, where it will subsequently be poured concrete mortar. It is important to note here the fact that the soil walls of the pit may begin to crumble. To avoid this, it is necessary to make them not perpendicular to the ground, but with a slight slope in outside, literally 3-5 degrees will be enough. The bottom of the pit should also not be perfectly straight: make it with a slope to the side of about 4 centimeters. Once the foundation pit for the construction of the pool is ready, installation can begin.
At this stage it is necessary to fill the bowl: it will represent monolithic structure made of concrete, in which the bottom is first poured, and then the walls, and this is done using a cold seam. In some cases, builders decide to add additional strength to the walls of the bowl. To do this, even at the pouring stage, it is necessary to install a reinforced steel mesh inside the frame - this kind of trick will prevent the structure from collapsing during operation. When pouring, make sure that both horizontal and vertical surfaces are as smooth as possible, otherwise you may damage the film, which is sensitive to any irregularities. It is very easy to deform it, but repairing it, much less replacing it with a new one, can be very problematic.
To level the surfaces, there is a simple way - use cement diluted with water, apply it with a whitewash brush.Next, a layer of insulation is laid, which prevents the film from rubbing against hard concrete, and then the pool film itself. The seams of the material must be welded with special equipment and treated with sealant, then the film must be welded to the edges of the reservoir. Installation work finished. Upon completion, the pumping and filtering equipment purchased in advance is installed, and a comprehensive check of the functionality of the hydraulic systems is carried out.
A swimming pool is a useful building, as it cools off in hot weather. summer heat, helps you relax, escape from everyday worries and have a good rest. An important stage When building such a structure, its interior decoration is important. Often, the pool is lined with ceramic tiles or mosaics - materials that are not only aesthetically beautiful, but reliable and durable. But, as you know, technology is moving forward with great strides, so these days there is another material that has won an honorable place among such facing materials like tiles and mosaics. About what we're talking about? This is a PVC film for a swimming pool. More and more often, pools are covered with this material, and not without reason. After all, the price of such film is significantly lower than other materials, and working with it is much easier and faster. Moreover, PVC film can act not only as a finish, it may well be the main material for the manufacture of a pool. Let's find out how to make a PVC pool with your own hands.
PVC film 2 in 1 – waterproofing and finishing
Polyvinyl chloride film (PVC), in addition to looking aesthetically beautiful, has another important advantage - it can act as a waterproofing material. Water will not pass through such a film, so you can save your money on waterproofing the pool bowl itself. The nice thing is that even if there are cracks in the concrete, and all the work was carried out without waterproofing, appropriate waterproofing putties and primers, the PVC film will be able to hold all the water in the pool, despite the enormous pressure of the water column.
Due to this property, the film is often used in the restoration of old swimming pools, the bowl of which is cracked and problems with waterproofing have arisen. Covering the pool with PVC film will help save the situation. And what’s most amazing is that you can do this without even taking off old material, for example, mosaic. In this case, it is only important to take care of the tile’s strong adhesion to the surface so that it does not peel off. Thus, by choosing PVC film as a finishing material for the pool, you can kill two birds with one stone.
Varieties

Manufacturers took into account the various preferences, financial capabilities of people and the purposes for which the film will be used. Thanks to this, you can choose a pool cover from several types of PVC film:
- Simple unreinforced film. It is an economy class material that anyone can afford. This is the most cheap material from three types of films. Its thickness varies from 0.65 to 0.85 mm. This film cannot be called very durable, but it still copes with its functions. It is impossible to make a frame pool from such a film, but it is quite possible to cover the bowl of a small pit pool.
- Reinforced film. The most common option. The price/quality ratio is completely justified, since this film not only has a thickness of 1.5 mm, which is 2 times more than the usual one, but it is additionally reinforced with polyester threads, which gives it greater strength. A pool with such a finish can withstand significant mechanical loads without deforming. This property is especially useful for those who want to make a frame pool, where the film serves as the walls. She takes on the entire burden, being load-bearing structure, so she must withstand enormous pressure, which she copes with.
- Anti-slip film. Its difference from all others is its ribbed surface, so it is often used to prevent slipping on the surface of the pool. Families with small children cannot do without such a film.

Please note that there is also a material that has an acrylic coating. What does it give? Thanks to it, the film is protected from bacteria and algae that can colonize micropores. As experts say, with such a coating the film will last twice as long and will better retain color and elasticity. But what are the advantages of PVC films compared to other finishing materials?
Advantages and disadvantages of the material
One of its main advantages is its affordable price. Building a pool in itself is an expensive proposition, so finishing with PVC film is a salvation for some. Another important point is that, as already mentioned, it acts as both a waterproofing and decorative material. Moreover, this material is hygienic, resistant to ultraviolet rays and sudden temperature changes. The material is easy to care for, because it is not afraid chemicals for care.

It should be noted that you can buy film various colors. It is produced in different tones of blue, blue and green; they are able to “illuminate” the water and give it a beautiful “sea” tint. You can also buy material that imitates a mosaic of beige-white, blue-white and similar tones. One of the main advantages is that the film is easy to install if you have a special tool.
It is clear that, like all materials, film also has its disadvantages, they are as follows:
- during operation, scratches will form on the surface, which leads to rupture;
- over time, the saturation of colors is lost, all this will happen in 6–10 years, so the material will have to be changed;
- butt seams spoil general form coatings;
- when in the area where the pool is located, groundwater is close to the surface, it is impossible to cover the pool with film.
So, having considered all the material options, their advantages and disadvantages, you can get straight to the point. .
Work on the installation of a pit pool

If you want to make a pit pool at home or in the country, you need to follow this sequence:


If you want to install a drain, it is better to do it in advance, even at the pouring stage.
Finishing work

To install PVC film, it is important to follow the instructions. The process itself is simple, but requires attention. Even if you are a layman, the tips below will help you deal with this matter.
- First of all, you need to prepare the surface: remove all debris, leaves and everything unnecessary. If the poured walls and floor are not level enough, they must be leveled with plaster. A flat surface is necessary because under pressure PVC water the film will repeat the relief of the bowl; if the surface turns out to be curved, after installation it will be very noticeable.
- To finish the pool with film, a fastening strip or corner is laid around the perimeter, which must be secured with screws. On one side, the strip has a plastic coating, to which the film will eventually be welded; if it is a corner, then the film must be secured with screws. When the pool is large, stripes are additionally fixed to the walls.
- Now lay a special insulation over the entire surface, thanks to which the friction of the film on the concrete will decrease, it will not wear off, and the service life of the material will increase. When the pool is placed indoors, geotextiles can be laid instead of insulation. The substrate is attached with fastening strips, and in difficult places it is fixed with glue.
- After this, a film is spread on the surface with an overlap of sheets of 8 cm and a distance of 1–2 cm from the wall. To ensure that the film adheres well to the corners, use a corner.
- Using special equipment for PVC gluing films, weld the drain seams and additionally seal them with sealant.
- At the last stage, the PVC film must be connected to the mounting profile on the side of the pool.

You can see how this work is done in the video below:
All that remains is to fill the pool with water and test the new coating. Your pool is now ready for full use. To complete the job you will need the following tools:
- sharp knife;
- sealant;
- equipment for gluing PVC film;
- silicone roller;
- corner;
- the PVC film itself.
Frame pool made of PVC film

If you don't have the space or ability to build a pit pool, you can make a PVC frame pool that will be installed on the ground. We will look at a homemade pool made of wood and PVC film, which will have dimensions of 4.5 × 2 m and a wall height of 1 m. It can be made in a day.


That's all, all that remains is to check the tightness of your new pool by filling it with water. You can make such a pool quickly and inexpensively, but there will be many benefits from it.
Video
To make your task easier, you can use wooden pallets as a frame:
When intending to build a pool, you should decide not only on its location and shape, but also on the type of cladding - the finishing touch of the work. Facing materials perform both an aesthetic function and have important practical significance. Therefore, the product for the final stage must be selected with special care. The best option decor is a pool film, which is very popular today.
Film coating, although inferior in quality to mosaic and tile finishes, is recognized by consumers. And for that there is good reasons.
Advantages of finishing with film
Film, a new generation facing material, helps to simultaneously solve two problems: covering the bowl and waterproofing the reservoir, regardless of its size, shape and type.
Innovative technology allows you to glue the film to any surface: stone, concrete, plastic, tile, iron. This durable and reliable material is resistant to water care products and microorganisms.
A wide selection of shades and a variety of patterns make this type of coating extremely beautiful. Facing with film occurs in as soon as possible and ensures tightness (even if cracks appear in the bowl).
Film is a very durable material consisting of several layers that are connected to each other by a reinforced network of threads. It is ideal not only for the construction of new tanks, but also for the reconstruction of old ones.
Upper layer has a rough surface - a guarantee of an anti-slip effect.
In order to correctly lay the film, it is not at all necessary to have remarkable knowledge: it is enough to carefully read the instructions and strictly follow them.
Besides, this method cladding is an excellent option for thrifty owners who want to save money and decorate the pool. The affordable price will allow everyone to buy universal material for decoration and waterproofing.
Disadvantages of film coating
But, unfortunately, despite many advantages, waterproofing film for swimming pools also has disadvantages.
The service life is only 6 years. It gets dirty, fades and may lose its original shape. If the external waterproofing is damaged, bubbles appear on the inner wall of the pool under the film.
And when using a skimmer-type film, after a couple of years (due to exposure to ultraviolet radiation), a noticeable difference in the color of the coating appears under water and above the surface.
At sub-zero temperatures, the film is prone to destruction, which creates the need to think through methods of “preservation” of the pool for winter period.
Types of film coverings for swimming pools
The market of modern facing materials offers consumers two types of film:
1. Polyvinyl chloride film is synthetic surface based on plasticized PVC. Special impregnation protects against the negative effects of bacteria, spores and fungi present in the water.
You need to know this!
PVC film for swimming pools comes in different section thicknesses: 1.2 mm; 1.0 mm; 0.8 mm; 0.5 mm. The thickness is selected according to the type of pool. For shallow reservoirs, a film of 0.5 or 0.8 is used, for deeper bowls - 1.0 and 1.2 mm. The length of the rolls does not depend on the thickness - 25 m, and the width - 2.4 and 6.8 meters.
Color palette varied: white, turquoise, beige... This allows you to choose a copy in accordance with your preferences and fantasies of the designer. There is PVC film for the pool with marble, mosaic and other patterns, which gives the pond a special look.
2. Butyl rubber film, which has improved ductility and durability. It is easy to cut with scissors and glued together. This film is good for large tanks, where special strength is important. Butyl rubber film is not afraid of changing seasons, because... It perfectly tolerates fluctuations in temperature and pressure, which means it is suitable for working with any surface, even in severe winter.
You need to know this!
With a thickness of 1 mm, the film can have a width of 3.05 m; 6.1 m; 9.15 m; 12.2 and 15.25 m. The length changes in the following sequence: 15.25; 30.5; 45.75 and 61.0 m.
The two-layer material eliminates the occurrence of leaks and increases service life.
How to choose the optimal material
First of all, you should decide the amount you plan to spend.
It is important!
In the situation with waterproofing materials, price is a mirror image of quality, so if you want to buy good products, you will have to fork out more.
Pool owners big size Not round, but with a relief shape, you should pay attention to expensive and thick samples. For small bodies of water with a smooth bottom, you can choose a more economical option.
When purchasing, there are two important properties to consider:
- elasticity. This indicator is extremely significant, because allows the material to stretch without losing quality;
- thickness is a criterion on which the service life of the film coating depends.
How to line a pool with film with your own hands?

Finishing the pool bowl with film requires strict adherence to technological rules
In order to finish the pool with film according to all the rules, you should pay attention to some points.
Requirements to be followed
- The surface of the reservoir must be smooth, without potholes and sagging (roughness no more than 2 mm).
- the edge of the pool must be strong (there should be no chips when drilling at a distance of 4 cm from the inner edge).
- The mating places must maintain an angle of 90 degrees (except for areas of differences at the bottom).
- the deviation along the vertical plane should not exceed 3 mm.
- embedded elements must have flange connections.
- it is necessary to maintain a distance of 30 cm from the bottom and walls to the embedded part.
- tiling of the side should be started after applying the film coating.
- To avoid the appearance of bubbles and folds, as well as further violation of the waterproofing properties of the film, you need to plan measures to protect the bowl from groundwater.
Pool lining technology with film
The cladding process consists of 4 steps.
1. Surface preparation.
If there are bulges and roughness, the bottom needs to be sanded. If there are potholes, they need to be filled with putty. If it is impossible to restore the surface to its proper form using the above methods, leveling should be done. When leveling the edge, make sure that the leveling layer adheres to the base without a tendency to peel off.
It is important!
The film can be laid directly on the old tiles, after making sure that it lays firmly. If the tile peels off, it will have to be dismantled.
2. Laying the substrate and fastening strip.
The backing is needed to protect the film from abrasion on the pool bowl. The substrate is secured to the walls with a fastening strip, to which the film is then welded.
The fastening strip is a metal strip (2 meters long, 2 mm thick), on which a plastic coating is applied. The strip is secured with screws. The drilling frequency is 10-15 cm from the inner upper corner of the reservoir wall.
The main thing is to prevent the backing sheets from overlapping each other and forming folds.
Use elastic adhesive if necessary.
3. Laying the film.

The main requirement for film cladding is tightness
To ensure tightness and impeccable appearance, you need to adhere to welding technology and keep the working surfaces clean.
In places of welding, the sheets should be “grabbed” by rapid heating and compression, which will avoid the formation of unsightly grooves. After welding, the joints are treated with a special seam sealant.
4. Filling with water. First, a 30 cm layer of water is poured into the pool to stretch the vertical layers of the film. Next, the counter flanges of the embedded elements are mounted, and only then the reservoir is filled with water to the desired level.
It is important!
The water temperature for the first filling should not exceed 40 degrees.

Ready! The film covering has been laid, the pool is filled, and now it’s time to enjoy relaxing on the shore of your own body of water, and the thought that this masterpiece is the result of your efforts will make your vacation doubly enjoyable.
So, the pool bowl has already been filled, all that’s left is the final lining. But first you need to think carefully and wisely choose a finishing material that will give the pool maximum tightness and increase its maintenance-free service life. Today the bowl can be finished with mosaics, tiles or PVC film for swimming pools. The latter is becoming increasingly popular.
Features of PVC film for swimming pools
A synthetic film coating based on polyvinyl chloride, which is increasingly used for finishing swimming pools, also acts as a decorative cladding, And waterproofing material. PVC film, as a rule, has a reinforcing layer made of fabric with antifungal and antimicrobial impregnation. Its thickness reaches a couple of millimeters.

PVC film for pools and ponds is used by summer residents with great success, and here's why:
- PVC sheets have a long useful life, which reaches 20 years. Therefore, the film is considered very practical material for lining swimming pools.
- The coating is resistant to changes temperature regime, cold (unlike tiles), ultraviolet radiation.
- The film for finishing the pool bowl is absolutely safe for humans, does not emit harmful fumes, and meets all established requirements and certificates.
- The material is lightweight and quick to install, allowing you to cover the pool in a few hours.
- Polyvinyl chloride film responds well to the formation of cracks in the pool bowl.
- The film is hygienic and tolerates contact well with products intended for pool care.
- PVC film is presented on the market in a wide range of colors - from plain to material that imitates decorative tiles, white-blue and white-beige mosaics. As a rule, it is produced in blue tones, but also comes in green, beige, turquoise and white.
- The popularity of using this material is also due to the affordable price of pool film - it is 2-3 times cheaper than mosaics or tiles.

But, along with the numerous advantages of PVC film, it is not without some disadvantages, which will be listed below:
- Most main drawback- formation of scratches on the surface of the coating, which inevitably occurs over time.
- The color intensity and gloss of the PVC film are gradually lost. Of course, this won't happen right away. But in 10 years you will notice this factor.
- The joining seams, if you look closely, still spoil the appearance of the coating.
- Cleaning a liner pool is not an easy task compared to caring for a mosaic.
- If in an area with a swimming pool the groundwater is located close to the surface, then it is better to avoid using the film.
Choosing PVC film for the pool
If you prefer PVC waterproofing film for lining your pool, then you will have to choose from the following types of material:
- Not reinforced coating. It is the cheapest, and therefore the simplest. The thickness ranges from 0.65 to 0.85 mm. No increased strength is noted. Therefore, it is recommended to use it exclusively for prefabricated pools.
- Reinforced two-layer coating. This panel is the most popular solution among summer residents who decide to build a swimming pool. The material is reinforced with polyester threads and has a thickness of one and a half millimeters. Does not deform and can withstand significant loads. Suitable for coffered and reinforced concrete pools in which the walls have a holding function high pressure created by water.
- Anti-slip coating. This pool film has a ribbed surface, which helps prevent slipping when swimming. This kind of material is worth laying if you are building a family pool for adults and children.
- PVC coating with acrylic. The acrylic layer acts as bactericidal protection. It is this that prevents algae, fungus and harmful microorganisms from settling in the micropores of the material, repels dirt and limescale, is resistant to salts and chlorine. Specifications(elasticity and color fastness), the service life of such a panel is approximately 2 times higher than that of a film without an acrylic coating.

PVC film has different thickness- from 0.5 to 1.5 mm. Choose the thickness of the material, taking into account the type of pool: for a shallow reservoir, use a panel with a thickness of 0.5-0.8, for deeper bowls - a film with a thickness of 1-1.2, for large relief pools - a thick two-layer material with a thickness of 1.5 mm . Other roll sizes are independent of thickness: the length is 25 m, and the width is 2.4 and 6.8 m.
Pool lining technology with PVC film
The film is most often installed by professionals who have special equipment, but many owners want to try their hand at this exciting activity. In the process of finishing a pool with film, you cannot do without specific knowledge, and therefore we recommend reading the following instructions.

Preparatory work
To PVC installation film was successful, follow the tips below:
- Install the panel while maintaining the appropriate temperature conditions - at least +15°C. The film will “stick” better in hot weather.
- Stock up industrial hair dryer for welding PVC panels, nozzles with different jet inclinations, which have different air flow widths, a puncher, a silicone pressure roller, which is used for rolling seams, a brush with metal bristles, which is required for removing carbon deposits from the welding machine, a knife, scissors, a ruler and a high-quality solvent.
- Before starting work, put the pool in order, namely, thoroughly clean the bowl of debris and dirt.
- If you want to update an old tiled pool that has problems with waterproofing, you can lay PVC film on the tiled covering itself. However, remember that the tiles should not peel off. If in doubt about this, it is recommended to remove it and level the inner surface with PVC film before repairing the pool.
- Make sure that the surface is solid and free of potholes, bulges and cavities. If there are bulges, they should be sanded. Fill sinks and uneven surfaces with putty. This way, the film for pools under water pressure will not take on the appearance of an uneven bowl topography.
- If the above methods do not help bring the surface into proper shape, then it is worth laying a leveling layer, which is highly durable.
- The inner corner edges of the bowl must be strong. For their manufacture, use only high-quality material. If you leveled the side, then make sure that the solution fits tightly, without giving any hint of detachment from the base in the future.

Laying geotextile backing
To reduce the friction of the film on the concrete bowl and increase the useful life of the pool finishing material, you can glue a special geotextile substrate made of non-woven raw materials to the prepared and plastered surface. It also serves as a kind of insulation, making your stay in the pool more comfortable. Geotextiles are secured with screws using a metal profile using the following technology:
- First, we place the fastening strip. This is a metal tape, which, as a rule, has a length of 2 m, a width of 5-8 cm and a thickness of 2 mm. On one side there is a plastic coating on it. The film coating needs to be welded to it.
- Lay the strip closely. When attaching to the bowl, screw the screws into the pre-installed dowels. The drilling step is 10-15 cm.
- Often the bottom is different complex shape or may have steep slopes. In this case, you will have to attach strips to the bottom as well. Thus, when pouring water, you can prevent the bottom sheets from moving. At the bottom, the strip is attached at the top point of the slope.
- If the bottom of the pool is pyramidal, then do this. Lay the fastening strip along all edges adjacent to the walls. In the case of a stepped pool, the strip is laid in the same way as on the walls.
- When is the pool provided? concrete staircase, then we use a special corner as fastener. When installing fasteners, you need to remember that the installation of the pool film on the stairs should be done with a slight stretch.
- The most difficult procedure is to lay the fastening strip if the surface of the bowl is rounded. In this case, the work will be more labor-intensive than the curvature is less. To repeat the curved edge of a corner, make cuts by removing or inserting part of the fastener.
- Clean the pool and wash it before installation nonwoven fabric. The backing is fixed to the walls. To do this, it is clamped between the base of the pool and the fastening strip. Make sure the bottom end hangs down a little. Also lay the substrate loosely on the bottom. There should be no folds at the joints.
- In the most difficult cases, you can glue the sheets to the surface of the walls. Choose adhesives that have an elastic structure.

Installation of PVC film
When tiling the pool bowl, maximum care is required. Also, cut the material correctly, observe the cleanliness of the surfaces to be welded and the technology of finishing pools with PVC film:
- First you need to cut the PVC fabric. In this case, complete coverage of the pool bowl should be achieved.
- First of all, it is recommended to lay the bottom sheets, maintaining an overlap of 5-8 cm. Step back 1-2 cm from the wall. When laying the sheets, folds should not form. You need to fasten the film so that it does not move down when you fill the bowl with water. If the bottom has large slopes, let the film sit.
- After laying the film on the bottom, you can begin hanging the panels on the walls. It is customary to hang sheets plumb, maintaining overlap. For vertical seams - 5-8 cm, for wall-to-wall seams in the corner and wall-to-bottom - 15 cm.
- Pay special attention to the wall-bottom seams. It is necessary to provide for the effect of stretching the PVC sheet in the horizontal plane. Move the sheet that is attached to it a few centimeters along the bottom from the pool wall. Make more indentation, the greater the depth of the concrete bowl.
- Before welding the pool film, clean the surface of all contaminants.
- Before welding the seam, fasten the panels to each other, practicing the tack method, which consists of rapid and incomplete heating small area both PVC sheets and subsequent compression of the tack joint. This way you can prevent the two surfaces being welded from changing position with each other. If the film sheets change their original position, folds will appear that will not disappear. Even after filling the bowl with water.
- Butt seams must be welded with hot air using special equipment. It is recommended to buy a Leister industrial hot air gun for work, which, when welding thermoplastic panels, supports the function of adjusting the temperature of the air stream.
- The strength of the weld will not be inferior to the base material in terms of strength. The big advantage is that there is no need to use glue, solvent, or other materials. The air is heated by an electric coil to a temperature of 450-600 degrees Celsius. Then it flows to the nozzles of the welding machine, providing fire safety and absolute environmental cleanliness of the procedure.
- The air flow temperature must be adjusted depending on the ambient air temperature. Consider also the welding speed of the waterproofing film for swimming pools. Take into account the composition of the materials, whether you are welding film and film, film and fasteners together.
- Monitor voltage fluctuations in electrical network, because the surfaces to be welded must be heated evenly, and due to voltage drops, the temperature of the air flow changes. Check the condition of the hair dryer nozzle. No carbon deposits should form on its surface. If there is one, remove it with a special metal brush.
- Sheets of film in internal corners welded at the last stage. They bend upward along a bisector a part of the panel that is fixed vertically in a horizontal plane. In this case, it is necessary to achieve a position where the entire sheet weighs without forming folds on the surface. Bend the bend to the bottom plane, draw a line on it at a distance of 5-10 cm. It should be parallel to the bisector. Cut the film along this line and weld the inner surface of the bend.
- After having spent welding work, check the quality of all seams. Check to see if any defects have formed on the surface of the PVC film pool.
- Additionally, treat the seams with a special substance for additional sealing, called seam sealer. This is the mass that is in liquid state, hardens in open air and remains elastic after hardening. The seal has a color similar to the color of the PVC film. When working with the seal, use a special oiler. Apply film to the joint of the sheet, having first removed any dirt from the surface. When sealing vertical seams, work downward from the top edge. After application, allow the sealant to cure for at least 30 minutes.
- To secure the film to the sides of the pool, it is customary to use a mounting profile, which looks like a corner or strip. Fix the film with a profile in places with ledges - where there are differences in height or steps. Now we can weld the film to the sides.

Filling the pool with water
When the seam seal has hardened and you have cleared the film covering of dirt and debris, you can begin filling the pool bowl with water. To achieve good results, fill the pool with water that is not too cold. Remember that the higher its temperature, the better the final result.
However, the water temperature should not be more than 40 degrees. Fill the pool half a meter to begin with, maybe even less - 30 centimeters. Then install the counter flanges of the mountings and decorative elements, lighting lanterns, only then can you add water to the level that you planned to achieve.
Now the film pool is considered completely ready for use. All that remains is to watch a video about finishing a pool with PVC film and consolidate your skills in practice. If the water is cloudy, take appropriate measures, which you will learn about in our next material.
A swimming pool is a rather complex technical structure that requires a competent approach to its construction. You cannot build a permanent pool with your own hands; it requires experienced specialists who can work with engineering communications knowledgeable about technology.
One of these technologies is lining the pool with film, which we will introduce you to in this article.
Build a swimming pool in classic version, lined with ceramic tiles, is not cheap, especially if it has a large volume. To build such a structure, even small size, it takes a lot of time - more than three calendar months.
So:
- Pool lining films can reduce this period to one and a half months, and their price significantly reduces the cost of the facility. These criteria are often decisive when a client chooses a method of finishing a pool.
- In terms of their decorative and performance properties, films for lining pools are, of course, inferior to ceramic tiles or mosaics (see Finishing a pool with mosaics: a tribute to fashion or style), but not everyone wants to make a structure out of this architectural masterpiece. For many, it is enough that the finish will be of high quality and reliable, without frills.
- What is important, PVC film for lining pools is not only finishing material, but also waterproofing, and very elastic and durable. The production of such films is based on plasticized polyvinyl chloride, mesh reinforced made of polystyrene.

- During the production process, this material is subjected to a special impregnation that prevents the development of microorganisms on its surface.
This is very important for the pool; it will not have to be cleaned often. So, this finish also has its advantages. - PVC film for lining swimming pools is produced in rolls 1.6 m wide. One roll is enough to cover forty squares of a concrete bowl.
Among the range of PVC coatings for swimming pools, which you see in the photo above, there are smooth options, as well as films with an anti-slip surface. - Corrugated film is used for lining the steps of stairs leading into the water, as well as for covering the bottom in the shallowest areas of the pool. By the way, this finish is highly recommended for outdoor pools, since PVC is better, than tiles, tolerates temperature changes.

- Manufacturers of this material do everything to ensure that the finishing of pools with film is not only durable, but also aesthetically pleasing and varied.
- In addition to plain PVC films, options began to appear with patterns stylized to resemble the texture of marble, ceramic tiles, and even mosaics. Naturally, such coverage is somewhat more expensive.
The service life of a pool film coating is about ten years. This is much less than ceramic tiles, and is the only drawback of this material.
But, lining PVC pools is done quickly, the film is easy to repair or replace, at the same time updating the appearance of the pool.
Preparatory work
In order for the cladding to be of high quality, work should begin by preparing the base. The quality of further finishing will depend on how well it is performed.
So:
- It is important that there are no sagging or potholes on the surface of the pool bowl. If the bowl is made of brick, it must first be plastered and then sanded.
concrete surface, you may have to putty.

- When performing leveling, special attention should be paid to the corners and sides. In these places, the adhesion of the solution to the base should be as tight as possible.
- In progress preparatory work It is necessary to pay attention that all embedded parts are installed flush with the surface, and are also equipped with sealing flanges. If it turns out that they are buried, it will be difficult to install the coating.
- The flanges are usually made of plastic or stainless steel and have a chlorine resistant rubber gasket. These parts must provide a tight connection with the embedded elements using a screw connection.
- PVC film for pool lining is now often used for the reconstruction of old structures whose waterproofing has already been damaged. In this case, the film is installed directly on the ceramic tile.
The main thing is that it does not move away from the base anywhere. If necessary, unreliable elements of the old coating are dismantled, leveled, and then the film is installed.
Film cladding
The PVC film is fixed using a fastening strip. This is a two-meter metal tape, 2 mm thick, no more than ten centimeters wide.
On one side there is applied to the tape polymer coating, to which the film is welded:
- The fastening strip is mounted end-to-end to the surface of the walls, just below the side of the pool, using dowels. The location of the fastening strips may vary depending on the complexity of the bowl configuration.
- And it can be multi-level, have steep slopes and turns. In each specific case, specialists make an individual decision.
If necessary, the tape is also attached to the bottom, this will prevent movement of the bottom sheets and the formation of folds on the film. - In some cases, mounting angles are also used, for example, if there is a concrete staircase in the pool. They cover all protruding edges of the steps and allow you to fasten sections of PVC with tension, reducing the number of points for attaching the film to the concrete.

- Before installing the film, a special geotextile substrate is laid on the bottom of the pool. Its main task is to protect the coating from abrasion as a result of direct contact with concrete during operation.
- The substrate is clamped between the fastening strips and the base. If you are interested in this issue, you can watch the video.
Geotextile segments are laid end-to-end, without overlap or discrepancies. In areas of the base that have a complex configuration, the substrate is fixed with glue. - At the locations of the embedded parts, holes of the appropriate configuration are cut out in the geotextile sheets so that it does not interfere with the compression of the film by the flanges.
- In those areas where the film coating will be welded, self-adhesive foil is fixed on top of the substrate. It prevents burning of geotextile sheets.

- The cutting of the canvas must be approached with great care in order to reduce the amount of waste. For this you need good scissors and the longest possible metal ruler.
- To work you will also need a dye cord, a special hair dryer with a set of welding attachments polymer materials, pressure roller for rolling seams, linoleum knife. To remove carbon deposits on welding machine a metal brush is used.
- Welding of PVC sheets is carried out with a stream of hot air supplied by a hairdryer. Its temperature is regulated depending on many factors: network voltage, indoor or outdoor air temperature, welding speed.
There are other nuances of using a welding gun; the operating instructions will tell you about them. - It also matters what the PVC sheet is welded to: to the same material or to a fastening strip. Film installation work is carried out only at above-zero temperatures. The warmer it is, the better the quality of the coating.

- First, the covering sheets that will be mounted on the bottom are laid out. They are laid with an overlap of up to five centimeters, along the entire bottom, with a slight indentation from the walls.
If the bottom has a complex configuration and slopes, the sheets are fixed so that when the pool is subsequently filled with water, they do not move. - It is best to spread out the film and let it rest. Before starting welding, the PVC surface must be cleaned of dust and any contaminants.
Before welding the seam, the joints of the sheets are fixed using the tack method. - This is incomplete heating and pressing of individual sections of the joints. This prevents the film from accidentally changing its original position, which could lead to the formation of wrinkles.
- After the installation of covering the pool bottom is completed, they begin to hang pieces of film on the walls. They are hung plumb, with the same overlap of seams as on the bottom, and welded to the fastening strips along the sides.
Note! For welding horizontal surfaces with vertical as well as corner connections, the overlap between the sheets of film is greater - up to 15 cm.
- Particular attention should be paid to seams that transition from the bottom plane to the wall plane. There are some nuances here, and the specialists who install the film know about them.
Lastly, welding is done in the inner corners of the pool, after which the quality of all seams is checked. - If everything is normal and there are no complaints about the quality of welding, the seams are treated with a special sealant. It comes complete with film and has the same color.
This is a liquid mass that hardens in the open air, but remains elastic after hardening. - This composition is designed to provide additional tightness of seams. It is applied to the joints of the film using a special container similar to an oil can.
The sealant is applied to vertical seams from top to bottom. Half an hour is enough for it to harden, and you can fill the pool.
The first filling of the pool should be warm, but not hot water. First, it is filled to about forty centimeters, which promotes good tension of the vertical film covering.
After this, you can make holes in it and install flanges on the embedded parts. When the flanges and decorative elements will be installed, the pool can be filled to the top.