Polymeric floor covering: advantages and disadvantages. Instructions on how to lay a polymer bulk floor How to fill bulk polymer floors in an apartment
Floor coverings in this design are becoming more widespread in civil and industrial construction. This is due to factors such as their exceptional strength and durability. In addition, polymer self-leveling floors are distinguished by an extremely simple execution technology, which allows you to make them yourself.
The combination of the words "self-leveling floor" or 3D floor is familiar to many, but few know what these terms mean. How to arrange such coatings, how environmentally friendly and durable it is, and how to make them yourself. Those and many more questions would like to be clarified by those wishing to acquire such a progressive floor covering.
On the advantages and disadvantages of polymer self-leveling floors
Like any engineering solution, the device of a floor made of polymeric materials has a number of advantages, but it is also endowed with certain disadvantages.
The advantages include the following properties:
- elasticity of the coating, which determines their ability to withstand vibrations of the building, both seismic and seasonal;
- resistance of the polymer coating to any reagents and high humidity;
- Fire safety;
- simplicity of manufacturing technology, which allows you to make the coating yourself;
- ease of maintenance and care;
- long life cycle of a polymer coating;
- despite the very smooth surface, such coatings are non-slip;
- many options for execution, including original drawings and patterns.

The disadvantages include the following points:
- a high-quality polymer floor is really expensive, but in terms of reliability and durability it is unmatched. There is still no complete statistics on their operation, but the practice of their application speaks of their high rates. Of course, if the installer does not pursue cheapness and does not acquire low quality material that is exposed to harsh ultraviolet radiation. As a result, the composition may become cloudy, the appearance of yellowness and the loss of visual perception;
- for the installation of a polymer floor, a very flat and solid base is required;
- problems arise if you want to replace the flooring with another. The high adhesion of the material and its strength characteristics make it practically impossible to dismantle, the next coating will have to be arranged over the polymer one;
- the polymer layer is very sensitive to the moisture content of the substrate, which should not exceed 4%. During installation, the room temperature should not change by more than two degrees.

Classification of polymer floors
The separation of materials can be made according to various criteria. The most used is the classification according to the materials used:
- Self-leveling floors made of epoxy materials are the most popular due to their high elasticity and strength characteristics of the composition.
- Self-leveling polyurethane floors are characterized by increased durability.
- Methyl methacrylate coatings are characterized by fast solidification and increased coating strength. Most often used in industrial premises.
- Floors for the same purposes are made from urea, and there is no need to stop production, since they are applied by spraying.
- Polyester-based solutions are the cheapest and most unreliable way of installing self-leveling floors, which cannot guarantee a positive result.

How much does a self-leveling floor device cost
The technology by which the polymer flooring is arranged is simple. In this case, the main labor costs are borne by the preparatory work. The final success of all work depends on quality preparation. Therefore, the price in each specific case depends on the volume of training and its content.
Therefore, on the market for filling polymer floors, the price per square meter of floor ranges from 350 to 600 rubles and is determined after a thorough examination of the object.
Self-leveling floor technology
Before purchasing materials, you should decide on a number of points:
- the type and purpose of the premises;
- the amount of possible loads on the floor;
- the need to introduce decorative elements into the composition of the coating;
- the desire to give the floor certain properties - antistatic, anti-slip and others;
- cost optimization taking into account the price-quality ratio.
Self-leveling floor tools
In the process of work you will need:
- a container for the preparation of plastic mass with a capacity of at least 20 liters;
- a drill with adjustable speeds and a special nozzle for mixing the components of the self-leveling floor. It is necessary to choose a nozzle in length - it must ensure mixing of the mass to the bottom;
- a spatula designed to distribute the mixture in inaccessible places;
- a spatula in the form of a squeegee for uniform distribution of the plastic mass over the supporting surface;
- needle roller - to remove air bubbles from the plastic layer;
- studded soles - for moving around the flooded space with the least impact on the flood layer.
- a solvent used to flush the tool from the remains of plastic mass. It must be selected following the directions on the packaging of the base material.

In addition to the above, you need to stock up on household rubber gloves to protect the skin.
Calculation of the amount of materials
The self-leveling floor is arranged in different thicknesses, the average is considered to be 1.5 - 3.0 mm. Also, the amount of material depends on the use of the filler, or what the quartz sand is used for.
The calculation is simple: for 1 square meter of floor surface, 1 liter of polymer mixture is required with a layer thickness of 1 mm. Accordingly, the requirement is recalculated for the planned thickness. The result must be multiplied by the density of the composition, which is indicated by the manufacturer on the package. Usually it is between 1.25 and 1.40 kg / liter. In order to reduce consumption, the manufacturer often includes a filler in the composition, achieving a density of up to 1.70 kg / liter.
With a filler in the composition, the consumption of plastic is halved.

Preparation of the base for the 3D floor
The main requirements for the supporting surface on which polymer floors are arranged are their strict horizontality and moisture level. Therefore, for a concrete floor, it is better to use a semi-dry screed, on top of which you need to make a leveling layer with a thickness of up to 5 mm. This will allow you to get a fairly flat horizontal surface. In the material of the leveling screed, it is necessary to use fiber shavings as a reinforcing additive. Dry the finished floor thoroughly. Further:
- the surface of the concrete screed must be cleaned of dust with an industrial vacuum cleaner;
- remove grease stains and dirt, using solvents if necessary;
- when working with an old concrete base, it is necessary to cut the cracks found and fill them with epoxy, and only then make a leveling screed;
- a porous surface must be treated with a sealer - this is a solution with strong penetrating properties.

Traditionally, it is believed that the surface of an old wooden floor is not suitable for polymer self-leveling floors. However, with some preparation, in a living space, this is quite possible. For this you need:
- open the floor, inspect the logs, if necessary, replace or repair unusable ones;
- close the floor, further strengthen the fastening of the boards;
- remove old paint;
- patch up cracks in the boards and gaps between them with wood putty, dry, sand the repair sites with emery cloth;
- remove dust from the surface, arrange a self-leveling screed.
Further steps are the same for both concrete and wood.

Surface priming
What kind of primer is needed for a specific floor material is always indicated by the manufacturer on the packaging of the main material. These recommendations must be followed scrupulously. The primer is applied to the surface with a fine-fleecy roller or, in small areas, with a paint brush. Quartz sand is added to the soil. This increases the adhesion surface of the base floor and subfloor. After the primed surface has dried, apply a second coat of primer.
Polymer coating
Stir the finishing composition according to the instructions on the package. In this case, it is imperative to achieve the maximum possible uniform mixing using a drill with a nozzle.

At the end of mixing, the resulting mass must be poured onto the floor and dispersed along the supporting surface as a rule. After that, the applied layer is carefully rolled with a needle roller. This operation is necessary to remove air bubbles and evenly distribute the plastic mass over the floor surface. Moving on the floor during the pouring process is possible only on needle soles.
When signs of thickening of the composition appear, work with it must be suspended. On the surface of the layer, you need to place decorative elements of the 3D floor: shells, coins, pebbles, etc. that the performer wants to see on his floor.
The final transparent layer of the coating is applied after the previous one has hardened. Moving on the newly created surface is possible on the second day after pouring, full operation - on the eighth day.
Application area
Self-leveling polymer floors can be used in premises for any purpose, both domestic or industrial, and office.
The main limiting parameter of the construction of 3D floors is their high cost. But at the same time, there are such positive aspects as high strength, durability, as well as the beauty of performance.
The simple technology of the device allows you to do them yourself. I wish you success!
Features of the use of polymer floors in rooms, the types of coatings used, their disadvantages and advantages, preparation and installation on their own.
The content of the article:
Polymer floors are a modern and ergonomic flooring for all types of premises. It is applied by pouring and a perfectly flat surface is obtained. If the work is done correctly, then the finished floor will feel like a tile to the touch, and in appearance it looks like linoleum. The thickness of such a product can be from 1 to 7 mm.
The main types of polymer floors

On the market of modern building materials, you can find several main varieties of this coating, which differ in their characteristics and application:
- Epoxy urethane floor... Indispensable in rooms where there is a lot of traffic. It has great strength, but retains a certain level of elasticity.
- Polyurethane floor... Resistant to chemicals, temperature extremes. Such a surface does not collect dust, it looks perfectly smooth and aesthetically pleasing.
- Epoxy resin floor... Differs in high resistance to abrasion, as well as exposure to alkali, oil, acid, moisture. According to sanitary and hygienic standards, it can not be used in all types of premises.
- Methyl methacrylate floor... Differs in significant installation requirements. At the same time, the strength to external influences is somewhat worse than that of other types of coatings. Because of this, this mixture is the least popular.
Advantages and disadvantages of polymer flooring

The most important positive aspects of using such a coating include:
- Ease of use, thanks to a perfectly flat coating surface.
- Temperature resistance. Such a floor is not afraid of frost, drafts, or heat, so you can successfully install a polymer floor in a garage or even in a sauna.
- Increased strength (wear resistance). All types of polymer floors last much longer than a number of other floor coverings.
- Variety of interior solutions and application possibilities - pay attention to this when carrying out renovations indoors.
- No need for waterproofing.
In addition, this type of surface can hardly be called natural. Many potential customers are concerned about the environmental safety of this type of coating. It is rumored that self-leveling floors give off resins that are undesirable to human health.
But what experts say about this: of course, polymer flooring is not a natural material. But all volatile substances that it contains evaporate even at the stage of polymerization (solidification). After a week, that is, the period of complete hardening and readiness of the floor, it becomes 100% safe, even for children's health.
In terms of sanitary and environmental characteristics, a self-leveling polymer floor is not inferior to many more familiar natural materials. This is evidenced by the relevant sanitary certificates and quality and safety certificates issued for this type of coating.
Tools and materials for pouring a polymer floor

What tools and materials are needed in order to independently fill in any types of polymer floors:
- The polymer material itself is in the factory packaging;
- Tank (bucket, basin, other container) for mixing;
- Wide construction trowel;
- Roller for painting;
- Painting tape (scotch tape);
- Construction level;
- Electric drill with mixing attachment.
Preparatory work before pouring the polymer floor

The service life and external data of the future coating will depend on how correctly the work on preparing the surface for pouring will be performed. In other words, if you want the floors to please the eyes of the inhabitants for a long time, pay the greatest attention to preparation. Neglecting this stage can lead to the fact that an incorrectly laid coating will eventually deform and subsequent destruction.
To begin with, different requirements are imposed for different types of bases. So, the wooden covering must be sanded, and also make sure that it is always dry. But such floors should not be primed.
Another porosity is a concrete floor or cement screed. Since they perfectly absorb moisture, such a surface must be primed. In addition, you will need a sealant to seal any cracks and seams as much as possible.
If there is old concrete on the floor, then you will have to remove the topmost layer, and then sand the surface well. After sanding, use a vacuum cleaner to pick up any raised concrete dust and particles.
At the stage of preparing the room and the floor surface, it is also necessary to worry about the ambient temperature. This directly affects the properties of the poured mixture and its drying. It is normal if the pouring is carried out at a temperature of 5 to 25 ° C, while the humidity should be approximately 60%. If you do not follow these conditions, the floors will dry longer than expected.
In order for the future floor to have an ideal structure, a priming procedure is performed before pouring it. The primer fills in any, the smallest pores and prevents the flow of oxygen, which will increase the life of the coating.
Some craftsmen add a little dry sand to the soil solution to increase the adhesive properties of the solution. In addition, in this case, the finished solution acquires a slight roughness, and it becomes easier to work with it.
The primer is applied in an even layer using a construction roller. If required, reapply another primer coat. To do this, you need to wait until the starting layer is completely dry, and this is 12-16 hours on average.
Features of pouring a polymer floor with your own hands

The necessary information on mixing the working mixture and its preparation is always placed by the manufacturer on the packaging of his products. Better to purchase materials from the same brand.
Before pouring the future floor, it is necessary to carefully prepare the base (base level). If this is a board, then each of them should be checked and secured so that none of them dangle. All cracks must be sealed with a cement mixture and sealant, otherwise the finished solution will flow into them and lead to unevenness of the coating as a whole.
The thickness of a self-leveling polymer floor is based on whether it will be an independent coating or will serve as a base for another material on top of it. With its help, differences in surface levels up to 30 cm are eliminated. Most often, the height of the finished polymer floor is 10 mm or slightly less.
Warm water is poured into a container prepared in advance (usually a basin, a bucket), after which a dry solution is poured. It is important to observe all proportions so that the coating has all the necessary qualities after drying. The finished solution should not contain air bubbles or all sorts of lumps. Its consistency is somewhat reminiscent of liquid kefir.
The prepared mortar is gradually poured onto the base of the floor and spreads evenly over the entire surface with a construction trowel. It is important to work with a partner, since the solution must be distributed as quickly as possible. One more thing: to move around the room, you need to use special spiked shoes. To do this, you can take any old shoes and attach to them along the cut of the board with tape. Self-tapping screws or nails are pre-packed on each board.
After the solution has been distributed over the surface of the room, it is carefully processed with a paint roller. It is necessary to pay attention to the fact that all air bubbles are removed as much as possible - in this case, it will be possible to achieve the most even, smooth, glossy surface. It will take no more than 40 minutes to complete the work, since after this period the solution begins to set and it will be wrong to carry out further work.
The very technology for the production of polymer floors should be organized in such a way that for each square meter of the floor surface in the room, the average consumption of dry matter is about 1.5 kilograms. For pouring, you need to prepare protective gloves and goggles to protect yourself from harmful vapors. It is necessary to provide good ventilation in the room - this way the resins will evaporate much faster, and the solution will dry out better.
After 2-3 days have passed after pouring the main polymer layer, you can start leveling the floor. This is the finishing part of the technological process. The thickness of the last layer should not be more than 3 millimeters. After the final drying of the finishing layer, proceed to varnishing the finished surface. It is best to use a polyurethane-based varnish. This will create additional protection for the floor and increased resistance to aggressive effects of alkalis, acids, paints.
It will take about two days or more to fully solidify, depending on the climatic conditions in the room. After the top layer is completely dry, you can start applying a decorative coating layer.
Another good thing about polymer floors is that you can use a variety of decorative elements on them. Absolutely any desired pattern based on different colors and shades can be used as an image. With well-organized work and careful study of the instructions, you can independently get a result that will not be inferior to the work of an experienced master.
Indoor polymer floor care
Caring for this type of flooring is not particularly difficult - as if you have to take care of ordinary parquet. Typically, classic wet or dry cleaning is sufficient to keep it clean.
To wash the polymer floor, household chemicals are used, which have a significant acid content. Such a product is applied to the floor surface for 5-10 minutes, then removed. The floors are then washed with plenty of water. If there are stains from various contaminants on the surface, they are treated separately.
As for the processing of polymer floors in industrial and commercial premises, the intensity of their use can be much higher. In such cases, there are hardly visible cracks on the floor, into which dirt particles are packed. They lead to the fact that the floors dull and lose their former attractiveness. Therefore, it is first necessary to remove the accumulated dirt and dust with a high pressure washer. The floors are then washed, after which they can be varnished to give the same glossy look.
However, in cases where floors will be frequently exposed to harsh chemicals, additional protection is required. The device of polymer floors at this stage will be as follows: before the start of pouring, the surface is covered with a special protective polish. It will require renewal every 6 months. But it is impossible to leave detergents and other aggressive agents on the surface of polymer floors for a long time, since they are susceptible.
The polymer flooded floor has proven itself well in those rooms where people go barefoot or in light shoes. It is recommended to fill the floors with polymers in the bathroom, shower, kitchen, bedroom and so on. In corridors and public areas, the coating will wear off faster due to contact with dirt and sand particles on the shoes. In such cases, the floors will have to be refurbished more often, which is associated with additional costs.
How to pour a polymer floor - watch the video:
Thus, a self-leveling polymer floor belongs to the finish type coatings, which allow you to achieve a perfectly smooth and absolutely flat surface that is resistant to abrasion and impact. This type of floor covering is to a certain extent still distinguished by its novelty for the domestic customer. This is used by construction companies and repair crews to receive higher rewards for services. But making polymer floors with your own hands is not so difficult if you follow the indicated tips and approach the pouring process carefully.
They are widely used in modern industrial and civil construction. According to their characteristics, they have proven themselves well as environmentally friendly, dust-free, shock-resistant and sound-insulating coatings.
According to the composition of the components included in the bulk antistatic polymer floors, they are divided into polyurethane and epoxy. The former are based on polyurethane and methyl methaacryl. The curing of the coating occurs under the influence of air.
The latter are based on a two-component epoxy resin. Polymerization of such a coating occurs when a hardener is added to the mixture.
Since these coatings were developed for industrial use and are resistant to high loads, when they are used in an apartment and a private house, the difference between them is practically not noticeable.
The difference may not be significant, but there is. Epoxy self-leveling floors are more resistant to abrasion and impact (when the tool falls). But polyurethane coatings dampen vibration well and reduce noise (during machine operation).

Based on this, it is possible to offer polymer floors in an apartment or house according to the following principle:
- hallway - polymer epoxy floors (there is a high content of sand from shoes);
- kitchen - epoxy floors (high probability of falling heavy objects);
- bathroom and toilet - epoxy floors;
- bedrooms and living rooms - polyurethane floors (increased sound insulation of premises).
The technology for laying self-leveling polymer floors is quite simple. Even a schoolchild can master it. Therefore, it will not be difficult for a home craftsman to lay a self-leveling polymer floor with his own hands.
When performing work, he will need a maximum of one assistant. However, it is important to remember that no matter how simple the operations for the installation of a self-leveling floor are, they need to be approached responsibly. Especially if you are planning the installation of self-leveling 3D floors.
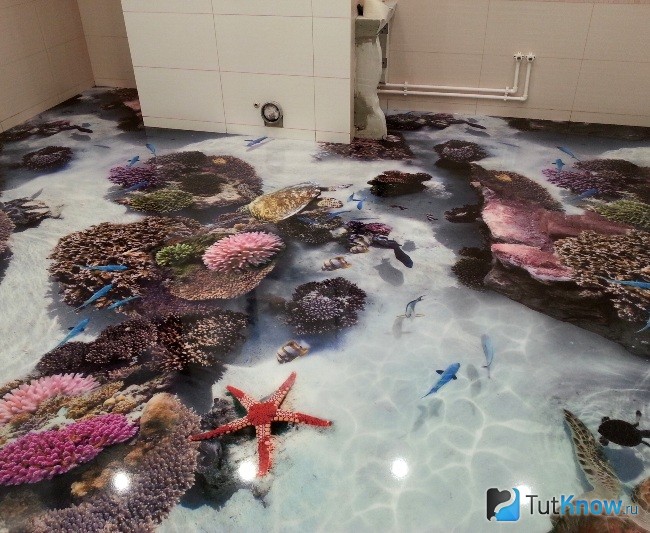
Self-leveling 3D floors are the same epoxy or polyurethane floors, on the surface of which a volumetric drawing, a finished photograph or a reproduction of a painting is applied. From above, such a floor is covered with a protective transparent layer (varnish).
Let's consider in detail how to properly fill the self-leveling floor. More precisely, below there will be instructions on what and how to do.

How does the repair in an apartment or house begin? Of course, with planning, calculating materials and your budget. When you have decided which floors you will use, you can start calculating.
Choosing (epoxy or polyurethane) self-leveling floor how to calculate the amount of material for its device will not be difficult. They are sold in sets. The composition of the self-leveling floor may include various fillers (quartz dust, marble chips, dyes, etc.)
The choice of color and filler is up to you. An instruction is attached to the kit, which indicates which layer and for what area it is consumed. On average, 1 liter of the mixture is used for 1 square meter of the base of the floor with a layer thickness of 1 mm.
How to calculate material for self-leveling floor
The specific gravity of 1 liter of the substance is approximately 1.3 kg. For a room of 16 square meters, you will need 16 x 1.3 = 20.8 kg of the mixture. For polyurethane floors, the specific gravity is 1.25-1.33kg / l. For epoxy floors 1.4-1.5 kg / l.
Sets of self-leveling polymer floors from different manufacturers may differ in weight. On average, 1 set weighs —— and its consumption is 20 square meters with a layer thickness of 3 mm.

Damping tape to compensate for the expansion of the floor when it is heated. It fits around the entire perimeter, where the floor is in contact with the walls.
You can do without it, but for this you need to arrange a special expansion joint in the walls. It will be described below.
Instruments
Tools for polymer floors:
- electric drill with low speed and mixing attachment;
- container for mixing components (plastic bucket);
- household scales (for weighing fillers);
- angle grinder (grinder);
- vacuum cleaner;
- wide spatula (notched);
- cloth roller;
- needle roller (squeegee for);
- paint shoes (have needle soles and are worn on shoes).
After you have prepared everything you need, you can get to work. Important! Before laying the self-leveling floor, the instructions attached to the set of materials should be carefully studied by you.
How to properly fill the self-leveling floor
Polymeric floors are laid only on a pre-leveled and prepared subfloor surface. If the screed has cracks and chips, they must be sealed with cement mortar or waterproofing mastic.
You can also process the joints of the floor and walls around the perimeter with mastic. If the base of the floor has critical drops, then it must be leveled. Self-leveling self-leveling floors are ideal for this.

If the surface of the original cement-sand screed is even, then it must be processed with an angle grinder (grinder). This will remove fragile elements and roughen (sand) the surface for strong adhesion of the self-leveling floor and the base (screed). If you do not want to use a damper tape, then along the perimeter of the room (in the places where the floor joins the walls), the grinder makes an incision parallel to the floor and up to 5 mm deep and equal in height to the poured layer.
This gap compensates for thermal expansion of the floor and prevents cracks from appearing. Otherwise, lay damping tape around the perimeter. After pouring the floor, you can cut it off with a knife, and close the joint with a plinth.
After cleaning, remove all debris from the surface and thoroughly vacuum the subfloor. Dust is the main enemy of self-leveling floors. If there are grease or oil stains, they must be degreased with a solvent.
A primer is applied to the prepared surface. Manufacturers of self-leveling polymer floors produce polyurethane-based primers. They can be supplied in a set of self-leveling floors.
In their absence, the solution can be prepared by yourself. The primer will be a mixture of 20-30% of the base material of the self-leveling floor and a solvent (acetone, solvent, xylene, etc.).
The primer is mixed in a container with a drill with a nozzle at low speeds. This will prevent bubbles from forming. Mix for 3-4 minutes. After that, the primer is poured onto the floor and stretched evenly over the surface with a flat trowel.
The applied layer of primer is rolled with a needle roller to remove their mixture of air bubbles. Paint shoes should be worn on the feet. Apply a second coat if necessary.
After applying the primer, it should dry well. Remember! Do not make large technological gaps between priming and application of the base coat.
As a rule, the drying time of the composition is indicated on the container with the primer. For epoxy floors, complete drying time is 12-18 hours. For polyurethane: 6-12 hours.
When priming is performed, the room must be well ventilated. The use of open flames is prohibited.
After the primer has dried, the base coat can be applied. Preparation of the mixture requires careful preliminary study of the instructions.
Open the container with the base layer (liquid A) and, using a drill with a nozzle at low speed, stir the liquid for 3-5 minutes. Add the hardener (liquid B) to the center of the container with liquid A. Using the drill again, stir for 3-5 minutes.
Avoid air bubbles. Add fillers (quartz sand, colorants) while stirring. When the mixture is ready, it is ready for styling.
Work starts from the far wall. From the container, the mixture is poured along the wall in parallel stripes and, using a spatula (notched trowel), is evenly leveled over the surface. Then the next portion of the mixture is poured.
When the mixture is spread over the floor, it must be rolled with a needle roller. It will remove air bubbles from the base coat. If this is not done, the floor will be weakened and may crack.
After the last procedure, the floor is ready and takes time to dry and cure.
After 24 hours, you can walk on the floor carefully. Full polymerization will occur in 7 days and the self-leveling floor is finished.
To increase the durability of the polymer floor, a protective varnish can be applied to its surface. If you first apply a decorative volumetric drawing or photo to it, you will get wonderful, exclusive 3d floors.
Step 3 describes the sequence for an epoxy floor. However, it differs from the sequence of laying the polyurethane floor only in the preparation of the solution.
There the solvent supplied in the kit plays the role of a hardener. The term of execution of works on pouring a polyurethane floor after mixing with a solvent is limited to 30 minutes.
And other wood materials on a solid base, metal, after applying a special primer.
In the article we will talk about how to make self-leveling polymer floors with your own hands in an apartment, as well as in a garage.
Types of polymer bases
The synthetic coating used in homes, apartments and offices is based on one of the polymers.
Epoxy Resin - Together with additives creates a tough, abrasion and chemical resistant coating.

The smooth, resilient floor is able to withstand any deformation.

Methyl methacrylate floors are created by mixing acrylic resins and hardeners. They are highly UV and moisture resistant, and unique color combinations are created with the help of dyes. The floor hardens in 2 hours and has a lifespan of up to 40 years. With all the positive characteristics, this type of self-leveling floor is rarely used, the reason for this is the high cost and harmful fumes arising during the pouring process.
Features and Benefits:
- Hygiene and ease of maintenance.
- Resistance to mechanical stress.
- Seamless technology of filling.
- The ability to make polymer floors yourself.
- Variety of colors.
- Immunity to chemicals.
- The high curing speed of the self-leveling floor reduces the repair time.
- Durability of use.
Preparation of the base

The main requirements for the preparation of the base are the correction of defects and the cleaning of the surface. If there is an old coating, it must be completely removed. The entire area of the subfloor is thoroughly cleaned of debris and dust (it is worth using a vacuum cleaner). After cleaning, existing defects become clearly visible. The existing cracks and cracks are putty, the protrusions go astray. The best way to treat the surface is to use a grinder. If the polymer floor has to be poured onto ceramic tiles, its surface is deprived of smoothness with sandpaper or sandpaper.
It is necessary to measure the horizontal level of the base: if its difference does not exceed 4 mm, then you can start making a polymer floor. With significant fluctuations in level, the surface will have to be leveled with a sand-cement screed and postponed further work until it dries.
In the overwhelming majority of cases, a poorly prepared base is to blame for a poor-quality filling of a self-leveling floor, which caused delamination.

After the screed has dried, a thorough primer is required, which increases the adhesion between the base and the self-leveling floor, and also reduces the absorption of the polymer mixture, and, therefore, the consumption of the expensive composition. It is better to apply the primer in two layers, taking a break between them for at least 4 hours. The composition is applied with a roller. To prevent the liquid mixture of the self-leveling floor from leaking near the wall, this area is glued with a damper tape. Also, wooden slats are installed along the perimeter of the room, which will save space for the expansion joint.
Preparation of the solution

For work you will need:
- Drill with attachment.
- Wide spatula.
- Roller with a needle insert on a long handle.
- Large bucket.

It's time to prepare the working solution. This process is described in the instructions on the packaging, in order to obtain an excellent result, the manufacturer's recommendations should be strictly followed. To create a polymer floor, you will need two components, one of which is a hardener. Mixing takes place in a large container. Heat is generated during the reaction, so it is recommended to lower the mixing container in advance into a container with cold water in order to slow down the reaction somewhat.
Novice craftsmen can mix the composition in a bucket by filling in two components in turn. A nozzle with spatulas is selected for the drill, and during operation, a low speed of the mixer is used. The mixing process takes about two minutes.
Mounting
The floor must be poured at a temperature not lower than + 10 ° C, at a lower temperature, chemical processes will slow down, and the polymer will not spread well over the surface of the base. High temperatures will cause the components to cure too quickly and will not allow a good casting performance.

During the curing process, the floor should not be exposed to drafts and direct sunlight. The top layer of the polymer coating must not dry out before the rest of the mass, otherwise cracks will appear.
The liquid polymer is poured into a corner distant from the entrance and is helped to spread over the surface with a wooden screed. The work is carried out in strips, without stopping, the composition quickly hardens in the container. It is good to involve an assistant in this process, because it will be difficult for one person without experience to do everything. In the process of pouring, the solution is rolled with a needle roller, which removes air bubbles. The work ends at the entrance to the room. Walking on a fresh train is not worth it, otherwise footprints will remain.

After the composition has dried (the process, depending on the polymer, takes several hours or days), the wooden planks are removed around the perimeter, and the seams are filled with sealant and closed with a plinth. The finishing layer of the self-leveling floor is a coating with two layers of varnish, it gives the surface shine and smoothness, and also increases wear resistance. Using different types of varnish: matte, colorless, glossy or colored - you can achieve the desired effect.

- thin-layer polymer paint coatings;
- impregnation of concrete;
- thick-layer polymer coatings with sand.
The most economical option for a self-leveling floor is polyurethane impregnation. This is one of the most reliable types of garage flooring. Outwardly it resembles lacquered concrete. For a more attractive floor covering, you can apply color markings to it.

The first step is to clean the rough surface. If the floor was wooden, then you need to dismantle it along with the logs. By removing debris and dust from the base, you will be able to assess the quality of the subfloor. If there are cracks and chips on it, then this is a bad signal indicating the destruction of the material. All damage to the screed must be repaired.
In some cases, before pouring the self-leveling floor in the garage, it is necessary to perform a cement screed. This is advisable if the floor is badly broken, there are large differences in height or in the absence of a screed as such.

If you still need to make a screed, then pay special attention to the arrangement of waterproofing. In addition, to improve the strength characteristics of the garage floor, which is very important in this room, make reinforcement. To do this, you can use a galvanized mesh laid in a mortar.
After the screed has dried or the existing subfloor has been cleaned, it must be primed. For what?
- The primer will improve the strength of the base.
- So, the adhesion of the screed to the polymer floor is ensured.
- Protection of the surface from the appearance / reproduction of microorganisms.
Apply damper tape around the perimeter of the garage, which will serve as a cushioning layer. This is done to the height of the polymer floor pouring.

Now you need to install the beacons / guides. If you have a small garage, then corners, pipes or metal profiles can be used as guides. Place them so that the top edges of the guides are in the same plane. For these purposes, you can use long self-tapping screws. Divide the floor into square / rectangular sections. Screw the self-tapping screws into the tops of the rectangles / squares. To do this, you first need to drill out the tie and insert it into the holes of the dowel. Raise the beacon as needed. Do this with a solution.
Now you should prepare the polymer mixture according to the instructions provided by the manufacturer. Stir it thoroughly. To do this, you can use an electric drill with a special mixer attachment. It is important that the drill runs at low speed, otherwise a lot of air bubbles will form in the mixture. And this will negatively affect the quality of the polymer floor.

The resin is poured quickly because it dries quickly. Therefore, the best method of doing this work is to prepare a mixture based on a rectangle / square set by beacons - pour it and align it.
At the end of the pouring, you need to roll the mass with a spiked roller. Thus, air and excess moisture trapped in the polymer will be removed. The self-leveling floor can only be used when it is completely dry. The time it takes to do this depends on the temperature in the garage.

You shouldn't artificially dry the floor. When the room is heated, a crust forms on the polymer. In this case, the thickness of the self-leveling floor will remain viscous. As a result, the floor in the garage under the weight of the car will simply sag over time.
Work on the construction of a polymer floor has many complexities and nuances, but it is quite accessible to do it yourself. In compliance with the technology, training videos will help.
Video
The process of pouring a self-leveling floor can be seen in the video below:
Photo


Self-leveling polymer floors are a very popular and practical coating that has many advantages. They are a liquid polymer mass, which is poured onto the base, and after hardening, it becomes even and strong. The presented material can be used at home, as well as at industrial facilities.

Among the advantages of self-leveling floors, the following can be noted:
- Lack of joints and seams, which reduce the decorative properties of the coating.
- High degree of environmental friendliness.
- Tightness.
- Resistant to moisture, biological factors, corrosion.
- High level of durability.
- Choice of different shades and textures.
- Hygienic, so the mixture can be poured even in children's rooms and hospital rooms.
- Ease of cleaning, and various detergents (even chemical) can be used to clean the floor.
- Antistatic.
- Resistant to temperature changes. The presented coating is capable of withstanding a sufficiently high temperature.
- The ability to pour the mixture with your own hands.
The video will tell you about the advantages of coverage:
As for the shortcomings, there are only a few of them: the rather high cost of the material, as well as the unusually difficult dismantling of the polymer layer.
Classification of polymer coatings
Before you start pouring the mixture with your own hands, you need to decide on what they are:
By the material of manufacture used
- ... They are distinguished by their low cost, good hardness and strength. However, under strong mechanical stress, they are capable of cracking, since they are considered quite brittle;
- ... They are resistant to temperature changes, can withstand heavy loads and do not crack even after a strong impact. However, their cost is quite high;
- Methyl methacrylate. Such floors are quite difficult to fill with your own hands, while they harden extremely quickly (in 25 hours). Thanks to this property, the period for repairing the floor is significantly reduced. However, they also have some disadvantages: poor resistance to the negative effects of chemicals.

Depending on the layer thickness
- Thin-layer. Most often they are used to equip garages, parking lots, storage rooms. In this case, the layer thickness is only 0.25-0.4 mm. Such a coating practically does not peel off during a point impact, and is also able to withstand traffic;
- Medium thickness - 1.5-2.5 mm. Used in industrial premises and commercial buildings. They are quickly assembled and hardened. Such mixtures have a rich range of shades;
- Thick-layer. The layer thickness is 5-8 mm.

Depending on the properties
- Cement polyurethane. In this case, the thickness of the coating is 5-8 mm. They are used in those areas where very strict requirements are imposed on cleanliness, for example: in the kitchen, in the food industry, in medical laboratories. Such a coating performs well its functions in a fairly wide temperature range: from -40 to +1200 ° C;
- Antistatic. Such floors are ideal for photo salons, in electronics manufacturing workshops, research laboratories;
- Frost resistant. They have a small thickness, and can be used in those rooms where there is high humidity and low temperatures;
- Highly filled. They have a maximum thickness of 5-10 mm. The mixture contains quartz sand, which allows the coating to withstand super-strong loads;
- Deactivatable. They are most often used in buildings where work is carried out with nuclear reactors.
Filling technology
Required tools and materials for installation
In order to mount, it is necessary to collect the following devices and materials:

Preparatory work
You can pour the mixture with your own hands, but the surface of the base should be well prepared before this. In most cases, polymer blends can compensate for significant differences in height, but it is better not to have them. If there are any defects, chips, protrusions at the base, then it is advisable to remove them.
We have here a very detailed video about all the nuances of preparing a base for pouring a self-leveling floor:
In order for the filling to "take" well, the base needs to be processed with sandpaper. In addition, the floor should be covered with a primer mortar. Subsequently, the poured layer cannot be dismantled on its own without special equipment, therefore it must be poured extremely carefully and carefully.
Filling the rough and finish layers
To fill the polymer floor with your own hands, you need to complete several steps:

Filling the second layer of the mixture, it is necessary to leave a technological gap around the perimeter of the room. It will subsequently be filled with a special sealant designed for polymer coatings.
More clearly about the technology of self-assembly in the video:
As you can see, it is quite simple to install such a floor covering with your own hands, even if the master has no experience with such a mixture. However, all work should be done carefully and carefully.

