DIY wall decoration with mdf panels. Do-it-yourself installation of mdf panels Do-it-yourself installation of mdf wall panels
This information is intended for those who want to do it themselves, quickly and cheaply. MDF walls, or those who just want to expand their horizons. By studying this article, you will understand that do-it-yourself decoration is not very difficult. After all, the installation is alternately painted and shown in the form of photographs.
MDF material is wood waste (chips) mixed with a special adhesive solution and pressed.
A similar structure of the material makes it similar to boards, but at the same time it differs significantly. For example, heat processing wood waste in the production of particle board, avoids the addition of various resins and other negative chemical compounds to the mixture for gluing.
Despite this, they have excellent technical performance, as a result of which they are widely in demand today.
Let's take a closer look
Interestingly, this material is used for finishing works all surfaces, from ceiling to floor. On the other hand, this species materials are much more common in various administrative premises and in public places. Perhaps, people do not use it for their home due to the lack of domestic warmth and comfort of this material.
Advantages of MDF
The advantages of this finishing material include several qualities at once.
- One of the main advantages - is the ease and availability of installation.
- As a result, for its implementation it is not necessary to have for the implementation of this process.
- In addition, the installation of this material does not require special preparation of the wall surface, since installation is the end point.
- It is also worth noting that during the installation process there is not much dirt and dust.
- The repair, which includes dismantling the damaged panel and installing a new one, is quite simple and does not take much time.
- Today, there are also requirements for heat and sound insulation, which is quite good for this finishing material.
- As for caring for them, it is very simple, for example, they just need to be washed with warm water.
- You should not forget about the long service life, combined with the environmental friendliness of the material.
- And, finally, it is worth saying a few words about the texture and color of MDF panels, which is wide enough and imitates different materials from wood to stone.
- At the same time, the cost of this type of material varies widely.

Flaws
Along with the advantages, they also have some disadvantages. So, for example, this finishing material,
- not very resistant to high humidity, and deformed. At the same time, manufacturers are working on this shortcoming, and now there are special moisture-resistant chipboards that are designed to finish such rooms as the kitchen and bathroom. Including this material is suitable for finishing a house or a summer residence.
- It is also worth noting the low strength, which is less than that of other finishing materials, in particular laminate. So, a strong enough hit with the ball may well deform our finishing plate.
- And, finally, this finishing material burns well, in this regard, experts recommend placing electrical wiring in special protective boxes (fire-resistant).
Installation
The installation process will require the presence of equipment such as special wiring boxes, a screwdriver, edge profiles, adhesives, self-tapping screws, and so on. In general, the installation process does not require special skills, but knowing little tricks will allow it to be carried out as efficiently as possible.

Preparing for installation
- And so, before proceeding with the decoration, it is worth removing the wallpaper that is swollen or simply not holding tight.
- After that, the surface of the walls is treated with a special raster - a primer. The fact is that this solution prevents the reproduction of fungi, which often appear in voids.
- To increase the thermal insulation of the walls, you can use a heater and cover all the walls with it. Some types, for example, are mounted on the wall with adhesive solution, while the thickness of the insulation can be 0.5 cm. As a rule, such insulation materials butt-glued. It is worth noting that the sparkling side of the insulation is glued directly inward.

Installation of mdf wall panels
Consider the first example of a finish in which they are installed in a standard bullfighting room. three-room apartment, in a multi-storey building. Considering the fact that there are no external walls, additional insulation is not required. Installation work must begin from the ceiling.
- To determine the lowest angle in the room, you should use the building level and draw a horizontal line exactly 5 cm lower, which directly determines the position of the upper UD - profile.
- To mount it, use quick installation. Sometimes wooden slats are used as a frame, but this is not always effective. The fact is that if the wood is even slightly damp, then for some time it can be deformed during the drying process.


- Next comes the stage of attaching the suspensions to the ceiling surface, while they should be about 60 - 70 cm apart from each other. For their fastening, you can also use quick installation, the parameters of which are from 4 to 6 cm. holes on top.

- After that, the SD profile is mounted on the suspensions.

Interestingly, such a base allows you to install any of these types of finishing materials such as plastic, drywall or particle board. As for the plates made of pressed sawdust, it is better to use cements and self-tapping screws for their installation.
Remember, first carry out the laying of all communications (wiring, and so on), and only then the panels are mounted.

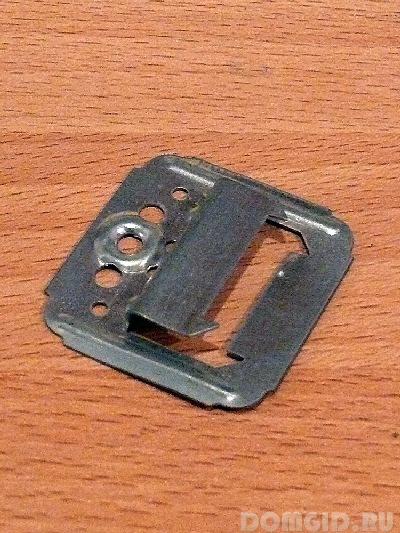
- On one side, the material should be attached with self-tapping screws, and the other end is fixed with clamps. Interestingly, the clayers are attached to the frame with the help of bedbugs. Following this technology, you can quickly and easily close the entire surface of the ceiling.

- If you want to mount spotlight, then a perforator with special crowns will help you with this, which will make required hole in this panel.

- Next comes the turn lighting fixtures whose installation is described in more detail by their manufacturer.

- As for the installation of wall panels, here you should not forget about special boxes for electrical wiring.


- The next step is to create the base frame. Here again, you can use suspensions that are fixed on the surface of the walls.
- And they already have a CD-profile installed.
- The top and them are delimited directly by the UD profile.

As for the location of the horizontal profile, here one should focus on those places that are most often affected, for example, in the area of the knee, shoulder, and so on. The distance between this profile should be maintained at 60-70 cm.

If the issue of environmental friendliness is not an empty phrase for you, then you have probably paid attention to mdf panels for walls for a long time. With their help, you can seriously decorate your interior, make it more expressive and modern, while not completely emptying the precious in the current economic conditions family budget. In addition, the installation process does not differ in any transcendental level of complexity and is quite accessible for mastering by a "mere mortal". Therefore, feel free to arm yourself with a tool and hurry to buy material - today we will talk about how to fix MDF panels to the wall in such a way that you will experience well-deserved satisfaction at the sight of the result.
Pros and cons of using in the interior

It is quite logical before the direct installation of a particular finishing material to inquire about what positive and negative sides. Moreover, from the point of view of the appropriateness of using MDF panels, they are far from being such an unambiguous solution as plastic or drywall. Similar instructions, but already on fixing drywall, you can read in the article: "How to fix drywall to the wall: 2 installation methods".
+
- environmental friendliness already mentioned above;
- the simplest installation;
- good soundproofing performance;
- a wide selection of textures and colors;
- elementary care;
- low cost.


-
- combustibility of the material;
- irregularities are possible at the joints of the fragments;
- not suitable for outdoor decoration;
- poor moisture resistance;
- possible deformation under mechanical action;
- inconvenient installation of hanging furniture.


As you can see, it is possible to fasten MDF panels to the wall surface only in relatively dry rooms with favorable thermal conditions. Be sure to get rid of mold on the walls, if any. At the same time, it is necessary to take into account the fact that this material is very afraid of any force impact and will inevitably crack in case of any active contact with it. Otherwise, all the negative aspects of using it are safely leveled by its pluses. One of them is a wide selection of a variety of textures and colors, allowing you to decorate the interior in full accordance with your aesthetic needs. 

Tools and Consumables

In order to fix the panels, you do not need any specific tools. You need to keep on hand all the same standard set that is used to mount any other finishing material.
- plumb;
- level or corner;
- a hammer;
- screwdriver;
- electric jigsaw or wood saw;
- construction stapler;
- roulette;
- pencil.
Prepare and consumables:
- nails;
- dowel;
- self-tapping screws;
- wooden slats or metal profiles for the frame (subject to this method of installation);
- liquid nails or other adhesive composition.


It remains only to add the MDF panels themselves - and then there will already be a complete set of everything necessary for high-quality and successful installation. In order to calculate their exact number, you need to make the correct markup. 

Foundation preparation and marking

Probably the most tedious and tedious stage, which many masters (both beginners and already professionals) do not take quite seriously. It's a pity, because a lot depends on the quality of the preparation of the base surface. Especially if you mount the mdf panels directly to the base without creating a leveling frame. Therefore, it is better to think soberly and perform the necessary manipulations with the utmost quality and care:
- as carefully as possible, but without excessive fanaticism, delete old finish(read about how to remove liquid wallpaper from the wall);
- if the paint stubbornly does not want to get off its "familiar" place, then leave it - it will not interfere with you during further installation;
- eliminate all possible cracks with a primer and repair compound;
- if the cracks are minor, then first make them wider with a hammer and chisel, and then treat them with a deep penetration primer - this will help protect your base surface from mold and mildew;
- after all the processing, decide where and how you will attach the panels to the wall - in order to make accurate markings;
- lean the level against the wall and determine the upper and lower mounting points;
- draw a horizontal line along the perimeter of the room in which the repair will take place, and then directly under the ceiling;
- we determine the location of the guides based on the optimal step of 50 cm.


All your further actions depend on how you decide to fix the panels on the wall - directly on the glue or through the auxiliary frame device. Consider both types of installation, noting the features of their use, the pros and cons, as well as the specifics of the various stages. 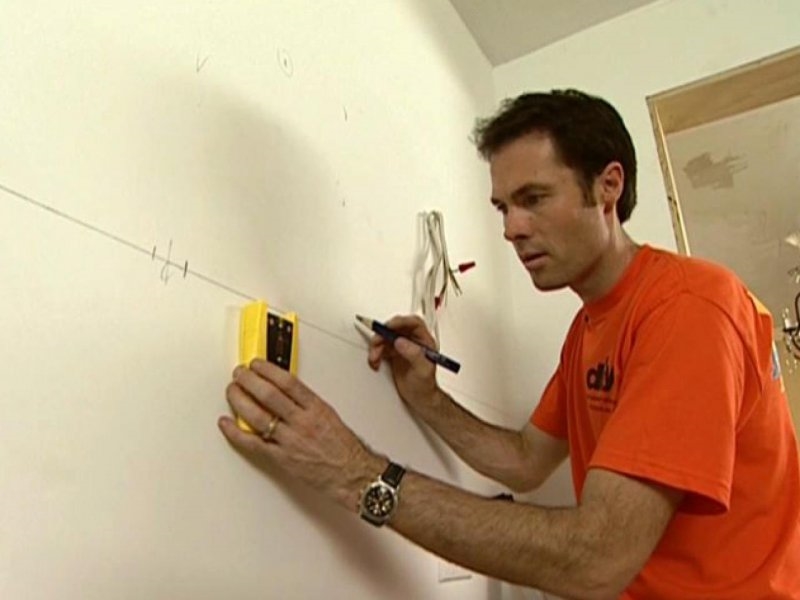


Method one. Installation using the crate

- recommended in cases where base surface it has strong irregularities that cannot be corrected manually;
- for rooms with high humidity it is best to use not wooden slats as a base for the frame, but metal profiles;
- the method using the crate is indispensable in cases where additional wall insulation is planned.

The main disadvantage of this option is the need to mount the frame, which slightly lengthens the duration of the work. In addition, the frame takes up a certain number of centimeters of free space. Are you ready to put up with such "arbitrariness"? Very often, you simply don’t have options, because achieving the perfect surface is far from possible every time you need it. 
Lathing device
Highly important point- know how to attach mdf panels to Wall: vertical or horizontal. The nature of the device of the auxiliary frame directly depends on this.
- horizontal arrangement of MDF panels - vertical lathing scheme;
- vertical arrangement of MDF panels - horizontal lathing scheme.


As you can see, everything is quite simple - it is unlikely to be confused! 


Some points to pay attention to:
- before installation, the rails should be treated with an antiseptic - this way you protect the wood from the appearance of microorganisms;
- the length of the rail must be at least a few millimeters less than the actual distance from the top to the bottom of the structure.


Subsequence
- no matter what kind of frame you are going to design - metal or wood, in any case, first of all, you need to fix corner posts, and then already transverse and those that will be located in the openings;
- a step of 50 centimeters is optimal for all types of crates;
- for fixing narrow and wide metal profiles, it is best to use self-tapping screws, since the so-called dowel-nails are less reliable for this kind of fastening.


The whole process of mounting the frame is in the next video.
Fixing panels
- we cut off the comb at the first panel and with the same side we clamp it to the crate of the adjoining wall;
- we fix it to the horizontal bars with the help of self-tapping screws, do not forget to retreat 1 centimeter from the very bottom;
- each subsequent panel is inserted in the same way into the groove of the previous one and secured with nails or clamps;
- most complex element- last: it is cut under right size, is inserted and fixed on vertical rack self-tapping frame.
A video detailing the key points of the operation is below.
Method two. Mounting with glue

- used only in cases where the base surface of the wall is close to ideal;
- not recommended in rooms with high humidity;
- saves usable space.

Surface preparation and marking this way practically do not differ from the previous method considered by us. The only difference is that you need to work hard primer in order to exclude the appearance of fungus or other destructive processes.
For the rest myself action algorithm
looks like that:
- prepare the MDF panels, cut the necessary fragments with a hacksaw or jigsaw;
- apply the adhesive around the perimeter of the sheet, and also draw a line exactly in the middle of it;
- apply glue not with a continuous line, but with dots - this way you will save the composition;
- press the panel against the wall and fix;
- fix first of all solid sheets, all corner elements and fragments - last.

As an excellent adhesive for MDF panels, we recommend using liquid nails
- fast, reliable and very inexpensive. 


How to fix MDF panels to the wall surface with glue, the following video will tell.
Conclusion
Information on how to properly attach MDF panels to walls of any type will definitely not be superfluous. In some cases, this material appears almost ideal solution for wall decoration. In addition, it is quite light and easy to install, so it is quite possible to cope with it even alone. The main thing is to clearly follow the time-tested algorithm for fastening mdf panels and do not be lazy to work hard on the base base, so that after that you do not reproach yourself for the fungus that has appeared and other troubles. 


Photo: vk.com
MDF panels are very popular in the field of interior design. Consumer interest in this finishing material is explained by its low cost, excellent decorative qualities and environmental friendliness. Another important advantage is that wall cladding with MDF panels does not require any special building knowledge and skills, therefore, there is an opportunity to save on the services of professional craftsmen. All work can be easily done with your own hands, you just need to show elementary accuracy and prepare required set tools.
Purchase of finishing materials and additional elements
Before buying panels, it is necessary to make measurements of the room, the finishing of which will be carried out. When typing material, one should be guided not only by the quadrature of the surfaces, but also by the dimensions of the panels themselves, taking into account possible waste. Also count the number of outside and inside corners in the room to purchase special finishing corners that match the color of the chosen panels.
The finishing corners are thin MDF strips, pressed with a protective and decorative film. Folding along, they form an internal or outer corner any radius. Finishing with laminated corners allows you to hide corner connections panels and give a finished look to the room.
In addition to finishing materials, it is also necessary to acquire wooden slats or special metal profiles for mounting the crate. The choice of these materials will depend on the layout of the room itself.
Sheathing of internal partition walls is carried out without additional insulation, so they are quite suitable for crates wooden bars 50x40 mm. If it is supposed to finish the outer walls, then it is more expedient to purchase metal CD and UD profiles or a 40x40 beam, which will create space for the location of the heat-insulating material in the gap between the wall and the panels. In the case of using profiles, you will also need special U-shaped brackets.
The number of elements for the crate is calculated based on the fact that the distance between them should be an average of 0.4-0.5 m. In addition, it is necessary to stock up on screws of the appropriate length for mounting the crate, as well as self-tapping screws, clamps or staplers wooden) for fixing panel strips. You will also need sockets ( mounting boxes for drywall), if there is a need to install a switch or socket, and glue for decorative corners(for example, liquid nails).
However, all these additional elements may not be needed if internal walls have a perfectly flat surface and it is not expected to dismantle the panels after a short period of time. In this case, their installation can be performed simple way gluing. Liquid mounting nails are perfect for this purpose.
A set of tools for wall cladding with MDF panels with your own hands
- screwdriver or Phillips screwdriver (for self-tapping screws);
- perforator (for making holes in concrete walls) or a drill (for plaster, wood, brick and other walls);
- locksmith's square (for precise marking of corners);
- sawing tool for MDF panels and slats: electric jigsaw (with fine wood sawing), hand-held circular saw or conventional hand saw with fine teeth (you can use a hacksaw);
- grinder or scissors for metal (for cutting metal profiles);
- any type building level or a home-made plumb line for the correct vertical installation of panels;
- furniture stapler (if necessary).
Installation technology
MDF panels are rigid strips of a certain thickness, width and length with interlocking joints. With the use of this material, it is impossible to perform radius bends. They can only be sheathed on flat surfaces (walls, ceilings, slopes).
If the installation of the panels with your own hands will be carried out on the crate, no special preparation of the walls is required, i.e. cleanse them of old paint, plaster or wallpaper is not necessary.
Manufacturing of crates
Initially, it is required to determine the so-called control point. To do this, it is necessary to examine the wall for protruding sections. The most prominent seat will play a role starting point, focusing on which, the elements of the crate are fixed to the level.
Depending on the design idea, panel strips can be arranged vertically, horizontally or diagonally, and the installation of rails or profiles is carried out in a perpendicular direction to the panels.

Reiki or beams are fixed in increments of 40-50 cm. It is not recommended to increase the distance between them, because. the structure will lose rigidity and may bend. If there are height differences on the surface, use linings required thickness to level out the dips.
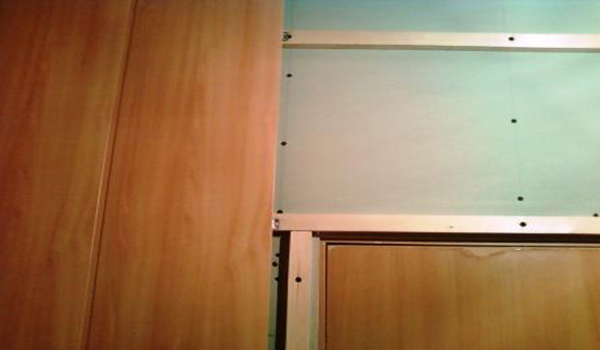
 done right metal carcass
 The technology for arranging the lathing from profiles is somewhat different from the "wooden" version. In this case, a frame of UD profiles is initially mounted along the perimeters of each of the walls. The distance from the wall surface must correspond to the thickness of the insulation. Then the locations of the transverse CD profiles are marked. U-shaped brackets are attached along the marking line with a step of about 40 cm. CD profiles are inserted into the starting UD profiles, after which they are fixed with brackets using metal screws.
Paneling
If the project provided for the thermal insulation of the wall, then immediately between the elements of the crate, strips of insulation are laid and fixed. Along the way, inside the structure, electrical cables are laid and they are brought out of the crate, so that after the installation of the panels, their length will allow connecting sockets or switches.
Installation of panels starts from the corner and continues along the wall surface. Each previous strip is carefully attached to the details of the crate through the tongue groove, after which the next panel is inserted into the lock. If the last strip does not fit entirely in width, it will have to be cut off. Fasteners are made along the edge, so that subsequently the fasteners can hide the decorative corner.

In places where sockets and switches will be located, holes are made in the course of work using a special nozzle on a drill, into which wires are brought out.
To fasten the panels to the crate, several methods are used:

Finishing the room with MDF panels using the adhesive method is carried out by dotted or zigzag application of special glue over the entire strip area. Before sticking the panels, the walls must be treated with a deep-penetrating primer and allowed to dry. A few seconds after applying the adhesive, the strip is carefully pressed and fixed to the wall.

All of the above technologies are applicable to the arrangement of slopes. If the slopes are small, then it will be enough to build a crate frame around the perimeter, without transverse elements.
At the last stage, the outer and inner corners of the room are finished with finishing decorative corners for fixing which glue is used. Corners can also be placed along the perimeter of the ceiling instead of the ceiling frieze.
At the locations of electrical points, special boxes are mounted and sockets or switches are installed.
MDF panels are one of the most affordable and easy-to-install finishing materials for wall decoration. It will take a minimum of components, a little skill and a desire to decorate the room beautifully. And, of course, the most important thing is our installation instructions for slats.
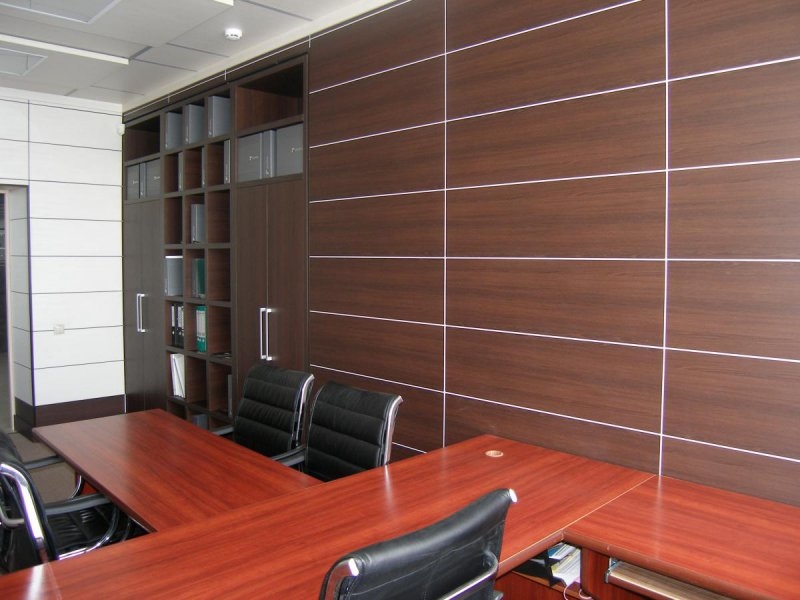
After finishing the wall with MDF panels, it may look like this. It's pretty, isn't it?
What are MDF panels
MDF or MDF (Medium Density Fibreboard) is a fibreboard produced by dry hot pressing. As raw materials, fine-grained sawdust of technical wood species, binders and some additives are used, which provide the material with plasticity and relative moisture resistance.
MDF boards are convenient because they can be produced in any thickness, easy to process, cut, mill, veneer. Therefore, wall panels with a thickness of 6 to 16 mm are produced from them. The width of the products varies from 12 to 37 cm, length - from 2.4 to 3 m. The surface is most often decorated with plastic or paper-resin films with a wood grain design, natural stone, ceramic products, fabrics, leather.
MDF panels are equipped with a tongue-and-groove connection system, that is, there is a spike on one side of the plank, and a groove on the other. As components, manufacturers (Kronostar, Soyuz, Kronospan, etc.) produce thin outer and inner corners from the same material with decorative surface under a tree, a stone and other materials.
 The tongue-and-groove system allows you to connect the panels firmly and without gaps
 The main method of mounting panels is frame or adhesive. The first is more complex, but reliable. The second requires more careful preparation grounds, respectively, time, labor and material costs can increase significantly.
What is required for the installation of MDF
For the installation of MDF panels with your own hands, you need the following set of tools and accessories:
- Panels and fittings made of MDF or plastic (outer, inner, finishing F-, U- or T-shaped corners).
- U-shaped steel profiles for gypsum plasterboards and components for forming a frame. An alternative is timber 30x50 mm, 40x40 mm, 40x60 mm, etc.
- Strengthening primer for concrete or antiseptic impregnation for wood.
- Self-tapping screws for metal or wood, nails or special clamps.
- Insulation (isolon, polystyrene, mineral wool, EPPS and others).
- Hacksaw with blades for wood or electric jigsaw, scissors for metal.
- Roulette and construction pencil.
- Gyrolevel and metal corner.
- Hammer, screwdriver or drill. Alternatively, you can use a construction stapler or Liquid Nails glue.
Step-by-step instruction
Consider the most common way to install panels with your own hands on walls - frame. The point is that from wooden slats or steel profiles for gypsum boards, a “skeleton” is formed on the walls, to which decorative lamellas are subsequently attached.
In the case of mounting MDF boards on a frame, the wall does not need to be carefully plastered, puttied, leveled, or removed the old coating in the form of wallpaper or paint.
It is enough to treat crumbling mineral bases (concrete, plaster, brick, cement) with a deep penetration strengthening primer, wooden ones with fire-bioprotective impregnation or an antiseptic indelible primer to prevent the development of mold, fungi, bugs.
Installation of MDF is carried out in the following order.
Step 1. Preparing the walls
The surface must be treated with a protective and strengthening composition. Fasten if necessary thin insulation with plastic dowels or construction stapler- ordinary or foil-foamed polyethylene (Izolon, Penoizol), XPS up to 7 mm thick (Pufas, QS) or others.
At this stage, work is also carried out with electrical wiring and other communications. Outlets of sockets, switches, cables are marked.
Step 2. Forming the frame
The main rule when installing planks with your own hands is that logs or profiles are attached perpendicular to the direction of installation of the panels. As a rule, MDF is mounted vertically, respectively, the rails must be fixed horizontally.
First of all, you should check the evenness of the wall with a level and mark it. Particularly protruding areas are desirable to be cut off, pits and depressions are marked with a pencil, so that when installing the crate in these areas, put thin dies of fiberboard, chipboard or plywood for leveling.
First, a frame is formed around the perimeter of the wall. The lower and upper beam or profile is installed at a distance of 3-5 cm from the floor / ceiling. Between them, the elements of the crate are placed in increments of 40-60 cm. Metal guides are fastened with metal screws or anchors; for wooden slats, you can use nails, dowel-nails or wood screws.

Along the perimeter of doors and window openings the crate is mounted with an indent of 3-5 cm from the edge. The distance between adjacent profiles should remain standard - 40-60 cm.
 Additional battens can be installed around door and window frames to increase rigidity
 Between the elements of the finished crate, you can install insulation boards - mineral wool, polystyrene foam, extruded polystyrene foam and others.
Step 3. Installing the panels
MDF must be carefully cut to size in advance. Installation starts from the corner. The panel is attached to the wall, the verticality is checked with a hydraulic level and fixed from the ridge side to the crate using small nails or special clamps. The next lamella is inserted with a spike into the groove of the previous one until it stops and is fixed on the other side with hardware. The remaining panels are mounted in a similar way.
After finishing the work, the corners and edges around the windows and doors are decorated with MDF fittings. Folding corners made of MDF or plastic are attached with Liquid Nails, Titanium glue and their analogues.
 Initially, an MDF corner is not a corner at all, but a plank. Depending on the type of corner (internal or external), it is bent in the right direction
 Excess adhesive must be removed immediately with a damp cloth. The upper part can be hidden under a decorative plastic or polyurethane cornice, while at the bottom, skirting boards are mounted with their own hands to match the color of the floor or wall covering.
The MDF paneling is ready. It is recommended to use a vacuum cleaner or a slightly damp cloth to remove dust and dirt. Do not use rags that are abundantly moistened with water, abrasive and aggressive detergents to avoid damage to the board surface.
Detailed video instructions for installing MDF panels:
Adhesive method of mounting MDF lamellas on the wall
With the adhesive method of installation, more stringent requirements are imposed on the base. The surface must be solid, even and dry. It is desirable to remove the remains of old coatings completely, then prime with a composition that increases adhesion.
On the reverse side the panel is applied with glue in zigzag movements, then the plank is applied to the wall and pressed. The next lamella is also smeared with glue, connected to the previous one and pressed. After installing all the elements, the corners and edges are decorated with corners, cornices, and other fittings.
The decoration of any room should be carefully thought out. Design must be not only beautiful, but also functional. For example, MDF panels can subsequently be washed, they will not quickly become dirty and age. In addition, this material has additional advantages.
Finishing for which MDF is used can be ideal. Do-it-yourself installation is quite simple. Special knowledge is not required here. So even a non-professional can do the job.
What is MDF?
For the manufacture of which very small chips are used. For production it is necessary high pressure and temperature. In order for the chips to stick together into one mixture, carbamide resins are added to it, which are considered a link.
MDF wall panels (even an amateur can do it yourself) are used for sheathing vertical surfaces in residential and office space. Other types of material can be used for making furniture, arranging partitions, laying floor covering. Very often from plates are made acoustic systems. The thickness of the material reaches 4 mm. There are some conditions for storing these products: humidity - no more than 70%, temperature - no higher than 25 degrees.
Material Advantages

Sheathing with MDF panels has some advantages:
1. High level of moisture resistance. Some types of materials can even be used to decorate the bathroom.
2. Good durability. The boards are well pressed.
3. Low cost. You can buy them at any hardware store at an affordable price.
4. Resistance to temperature changes, biological effects. Mice will not be able to gnaw through such a skin.
5.Ease of processing and use. You can cut the material ordinary jigsaw or circular saw.
6. Good soundproof qualities.
7. Products retain heat well and also they can be painted, laminated, varnished.
8. Ability to create an original design.
9. Easy panel cleaning.
MDF wall panels, do-it-yourself installation of which is done only after assembly necessary tools, made from natural material so they are environmentally friendly.
Product Disadvantages

Among the disadvantages of this material are the following:
Amenable to combustion.
Quite a large mass. This feature does not allow the use of shields for all walls.
The presence of synthetic resins in the composition of the product. Although they do not evaporate and are not harmful to health.
These shortcomings are not significant in correct operation material.
What types of plate fixings are there?
Before that, you need to understand the connection methods. They are like this:
- Tenon groove. This is the simplest type of locking elements. Laying is done end to end. A feature of this installation is the need for a base made of metal profiles or a wooden crate.
- Groove-groove. This also requires special training. The wall will need to be reinforced with U-shaped profiles.
- Glue. This method is used quite often. However, the panel should be light in weight, and the wall should be perfectly flat. It requires a special adhesive to work. Naturally, during the installation process, dust and dirt await you. But if you have a small room at your disposal and the availability of free centimeters is fundamental, then it is better to choose this particular method.
- profile. It allows you to level the base and attach large-format products.
What tools are needed for the job?

If you purchased MDF wall panels, do-it-yourself installation should be done only after the entire necessary material and the fixtures will be ready. You will need:
- Building level.
- Reiki for the construction of the crate.
- Locksmith's square for the correct determination of the angle.
- Plumb.
- Drill, as well as a special nozzle for tightening self-tapping screws.
- Hammer and pliers.
- for cutting panels.
- Special fasteners.
- Screw, self-tapping screw in the required quantity.
These tools should be enough to install the panels. Surface preparation may require other tools.
Varieties and features of panels

In order for the finish to serve for a long time and with high quality, it is necessary to choose the right facing material. There are such types of panels:
- Ordinary. They have high strength, but do not have special protection against moisture. Therefore, such products can be used for wall cladding in dry rooms: hallways, living rooms, bedrooms.
- For rooms with a high level of humidity. Such MDF panels for the kitchen are suitable. It is in this room that moisture often accumulates and there are temperature drops.
- Heavily loaded. They can be mounted in bathrooms, as they have the most high level protection from the damaging effects of moisture.
Naturally, one should not lose sight of the decorative properties of MDF boards. With different designs and color design you can work wonders. For example, in order to make a room visually larger, use light or white panels. To get an original and unique interior, you should pay attention to the material with an individual design pattern.
Naturally, when choosing, you should pay attention to specifications and quality. Buy material only from licensed stores. It is better to choose those manufacturers who have a good reputation and customer reviews.
Features of surface preparation
Before that, it is necessary to prepare the base. In principle, this is not difficult to do. First, remove the previous finish or its fragile parts. If the basis for fixing the plates will be wooden crate, then it will not be necessary to align the wall. It should be pre-marked.

The adhesive method requires a perfectly flat surface. If the defects or level differences are small, then you can use a regular plaster mortar. Naturally, the walls will then need to be primed in order to maximize adhesion with glue.
Most often, a wooden crate is still used. Making it is easy. Rails are installed vertically and horizontally. The distance between them should not exceed 30-40 cm. A screw, self-tapping screw or nail is usually used to fasten the rails. Please note that everything wooden elements should be treated with a special antiseptic.
If metal profiles are used for the crate, then the space that remains between them can be filled mineral wool or other heater. In addition to keeping warm, you can provide additional sound insulation.
Mounting Features

Interior decoration with MDF panels has a certain sequence:
- Fixing the first panel. She is screwed on inner corner using self-tapping screws. If necessary, cut the slab to length. Since each panel has a comb, it will have to be sharpened a little. For additional fixation, metal fasteners are used.
- The next strips need to be screwed back to back with the previous ones. From the side of the side groove, the product is fixed with additional fasteners.
- Installation of the last panel. If necessary, it is cut to length. This element is attached to the crate with self-tapping screws.
- Next, you need to repeat the above steps for each wall. After completing the work along the upper edge, a narrow baseboard should be installed. It is fastened with nails or screws.
As you can see, you can do this job yourself.
MDF panels are in very high demand. However, improperly mounted material can worsen the interior of the room. Therefore, try to follow the recommendations of experts.
For example, when laying slabs, always use a plumb line and this will help you attach the products evenly.
You can sew up with such material the entire wall or part of it. For example, you can only mount panels half the height of the base. This will enable additional Decoration Materials, as well as to diversify the interior.
If there is on the wall small bumps, then small pieces of plastic can be placed under the wooden slats. They will strengthen the crate. That's all. Let your home be beautiful and unusual. Good luck!