In what sequence to warm the walls on the loggia. How to insulate the balcony with your own hands: from a refrigerator in a warm island
The technology of insulation of the balcony lies in the performance of work, which is conventionally divided into three components: performing the process of insulation of gender, fencing and ceiling.
An important factor is the choice of glazing. In order for thermal insulation to be equipped at the proper level, the double-glazed windows must be energy-saving and have at least two cameras. Consider in more detail the process of insulation of the balcony and loggia do it yourself.
Features of the process of insulation
We are starting work on the insulation of the loggia or balcony with glazing. Since the room is insulated in order to use it in the future at any time of the year, the double-glazed windows are chosen by two-chamber and three-dimensional. Of course the last option is expensive, but the result justifies costs.
Do not forget about sunny summer days, especially if the balcony comes to the south. Often, in such cases, I want to protect yourself from direct sunlight. Therefore, it is better to take a branded. Usually, the glazing installation is performed by working firms in which the windows are ordered. We recommend that you must check the quality of the work performed on such parameters:
- reliability window installation;
- the quality of sealing seams around the window.
Problem places
 Take the casting to the corners
The loggia insulation technology contains many nuances that must be considered when performing the heat insulation process. First of all, we look at how much all the seams, joints and slots are processed after the glazing process.
Special attention should be paid to the corners. If the listed works are performed poorly, cold air and moisture will penetrate through weak points.
 Align and plump brick walls
 All this will lead to significant heat loss, and the difference in temperature and the presence of moisture will cause fungus. Reliable sealing is performed using a mounting foam.
To exclude this problem, it is necessary to perform the process of spitting of the walls with a glue mixture for a tile.
To identify problem areas, that is, the existence of the gaps can be used by a burning candle. The flame of the candle accurately indicates the presence of defects in sealing.
Material for insulation
 The construction market offers a fairly large selection of material that can be used to insulate the loggia or balcony with their own hands. Insulation have good quality, different thickness and structure.
Materials are easy to choose in accordance with the individual requirements of each consumer. These include polystyrene foam, glass gamble, mineral wool and so on. When choosing insulation, it should be based on such factors:
- climatic conditions;
- warming of the loggia or balcony;
- warming balcony or loggia in case of joining room.
 With the usual insulation of the balcony, you can buy a heater with a thickness of 3 cm. When you join the room, you must take a heater with a thickness of 5 cm.
Consider several insulation options using various insulation.
Insulation expanded polystyrene and insole
 Polystyrene foam
 Balcony or loggia insulation technology with polystyrene foam is the following stages. First of all, we begin from the installation of the insulation to the surface of the floor, walls and ceiling.
For fastening the insulation slabs, an adhesive mixture is used, which is commonly used for the tile. Installation is performed in this order:
- according to the instructions, the adhesive mixture is prepared;
- using a toothed spatula, we apply a mixture to the surface and glued the insulation plate;
- while the mixture was not frozen, the plates are fixing with special locking dowels;
- upon completion of the fastening of the plates of the insulation, the joints process the mounting foam.
Mounting foam will provide reliable seal sealing and thermal insulation indoors, which will not allow to penetrate cold and moisture at any time of the year.
 Isolon
 The next type of insulation is a foil isol. In this insulation, the front side is considered to be covered with foil. When the balcony is insulation, use isolon, the thickness of which is 10 mm.
When it is laying, it is not worth doing Fasting. Place the insulation is recommended to join and connect sheets with each other in aluminum-based aluminum based on the front part.
Facing the walls and ceiling
 After the installation is completed, the insulation is embarking on the surface facing. But in this case you need to pay attention to some features. It is impossible to fade the walls and the ceiling directly on the insulation. It is necessary to first equip the air layer. It should be at least 15 mm thick.
To ensure it build a framework. Materials for such a frame can serve a metal turn, wooden bar or rail. Place the rails horizontally and vertically. Check the placement using the level. Fasten with dowels. After the frame will be ready, the facing material is already attached to it. For details on the lining of the walls, see this video:
Features of floor insulation
 Floor insulation technology has its own characteristics. Before starting the installation of thermal insulation, it is necessary to equip a flat tie on the balcony.
This is to ensure a dense fit of the insulation to the floor surface. After laying the insulation and embelling the joints, perform another tie over the insulation. It must be at least 50 mm.
When adjusting the re-screed, it is necessary to carry out reinforcement. Use a cellular mesh 100 × 100 mm.
Next, you can perform floor cladding. Often in balconies and loggias are equipped with a warm floor. Otherwise, you should think about other heating options. For details on the insulation of the floor, see this video:
Battery removal to the balcony requires a special permission from relevant services.
Medvata insulation technology
 The process of insulation of the balcony technology of laying mineral wool is starting with the installation of a frame of wooden or aluminum guides.
The emptiness between the frameworks of the frame is filled with a mineral insulation. After mounting, the minvata framework is sewn using drywall or plastic.
Pay attention to some important points:
- the guide frames should be stirred at a distance equal to the width of the insulation;
- be sure to be waterproofing before the insulation device, and steam insulation.
We draw attention to the need for outdoor casing of a balcony or loggia. It is best to use profiled sheets or siding. For details on the outer decoration of the balcony, see this video:
Having equipping the insulation of his balcony or loggia with their own hands, it is necessary to apply such a technology that is optimally suitable in all characteristics.
Residents of apartments with balconies and loggias have the opportunity to increase their useful area. And it is obvious that the expansion of space should start from warm glazing, and then insulation.
High-quality thermal insulation you need to provide walls, gender and loggia ceiling.
We hurry to disappoint those who believe that for the insulation of the balcony / loggia, there are enough energy efficient double-glazed windows and an additional battery. Loggia, and a glazed balcony, especially in any residential building, are not designed for comfortable conditions for a person in the cold time. Deep autumn, in winter and early spring there is cold.
All these troubles eliminates heating in conjunction with an effective insulation, which will provide a normal room temperature in the room of the balcony / loggia and the room combined with it or the kitchen at any time of the year. The optimal choice of insulation will be high-quality and efficient thermal insulation plates of the grade of extrusion polystyrene foam.
Advantages of Polyoplax Plates Comfort ® when the loggia is insulation:
The low thermal conductivity coefficient up to 0.034 W / m to - provides high-quality heat shield even at low thickness. Zero water absorption - will not allow dampness, the development of fungus and mold.
Insulation of the balcony / loggia from the inside high-quality Penoplax Comfort ® Under the power of any person who is not afraid of work. Do not fear and unpleasant consequences, which sometimes overcome us in contact with some building materials. Penopelex ® plates are environmentally friendly and safe for health. They are made from general-purpose polystyrene, which is also widely used for the production of food and medical packaging, children's toys, refrigerator parts.
Penopelex ® in its composition does not contain small fibers, dust, phenol formaldehyde resins, soot, slags. Therefore, work with Penopelex ® does not require the means of protecting the respiratory and skin. Freons do not apply in its manufacture.
Safety of the insulation of Penopelex ® thermal insulation in the apartment is confirmed
With the insulation of the balcony / loggia, with their own hands, many more will cope and because Penopelex ® is convenient in montage. At the slab optimal geometry - on all parties there are M-shaped edges, which makes it easy to docile.
How to insulate the balcony / loggia with the help of Penoplax Comfort ® do it yourself
For the insulation of the balcony / loggia, the following materials will be needed with their own hands:
- Thermal insulation Penoplex Comfort ®. The required thickness for a combined loggia in the central regions of Russia is 100 mm. Thickness can be calculated using our.
- Moisture-resistant plasterboard (GLC) or gypsum fiber (GVL) sheets.
- For the device of the screed on Polyoplax ® plates, a cement-sand mixture is required with a reinforcing mesh with a "wet" coating; or slab materials with "dry" coating are two layers of plate materials such as GVL, CSP, OSP, or plywood in the junction of the joints.
- Fungal polyethylene film is often used to create a vapor insulating layer.
- Polyurethane glue Penoplex ® FastFIX ®.
- Self-tapping screws for fastening sheets of GLK, GVL to the guides.

Sequence of loggia insulation with Penopelex Comfort ®
- Window blocks are installed. The optimal means of seaming seams will be a mounting foam.
- Penoplex plates Comfort ® are powered by polyurethane glue, which are also processed by the joints between the structures.
- Parosolation is attached - foil polyethylene film - with two-way tape. The vapor barrier is made of jack, while the joint between the canvas and structures is sampled with a metallic scotch.
- Mount the balcony floor.

In the photo - the insulation of the loggia plates of penplex ® In the apartment Actress Marina Duzheva
The thermal insulation of Penopelex ® can be laid the following grounds:
Cement-sand screed (4 cm thick). Between the vertical wall and the tie, it is necessary to leave the temperature gap 1 cm. To do this, it is enough before the filling of the screed to be installed around the perimeter of the band from the foamed PE with a thickness of 1 cm. After hardening the screed, the finishing layer is placed.
CPS screed with electrical heating - using the system of the system system.
Solid flooring from GWL (gypsumless sheets) - it is arranged in two layers with a mandatory overlap of the joints.
- The drying on the walls, the ceiling and parapel is performed from dry wooden (processed antiseptic) of the rivers and is set to vertical and horizontal levels. Fastened directly to concrete with dowels and screws. Reiki can be 40x20 mm.
- The finish finish is fastened to the cut. This is usually plastic panels of 25 cm wide or moisture-resistant plasterboard. In the case of the use of drywall, additional finishing works are required, namely: priming, putty, corner processing, alignment, wallpaper sticker or painting.
- Electrical heaters, lighting, etc. can be installed on the loggia. Electric wiring is mounted to interior trim in non-combustible boxes.
Many residents of apartment buildings face the problem of a shortage of square meters. An excellent solution of this issue can be an independent warming of the loggia. This is a painstaking, requiring certain construction skills and time from the artist. However, the finished result is worth it. The warm balcony expands the possibilities of using space, "reflects" residential premises and can be the subject of the pride of a homemade master.
The need to warm the loggia
Each apartment owner independently decides for himself how to use additional square meters of loggia. Some shut down on the balcony the storage room or workshop, others exploit the room more rationally - create a "winter garden" or a separate room. Insulated loggia will be able to convert to a cozy place to relax, work, a compact gym or a zone for children's creativity.

In addition, a warmed balcony solves a number of problems:
- the heat loss of the room and the cost of heating the apartment are reduced;
- reduces the risk of mold on the walls of the balcony.
You can perform outer or internal insulation. The obvious advantages of the outdoor method:
- not "eaten" the useful area;
- simplification of interior wall decoration.
The essential advantage of internal insulation is the ability to perform work independently, without hiring workers.
Selection of thermal insulation material
Various thermal insulation materials are used as insulation, ranging from traditional, inexpensive, and ending with modern high-tech. For the insulation of the loggia from the inside it is better to use thin, lightweight materials. Thanks to their minor width, it will be possible to save useful space.
Consider the characteristics of the main thermal insulation materials for the insulation of the loggia / balcony.
Foil polyethylene - one side of polyethylene is applied by a foil layer, which reflects the IF radiation and "throws" heat fluxes back. Heater Characteristics:
- roll width - 1 m, thickness - 2-5 cm;
- easy installation - Polyenethylene canvas easily cuts into a knife;
- method of laying - online or brass;
- the effectiveness of thermal insulation increases almost twice;
- material is used for ceiling insulation and walls.
Loggia insulation: step-by-step instruction. Use of foam
Mineral wool has good thermal insulation qualities and affordable cost. However, experts do not recommend using this material for the insulation of the loggia for a number of reasons:
- bad moisture resistance - minvat absorbs liquid, so you will have to additionally enhance the waterproofing;
- when using the miniral wool, the arrangement of natural ventilation is required - over the insulation, it is necessary to leave a gap, which slightly "beautifies" the area of \u200b\u200bthe balcony;
- for lining of the loggia, it will take reinforcement of the wall and carrying an additionalness.
Polyfoam - foam plastic of different density. The bulk of the material is gas. Polyfoam has the following characteristics:
- plate size - 1 * 1 m;
- heater thickness 2-10 cm;
- polyfoam density - 15 or 25 kg / sq. Cm;
- durability.
Extruded expanded polystyrenex (PESEROPLEX) is a modern thermal insulator, resembling a foam, but characterized by a stronger structure and functionality. Properties of polystyrene foam:
- plates of rectangular shape 1200 * 600 mm;
- thickness - 2-10 cm;
- polympoth density - 35-45 kg / sq. Cm;
- countertileness;
- frost resistance;
- plates have a chamfer for a more dense styling;
- low weight and simplicity of installation;
- class of flammability - M-1;
- the material is not used in open places where UV rays penetrate.
Warming of the loggia do it yourself: a step-by-step instruction. Photo of the installation of Polymplats

Methods of fastening insulation
The choice of a method of insulation, first of all, depends on the heat insulating material used and the further decoration of the walls.
Warming under putty and plaster is suitable when using the foam or foam. The heat insulating panels are glued to the base with tiled glue. Plates are additionally recorded by fungi-dowels. To the plaster / putty the walls or the ceiling can be proceeding every other day after mounting the insulation.
Laying foil polyethylene is under the foundation of the frame. It does not matter the method of fastening profiles - to the wall or by means of P-shaped fasteners. The foam sheets are applied to the ceiling / wall of the loggia and are fixed by the rails. In this case, the compound is permissible, and the docking strip can be glued with scotch.

Warming under the base of the frame is possible only when using a thin insulation with a thickness of up to 20 mm. Pressing the thicker thermal insulator will affect the rigidity of the rails and fastening
If it is planned facing the balcony with plasterboard or PVC panels, MDF, then laying the thermal insulation material is advisable in the frame cell. As a heater, foam of the 15th density or mineral wool is used. Minus this technology is an increase in the thickness of the heat-insulating "cake".
Options for arrangement of "warm" floor
Floor insulation technology on the loggia is somewhat different from the heat insulation of the seating and the ceiling. Through this element of the balcony is inflated requirements.
There are several basic options for arranging the "warm floor":

Warming of the loggia do it yourself: step-by-step instructions
Below is a step-by-step instruction in the insulation of the loggia of the penplex.
Tools and materials
For work you will need:
- plates of fasteners;
- construction level, stationery knife, marker;
- pVC pipes for cable laying;
- capacity for kneading glue;
- construction mixer;
- trowel;
- polyuritan foam;
- mounted gun;
- grater for grinding thermal insulation sheets;
- plastic smooth grater for floating floor;
- metal grid;
- peskobeton M300 large-phrase;
- polyurethane glue.
Loggia insulation: step-by-step instruction. The photo is the diagram of the heat-insulating "cake".

Preparatory work
First of all, on the loggia it is necessary to install energy-saving plastic windows. It is not worth saving on the glazing - it is better to choose glass windas and fittings of firms that have proven themselves at the "window" market.
If high-quality windows are already installed on the balcony, then you can move to the insulation of the balcony.
Preparatory activities:

Heat ceiling

Installation of thermal insulator on the walls and parapet

Flooring of the floor loggia penplex: Step-by-step instructions
Consider the stages of creating a "warm floor" with the help of fasteners and cement-sand tie:

- If you need to install the carrier frame, it is better to use galvanized metal products. Unlike wood, it does not rot and not heavy.
- Heat insulation work should be performed in dry weather. Many glue mixtures and primer compositions have features of use in high humidity.
- The gaps on the loggia are treated with foam, resistant to low temperatures.
- The wood used must be dried, and then processed against fire and rotting.
Loggia insulation with its sleeves: step-by-step instructions. Video.
The balcony is part of the building that is stronger than others need insulation, because not all residents use it only as a warehouse. Increasingly, people begin to equip their balconies for an additional room, for example, a personal account. According to this, not only reasons have to produce competent insulation of the design from the inside.
In this article, consider three ways to insulate the balcony with your own hands using different materials.
Stages of balcony insulation
The insulation of the balcony from the inside is performed in such a sequence:
- First close existing gaps. We must carefully inspect the balcony and determine their location. It is possible to eliminate the problem with the help of a mounting foam, even if the slots are quite wide, only you need to choose a high-quality, for example, "macroflex", "conceived", "moment installation." After the foam dries, the surplus is trimmed with a stationery knife.

Waterproofing balcony from the inside. For these purposes, you can use the penetrating waterproofing "Aquatron", Penetron and the like it. They are applied using a bruster, roller or spraying. The advantage of penetrating waterproofing is that it penetrates inside the walls, as a result of which they become resistant to low temperatures and more durable. In addition, waterproofing eliminates all microcracks that are not visible to the "naked" eye.


№1. Balcony insulation polystyrene foam: sequence of work
If you chose polystyrene as a heater, the sequence of work is as follows:
- After all the slots are embedded and waterproofing is made, the surface is processed by primer deep penetration, for example "Ceresit". This can be made with a tassel or sprayer. The primer is poured into a bucket or another container, which is not a pity, then applied to the surface. Thoroughly work the walls, ceiling and floor to achieve maximum adhesion with them insulation slabs.


Back to content
№2. Insulation balcony by penplex (video)
Penoplex is actively used in the insulation of the premises. It is possible to mount it to the surface using bitumen mastic, mounting foam or dowel mushrooms. Consider the mounting option on the mounting foam.

So. Waterproofing is made. A mounting foam on the perimeter is applied on the insulation slab. It's enough. After applying, we wait a couple of seconds and fix the slab on the insulated surface. The next stove is placed to the first jack. Two days later, you can fix the plates with additional dowels. Further, the whole process is repeated in a similar manner, which is described above. Finish finish at your discretion. You can sew the plates of the insulation by plastic panels, they look very original.


The process of insulation of the balcony is completed. As you can see, nothing complicated it. If you are just planning to do this work, then our article will help you. If you have already done the insulation of the loggia yourself, then in the comments, share your methods with readers.
Number 3. Mineral Watt balcony insulation: technology features
The insulation of balconies of mineral wool is performed under the constructed shap. On top of the frame attached lining - wooden or plastic panels with special grooves.
A well-known fact is a construction recommendation to carry out insulation from the outside of the building. However, in the insulation of balconies and loggias, there is often no possibility to arrange the insulation material outside. The internal placement of the insulation layer requires certain calculations, compliance with technology and the correct selection of materials so that in the future, the work performed did not lead to the wetting of walls, corners and ceiling inside the remote design.

What materials can be insulated balcony and loggia from the inside? What finishing will allow to reliably protect the insulation from the inner space and will create an aesthetic type of inner walls?

In modern technologies of insulation of open attachments (balconies), four types of material are used as an internal insulation: foam, penplex, foam and mineral wool. Consider the technological features of installation and types of cotton insulation used for thermal insulation of balconies.
Types of mineral wool
Depending on the raw materials used in the production, three main types of mineral wool distinguish: glass, stone and slag. All three material are suitable for warming work.
Minvata is a soft material that does not have rigid sizes. It comes in the form of rolls (before laying, they are unwound into the track) or soft mats. Sometimes one side of the insulation is saved by aluminum foil to enhance thermal insulation properties. 
Minvati layer thickness determines the quality of insulation and varies in the amount of from 20 to 200 mm.
Mineral Wool Mounting Technology
Any kind of mineral wool is mounted under the frame, located between the outer wall (ceiling, roof) and the skeleton supports. As a support, wooden sticks or metal profiles can be used, depending on which cladding will be applied in the future.

When using the lining for the finishing facing of the walls, the frame-cutter is constructed from the tree. Wooden sticks of the cross section 150 - 250 cm 2 are installed, while you can save the inner space of the balcony slightly, installing the stick of the rectangular, and not square section (30 × 50 cm 2, 30 × 70 cm 2).

All racks and horizontal dokens are installed under the level. The mounting of vertical racks to the concrete surface of the ceiling and floor is carried out by anchor bolts. Horizontal supports are attached to vertical supports. If the future cladding is plastic lining, horizontal strips are attached to three levels: knee, thigh, shoulder.

For the internal warming of the mining mandatory is the installation of vapor barrier. Mobile material itself is breathing, it easily passes gaseous substances (air, steam).

Considering that with internal insulation, the condensate formation point is shifted to the insulation, it is necessary to limit the ingress of steam or air of their living spaces inside the construction wool. For these purposes, a vaporizolation film is laid between mineral wool and trim.
Interior decoration
Purpose of interior decoration:
- Close the material of the heat insulator from the residential space.
- Create aesthetic inner coating walls of a room or a warmed loggia.
There are various materials for the interior decoration of the balconies (plasterboard, wood, plastic, plaster). With a previously built cutter frame, the finish is performed by hanging various types of panels: plywood, MDF, lining of wood or plastic.

The finishing trigger is performed by the walls of the walls with wooden (or plastic) carriage panels having special grooves around the perimeter for the convenience of mounting and fastening density. At the same time, plastic lining is often a cheaper imitator of a wooden coating, laid on the inner walls of the balcony (or loggia). It is characterized by smaller strength and rigidity.

Wooden carriages are reliable, eco-friendly, have sufficient rigidity for floor covering. Plastic clap can be seen the ceiling of the loggia, the floor is covered with wood, as for the walls - both types of car coating (plastic and wooden) can be used here.

After finishing finishes, the inner surface is treated with a composition protecting wood from the effects of moisture and from destruction.
How to warm the balcony or loggia (video)
We warm the balcony from the inside right. 6 stages of work
The creation of a favorable microclimate on the loggia implies not only the insulation of the walls, all space should be hermetically. A material with a low degree of thermal conductivity is also shedding the surface of the floor and ceiling. In our article you will learn how to warm the balcony from the inside.
Selection of heat insulator
Advantages and disadvantages are peculiar to each type of thermal insulation. In order to choose the most suitable insulation, you should compare the main characteristics of thermal insulators.
The most common options for thermal insulators:
- Extruded expanded polystyrenex (PESEROPLEX);
- Polyethylene foamed (foam);
- Polyurethane foam (PPU);
- Styrofoam;
- Mineral wool.
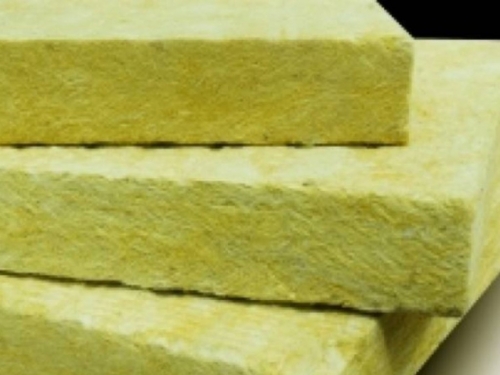
Mineral wool
The thickness of the sheets varies in the range from 2 to 20 cm. Mineral wool is divided into three types, depending on the components of the raw materials:
An example of a mineral wool device on loggia. The material is stacked in the prepared design. Mounting frame can be made of metal profiles or wooden bars.

Manufacturers produce wool in the form of mats and soft rolls. In some cases, one side is covered with foil. Aluminum foil allows you to improve the level of thermal insulation.
The main disadvantage - moisture acts destructively, a device of vaporizolation is necessary.
Polymer-based insulation
Polyurex, PPU, foam, foamed polyethylene are polymers treated with foaming compositions.
Advantages:
- The presence of gas bubbles provides not only a good level of thermal insulation, but also a small weight of plates;
- High degree of moisture resistance;
- Materials are durable;
- Antifungal stability;
- Simplicity and convenience when laying plates or sheets, as well as rolls (polyethylene foamed);
- Economical repairs, subject to the choice of foaming as a heater.
The main minus: Support the spread of the flame during the fire, distinguish harmful substances during the combustion process.
When choosing a foam and other materials based on polymers, it is necessary to correctly choose the thickness of the plates and determine the density
1. Sheets of foam

Insulator plates (polystyrene foam) in the process of laying.

Polyfoam refers to budget ways to insulation of the loggia, however, it is considered a fairly fragile material, so a lamp is needed for installation. A decent substitute is the extruded polystyolster, it does not require the creation of a special framework for its laying.
2. Polyurex

As a heater, plates of extruded polystyrene foam (thickness 50 mm) are used. The seams between the elements are closed by mounting foam. Fleecex is fastened with special plate dowels ("fungi").

3. Penophol.
The material is used as a separate heat insulator, also with foam insulation of polystyolster, can also be provided. Due to the foil side, the indoors reflects and delayed warm air.
In order to accelerate the insulation of the structure, an alternative heat insulation method can be used - polyurethane foam spraying (PPU).
4. Polyurethane Foolder
PPU is one of the most modern heat insulators. The cost of applying services is considered high, compared with other analogues, but many have time to evaluate the operational properties of the PPU. For this insulation, high rates of thermal insulation are characterized, thanks to a small-handed structure.
The main stages of work on the insulation of the space of the loggia
In order to increase the useful area in your home and exploit the room all year round:
1. Close the gapsif they are available. Carefully examine the room to eliminate all the flaws of the design. As a rule, the slits are filled with mounting foam, even if they have a significant size.
After complete drying, it is necessary to cut the surplus.
2. Glazing with reliable glass packages.
3. Organize a waterproofing layer. To protect against moisture, waterproofing with penetrating properties is "Penetron", "Aquaton", etc. The composition is applied with roller, brush, or spray. Such impregnation penetrates into the thickness, so the walls become maximum resistant to adverse weather, strength characteristics are improved.
5. Installation of the vapor insulating layer. In order to make vaporizolation, special polymer membranes should be applied ("breathable"), as well as Rockvul films, Izospan, Penofol.
Finishing the room balcony
The purpose of creating interior decorations:
- External masking of the heat insulator;
- Organization of a favorable interior indoor environment.
To create a balcony interior, you can choose various finish options. For the finish layer, plaster, plastic panels, MDF, lining, plywood, sheets, and even a block house are perfectly suitable.
The lining panels are environmentally friendly and reliable. One of the main advantages of the finishing material is rigidity. The lining is fixed on a wooden skeleton frame.

Loggia walls are truncated, flooring - laminate.

Facing balcony by a block house.

In plastic panels there are grooves for connecting elements. The plastic version of the lining has less rigidity and strength than wood.

Installation of sheets of G Clac on metal profiles. Plasterboard plates can be drawn up with wallpaper, paint, or fade with decorative plaster.

Registration of walls by wallpaper on top of the sheets of G Clac.

Bamboo wallpaper. The foundation for finishing decoration is plasterboard.

Video
1. The result of the warriology insulation.
Swimmed balcony. Demonstration of electrical conclusions. Check the strength of extruded polystyrene foam. The use of polyplex 30 and 50 mm thick, wall finishing with putty. Concrete floor screed over insulation plates.
2. Stages of repair work on the balcony.
The sequential process of arrangement of the room. Scheme of thermal insulation walls by foam and foamed polyethylene, finishing - panels of plastic. Gender: Alignment, heat insulation, OSB slab cover, installation of laminate lamella.
How to warm the loggia
The inner warming of the loggia has recently become increasingly popular and is made after it isolation from the street by full glazing. Having learned how much it costs to insulate the entire wall outside, the owners of the apartments are more inclined to the option of the trim and cladding from the inside, at the same time solving the task of expanding residential space. Accordingly, these people are interested, as you can properly insulate the loggia correctly and the best it is to obey it, which will be considered in this article.
The better to insulate the loggia from the inside
From the point of view of the ordinary owner of an apartment in a brick or panel house, the task of thermal insulation should be solved with such requirements:
- it is desirable that the temperature on the balcony and the adjacent room is the same and comfortable in the winter season;
- the space of the apartment should increase as much as possible at the expense of the loggia, for this sometimes dismantle part of the wall with the window;
- the cost of work and the procurement of insulation materials should be acceptable;
- it is necessary that the internal design of the loggia after insulation and finishing turned out to be aesthetic, but did not require high costs.
In accordance with the above requirements, it is necessary to choose a durable, quite thin and at the same time an effective insulation for a loggia, acceptable at cost. You can save on work in just one way - to fulfill them yourself. Then the exclusion method refuses such options as insulation of polyurethane foam or materials from foamed polyethylene. The first is too expensive, and the second is inefficient.
Council. Thin insulation of polyethylene foam (isolon, foam) with a layer of aluminum foil should be used correctly, that is, together with other thermal insulation materials.
It turns out that for the insulation of loggias inside, the following choice of suitable insulation remains:
- polystyrene foamed (foam) in plates;
- polystyrene foam extruded in stoves (PESEROPLEX);
- mineral wool, which is based on basalt and fiberglass.

Polyfoam density 25 kg / m3 is the best option for insulation in terms of cost, because the most popular. A little more expensive will be released a more durable polystyrene, laid on the floors - 35 kg / m3 of specific density. In addition to the fact that the material is cheap, it has one of the best thermal conductivity indicators - 0.043 W / m2 · ° C. It is better for it only extruded polystyrene foam, which has a thermal conductivity of 0.037 W / m2 · ° C, the Ministry of Service, the same indicator at a density of 80 kg / m3 is 0.06 W / m2 · ° C, and in glass gaming - 0.044 W / m2 · ° C.
Comparative analysis of materials
What of the above insulation is better for the thermal insulation of the loggias? In all the characteristics in the first place there is a polystyrene foam (Penoplex), the thermal insulation layer will be the thinnest. In addition, the polymer has high strength and prevents the passage of steam (permeability - 0.02 mg / m · h · par) so that when the dew point occurs in its thicker condenses there will be nothing. At the same time, this material is more expensive than the rest.

The second place behind the foam, since its indicators are slightly lower, including strength. Also, polystyrene worse repelled water vapor (permeability - 0.05 mg / m · h · par). But he is cheap, which is important for people with average sufficiency. There is another moment: when insulating the penplex or foam, it is not necessary to arrange vapor barrier, these materials can serve as a good barrier.
Polymers are easily destroyed when exposed to high temperatures and can burn, so it is better to hide them for some kind of trim, for example, from drywall. In contrast, they have a mineral wool that is not able to burn at all. As for the glass wool, its limit is 200 ° C, at a higher temperature, it is charred and destroyed. That is, the best non-flammable insulation is Minvat, located in the average price category.

The main disadvantage of Minvati is its ability to absorb moisture on open pores (permeability - 0.6 mg / m · h · par). And with the direct injection of water, the mineral wool flows completely, although it may restore insulating properties after drying. This is especially true of the low-density rolled mineral service, when the loggia is insulation, it will have to be protected from moisture and ensure the removal of vapors, which is not always possible.

Even if the Minvatu for the sake of the experiment to fully sole into polyethylene, then at a certain difference of temperatures from two sides, the dew point will appear in its thicker and condensate is formed. The only right path with the insulation of mineral wool is to ensure the removal of vapors through the product (air layer). This complicates the process and leads to the rise in the cost of work, so it's easier to take a sheet penplex. Wat makes sense to put in cases where the fire safety issue is acute.
Preparatory stage
Before starting work, training should be prepared. It lies not only in the selection of the tool and the purchase of materials, but also in the preparation of the loggia itself to insulation. The following recommendations must be performed:
- first of all, glazing is installed, and then insulation is carried out;
- close all the cracks leading to the street, otherwise the procedure of insulation will lose all meaning;
- cut flush sticking excess mounting foam;
- windows flush by plastic film so as not to be swap;
- make all the necessary communications: such includes electricity and installation of freon and drainage tubes for air conditioning.

Often, in new panel houses, you can detect slots on loggias, plugged on what fell. They should be cleaned and fill in polyurethane mounting foam. It is also important to remove unevenness on the walls and ceilings, and the resulting construction garbage is carefully removed.
Wall insulation, ceiling and windows
The first question is which insulation technology to choose, the response depends on the configuration of your loggia. The best option is when there is a concrete parapet, and if the metal fence is worth it, then there are several further action scenarios. The first - parapet can be put out of foam blocks or aerated concrete, and the metal is removed at all. This path is the most acceptable as in terms of excellent insulation and design of loggia and security.

Note. Parapeette masonry is carried out before installing a new glass package.
The second scenario - the fence is delayed by a professional flooring, and then the wooden frame of BRUSIV for fastening the insulation is satisfied. This path is somewhat shorter, but it is impossible to say that you will be hung much cheaper. There is a weak place - wooden bars will serve as cold bridges and to get rid of them, we will have to put the insulation in 2 layers with a displacement. There is a third path - a device of a panoramic loggia without a parapet with glazing for the entire height.
The technology of finishing the penplex, which you have to stick with the insulation of a glazed loggia with a concrete parapet, is quite understandable. On the purified and slightly moistened surface of the walls, an assembly foam for primary fixing plates of polystyrene or foam plates is first applied. Pre-prepared and curved plates are pressed against the wall and glued on the foam to the surface.

Often the home housing in the panel house are wondering if it is worth it to insulate the main wall between the loggia and the adjacent room? This sin some building brigades seeking to earn in any way. With thermal insulation of all the enclosing structures of the loggia, it is meaningless inside the wall.
At the same time, the walls of the loggia are insulated by the likeness of the brickwork, placing sheets of fasteners with sutures. Simple words, the vertical seams of each subsequent row must defend the seams of the previous one at least by 150 mm. In the process, it is necessary to monitor the vertical using the construction level. After the foam froze, each plate of expanded polystyrene is recommended to fasten to the wall by means of dowels - umbrellas.

A little more complicated process of insulation of the ceiling of the loggia, it does not prevent the assistant's help, although with a well-known snorkeeper you can manage it yourself. The insulation plates will have to immediately mount to the ceiling by a dowel, for which it is necessary to quickly drill holes, and then score a dowel, while maintaining the stove. At the end, all seams and cracks are carefully filled with the same polyurethane foam.

Council. To increase the effectiveness of insulation at this stage, it is recommended to see the walls of the loggia on top of the insulation and the slopes of the windows with foil foam (foil inside).

Now you need to create a frame for mounting the interior trim from plasterboard, plastic, lining or other facing materials. Wooden rails cannot be attached to the insulation, but you can drive the hole in the concrete through it. As is done by a drill with a diameter of 6 mm, and then the rails are screwed up directly to the wall with special screws along concrete (called - frame voiced).

On this, everything, a warmed loggia is ready for finishing, a step-by-step guide to action you can view on the video:
Floor insulation technology on loggia
The main trick of this technology is to properly collect a wooden frame, derived in one horizontal, for the subsequent installation of the piston floor covering. A timber is taken for this and cut into crossbars in the width of the loggia. The crossings are attached to the floor directly anchors or with steel corners with self-draws and dowels, the installation step depends on the width of the insulation plate.

Next, the insulation of the floor on the loggia by laying the sheets of the polyplex between the transverse bars. To fix them, it is enough to clean all the seams around the plates. Then the longitudinal bars are stacked on the crossbar - lags. Here they need to withdraw into one plane, for which special mounting wedges are used, placed on both sides of the bar. After that, lag is screwed to the crossbar with a self-tapping screw. On ordinary loggia, 3 lags are located.

It remains to cover the frame of thick plywood, which will be the basis for the finishing floor covering. Step by step and detail about the installation of the frame under the insulation of the floor is told on the video:
For reference. There is another method of insulation - under the screed, but it is necessary to understand that an additional load is created on the ceiling slab, and in cost, this option is more expensive.
Conclusion
In the reality of the ways of proper insulation of balconies and loggias there are several, we presented the easiest and use of the best material - expanded polystyrene. In the same way, can be mounted and foam, but for Minvati would have to be additionally laying vapor barrier.
10 errors in the insulation of loggias that need to be avoided
Small area of \u200b\u200btypical apartments awaken in the tenants of building invention, aimed at the possibility of increasing square meters. This leads to early or late to the fact that the gaze of the apartment stops on the balcony or loggia. "And what if you insulate the loggia and at the expense of this to increase the area?" - Such thought comes first. Warm and make a loggia with a full part of the living space, but it is important not to make mistakes that, instead of joy, bring problems and disappointment. What errors should be avoided when the loggia is insulation?
Redevelopment without permission
Remember what is a technical passport on the apartment: in this document it is described in detail the housing you own. Including how non-residential premises look like, what walls and windows in them are made of what material they are made. When reorganizing, for example, when the walls are insulation (even if you do not demolish the partition between the hall and the balcony), you risks then not sell your apartment, because the discrepancy between the passport and the real state of the apartment will turn out. To avoid this problem, agree with the BTI your alterations.
Installation on the loggia of a new radiator or the transfer of the old
I want to be warm on the new attached housing, and then the release of the heating radiator from the hall or kitchen on the loggia seems to come out. It is a gross mistake, which is not even worth thinking: the removal of the heating radiator beyond the external (carrier) wall is categorically forbidden. This is fraught with the accidents of heat supply (for example, pipe freezing), and you will never receive permits for such a self-government. And if you still remove this way, then you will have to return pipes and the radiator to the initial position at your own expense. Is there a way out? Of course, there is - electric heating of the floors. Modern technology allows you to make efficient and safe heating of the floor due to the installation of a special electrical cable. Moreover, for maximum heat transfer, the laying step can be varied depending on the planned heating temperature. I do not like? You can instead of a water radiator hang on the same place the oil electrical heater, which will make the same job.
Frameless glazing
Frameless glazing seems to be beautiful and modern, and also takes a minimum of space. But. This is a single glazing that will turn the loggia in winter to the branch of the refrigerator, and frost will penetrate between the frames. Therefore, this option must be reflected immediately. Only double glazing. Plastic windows with double-glazed windows and with swing sash will be the right solution. In addition, they will not take a lot of space, they are easily clean, and they can install anti-mosquito nets. But if the shower does not lie to the plastic windows, you can reverse the new technologies: it is lifting and sliding windows with thermal insulation.
Remote glazing balcony with brackets
Having done the glazing takeaway by 10-20 centimeters, you get another problem. A trump card that will inevitably close your glazing from above, it will collect snow in winter. And in the summer, rainwater will knock on the visor as a pioneer drum. In addition, the external glazing spoils the appearance of the entire facade of your building.
Single-layer insulation
There was an opinion that it is enough to lay out the loggia from the inside by foam blocks in one layer, and this is enough for a full insulation. In fact, such a wall will laugh. It is necessary to add to this sandwich insulation from stone wool or extruded polystyrene foam.
Warming without vaporizolation
The main Beach of the newly insulated premises is condensate. The temperature differences between the cold concrete panels and warm air of the heated room will inevitably lead to the appearance of condensate in the form of moisture. And where is the condensate, there are also unpleasant consequences - mold and fungus, to bring it very hard. They can be eliminated, if you pre-put a steam barrier on the path (separating the walls on the balcony or in the loggia of polyethylene film or foil). This is especially true if you plan to insulate the walls of mineral wool. There are modern materials in which insulation are combined with vapor barrier. This, for example, foam on which film or pergamine is pre-applied. Another option is such a material as a foil foam.
Use the sealant without a protective layer
The mounting foam perfectly close the seams when insulation, but the trouble - if you leave the sealant as it is, then under the action of sunlight (and it is enough in the loggia) it will decompose and turn into a crumb. Exit - protection of the outer surface of the sealant. Extra influx is cut into a flush, the surface is processed by sandpaper, and then covered by any acrylate paint. Runkelovka is suitable, - just to protect the polyurethane sealant from ultraviolet radiation. Even the glued construction scotch will make polyurethane sealant almost eternal.
The floor is incorrectly insulated
In order not to overload the ceiling slab (for example, a tie of concrete or an aligning mixture), it is better to make a floor covering from lightweight materials. Over vapor barrier - foil or polyethylene film - fit two layers of polyplex or mineral wool mats. From above - waterproofing, which can be used, for example, hydrokhotloizol. Rolls are superimposed from the top with an outbreak of about 10-20 centimeters. With the help of a soldering lamp, the lamps based on mastic are melted among themselves, and if the use of open fire for some reason is inappropriate or dangerous, then the sheets are fastened mechanically. Then the layer of plywood, and then carpet or laminate.
Finally, a good and "classic" way of insulation of the floor: wooden lags are stacked on the stove, between which modern insulation materials are located.
Unnecessary insulation of the wall between the loggia and the hall
It makes no sense to warm the wall between two warm rooms, it is not worth spending on this meaningless idea materials and means.
Inattention to small things
Any ill-conceived pre-trifle can minimize the work done to zero. So consider and do not forget:
- Do not use seams for seaming when warming gypsum putty.
- The gaps between the slabs of the overlap and the glazing plane need to be laid before the start of insulation.
- Even before glazing, consider the height of the arrangement of the handles on the winding sash.
- The width and design of the windows (if they are installed) should be thought out immediately.
- The feasibility and number of mosquito nets installed in advance.
- If the insulation uses elements from wood, then they must be processed to protect against moisture and rotting.
If you managed to avoid all the above errors, then you reacted to the wargia insulation as collected as much as possible and seriously. In this case, you have received what you wanted with the highest possible quality, and the result of your improvement efforts will delight you and your loved ones for a long time.
How to insulate the loggia: options + instructions for the device from the inside of the warning system with their own hands
Loggia is a few square meters that can serve as a variety of goals. To enjoy this room all year round, you need to provide a comfortable temperature there. Turn it into a cozy, useful and well-equipped space forces to each home master.
You gathered to make the arrangement of these additional square meters, but do not know how to insulate the loggia with your own hands and what materials do you need for this? We will help you to deal with all questions - our article provides recommendations for the choice of insulation and addressed step-by-step instructions for the insulation of walls, ceiling and floor of the loggia.
How to start the insulation of the loggia?
You should begin, of course, with planning. It should be defined with the functional purpose of this small room. If it is supposed to use it as a warehouse for not too necessary things, it does not have a lot of meaning. But the loggia can be turned into an office, a small gym, a winter garden, etc.
There are limitations. For example, the loggia cannot be used as a kitchen room, i.e. installed there, sink for washing dishes, etc. It is also prohibited to conduct a system of centralized heating on this area.
There are still a number of restrictions that may be associated with the architectural features and fire safety of the building. It may be a ban on glazing above a certain floor, to change the appearance of the building, the height of the fence, etc.
As practice shows, many manage to somehow get around these regulations and arrange a loggia to their taste. Before starting work, it will not hurt to agree on their plans with supervisory departments or prepare for the emergence of problems at the end of the alteration.
But under no circumstances should the openings in the bearing wall, only the holes provided for by the initial project are allowed. Even the window-door block removed from the loggia may be dangerous.
So that the loggia is warm, it will take high-quality glazing. It is better to order in a reliable firm. Double-glazed windows will perfectly cope with the task.
Part of the space will be "eaten by a layer of insulation. These centimeters will have to donate to securely protect the house from the cold. Loggias that are on the lower floors, most often insulated outside. We wrote here about the best materials for outdoor insulation of the walls here.
From the very beginning you need to think over the options for heating this space.
They are not so much, because for the loggia is suitable only:
Given that the installation area is small, you can spend on such convenience as TP. Cable systems are easy to install, all work can be performed independently. IK-Paul is more difficult to lay, it requires almost an ideal reason, but electricity costs will be moderate during operation.
But the easiest solution will be the use of the heater, especially if the loggia is not used every day, but only from time to time. The installation of a warm floor will require more costs and effort.
The choice of materials and options for the insulation of the loggia with their own hands is quite wide.
Among the most popular should be noted:
- mineral wool;
- styrofoam;
- polyurethane foam;
- polystyrene foam;
- penofol, etc.
Mineral wool is distinguished by a low price, but it is almost the only dignity. To lay such a material, you will need to pre-arrange a crate. Minvata is sensitive to moisture, when wetting it loses its useful properties, so it is not always suitable for the loggia.
Polyfoam is lightweight and durable material that moves well and is considered to be quite moderate at the price option.
Polyurenenitan is a sprayed seamless coating. Its thickness can be varied to save precious centimeters.
Such a heater as extruded polystyrene foam is light and comfortable plates. It is very durable, well saves heat, provides a high level of fire safety. It can be installed very quickly, but the cost of such insulation may be quite high.
Penofol is a relatively thin material that complement other heaters for the loggia.
It consists of a layer of foamed polystyrene and reflective foil coating. To reduce costs and provide the necessary effect, materials can be combined.
For example, the ceiling can be used by foam, covered by a layer of foam, and on balustrade and walls, apply stoves made of polystyrene foam.
The main stages of insulation of the room
To properly carry out insulation, you must perform the following basic operations:
- Release space from foreign objects.
- Remove the old coating from the ceiling, walls, floor.
- Inspect the base, reveal cracks, chips, noticeable irregularities.
- Carefully eliminate the found flaws.
- Remove old glazing if it needs to be upgraded.
- Processing the surfaces with antifungal and hydrophobic compositions.
- Conduct the sealing of the joints.
- Perform work on glazing.
- To put the insulation on the ceiling, walls and gender.
- Conduct electrical wiring.
- Install the TP system.
- Make finishing work, set lighting, etc.
Important moment - assessment of wear fastener construction. After installing double-glazed windows and thermal insulation, the weight of the structure may noticeably increase.
To carry out the necessary calculations and installing strengthening elements, you need to contact firms that have the necessary licenses. Independent in these matters can become fatal.
Stage # 1 - Careful Logging Preparation
When warming and finishing, the loggia should be very closely taken to the sealing of cracks and sealing seams. In such places, the entire crumbling material is carefully removed to a solid base.
The slots in concrete structures are filled with repair composites, strictly following the instructions. If part of the reinforcement was naked in the process and there are traces of rust, the rod should be cleaned and treated with anti-corrosion agent.
Vulnerable place - filler around the window frame. The material that is stamped by this space, after a couple of years, it starts to lose its properties. Before installing the new glazing, the foam must be completely removed.
For the insulation of old frames, a woven filler is cleaned from the grooves, and the obtained space takes out a more sustainable composition.
Stage # 2 - Installation of foam and foam on the ceiling
The insulation is mounted according to the "top down" scheme, i.e. Start from the ceiling. Most often, plates from foam plates are installed here. They can be fixed with tiled glue. The composition is flashed around the perimeter of the plate, and also make several smears in the center.
Fully covering the surface with glue is not necessary. After that, the plate is pressed to the ceiling and are waiting for a few minutes so that the composition grabbing. Then you can start gluing the next item.
The frame method of installation of this material is allowed, but it is considered more time consuming.
Before starting work on the insulation of the walls of the loggia, from the inside, the plates are cut so that they have the appropriate dimensions. It is necessary to ensure that the joints do not coincide on the adjacent plates. The surface of the ceiling of foam is closed with foam. The foil side must be addressed to the floor.
Stage # 3 - fastening of polystyrene foam on the wall
Such plates can be glued to the walls using an appropriate mounting foam or adhesive composition. The foam will be appropriate where the basis for which the polystyrene foam is laid is quite even, the installation time will noticeably decrease.
If there is a skew, it is more logical to use glue. You can vary the thickness of its application to perform the surface of the wall. After that, the plates are additionally fixed by plastic "fungi".
When installing polystyrene foaming, it is also necessary to ensure that there are no matching seams in adjacent elements. This will increase the overall level of thermal insulation and prevent the appearance of "cold bridges".
From above on the plates glued a plastic mounting grid to prepare the base for finishing materials. Some inexperienced masters press the grid to the plate and then apply the glue layer. This is an erroneous method, after drying or later, such a grid can simply fall off.
According to the technology, first need to be applied to the surface of the plates of the glue layer, then put the grid on it, and the glue again. This is a longer and costly installation option, but it provides the necessary adhesion.
Some wizards before mounting the grid align the surface of the polystyrene foam with glue: apply a layer, level the rule and wait for its drying. After that, we have a fresh layer of glue, the grid and the glue again.
The fact is that the protector of the foam can be simply considered a suitable sandpaper, but the polystyrene can be cut off. With small drops, it is easier to use a solution, not a knife. The density of the facade mesh should be high enough, not less than 140 g / sq. m, although it is better to take a more dense, for example, at 180 g / sq. M.
After it is installed, the wall surface is subjected to putty, to finally align it. Then you can finish: painting, wallpapers, etc. Of course, the installation of wiring should be performed before setting the grid.
Stage # 4 - Laying of electric heating floor
To pave the electrical wires, in the layer of the insulation make recesses. The wire is first inserted into the box, and then mounted on the wall, floor, ceiling, etc. In the future, it will facilitate the elimination of possible breakdowns.
The insulation of the floor is performed by approximately the same materials as on the walls. Sometimes clamzite is used, it is poured on the base covered with a layer of waterproofing. Next, you can use polystyrene plates or other material, such as minvatu. It is placed between wooden lags.
If it is assumed to install a warm floor system, you need to take care of a smooth base. Cable systems are placed in a screed layer. The composition is chosen in accordance with the manufacturer's recommendations.
Film IR-floor is put on the base, you can immediately mount the floor covering at the top. In this case, the floor level will rise quite a bit.
Step-by-step instructions for laying cable and film warm floor we led in the next article.
You need to provide a place to install the thermostat. Usually on the wall for these purposes make a niche of a suitable size. Among the turns of the cable TP there is a thermal sensor laid in a corrugated tube. It will also need to be connected to the thermostat.
Conclusions and useful video on the topic
Detailed video equipment on the warming of the loggia do it yourself:
Loggia floor insulation:
Modern materials and technologies allow you to insulate the loggia really reliably and quickly. In any case, when performing installation work, you should comply with the requirements of the manufacturer's technology and recommendations. Then the result fully justifies expectations, and insulation will remain effective for many years.
Planning to engage in the hands of the loggia, but did you have questions after reading our material? Feel free to ask the Council from our experts - write questions in the comment block.
Obtaining additional meters of living space through the arrangement of the loggia is the most common and economical way to improve housing conditions. To get a full-fledged room, it is necessary to conduct construction work in accordance with the technology of the loggia insulation. The process of insulation consists of several stages and the correctness of their implementation will avoid disruption of the integrity of the heat-insulating layer, its rotting and the occurrence of zones and mold on the walls, the ceiling.
The entire work order begins with the definition of the method and selecting the insulation. The method of arrangement of thermal insulation can be external and internal. With external thermal insulation, the internal space is significantly saved and the damper against the formation of condensate on the inner surface is created. However, the insulation itself requires expensive outdoor skin, and the installation work is not enough due to the external location of the surface.
There are many video technology insulation of loggia outside, which will be familiar with the frame and frameless way of finishing with thermal insulation materials.
Internal thermal insulation can be carried out independently, if you adhere to step-by-step scheme:
- the first step is to replace or insulate the existing windows, with their absence, complete new glazing. For this, window blocks with energy-saving multi-chamber windows are well suited;
- the second step is to conduct preparatory work, which includes the choice of insulation, and possibly the construction of side walls or a solid parapet, and the removal of the old cladding;
- the third step is the whole range of thermal insulation works, which consists of several stages.
The construction market offers rolled and tiled thermal insulation. The rolled belongs are, foamed polyethylene, and to the tile - polystyrene foam, foam, is the styrene, mineral wool.
Roll thermal insulation is a foamed polyethylene with a layer of aluminum foil or without it. This material is easy to install, has a small thickness, has good thermal insulating, sound insulation and moisture-resistant indicators. In combination with vaporizolation, they are ideal in protection from the cold. Mineral wool is often produced in rolls, which is much cheaper than other types of thermal insulation, but it is also easily fit and is a good heat insulator.
Tile thermal insulators have a thickness of 50 m, which can significantly reduce the useful area of \u200b\u200bthe room. These are environmentally friendly materials with good thermal insulating and hygroscopic indicators, resistant to temperature differences with sufficient sound insulation. The main disadvantage of which is easy flammability, but it is necessary to choose more expensive analogues that are so-flammable and self-fighting.

Often, clamzite, which has high resistant to the external environment factors, is used for sex as thermal insulation material.
Each of the types of thermal insulation has its pros and cons, but the optimal option is the creation of a whole insulating system from different materials.
Conducting the insulation of the loggia step by step, it is necessary to pay attention to the observance of the main stages of the technological process.
Stage First
At this stage, all preparatory work is underway:
- the liberation of space from all interfering work of objects;
- removal from all surfaces of the old finish;
- glazing;
- sealing cement detected cracks, damage in the walls, ceiling and floor;
- Floor treatment and ceiling by waterproofing composition.

Stage two
The procedure for insulation implies in this stage to heat the floor.
Options for carrying out insulation of sex differ depending on the selected material, but there are several basic moments that are the same for any kind of insulation:
- The floor is processed by waterproofing mastic;
- The layer of mastic stacked vaporizolation, better membrane type;
- The supporting bars is fastened;
- A wooden lag system is mounted on the bars, which are made of timber than 50x50 or 60x60 m;
- Lagged by self-assembly to bars and steel plates to the walls;
- In the voids that were formed between the lags, the insulation is stacked or clamzit falls asleep;
- everything is covered with a vapor insulator;
- They are stacked by boards or plywood with self-tapping screws as a rough floor.
The insulation of the floor can be organized and with the help, but the laying of vapor barrier is still needed.

Stage Third
It must be remembered that during the arrangement it will be necessary to carry out light, air conditioning, the "warm floor" system, and possibly water. All this is important to provide for the choice of the method of insulation and take into account when installing it.

