Types and installation of suspended ceilings installed in various rooms. Installation of stretch ceilings: step-by-step instructions Suspended ceiling mounting scheme
In an apartment or a private house, finishing the ceiling with stretch fabrics will be a good solution. This will help hide the unevenness of the base, hide various unseemly communications under the material (electric wires, exhaust hood, etc.). Stretch ceilings have a lot of advantages. There are a huge number of their colors and textures. This finish will harmoniously fit into almost any type of interior.
Installation organizations carry out the installation of canvases quite expensive. If you want to save money on the family budget, if you have enough free time, you can perform all the steps yourself. How to install stretch ceiling, will be discussed in detail in the article.
Material selection
There are two main varieties stretch ceilings. How to install presented designs, directly depends on their features and characteristics. There are fabric ceilings and PVC film trim. The choice depends on the type of room, as well as on the preferences of the owners of the house.
fabric ceilings made from polyester material. It is impregnated with polyurethane to give the necessary durability and wear resistance. Almost any pattern can be applied to the surface of the canvas. It can be one color, a drawing or even a picture. Fabric ceilings, due to their performance characteristics, are installed in the living room, bedroom, children's room or office.
PVC film has a glossy surface. It gives the room solemnity and beauty. Such a canvas does not allow moisture to pass through, it is not afraid of splashing. The film can be installed in the bathroom, in the kitchen and in other rooms. Cheap varieties of material can emit an unpleasant chemical odor. This is detrimental to health. It is not recommended to install such canvases in the bedroom or nursery.
wondering is it possible to install stretch ceilings, it is necessary to consider the technology of carrying out this process. Film and fabric mounting has a number of differences. Before you get started, you need to know about this in detail.
Mounting methods
Learning how install a stretch ceiling in the bathroom, in the kitchen, bedroom or living room, you need to familiarize yourself with the existing techniques for this process.
The PVC film is mounted on the base using glazing beads or special wedges. The harpoon method can also be used in this case. It is considered quite complicated, but reliable way. The fact is that there are no canvases with welded harpoons on sale. They will need to be attached to the film using special equipment. This procedure is carried out by specialized organizations. The processing cost is quite high. This is due to the use of sophisticated high-tech equipment.

Most often when self-assembly glazing beads or wedges are used. During installation, a special hard baguette is installed around the perimeter of the room. It has a specific kind of profile. The glazing bead involves the use of special additional fasteners. The fabric is wound into a baguette. It is fixed with a glazing bead inside the structure.
There are also clip-on clips. First, the film is inserted into the profile. Then it is closed. The baguette securely holds the material inside. There are many various ways fixing the stretch ceiling in the profile.
Fabric ceilings are easier to mount on your own. In this case, a frame is also mounted around the perimeter of the base. The canvas is clamped in it. The difference lies in the method of stretching the material.
Preparatory stage
By studying the technology how to install a stretch ceiling with your own hands, needs to be considered detailed instructions this process. First you need to carry out a number of preparatory work.
Remove all furniture from the room. If necessary, the walls are putty, finishing Finishing work. It is also necessary to prepare the base of the ceiling itself. It should not remain old whitewash, paint. If the material begins to crumble, it will ruin appearance stretched canvas.
The seams between the plates should also be smeared with putty. The walls must be even. This will greatly facilitate the process of installing profiles. You should also pre-mount all communications, bring wires for a chandelier or spotlights. You can hide under the canvas ventilation box. How to install a spotlight in a stretch ceiling? FROM there is a specific instruction.
If you plan to install a chandelier in a room, you need to prepare a base for it. You can extend an existing hook by reinforcing it with an additional metal chain. You can also build a special base. It should not reach the surface of the canvas by a few centimeters.
Required Tools
To install a stretch ceiling in the room, bathroom or kitchen, you should prepare everything necessary equipment. There is something for everyone home master. Part of the equipment, most likely, will need to be purchased in addition.
First of all, for installation it is necessary to prepare a screwdriver and a puncher. You will also need a tape measure, building level. It is necessary to install the canvas in the profile using special blades. You will need to purchase a set of them. You will need straight and angled blades.

You should also choose a certain type of canvas for a stretch ceiling. At the same time, the operating conditions of the finish are taken into account. After that, profiles are selected. They can be plastic or aluminum.
You can choose from various accessories. They are presented in the form of multi-colored inserts. Also, if necessary, they purchase clamps, accessories for installing lighting fixtures (glue, plastic rings).
If a PVC film is stretched, you should purchase a special heat gun or a building hair dryer. This equipment will allow you to properly mount the canvas.
Profile mounting
By choosing which stretch ceiling to install indoors, having selected all the necessary materials and tools, you should consider the procedure and stages of the installation itself. First you need to do correct markup walls. To do this, the height of the walls is measured in all four corners of the room.

After measurements, appropriate marks are applied to the surface. The difference in height can be about 5 cm or even more in some apartments. Having determined the smallest distance from the floor to the ceiling, it is necessary to subtract from the result the space that will be allocated for ceiling communications. If a chandelier will be installed in the room, you need to take into account the height of the platform for its fastening.
After the calculations are made using a laser level, a line is drawn on the walls in the room. It will set the profile. This mark should be perfectly level.
After that, you need to familiarize yourself with the technology of how to install a cornice on a stretch ceiling. A profile is installed along the intended line using dowels or self-tapping screws. The step between the fasteners should be 7 cm. To simplify installation, you can first glue the profile to the wall. So he won't move.
Film ceiling installation
Many novice installers ask, how many stretch ceilings are installed. It should be noted that the duration of this process depends on many factors. Professionals do all the work in one day. A novice master will need more time.

Installation starts from the base angle. Clips should be installed. They are attached to the corners of the room. First, attach one edge of the canvas. Next, the opposite corner is fixed with a clothespin. Then all the edges of the canvas should be fixed with clothespins.
After that, you need to send a stream of hot air to the canvas (at least 70 ºС). Then, alternately, the corners of the web are fixed in the profile using a spatula. Clothespins are removed. All edges of the film are fixed in the profile.
The procedure ends with the installation of a plastic baguette around the perimeter of the room. This decorative element can be selected in specialized hardware stores.
Chandelier for plastic canvas
It is important to consider how to install a chandelier on a stretch ceiling. There are several options for this process. Even before installing the canvas in baguettes, it is necessary to prepare a platform for the lighting device.

If a chandelier hook is already provided in the ceiling, it will need to be extended. At the same time, the distance from the canvas to the base of the ceiling is taken into account. The hook will need to be reinforced. For this, steel chains are used.
If there is no hook at the base of the ceiling, a special platform should be prepared. In this case, the weight of the lighting device is taken into account. If it's small, light chandelier, you can make two glazing beads on which the platform will be attached. A lighting fixture will be mounted to it.
It may be necessary to consider the technology of how to install a chandelier on a stretch ceiling which weighs quite a lot. In this case, the platform should be installed not on two, but on four supports. The platform should not reach a few centimeters for the surface of the web.
Chandelier installation
To install a chandelier on a plastic stretch ceiling, you need to perform a series of manipulations. It should be noted that the film under the weight of the lighting device can be deformed and torn. To prevent this from happening, when installing a PVC sheet, you will need to perform a few simple steps.

You need to purchase special protective rings made of plastic. They will prevent the destruction of the material at the installation site of the chandelier. How to install lamps in a stretch ceiling? FROM there is a certain method.
The retaining ring must be glued to the film in the place where the mounting platform or hook is installed under the canvas. You need to wait. When the glue dries, a round hole is cut out in the center of the ring with a clerical knife. An electric wire is pulled through it.
The chandelier is connected to the mains. Then it is attached to the prepared platform or hung on a hook. A decorative cap covers the installation site. If desired, you can create a system of spotlights. In this case, protective rings are also used.
Safety regulations
To install a stretch ceiling in the kitchen, in the bathroom or other rooms, you will need to use special equipment. When carrying out such work, all safety rules must be observed.
A heat gun heats air with gas. This is explosive equipment. The balloon must be correct. If its service life has expired, the gun cannot be used.
If you need to fill the cylinder, you should contact a special organization. It is impossible to perform such actions at a gas station.
Before starting work, it is necessary to check whether the hose is intact and whether there is any visible damage to the equipment. If a gas leak is detected, the unit will need to be returned for repair.
The heat gun generates high heat. It is strictly forbidden to direct the flow of hot air to the cylinder. Accurate implementation of operating rules gas equipment guarantees the safety of the master. If you ignore the recommendations of the equipment manufacturer, you can cause significant damage to property, the health of the master.
fabric ceiling
Having studied the technology of mounting vinyl sheets, attention should be paid to the technology of fabric. Such products do not have seams. Their width can reach 5 m. This allows you to mount seamless canvases in almost any room.
Fabric stretch ceilings are easier to install with your own hands. In this case, you do not need to use a heating gun. The room should be at normal temperature. This type of installation also involves the pre-installation of profiles. Strong structures should be preferred.
Installation of profiles is carried out using the same technology as in the case of a PVC film ceiling. First, marking is done, and then, using dowels or self-tapping screws, the guides are tightly attached to the wall.
Starting to stretch the canvas from the fabric should not be from the corners, but from the middle of the wall. First, a kind of cross is formed from the material. The remaining pieces are pulled from the center to the corners of the room. In this case, special blades are also used. Excess material is cut off with a sharp knife. Installation should be carried out so that wrinkles do not form on the canvas.
Having considered how to install stretch ceilings different types, you can complete the whole process yourself. Following the recommendations of experts, you can achieve high quality finishes. When working, be sure to follow existing rules security. Installing a fabric web for beginners is easier than PVC films.
A suspended ceiling is a structure that is attached to base surface, but at a distance from it. This type of finish is very popular, as it does not require alignment of the main ceiling. Designs developed different types, from which you can create complex multi-level or standard flat surfaces. It is thanks to the variability and impeccability of the finished ceiling that suspension systems are used very often. Install simple designs you can do it yourself.
Design false ceiling consists of frame and cladding. The base, as a rule, is metal, it holds the entire finish. Sheathing can be made of different types of materials: boards, drywall sheets, PVC panels, slats.
Advantages of suspended structures:
- There is no need to level and repair the base;
- You can hide protruding communications and beams;
- Suspended ceiling provides additional sound and heat insulation;
- Such a finish does not need repair for a long time;
- Designs can be given an unusual complex shape, thus, zone the room or visually change the proportions of the space.
The cost of finishing suspended structures is somewhat higher than plastering and painting the base ceiling, but the investment will quickly pay for itself, since repairs will be required in at least a dozen years.
Preparation of the base surface for the installation of a false ceiling
In this case, alignment is not required. The only thing that needs to be done is to check the reliability of the base ceiling, its strength and ability to hold a heavy structure.
If there are damaged areas of plaster on the ceiling or peeling paint, then the surface must be cleaned so that the pieces that have fallen off do not clog the space between the base and the finish.
In advance, you need to separate the electrical wiring lines, mark the location of the lamps, ventilation, fire fighting system, video surveillance and other communications.
One of milestones work - removing the level of installation of a new ceiling. The hydraulic level will help to cope with this work. How to use it, see the video.
Suspended plasterboard ceiling
Drywall constructions can be given any complex shape. It is this material that is preferred in the construction of multi-level ceilings. The frame for such structures is made of special profiles. There are two main types of them: a ceiling guide (it is fixed along the perimeter of the walls) and a rack ceiling (connects the guide elements to each other and creates a plane for attaching drywall sheets). To fix the racks to the base ceiling, special elements with perforation for self-tapping screws are used - suspensions. 
To make a curved frame, you can use a special arched profile or make notches on the sides of the rack profile and give the desired bend. 
To create corners, V-shaped cutouts must be made in the sides of the rack profile and bent to the desired degree.
How to make a frame:

Next, you need to sheathe the resulting frame with drywall sheets. To do this, it is necessary to measure the area on the ceiling, cut off the desired fragment from the plasterboard and fix it with self-tapping screws on the guide and rack profile. 
To make an even cut, a sheet of drywall must be marked with a pencil, attach a rule or a long ruler to it and cut upper layer stationery knife. Then bend the sheet so that the gypsum filler bursts along the intended line, and cut the second sheet of cardboard. 
The drywall box needs additional finishing. First it must be primed, then putty the lines of the joints of the sheets, the caps of the self-tapping screws and corner connections. Further, the surface can be painted with enamel, water-based or oil paint. 
Suspended ceiling made of PVC panels
The most budget option false ceiling- PVC panels. They do not require additional finishing and repair during operation. The plastic holds up well. high humidity and low temperatures, so you can use this type of finish in the bathroom, on the balcony or veranda. Panel structures are very easy to maintain - any dirt is removed from them with a damp cloth. The width of standard parts is 25 and 50 cm. 
The panels are equipped with grooves in which each subsequent sheet is installed and hides the place of fastening of the previous one to the frame. This ensures not only ease of installation, but also tightness and durability of the finish.
For the manufacture of the frame, you can use metal profiles for drywall or wooden beams. The pitch of the crate should be no more than 50 cm. The panels are very light, so only perpendicular racks are enough. 
Don't forget about fire safety. The electrical wiring lines under the ceiling of PVC panels should be hidden inside the corrugations.
The false ceiling installation kit consists of a U-shaped rail plastic profile and the panels themselves. The guide elements must be installed along the perimeter of the room, the ends of the panels will be installed in them.
Panel mounting:

At the final stage, a decorative plinth is mounted. You need to glue it on liquid nails. Apply glue only on the side that will be adjacent to the wall.
Suspended ceiling type Armstrong
Armstrong ceilings consist of a suspended base and slabs. The frame remains partially open during installation, so its visible parts are given an attractive appearance. The material for the manufacture of plates can be: pressed mineral fiber, glass, plastic. The convenience of this design lies in the free access to communications hidden under the ceiling. 
The structure of the frame made of load-bearing and transverse profiles is supported by spring suspensions, which can be easily adjusted in level. Instead of spotlights or a chandelier for Armstrong, it is advisable to use special built-in lights that are selected according to the size of the cells and plates. 
Armstrong ceiling installation:

During installation mineral plates clean gloves must be used in the cells. This is due to two reasons: the surface of the parts is easily dirty, the mineral fiber can irritate the skin.
Slatted ceilings
The design of the rack ceiling consists of narrow and long panels and a suspended frame. Rails are made from metal and plastic. The frame is assembled from adjustable suspensions and universal bearing tires. Along the walls, the structure is held by guide corners. The panels are fixed on the rail with special latches, so no additional fasteners are required. 
Reiki are presented in a huge assortment. You can choose elements of different shades, materials and textures that will harmoniously complement the interior of the room. There are two types of fastening rails:

Installation of the ceiling is carried out in several stages:

At the final stage, you need to install a decorative profile, if used open system fastening rails, and glue the plinth around the perimeter.
The choice of design and materials for a false ceiling depends on many factors. If the installation is done by hand, then its complexity matters. They play a big role performance characteristics material. For rooms with high humidity and low temperatures it is necessary to select a material resistant to these influences. The complexity of maintaining the structure also matters, for example, in the kitchen it is better to install a ceiling made of plastic, metal or glass. It will be difficult to remove dirt from grease and burning from the painted surface of drywall.
To get a suspended ceiling, you first need to install a frame on which the main decorative elements are already attached. Depending on their type, a scheme for mounting guide elements is selected. Also, the frame consists of moldings that are installed at the corners, and suspensions - responsible for adjusting the structure in height. The latter may take the form of brackets, rods made of metal or ordinary wire. Installation is carried out according to the established guides decorative elements. If used drywall sheets, then their puttying and painting is mandatory.
Where to order the installation of a false ceiling in Moscow?
Our company is engaged in the installation of suspended ceilings of varying complexity in Moscow. We guarantee the high quality of the work performed, regardless of the materials used, design solutions, contour or purpose of the room. Installed ceiling will not only be durable, but also fully perform the necessary functions. High quality is ensured by a phased control of the work, the use of only professional equipment and tools, and extensive experience in this field. Also, we always take into account the requirements of the customer, and if necessary, provide advice on all issues of interest.
In order to understand how to install a false ceiling, consider what it is, what main types and types exist. Suspended ceiling - these are elements of a variety of materials that are mounted on a rigid wooden frame or a frame made of light, durable metal, which is then attached to an existing ceiling.
The most common option is the use of suspensions, but if suspensions are not used, the frame is attached directly to the ceiling, then such a suspended ceiling is called a false ceiling.

There are two main types of suspended ceilings: modular and solid.
Modular ceilings have in their set a variety of modules that form a ready-made complete design. Ceilings of the following type can be cassette, slatted.
Cassette ceilings are square modules (plates or so-called cassettes), these plates are inserted into rectangular or square niches made of metal laths. Most Popular cassette ceilings are Armstrong and Albes.
Advantages:
- easy to assemble, install;
- easily repeats the irregularities and curves of a room or room;
- environmental friendliness;
- safety.
Flaws:
- bulky;
- hides up to 30 cm of room height.

Slatted ceilings consist of narrow rails that are interconnected. This type of ceiling is most often placed in bathrooms or kitchens.
Advantages:
- heat resistant;
- moisture resistant;
- eco-friendly;
- fireproof;
- practical to use.
Flaws:
- steals up to 20 cm of the total area of the room;
- not aesthetic, not comfortable enough.

A solid plasterboard ceiling is sheets of plasterboard that are suspended on metal structures.
The main pleasant qualities of working with this type of suspended structures are:
- hiding all irregularities;
- the possibility of creating multi-level ceiling;
- convenient hiding of all communications;
- the ability to conveniently accommodate all lighting directly into the ceiling;
- ability to create smooth curves and shape the ceiling.
Preparatory stage
Before proceeding with the direct installation of the selected false ceiling, it is necessary to carefully carry out mathematical calculations so as not to be mistaken in size, shape, buy the necessary building material and prepare the necessary for further work tools.
What materials are needed?
- self-tapping screws, dowels (plastic inserts that are attached to the wall);
- suspensions;
- support profiles - stringers;
- fastening corners (P-profile);
- brackets, thanks to which the installation of suspensions is carried out;
- panels (rails), interpanel inserts;
- fixtures, wires (if you plan to add built-in lighting).

What are the main tools needed for the job?
- pencil or marker for notes;
- metal scissors;
- laser level (or regular bubble level);
- drill with a variety of nozzles;
- reliable roulette;
- standard size hammer
Constituent system elements
Hanging frame generally consists of several specific types ceiling profiles:
- corner wall profile 19/24;
- transverse profiles with a length of 0.6 and 1.2 m, types T15 and T24;
- carriers with a length of 3.6 m, types T15 and T24 (the width of the profile depends on this type).
Tiles are the main finishes. Depending on the size, it can be divided into two types: 595 x 595 mm (single) and 1190 x 595 mm (double tiles). The first option is the most popular because a rectangular shape is not always practical.
Let's figure out what a spoke is. The needle is a double device, consisting of three main elements:
- a knitting needle at one end enclosed by an eye;
- a knitting needle ending at the end with a hook;
- spring, the so-called "butterfly".
In order for the profiles to be supported securely in a hanging state, certain spokes are used as fasteners, which are securely spring-loaded and with which there is a convenient opportunity to change the height frame installation. For professional horizontal alignment of the ceiling structure, high-quality adjustment of the length of spring-loaded spokes is used.
Exist various classes of suspended ceilings, it all depends on prices, the desire of the customer, ideas for a beautiful interior. The main classes that can be distinguished (using the Armstrong suspended ceiling as an example):
- economy option - microfiber plates do not have very high-quality properties, but at the price they are the most affordable. They have low moisture resistance, therefore, in rooms with high humidity or an unreliable roof, such ceilings are not recommended. The main models of this option are: Baikal, Oasis and Tatra products;
- "prima" class - higher characteristics associated with technicality, moisture resistance here is already high level, such ceilings are durable, the strength is also high. Different design relief and various colors, thickness of tiles - depends on the desire of the buyer, but in general up to fifteen mm;
- acoustic ceilings - the following products will please high quality material, reliable relief and, most importantly, it will protect against any penetration of unwanted noise. Also, this design will be incredibly reliable in operation, environmental friendliness;
- design classes - the most expensive, but unusual and bold, such ceilings are made of high quality material, have many advantages.
Important point! In the case of planning work in a room with high humidity, a moisture-resistant material should be chosen for the sheathing so that the structure serves for a long time and does not upset with premature breakdowns. Very often, after the final sheathing, certain finishing works are carried out, for example, filling the joints between the ceiling sheets with putty, after which the surface is painted with certain paints for the wrong side. Correct calculations also play an important role.
The following calculations need to be made important details premises:
- ceiling size;
- right amount profiles;
- how many suspensions are needed;
- the number of sheets of drywall or other base material.
During the necessary preliminary calculations, you should use the data that are on the outside of the packages of different building materials, this is due to the fact that the packages indicate the approximate material consumption per 1 m2. Such information will greatly simplify the calculations, so it will be very important to pay attention to them.


 One of the main tasks is correct calculations
 The first stage - markup
The marking is applied directly to the ceiling, the walls of the measured room, and then the frame will be formed on it. The required level of construction is determined, which will be created in the future, for this the height of the room is measured in each corner. From the lowest corner of the room, the distance to the lowest point of the future ceiling is determined. In the case of planning the creation of lighting at the same time as finishing the main work, it must be taken into account that the distance between the suspended structure and the base should be more than ten cm, in other cases, it is possible to use a smaller distance.
In one of the four corners, a base line is drawn, which will be a guide for the starting profile. It should be noted that in order to desired result the most effective would be to use a laser level (if there is none, a regular bubble level will also be useful). The markings are then applied directly to the ceiling, which will determine the subsequent fixation points for the required suspensions. One important point, the distance between them of 60 cm will be more optimal and effective.
When the necessary markings have been applied, the main work begins. That is, the direct formation of the structure. In the process of systematic marking, in order to avoid distortions and other unpleasant situations in the final result, the usual standard tape measure will not work, professional measuring devices are needed for an ideal result. This should be taken into account.
The second stage is the creation of the main frame
When installing the frame, the sequence of actions is very important. To begin with, a metal starting profile is attached to the walls, so the orientation to the markings made in advance is important here. In order for the fastening of the profiles to be reliable, special anchor bolts are attached to pre-made holes (here you can use a puncher or any other suitable tool).

the same anchor bolts suspensions are attached directly to the ceiling. The most commonly used plate hangers, which can be bent in such a way that they are perpendicular to the ceiling. In the case of using rod hangers, they are attached to the rings, and after that the optimal and desired length of each rod is adjusted separately.
Using short self-tapping screws, we fasten the main profiles to the suspensions. Self-tapping screws are used designed to work with metal materials.

To work in wide rooms, we connect the longitudinal elements of the finished frame with each other. Using a level, all parts of the prepared frame are aligned and checked. The main profiles with their ends are inserted into the starting profile, after which they are fixed with the help of working self-tapping screws.

The third stage - lighting and wiring
In order for the design to be truly rich, full-fledged, unusual, it is better to think over the lighting, make it in advance, using high-quality built-in lamps. At this stage, it is necessary to make the wiring, then fix the lamps themselves. Determine connection point main network electricity, we apply markings on the ceiling.

These dots will show the installation location of each fixture. Following this, a cable is connected, which is fixed securely to the very base of the structure, provided that the cross section is more optimal.

In places where the lamps will be installed, the cable is passed, it is very important to calculate the correct cable length so that the use of lighting devices is comfortable and easy for a person. The luminaires are connected, checked, so that in case of a malfunction, the error can be corrected.
Installation of suspended ceiling cladding
The next stage is the installation of the cladding, which is plastic panels, drywall or other elements, it all depends on the wishes, design, and financial capabilities.
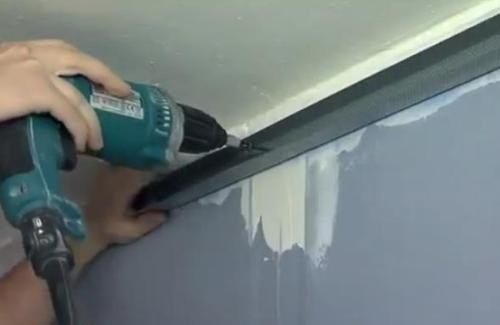
Depending on the distance between the hangers, the sheets are cut, for which an ordinary knife is used. For a change, you can apply markings to avoid damage to the material. One person holds the sheet, the other fixes it, usually a screwdriver is the best tool for this. It is necessary to screw in the screws in such a way that the plane is even and the heads of the self-tapping screws are not visible.


Final actions
After sheathing, the final finishing is performed, joints, irregularities, self-tapping caps are filled with putty material. Dry material is corrected, cleaned sandpaper. Use decorative finishing materials such as paint, lacquer coating, decorative plaster, wallpaper, any coating. It all depends on imagination and desire.

As you can see, installing a false ceiling yourself is not at all difficult. It is enough to follow the instructions, have the necessary materials, desire and inspiration!
Armstrong ceiling systems are known as prefabricated suspended structures, consisting of metal frames and mineral fiber slabs. Under them, you can easily hide communications and they will not spoil the appearance of a room decorated in a classic style.
Advantages and disadvantages
Most often, the installation of the Armstrong ceiling is performed in public institutions, when decorating offices, trade enterprises, cafes, and they also fit well into the decor of apartments.
Among the advantages of these ceiling structures are:
- low cost;
- no need for preliminary preparation base base;
- a sufficient degree of sound and heat insulation;
- a wide variety of plates allows you to implement any design solution;
- simple installation of suspended ceiling Armstrong, which does not require the participation of professionals;
- the ability to make communications and ventilation systems invisible;
- providing easy access to the interceiling space for inspection and repair;
- trouble-free installation of lighting devices;
- it is possible to dismantle and reuse the elements of the system, since it is completely collapsible.

Armstrong has few shortcomings:
- it lowers the height of the room by no less than 20 centimeters, so it is not always possible to use it in apartments;
- the ceiling cannot be mounted in a room with a non-standard configuration;
- the design will not protect furnishings in case of leakage from above;
- it does not tolerate high moisture, from which organic plates begin to soak and undergo deformation.
The popularity of such ceiling systems, thanks to numerous advantages, does not decrease. Do-it-yourself installation of the Armstrong ceiling is quite simple both in the office and in the living room.
Features of the structural device
Armstrong ceilings consist of a frame made of metal slats, assembled in the form of cells measuring 60x60 centimeters. Soft or hard tiles of a certain size are laid on them.
Rigid elements are made from the following materials:
- whole or perforated sheets of metal;
- wood;
- plastic;
- mirror;
- glass.

Soft plates are made from organic or mineral materials. AT recent times due to the fact that preference is given to environmentally friendly finishing materials, mineral products are used very rarely, since they contain mineral wool, the smallest particles of which, when they enter the respiratory system, cause serious harm to human health.
For the installation of an Armstrong false ceiling, soft organic tile elements are often used. They contain recycled cellulose raw materials, so they are completely safe, weigh a little and, if necessary, are easily cut.
For the construction of the frame and its finishing will require:
- Ceiling tile, having parameters of 60x60 centimeters.
- Bearing profile T-shaped, 370 centimeters long. It is installed parallel to the short side of the room and, if necessary, is increased using standard fasteners or cut off the excess.
- The profile is transverse T-shaped, 60 centimeters long.
- The profile is longitudinal T-shaped, 120 centimeters long. It is attached to the carrier profile with a gap of 60 centimeters.
- Ceiling suspension with hook and rod. The bar is attached to the ceiling with dowels or anchors, and the hook is attached to the carrier profile. The length of the suspension is regulated by a clamp and thereby ensures a horizontal arrangement of the frame.
- Wall profile L-shaped, 300 centimeters long. It is installed along the perimeter of the room using a level.
- Dowel or anchor. When mounting the Armstrong ceiling, these products serve to fix the suspension to the rough base.
- Ceiling trimmed plate, designed to fit the parameters of the room.

The profile for assembling the frame is metal-plastic or metal, coated with a powder coloring composition. The standard width of its shelves is 15 or 24 millimeters. In the first case, the profile is used for the construction of lightweight structures using organic tiles.
The second option is used in the construction of metal, glass, mirror ceiling structures with a large number built-in elements. For mounting Armstrong to the ceiling, if it is heavy, reinforced suspensions are used.
The frame is fixed using standard fasteners, it usually requires minimal adjustment, since it is assembled similarly to the designer, quickly and simply.
By the way, tiles for Armstrong can, if desired, be made with your own hands from MDF or wooden panels. Their design gives the interior of the premises a unique style.
Calculation of components
Before you install the Armstrong ceiling, you should calculate the materials that will be required for work, for which they measure the length and width of the room. Given these parameters, their number is determined.
When heavy fixtures or elements of the ventilation system are to be installed, experts recommend additionally using suspensions. It is advisable to order all the necessary materials with a small margin, since adjustment may be required during the work or the product will be damaged.
Foundation preparation
As with the arrangement of other types of ceiling structures, before installing the Armstrong ceiling, a series of preparatory activities. This suspension system completely makes the state of the rough base invisible.
The preparatory stage consists in removing the old, which has become unusable finishing material. When the paint or whitewash is firmly attached to the surface of the floor, it is permissible not to remove them.
If there is a detachment of the finishing areas or the layer of plaster falls off, they can damage the mounted tiles. For this reason, they must be removed and the cracks filled with putty. Before installing Armstrong ceilings in a room where there is a high probability of leakage, the rough base should be waterproofed.

Since there will be a gap of 20 to 25 centimeters between the ceiling and the surface of the structure being installed, heat and sound insulating materials can be placed in it. Before their placement, first of all, for the fibrous plates of the heat insulator, a crate is assembled from wooden bars, positioning it in such a way that it is slightly offset in relation to the suspended frame.
Armstrong ceiling assembly step by step
Getting started, you need to use the installation instructions for the Armstrong ceiling.
Installation is carried out in several stages:
- Marking the level of the structure location. The successful result of the whole work largely depends on the correct implementation of this stage. For marking use laser level. It starts from the lowest of the four corners of the room. It is laid off from the ceiling average length suspension so that it can be adjusted in the direction - both up and down. A level from this point on both walls draw lines, mark the corners adjacent to them, and then continue the lines on all other walls. At the last corner, the lines should converge.
- Fastening wall profiles . When installing L-shaped elements, dowels and self-tapping screws or anchor bolts are used with a gap of 50 centimeters down the shelf and aligned according to the previously marked line. The profile is bent at the corners, before cutting the shelf.

- Installation of ceiling hangers. These frame elements are used to fasten the carrier profile. To place the ceiling hangers in the required place, you should pre-plan the location of the rails. They are installed parallel to the short wall of the room in increments of 120 centimeters. For easy installation, you can draw the appropriate lines on the ceiling or use a chalk cord for marking. Further, according to the scheme, the places of attachment of the suspensions are marked on them. In accordance with the Armstrong suspended ceiling installation instructions, these components should be located at a distance of no more than 120 centimeters from each other and 60 centimeters from any wall. They are fixed with anchor bolts or dowels. To do this, according to the marking, holes are drilled and the suspension is fixed by the eye of the rod.
- Installation of suspensions for lighting fixtures. The places where the installation of fixtures and split system blocks is planned must be further strengthened with suspensions, placing them with a slight offset relative to the main components of the frame. The suspension hook often interferes with the installation of elements, so it is advisable to place the suspension with an offset of 5 - 10 centimeters.
- Installation of supporting profiles. They are placed according to pre-applied markings and fastened with hanger hooks for the holes in the profile. It is necessary that the ends of the carrier rails abut against the L-profile shelf. When there is not enough length, it must be increased by using a standard lock located at one end of the rail. If necessary, the profile can be cut. See also: "How the Armstrong ceiling is assembled - installation sequence".

- alignment. It is necessary to achieve a horizontal arrangement of the bearing elements by adjusting the length of the suspensions. To do this, first the butterfly clamp is compressed, the hook and the rod are moved in the required direction. Then the clamp is released and thereby fix the length of the suspension. In order to control the ceiling plane, they use a level and tightly stretched cords.
- Assembling the frame structure using profiles of transverse and longitudinal type. Longitudinal profiles having a length of 120 centimeters are installed between the bearing elements in increments of 60 centimeters using fasteners on the profile. In order not to cut the edge plates once again, the indents from the walls should be adjusted, making them symmetrical. In the gap between the longitudinal rails, transverse products 60 centimeters long are mounted using conventional fasteners.
- Installation of built-in elements. As indicated in the installation instructions for the Armstrong ceiling, after completing the assembly of the frame, you should proceed to filling the cells with slabs and installing built-in appliances. First, communications are prepared for connection, laid under the surface of the suspension system - ventilation ducts and electrical wiring. To do this, they are brought to the locations of the blocks and lamps. LED, raster or fluorescent are inserted into Armstrong lighting size 590x590 millimeters. They are brought in at a slight angle relative to the plane of the ceiling and deployed diagonally across the opening, aligned with the cell. As a result, the lamps are on the guide profile. By means of adjacent empty cells, the devices are connected to the supply cable.

- Installation of spotlights and ceiling split systems. They can also be used in Armstrong ceilings. To do this, holes are made in the slabs in accordance with the size of the reinforcement. lighting equipment. After the tiles are returned to their place, point devices are connected. Air intakes are cut in the same way ventilation systems. Split system units are best installed in the most fortified places, for example, in the corner.
- Tiling. Deaf elements are placed in place last. They need to be brought into the cell diagonally and placed on the guides, then, lifting from below and turning, put in place.
The nuances of installing a ceiling structure in an apartment
With the task of how to install Armstrong in apartments typical layout not always manageable. If the ceiling height exceeds 275 centimeters, installation is carried out according to standard technology. In this case, the surface of the structure must be located at a height of at least 250 centimeters - this value is provided for by SNiP.
When the ceilings are lower, then Armstrong can be installed in rooms where people stay periodically, for example, it can be a corridor.
Since such a ceiling has a low price, does not emit substances harmful to health, is easy to install and maintain, the main thing is to choose quality material and related design.