How to properly glue the wallpaper. Wallpaper gluing: step-by-step instructions and technology for applying glue and different types of wallpaper (90 photos) How to paste wallpaper
Take out the furniture and cover any items that cannot be removed with plastic. Remove shelves and decorations, sockets and switches, and, if possible, door trims and baseboards from the walls.
Wallpapering is a wet job. Therefore, be sure to turn off the electricity.
If this cannot be done in just one room, insulate the ends of the wires and close them with plugs.
For a dark room, you can make temporary lighting. For example, stretch extension cords from another room and put tabletop ones.
If the floors are finished with a material that is afraid of moisture, cover them with plastic wrap.
How to remove old wallpaper
If you stick new wallpapers on old ones, the result is unlikely to suit you. The top layer of old paper wallpaper can peel off after contact with water-based glue, and when everything is dry, a bubble is likely to form at this point. And if there is a convex pattern on the previous wallpaper, then the new coating will turn out to be uneven.
In addition, due to poor ventilation, walls can form under the wallpaper.
You can remove the old paper covering with a spatula. Pry the wallpaper on them, pull on the bent part and tear it off the walls.
To make the process easier, soften the glue that holds the old wallpaper. To do this, you need a container of water, a scraper and a sponge. Dampen the canvases with water using a roller or spray them with a spray bottle. Scrape off the wallpaper with a scraper and rinse off any residue with a wet sponge.
Anton Toskuev, head of the construction department for the service of ready-made repair solutions "Tnor"
For greater efficiency, you can dissolve a little in water. It will definitely help if there are wallpapers on the walls that could not be removed with plain water.
Thus, you can easily and fairly quickly remove the paper wallpaper. But on non-woven or vinyl, you need to first walk with a needle roller in order to violate the integrity of the cover.
Sometimes the wallpaper is treated with hot steam, passed over it with a needle roller and only then moistened. Water will penetrate better through the holes.
If the water does not work, it can be replaced with a special wallpaper remover. Such formulations dissolve the glue.
How to remove paint
On a smooth surface, the wallpaper will not last long, so you need to get rid of the paint layer. You can clean it with the same spatula, but it will take a lot of time.
You can use a hammer drill with a wide blade or a grinder with a grinding attachment. Please note that there will be a lot of dust in the process. So don't forget to wear a mask.
There are also special solutions designed to remove paint. They are applied to the surface with a roller or wide brush, moving in one direction. After the time indicated on the package, the paint will soften, and then it will be much easier to remove it.
Keep in mind that such products are very toxic and take a long time to fade. It is necessary to work with gloves, goggles and a respirator and with open windows.
A construction hairdryer can also come to the rescue. Under its influence, the paint melts and is easily removed with a scraper or spatula. In this case, you also cannot do without a respirator: there will be a pungent smell in the room.
This video shows the process of removing paint with a building hair dryer:
How to prepare the walls
After getting rid of old finishing coatings, the walls must be primed. This will prevent mildew and prevent putty and new wallpaper from falling off.
Apply the primer from the bottom up. It is most convenient to do this with a roller, and in the corners with a brush.
Then you need to wait for the liquid to dry. This takes about 10-15 hours, but the exact time must be indicated on the package.
After that, small irregularities, holes or chips on the walls are hidden with a layer of putty. It is applied with a wide spatula and leveled with it with even pressure.
The drying time of the putty is also indicated on the package.

After the putty has dried, level the surface of the walls using a trowel with an abrasive mesh attached to it. Then clean the walls with a brush and a damp cloth to remove any dust that has formed.
Yulia Soldatova, expert of the decor department of the company "Leroy Merlin"
After that, the walls need to be treated again with a regular store primer.
You can also use a weak solution of wallpaper glue: about 300 g for 10-12 liters of water. A primer made of PVA construction glue will be much cheaper: it is enough to dilute 2 glasses in a 10-liter bucket of water. These methods are effective, but they will not protect the walls from the growth of microorganisms, since the glue does not have antiseptic properties.
After the final primer coat has dried, the wallpaper can be glued.
How to measure and cut wallpaper
If the wallpaper does not require matching the pattern, you can simply measure the height of the wall with a tape measure and cut the required amount from the wallpaper rolled out on the floor. To keep the strip even, the wallpaper is folded in half and cut along the fold.
If the walls in the apartment are not very even, you will have to measure the length of each strip.
If the wallpaper needs to be customized according to the pattern, you will have to act a little differently. It is necessary to cut the strips from two rolls at once. In this case, the consumption of wallpaper will be less than if you will adjust the pattern using only one roll.
First, cut one strip, lay it face up on the floor, roll out the second roll and place it on the strip so that the pattern matches. Then you can cut a new strip.
Lifehacker spoke in great detail about calculating the required number of wallpapers in this article:
And yes, don't throw out the scrap. They can be used near windows or above a door.
Wallpaper must be glued in a circle, that is, one strip after another. The place where the pasting starts is really not that important. However, for many, the usual starting point is the edge of the window.
Firstly, the front lane needs a level reference, and windows, especially in older houses, are often smoother than corners or doorways.
Secondly, a few decades ago, paper wallpaper, which is glued with an overlap, was most often used. And if the light falls from the side of the window, during the day the seams are less conspicuous.
 thewalls.ru
But if the wallpaper strips are glued end-to-end, then you can start from the door or corner.
It is better to start gluing wallpaper with a pattern in an inconspicuous place. For example, where it will stand. The fact is that the space between the first and the penultimate stripes can be quite narrow. Because of this, the last stripe may not coincide in the pattern with the first.
It is very important to glue the first strip evenly.
Using a building level or plumb line, draw a strictly vertical line on the wall. It will serve as a beacon to guide you when gluing. This will avoid distortions.
Yulia Soldatova, expert of the decor department of the company "Leroy Merlin"
 diy-ally.com
How to glue stripes
Be sure to close all windows and doors tightly before gluing the wallpaper. If there is a draft in the room, the wallpaper will simply fall off the walls.
On the liners in rolls, it is written where the glue is applied: on the wallpaper or directly on the wall. In addition, the time for impregnating the canvas with glue should be indicated there. In this article, Lifehacker explained what the signs on the roll mean:
And on the package with glue, it should be indicated how to dilute it correctly.
It is good if the glue contains substances that prevent the formation of mold. In addition, the glue must be environmentally friendly.
Anton Toskuev, head of the construction department for the service of ready-made repair solutions "Tnor"
If glue is applied to wallpaper, then for better impregnation, fold the ends of the strip to the middle with glue inward, and then several more times without pressing the folds. Do not overdo it, consider the time indicated in the instructions.
Then attach the wallpaper to the line drawn on the wall. The canvas is glued from top to bottom, while a few centimeters must be brought to the ceiling and floor or baseboard.
Smooth the wallpaper with a roller or dry brush from the middle to the edges and from top to bottom.
 diy-ally.com
There should be no air bubbles between the wall and the canvas. If they do appear, pierce them with a needle and gently smooth the surface.
Cut off any excess wallpaper at the top and bottom. To do this, press them well to the edges so that a fold forms, which will serve as a cutting line. You can also press down on the wallpaper with a spatula and cut off any excess with a utility knife.
 diy-ally.com
The next strips are glued according to the same principle, only the edge of the previous canvas will serve as a guide.
Please note that thin paper wallpaper is glued with a little overlap, and wallpaper made of thicker materials is glued end-to-end.
The joints between the strips should be ironed with a small rubber roller. Excess glue can be removed with a soft, damp sponge.
 diy-ally.com
How to glue wallpaper in inner corners
Glue the first strip, leading it around the corner by 1–2 cm. In this case, it must first be cut to the required width. Glue the next strip straight from the corner, with an overlap.
If the wallpaper is thick, then a double strip of wallpaper will be visible. In this case, press the wallpaper firmly with a spatula in the place where the canvases are glued to each other, and draw a line with a clerical knife. Then remove the two narrow strips left over from both strips and smooth the seam.
How to glue wallpaper in outer corners
The technique is almost the same as the previous one. The first strip should be wound around the corner by a few centimeters, and the second should be glued with an overlap.
 diy-ally.com
Then place a ruler at the corner and use a utility knife to cut off the edges of both strips. Remove excess parts and tighten the blades if necessary. Iron the seam between the strips with a roller.
 diy-ally.com
How to glue wallpaper around windows and doors
When you get to a window or door, stick the strip in the same way as the previous ones. Then carefully trim off any excess wallpaper around the edges.
 diy-ally.com
 diy-ally.com
How to glue wallpaper behind batteries
Measure in height and cut the required amount of wallpaper. Attach the sheet to the battery and make vertical cuts on the wallpaper in the places where it is attached to the wall. Liberally coat the canvas with glue, put it behind the battery and level it.
The video shows this process in detail:
How to glue wallpaper behind pipes
Start gluing the canvas, and make an incision at the beginning of the pipe. Having wound the strip behind the pipe, cut off the excess wallpaper around it and smooth the canvas.
Here is a detailed instruction:
Mark their edges on the canvas with four diagonal lines. Then carefully cut a window in the right place and level the wallpaper with a roller.
 diy-ally.com
How to fix shortcomings after pasting
Directly in the process of work, while the glue has not dried, the strips can be slightly pulled to each other right on the wall. After this it will no longer be possible to repeat it. Therefore, be extremely careful.
Defects in the form of air bubbles that appear on the wallpaper after drying can be corrected.
To do this, put glue into the syringe, pierce the bubble and put a little glue in there from top to bottom. Then smooth the surface with a roller or cloth.
If the edges of the wallpaper have lagged behind, they can be glued either with a brush or using the same syringe with glue. Smooth the blade and press it down with a dry cloth for a few minutes to make it secure.
If a wide gap has formed between the strips of wallpaper, cut out a strip of the required thickness from the remnants of the wallpaper and glue it end-to-end in place of the gap.
If the gap is very narrow, you can dip the edge of a spatula or ruler in paint of the same color as the wallpaper and paint over the gap. You can also use a regular felt-tip pen for these purposes.
Do not forget that after pasting the room, it cannot be ventilated until the wallpaper is dry.
As a rule, paper wallpapers dry for at least 12 hours, non-woven wallpapers - about a day, and vinyl - about two days. The time may increase if the room has high humidity and low temperature. To check for sure, touch the pasted walls with your hand: they must be dry.
In the renovation of a room, wallpapering is considered one of the final stages. That is why you should know how to glue the wallpaper so as not to spoil the interior, but rather to make it as attractive as possible. As you know, it is the wallpaper that first of all catches the eye of everyone who enters the room. The efficiency of the repair depends on how well they are attached to the wall. You can spend a lot of time and effort leveling the walls, and then ruin everything with incorrectly pasted wallpaper in one day.
Important points
This work is not physically difficult, but very painstaking. Particular attention is always paid to difficult areas, which include the area of windows, radiators and corners. Before you properly glue the wallpaper on the walls, you need to carefully calculate everything and select the right materials.
Very often the owners of the apartment entrust the work of gluing wallpaper to professionals. But in order to save money, you can stick the wallpaper yourself. However, if a person does not have experience in this process, he should not take up expensive materials, since they can be easily spoiled. You can first practice on cheap wallpaper, and then try to use more expensive ones. Some types of wallpaper do not require much attention to the walls, while others are glued only to perfectly aligned surfaces, but in any case, the principle of operation remains the same, regardless of whether the materials are paper, vinyl or non-woven. 
It is recommended for beginners to choose wallpaper with such patterns so that they can be easily docked. The best option would be plain wallpaper or options with fine abstraction. But you need to remember that for large rooms a small drawing is not always suitable, as it makes the room large and uncomfortable. In turn, large drawings cannot be used in small rooms, as they visually reduce the space.
Preparing the walls
If it comes to wallpaper, then the dirtiest renovation work has already been done. Now all that remains is to choose the right materials that will delight the eye and create a pleasant feeling of coziness in the room. If the thick rolls are already ready and lie neatly in the corner of the room, you can start preparing the walls.
First of all, you will need to completely remove the old wallpaper. It all depends on how well they were pasted earlier. If the glue was used weakly enough, in this case it will be a huge plus. This way the old material will be removed very quickly. Sometimes it is enough to pick up the paper on one side to completely remove it from the entire wall. 
But the process is not always so simple. If, during the previous repair, the wallpaper was glued with high quality, this can become a significant disadvantage. If the old material does not want to peel off, you can try to do this work with a spatula, after soaking the paper. To do this, you can use a regular spray bottle with water, which you need to spray on the surface and leave for ten minutes.
The most difficult thing is to work with foil-covered wallpaper. It is a washable material that cannot be treated with water. Here it remains only to tear off everything with a spatula. But this must be done so as not to damage the wall.
After the wallpaper has been completely removed, it is worth cleaning the old plaster too. Those places where it will easily leave should be treated with a spatula, and then a new layer of good and high-quality plaster should be applied. All seams and cracks also require additional processing. This is necessary in order to prevent the wallpaper from peeling off after being applied to the wall. 
After the putty is dry, you need to walk on the wall with a primer. This is very important, because if you skip this step, then the wall will become very dusty while the wallpaper is being applied, and the material itself will not adhere well enough. Moreover, sometimes plaster that has not been primed will begin to roll off, so the use of a special mixture to cover the walls is imperative. In specialized stores, you can find suitable options for surface treatment after plastering. If nothing suitable was found, you can dilute PVA glue in water and walk it along all the walls on which you plan to stick wallpaper. One glass of glue takes a bucket of water. This is enough for a quality primer.
The point of this work is to make the walls as even as possible. For some types of wallpaper, this plays a very important role. Before you start gluing the material to the wall, you should very carefully examine the surface. This will allow you to detect unnecessary elements and large debris that could ruin the whole look. This is especially important when you plan to use thin paper wallpaper. Even a small pebble stuck to the wall can break them. As a result, you will have to throw away a whole sheet of material. 
Adhesive selection
The working walls must be strong, dry and absolutely clean.
If the surface quality has been checked, you can start preparing the glue. It must be selected after the wallpaper is purchased, since each type of material needs a special glue. If you do not want to purchase a special glue, you can act as they did several decades ago and weld the paste. But it is highly not recommended to use it for vinyl and textile wallpapers, as they are quite heavy and expensive, so re-gluing them will cost a pretty penny. 
And yet, the best solution would be to purchase a special glue. It needs to be diluted in water and just used according to the instructions. As a rule, one package is enough for six to eight rolls, so you don't have to spend a lot of money on glue. The main thing is to properly dilute the powder so that lumps do not turn out. They can also adversely affect the wallpapering process. It is best to take water at room temperature and gradually pour the powder into it, stirring the liquid constantly. After that, the mixture should be infused to make a normal wallpaper glue.
Wallpaper gluing methods
When answering the question of how to glue wallpaper on a straight wall, it is worth noting that this type of work is the simplest, since it requires minimal adjustment and cutting. A straight wall is pasted over with wallpaper pretty quickly, and it is from it that you need to start work on the redecoration of the room.
First of all, we completely close the windows and doors in order to in no case allow drafts, which are destructive for this process. Next, you need to do the cutting of the parts. To do this, we need to accurately measure the wall from ceiling to floor. This must be done in several places, since it is possible that the floor or ceiling is not entirely flat. We cut strips of wallpaper of the size that turned out to be the largest parameters of the wall. Let it be better in some places with a margin than in others not enough. 
To understand how many vertical stripes are needed, you need to measure the length of the wall, and then divide this value by the width of the roll. For example, if the length of the surface is 3,700 mm and the width of the wallpaper is 540 mm, the value is 6.85. That is, we need six whole strips and one with an undercut. We cut off seven sheets for a straight wall, but to each it is worth adding two or three centimeters from the bottom and top, just in case. If they don't come in handy, they can be easily cut off. You can make calculations for all the walls and immediately cut the material so as not to waste time afterwards.
If the question arose as to how to glue the wallpaper as evenly as possible, then it is necessary to correctly determine the position of the first strip. To do this, you need to accurately mark the vertical. Most often, a plumb line or a building level is used for these purposes. The main thing is that everything is clear, otherwise the wallpaper will look ugly. You need to determine the points at the top and bottom, and then connect them with a straight line.
Experts recommend to start gluing wallpaper not from the first, but from the second strip. That is, it is better to leave the places in the corners for later. It will be easier and smoother. The adhesive must be applied to the wall and to the wallpaper strip itself. You can use a brush for this, but it is better to use a roller, as it provides a more even distribution. 
It is necessary to start gluing from the top. Here we carefully apply the second strip, since it was decided to leave the first one for last. Its edges should coincide with the line of the ceiling. If the cut is not very straight, you will have to trim the part. That is, the adhesive strips must be slightly overlapped, and then remove the excess with a sharp clerical knife.
It is necessary to glue the strip very carefully. Most often, beginners are faced with the problem of bubbles, which are difficult to get rid of afterwards. To prevent their appearance, it is necessary to walk several times on the freshly glued wallpaper with a roller. The bottom needs to be trimmed as it is likely to be too large. To do this, you need to use a clerical knife. Trimming should be done carefully, but if there are several irregularities, this is not a problem, since the lower part will be necessarily covered with a plinth.
After gluing one strip, we do the same with the next. Do not forget that every detail will have to be adjusted according to the pattern. For this, the strips are cut with a margin.
In the event that there is an outlet on the wall, it must be de-energized and removed. Then a strip of wallpaper is glued, and after that an opening is cut. You do not need to try to do this work in advance, as it will be very difficult to accurately calculate the location of the outlet. 
Pasting wallpaper in the corners
As for how to glue wallpaper in the corners, this work is the most difficult for the master, as is the case with the area around the battery and windows. But if you have to tinker with window and door openings, as well as with batteries, calculating, cutting and adjusting as accurately as possible according to the drawing, then with the corners the issue can be solved faster.
The main thing is not to try to cover the corner with one sheet of wallpaper. This is a big mistake, since bulges and folds are bound to form in the corner. It is best to cut the strip so that it overlaps the corner slightly. After it has been carefully smoothed out with a roller, you need to cut off the part that goes around the corner. To do this, you need to take a ruler and a stationery knife. On the other side of the corner, the work is done in a similar way. The result is a joint along the corner line. It will not be noticeable, and no irregularities in this area will arise. 
The choice of wallpaper for beginners
The easiest option for work will be adhesive wallpaper, on which there is no pattern. But this is not the best option in terms of design, since such colors make the room not very cozy and create a strict atmosphere. Wallpaper with patterns is much more interesting, but it is also more difficult to work with them, since here you have to adjust the pattern. Moreover, in this case, the material consumption will be large, since you will have to cut off the excess parts of the roll to fit the patterns.
In terms of quality and structure, it does not matter which option will be chosen: all types of wallpaper are glued in the same way. But it is worth considering: when a person performs such a task for the first time, there is a high risk of damage to the material. If you spoil expensive wallpaper, it will be a shame. 
You can choose any options in width. But, if the master is going to work alone, it is better to take thin rolls. Experts consider the optimal width to be 70 cm. You can use options on a non-woven base, which do not require preliminary priming of the walls with glue. This saves you a lot of time.
Wallpaper appeared in the 16th century and is still a popular way. home interior decoration, bringing personality to the living space.
To bring a fresh breath into your interior, you need to approach the issue of wallpapering with knowledge and even a certain skill.
Let's figure it out how to glue the wallpaper correctly.
What wallpaper is better to glue
Non-woven wallpaper(non-woven wallpaper) are more environmentally friendly than vinyl wallpapers. At the same time, when gluing non-woven wallpaper the glue is applied to the wall, whereas when gluing vinyl wallpaper glue is applied to the wallpaper itself.
There are non-woven wallpapers that you can to paint after gluing with water dispersion paints.
When choosing wallpaper, you need to take into account the humidity of the rooms in which you are going to glue the canvas, as well as the condition of the walls.

Vinyl wallpaper can be used in the toilet, bathroom or kitchen. With small dirt, they can be wipe with a damp cloth soaked in a mild detergent solution. For dry rooms, such as a corridor, any type of wallpaper is suitable.
However, there are also expensive non-woven wallpaper, which can also be cleaned with a damp cloth.
If there are irregularities on the walls, then they can be covered. embossed wallpaper, wallpaper with a dense pattern or with a large cell.

As you can see, there are many factors what wallpaper is better to glue, therefore, in each case, you need to approach the issue individually.
Remember that there are several visual patterns of wallpaper patterns:
- If the drawing is in the form of vertical stripes, then visually the room is made high and narrow.
- Large ornaments or transverse stripes give the impression of low ceilings and a wide room.
- Rooms with dark ceilings make them look low.
Light-colored wallpapers give a spacious feeling.
How to glue paper wallpaper

When gluing wallpaper, it is very important to observe all technology. All tools must be cleaned and washed. The brushes must be absolutely clean.
We prepare the surface (walls) for gluing.
Some experts advise, in case of irregularities on the wall, to glue additional wallpaper or newspaper. to smooth out irregularities.
If your surface smooth, then you can safely glue the wallpaper on it.
If residues on the wall are large enough irregularities from paint, old wallpaper and other repair work, additionally align walls. This is done with a pointed object such as a putty knife or sanding paper.

You can use special solution for removing wallpaper. There is also a special steam cleaner for these purposes.
Crevices and large depressions are filled or cemented.
Ideally, you need to plaster the surface to correct gluing of wallpaper.

After that, it is better to saturate the walls special primer, which can be purchased at any hardware store, which will prevent the appearance of mold and mildew in the future. Also, a primer is necessary for good adhesion of the wallpaper to the surface.
After the walls are prepared for gluing, we proceed to the preparation of the wallpaper itself. First, you need to measure the surface to be pasted and roughly calculate how many rolls of wallpaper you need.

The length of the standard wallpaper is 10 m, therefore, each roll will need to be cut into approximately 3-4 pieces (depending on the height of your ceilings).
If you have wallpaper with a pattern, then you need to purchase a canvas with a margin, because you have to cut them to "fit" the drawing correctly.
Wallpaper glue

For each type of wallpaper, you need to choose the right glue. Paper wallpaper is glued universal glue.
For vinyl, embossed and heavy wallpaper use glue for vinyl wallpaper.
Non-woven wallpaper is glued adhesive for non-woven wallpaper.
It should also be noted that if you are going to paint the ceiling, in addition to gluing wallpaper, then it is better to do this first.

Follow precise instructions on a pack of powder or concentrated wallpaper glue when diluted with water. If there is not enough water, then the glue will be too thick and if there is a lot of water, then the glue will become too liquid and as a result, the wallpaper will not stick to the wall.
There are already ready-made adhesives. In this case, you only need to shake up such glue, and it is ready for use.
A few tricks on how to glue wallpaper on walls

Before you start gluing the first sheet, you should hang plumb to the ceiling, to draw an accurate landmark.
Necessarily needed prevent any drafts, therefore we close all windows and doors.
At gluing vinyl (paper) wallpaper It will be more convenient to apply glue on the table, but you can do this manipulation on the floor as well. Apply the glue with a brush or roller in a thick layer so that they can be moved on the wall. Excess glue on the already glued sheet can be squeezed out with a damp sponge.
After you have applied the glue to the wallpaper, you can fold the glued strip in two or three layers and let the glue soak, in the meantime, apply glue to the next canvas. Wallpaper on a paper base should be soaked for 5 minutes, and other types of wallpaper should be soaked for 7-10 minutes (depending on the density of the wallpaper).

It will be much more convenient for you to study adhesive wallpaper with a partner. After all, it is much more convenient when one feeds a roll, and the other, standing on a ladder, glues it, clinging the wallpaper from top to bottom and gently applying it to the joints.
Here's another tip: glue wallpaper from windows to doors on each side of the room so that the joints are less noticeable.
If you have thick wallpaper (no matter what type and material), then glue them end-to-end, and if thin - overlap.

If bubbles remain on the wallpaper that do not squeeze out, then carefully pierce such places with a pin so that the air comes out. Perhaps your wallpaper will have bumps - this is not a problem, because when the wallpaper dries, the bumps will disappear. If the bulges have not disappeared, it follows re-glue such canvases.
After the wallpaper has already been placed on the walls, you need to smooth out the joints with a small roller. If you are dealing with embossed wallpaper, then use a clean cloth instead of a roller, which will exclude damage to the structure of the wallpaper.
Excess edges on the ceiling and curly walls should be cut off with a knife until the glue dries. Over time, glue will harden and accumulate on your knife, so rinse the knife periodically in hot water.

You may face a problem like gluing wallpaper near the radiator. Near the radiator mountings and pipes, you can simply cut the wallpaper and thus glue hard-to-reach places. To glue the canvas behind the radiator, you can use mop, after wrapping a dry and clean material, such as a rag, around it.
Important! When working on wallpapering, be sure to turn off the power supply in the room where the work is being carried out (sockets, switches).
Before gluing the wallpaper, you must remove the housings from the sockets and switches.

Wallpaper can be glued directly to the holes where the electrical wires are located, and after the canvas is dry, done in the place of the electrical wires knife cut crosswise.
First, before repairing, you need to think carefully about everything, decide on the design and interior, for example, it is important to choose the right new wallpaper and make preparatory work. Most importantly, be patient. If you have a budget, it is possible to glue the wallpaper yourself at no additional cost. How to do this correctly, it is possible to find out by studying this detailed method presented to your attention. All that is needed is patience, accuracy, a minimum set of tools and knowledge of some points that will be described below. We will try to thoroughly answer how to properly glue the wallpaper with our own hands and without bubbles :-)
Preparing the walls
In many ways, the quality of wallpapering depends on the initial purpose of the room and the customer's requirements, if the repair is not done for himself. So, if the premises will be used for auxiliary purposes, and there are no requirements for quality at all, then old technologies can be used here. Partially ripping off the old wallpaper, anointed the wall and the sheet, and glued it. But if the repair is carried out in a cultural room or for yourself, then you will not allow to stick the wallpaper anyhow like your own conscience. Then it is necessary to resort to the help of professionals, to hire workers and so on. But if there is no extra money, then it is quite possible to make wallpaper with your own hands. The first step is to prepare the foundations.
It is from the original surface that the quality of finishing work depends. If the wall is uneven, then these irregularities will be clearly visible on the wallpaper. This should be taken into account.
The first step is to properly glue the vinyl wallpaper. This can be done with plaster, putty, etc. After leveling, a surface is recommended. You don't need to do this if the wallpaper is light. For example, paper ones. But today, fiberglass, non-woven or vinyl are increasingly used. They usually belong to the class of heavy wallpaper, so a reliable and very solid base is required under them. Plus, with subsequent repairs, there will be no problems such as chipping of the putty in layers when removing old wallpaper.

If the wallpaper is light, then the same wallpaper glue can be used instead of the primer. Just pre-smearing the wall with it and drying it.
To glue wallpaper for painting with your own hands with high quality, especially for fiberglass, fiberglass or non-woven fabrics, you need a clean and smooth surface without spots and protrusions. Indeed, even after applying several layers of paint, these spots will still show through. Therefore, the surface must be 100% putty. At the same time, it acquires a perfectly white color, becoming an excellent springboard for further work.
So, the surface is prepared and saturated with soil abundantly. We will figure out further how to glue high-quality wallpaper with our own hands.
Self-pasting methods
Throughout the history of mankind, various options for gluing wallpaper have been developed. The choice, of course, of a specific method depends on the availability of a particular tool. Consider the most effective way when even one master can handle this job. But for its successful work, the following tools will be required:

- Stationery or cutting knife with sets of blades. They must be purchased at the rate of 1 package for 1 room.
- A ruler, it is better to use a flexible one in a plastic casing. They were specially invented to perform such work.
- Level. One of the most important tools in any craftsman's arsenal. In early technologies, a plumb line was often used, but due to the inconvenience of using it, it was no longer used. At the same time, the level was still used for horizontal elements, so why not use it for vertical ones.
- Pencil.
- A sponge or cut from clean gauze or any other non-dyeing cloth.
- Glue bucket.
- Roller for applying glue with medium pile.
- Smooth rubber roller narrow for rolling joints.
- Wide, smooth roller for leveling and deflating wallpaper.
- Wallpaper brush, if pasting with delicate materials.
- Roulette.
- Often, experienced craftsmen use a cone-shaped roller for more efficient leveling of wallpaper.
So, having found all the necessary tools and purchasing the required amount of wallpaper, you can get down to business. To glue the wallpaper beautifully, you need to correctly count their number. This can be done according to special tables based on the fact that with a ceiling height of 2.5 m, 4 sheets of canvas are obtained from one roll without selecting a pattern. It will help to correctly calculate the number of wallpapers.
This moment plays an important role, since there may be a shortage of 1 roll at the end of all the work. And the remaining pieces for pasting sections of walls above windows and doors will not be suitable.
How to calculate the required number of wallpapers?
It's actually pretty simple. It is necessary to measure the parameters of the walls of the repaired premises to determine their area. Further, subtract the area occupied by doors and windows from it. Plus add some headroom. And if the wallpaper is with a picture, then it is better to conventionally count 1 tube - 3 sheets. The width of the tubes can be different and is indicated on the packaging, as well as the length.
 We count the number of wallpapers
 In order for the wallpaper gluing technology to be respected, and the canvases do not peel off after a year, you must read in the instructions what kind of glue you need to use. At the same time, it will also be written on its packaging what types of wallpaper it is intended for and how it is bred. This is an important and decisive moment, so you should read the recommendations and instructions.
It must be remembered, if you are too lazy to read the instructions, that 1 package of glue is diluted in 1 bucket of water (10 l). At the same time, it should be cold, and when adding glue, it must be constantly and vigorously stirred. This will allow it to swell well and not form lumps.
Wallpaper gluing procedure
Gluing wallpaper is not something difficult, but nevertheless, certain recommendations must be followed. Stages of wallpapering:
How to paste over the corners
 3D Wallpaper
Wall decoration with wallpaper of various types today is one of the most popular design moves. Such a technology for decorating a room makes it possible to combine ornaments, colors, textures, and also place material on the walls in various variations. Everyone wants their home to be as comfortable and unique as possible. Many design tricks are used to create a pleasant atmosphere in the room. These include the gluing of two types of wallpaper. Before you should decide exactly how you want to see the room after the completion of the renovation, visually or on paper by combining the textures and colors of the wallpaper. In addition to this, you need to decide on the functions and characteristics of the room, think in detail about options for gluing two types of wallpaper, taking into account the dimensions of the room and the features of its layout. There are many ways to combine wall finishes. Today we are going to look at several universal variations. But, before that, we advise you to familiarize yourself with the rules of a spectacular and competent combination of wallpaper.
Rules for competent combination
Neutral, muted color scheme is ideally combined with rich, "concentrated" colors.
- Pasting walls with wallpaper of two types implies a successful combination of abstraction with geometric shapes and textured surfaces with floral patterns.
- Wallpapers of the same quality, which differ in shades and texture, look very good.
- There will be no problems with the choice of edging and a beautiful joining of the canvases if the wallpaper strips are of the same thickness.
- The combination of different wallpapers should speak about the functional purpose of the room, look with the general style of the living space and have "echoes" in the interior.
- If you plan to decorate the room with a wallpaper panel with a rich color scheme, then you should "dilute" it with a material of one tone.
 Pasting walls with wallpaper of two types
 So how do you glue the two types of wallpaper? What is the best way to place them on the walls? Let's take a look at a few versatile options:
- Vertical placement of two types of wallpaper. This combination will look great in a living room or hallway. Usually, for this technique, canvases of different colors and with different ornaments are used, but they are identical in thickness and texture. Allowed two most optimal solutions for the interior: contrast - different colors of the wallpaper and monochrome - wallpaper similar in shades;
- Horizontal pasting allows you to combine material of different thicknesses. For example, the lower part can be decorated with wallpaper in a deep, dark color, and the upper one with light-colored textiles. The "border" between the canvases is drawn with a border. The interior of the bedroom and wallpaper of two types in a horizontal combination is what you need;
- Also, different wallpapers can be glued with inserts, thus, focusing on a certain area of the room. For example, the work area in the kitchen is decorated in one color, and the rest of the space in another; · Patchwork technique - a strict combination of wallpaper. Decorating work begins with gluing "patches", then the rest of the background of the wall is adjusted.
Related Videos
Here are the rough work behind. A more pleasant stage has come - finishing. After repeated shopping trips, the ones I liked were found. The only thing left is to stick them on the walls. It is important to do this without mistakes, so that you can then enjoy the fruits of your work for several years. Today in our review there are detailed instructions on how to glue the wallpaper correctly.
Beautifully and evenly glued wallpapers always change the interior and make it more comfortable
In order to get down to work, in addition to themselves, you will need a number of devices and devices. They will help you complete this process easily and with the best possible result.

What you need:
- Spatula 35 cm wide for trimming excess.
- Painting knife with break-off blades. Better to buy a high-quality one, it will stay sharp longer.
- Rubber roller for wallpaper seam. To work in corners, you need a narrow version.
- Paint roller fleecy. It is needed for applying glue to the surface of wallpaper, walls and ceilings.
- Painting bath. It is useful for evenly distributing the adhesive on the surface of the fleecy roller.
- Dilution tank. A plastic bucket is perfect for these purposes.
- Painting plumb bob with thread. You can build it yourself from a weight and a strong thread. It will help you draw a perfectly straight vertical line on the wall.
- Painting brush. You will need a brush 6 cm wide. With its help, glue is applied to hard-to-reach places, where the roller is missing.
- Roulette. For measuring the cut wallpaper.
- Scissors with long blades. Not every beginner is comfortable using a paint knife to remove excess wallpaper. It is easier to do this with scissors.
- Pressing spatula for wallpaper. If air bubbles accumulate under the glued sheet, they can be easily removed with this tool. It will also be indispensable in hard-to-reach places.
- Stepladder and pencil. The stepladder is clear for what, and a pencil for marking the direction of the wallpaper.
Related article:
If you are thinking about a stylish and elite interior decoration, then we recommend that you look through various wallpapers for walls, a catalog of photo ideas in the publication of our portal, which will help you make the right choice of paintings, and give an apartment or house an unusual look.
Preparatory stage before sticking wallpaper on the wall with your own hands

Before you start gluing yourself, it is important to prepare the surfaces. They should be perfectly flat, without chips or bumps. Even the most imperceptible defects will appear and will be visible to the naked eye. If it is not possible to level the walls, thick wallpaper with a corrugated pattern would be the best option.
How to remove old coating from walls
Wallpaper is often re-glued, making so-called "cosmetics" in the apartment. Children grew up, painting pictures on the walls, the corner near the stove in the kitchen, in the corners, darkened, there can be many reasons, which is why the look of wallpaper loses its color and freshness.

To glue the new ones, you first need to remove the old ones from the walls. You will need a soapy water solution and a spatula. We wet the old wallpaper well with a rag, wait a little and carefully rip it off. If the walls under the old layer are painted. There is a special wash for this.
How to level walls and sand surfaces

Basic principles of wallpapering
Let's consider step by step the basic principles of wallpapering:
- Removing old wallpaper and paint.
- Plastering and wall polishing.
- Primer.
- Purchase the required quantity. Rolls must be with the number of one batch. When purchasing the required number of rolls, do not forget about a 10-30 cm reserve. The larger the drawing, the larger the cut.
- The ideal room temperature is around + 20 ° C.
- Indoor air.
- The room should be free of drafts and direct sunlight.
- With the help of a plumb line, a perfectly straight vertical line is drawn. The whole result of the work will depend on how smoothly the first strip is glued.
- The rolls are cut into the required size pieces with a margin.
- The glue is applied, kept for 5-10 minutes (depending on the type of wallpaper), and after that the wallpaper canvases are pressed against the wall, in the direction from the ceiling.
- The wallpaper pressed against the wall is leveled with a wallpaper trowel in the direction from the center to the edges.
- Paper wallpaper is glued with an overlap, butt-to-end.
- You need to glue the wallpaper from the window on both sides towards the door.
Related article:
Pros and cons of canvases from different materials, criteria for making the right choice, customer reviews, how to glue and paint canvases, advice and recommendations from specialists.
Where to start glueing the wallpaper and how to adjust the picture
You need to start gluing the wallpaper in the direction from the window, gradually moving towards. Thus, the joints between the canvases will be invisible.

If the wallpaper is monochromatic, then it will not be difficult to cut the pieces of canvases correctly. But with the picture, you have to be a little more complicated. To match the picture, you need to cut off the first strip, then combine the next one with it, and so on. You can fold the cut wallpaper. The main thing is not to forget the order.
How to apply glue to wallpaper and glue the wallpaper on flat areas
Note that different glue is used for different types. Which one you need depends on the type of wallpaper. Another trick - it is better to stir the diluted glue with a special construction mixer, then it will turn out to be homogeneous, without lumps.

For even application, we need a fluffy roller of medium width and a paint bath. We distribute the glue on the strip from the center to the edges and wait for the right time for impregnation. This is usually 5-10 minutes. Paper and thin wallpapers are soaked for no more than 5 minutes. Then we fold the strip in half, with the front side inward, avoiding bending, and press the wallpaper from, focusing on the vertical line made with the help of a plumb line.

After the upper half of the strip is pressed, release the second down and also press it against the wall. We remove the formed bubbles with a wallpapering spatula, moving from the center to the edges. If with a relief pattern, we go through with a rag. The excess wallpaper at the ceiling and floor is cut off with a paint spatula and a knife. It is important that it is as sharp as possible, so you need to change the blades as often as possible.
How to glue wallpaper in the corners correctly
Basic steps when pasting an inner corner, which are also suitable for finishing an outer.
| Illustration | Description of action |
 | We prepare two strips along the height of the walls and the pattern - one solid, the second about 10-15 centimeters wide. We apply glue to the wall and strip. |
 | We apply the first full strip of the drawing to the wall. We press the wallpaper well, and cut off the free edge using a paint spatula and a knife. |
 | Note that it is best to glue this strip with a slight overlap at the corner. After that, it needs to be cut along the contour of the corner, even if it is curved. |
 | We glue the second strip to the wall and overlap by an angle of 10-15 mm, press the wallpaper well against the wall with a wallpaper spatula, without going over the edge located on the adjacent wall. |
 | We pass the joint in the corner with a narrow rubber roller. We remove the remnants of the glue. The perfectly glued corner is ready. |
If you have any questions about wallpapering, watch the video below.
How to glue wallpaper near windows, doors and behind the battery
Places near windows, and behind are considered difficult to access, and in order to paste over these areas, you have to contrive. We glue the wallpaper behind the radiator according to the following instructions.
| Illustration | Description of action |
 | We measure the strip from the floor to the windowsill. If it is impossible to remove, then we make cuts in the places where the radiator is attached and the pipe connections are located. We apply glue to the strip for the required time. |
 | We glue the strip behind the battery. |
 | Carefully push the strip behind and press it against the wall. Smooth the canvas with a rag from the center to the edges. |

We glue the wallpaper near the window and doors:
- We prepare strips of the required length along the height of the walls or from ceiling to window and from floor to window with a margin.
- We spread the strips with glue.
- We press the canvas against the wall so that we get an overlap of several centimeters on the door trim and the window slope.
- In the corner where the door casing is located, we make an incision at an angle of 45 °, then cut off all unnecessary, and drive the remaining couple of centimeters with a wallpaper spatula behind the casing.
- In the case of windows, we leave a margin around the slopes of 2-3 cm and press the wallpaper well with a special spatula. After drying, carefully cut off the excess with a painting knife.
How to make seams invisible
Why do gaps appear between the butt-glued canvases? This is most often due to the application of a large amount of glue. The wallpaper gets very wet and may increase in width by several millimeters. When dry, they return to their original size, and a thin gap forms between the canvases. What if this happened? Take an unnecessary piece of wallpaper (which is pasted over the room) and use sandpaper to remove the front layer. Mix the resulting powder with PVA glue. Use this homemade grout to go through the seams. You can also use paint if the wallpaper is plain.

It happens that the seams are visible due to the ingress of glue on the front part. Then you need to use a special liquid to remove glue spots, but if it does not help, it remains to re-glue the wallpaper. If the edges of the wallpaper come off and are bent, use special glue for the joints and once again roll over them well with a roller.
How to properly stick wallpaper of different types
We have covered the basic techniques for gluing wallpaper. But they can be of different types - paper, vinyl, non-woven, photo wallpaper,. There are nuances and peculiarities in working with them that are important to consider. For different types, different glue is used, different time is needed for impregnation after applying the glue, the method of gluing on the wall is different, etc.
How to glue paper wallpaper

Paper wallpapers are good for their breathability, environmental friendliness and price. Therefore, many choose them. Algorithm for gluing:
- We cut the roll into strips with a length equal to the height of the wall, not forgetting in reserve, depending on the pattern.
- Using a plumb line and a ruler, mark the wall.
- We put glue on the wallpaper and wait 5 minutes, it’s not worth it anymore, since the paper wallpaper is soaked quickly and can be damaged.
- We press the canvas against the wall from the ceiling using a wallpaper spatula and smooth it from the center to the edges to remove air bubbles.
How to properly glue paper wallpaper with your own hands is described in detail in the video.
How to properly glue vinyl and non-woven wallpaper

Rolls of vinyl wallpaper are cut in the same way as paper rolls. The following steps are followed:
- The wall is coated with a thin layer of glue, which dries for 15-20 minutes.
- The glue is applied to the strip for 8-10 minutes.
- We press the canvas against the wall from the ceiling with a spatula and smooth it from the center to the edges.
- Vinyl wallpaper is glued end-to-end.
The gluing process for non-woven wallpaper is the same as for vinyl. Only in this case, the glue is applied exclusively to the wall, since the reverse side of the canvas is covered with a special binder polymer. The same technology answers the question of how to properly glue non-woven vinyl wallpaper.
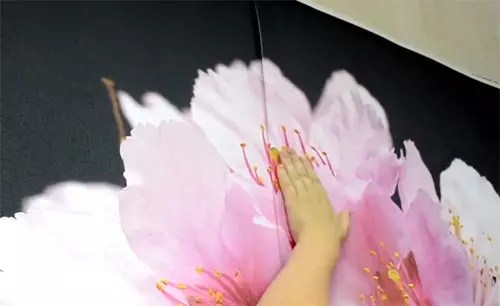
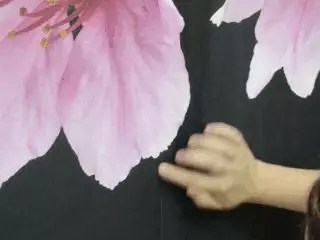
How to glue photomurals
They are very popular in the decoration of apartments and houses. With their help, you can create a unique interior and visually expand the space of the room. What you need to remember when gluing these wallpapers:
- You should use a special glue for photo wallpaper.
- First, lay out the pieces on the floor so that you understand how to properly attach them to the wall for the integrity of the drawing.
- The surface of the walls under the wallpaper should be perfectly flat.
Let's consider how the wallpaper is glued.
| Illustration | Description of action |
 | We apply glue both to the wall and to the first sheet of wallpaper. We fold them in half so that the glue is well saturated, but not more than for a couple of minutes. Expanding. |
 | Carefully smooth out the wallpaper with a rubber spatula. We pass the joints with a rubber roller. In no case do we use various fabric trimmings. |
 | We apply the second part of the wallpaper and carefully, literally up to 1 mm, dock the picture. We smooth everything with a rubber spatula. Please note that many wallpapers are trimmed between the joints. |
 | When the wallpaper is glued, you need to cut through the joint and remove the unnecessary strip. |
 | Once again we look at the joints, trying to fit them as close as possible. We grease with glue and go through with a roller. |
 | Now you need a whole palette of pencils to retouch the drawing. We select the desired color for the drawing, cutting the lead with a blade. |
 | We take the crumbled lead and carefully cover the joints and the resulting scratches with our finger. |
How to glue the right wallpaper, the video below will tell.
Article

