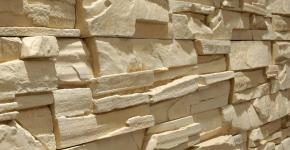
How to plaster walls with your own hands. How to plaster walls with your own hands for a beginner: video and written instructions
Today, most apartments in new buildings are rented without any finishing. For this reason, before wallpapering or painting the walls, it is necessary to level them using plaster mixtures. Which composition is more suitable for this and whether it is possible to prepare it yourself - this is discussed in our article.
Gypsum mixtures - ease of use and affordable price
To begin with, it is necessary to indicate that houses are now built from various materials. It can be brick, foam or aerated concrete, Wall panels etc. It is important to understand that they all have different properties in terms of heat transfer and vapor barrier. Some materials are said to “breathe”, while others block the removal of moisture from the room. For this reason, you need to carefully consider the choice of plaster mixture.
The most common at the moment is gypsum plaster. It gained its popularity due to the fact that it dries quickly and is easy to use. Among famous manufacturers You can name such companies as Knauf-Rotband, Volma Layer, Perel PLAST, etc. Prices for dry gypsum mixtures vary between 300 rubles per bag of 25-30 kg.
As the name implies, the main component of plaster mixtures is gypsum. Auxiliary elements are various additives that give the material elasticity. The powder is diluted with water, after which it retains its properties, as a rule, for no more than an hour, so before starting work it is necessary to mix the amount of material that we can apply in one go.
Important! When preparing the mixture, follow the manufacturer's recommendations, not general rules or “by eye,” as some masters like to do. Compliance with the technology will help not only to prepare a high-quality solution, but also to avoid problems during application and further operation (cracking, smudges, etc.).
The main disadvantage of the gypsum mixture is that it can only be used indoors with normal and low humidity. For bathrooms, for example, it is better not to use gypsum-based plaster, since it can accumulate moisture, which can cause the formation of fungus and mold. The vapor permeability of gypsum plasters depends on the manufacturer.
For example, Rotband does not recommend plastering walls in an apartment if they are built from foam concrete, since they remove moisture from the room through their pores. But Volma Layer is just right for the job. For this reason, it is imperative to read the application information provided on the packaging. Right choice gypsum mixture will ensure comfortable living and quality finishing work.
Cement plasters are a suitable option for interior and exterior decoration
Cement-based dry plaster mixtures are presented on store shelves in large quantities. Depending on the purpose of application, scope of work, conditions of subsequent operation and financial capabilities, you can select the required manufacturer. And today there are a lot of them - Prospectors, Volma, Garant, IVSIL, etc. The average price per bag is about 200 rubles.
Interesting! Although gypsum and cement mixtures differ in price, the cost of the total amount of material spent on the same area will be approximately the same due to the fact that gypsum plaster is more economical to apply.
Prepared cement-based mixtures can be used not only indoors, but also outdoors. This is possible due to its water-repellent properties. In addition to the fact that cement itself is not very hydroscopic, sealing additives, mainly of artificial origin, enhance the water-repellent properties of cement plaster.
Due to its resistance to moisture, cement plaster is recommended for use in bathrooms, bathrooms and kitchens. In addition, it is worth pointing out that cement plaster is very durable, has high adhesion, and its service life can be measured in decades. Cement-based plaster mixtures are resistant to mechanical stress and are used not only for finishing, but also for restoration work.
However, cement plaster is not without its disadvantages. Not every person will be able to work with it, since the application differs from working with gypsum-based analogues. First you need to master the technology and learn how to prepare a solution for each stage - from fairly liquid to thick. Cement plaster is heavy, so its use in a thick layer requires mandatory reinforcement with a metal mesh.
It is worth noting that you can often find self-prepared compositions based on cement and sand, in which ready-made lime is a binding component. Such compositions have the right to life, as evidenced by their many years of use in construction and repair. The advantage of such mixtures for plastering is their low cost - it is enough to purchase cement, and sand and lime can be found for free.

The main disadvantage of working with self-prepared formulations is the difficulty of maintaining the correct proportions. Most finishers prepare solutions “by eye,” which can subsequently lead to cracking of the surface and even crumbling. To obtain a high-quality mixture, you need to pay attention to the shelf life of the cement and the size of the sand fraction (it is better to use the middle one).
Polymer plaster - a new word in finishing
In addition to gypsum and cement mixtures, you can see such material as polymer plaster on the market. This is a special type that is used not for leveling walls, but for decorating them and is applied to an already prepared or leveled surface. It is worth mentioning that using the previously listed compositions it is also possible to produce decorative finishing, but that's a completely different topic.
Polymer plasters have a variety of compositions that help create surfaces of various colors and textures. The coating is applied in a thin layer, and it can be used on bases made of concrete, cement, and plasterboard. The compositions cope well with the influence of atmospheric factors, so they can be used not only inside, but also outside.
Depending on the substance acting as a binding element (acrylic, polyurethane, epoxy resin and etc. ), polymer plasters will be divided into:
- silicone;
- acrylic;
- silicate;
- siloxane.
Plaster compositions based on polymers provide good adhesion to the base and are able to hide minor defects and unevenness. They can be used with fiberglass mesh, which will mask small cracks. Among the main advantages of using the product is its waterproofness, vapor permeability and mechanical resistance. The material can improve the heat and sound insulation of rooms.
Applying plaster does not require special knowledge, and even a beginner can handle the job. The mixture is plastic and fits well on the base. For work they use standard tools: spatulas, graters, etc., so you don’t have to buy special equipment. Among the manufacturers the leaders are: trade marks, such as Ceresit, WallMix, Weber-Vetonit, Osnovit, etc. The cost of the material depends on the form of release and ranges from 400 rubles per bag of 25 kg of dry mixture to 1,500 rubles and more for ready-made compositions of the same weight, packaged in plastic buckets.
Well-plastered walls are the key to successful, high-quality and durable repairs. But plastering work- the process is very labor-intensive, requiring great skill from the one who does it. We advise you to entrust this work to specialists, but if you still decide to take on this matter yourself in order to save your budget or out of curiosity, then our article today will try to instill in you theoretical basis, without which one cannot count on the success of this enterprise. How to properly plaster walls - read in our material today.
The plaster mixture, which will be used for the work, must be selected in accordance with what the walls of the building are built from. Another important factor when choosing is the side of the wall that will be plastered - internal or external.

Concrete walls
First of all, you need to pay attention to the texture of the wall. If the wall is smooth, then it should be pre-treated with a primer that contains quartz inclusions - they will make the surface quite rough, which in turn will help the wall to hold the plaster well. IN cement mortar You can add gypsum powder, it increases the adhesive qualities of the mixture. 
Another option for working with smooth concrete wall is a lime-gypsum solution consisting of ¾ part lime and 1 part gypsum. The process of preparing the solution is as follows: gypsum is added to the water and quickly mixed, then a sufficiently liquid substance is added mortar and all this is mixed to a homogeneous consistency.
With a rough wall the situation is simpler - here you can use standard cement or gypsum solutions, but first the wall should be impregnated with a deep penetration primer - this way the result will be more reliable.
Brick walls
It is better to plaster such walls with mixtures based on cement with the addition of lime, the latter adding moisture-resistant qualities to the solution. The applied layer of plaster should not exceed 30 mm, and if you have chosen a layer from 20 to 30 mm, then you must first attach a chain-link mesh to the wall, which will help hold the plaster mixture.

The mixture must be plastic, and therefore we recommend using a solution consisting of ¾ parts sifted sand and 1 part cement. By mixing the components with water you will get a fairly plastic mixture that easily fits on the wall. When the lime component is included, the solution will look like this: 1 part cement, half lime and 5/7 parts sand. Diluted lime is added to the dry mixture of sand and cement, after which the solution is mixed.

If the plaster is applied to a smooth facing brick, you will have to tinker and pre-treat the wall with a primer, as well as select a reinforcing mesh. Applying plaster to a wall facing bricks It’s better to leave it to professionals; few people succeed in doing this kind of work well the first time.
Wooden walls
If the room you plan to plaster has wooden walls, then before you begin work, you need to lay shingles on them. Thin slats or scraps of plywood are suitable for this; if such elements are not at hand, then you can use the usual chain-link mesh.

The distance between the mesh and the wall must be at least three millimeters, otherwise the plaster may crumble.
Preparatory stage
Required tools and materials
Plastering walls is a labor-intensive process; to implement it you will need the following tools and materials:
- Ready plaster mixture or components for mixing it;
- In order for the walls to come out smooth, we need to be able to track curvatures - we will need 3-6-10 mm beacons;
- Tin scissors or grinder to cut beacons;
- The mixture will have to be stirred; a hammer drill with a special attachment will come in handy here;
- Dowels, many dowels of different sizes;
- The situation is the same with screws;
- Crosshead screwdriver;
- Level;
- Hammer;
- Primer for treating concrete and smooth walls, as well as acrylic primer;
- Wide brush or roller;
- Individual protection means.

Preparing walls for plastering
As always, before moving directly to the plastering process, we need to clean the wall of previous finishes and various deposits. If you set out to plaster the walls with your own hands and skipped this stage, do not be surprised when the plaster begins to slowly and inevitably collapse. If the wall consists of several types of materials, then each section should be cleaned in accordance with the recommendations for a particular surface.

After we have bare walls in front of us, they need to be carefully inspected for cracks. Why plaster walls if not to eliminate cracks? Having seen a crack, we carefully clear it and treat it with a primer. After it dries, the crack should be sealed with putty at the same level as the remaining plane of the wall. Narrow and shallow cracks can be sealed with sealant, but with wide ones you will have to tinker and use polyurethane foam.

Further sequential actions depend on what the walls inside the house are made of. In the case of a brick base, we first remove the previous layer of plaster, if any, and then sand the walls using an iron brush. If necessary, the seams between the bricks are deepened to better adhesion plaster, and the surface of the wall is treated with a primer. 
The concrete wall must be freed from whitewash, and notches should be applied to the cleaned surface or a primer containing quartz sand should be used. After completing these works, run your hand over the surface of the wall - we need to get a rough texture.

Displaying beacons
We need a perfectly flat wall, and therefore we cannot avoid using landmarks. Metal guides are used as beacons, fixed on the wall surface using gypsum mortar.

Levels for beacons should be set at a distance of one and a half meters from each other.

The verticality of the profiles is controlled using a plumb line. After our walls are ready for action and are waiting for the plaster to be applied, we can begin preparing the solution.
Preparation of the solution
Following the rules for plastering walls, we will apply the mortar in three stages, there are no secrets here - we apply the mortar thickly with the first layer, this can be done either manually or with the help of a trowel. Brick and concrete walls should be covered just above the beacons, at a level of about 5 mm. The layer thickness on wooden walls should be about 8-9 mm.
The second layer, the ground layer, has the consistency of dough and should be applied using a 7-8mm thick spatula. The third layer has a creamy consistency and consists of fine sand.

For each of the layers, you can purchase ready-made mixtures, but it can also be produced independently; the main options have already been described above. It must be remembered that solutions have various properties, for example, a solution on gypsum base it must be mixed right before application, since it hardens extremely quickly, and cement-based plaster must be used within an hour from the moment of mixing.
Wall plastering technology
Where to begin? We follow the three steps described in the above instructions for preparing the solution. First, we throw the mortar from the bottom of the wall, gradually rising up. Having reached about a meter in height from the floor level, we level the plaster using the rule; there are other methods, but why reinvent the wheel. 
We already know how to apply the second layer of plaster to the wall - after the first layer has set, we apply the plastic primer composition using a spatula. This layer should hide the still visible guide strips.

At the final stage of wall plastering, we make the wall surface smooth using a finishing layer. This thin layer should not exceed two millimeters in thickness. The third layer should be applied to the still wet second layer; if it has already dried out, it should be moistened.

After finishing layer dry, you need to start grouting using a grater. Using circular movements counterclockwise, level the surface. Putting a soft felt material on the brush, repeat the sanding, and the plastering process is complete!
Any, even the most expensive and high quality finish It will look completely ridiculous on crooked walls. And not any material will “lie” on an unprepared surface. In addition, curved walls cause a lot of problems when arranging or hanging furniture and other interior items. Therefore, the problem of carefully leveling all surfaces to be finished is relevant in the vast majority of cases of renovation in an apartment or house.
And you absolutely cannot do without applying plaster if you have to deal with a “bare wall,” for example, brick or block masonry. Here you have to apply a layer that will become both protective and leveling at the same time. And such cases are all too common both in modern new buildings and when building your own home.
The work of professional plasterers costs a lot. Therefore, many homeowners, wanting to save money, try to perform most of the finishing operations themselves. They need to be prepared for the fact that it may not start working out right away - this operation cannot be called simple, even if one wants to. And all the more important it will be for them to learn in advance how to properly plaster walls, so that they can soberly assess their own capabilities and make a decision in favor of one option or another.
How much work remains?
The owner of the apartment (house) must answer this question in advance. The complexity of its implementation and the amount of materials that will need to be purchased will depend on the assessment of the scale of the work.
- It is necessary to measure the dimensions of the room - this, by the way, will help to draw the diagram on paper. The requirement is optional, but still the graphic image very often becomes an excellent help when a novice master begins to estimate the thickness of future plaster layers on each wall.

- The initial parameters will be the lengths of the sides of all walls. In a rectangular room, ideally, opposite walls should be the same, but, alas, this does not always happen. Measuring and comparing the diagonals immediately shows how distorted the correct configuration of the room is - the diagonals of a rectangle must be strictly equal.
- The height of the walls is measured - this will allow you to determine the area of each of them. Naturally, window and door openings should be subtracted from this area. Based on the known area values, it will be possible to estimate how much material will be required for plastering.
To help those who have problems determining surface area.
Walls are not always rectangular in shape, and determining the area of more complex shapes can sometimes become difficult. For example, when finishing attic rooms, areas in the form of trapezoids or even non-rectangular triangles are often encountered. There may also be more complex ones, for example, arched configurations. Various cases are discussed in detail in a special publication dedicated to.
- It is clear that the task of plastering the walls in any case will be to bring them to a vertical plane. Using a long rule and a building level, you should immediately assess how much the wall plane differs from the required vertical one. To do this, the rule is pressed against the point most protruding towards the room. These readings (direction of deviation and its magnitude) can also be plotted on the diagram with symbols that are understandable to you. In the illustration above, they are indicated by blue arrows as an example. That is, the distance from the vertical line to the wall surface is measured, for example, using a ruler or square.

If you don’t have a long rule for the entire height of the wall, then you can hang the plane with a regular plumb line. After hanging it, the distances from the wall surface to the thread at the maximum and minimum points are measured, compared, and their difference shows the magnitude of the level difference.
Plaster prices
plaster

The obtained difference values will also be useful for conducting preliminarycalculations required quantity materials for plastering.
- It was already mentioned above that the shape of the room may differ from a rectangle. Plastering can also eliminate such a drawback, if this is fundamentally important for the owners. Knowing the values of the measured diagonals and lengths of the sides of the room, it is easy to make a drawing diagram and try to fit a rectangle into it, assessing how much the thickness of the walls will have to be increased in different areas.

At the same time, they try to choose as a starting line the wall on which there is a doorway - the width of the walls of this opening (slopes) after plastering should be the same on both sides, otherwise it will look extremely unsightly. And if you start such an alignment from an arbitrary wall, then just at the level of the doors (or, in a variation, a window opening) a very significant distortion may well appear.
When choosing this alignment path, it must be borne in mind that it must be justified by practical considerations. It should be correctly understood that every extra centimeter of thickness of the plaster layer results in tens of kilograms of solution and a significant complication of the work. In addition, the area of the room is reduced. So it is often wiser to draw the walls exactly vertically and put up with small deviations from the rectangular shape of the room, which will not be particularly noticeable, rather than to bring them to the ideal. However, it is up to the owners to decide. The diagram drawn up should help them make such a decision.
How to plaster walls
Today, consumers are offered a very wide range of different compositions for plastering walls. They differ in the basic component and, accordingly, in the scope of application.
- Gypsum-based plasters (which often contain polymer additives) are the most popular when leveling walls indoors. They are very easy to use, have high plasticity, and provide a high-quality surface for further finishing.
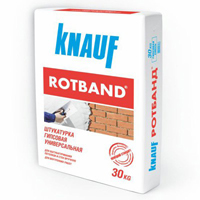
 "Knauf Rotband" is a typical example of high-quality gypsum plaster for interior use
 The disadvantage of such plasters is their instability to high humidity, due to the characteristics of gypsum. That is, they are suitable only for interior work and only for rooms with normal humidity. Sometimes, however, reservations are made that their use in bathrooms and kitchens is acceptable if a continuous coating is intended ceramic tiles with careful sealing of seams. But this is still a rather risky option - due to the fact that tile adhesives usually have a cement base, “conflicts” are possible.
- For rooms with high humidity and for external works Cement-based plasters are used. They create a reliable basis for any type of subsequent finishing.

True, working with cement plasters is much more difficult, although many of them are enriched special polymer plasticizing additives. Material consumption is also significantly higher. But at the same time the cost cement compositions about a third lower than gypsum.
Prices for Knauf Rotband plaster
plaster "Knauf Rotband"
- Very a good decision is the use of combined cement-gypsum plasters, which combine the advantages of both types listed above. Such compositions are the most universal.

Such compositions are convenient to work with, as they have the plasticity of gypsum mixtures. And, at the same time, the plaster layer easily tolerates conditions of high humidity. And the only drawback is that their acquisition will cost more.
- There are also ready-made formulations for polymer based. But we will not consider them, since their use for internal leveling of walls looks completely unprofitable - their prices are quite “impressive”. And on top of that, most often polymer-based plasters involve some kind of plastering, that is, they are usually used for facade finishing.
The table below shows, as an example, several popular brands of plasters that are well suited for leveling various types walls indoors. Please note that the manufacturer stipulates not only the scope of application, but also permissible thickness layer when applied once - this can also be very important when planning work.
| Image | Name, type of binder | Scope of application | Minimum and maximum thickness of a one-time applied layer, mm |
|---|---|---|---|
 | Gypsum plaster "Knauf Rotband" bags 5 or 30 kg | For leveling ceilings and walls with a solid base made of concrete, brick, including those covered with cement plaster, polystyrene foam, cement-bonded particle boards. It is used in rooms with a normal level of humidity, as well as in kitchens or bathrooms, if a waterproof finish is installed (ceramic tiles with sealed seams). | from 5 to 50 mm, with the possibility of re-application after the first layer has dried. |
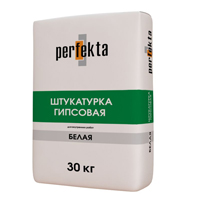
 | Gypsum gray plaster "Perfecta" bags 10 or 30 kg | For plastering walls and ceilings made of concrete, gas and foam concrete, brick, stone and any gypsum surfaces in rooms with normal humidity levels. | from 5 to 50 mm |
 | Plaster white plaster"Verputz" 30 kg bags | For leveling the walls of rooms with normal humidity levels. Apply to any solid base made of concrete, brick, stone, including those covered with old cement or gypsum plaster. | from 5 to 50 mm |
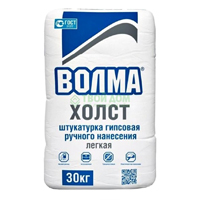 | Gypsum plaster "Volma-Canvas" 30 kg bags | For plastering indoors with normal humidity levels. Apply to any hard surface. | from 5 to 30 mm |
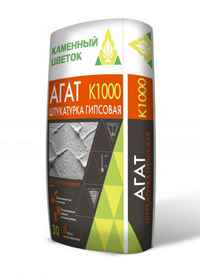 | Gypsum gray plaster “Agat TM Stone Flower” 30 kg bags | from 5 to 30 mm, It is recommended to apply once in a layer of up to 20 mm |
|
 | Gypsum gray plaster “Prospectors” 30 kg bags | For plastering walls and ceilings in rooms with normal humidity on any hard base. | from 5 to 50 mm, locally it is allowed to increase the thickness to 80 mm |
 | Gypsum white plaster "Perfecta" 30 kg bags | For plastering walls and ceilings in rooms with normal humidity. Can be used on all hard substrates made of concrete, brick, stone, aerated concrete and foam concrete. | from 5 to 60 mm |
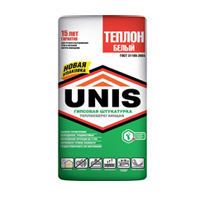 | Gypsum white plaster "Unis-Teplon" 30 kg bags | For plastering walls and ceilings in rooms with moderate humidity on any hard substrate. Has increased thermal insulation properties. | from 5 to 50 mm |
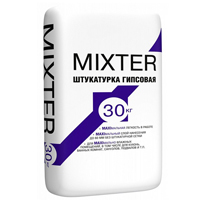 | Gypsum-cement plaster “Prospectors Mixter” 30 kg bags | For plastering in rooms with normal and high humidity levels on all solid concrete bases, cellular concrete, brickwork, including on old cement plaster. | from 5 to 60 mm local application up to 100 mm |
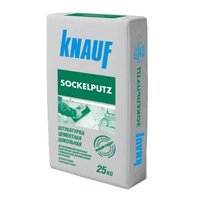 | Base cement plaster “Knauf Sokelputz UP 310” 25 kg bags | For plastering plinths, as well as rooms with high levels of humidity and high dynamic loads. Suitable for use on hard concrete and brick substrates. | from 10 to 35 mm single application in a layer of up to 15 mm. If the total layer thickness is more than 15 mm, galvanized plaster mesh should be used. |
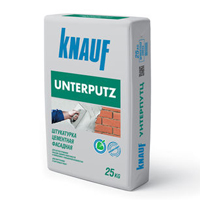 | Leveling cement plaster “Knauf Unterputz UP 210” 25 kg bags | For plastering facades and hard surfaces of concrete and brick in rooms with high humidity. | from 10 to 35 mm with a single application, a layer of up to 20 mm. |
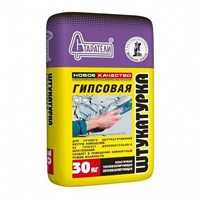
 | Light cement-sand plaster “Starateli” 25 kg bags | For outdoor and internal use. For plastering facades and surfaces in rooms with normal and high humidity. It is used on bases made of concrete, brick, cement plaster, cellular concrete. | from 10 to 20 mm, There is the possibility of repeated application with drying of intermediate layers. |
The cost of mixtures can vary significantly, and not only by specific brands, but also by sales regions - the location of production lines and logistics features affect. So it is better to clarify this parameter specifically by location.
One of the characteristics indicated by the manufacturer is always the estimated mixture consumption. Most often it is expressed in kilograms - it shows how much composition will be used to apply a plaster layer 10 mm thick over an area of 1 m².

This allows you to calculate the volume of material purchases in advance. In this case, of course, one should also take into account possible losses, which due to inexperience can be very significant. So, it would be useful to include a reserve of about 10%, and if plastering will be performed for the first time, then the entire 15%.
One of the most important stages carrying out repair work is plastering the walls of the room. This article will discuss the main types of plaster, rules for mixing solutions, as well as phased implementation procedures for leveling walls.
Modern manufacturers today present on the market a large number of ready-made mixtures having different characteristics and properties. All the differences between them are in the components used, which affect the hardening time of the finished solution, its strength, hardness and service life. Besides ready-made options, which can be purchased at any construction supermarket, you can mix the solution yourself, observing the proportions and using the necessary components.
When choosing a mixture, it is important to consider what surface it will be applied to. Since for concrete, brick, foam concrete and wooden walls, they are used different materials, characterized by adhesion (adhesion to the surface).
Plaster has a wide range of varieties, among which experts distinguish the following types, their basis is:
- limestone;
- cement;
- clay.
Thanks to technical parameters And physical properties, the most popular is cement mixture. Plastering walls with this composition is considered a practical, reliable and inexpensive option.
Cement mortar
This type of finishing materials is divided into two main types:
- cement and sand. It is used to level walls and finish all surfaces except concrete.
- cement and limestone are most optimal for leveling surfaces made of brick, concrete, and ceramics.
Having chosen this finishing material, it is important to decide on the brand of the composition. It is with its help that the correct balance is determined between the binder and fillers, which can be used sawdust, polystyrene, perlite, etc. It is these fillers that are used in warm plaster, which contains cement. This material is new on the market, but is already actively used at facilities as thermal insulation material, with increased quality characteristics and service life.

The choice of brand determines the specificity of the mixture, that is, the scope of its application ( external, internal works; rooms with high humidity levels):
- M 50 - characterized by low strength of the working layer, minimal shrinkage. Most commonly used as a grout material. Proportion (for cement M 400): 1 × 6.3, where the last value is sand.
- M 100 – available for interior finishing work. Proportion: 1×5.
- M 150 – used for external work, as well as for finishing premises, with high level humidity. Proportion: 1×3.
The consumption per 1 m2 of cement mortar is calculated quite simply. To do this, the thickness of the proposed layer is multiplied by the available wall area. It is important to consider that the minimum layer to be applied is 6 mm, it is determined by the depth of the beacon. Wherein maximum amount directly depends on the curvature of the surface.
Preparing the wall for plastering
Plastering walls is a labor-intensive process that requires following the appropriate steps. One of them is preparatory work. They are carried out after laying all the necessary communications and engineering networks.
Stages of preparation:
- Alignment of walls. Initially, it is worth identifying all the depressions, and also checking the vertical evenness of the surface. To eliminate unevenness, mesh or wire (10*10 mm) can be used. To prevent the formation of corrosive processes on its surface, it should first be treated with laitance. Small errors, in the form of cracks and holes, are sealed with cement mortar, after which you need to wait 3 days until it dries completely.
- Cleaning. The old plaster from the wall must be removed, since after applying a new mixture to it, after some time it will lag behind the base and lead to deformation formations. Removal is carried out using a special construction tool, or with a spatula or hammer. All contaminants in the form of dust, dirt, old paint job must also be removed. After this, it is advisable to moisten the wall with water. On surfaces where oil stains are present, a deep cleaning, and the resulting depression is sealed with the mixture.
- Primer – involves protecting the applied plaster from premature drying, that is, it does not allow the base to absorb moisture from the mixture.
- Installation of beacons. The final result of plastering will depend on the accuracy and evenness of their installation.

Surface reinforcement
Plaster mesh is used in cases where the expected layer of plaster exceeds 4 cm. The stainless steel mesh has cells from 1*1 cm, 4*4 cm. Its use eliminates the possibility of swelling and separation of the applied thickened composition from the base, thereby ensuring it has an extra level of durability.

Installation of beacons
When leveling the surface, craftsmen set themselves the task of achieving the maximum level of evenness. Beacon plastering is ideal for this purpose. This work can be done with your own hands, but in this case you need to listen to the recommendations of the masters.
Beacons are metal slats with perforations along the perimeter. Their standard thickness is 6 and 10 mm, and their length is 2.5 or 3 meters. You can purchase such items at finished form, in any hardware store.

To mark the future location, a plumb line and a building level are used to verify compliance with plane and evenness. The width of the step varies, and the distance between elements directly depends on the length of the rule. It is important that its ends fit tightly to the surface. According to accepted international standards, the first and last beacon are installed at a distance of 20 cm from each corner.
How to properly secure a beacon? To do this, you will need a special alabaster solution, which is characterized by a high hardening rate. It is applied pointwise to a predetermined marking line, after which the product is pressed tightly to the base. In some situations, in order to achieve a higher level of adhesion, products are additionally screwed with self-tapping screws.

After installing each element, it is necessary to check their flatness and, if necessary, make appropriate adjustments. Thus, an ideal level of plane is achieved for future application of the mixture. In addition to vertically installed products, there are cases when craftsmen can decide on the need to install horizontal beacons. Basically, this happens when machine plastering is planned.
Applying plaster
Important questions remain how to plaster walls correctly. Actually exist three main types of plastering of rough surfaces:
- simple - applying two layers. It is used in non-residential structures that subsequently do not require additional processing(attics, basements, technical rooms).
- improved – designed for living rooms, involves applying three layers using classical technology. The final result allows for finishing work on decoration with finishing materials.
- high quality - carried out with a predetermined finish. Involves the use of expensive materials that will be applied over markers.

Leveling is carried out by throwing mortar between the beacons using a trowel. The mixture is drawn onto its sharp end or edge, after which it is brought to the wall, and with a sharp swing it is placed on the wall.
As mentioned earlier, plaster is applied in several layers. The basic one is called spraying. To do this, we apply kneading in liquid state, which spreads in a continuous layer over the entire surface. Its thickness does not exceed 5 mm. After the base has dried, it is covered with a second layer, which is considered to be primer. Its consistency is thicker, and makes up the bulk of the entire thickness of the leveling.

After waiting for it to dry completely, you can begin applying the covering. With its help, the maximum level of evenness is achieved. The thickness of the coating reaches a maximum of 2 mm, although it is possible that in some places its application is not necessary.
In situations where markers have not been installed, the solution is named. To do this, you need a falcon, on which plaster is applied in portions. Then it fills the entire space at an angle, at a short distance, with an even layer.
Removing beacons
The need to eliminate beacons is mainly determined by prejudices regarding the formation of corrosion processes on metal and the manifestation of rust. In addition, some believe that untimely removal can lead to the formation of cracks. All these speculations have no basis. If it is possible to eliminate this element, it can be eliminated, but if this is not possible, then it may remain, since modern products are made from stainless steel, which is characterized by resistance to mechanical damage and the influence of humidity.

However, despite this, there is complete confidence that finishing no one can guarantee that any deformations or stains will appear, since the influence of various factors cannot be excluded:
- product quality. To carry out repairs, it is advisable to purchase only certified products, the documents of which indicate the raw materials from which they are made.
- It is possible that rye may form on galvanized beacons, since they have a thin protective layer that can easily be damaged during repair or during the grouting process.
- increased humidity level.
Regarding the formation of cracks, experts are not inclined to believe that lighthouses are involved in their appearance. They can appear both during the process of eliminating them, and if, when installing wall-mounted furniture, the master makes fastening at its location

If, however, the products were removed, the resulting space must be sealed with a gypsum mixture; it has a shorter hardening time. After which you can begin the process of grouting seams and irregularities.
Time for complete drying of the solution
Repair specialists determined the approximate relationship between drying time and layer thickness. On average, a 1 mm layer needs 1 day to dry. If the room or building has ideal drying conditions, then this proportion changes - 2:1.
The selected material plays a significant role in the drying process. Often it is a cement-sand mixture diluted with water. It reaches ideal strength and drying after 28-30 days.
To this process occurred as quickly as possible, the following indicators must be adhered to:
- humidity level – does not exceed 70%;
- internal temperature – up to +20;
- absence of drafts;
- exclusion of ultraviolet radiation;
- frequent ventilation to remove excess moisture.
Carrying out troweling work
Grouting the wall after plastering is final stage. After it is carried out, all defects are eliminated and a perfectly smooth base is formed. The process can be carried out both after drying and when applying plaster.
This stage requires the precision and experience of the master, since it is no longer possible to rely on any marks or guides. All work must be carried out under properly selected lighting, because the result can only be assessed visually. Gypsum lends itself to better grouting due to the viscosity of the components. With cement the situation is a little more complicated, since it can crumble. To neutralize this effect, they resort to adding special substances - plasticizers..

The tools used for grouting deserve special attention. The best option It is considered to be a metal grater. For substances that have not yet hardened, it is worth giving preference to polyurethane-based products. They are quite durable and can be used several times without damaging the plaster itself.
Before grinding, it is advisable to wet the grater, after which you can perform horizontal and vertical movements, aimed at eliminating and smoothing small particles by distributing them evenly over the entire area. At the end of all processes, you can finally apply a primer, which will serve as an excellent binder and form a protective film.
Particular attention should be paid to the corners. To avoid defects in the end, you should initially acquire special corners. Failure to follow this advice may lead to the formation of defects that will be visible in further processing, especially painting.
Decorative grout
In addition to the smooth effect that is necessary for wallpapering and painting, there are options with decorative plasters that have a characteristic pattern. In this case, it will not be possible to use a standard grater, since it can completely remove the formed structure and texture.
However, there is a way out of this situation, and it consists in using special devices, which include sandpaper or grout mesh. These options are an alternative to professional tools designed to hold replaceable abrasive segments.

All work is carried out after complete hardening, thus minimizing the risk of damage to the design. Then, using a brush or brush, remove dust from the recesses and furrows, and treat the entire area with a primer.
Many people theoretically know how to plaster walls, but not everyone can do this work on their own. After all, it has its own requirements and features.
In this article we will look at how walls are plastered and what to consider when performing the work. In the video in this article and photos you can see the most difficult parts of the work.
Before deciding how to plaster walls with your own hands, you need to familiarize yourself with the requirements that undoubtedly exist. After all, plastering work, just like other construction and finishing activities, must meet a number of requirements listed in latest edition SNiP:
- The maximum horizontal deviation per meter of the working surface does not exceed 2 mm, vertical - 3 mm. On a wall area of 4 sq.m, the appearance of two irregularities up to 3 mm deep is acceptable. This applies to satisfactory quality of work;
- For good quality plaster, vertical and horizontal deviations are no more than 2 mm, and there are 2 or less irregularities up to 3 mm per 4 sq.m;
- Plaster work deserves the highest score if it meets the specified quality parameters: horizontal and vertical deviations are 1 mm, existing irregularities in an area of 4 sq.m do not exceed a couple of pieces and go deep by a maximum of 2 mm.
Basic rules for performing plastering work
The choice of method of performing the work is determined by how serious the wall defects are:
- If the slope of the surface, as well as protruding tubercles or depressions are practically invisible, then after applying the solution, it is leveled as a rule without any auxiliary fittings;
- If wall defects are visible to the naked eye, then beacons must be placed before applying the composition. They will be a guide for leveling the surface and determining the thickness of the composition used. The work of applying plaster using only the rules is quite easy to carry out. More questions arise when carrying out construction activities with the installation of beacons.
Rules for conducting plastering work
All work is done in a certain order and must be followed.
Technically, everything looks like this:
| Preparing the plane | This is the first stage. And from him correct execution The quality of the coating will depend. If the preparation is done incorrectly, then you should simply forget about durability and quality. |
| Solution | Here you need to consider where you will plaster. If this is an internal plane, then a lime composition is most often used. If this is an external surface, then it is better to give preference to cement mortar. If you need to make a seam of a certain color, then you won’t find a better dry mixture. It can be almost any color. |
| Application of the solution | Technology is important in this matter. The quality of the plane will depend on it. If the application is done incorrectly, then the material may simply flake off and will not last long. |
Now, let’s look at how best to plaster walls, point by point and in detail.
List of tools, equipment and supplies
Instructions for the rules of plastering begin with the correctly selected tool (see Tools for plastering walls: what you will need for the job). Therefore, we start with this.

Required:
- Plaster mixture of a certain composition of components (the most popular mixture is cement and gypsum based);
- Composition for priming surfaces;
- Roller for applying primer and brush for hard to reach places and corners;
- A trowel or spatula (about 15 cm wide) for applying plaster;
- Beacons (are aluminum guides with perforations);
- Rotary hammer and drill of the appropriate size;
- Dowels and screws to make markings;
- Level for measuring the inclination of planes;
- The rule is a rigid metal or wooden strip up to 2.5 m long;
- Ironing iron;
- Scissors for cutting metal or grinder.
Preparing walls for applying plaster
You saw the preparation in the table. But here we need to analyze this process in more detail.
- First, we need to decide on the application layer. To do this, we stretch the fishing line along the diagonals of the plane, then you can immediately see the required layer. If it is less than 2 cm, then application can be done in one approach. If the layer is larger, then several layers must be applied. If the thickness exceeds 5 cm, then it is better to level the plane using drywall (see Installing drywall on a wall: how to quickly and inexpensively hide all defects).
- Now it is necessary to clean off unnecessary wallpaper, plaster and other coatings that do not adhere well and in the future may lead to the removal of the applied layer of plaster.

- Another necessary step is to increase the adhesive qualities of the wall. If there is a long-term paint coating that is difficult to remove, then a notch is made on it with a spatula. Plaster shingles promote better adhesion of the mortar and wooden walls. If you have an impressive work area, using a sandblasting machine will come in handy.
- When plastering with a thick layer (up to 5 cm), work is carried out to install reinforcing metal mesh. To avoid the appearance and development of corrosion, the mesh is treated with a special anti-corrosion compound.
- For better adhesion of the surface and the working composition, to prevent the formation of mold and fungi, as well as protection from moisture, priming is carried out.

- For surfaces that are sensitive to dampness, have bumps, pores and other defects, use a deep penetration primer. “Betonokontakt” is a composition that will be ideal for processing concrete walls. The work is done with a brush or roller.
Marking and error-free installation of beacons is not only the most difficult stage of finishing work, but also the most important. At this stage, they determine how thick a layer of plaster should be applied, and, in accordance with this, set the levels strictly vertically and horizontally to level the finished mixture.
So:
- First of all, they look for the largest irregularities - tubercles and depressions. To do this, the rule is brought to different sections of the walls. All found defects are marked with a marker. It's practical. In the following, the most noticeable protrusion will be used as a guide.
- After detecting and fixing surface defects, marking is carried out. For these purposes, dowels with self-tapping screws and rope are used. Work is performed sequentially. Only after finishing with one wall do they begin to work on the other. First, tighten the top and bottom screws. The distance from the ceiling and floor should be 15 - 20 cm, and from the corners - about 30 cm. This is explained by the fact that the beacons are shorter than the distance between the floor and the ceiling.
- The segment on which it is planned to place intermediate screws near the floor and ceiling is determined as follows: when working with a rule of approximately 2 - 2.5 m in length, they are placed at a distance of 30 - 40 cm from each other. Start from the corner so that later it will be convenient to level the mixture between the beacons. At this stage, a building level will come in handy; it will help make an even vertical line.
- As a result, 4 self-tapping screws will be installed on the working surface in the corners, plus intermediate ones, located at the places where the vertical lines and horizontal ropes intersect. Using a level and a rule, place the heads of the existing screws within the same plane. This procedure must be approached with all responsibility, since this will determine the level for setting the guides.
- At the next stage, beacon guides are installed and fixed with the finished composition. Its consistency should be such that it does not flow down the wall. Using a spatula or trowel, work surface throw on a little mixture and lower the beacon into it so that it is located in the same plane as the head of the self-tapping screw located on the vertical line of the breakdown. The remaining beacon profile is placed using the same principle. The correct location of each of them is determined building level and the rule.
- After completing the beacon installation procedure, the screws are removed.
How is plastering done?
If repairs are made using a cement-sand mixture, then this recommendation must be taken into account: the thicker the layer required, the larger the sand grains should be contained in the mixture. You can do the work with other mixtures; you can see the proportions for preparing the solution in the photo.

- To prevent the plaster from drying out while the selected area is being finished, it is mixed in small portions. A liquid solution is suitable for forming a thin layer, and a thick one for a denser one.
- To mix the working composition, take a separate container. And using a construction mixer or a special attachment on a drill, the plaster is prepared. First, fill the container 1/3 full with water, and then slowly pour out the special mixture. Only after the solution has become homogeneous can it be applied to the selected area.

- From time to time it is recommended to spray water from a spray bottle onto the surface intended for plastering. This is necessary if there are pores and rough spots, as they absorb liquid from the plaster, causing it to crack and peel.
- Using a spatula or trowel, the resulting composition is spread over the area in the middle of the two beacons. To make the mixture stick better to the wall, make an effort. Areas near the floor and ceiling are treated at the very end. Ideally, the width of the area to which the composition is applied should be greater than the distance between the beacon guides. Thus, the area near the beacons will be filled with plaster.

- Next, using the rule, the plastered area is leveled. The rule is applied with the pointed part to the edges of the guides. It is important to position the tool perpendicularly. If this recommendation is not followed, the excess layer will be removed.

- They begin to level the wall from the floor, gradually moving towards the ceiling, while the tool should move in a zigzag from one side to the other. To prevent the collected composition from drying out, it is immediately thrown onto a higher area. If voids or bubbles form in the layer of the working solution, they must be removed immediately, since in the future, due to the rapid drying of the composition, this defect cannot be eliminated. The selected segment is leveled until excess plaster remains on the rule.
- When finishing with cement mortar, leveling should not take more than 12 hours. During this time, the plaster does not dry completely. If it is necessary to apply two layers or more, it is recommended to wait until the previously applied layer hardens.
- After the cement mortar dries well and becomes hard, they begin to fill the areas located at the top and bottom of the wall with the composition.
- Openings at doors and windows are plastered flush with them, or overlapping.
If the defects in the treated area were very serious and it was necessary to apply a solution more than 50 mm thick, perform the following steps:
- Comply with all previous points;
- Take a break from processing for 3–4 days;
- For better adhesion, notches are applied to the surface;
- Carry out another priming;
- Apply another layer of working solution.
Grouting plaster
The area treated with the rule becomes even and smooth. However, this is not enough to achieve an ideal result. It is necessary to perform a mandatory procedure - grouting.

- A special plaster solution is prepared in advance, its thickness reminiscent of liquid sour cream. Ready-made plaster is applied to the selected area.
- Using a metal iron, the composition is thoroughly rubbed until the surface becomes perfectly smooth. It is recommended to carry out grouting work before the main layer of plaster dries, while it is damp and can be easily processed.
Attention: When leveling the walls in the shower room and subsequent laying tiles, it is not necessary to grout the plaster. This is due to the fact that the adhesion of glue to a rough surface is much better than to a flat and smooth one.
And now, how to dry the walls after plastering, this is done at natural temperatures. Some people also use heating devices, but there is one caveat here: high temperatures The coating may begin to crack, so pay attention to this.
Slopes are classified as complex surfaces. If you have not done plastering, then try doing this work on a flat surface.
- Lime-cement and cement plaster You can purchase it ready-made at hardware stores or make it yourself. Do not use mixture with expired suitability.
- When mixing the solution, always use only drinking water. There are a lot of impurities in process water, which leads to the appearance of a white coating on the plaster.
- To prepare solutions, use only fine sand. The finer it is, the higher the smoothness of the plastered surface.
- If working temperature air below +10 °C, then prepare the solution using Portland cement.
Attention: Concrete and reinforced concrete surfaces can only be plastered 28 days after they are poured.
- Plastering surfaces with any solution can be done only after mandatory priming of the base.
- The primer is applied only 8 hours after spraying, so that the solution sets and dries.
- It must be remembered that beacons made of wood or metal must be removed after smoothing the plaster.
- Where you plan to cover the surface with ceramic tiles, you can simply prime it.
- Do not leave voids under metal profiles.
- Use a corner trowel to smooth out the plaster in the inner corners.
- Walls can be painted or wallpapered two weeks after plastering with gypsum and 28 days after using cement mortars.
If you are wondering how to plaster adobe walls, then this work is done in exactly the same order. Never rush and do everything carefully, the instructions will help you not make mistakes. You can find how to cover walls without plaster with other materials on the pages of our website.