Painting wooden frames: is it possible to paint with your own hands? Painting wooden window frames with your own hands Painting old frames
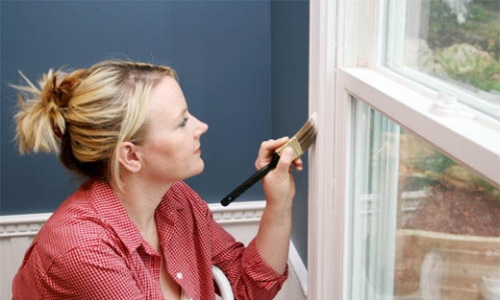
Although many people today put PVC windows in their homes, most people, especially in a wooden house and in old apartments, leave wooden windows. Wooden frames require periodic painting. In order not to repeat this process annually, you should take it responsibly, prepare all materials and tools in advance.
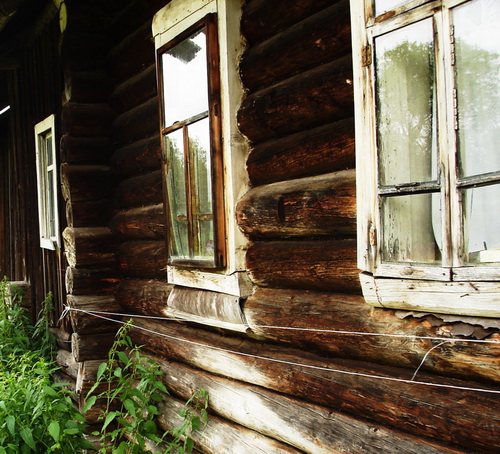
In home repairs, wooden frames are the most labor-intensive section. From the street they are affected by sunlight, rain and snow, and from the room - a higher temperature, compared to the street, dry air, water condensate. In addition, bugs often start in a wooden frame, fungus and mold develop. To avoid any trouble, you need to keep the order of wood processing and paint according to the rules.
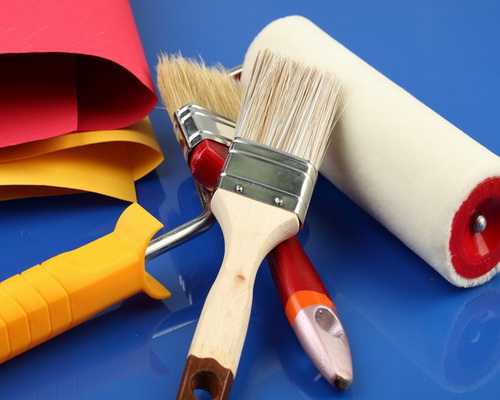
Materials and tools for painting a wooden window
Repair of a wooden frame begins with an inspection of their current condition and the preparation of materials and tools. To paint old windows, we will need the following items at different stages of work:
- Scraper
- Grinder or drill with a special nozzle
- Roller
- brushes
- Putty knife
- Sandpaper with coarse and fine grit
- metal sieve
- masking tape
- Newspapers and film under the window
- Dust cleaning cloth
- Trays for paint
- Primer
- Putty
- White Spirit
- Dye
- Solvent
- Step ladder or stable chair, stool
- Hammer, chisel, screwdriver, nails
Do not forget about the necessary ways to protect yourself from exposure to harmful substances: mask, goggles, gloves, headgear.
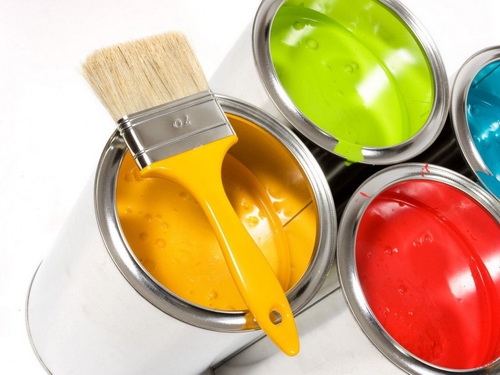
For painting wooden frames from the inside, oil-based alkyd paint is usually used, and from the outside - acrylic, for outdoor work. However, you can use paint for outdoor work on both sides of the frame, but what kind of paint to paint the windows - domestic or imported - depends on the cost of repairs and the owner's preferences.
Preparing for painting
In order for the frames to last longer, you need to choose the right time. Neither the scorching sun nor rain and snow should interfere with us, because the ideal conditions for repairs are a warm spring day without bright sun, when there is little moisture, and ultraviolet is not able to destroy the paint structure. Frames dry well at temperatures above five degrees Celsius and humidity below 80%. If you apply paint on a wet surface, bubbles will appear on it later, and the work will have to be done again. The paint also peels off due to dampness, poor cleaning or an unsuitable primer.

We will prepare wooden frames for painting in several stages.
We remove the old paint. For this work, we use a scraper and sandpaper with a large grain. Let's check how easily the frame closes, if there are problems, we use a grinder or a drill with a special nozzle. BUT you have to be careful! Do not damage the wooden base of the frame!
Today there are special liquids for removing old paint. This greatly speeds up the process of preparing frames for repair. There is Finnish Tikkurila Maalinpoisto, Ukrainian Shostka, Svema. You can find it in car dealerships (it is used for cars). We apply, wait until the paint wrinkles and turns into a curdled substance, clean it with a spatula, and process it with coarse-grained sandpaper.

It is better to remove window fittings (and window sashes too) before painting at all, so that later the window looks neat, if there is something that needs repair, it must be replaced and corrected in advance. If it is problematic to remove handles or locks, you can paste over them with masking tape, protecting them from accidentally getting paint.
We also carefully prepare the glass. If earlier the question of how to paint wooden windows was not before you, seal all the glass with newspapers and masking tape on the sides, stepping back 2 mm from the edge so that the paint gets into these narrow cracks and does not allow water to accumulate here. Experienced craftsmen usually use only tape around the edge of the glass.
Throw away the old glazing beads holding the glass, if possible. New ones are painted separately from the frames (also cleaned, sanded, primed) and ready-made ones are nailed with carnations.
Putty and primer of a wooden window
Let's take a closer look at the wooden frame. We pre-treat all parts that can rust and ruin our repair with an iron primer (these can be stud caps, hinges, etc.).
An antiseptic (for example, linseed oil) is a mandatory part of the preparatory work before painting. This treatment prevents the wood from rotting, the development of fungus and does not allow insects to settle in your home.

Got rid of the old paint and treated the frame with an antiseptic? Now let's take a closer look at the surface of the window. All cracks, pits and potholes must be filled. This should be done gradually, because a thick layer of putty will simply fall off along with fresh paint, and the repair will have to be started all over again.

The putty should be special, for wood, on an acrylic basis, usually it comes in jars of 200 gr. Good alkyd putty Lakkakitti. If we paint the frames, we simply put the putty on the surface, if instead of paint we use a stain, all putty places will be visible through it, therefore, first we tint the putty with a color scheme to match the color of the wood. You can make this finishing material yourself from wood flour (superfine sawdust) and glue or epoxy.
After the first application of putty, we clean the surface with sandpaper, grind and remove dust with a damp cloth. After an hour or two, after it dries, we level the surface with fine-grained sandpaper, remove dust with a rag, once again carefully examine the frame and, if necessary, again apply a thin layer of putty where necessary. The process is repeated until a perfectly flat surface.
The next stage of preparation for painting is a primer. This process provides a reliable coating of wood with paint. By the way, a modern high-quality primer is also an antiseptic. So, Pinotex is good for these purposes. When applied, it forms a transparent protective film, which is very important for preserving the natural pattern of the wood. In addition, it perfectly protects against mold and fungus, does not allow decay processes to develop on the outside of the frame, even with high humidity.
Primers are made up of many components: oils and resins, adhesives and pigments. The recipe of each primer is somewhat different, but the common thing among wood primers is their ability to preserve the structure of wood, therefore metal primer is not used for wooden surfaces.

Before priming, the surfaces are again thoroughly cleaned and degreased with white spirit. It is better to prime with a brush, not a roller. If you do not let the putty dry well or skip the area when priming, after painting a dark spot will appear in this place. Then you will have to clean it again with sandpaper, then prime and paint, so you should not rush before painting.
Several coats of paint on a wooden window
Our window is now smooth and even. Before direct painting, we carefully clean the room, clean the space near the window from dust so that it cannot get on the freshly painted surface.
We choose water-acrylate or alkyd enamel paints for a wooden frame. Their main advantages are moisture resistance, elasticity, resistance to fading under the sun's rays. There are several global brands that produce paint specifically for wooden surfaces. In our country, with changeable weather, rain and frost, Dulux, Remmers, Caparol hold well on window frames, however, at the same time, the question of how much it costs to paint a window is decided by a fairly decent amount. Domestic paint is cheaper. In general, window repair can cost from 500 rubles. up to 10,000 (the last cost includes the services of a hired master finisher).
The paint is thoroughly mixed in a jar, filtered on a metal sieve into a bath. You can do without a sieve, but then small lumps of paint from the can, which turned out to be on the smooth surface of the frame, are not excluded.
The first coat of paint will be much waterier than the next, because its purpose is to soak all the bumps and pores of the wood. To dilute, use a solvent. Allow the paint to dry after brush or roller application. And only after the first layer has completely dried, you can proceed to the second.
Usually the third coat of paint is the finishing one, although sometimes two are already enough if all the preliminary work was carried out in compliance with all the rules. The second and third coats of paint should be thicker than the first to avoid streaks. If they appear, immediately, before drying, remove with a rag with a solvent. If you look at this defect, you will later have to clean the surface again and paint again.

We do not dip the brush into the paint entirely, only half, leave the excess paint in the bath, brushing along the edge with a brush. We start painting from the outside of the window. It is advisable to have several brushes: small ones for hard-to-reach places, large ones for flat surfaces. The width of the brush can be 3cm - flute, and wider - 4-5cm. In shape, a flat brush is much preferable to a round one.
The paint lays down well along the wood fibers. We paint over the corners with light, short brush strokes.
Tape and newsprint should be removed from the glass before the paint dries, because the paint layer can be damaged later.
Accessories, if removed in advance, are installed after the frame has completely dried.
If you have been thinking about how to paint a window - on your own or hire a master - after our instructions, all questions and doubts will disappear. Good luck with your repair!
An old bicycle can serve faithfully for many years, but its visual appeal often suffers. The paint on the frame, wings, steering wheel begins to crack and peel off, especially with intensive use. The latest paint and varnish materials allow you to update the product yourself without unnecessary time and financial costs. Before you paint the bike, you need to properly remove and prepare the parts, and only then proceed to the main work.
Bicycle frame painting
With frequent trips, the "iron horse" invariably loses its external gloss. Its coating becomes dull, a network of small scratches, cracks, chips appears, some parts rust. All these troubles affect not only the aesthetic component. Metal pipes and plates on which the paint has peeled off serve an order of magnitude less. In order not to throw away the old bike later, it is necessary to resort to its full or partial renewal immediately after defects are detected.
Is it worth painting a frame from a balloon
Bicycle frame paint must be selected with the utmost care and caution. Quite often, cyclists prefer to use paint spray cans, which are very convenient to use and allow you to beautifully paint parts in a matter of minutes. Immediately after application, the paintwork material shines, shimmers with an attractive gloss and looks like a new thing.
Unfortunately, unsuitable compounds do not adhere well to the frame, they can quickly scratch even at the slightest touch. According to professionals, cans should not be used, except for partial tinting of defects. After a month of riding, the bike will lose its gloss and will again require repair. However, for a partial update, this method is quite suitable.
Powder coating of a bicycle
The powder method is ideal for painting bicycle frames. It is commonly used in the manufacture of bicycles because it provides the strongest, most even and smooth finish. Painting a product at home with powder paint is an unrealistic task, because this requires special equipment. If you want to update the details of the vehicle reliably and for a long time, it is better to contact the workshops where this type of staining is practiced. The bike will turn out like new, but the price of painting will be quite high.
What paint to choose for a bike
To paint a bicycle with your own hands, you need to choose a quality paint. Acrylic paints and varnishes, which are marked "for metal", have proven themselves best. They have a high degree of adhesion, are easily applied with a brush, spray, have no unpleasant odor, and are non-toxic. Nevertheless, nitro paints are distinguished by better hiding power and faster drying, but they contain solvents, so they must be handled with strict observance of safety measures. Usually, only 250-300 ml of paint and varnish is enough to update the bike.
What color to paint the vehicle, the owner will have to decide. With high-quality surface preparation and complete removal of the remnants of the old paint, you can radically change the shade of the details, it's just the artistic taste of the owner. You can also take into account current fashion trends and use the most popular shades of the season. Many use special reflective paints for full coloring or partial decoration of the bike. Pros give advice: since the frame of the product is quite thin, it is better to use the brightest colors for it so that it is more noticeable. If you don’t want to use monochromatic coatings, you can use stencils or even apply exclusive drawings using an airbrush.
Tools and materials
Depending on the model of the bike and the amount of work, a different set of accessories and consumables may be required. It usually includes:
- wrenches, screwdrivers for vehicle dismantling;
- remover for old paint;
- iron scraper;
- stationery knife for removing stickers, logos;
- sandpaper of varying degrees of graininess;
- degreaser (acetone, white spirit);
- primer;
- putty;
- brushes or spray (pneumatic gun);
- bicycle paint;
- varnish for metal;
- gloves;
- respirator;
- rags;
- wire or rope (for hanging and drying the frame);
- construction tape, stencils (for complex coloring options).
How to paint a bike at home
In order to carry out the whole range of work on painting a vehicle at home, you must first prepare it with high quality, and then proceed to the main stage. Work should be done outdoors in the shade or in a well-ventilated area.
Dismantling the bike and preparing the frame
It is mandatory to paint the bicycle frame, because it is it that determines the main color of the equipment. It is also often necessary to update the rims, fork, trunk. Therefore, first of all, the bike is disassembled, acting in this way:
- remove all canopies - shock absorbers, brakes and others;
- remove the front wheel and fender, if any;
- unscrew the steering wheel from the fork;
- take out the trunk;
- dismantle the rear wheel and fender.
Impressive chips will have to be sealed with putty. If it does not hold well, cold welding is used. The finished base is degreased with any solvent. Removing grease stains is an important procedure that cannot be ignored, because oils reduce the adhesion of the primer and paint to the metal, so in the future the paintwork will quickly fall off.
Priming surfaces for painting
In order for the paint to adhere perfectly to the surface, to lay down evenly, a primer must be applied. The material can be sold in liquid and dry form, the latter is diluted according to the manufacturer's instructions. The consistency of the primer for metal should be quite thick: with proper dilution, it flows smoothly from the brush. The thickened mass is diluted with a solvent.
The cleaned frame, other parts are primed. The product is applied in a thin layer, allowed to dry for 20 minutes, repeat the procedure 2-3 more times. After that, the bike is left for final drying for a day (this can be done by hanging the parts on a wire). The next day, they take sandpaper-zero, carefully sand the base. It is necessary to act in such a way as to remove streaks, thickening places and make the metal perfectly smooth, but not tear off the primer layer.
Painting process
Experts recommend making the first coat of paint white. This will help to enhance the brightness of the main tone. However, the use of white is not mandatory. The paint is applied with a brush or spray gun in several layers with intermediate drying for 30-40 minutes. The surface should eventually become smooth, uniform.
If the work is done with a brush, do it with small alternating strokes to prevent smudges. After the part is hung or carefully placed on a newspaper, cellophane. Before varnishing, careful polishing is done with sandpaper with zero grit.
If desired, patterns, inscriptions, symbols can be applied to the details of the bicycle. Stencils made from a thin sheet of rubber, a durable film, are glued onto an already painted frame using masking tape. The inside of the stencil is painted over with a brush or filled with paint in a contrasting shade from a can. After the paint has set, the stencils are removed.
Frame varnishing
For long-term preservation of color brightness, protection against fading, it is necessary to varnish the base in several layers. It is desirable to perform at least three coatings: the first will be a primer, the second - fixing, the third - the main one. The pieces are then allowed to dry completely. It is recommended to start using the bike a week or later after painting.
Bike wheel and trunk upgrade
If the vehicle is disassembled, in addition to the frame, other elements can be painted with high quality. Beautifully designed rims and trunk will make the bike even more attractive. The sequence of actions will be as follows:
- disassemble the wheels, remove the tires;
- remove dirt, rinse, dry the elements;
- clean up chips, scratches;
- make degreasing parts;
- wrap the edges of the spokes that are adjacent to the rims with film or masking tape (this will prevent paint from getting on them);
- hang on a thin wire;
- sand, primed for 2 layers;
- make 3 passes of paint with a spray can.
It is not more difficult to paint a bicycle trunk, the procedure will be the same. The easiest way is to spray paint from a can in small portions, in several steps. If in some area the paintwork has collected drops, you need to blot it with thin paper or a napkin.
How to paint a bike without dismantling
It happens that there is no time or desire to disassemble the bike. It can be painted in a simpler way - without unscrewing the parts. It is only important to devote more time to problem areas - feathers, rear wheels, gaps between the rims and the front fork.
Before work, it is necessary to rinse and dry the bike, degrease individual elements. Release the brake cables (it is better to remove them, like chains, holders). Wrap all mechanisms, bushings, knitting needles with masking tape. Put the bike straight or hang it, apply a primer on the frame, wheels, etc. After drying 2-3 layers of primer, spray the paint. Grease unpainted places with a thin brush. Such a procedure will be even faster and easier, it will seriously save time and budget, allowing you to upgrade your bike with a minimum of costs!
Every day, the balcony window is affected by various factors, both from the outside and from the inside. Naturally, in order for it to serve as long as possible and at the same time retain its proper appearance, it is necessary to provide reliable protection. And painting wooden frames will prevent premature deterioration of the quality of the window.
For reference!
Window frames are usually repainted every year or two, as the outer layer of paint can begin to crack during this time.
Paint selection
- The penetration of moisture into the inside of a wooden frame can sometimes lead to irreversible processes: putrefaction, mold and even destruction, which, of course, can harm both your health and your budget. Therefore, when choosing paints and varnishes, one should give preference to moisture resistant ones.
- Another important requirement that is placed on the coloring materials for window frames is their elasticity. Only then the coloring layer will remain intact in the process of deformations typical for wood - shrinkage and swelling.
For reference!
When choosing a paint, mainly focus on two parameters: the type of wood from which the frame is made, and the climate in the area.
- For mild climates, oil paint is the best solution.
- Old wooden window frames are painted using glossy enamel, which is weather resistant. It is suitable not only for outdoor work, but also for indoor, that is, it can be considered a universal material.
- "Weak" wood species, which are unstable to the effects of the atmosphere, are additionally protected by a layer of varnish.
- Painting wooden frames with alkyd paint protects the wood from the damaging effects of sudden fluctuations in temperature, moisture, and more. Such a coating is elastic and durable, has high decorative characteristics, is unpretentious in maintenance - it can be simply washed using almost any detergent composition.
- To paint the surface of salaries on the outside and on the inside, you can use different compositions. For example, alkyd paint is suitable for interior painting, acrylic paint for exterior.
The rules for choosing a paint color are quite simple:
- light is suitable for window systems on the sunny side, then it will not absorb the rays of the sun, but, on the contrary, reflect, and the frame will not dry out for a long time;
- facing the shady side can be painted in dark colors.
Technology for painting wooden windows

The process of painting wooden windows depends on their condition, but one way or another, the window must first be prepared.
Preparatory work
The most convenient time for painting frames is a spring day without precipitation, when it is warm outside and the sun does not shine too brightly.
In the process of preparatory work during the restoration, the existing layer of paint is removed, then all defects are repaired.
Cleaning methods

Three methods are used to remove old paint from frames.
- Thermal. For cleaning use a building hair dryer. Under the influence of temperature, this layer softens, after which it can be immediately removed with a spatula or even just a kitchen knife. The temperature of the hair dryer must be controlled, otherwise the material may overheat and begin to smoke.
For reference!
- Chemical. An aggressive remover can be used to remove the old coating. This method is considered the least laborious. The wash is applied to the old layer of paint with a brush. After a while it starts to dissolve. The paint may also turn into a jelly-like mass. One way or another, it is cleaned off with a steel spatula. Sometimes the process has to be repeated until the window is completely cleared.
Do not forget that aggressive compounds are dangerous for the skin, so when working with them, you need to take safety measures: wear rubber gloves, and protect your eyes with goggles.
To make cleaning more convenient, you first need to remove the locks and handles, remove the glass.

- Mechanical. This is the most time-consuming method, but it is suitable for processing any paint and varnish coatings. The paint is cleaned manually or using an electric tool, for example, a grinder or a drill with special nozzles in the form of wire brushes (brushes). The manual method is more suitable for performing a small amount of work. Scratches left after using scrapers, cycles or other tools are cleaned with emery.
For reference!
Wooden frames must be degreased before painting, as the presence of grease on their surface impairs the adhesion of the paint. That is why the entire surface to be finished must be thoroughly cleaned with a solvent.
Repair of chips and cracks

After cleaning, defects are usually found on the surface of wooden frames. To seal them, an acrylic-based putty is used, designed for outdoor work. The composition is applied in a thin layer in several approaches. If a transparent finish is expected, then the putty should either match the shade of the wood or tint it with color.
For reference!
The putty mixture can be made independently. Epoxy glue and small sawdust are suitable for this.
Surface grinding

Grinding in the process of preparatory work is resorted to several times:
- wooden frames are completely processed after complete cleaning of the old paint layer;
- in the process of puttying, each layer is processed, after which the entire surface of the wooden frame is cleaned;
- grind a fine pile, which rises after applying an antiseptic to a tree.
For reference!
The wooden surface, as a rule, is sanded twice: first with a coarse-grained sandpaper, after which the surface is “finished” with fine sandpaper.
Primer application
Priming compositions, which impregnate the frames, protect the wooden frames from rotting. In addition, paint consumption is reduced, and its adhesion to the surface is also improved. The primer is applied using a brush. The liquid is thoroughly triturated in the direction of the fibers.
After completion of the preparatory work, the surface of the wooden frame becomes smooth and even.
Window frame painting technique

Before painting, the room is thoroughly cleaned, as dirt or dust can settle on the freshly painted surface.
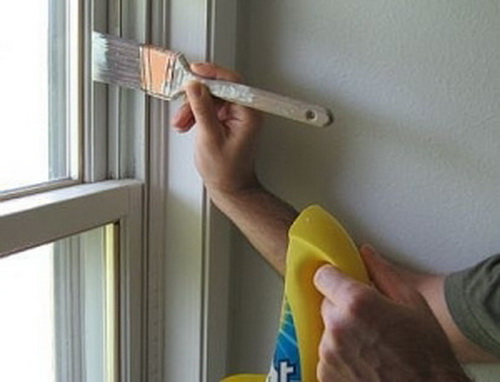
Even for professionals, it is sometimes difficult to accurately paint over window frames without staining the glass. Therefore, they recommend the use of painting cattle. It is carefully glued around the perimeter of the wooden frame on the glass butt-to-the-wall with their surface. Glass is treated in the same way on the other side. Staining, as a rule, starts from the outer surface, then moves to the inner. In this case, depending on the characteristics of the surface to be painted, several brushes are used. For example, wide ones are more suitable for even areas, small ones for hard-to-reach areas. At the corners, the paint is applied with short, light strokes.

The masking tape laid around the perimeter must be removed until the paint is completely dry, since it will be difficult to do this later.
You can completely protect the glass surface from paint ingress with a soap solution. Before painting, the glass is covered with thick foam. As soon as it dries, you can start painting, and at the end the foam is simply washed off with plain water.
The technology of painting windows involves applying paint in two layers.
- The paint for the first layer should be thinner so that it penetrates the wood better. It is applied with progressive movements from top to bottom. The corners are especially carefully painted over, otherwise white spots may appear on the finished surface.
- After waiting for the paint to dry completely, proceed to the application of the second layer. It is very important that the coating does not run, so it should be thicker than when applying the first.
- If, when painting frames, the coloring composition got on the glass, then it is easiest to clean it with a knife or blade after it has completely solidified. This must be done carefully so as not to scratch the glass.
Windows are the "eyes" of a house. Now most buildings seem to be impersonal due to the fact that typical PVC double-glazed windows are used everywhere. However, there are those who, despite the fashion and practicality of modern technologies, still prefer a wooden structure, because its environmental and aesthetic advantages are undeniable.
In order for wooden frames to last longer, it is necessary to reliably protect them from the influence of sunlight and dampness, as well as various insects and their larvae. To complete all these tasks, painting a wooden window is called upon. In addition, such processing will preserve the appearance for a long time, however, provided that it was carried out correctly and in a timely manner. We will tell you how to paint and protect new wooden windows, as well as restore old ones if possible.
What tools will be required?
The simplest set is required when painting a new window. For the old design, the list is noticeably expanding. From the tools, prepare in advance a spatula, a scraper, a drill with a special nozzle or a grinder, a roller and brushes, sandpaper (fine and coarse), a metal sieve, a paint container, a stable chair, a stool or a stepladder, well, rags, and newspapers.
Next on the list are consumables. As a matter of fact, this is how to paint wooden windows and process them before that: putty, primer, paint, thinner, white spirit. Do not neglect protective equipment, such as a mask, goggles, a respirator, a hat and gloves.
What paint to choose for windows?

Even a professional cannot unequivocally answer the question of which paint to choose for painting windows. The preferences of each owner of a wooden structure are different. Someone for tradition and white color, others for the naturalness and natural structure of wood. The modern construction market offers a very rich choice:
- alkyd enamel;
- acrylic (water-dispersed) paint;
- clear nail polish;
- Oil paint;
- primers and drying oil;
- solvent-based stain.
If preference is given to the natural color of wood, then experts recommend using special varnishes, azures and impregnations for coloring and protection. They perfectly penetrate the tree, form a water-repellent layer and prevent the penetration of rot and mold, and also protect against pests.
For interior work, it is preferable to use acrylic paint, which is practically odorless and dries quickly (literally in a couple of hours). Outside, the design is best handled. But the question of what paint is better to paint wooden windows, imported or domestic, is a purely personal matter of each owner, his preferences and financial capabilities.
Step 1: Removing Old Paint from the Window Frame

If they are new from wood, then painting them is not particularly difficult. The situation is much more serious with old windows, which have already been repeatedly applied paint. Before carrying out a new processing, they should be carefully prepared. Peeling paint is best removed completely. And the better it is done, the more attractive the end result will be.
Old paint from windows can be removed using special compounds that soften the layers, gradually turning them into a curdled mass, easily removed with a scraper or spatula. However, it should be remembered that such products are quite toxic, and therefore gloves, goggles and a respirator should be used when working with it.
You can use a building hair dryer when treating old windows, which will soften the old paint with hot air. Then it will be easy to remove it with a scraper. Remove the old coating in stages, warming up only small areas. Before the procedure, it is desirable to remove the glass from the frames.
If the coating is not badly worn out under the influence of atmospheric factors, you can get by with small preparatory measures and not remove it completely. However, before painting wooden windows using old paint, in any case, they should be carefully sanded and then cleaned of dust, and the irregularities should be treated with putty.
Step 2: sealing cracks and cracks

Wooden products have one significant drawback - this is cracking when dried. On window frames, quite often you can find both small and rather deep cracks. Therefore, before painting, be sure to inspect the structure, including the joints of the window block with the wall. Cracks are where dirt and moisture accumulate. Thoroughly clean them from accumulated dust with a brush or vacuum cleaner, dry and fill with a special putty. After the composition has dried, sand the entire wooden surface with coarse sandpaper. Otherwise, after painting, uneven areas on the frame will be very noticeable.
Step 3: Coating the window frame with a primer
Before painting the wooden frame of the window, it is necessary to prime it. This is done not only in the case of a new design, but also when stripping the old one to the very tree. If this is not done, the paint will not hold well and in less than a year, it will have to be put in order again. The application of a primer promotes better adhesion of the paint to the surface, reduces its consumption. After using it, the wood fibers may rise slightly, so experts advise sanding the window frame again with fine-grained sandpaper. This should always be done in the direction of fiber growth.
The choice of primer depends directly on what kind of paint will be used in the future.
Step 4: the final stage of preparation before painting
The process of preparing wooden windows for painting ends with an inspection of the structure. Carefully inspect it for traces of resin. This is especially true if the frame is new and/or made from softwood. Resinous secretions should be carefully removed, as the acid present in their composition will gradually destroy the paint layer. Next, the surface of the wood must be degreased. Which composition should be used for these purposes depends on It must be compatible with it. So, since ancient times, turpentine has been used complete with oil paint. Its residues on the surface did not in any way affect the quality of the painting. White spirit or simple kerosene, gasoline is popular.
Step 5: protect the glass surface of the window

As practice shows, even the most experienced craftsmen easily touch structures with a brush. Therefore, it will be better if you protect it with a special masking tape. The process will not take much time, but the painting of a wooden window will be much faster, and the coating will turn out without smudges, smooth and neat.
Keep in mind that you should remove from the glass surface before the paint on the window frame dries. Otherwise, there is a risk of tearing off part of the paintwork along with it.
Step 6: paint and brushes
Whatever composition you choose for painting a wooden window, you should first mix it well right in the jar. Then the paint must be filtered through a metal sieve into a special bath or other container. This step will save you from lumps that may later get on the surface to be painted.
Don't dip the brush all the way into the paint, it's best to do it half way. The excess should remain in the bath or jar. To do this, brush gently along the edge of the container. A large amount of paint is completely useless, so you only contribute to the formation of smudges.

Prepare several types of brushes in advance. For the most inaccessible places, those that are smaller are suitable, for a flat surface - large ones or a roller. A flat brush is much more preferable than a round one.
Step 7: Apply paint to the surface
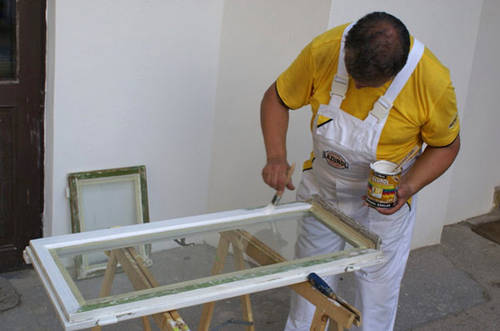
So, having learned how to prepare the surface before painting wooden windows from the outside and inside and having completed this stage, you can safely proceed to the main work.
It is best to paint a window from the inside out. You should open the frame and initially process the internal surfaces, primarily horizontal ones. Then move from bottom to top. If there are curly elements on the frame, it is better to start with them, using a narrow brush. For even surfaces, use a roller, because with its help the paint lays down much more evenly. Apply it in several layers (2-3). Do not try to close all dents, gaps and cracks with one stroke. A thick layer of paint will certainly begin to spread, sagging will appear and, in general, the work may be spoiled.
Apply a thin first layer and let it dry. The waiting time depends on the weather and humidity. When the surface is ready, apply a second coat of paint. As a rule, this is enough. In the case of old windows, a third coat may be necessary, as dry wood absorbs paint heavily.
When is the best time to paint windows?

The question of what weather is best for painting windows is far from being idle, as it might seem at first glance. Experts always pay attention to this aspect. They advise to carry out work on a cloudy spring day, when it is already warm, but there is still little moisture in the air, and ultraviolet does not have a damaging effect on the paint. Window frames dry best at temperatures above +5°C and humidity no more than 80%. Avoid rainy weather. Drops of water on the surface to which the paint is applied lead to further "bubble" of the coating. It not only spoils the aesthetic appearance, but also contributes to the rapid destruction. In addition, when painting a wooden window, the coating may peel off due to dampness, poor primer, or poor pre-cleaning of the surface.
Windows with wooden frames are a wonderful choice for those who appreciate the classics and care about maintaining a cozy climate in their home. Over time, the tree loses its presentable appearance, so it needs to be restored in time.
With new high quality windows, troubles do not arise - painting them is not a problem. But restoring old wood frames with a shabby appearance is sometimes difficult. So how do you paint an old wooden window?
Preparation before painting
So, there is a middle-aged wooden window slightly spoiled by time. In no case should you start painting it with raw paint from a can, as many do. This can only be done in one case - if the frame has just been purchased and is of excellent quality. But even here you can not do without a primer.
Before painting, the old window needs to be thoroughly prepared, and for this it is necessary to assess its condition:
- conduct a detailed diagnosis of all sides of the window frame;
- evaluate the tightness of the glass to the glazing beads;
- check the presence and condition of the old paint layer.
Preparing the window for painting is a must. Ignoring this point, you can only spoil the product, and waste time in vain. After a thorough diagnosis, the frame should be removed from all defects that have been found. If there are rotten places, they need to be scraped off with a sharp metal object, for example, a knife. Old paint, if it does not adhere well or bubbles, also needs to be removed. For a better do-it-yourself window renovation, it is better to completely clean the frame of old paint with a special solvent and a knife.

After removing damaged areas of wood, bumps and pits often appear on the window frame. Grinding with coarse sandpaper, followed by applying putty, will help fix the problem. At the same time, in this way, you can fill the cracks that appear as a result of the drying of the tree. The preparation of the window for painting does not end there. Once the layer of putty has dried, it can be polished with fine sandpaper. It remains only to cover the frame with a layer of ground enamel. You can’t do without it, since the paint applied immediately to the tree does not hold well, swells and peels off ahead of time.
If the preparatory work is completed, and the window frame has a flat, smooth surface, you can proceed to painting the old wooden window.
Applying paint to the frame
To make it easier to apply the paint, it should be diluted with a solvent. The choice of thinning fluid depends on the composition of the protective coating. This can be easily checked with the seller from whom the paint was purchased. But if it was not possible to obtain any recommendations on this matter, you can use the White Spirit universal thinner. It is suitable for almost all types of alkyd paints. How to calculate the optimal amount of solvent? Here everything is chosen by eye. The main thing is that the finished mixture should not have a thick or watery consistency.

To paint the frame without staining the glass, you need to use masking tape. It will help update the window without losing its transparency. Adhesive tape is glued around the perimeter of the glass close to the glazing beads. When working with a brush, a minimum of spatter is created, so narrow strips of masking tape will be enough. To paint the window frame easily, quickly and efficiently, you should follow a few rules:
- during work, care must be taken to ensure that the paint lays evenly and does not fall into unnecessary places;
- it is not recommended to immerse the entire brush in a container with a dye. It is enough to dip the brush halfway and walk it along the edge of the can to get rid of excess paint;
- staining must be done from top to bottom. So it will be possible to prevent the appearance of sagging and smudges;
- no need to try to apply as thick a layer of paint as possible in one go. This can lead to unevenness.
One simple rule will help to properly paint wooden windows: it is better to apply 2-3 layers, the first of which should be made thin. Moreover, the next staining is carried out only after the complete drying of the previous layer. Thus, the whole process can take several days, depending on the drying speed of the coating. This technology helps to get rid of unpainted areas and provides reliable protection of the wooden frame from natural precipitation and sunlight.

It is not difficult to paint a wooden window. Armed with patience and tools, an old product with an unsightly appearance can be turned into a beautiful thing, as evidenced by the example of a window frame. With the above tips, you won't have to rack your brains thinking about how to paint wooden windows with old paint. The main thing to remember: "It is not so much difficult to achieve professional quality painting of old windows, but to maintain this quality for a long time."
https://www.youtube.com/watch?v=Cnner994xzI Video can "t be loaded: Tips for painting old wooden windows (https://www.youtube.com/watch?v=Cnner994xzI)

