A table with a glass top with your own hands. Glass table - an element of a stylish interior DIY plexiglass kitchen table
A glass table in the interior of an apartment is often used as a coffee table. He is able to enliven the atmosphere of the room and is appropriate in the room. small size, as it creates a feeling of weightlessness of the product. The simplicity of the design allows you to make glass table do it yourself. It is distinguished by hygiene, as it is resistant to detergents and cleaning agents. Using modern materials for making the table will be very practical and inexpensive.
Preparation of material and tools
The table top can be cut from clear, frosted, textured, tinted glass or mirror sheet... Transparent glass visually expands the interior of the room. A colored countertop can be an organic addition to a room's decor. Dark color will allow you to create a "glamorous" style. Kitchen table with black glass, complemented by white chairs, will look spectacular.
In the absence of experience in making furniture, it is better to make a table with your own hands with a solid table top and metal legs. Having mastered the technology of working with such material, in the future you will be able to figure out how to make a table from glass of a more complex type.
For quality workmanship tables you will need:
- glass sheet;
- metal legs;
- suction cups for attachment to the table top;
- joiner's glue for metal and glass;
- gloves and goggles;
- glue "metal-glass", paste for grinding.
Set of tools:

Glass cutting tools: 1 - square; 2 - corundum stone; 3 - compass for glass cutting; 4 - pliers; 5, 6, 7 - glass cutters.
- diamond or roller glass cutter;
- pliers with rubber pads;
- metal ruler of suitable length;
- grinder (grinder), drill;
- grinding discs, felt wheel;
- a pencil for marking.
- file (emery bar).
The glass should be purchased tempered, 6-12 mm thick. It must be clean and dry when cutting. Dirty material may cause an uneven cut. Having decided on the location of the homemade piece of furniture, plan its dimensions. Draw the accepted dimensions on the sketch. Mark where the legs are attached.
Back to the table of contents
Share onGlass products in interior design always look light and elegant. The transparent texture does not create a heaping effect, but the strength of the special thickened furniture glass let the product serve you long time... Making a table with glass top with your own hands will allow you not only to save a significant amount of money, but also to create a unique, exclusive design.
How to choose glass for your table?
The most important parameter in the characteristics of glass is its thickness. In second place will be the texture: matte, glossy, with a relief pattern. In some cases, the color of the glass will be important. The choice of material type depends on the purpose of your table. For coffee table glass with a thickness of 5-6 mm is suitable. Such products do not experience a strong load, so this thickness will be optimal. If you are planning big dinner table, then the glass thickness should be 8-10 mm. It is better to order the countertop itself from a glass organization. On professional equipment, you can cut out any shape of the tabletop, as well as carefully process the edges.
Design
The table must fit into the interior of the room in which it will be located. If the furniture in your home is classic style, then the legs for the table should be solid wood, with carved patterns and curls. To make the tree presentable, you can cover it with a stain, imitating expensive wood. If you have even a little experience in the field of creating furniture, then it will be easy to make a glass table with your own hands. The photo shows a variant that is made of only one glass.
For lovers of high-tech style, a table with metal symmetrical legs is suitable, and the tabletop itself can be in the form of a circle or a square. Mediterranean style assumes simplicity in the interior, so the glass tabletop can be placed on rough wooden legs correct shape colored, for example, in White color.
Making a glass tabletop with your own hands
The most important and most expensive element of a glass table is the table top. If you are wondering how to make a glass table with your own hands, then you need to know about some rules for glass processing. Cutting it under required sizes may be challenging task for a beginner. Practice before starting trimming. If the glass cutter is roller, and not diamond, then the pressing force should be about 2 kg.
If you get a good even cut, you can proceed to the next stage - processing the edges. Always take care of eye and hand protection before starting work. For convenience, you can moisten the file in turpentine or kerosene. The movements should be smooth, in the direction along the edges of the sheet. You can use an emery block.

Next comes the stage of grinding the edges. To carry out this work, a grinder with a special grinding attachment is used. The angle at which corners are processed must be the same around the entire perimeter. The sanded edges are polished. The bend of the countertop should be smooth and smooth.
Wooden underframe
To make such an underframe, you will need a 50 mm beam if you are planning a coffee table. You can use a board, it all depends on the design of the structure.
Consider making a glass table for the kitchen with your own hands measuring 800 x 1400 mm. For such a massive product, you will need a beam of 150 x 150 mm. The surface of the timber must be carefully sanded, it must be perfectly smooth. To protect the wood, you need to apply varnish, stain or paint. If you want the structure of the wood to be visible, then use varnish or stain.
For joining the elements of the timber, it is better to use an open tenon joint in half a tree. This will mask the joint and increase the level of strength at the joint. Even a person with a minimum amount of experience in this area can make do-it-yourself legs for a glass table and a base from a bar on which the tabletop will be held.
Metal underframe
Not every carpenter can afford to use metal. To work with such material, you will need special equipment and skills. To connect the elements of the table frame you will need welding machine... You can use metal tubes, corners or even a profile.
Consider how the glass will attach to the countertop. In this case, the tabletop is installed in a special recess, which was formed when joining metal profiles. All you need to do is fix the glass to the profile with glue. A handmade glass kitchen table on a metal base will perfectly complement a minimalist kitchen.

If it is planned to manufacture forged products, then for the base and it is better to perform with the help of mechanical fastening. Holes are drilled in the glass surface and fasteners are inserted.
Chipboard underframe
The simplest material for making furniture is, of course, chipboard plates... It is not at all difficult to come up with a design for a glass table with a chipboard base. There are many options, colors and textures for laminated chipboard.
Chipboard sheet cutting is carried out using circular saw... In the cut, a rough edge is obtained, which must be closed with an edge. If you don't have special equipment for edging, don't be discouraged. The end tape can be glued with a regular iron.

The connection of chipboard parts is carried out using euro screws, self-tapping screws, corners. The most acceptable option is to use Euro screws. For them, you need to make holes in the chipboard with a drill. Tighten such screws with a hex wrench. In the places where the screw heads are located, special stickers are installed to mask the joint.
How to fix the glass to the underframe?
There are several ways of attaching glass to the base, the choice suitable way depends on the materials and weight of the glass. If the glass is massive and thick, then you can simply install rubber mounts on the surface of the underframe, the mass of the glass and the frictional force will not allow the tabletop to move.
The mechanical method of fastening is as follows: holes are drilled in the glass, fasteners are inserted into them. There must be rubber gaskets between the metal of the fastener and the glass.
In some cases, the glass is glued to the surface of the underframe. This is a very common fastening method. The main thing in this case is to choose the right glue. It must be compatible with the materials used.
Another time-tested way to securely attach glass is with rubber suction cups. This mounting method is often used when you need to fix a tabletop with a wooden base. non-standard form.
Imitation glass with epoxy resin
Epoxy resin can be used to make not just a table, but a work of art. Particularly interesting look options for countertops that include time deformed wooden elements connected by transparent epoxy resin.

To make such a glass table with our own hands, we need a suitable cut of a tree. It is desirable that it be cracked and aging. You can add irregularities yourself by artificially aging the wooden blank. Two pieces of wood with a thickness of 4-5 cm are laid out at a distance of 20-30 cm from each other. Uneven side surface should be between the cuts, and along the edges of the table top should be smooth and even. The surface is carefully sanded and leveled.
A container for casting epoxy resin is being built - the bottom and walls. You can dye the resin with pigments. After the resin is poured into the container between the two halves of the tree, you need to wait about 1 day. After complete drying, you need to cover the surface of the product with several layers of varnish. Remember the safety precautions when working with epoxy. A respirator mask and gloves are required. The resin is toxic and can cause poisoning.
Ecostyle glass top table
V recent times rough interior elements are gaining popularity, which are transferred almost unchanged into our home from the wild. Ecostyle is the direction of interior design, which involves the use of natural materials or their imitation to decorate furniture, walls, floors, and decorative elements.

Large driftwood or tree roots are an excellent basis for making a glass table with your own hands. This piece of furniture looks very original. The process of processing natural material itself can take a significant amount of time, but this process should not be neglected.
The first step is to remove the bark and peeling rotten elements from the wood. A solid frame should remain. All bends must be sanded. At the point of joining the glass, you need to cut the branches so that they form supports for the glass surface. At the final stage, you need to treat the wood with several layers of varnish or stain. It is better to attach the glass to the suction cups, as other types of attachment will look unaesthetic.
Finally
Feel free to experiment and try new combinations. The glass table itself is a highlight in the design of the room, and the construction of an original and exclusive base for it will blow everyone away.
- Advantages and disadvantages of glass tables in the interior
- DIY high-tech glass table
- Glass table with wrought iron legs
Glass tables, complemented, for example, by forged legs, are very elegant and sophisticated interior elements. However, how to make such a table with your own hands and, in general, is it possible to make it yourself? The answer is yes, it is possible. The following tips will help you craft this piece of furniture yourself. However, before you get down to work, remember that glass is a rather complex material. It must be handled very carefully. Option "and so will do" in the case of a glass table will not work. You will have to give up all your strength to do for real worthwhile thing for your interior design.
Advantages and disadvantages of glass tables in the interior
Besides the fact that glass is a “delicate material,” you need to know about its other advantages and disadvantages before you start doing the work yourself. So let's start with the benefits, because they are really tangible.
- This is very stylish element interior. It will look great in almost any interior style, especially if you combine glass and forged legs.
- Practicality. Contemporary glass coffee tables are designed to be truly functional pieces of furniture, not just as decorations.
- Finally, these tables have high level firmness. They are not afraid of either high temperatures or humidity. So, unlike wooden table, a glass table on wrought iron legs can perfectly coexist in the kitchen. In addition, it can be washed with any household detergent, which makes the table easy to clean.

The main disadvantage of a hand-made glass table is that it is very easily soiled. Fingerprints and other marks will constantly remain on it. That is why it will have to be washed very often. However, this disadvantage is solved by replacing the traditional glass with matte of the desired tint.

In addition, if you decide to make a table with your own hands, do not forget about the high cost of materials. This is especially true if you want to combine glass with forged elements.
DIY high-tech glass table
The easiest way to make a glass table with your own hands is to use simple metal pipes ok and glass. The simplicity of this method is that all you have to do is glue all the elements together. You can buy a pre-made sheet of glass or cut a countertop in any shape you want. You can buy metal tubes at a hardware store.

To make this piece of furniture in the now fashionable hi-tech style, you first need to choose the right glue. If you use the standard version with mirror adhesive, it will be visible through the glass surface when it dries. Accordingly, this option does not suit us. Yes and dries given view glue for a very long time, which is unacceptable in our case, when there are no other types of fasteners.
This is why you should go looking for a special glue. It comes in two types: "glass-to-metal" and "glass-to-glass". They produce such glue as domestic manufacturers and foreign ones, Polish and German glass glue is especially appreciated. Please note that glass glue dries only under the influence of a special construction ultraviolet lamp(a conventional medical UV lamp will not work). This lamp can be rented from a hardware store. Working with her is extremely simple. The glue is completely polymerized under the influence of rays in 30 seconds.

Glass table with wrought iron legs
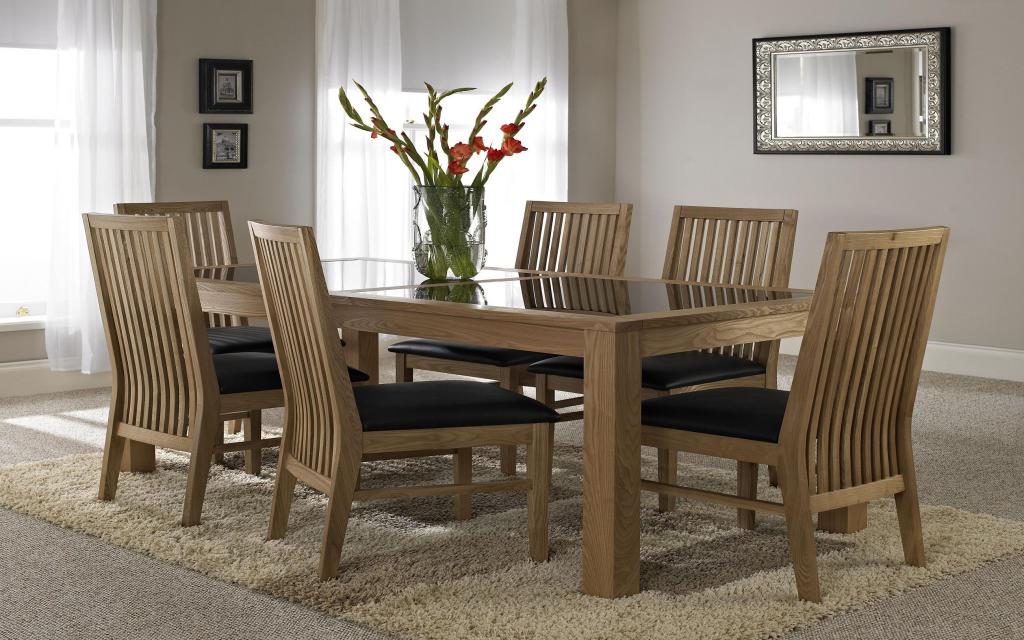
The combination of glass and exquisite forged metal can give any interior a touch of graceful home comfort... The fact is that the delicate weaving of powerful metal is perfectly combined with the delicate grace of glass. In this case, it is better to abandon matte countertops and choose the option with transparent glass, because the beautiful forged legs should remain in sight. In addition, so that the table with forged legs does not get lost in the design, it must be supplemented with chairs in the same style. Of course, chairs don't have to be entirely made of wrought iron. A pair of forged parts is enough.
In addition to beauty, this table also has practical advantages. It is very stable, and due to its rather large weight, no one can accidentally move it. And besides, forging opens up the widest scope for imagination. Find a good master blacksmith and he will recreate any intricate ideas from your sketches.

In the article we will talk about how to make a glass table with your own hands. This piece of furniture is light, elegant and adds airiness to any interior. At the same time, it is distinguished by ease of care, reliability and durability.
Type of tables
The glass table can be round, square, oval, triangular, or any other shape. Coffee tables, kitchen and computer furniture are most often made of glass. The product can also be produced from combined materials(metal, wood, plastic, rattan, stone).
The design can be framed or frameless, and a piece of furniture can also have an underframe. For the assembly of such products are used Various types glass: plain, frosted, tinted, tempered or triplex. Most often, structures with monolithic countertops are made from this material, but it is also suitable for production sliding tables, transformers, tables with shelves.
Advantages and Disadvantages of Glass Furniture
A glass table with your own hands has the following advantages over wooden, metal and any other furniture:
- Aesthetics. Such a product will perfectly complement any room, but it will best fit into a high-tech interior. Due to its transparency, glass creates a feeling of weightlessness and expanded space. A table of the same size, made from different materials, will appear bulkier and heavier than glass construction.
- Hygiene. Furniture does not absorb dirt and odors, does not emit toxic substances.
- Practicality. This material is easy to care for, it must be processed with a special detergent and water.
- Security. Many modern types of glass have increased strength, comparable to that of wood. Breaking up such material is not as easy as it might seem. In addition, it is covered with a special protective film... If the table nevertheless breaks, then the fragments do not fly around the room, the tabletop is simply covered with cracks.
- Resistant to aggressive influences. The material is resistant to moisture, high temperatures and chemicals.
But such furniture also has disadvantages:

- The appearance of unaesthetic stains on the surface with insufficient wiping with a sponge.
- Low resistance to mechanical stress. Scratches and small chips can appear on the surface rather quickly.
- Contamination when touched with fingers (prints remain).
- Ringing when the tableware touches the table surface.
- High manufacturing cost. Not only are the materials needed, but also the equipment, such as a special lamp for drying glue, is expensive.
- Relative fragility. The table may break.
In addition, for the independent production of such products, it is desirable to have at least minimal skills in working with glass (cutting, grinding).
Preparing for assembly
To make a glass table with your own hands, you need to stock up necessary materials and tools. The master will need:
- a sheet of glass with a thickness of 6 to 12 mm ( optimal thickness- 8 mm); it is recommended to choose a material according to its properties, the best way- tempered glass or triplex;
- 4 table legs, they can be made from metal pipes;
- Special glue;
- suction cups for legs;
- a thick sheet of plywood or chipboard, on which structural elements will be cut;
- gasoline or acetone for degreasing glass surfaces, vegetable oil for wetting the cutting edge of the glass cutter;
- fine and coarse sandpaper;
- polishing paste.
You should also prepare tools:
- pencil, marker;
- a ruler (preferably metal);
- roller or diamond glass cutter;
- a rubber hammer, with which the edges of the glass will be beaten;
- grinder;
- felt circle;
- grinder or drill.
In order not to get damaged by sharp edges during the manufacture of furniture, it is necessary to carry out all work in protective gloves, as well as in special glasses.
Countertop manufacturing
Before starting work, you need to prepare all the tools and thoroughly wash the glass on both sides. At the next stage, the tabletop is made, this is the most tricky part work. First you need to decide on the shape and dimensions of the future product, it is recommended to prepare a drawing and indicate on it the dimensions of the structural elements. Then it is necessary to mark the material for the subsequent cutting of the countertop of the desired shape and size.
The markings are done using a marker and a ruler; the elements can be cut with a roller or diamond glass cutter.
The use of each type of tool has its own characteristics:
- Slicing roller glass cutter... First, the glass cutter circle is moistened in oil, and then the master draws the tool along the marking. The pressure should be equal to two kilograms. If it was not possible to make an incision from the first time, then you need to carry out a glass cutter several times over the corresponding area. After making the cut, it is necessary to knock with a rubber hammer on back side glass.
- Cutting with a diamond glass cutter. Excessive pressure must be avoided when using this tool. It should be carried out over the material with a glass cutter only once, after which the sheet must be placed on the edge of the table. This must be done in such a way that the cut section protrudes beyond the edge of the table. Then it is recommended to gently knock with a rubber mallet on the inside of the glass, grab its edge and sharply pull it down or away from you. This will separate the edge from the countertop. Small fragments that have not separated can be removed with a glass cutter. This tool is equipped with a special slot that allows you to capture small fragments.

If a surface with curly edges is being made, then you need to depict the corresponding drawing on paper, and then transfer it from the template to the glass using a marker and draw it over the drawing with a glass cutter.
If the product is round, then you need to draw a cross in the middle of the sheet, and then attach a thread or rope to the center of the cross. A glass cutter should be tied to the opposite edge of the thread and a circle should be drawn with it.
After that, from the edges of the circle to the edges of the sheet with a glass cutter, lines are drawn at a certain distance from each other. It turns out a kind of sun. You should remove the scraps of glass, sequentially separating one segment from the sun.
Grinding the product, mounting the legs
The cut-out countertop needs to be sanded with grinder and sandpaper... Sanding should be carried out at a low speed (up to 1700 rpm of the grinder), as at a higher speed the glass may overheat. First, sand with coarse-grained sandpaper, and then repeat the procedure with fine-grained sandpaper. After that, the sanding paper should be replaced with a felt wheel covered with sanding paste and the product should be polished.

In the next step, the legs are attached to the table. A hole should be made in the top of each leg, and then a special suction cup designed for glass furniture should be attached using glue. After that, the product must be dried. You can also use suction cups with self-tapping screws.
Inner side the countertops must be thoroughly degreased with acetone or gasoline, after which the legs must be glued and the glue must be completely dry. In this case, the choice of glue must be given Special attention, it must be of high quality, suitable for glass furniture. Cheap glue will be visible through the transparent surface, it will look like dirty stains. Drying of the glue should be carried out using an ultraviolet lamp with a wavelength of 300-400 nm. When all the work is done, the do-it-yourself table is ready for use.
Product decoration

There are many ways to transform a glass table into a true work of art. To make this piece of furniture creative and original, you need to use one of the following glass processing methods: decoupage, etching or toning, sandblasting, stained glass painting, placing various objects inside a double tabletop, for example, dried flowers, grains, stones, shells.
Stained glass painting or decoupage decoration is done from the underside of the countertop. This protects the decor from mechanical damage and at the same time keep the surface of the table perfectly flat.
A great way to decorate a table is to equip a table top LED backlight... Such furniture allows you to create a special, festive atmosphere in the room. You can decorate with this method not only a table, but also a bar counter.
Alternatively, you can wrap the worktop in wood, metal or plastic frame. A similar solution will not only change appearance design, but will also increase its reliability.
Do you want to diversify the interior without extra costs? A DIY glass table is a great idea. A unique product will allow you to update the interior of the room. Of course, self-production furniture cannot be called a simple matter but the result is worth it. And such a product will cost much cheaper than the purchased one. Today's article - detailed description the process of making a table with a glass top.
Design features
The most popular are products with a monolithic table top. But there are also transforming tables, with the possibility of lengthening the tabletop. The form can be different:
- Round.
- Oval.
- Rectangular.
- Square.
Glass can be ordinary, transparent, as well as frosted or tinted:
- Transparent design - perfect solution for small spaces... She gives the impression of floating, grace and lightness.
- Matte countertops often have a greenish tint. This is the natural color of the glass.
Important! Colored material attracts attention, first of all, for its uniqueness and originality. For example, black glass is a great addition to the Gothic or modern style. It will look great with white metal or plastic chairs.
For the manufacture of the underframe, most often, chrome-plated metal or wood is used. The wicker underframe looks good, forged metal or durable high quality plastic. If the tabletop is made with a frame, then the frame must be made of the same material as the underframe.
DIY glass table - advantages and disadvantages
The advantages of glass tables include:
- Nice appearance. Such a product looks stylish and transforms the interior in an advantageous way.
Important! Glass fits especially organically into the concept modern styles- Hi-tech and Minimalism.
- Practicality. Thanks to modern technologies, there are high-strength types of glass. Furniture where glass is covered is also safe. special film... Even when broken, the tabletop does not crumble to smithereens. The fragments are firmly glued to the film.
- Persistence. The material is resistant to high humidity and significant temperature differences. It is chemically neutral towards aggressive substances. Glass does not absorb grease and dyes. This compares favorably with the usual countertops made of wood, MDF and chipboard.

However, there are also disadvantages:
- Fingerprints and traces of dirt are clearly visible on the surface.
- If you put dishes on it, then a rather loud noise is generated.
Important! Compared to the advantages, these disadvantages are not at all critical:
- On matte surface fingerprints are invisible.
- The use of special caring compounds allows you to keep the products in an impeccable condition.
- The noise problem is also completely solvable. It is enough to purchase special coasters for dishes.
DIY manufacturing technology
Consider how you can make a beautiful glass table on one's own.
Preparation
First decide where new item the furniture will stand as you are going to operate it. For example, as a coffee table or for eating. Take all the necessary measurements, draw the product to scale, indicating the location of the legs and the size of the table top.
To make a glass table with your own hands, you will need:
- Glass cutter - roller or diamond.
- Long metal ruler.
- Hammer with rubber striker.
- Pliers equipped with rubber pads (for breaking glass).
- Bulgarian.
- File or emery bar.
- Turpentine or kerosene.
- The glass itself. Which option to choose - transparent, textured, toned or mirror, is up to you.
Important! It is advisable to use high-strength hardened material for the manufacture of tabletops, with a thickness of 0.6 to 1.2 cm.
The main thing is that the glass is dry and clean. It is best to dedust it with soft textiles and a soda solution. Such preparation will not be superfluous, because dirty glass can crack away from the notch, and the tool quickly fails.

Open the glass:
- Place prepared glass on a table or plywood sheet.
Important! Make sure that the material adheres to the surface with its entire plane.
- Place a thin rod (about 3 mm in diameter) under the cut line.
- Place a ruler on the glass so that it is 2-3 mm from the cutting line.
- The optimum pressure force on the glass is 2 kg - this can be easily checked with a conventional scale.
Cutting features
It is best to cut glass using a thin metal ruler. Highly skilled craftsmen cut the material by eye, according to the markings previously made with a marker or along the edge of the table.
Important! If you do not have a lot of experience in cutting glass, then it is better to pre-practice on scraps. It is not that difficult and will take a little time, but the chance to cut the material flawlessly increases significantly. Try to draw only one cutting line.
The glass is broken off by hand wearing protective gloves. When doing this, position the glass so that the cutting line and the edge of the cutting table match. Press down on the glass with a sharp motion and it will break off along the cut line.
Important! If there are any sharp edges or glass debris, remove with rubber-lined pliers. For best results, place several layers of paper under the lips of the pliers.
If the glass is curved, stencil and cut along the line. Make a round cut in the same way. To make unnecessary glass easier to break off, make special "rays" and break off in parts.
Edge processing
Even if you worked with the utmost care, there are sharp "teeth" and protrusions along the edge of the edge that must be removed. Of course, the best option for processing glass edges - this is a special machine. But manual processing is also quite effective:
- In this case, work only in cotton gloves.
- Use a file or abrasive block to file the edges.
- Be sure to moisten the file with turpentine or kerosene.
- To keep the edges straight, move the file or block evenly along the edge.
- Use a drill with attachments or a grinder to sand and polish the edge.
- Grinding speed should be low (1200-1700) rpm.
- Change the grit size of the sandpaper from coarse to finest.
- Polishing is the final stage. Perform it with a felt circle, using a grinder or drill.


