DIY round table on one leg. How to make a round table? For a strong feast
Every owner wants to show off his possessions to his guests. It's especially nice to point out things you've made with your own hands. This adds special comfort to the site and special pride to the owner. Increasingly, flowerpots, flower beds, swings, and homemade decorations are found in garden plots. But the owners are not limited to this list, and move on to creating more complex products. So, today we propose to make a round table with your own hands, surprising your family and friends.
The round shape is not the most ergonomic for a small space, but it promotes a trusting, comfortable atmosphere of communication
Do you doubt whether you should take on the job? Then let's talk about its advantages. I would like to note that this work– not complicated. We suggest doing simple model. Manufacturing will not take much time, effort, and will not require great carpentry skills. Now about the benefits. By making a table with your own hands, you get the following advantages.
- Save a significant amount of money. Store-bought products that distributors offer everywhere are quite expensive. Sometimes the product offered is not worthy of the stated price. By selecting each particle with your own hands, you can make sure that it is worthy set price. And the entire product will cost significantly less.

Handmade massive wooden table
- You can choose any model. Stores may not always be able to offer a table that meets all your needs. When making furniture with your own hands, you can compile elements different models, create your own innovation.

Simple model wooden table with a durable, smooth tabletop and a secure base
- You have the opportunity to choose a design. In this case, history repeats itself. You won’t always find the desired product with the desired design in the store. Sometimes appearance The table may not fit into the overall interior. So, you can choose any design, doing all the work yourself.

Round table made from a cable reel with an unusual design
- Contributing to own house. As an owner, you will feel a bit of pride in upgrading your property or home without outside help.
- roulette;
- pencil;
- jigsaw;
- screwdriver or drill with a set of drills;
- construction compass;
- clamps;
- Sander.
- pine boards (for the lid);
- pine bars (for legs);
- self-tapping screws;
- wood glue;
- metal corners;
- wood varnish;
- wood treatment product;
- paint (if the design suggests).

Even a small round table can fill the atmosphere of any room with coziness.
We think now you have no doubt that the furniture you created will be useful, and now you are asking yourself another question, how to make a round table with your own hands. Let's start looking for the answer!
Deciding on the appearance

Country furniture option - round table and stools

Round table in the interior of a small kitchen
Before moving on to detailed instructions Let's decide what we want. The concept of “appearance” includes several items with a number of options. Let's look at them and we can determine the type of future table. And at the same time we will decide what needs to be done and build an action plan.
![]()
Round folding transforming tables

Round folding plastic table
Now let’s look in detail at how the criteria described above influence our choice, decide on the appearance of our brainchild and get down to business.

Beautiful and spacious round wooden table in the living room interior
Purpose
This factor is important; it influences further actions. The table will be located on the street - then it needs to be processed by special means, preventing its damage. It will stand in the house - the conditions will be greatly simplified.
This factor also affects others: the type of construction, the presence of additional elements and design. Depending on the location and its further functions, a model will be built. When this is a street option, it is necessary additional boxes. If the creation is intended for barbecue, it can be made without additions. If the product is intended for a child, it must have appropriate parameters and additions.
So, the remaining criteria depend on the functions assigned to the future creation. Therefore, determine in advance what is necessary for the full implementation of the intended functions.
Construction type
Let's divide the types of tables into folding and regular. Depending on your choice you will need different instruments and the assembly process varies. Determine this criterion in advance.

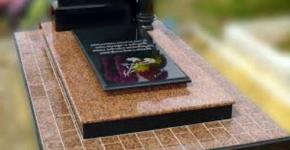
White round table on one leg
Next, we find out the number of legs. We can make a table with our own hands on one leg, two, three or four. All of these models are durable (if designed and built correctly) and look great. It all depends on your own preferences and functions of the product.

Round dining table on three legs
The design type includes additional elements. Find out whether you need a drawer inside or a footrest; it may be enough to make one shelf under the lid of the product. In this case, the determining factor is the purpose.

Diagram of a round wooden table for self-assembly
In general, think through everything in advance and start creating a drawing. It is at this stage that you can make adjustments or make mistakes (then they must be corrected on paper!).
To avoid mistakes when designing a table, take the drawing seriously.
This stage is very important. If you can't complete it yourself, find finished drawing on the Internet, adjusting the dimensions, or entrust this matter to a master.
Choosing material
The most common material for creating a table with your own hands is solid wood. That is natural wood. The basis can be pine, beech, oak, ash. Pine is most often used. It is easy to process and does not require special skills.

DIY solid pine dining table
The next option is chipboard (chipboard). They can be used, but not for the entire table, but only for some parts, such as the lid, drawers or shelf. The legs should be made of solid wood for stability and strength of the product.

Large round chipboard table with metal legs
On summer areas you can see plastic tables and chairs. You can make them yourself, but for this you need to purchase elements. And creating a table comes down to assembling the resulting parts.

Plastic table and chairs for outdoor
Metal is a common material among people who have welding skills and the appropriate tools. This base is strong, durable, and well suited for outdoor items. But if you do not have the necessary skills, it is better to give preference to wood. A DIY round table made of wood will suit any design and does not require any special skills to create.

Round table with solid oak top and metal base
Selecting decor
This is also an important part and should be thought out in advance. Some types of decor, such as burning, must be included in the action plan in advance, since the product should be varnished only after the decor has been displayed.
Choose a design depending on the purpose and location of the table. If it's a children's room work zone, make it bright, and from white It's better to refuse. If intended for an outdoor gazebo, leave the color of natural wood by varnishing the product.
Overall, the choice is yours. But do not forget that the decor should not interfere with the main function and should be in harmony with the surrounding environment.
Let's start production
We have decided on the main criteria and can begin a step-by-step analysis of creating a table. We will make a table from pine, since this is the simplest and most common option. But before assembly there are still a few preparatory steps left to do.
Let's prepare materials and tools
Assembling the table will not be difficult if everything is done correctly preparatory work. First you need to prepare the tools so as not to look for them during the work process. The arsenal should include:
If any tool is missing, be sure to purchase it or borrow it from a neighbor, because without proper preparation a good product will not come out.
You will also need the following materials:
Now that all preparations are completed, we can begin the main stage of work.
Build process
For a simpler and faster explanation, we will describe the work step by step.
The table elements are coated with a water-repellent agent before installation.
- Make a lid. To do this, fasten with wood glue required amount pine boards and secure them with clamps. After the glue has dried, draw a circle on the resulting square. Cut out a circle along the outline. This is the basis for our table.

We coat the sides of the boards with wood glue and apply them to each other, fasten the structure with clamps

Draw a tabletop circle using a construction compass
- Process grinder all edges of the lid and its surface. If necessary, start finishing the edges with sandpaper.

We use a sander to sand all surfaces of the countertop.
- Take 3 bars of equal length and secure them with corners and self-tapping screws back side covers at equal distances from each other.

We cut the required length of timber for the legs and round all the corners

We attach a metal corner to each leg on three sides, always in the same plane

We fasten the legs to the tabletop with self-tapping screws
- We attach jumpers between the legs to strengthen the product.

We make jumpers from bars of the same or smaller size and attach them to the legs with self-tapping screws
- Cover the surface with 1-2 layers of varnish.

We treat the surface of the table with varnish
We hope that now you have no questions about how to make a round table. As you can see, it's quite simple. All that remains is to apply finishing touch, choosing any design. By leaving the product unpainted, you will emphasize its natural beauty. This option will be better than others, and in Lately it is becoming more and more popular. Do not forget that the design must be specified in the preliminary work plan. This will help avoid surprises and make the process much easier.
Video: How to make a round table.
It's nice to gather around the big table in the evening with the whole family. It’s even nicer when the table is made by yourself. What shape the table should be is up to you to decide: square, rectangular or round. A circle is a perfect shape. It is not entirely accidental that in nature there are quite a lot of analogues of this form - the sun, the moon, rings on tree cuts.
It has been proven that the circle gives harmony and has a beneficial effect on a person’s psychological comfort. Round tables are often used to create a relaxed and informal atmosphere at business meetings. If you doubt how it will fit into the interior, you can look at the photo of a handmade round table.

A round table at home will fit well into any interior. Most a budget option- This is to make a round table with your own hands. Despite the fact that at first glance it seems quite complicated, assembling such a table will be quite simple.


What are the options for round tables?
A round table is not just a tabletop with legs. Furniture manufacturers decided to diversify the variations of the products they offered and made several options (which can then be easily repeated at home):
- There is one central leg or cabinet.
- Three legs.
- Four supports.
- Several supports in the middle.
- Tables can have several shelves, drawers that pull out, a cabinet, etc. They can be sliding, folding or transformable.

The material for making a round table can be varied. For its production, MDF, plywood sheet, stone (natural or artificial), plastic, metal, glass can be used.

DIY wooden table at home
Before making a round table, determine its dimensions - it should be a small, coffee table, large or medium dining table. Do not forget to take into account the size of the room in which the table will stand. Before production, it is necessary to determine in advance the drawings and dimensions of the round tables.

What materials are needed to make a round table? In order to make a table out of wood with your own hands, you will need timber, wood glue (carpentry), metal corners (each table leg will require 3 pieces), screws, varnish or waterproof impregnation in order to process the wood.

Additional tools that may be needed are a saw or jigsaw, pencil, tape measure, drill, brushes, sandpaper, screwdriver or screwdriver.

Preparatory stage
Before all work, you must read the instructions on how to properly make a round table. All parts require careful preparation before assembly. For the countertop you will need material in the shape of a disk or circle.

The plywood must be sanded and coated with several layers of varnish. The sanding and varnishing procedure must be repeated with the table legs. They are attached to the tabletop using a plywood ring.

Assembly
On the plywood ring, you must first make markings for future holes - the legs will be placed there. On the marking you need to drill holes of the required diameter using a drill. The legs are timber sawn into 4 parts. Before fixing them on the tabletop, they must be processed.

Attach to the ring using a screwdriver. Be sure to fix the legs well - this will give reliability and stability to the table. You can install two plywood strips crosswise between the legs under the tabletop. This will add even more stability to the structure.


After completing the assembly of the round table, as soon as the glue has dried, you can begin to decorate the structure. For this, varnish, stain or paint is used. To make the table last a long time and look beautiful, you can use varnish and stain together. First, saturate the entire surface with stain, and then comes the varnishing stage.

Using products that contain a coloring pigment, you can give even ordinary plywood a noble look expensive materials– mahogany, oak or beech. To do this, you must use it during finishing transparent furniture varnish. Apply using a foam paint roller. This will allow you to apply the varnish evenly and without bubbles.

If you plan to use the furniture for personal plot– use for decoration acrylic paints on water based. To do this, you will need to add a special pigment to the white enamel.

Note! 
Making and assembling a round table with your own hands is very simple and exciting process. You can implement any ideas on how to make a round table with your own hands; there are no restrictions on imagination and materials.

DIY photo of round tables


Note! 


Note! 


We will send the material to you by e-mail
Not everyone likes to buy finished goods for home use. The soul of some people requires creative and practical self-realization. The editors of the online magazine website invites those interested to learn how to make a wooden table with their own hands, what is required for this, and whether there are any pitfalls in such work.
Beautiful wooden product for the kitchen or living room, made with love
Professional carpenters are unlikely to find our step-by-step recommendations, but for novice amateurs the advice will come in handy. First, let's look at what products you can make with your own hands from wood.


Of course, the more skills a person has, the more complex the model he can make. But to build a table with your own hands from wood, there are ready-made drawings and photos to help beginners.
How to choose a material for making your own wooden table for home and garden
What to make from dinner table with your own hands? Best of all - made of wood. The most pliable wood for a new master will be pine. Products made from poplar will look more solemn. For the street you can take mahogany.
If you want a simpler option for your home, then you should consider laminated chipboard with optimal thickness at 25-35 mm. Can be taken on the tabletop wooden boards, birch plywood with a thickness of 35 mm. Legs can be made of metal or wooden beam(about 50 mm thickness).
In order not to make a mistake with the amount of material, a preliminary drawing of the future structure is made with precisely specified dimensions.
Advice! The suitable height of the product varies between 750-800 mm.
Related article:
DIY wooden furniture: for the garden, children's room, kitchen, bathhouse, garden, gazebo; How to restore pieces of furniture, useful tips and recommendations from experts - read in our publication.
What tools are needed to make a wooden table with your own hands?
It doesn’t matter what shape the future table will be: working with wood requires a certain set of tools. You can’t do without a jigsaw, and it will be much easier to work with electric model. To secure all structural elements, use either a drill with a multi-stage drill for holes, or confirmations. To polish the product to perfection, you need a special attachment for a drill.

For greater fastening strength, the tools include wood glue.
How to make a wooden table with your own hands - step-by-step instructions
We have selected four types of structures that can be made on your own, even with a minimum of carpentry skills. We invite you to learn about the stages of manufacturing round and rectangular table, coffee table and models for garden gazebo.
Making a wooden round table
It is easiest to make a round table top and a connecting ring from or with dimensions of 1500 × 1500 mm and 1280 × 1280 mm. You will also need two laminated chipboard strips (1110 × 120 × 25 mm). We will make the legs from four wooden blocks measuring 120 × 50 × 750 mm.

How to make a countertop
How to draw a circle perfectly straight? Place your own thumb on a sheet of plywood in the center with a string and pencil tied to it. The length of the rope from the base to the top should coincide with the radius of the future tabletop. Holding your finger in one place, draw a circle around the full length of the rope with a pencil. All that remains is to cut it out with a jigsaw.
The underframe circle is cut out in the same way.


Making legs
A round table made of wood or chipboard will look charming if you do everything consistently. You won’t have to bother with the legs if your plans aren’t too original. The bars are divided into 4 parts according to the desired size of the table height minus the thickness of the table top. First, one leg is cut off, and the other three are aligned along it.
All processing grinder is carried out immediately.
Advice! You shouldn’t rush into sanding, as the first coat of varnish will reveal all the imperfections.
Assembly of the structure and processing of the finished product
Assembly is carried out in stages. First, align the planks groove to groove. Then the crosspiece of the planks is connected to the legs with confirmations, as in the figure below:

If you want to make the structure stronger, before connecting the legs to the tabletop, coat their upper base with glue.
Advice! Nails are not used in this type of work: a self-tapping screw or confirmat can be unscrewed without any problems, and the connections will be much stronger.
Making a rectangular wooden kitchen table
The rectangular design is classic and very useful in everyday life: it is convenient to cook on such a table and you can comfortably dine at it.

How to make a countertop
A wooden tabletop for a table is made either from a whole sheet of plywood, or from individual edged boards processed to perfect smoothness.

Having fastened the boards with screws and glue, they begin to make the frame.
Making wooden legs for a table and frame
At the heart of the quadrangular models is a frame. It serves to securely fix the legs, ensuring the stability of the entire structure. The tabletop is turned over, a depth of 3-4 cm is measured on each side and the measurements are transferred to the boards. As a result, you will need two boards of shorter length and two longer.

The frame is made of four elements: according to the approximate ratio, these are two boards of X cm and two of 2X cm. They are connected to each other with an overlap one by one, building a rectangle. In order not to break the 90° angle, use any board when working with a screwdriver: it is used to press the structure while tightening the screws.
As soon as the frame box is ready, they begin to make the legs. You can take ready-made balusters for the table, buy metal supports or cut them out of bars according to the desired length according to the drawing.

Both the frame and the legs are subject to mandatory thorough sanding!
Product installation and final finishing
The frame is screwed to the tabletop with glue or self-tapping screws. Then the product is turned over and the legs begin to be attached.

Important! It's better to make holes for the screws in advance. This eliminates the possibility of the wood splitting.
Why don't they use nails and a hammer? Not everyone has the skills to work with a hammer - it’s not only dangerous to hit your finger. Overdoing it can easily damage the wood by splitting it. Confirmations and self-tapping screws hold the tree much more firmly.
As soon as the leg is secured, the angle is immediately checked: there should be no deviation from 90°. The operation is repeated with other legs. You can attach the legs directly through the tabletop, but this will affect the aesthetic component of the product.


Related article:
: photo best ideas. What can be made from pallets for an apartment, office and cottage; rules for selecting and processing pallets; Master classes on making a table, sofa, bench, armchair and shelving - read our publication.
Making your own wooden coffee table
Not only a beautiful interior element, but also a useful one. There is no need to look for a visible place to put a book, gadget, glasses, or TV remote control. Such necessary structures are made from different materials: metal, glass, plastic, chipboard, wood. But let's leave other materials alone and concentrate on working with wood.


Choice wooden table top for the table depends on the expectations of the owner of the product. Some people want something massive, while others prefer lighter options. Let's stick to a simple solution.
We purchase five boards 30 × 150 mm and process them to perfect smoothness. Immediately saw off the required length onto the tabletop: you should get 6 identical sheets. We take four bars for the legs, 6 shorter pieces for the lower tabletop, and 4 narrow slats for the frame.
| Illustration | Description of action |
|---|---|
 | To brush wood, use a grinder with a brass brush attachment. The procedure will expose the structure of the wood, giving the product a special flavor. |
 | We go back and forth along each board on the side that will be the front. |
 | We treat the wood with fire. The flame is gradually moved from place to place: the board will acquire a beautiful darkish tint. The procedure will completely destroy unnecessary soft wood fibers. We actively wipe the entire surface with a felt boot or a piece of felt. |


Let's start the assembly process small table with your own hands made of wood.
- The lower and upper tabletops are laid on work surface wrong side towards you. The boards are laid tightly together, gluing them together. Once the boards have set, slats are attached to the top tabletop. They will serve as a frame and fastening element. They can be glued or screwed with self-tapping screws. The self-tapping screw is screwed into the center of the slats into each of the boards.
- The legs are screwed to both the tabletop and the slats. You can use furniture corners.
Video: the process of making a coffee table from wood
Making your own wooden table with benches for a gazebo
It's time to take the time and build a wooden garden table.


It's best to take boards standard sizes. At a hardware store, you can purchase studs (suitable for a length of 16 cm) and washers (24 pieces). For a garden gazebo, long nails (8 cm) will do.

Whether to paint a product or simply varnish it is a matter of taste.

The circle is a perfect figure. That's why he has greatest number analogues in living nature - the sun, the moon, fruits and vegetables, round in cross-section, annual rings present on trees when cut down. Psychologists note that this harmonious form contributes to the psychological comfort of every person. To create an informal, relaxed atmosphere, it is no coincidence that round tables are used at negotiations and business meetings. Such an item will fit perfectly into any interior, and it doesn’t matter whether it’s a spacious living room or small kitchen. Due to the absence sharp corners These tables look elegant, but they are not cheap. To acquire such an interesting piece of furniture and save money, you can make a round table with your own hands. In today's article we will tell you how to prepare all the necessary parts and assemble such a structure from the most popular materials.
Types of round tables
It may immediately seem that making round tables with your own hands is a simple matter, but in reality there are many nuances that should be taken into account. It would seem that there is an ordinary round tabletop on the most ordinary legs. But modern manufacturers offer a huge selection of similar products, so it is very difficult to decide on just one option.
Supports
Maximum attention, naturally, is paid to the number of supports. There are several options here:
- large central cabinet or leg;
- three or four legs;
- several legs at once in the middle.
Equipment
But the design differences between round tables are not limited to just the number of supports. The design may have:
- cabinet;
- shelves;
- superstructures;
- drawers.
Important! Like structures of other shapes, they can be sliding, folding, transforming. On sale you can even find a barbecue table or a campfire product, a card table, folding or in the form of a book.
Base materials
Naturally, great value has the material from which the product is made:
- IN classic version This solid wood. Wooden furniture It looks solid, beautiful, fits perfectly into modern and classic interiors.
- Less commonly used for their production are regular and laminated chipboards, plywood, MDF, artificial or a natural stone, plastic, glass, metal.
How to make your own round wooden table?
Have you decided to take on the work yourself and make a round table with your own hands from wood? Drawings are the most important thing you will need, in addition, you should decide on its dimensions, because it can be large, medium or small. Everything here depends on what you want to get as a result - a coffee table or a dining table. An important factor such as the dimensions of the room is also taken into account.
We will give an example of making a small wooden table with three legs.
Materials for work
It is necessary to prepare the following tools and materials:
- Boards.
- Beam.
- Special wood glue.
- Metal corners, 3 pieces per leg.
- Self-tapping screws.
- Waterproof impregnation for wood processing.
- Ruler.
- Pencil.
- Roulette.
- Saw.
- Electric jigsaw.
- Screwdriver or screwdriver.
- Drills and drill.
- Brushes.
- Clamps.
- Sanding machine and sandpaper.
- Construction compass.

Assembly
Make the table according to the following scheme:
- Coat the sides of the boards with wood glue and attach them to each other. Use clamps to secure the structure.
Important! To further strengthen the table, fasten the boards with slats on the underside.
- Draw a circle for the table top using a compass. If you don’t have one, you can use the following scheme: screw two bars with a self-tapping screw at the desired angle, attach an awl to one bar with tape, and a pencil to the other bar. Then draw a line and measure the resulting circle with a ruler.
- Cut out carefully electric jigsaw the resulting circle.
- Use a sander to sand all surfaces of the countertop. This must be done especially carefully so as not to miss anything. Clean the edges of the table sandpaper. It is important that there are no splinters on the ends and table top.
- Round the bottom and top edges of the tabletop edge.
- Make legs from timber. Cut them to a length of 70 cm, then sand them with a machine and sand them. Round the corners.
- Attach a metal corner to each leg on three sides. They must be mounted in the same plane. To do this, you should place the leg on a flat surface next to the tabletop where it is attached. Attach the corners and mark their location with a pencil. Attach the corners to the leg with self-tapping screws. Do all the steps with each leg.
- Mark the location of all legs on the tabletop. To ensure complete compliance, you can turn the tabletop over, then put it on its legs. Attach the legs to the tabletop with self-tapping screws.
- Make jumpers from bars of the same size, attach them to the legs using self-tapping screws.
- Treat all elements of the product twice with water-repellent impregnation. Cover it with varnish in several layers.
So you have learned how to make a round wooden table with your own hands. If you adhere to this scheme, then everything will certainly work out. You can leave its surface natural, decorate it, or just slightly emphasize the beauty of natural wood.
How to make a glass round table with your own hands?
If you're tired of the classics, you might like the following master class, which will describe how to make a round table with your own hands from glass.
As for the glass itself:
- Basically, for the manufacture of such structures, shockproof tempered glass with a thickness of at least 5 mm is used. This material can withstand enormous loads - to break it, you will have to deliver a strong targeted blow to the rib. In addition, tempered glass does not shatter into small fragments, it falls off in rectangular pieces, not dangerous to humans. But to work with it, you need special equipment.
- At home, it is better to use triplex, tinted, frosted or ordinary glass.
Important! If you have never cut it, then it is better to entrust this work to a professional so that he can cut the tabletop to the required diameter.
You need to do the following to get a beautiful glass round table:
- Draw a circle on a sheet of glass using a compass, sticking a suction cup right in the middle, sticking a needle in its center.
Important! You can also use a template cut from a sheet of paper. Simply attach it to the material and circle it with a marker.
- Turn the glass over to the front side and thoroughly clean it of dirt. Wipe it with a microfiber or cotton cloth. Make sure the surface is perfectly dry and clean.
- Place the glass on a hard, flat surface and move its edge close to the edge of the surface. Start cutting from the farthest point of the resulting circle.
Important! Carry out cutting in one continuous motion.
- Lay it under the circle soft cloth or a towel, carefully break off the structure.
- Clean the edge under running water to soften it. machining. If large nicks have formed, you can remove them with a file. Sand everything else with sandpaper.
- To sand the surface, use a grinder or drill. Glue coarse sandpaper to the nozzle. Go around and finish sanding with fine grit sandpaper. Round the edges at the bottom and top.
- By using polishing paste or felt pad, polish the tabletop. If you have a preference frosted glass, then no paste is needed for polishing.
- Table supports can be made from chrome-plated legs with nickels, which are glued to the tabletop with special glue, then fixed ultraviolet lamp. In principle, using this method you can fasten legs from any other material.
Important! Before you make a round table, decide on the option for attaching the legs, because you will have to prepare in advance necessary materials and tools. You can use another method - make a circle from chipboard of the same diameter as the tabletop, insert screws with suction cups around the entire perimeter. This connection holds much better if the gluing is done not with ordinary glue, but with a special one for ultraviolet lamps.
This year I acquired a suburban area, which requires a lot of work, but the moment came when it became necessary to equip it with basic garden furniture. To begin with, I decided to make a round wooden table on one leg myself for convenience. And while working, take a photo for step-by-step instructions.
Do-it-yourself stylish round table step by step and with photos
I started making garden furniture from a table. They buy everything for themselves or make them rectangular or square. I decided for myself to make a round one without corners.
To make a wooden round table you will need the following tools:
- Screwdriver.
- Jigsaw.
- Grinder with grinding attachment.
- I used grinding wheels for attaching to the grinder with very coarse grit.
- Self-tapping screws for wood, 6 cm and 4 cm long.
- The boards are 4 ms thick. and 2 cm. Since I am an environmentalist, I used boards from disassembled pallets.
- Rope.
- Pencil.
- One nail.
Making a round base for a garden table leg
I won't give exact dimensions, as they can be customized to suit your needs. In my case, the base is 52 cm in diameter. We place 4 cm thick boards near us and, using high-precision tools (nail, rope, pencil), like a compass, draw the outline of a circle for the base of a stylish garden table.
Using a jigsaw, we cut out a round base along the round frame.
Let's make a leg for a round table with our own hands
From boards 2 cm thick we make a leg, in my case measuring 14 x 14 cm and 70 cm high. Next, measure the hole on the leg and cut it out:
We screw the two twisted elements of the leg to the two elements of the base:
Then we twist the leg for the round table into one piece:
Now you need to cut it out required size wooden boards 2 cm thick and screw them perpendicular to the boards 4 cm thick. To do this, we will use wood screws 6 cm long. In the future we will use only screws 4 cm long.
Now we carefully sand the entire surface of the wooden round table for the garden:
We cut out and screw the elements that will give strong stability to the leg based on it:
DIY round wooden tabletop
We cut out and screw two shaped spars, to which we will screw our wooden tabletop:
We screw the boards and, using professional tools (nail, rope and pencil), draw a round outline of the tabletop on the wood like a compass, in my case it is 90 cm.
Then carefully use a jigsaw to cut out a round table top for a garden table:
We cut out and screw boards from the bottom of the tabletop, which will firmly fix it:
Now there is only one thing left to do - sand the countertop. I like the result! The table is quite stable, which is something I was concerned about during the design and execution of the work. The test table passed the test perfectly! Of course, the results are still not known yet, if someone falls on him - after all, anything can happen;).
The stylish design of the round table fits into any interior, not only into the composition garden furniture, but it also has a place in the kitchen. The presence of only one leg on a round table instead of the traditional four makes it as convenient as possible for practical use.