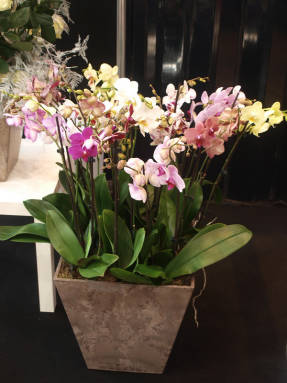
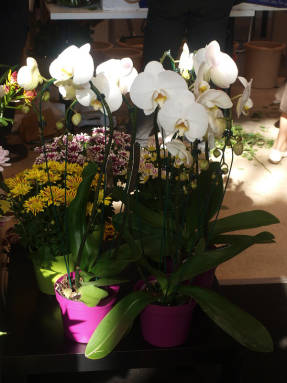
Indoor flowers phalaenopsis care. Phalaenopsis orchid - butterfly flower needs special care
Our grandmothers, growing garden strawberries, or strawberries, as we used to call them, were not particularly worried about mulching. But today this agricultural practice has become fundamental in achieving High Quality berries and reduce crop losses. Someone might say that it is troublesome. But practice shows that labor costs in this case are repaid a hundredfold. In this article, we invite you to get acquainted with the nine best materials for mulching garden strawberries.
Succulents are very diverse. Despite the fact that "babies" have always been considered more fashionable, to the assortment of succulents with which you can decorate modern interior, it is worth taking a closer look. After all, colors, sizes, patterning, degree of prickle, influence on the interior are just a few of the parameters by which you can choose them. In this article, we will tell you about the five most fashionable succulents that amazingly transform modern interiors.
Mint was used by the Egyptians as early as 1.5 thousand years BC. It has a strong aroma due to the high content of various essential oils with high volatility. Today mint is used in medicine, perfumery, cosmetology, winemaking, cooking, ornamental gardening, and the confectionery industry. In this article, we will consider the most interesting varieties of mint, and also talk about the features of growing this plant in open ground.
People began to grow crocuses as early as 500 years before the advent of our era. Although the presence of these flowers in the garden is fleeting, we always look forward to the return of the heralds of spring next year. Crocuses are one of the earliest primroses that bloom as soon as the snow melts. However, flowering times may vary depending on species and varieties. This article focuses on the earliest crocus varieties that bloom in late March and early April.
Cabbage soup from early young cabbage on beef broth - hearty, aromatic and easy to prepare. In this recipe, you will learn how to cook a delicious beef broth and cook light cabbage soup in this broth. Early cabbage cooks quickly, so it is put into the pot at the same time as the rest of the vegetables, unlike fall cabbage, which takes a little longer to cook. Ready-made cabbage soup can be stored in the refrigerator for several days. The present cabbage soup is tastier than the freshly cooked one.
Looking at the variety of tomato varieties, it is difficult not to get confused - the choice is very wide today. Even experienced gardeners are sometimes confused by it! However, it is not so difficult to understand the basics of selecting varieties "for yourself". The main thing is to delve into the peculiarities of culture and start experimenting. One of the easiest tomato groups to grow are varieties and hybrids with limited growth. They have always been appreciated by those gardeners who do not have a lot of energy and time to care for the beds.
Once very popular under the name of indoor nettles, and then forgotten by everyone, Coleus today are one of the brightest garden and indoor plants. They are not in vain considered stars of the first magnitude for those who are looking primarily for non-standard colors. Easy to grow, but not so undemanding as to suit everyone, Coleus require constant monitoring. But if you take care of them, the bushes of velvety unique leaves will easily outshine any competitor.
Salmon ridge baked in Provencal herbs is a "supplier" of tasty pieces of fish pulp for a light salad with fresh leaves of wild garlic. Champignons are lightly fried in olive oil and then poured with apple cider vinegar. These mushrooms are tastier than regular pickled mushrooms and are better for baked fish. Ramson and fresh dill get along well in one salad, emphasizing the aroma of each other. The garlic pungency of wild garlic will saturate both the flesh of the salmon and the pieces of mushrooms.
Conifer tree or a shrub on the site is always great, and a lot of conifers are even better. Emerald needles of various shades adorn the garden at any time of the year, and phytoncides and essential oils secreted by plants, not only aromatize, but also make the air cleaner. As a rule, most zoned adults conifers are considered very unpretentious trees and shrubs. But young seedlings are much more capricious and require competent care and attention.
Sakura is most often associated with Japan and its culture. Picnics in the shade flowering trees have long been an integral part of the meeting of spring in the Land of the Rising Sun. The financial and academic year begins here on April 1, when the magnificent cherry blossoms are in full bloom. Therefore, many significant moments in the life of the Japanese are marked by their blossoming. But sakura grows well in cooler regions - certain species can be successfully grown even in Siberia.
I am very interested in analyzing how the tastes and addictions of people to certain foods have changed over the centuries. What was once considered tasty and was an object of trade lost its value over time and, conversely, new fruit crops conquered their markets. Quince has been cultivated for over 4 thousand years! And even in the 1st century BC. NS. about 6 varieties of quince were known, and even then methods of its reproduction and cultivation were described.
Delight your family and make themed Easter egg-shaped cottage cheese cookies! Your kids will be happy to take part in the process - they will sift the flour, combine all the necessary ingredients, knead the dough and cut out intricate figures. Then they will watch with admiration how the pieces of dough turn into real Easter eggs, and then with the same enthusiasm they will eat them with milk or tea. How to make such an original cookie for Easter, read our step by step recipe!
There are not so many decorative leafy pets among tuberous crops. And Caladium is a true star among the variegated inhabitants of interiors. Not everyone can decide to start a Caladium. This plant is demanding, and first of all - to care. But still, rumors about the extraordinary capriciousness of the Caladiums never justify. Care and attention will help to avoid any difficulties in growing caladiums. And a plant can almost always forgive small mistakes.
We have prepared a hearty, incredibly appetizing and simply elementary dish for you today. This gravy is one hundred percent universal, as it goes with every side dish: vegetables, pasta, or whatever. Gravy with chicken and mushrooms will save you in moments when there is no time or you don't want to think too much about what to cook. Grab your favorite side dish (you can do it ahead of time to keep everything hot), add the gravy and lunch is ready! A real lifesaver.
Among the multitude different varieties We will tell you about three of these most popular vegetables, which differ in excellent taste and relatively unpretentious growing conditions. Characteristics of the varieties of eggplants "Almaz", "Black Beauty" and "Valentina". All eggplants are medium-firm. For Almaz it is greenish, while for the other two it is yellowish-white. They are united good germination and excellent yield, but at different times. Skin color and shape are different for everyone.
The most common orchid in indoor floriculture. It so happened that in 95% of cases, to the question "Tell me! I was presented with an orchid, but I do not know what it is called", it turns out that the phalaenopsis was the gift. What determines such a love for this particular orchid, and not for dendrobium or, say, for Ascocenda?
"A matter of taste!" - someone will say, and they will be right. Another will add, "It's easy to grow!" - and also will not be mistaken. "She's beautiful!" - and this is undoubtedly. It turns out that the visual appeal and simplicity of the content determine the popularity of the plant? Exactly!
Although with regard to phalaenopsis it was not always so. The fact is that until 1995, Russia was supplied mostly with species orchids, that is, natural species taken directly from natural conditions and propagated in open ground or in greenhouses. But the conditions of the premises - apartments, offices, etc., were not suitable for these orchids, there they either did not reveal their decorative potential, that is, they did not bloom or bloomed weakly, or they died very quickly. But after 1995, only hybrid orchids began to go on sale. Why? Because their removal from natural habitats, often barbaric, leads to the threat of extinction of species. Hybridization came to the rescue - the resulting hybrids are propagated under industrial conditions, hybrid orchids bloom no worse than natural species. Moreover, the breeders took care of the duration of flowering, and so that the orchids could live better in unnatural conditions for themselves.
But you should never forget that when you buy a plant, you are acquiring a living organism that requires unremitting care! Unfortunately, according to the number of questions asked on the forum, the site and the operators of our telephone service, the conclusion is disappointing - people either do not understand this, or hope for the eternal Russian "maybe" - maybe it will grow somehow. This is very annoying. With this approach, a person torments the plant and suffers himself, not getting what he hoped for. What is the bottom line? - disappointment. To reduce disappointment, let's change our attitude towards plants and feel that we are responsible for those we have tamed.
Consider the main points of caring for phalaenopsis, adhering to which, you can long time enjoy the luscious green leaves and the stunning beauty of butterfly flowers.
Lighting, temperature control, spraying
It is best to keep the orchid in the east or west window, you can also in the back of the room under fluorescent lamp white light or under a phytolamp special for plants. Supplementary lighting is especially important in the autumn-winter period; the length of daylight hours should be at least 14 hours.
The optimum temperature in summer is + 20-25 ° C, in winter + 16-18 ° C. To stimulate flowering, it is important that the orchid experiences a temperature difference of 3-5 degrees between day and night. In winter, at temperatures above + 25 ° C, flowering is practically not observed.
Consideration should be given to the great adaptability of the phalaenopsis to the conditions of detention. Of course, when creating conditions that coincide as much as possible with natural requirements, the orchid will live longer and bloom more often.
Leaves with settled water room temperature you need to spray regularly, at least 3-5 times a day, especially in winter with the heating system turned on, when the air humidity is very low.
During the flowering period, you need to spray very carefully, trying not to get on the flowers - from the water on the petals appear brown spots, which reduces decorativeness and leads to a rapid fall of flowers.
Transfer
The orchid needs to change the substrate as the bark is destroyed and the substrate is compacted. This is usually done once every 3-4 years. Special substrates "For orchids" are used. It is better to replant in the spring, when the growth processes are activated and the orchid tolerates post-transplant stress more easily. The plant experiences a transplant worse in the autumn-winter period, it recovers more slowly. Do not transplant during flowering, otherwise it will end faster.
For phalaenopsis, transparent plastic pots are more suitable containers - the roots of this orchid photosynthesize in the same way as the leaves, that is, the roots need light. When transplanting, remove dry, empty, dead roots and old substrate. Very carefully separate the roots that have adhered to the walls of the pot (for this, an hour before transplanting, you need to water it, thoroughly moistening the substrate and roots, then they are easier to separate from the walls of the pot). Pieces of bark, to which the roots have adhered, do not need to be removed.
After transplanting within two months, it is useful to add Zircon to the irrigation water once every 2 weeks at the rate of 2-3 drops per glass of water - this will help the orchid to take root faster. Any transplant usually delays flowering by 1.5-2 months. There are times when the orchid blooms immediately after transplanting - the stress from damage to the roots affects the plants in different ways.
Watering
Orchids are watered in two ways - from a watering can through the top of the pot or by immersion in a container of water.
During the flowering period, it is better to water from a watering can, so as not to change the location of the plant, because of which it can shed flowers. Watering must be carried out in such a way that the substrate and roots dry out once a week. Keeping the roots in a constantly damp or wet substrate increases the risk of root rot and the substrate breaks down faster.
When phalaenopsis does not bloom, it is best to water it by immersion - the pot is immersed in a bucket of water for 1-2 minutes (until the air bubbles stop flowing). After such submerged watering, you need to allow excess water to drain, and only then return the orchid to its place.
The temperature of the irrigation water should be equal to the air temperature, and it is even better if the water is 3-4 degrees warmer than the air. The limiting indicator of water temperature is + 28 ° C (warmer water burns, scalds the roots). The water must be surely settled during the day, soft.
If, nevertheless, the water is hard (it contains a lot of lime salts, which can be seen from white streaks on the leaves after spraying and a whitish-yellow bloom on the surface of the substrate after watering), then the amount of lime in it should be reduced.
To do this, you can:
- Boil water for 20 minutes, and take it from a hot tap (there is less lime in it than in a cold one, because it has already boiled at least 1 time);
- Freeze in a plastic bottle, then cut off the bottom and drain the non-frozen water with salts;
- Add oxalic acid to 1 liter of water (on the tip of a knife). After that, the water should settle for 2-4 days, until a white precipitate of salts appears at the bottom.
Top dressing
Fertilizers are used specialized, "For orchids".
Top dressing during the flowering period in summer is carried out 2-3 times a month, during the flowering period in autumn and winter, they are fed 2-3 or 1-2 times a month, but the fertilizer concentration is halved from that indicated in the instructions.
In the absence of flowering, you can not feed or do top dressing once a month, not more often.
To remove excess salts, rinse the soil under a stream warm water within 15-20 minutes once a month.
Reproduction
V indoor conditions Phalaenopsis is easiest to propagate vegetatively - by side shoots-children. They can form both at the base of the leaf rosette and on the peduncle. In both cases, you need to wait for the child to form its own roots (at least one root), and only then plant it in its own pot.
Content Issues
Most problems are caused by non-compliance or violation of containment conditions. If you treat the plant more carefully, there will be fewer problems.
What usually scares a grower? If the orchid does not bloom, if the leaves turn yellow or somehow change, etc. Here I will try to answer these "ifs":
- An orchid does not bloom if there is not enough light for it, if it is constantly kept at temperatures above + 25 ° C, if it is exposed to a sharp change in air and soil temperature (drafts), when watered with cold water, from a lack or excess of nutrition, after a recent transplant;
- Leaves turn yellow as for a natural reason - they age ( lower leaves physiologically, the oldest and should die off first - this is normal), and if the upper leaves turn yellow, become lethargic - overmoistening or overdrying of the substrate, sudden hypothermia, freezing of the plant was allowed;
- If, at the end of flowering, the peduncle immediately turns yellow, you need to wait until it dries itself and only then remove it. The formation of a new peduncle, depending on the strength of the plant itself and from caring for it, can take from six months to two years. If the peduncle remains alive, green for 2-3 weeks after flowering, do not remove it - after 2-4 months, flowering on it may resume or a baby will form on it;
- In case of damage by pests - spider mites, mealybugs and others, use the preparations Agravertin, Fitoverm, Aktara, Neoron (as instructed). Against diseases (as a rule, these are various rot), it is enough to follow the rules of watering, but treatment may also be required. Then apply biological product, for example, Fitosporin-M (in liquid form) - even if you use only it, this is enough for healing plants and for further prevention diseases.
Plants in our apartments depend on us almost completely - we decide when to water, feed, transplant ... However, we should not make these decisions spontaneously, but depending on the needs of the plant at a given growth period and in specific conditions - it is cold in the apartment or hot, light or dark, etc. Moreover, we must evaluate these conditions not only by our own criteria, but also take into account the needs of plants. Indeed, for a person, a temperature change of 1 degree is practically imperceptible, but for a plant it is a strong stress.
As a common saying goes, a plant, like a person, gets used to everything. Let's make it so that the coexistence of a plant and a person is not burdensome, but as comfortable and useful as possible.
Phalaenopsis flowers (lat.Phalaenopsis) – herbaceous plants tribes Vendian family Orchidaceae, native to the humid forests of Australia, South-East Asia and the Philippines. Phalaenopsis orchids are mostly epiphytic because they grow on trees, but sometimes they also grow on rocks. The first phalaenopsis on one of the Moluccas was discovered by the German naturalist Georg Rumph, but the flower got its name from Karl Blum, director of the Leiden Botanical Garden, who, looking at an exotic orchid through binoculars, mistook it for a butterfly, and therefore called it phalaenopsis - “like a moth”. And until now, flower growers call these flowers "butterfly orchids."
The phalaenopsis genus has about seventy species. Phalaenopsis flower that is sold in flower shops, is incredibly popular not only because of its exquisite and extraordinary beauty, but also because the cultivation of phalaenopsis and its maintenance does not cause concern and does not require costs.
Listen to the article
Planting and caring for phalaenopsis (in brief)
- Bloom: at any time from 2 to 6 months.
- Lighting: bright diffused light (windows of western, eastern or northeastern orientation) or slight partial shade.
- Temperature: maximum - 42 ˚C, minimum - 12 ˚C, comfortable - within 15-25 ˚.
- Watering: after complete drying of the soil.
- Air humidity: 30-40% with good ventilation of the room.
- Top dressing: solution of full mineral fertilizer weekly.
- Rest period: not pronounced.
- Transfer: as the substrate acidifies and cakes, about once every 2-4 years.
- Reproduction: vegetatively (side shoots).
- Pests: mealybugs, spider mites, thrips, scale insects, slugs.
- Diseases: fusarium, rust, anthracnose, blotchiness, black, brown, gray and root rot.
Read more about growing phalaenopsis below.
Phalaenopsis orchid - features of cultivation
Any plant has its own preferences, and even more so for such a rare flower in our latitudes. The peculiarities of growing phalaenopsis are due precisely to the fact that they come from humid mountain and lowland forests, where they grow on trees, therefore they require a microclimate, which must be created artificially in our homes.
Here are some of the features of Phalaenopsis:
- the pot and the soil in which the phalaenopsis grows, he needs almost exclusively as a support;
- phalaenopsis roots should be in the air and in the light;
- phalaenopsis roots are green, in nature they receive moisture and rainwater from the atmosphere, and food comes from the bark of the trees on which the flower grows. The roots are involved in photosynthesis, so they must be exposed to light;
- In addition to ordinary roots, Phalaenopsis has aerial roots, branching in a constant search for food, so make sure that they do not climb into neighboring pots.

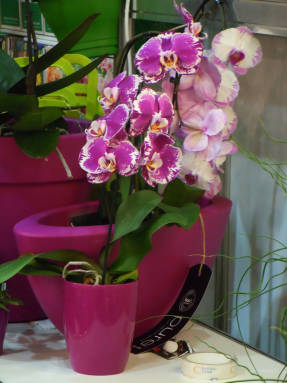
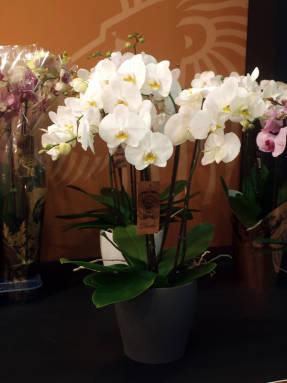
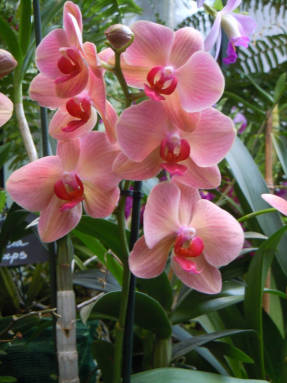
Succulent leaves of phalaenopsis, arranged in two rows, form a basal rosette. Peduncles are long, curved, butterfly flowers are collected in racemose inflorescences. The variety of colors is amazing: violet, lilac, white, yellow, green and red, brown ... Often the flower lip stands out against the background of petals (monochromatic, brindle, mesh or striped) with a contrasting color. Phalaenopsis, like wandas and dendrobiums, are monopodial orchids, that is, they do not form a bulb.
The most pleasant feature of phalaenopsis is that they do not have a pronounced dormant period: their flowers bloom twice a year - in spring and autumn, although persistent flower growers achieve three-time flowering.
Phalaenopsis care at home
How to care for phalaenopsis
Phalaenopsis care consists in choosing a place for a flower, in the right organized watering, feeding, temperature and protection from pests and diseases. It is best to place the phalaenopsis pot on the western, eastern or northeastern windowsill.
If this is not possible, and you have to place the orchid on the south side, put it on a table near the window, behind a curtain that creates a light shade - direct sunlight leaves burns on the plant that look like spots on the leaves and flowers of phalaenopsis. Rotate the plant 180º every 2-3 weeks so that it does not tilt to one side. But during the formation of buds better plant do not disturb.
Phalaenopsis blooms in partial shade at a temperature of 18-25 ºC, and the plant can endure some time and higher temperatures, up to 35 and even up to 42 ºC, and a lower one - up to 12 ºC. But do not test the power of phalaenopsis, try to keep the temperature within 15-25 ºC.

Air humidity is required 30-40 percent, while you need good ventilation premises. With insufficient humidity, the leaves lose their turgor, and the flowers fall off. To avoid this problem, place the plant on a pallet of wet pebbles. Too high humidity can cause root rot and leaf spots.
Spraying phalaenopsis is undesirable even in a very hot season, since water flows into the core and the axils of the leaves, which can lead to rotting of the plant. In addition, moisture evaporating from the surface of the leaves can cause them to burn.
Phalaenopsis feeding carried out during irrigation by adding to the water a complete complex fertilizer Kemira-lux at the rate of 1 g per 1 liter twice a month. You can feed the orchid weekly, but then the concentration of the fertilizer must be weakened. Top dressing is poured only on a wet substrate.

How to water phalaenopsis
Watering phalaenopsis is carried out after the soil has completely dried, but it should not be dry for a long time. If you are growing phalaenopsis in a transparent container, then the signal that it is time to water the orchid is the absence of moisture on the walls of the flowerpot. In addition, the lack of moisture makes the green roots of the flower lighter. If the container is opaque, you will need to scoop up the substrate to determine how deeply dry.
Do not water the orchid over the leaves, water the substrate, or use the bottom watering method for the orchid - immerse the flowerpot in a container of water to saturate the substrate with moisture through drain holes... Water for irrigation of phalaenopsis should be soft and clean: it is not enough to filter the water, it still needs to be boiled. Or use distilled water for irrigation.
Once a month, Phalaenopsis likes to take a shower or wash under the tap, after which the plant should be wiped dry. Avoid waterlogging the phalaenopsis, otherwise its leaves will become lethargic and the growing point may rot. V best case the orchid will have a lateral shoot, at worst - the plant will die.
How to transplant phalaenopsis
When is Phalaenopsis transplant performed? When the plant is in the same pot and in the same substrate for 2-3 years. Usually, by this time, the substrate is caked, sour and becomes unusable, therefore, it needs to be replaced. If you noticed the strong branching of the roots and their germination through the drainage holes, this is also a sign that it is time to transplant the phalaenopsis orchid. This should be done after flowering.
If your orchid is not sick with anything and is planted in a substrate of a large fraction, then it can be carefully transferred into a new, large container with a drainage layer and filled with fresh substrate, the main component of which is the bark of a small and medium fraction. In addition, sphagnum moss is included in the substrate for phalaenopsis. You can purchase a ready-made substrate, or you can buy the ingredients and carefully prepare a mixture for your overseas beauty: place a drainage from expanded clay or pieces of polystyrene on the bottom of the pot, then the bark of the medium fraction, then the bark of the fine fraction, mixed with chopped moss. Keep in mind that dry bark quickly passes water, therefore, before making a substrate out of it, you need to rinse it and leave it in water for a couple of days to swell, then rinse the bark again in clean water.
How to prune phalaenopsis
If the phalaenopsis has faded, watch for a while how the old arrow behaves. If it begins to turn yellow and fade, then remove it without regret, but if it is still green and juicy, then, most likely, after a two-month rest, flower buds will appear on it again. The new arrow must still grow, and only then lay the buds and give flowers. If the old arrow is too long, shorten it by cutting 1 cm higher than the developed bud.
By the way, the lower you cut the peduncle, the more flowers will be on the side arrow. In any case, you do not need to cut the peduncle below the third bud: you will have to wait a long time for flowering on the shortened arrow.

Phalaenopsis bloom
Phalaenopsis orchid bloom
These plants can bloom at any time of the year, and depending on the general condition of the orchid and the conditions in which it is kept, flowering can last from two months to six months. Phalaenopsis usually bloom twice a year, but sometimes a third bloom occurs within one year. Flowers ranging in size from 2 cm to 15 cm in diameter are located on the peduncle in an amount of from three to forty pieces.
How many flowers there will be on the arrow depends primarily on how branched the peduncle is and how comfortable the conditions created by you are for the orchid. Some orchids have a peduncle length of up to 1 m, on which up to hundreds of large flowers are located! The delicate scent of phalaenopsis flowers is just as attractive, as well as their color variety: from solid white, yellow, purple, red to different variations specks, spots and veins on the main background.

Why Phalaenopsis does not bloom
If three months have passed since the last flowering, then it is time for the phalaenopsis to bloom again. But there are times when the leaves grow, and the phalaenopsis still does not bloom and does not bloom. How to make phalaenopsis bloom?
First you need to find out the reasons for this behavior of the orchid. And the reasons may be as follows:
- insufficient lighting (eliminate the cause and wait for flowering);
- the plant is overfed with nitrogen-containing fertilizers (you will have to wait until the nitrogen is processed by the plant, at this time add only phosphorus as a top dressing);
- the plant is just tired, and it needs a longer period to recuperate (wait a bit, and then stimulate the phalaenopsis flowering).
Stimulates the flowering of phalaenopsis by insufficient watering using the drug "Ovary" or "Bud". In addition, it would be nice to lower the night temperature so that the difference between the daytime temperature and the nighttime temperature becomes at least 6-8 degrees. Such drastic changes will make the orchid bloom.

Phalaenopsis after flowering
Usually, after flowering, the faded arrow dries up and is cut off. But sometimes the peduncle continues to remain green, and then you can decide what to do right. You can:
- do not touch the peduncle;
- cut the peduncle to the height of the branch;
- cut off the green peduncle altogether.
If you have cut a green flower stalk, put it in water and it is likely that a baby will appear on it. If you do not cut off the old arrow, then lateral branches may appear on it, on which flowers will appear over time, but the flowering will not be as abundant as on the new peduncles.

Reproduction of phalaenopsis
Reproduction of phalaenopsis by children
If some orchids can be propagated by dividing the rhizomes, then this method is unacceptable for phalaenopsis. Under natural conditions, they reproduce by seeds and new shoots. But the seed method at home is also impossible. How to propagate phalaenopsis at home?
The easiest way is to reproduce the phalaenopsis orchid vegetatively, separating side shoots formed on the peduncle or at the base of the leaf rosette. They do this by letting the plant rest for a month or two after flowering. Those shoots are planted that have already formed a pair of leaves and aerial roots have reached 5 cm in length. But do not let the kids outgrow, as this will badly affect the mother's outlet. The separated baby should be dried within 24 hours, and then planted in a substrate from the bark of a fine fraction, building a greenhouse over the shoot, in which the temperature will be maintained at 22-25 ºC.
The appearance of lateral processes in phalaenopsis is a rare phenomenon, indicating that you are somehow taking care of it incorrectly. Therefore, if your orchid does not have children, you can artificially awaken dormant buds that will give children. They do it like this: find dormant points at the base of the old, faded peduncle, make a shallow semicircular incision at the base of the covering scales with a sharp blade and remove it with tweezers, and lubricate the bud with growth regulator or fresh birch sap.
After a month or two, rosettes of several leaves are formed at the site of the incision, and after three months the roots will appear. To speed up the process, put a plastic bag on the plant - in a warmer and more humid microclimate, children will grow faster.
You can get a baby using a cut peduncle: immerse the peduncle by 4-7 cm in a 0.005% solution of complex mineral fertilizer, having previously removed the scales from the bud as described above. Build a greenhouse over the peduncle and do not forget to change the water.
Phalaenopsis diseases and their treatment
Phalaenopsis get sick from both infectious and non-communicable diseases... And in fact, and in another case, the main cause of the disease is errors in plant care.
Of the fungal diseases, Phalaenopsis most often affects Fusarium, in which the roots of the plant first hurt, and then the disease spreads to the entire orchid. The main reason for the occurrence of fusarium, like other rot, is an excess of moisture. It is impossible to cure phalaenopsis from fusarium, so the plant is destroyed. But other rot (black, brown, root, gray, as well as diseases such as rust, anthracnose and spotting) are sometimes cured by two-time treatment with a fungicide (foundazol or, for example, Topsin-M) at intervals of 10 days.

Often found in phalaenopsis is a disease such as urticaria, which affects leaves at an early stage with large spots of 2-3 cm in diameter. The fault is low temperature air, high humidity and poor air exchange in the room. Eliminate the deficiencies in grooming and everything will go well.
And from a disease such as botrytis, the plant suffers in conditions high humidity air and poor ventilation in the room, but it does not affect the leaves, but the flowers of the phalaenopsis: first, dark brown spots appear on the petals, then the petals fade. If the temperature in the room is raised, the disease will slow down. Also, provide good ventilation. humid air in the room and treat the plant with a bactericidal preparation.

Non-communicable diseases are caused by the use of pesticides, excessive lighting, improper feeding, uneven watering and are expressed by drying out of the tips of the leaves, necrosis of the roots, damage to other plant tissues and all kinds of spots. Find and eliminate the cause of the disease, and, most likely, you can save your orchid, but you should know that resuscitation of phalaenopsis is a laborious process and not always successful.
Phalaenopsis pests
In addition to diseases, phalaenopsis and pests are debilitating. For example, a small insect such as a mealybug can cause yellowing and dropping of leaves. It is destroyed by processing leaves and stems aqueous solution laundry soap.
A spider mite that infects any plant with insufficient air humidity can also harm phalaenopsis. The tick expresses its presence with a silver cobweb on the leaves, as if impaled with a needle. If you find spider mite at the very beginning of the occupation of the plant, you can remove it, like aphids and worms, with soapy water, but if things have gone far, and the pest has firmly settled on your orchid, you will have to use acaricide treatment to combat it.

Almost recently, the cultivation of the Phalaenopsis orchid was the lot of only the most advanced gardeners, today it is increasingly found on window sills ordinary apartments... When you decide to purchase this exotic flower, first find out all the features of caring for it.
What is Phalaenopsis
Phalaenopsis is exotic flower from the Orchid family, habitat - tropical places with a hot climate. The plant has only one single point of growth - a rosette of leaves. A medium-sized orchid can be up to a meter high, the mini-version grows to a maximum of 30 cm. The color of the buds in the photo is varied: lilac, pale pink, white or yellow. There are plants that have additional decorations on the sides of the flower: bright stripes or blotches.
Phalaenopsis - the birthplace of the plant
The world first learned about this flower thanks to Karl Blume in 1825. Examining the jungle through binoculars, the man saw very beautiful butterflies... The researcher was so interested in the find that he decided to come closer and was extremely surprised - these were flowers. This is how the name of the now popular houseplant Phalaenopsis appeared, which means moth-like. The homeland of the Phalaenopsis orchid is northeastern Australia and the Philippine Islands.
Caring for the Phalaenopsis orchid at home
Lovers are afraid to buy an orchid simply because they don't know how to care for Phalaenopsis. Growing this exotic flower at home is no more difficult than planting violets. He is just as unpretentious, loves warmth and moderate watering, loves daylight, and artificial lighting can be turned on for him in nurseries. However, it is hard for him to endure the change of residence, therefore, caring for the Phalaenopsis orchid at home begins immediately after its acquisition.
Phalaenopsis - home care after the store
You have been looking closely at the display case with orchids for a long time, carefully choosing and examining the plant, and finally brought the beauty home. What to do after? How to care for Phalaenopsis orchid right after purchase? Take a deep breath first, calm your beating heart and choose the right place to keep the plant pot.
If other flowers already live on the windowsill at home, then it is better to put the orchid separately from them. You do not need to immediately water the plant and, moreover, feed the roots with special fertilizers, for at least two weeks. In addition, the newly purchased flower does not even need natural light. Remember, good care for Phalaenopsis after the store is to provide the plant with complete rest.
How to transplant the Phalaenopsis orchid at home
The main question for all lovers of exotic flowers is how to transplant Phalaenopsis. The orchid is not too whimsical, so move it to new pot it will not be difficult. The main thing is to choose the right time for a transplant and to know a few subtleties. In general, the transplant of the Phalaenopsis orchid at home should take place according to the following scheme:
- Lightly remember the pot with your hands, or moisten the substrate with water and then remove the plant.
- Rinse the roots in the shower, remove the remnants of bark and earth. To make the dirt easier to wash, the plant can be left in water.
- Examine the root system and cut off any bad areas. Prune the stalks. To avoid damaging the branch, make an incision 1 cm above the bud. It is better to use a garden pruner or sharp scissors for this.
- Leave the plant overnight so that all the cuts on the roots have time to tighten.
- Then place the flower in a new pot, filling the voids with fresh soil.
When to transplant the Phalaenopsis orchid
In order for the Phalaenopsis transplant to benefit the plant, and not vice versa, it is worth focusing on the general condition of the flower. If the leaves are soft or sagging, and the soil resembles a caked washcloth, rot is even visible in places - the plant should be transplanted right now. If, during the transplant, it turned out that there is absolutely trouble with the roots, even the flower arrows will have to be cut off.
When the leaves are fresh or new ones have just begun to grow, the soil consists of large pieces, and the roots are alive - there is no need to move the orchid to a new flowerpot. In general, professionals advise replanting the Phalaenopsis orchid not very often and always after flowering. Early spring is considered the most favorable time of the year: March-April, but at the time of cold weather, from about October to January, the plant should not be disturbed.
Phalaenopsis orchid soil
Finding the right substrate is practically the most important ingredient for a successful transplant. These flowers categorically refuse to grow in ordinary soil. Soil for Phalaenopsis orchids needs special: coarse-grained, made on the basis of bark, well ventilated. If it is not possible to buy substrate in the store, you can make a mixture at home from ordinary bark, moss and charcoal cubes up to 3 cm in diameter.

Pot for Phalaenopsis
A glass container, or better a translucent plastic pot for Felinopsis, should be slightly larger than the previous one. You can put the plant in a regular dark pot as well, but the glass will provide a constant supply of sunlight and the roots will feel much better. When choosing a container, you should take a closer look at the one that has large drainage holes - stagnation of water is extremely unacceptable.
How to water Phalaenopsis orchids at home
Before watering Phalaenopsis, you should make sure that the substrate is well dried. Therefore, it is much more convenient when a flower grows in a transparent pot. If the orchid lives in just such a container, then the signal for watering will be light roots, under normal humidity conditions they are light green in color. If the pot is darkened, then watering will have to be done by touch: rake the top soil and try the moisture with your fingers.
Watering the Phalaenopsis orchid at home after transplanting is somewhat different. You should forget about water for 1-2 days so that the wounds of the cut roots have time to heal. And in general, you will have to adapt to watering again, because the fresh substrate will dry out a little faster than the old soil. There is a single rule for all types of soil - the substrate must have time to dry before the next watering.
Reproduction of Phalaenopsis orchids at home
The division of the plant is carried out vegetatively, through the shoots at the base of the outlet. Those children on which the first leaves appeared, and the aerial roots reach a length of up to 5 cm, are planted. First, they are separated, then dried and planted in a new earthen mixture. As soon as Phalaenopsis continues to grow, a fertilizer solution can be introduced into the soil. Reproduction of Phalaenopsis orchids at home can begin several months after flowering.

Phalaenopsis orchid flowering at home
To initiate flowering, the plant must be positioned correctly. In late autumn and winter, it is better to place the orchid on the south side; the pot can be transferred to the western and eastern parts of the house in summer. An important process on your part is to reduce watering, it is better to just spray the substrate from a spray bottle. Under normal conditions, the flowering of the Phalaenopsis orchid at home lasts up to six months. If you want to prolong this moment, then spray the peduncle itself with warm water.
Phalaenopsis care after flowering
After the buds bloom, the arrow dries up and is cut, but this is not always the case. If the peduncle remains green, then care for Phalaenopsis after flowering can take place in one of three scenarios:
- leave the stem as it is, over time new buds will appear on it;
- cut the peduncle to the first bud;
- cut the peduncle completely, put it in a vase and wait until the bud appears.
Why Phalaenopsis does not bloom
After three months, the plant will sprout new buds and bloom again. If this does not happen, you are doing something wrong. In most cases, Phalaenopsis does not bloom for the following reasons:
- The plant lacks sun. The pot should be in a light shade, where the temperature can fluctuate within 25 degrees, and the moisture content of the air is 35-40%. Plus, there should be good ventilation in the room.
- Too much feeding. It is necessary to wait until all the beneficial vitamins and minerals are completely absorbed by the roots.
- He needs rest and moderate active growth stimulation. To put the plant in order, give it a few months of rest, and then stimulate the flowering with drugs.

Phalaenopsis diseases and pests
The only thing that the Phalaenopsis orchid requires from its owner is home care according to all requirements. With moderate watering, compliance temperature regime, it will delight the eye with beautiful flowering all the time. If the care is not correct, the plant may die. A flower is usually attacked by such infections:
- Fusarium - fungal disease that attacks the roots of the plant. The main indicator decay - excess moisture. There is no way to cure this disease.
- Urticaria is a viral infection that affects the leaves of the plant. The reason - the flower stopped receiving Fresh air.
- Botrytis - affects the buds, which eventually wither and fall off. The reason is that the air in the room is too humid.
Video: caring for the Phalaenopsis orchid
The butterfly flower is loved by many gardeners. In order for the bush to delight with its beauty, the phalaenopsis orchid at home requires specific care. The epiphyte plant develops in conditions that are easy to create. Compliance with all content requirements will be a guarantee long flowering orchids.
Phalaenopsis orchid care at home
 It is important for the development of a plant to create conditions for the correct development of the root system. You need transparent pots and a special substrate. There are no trifles in the maintenance of an orchid, only correct agricultural technology will create a picturesque indoor garden:
Location for a flower pot- the shaded side of the apartment. Direct sunlight and a southern window are not suitable for an orchid. It is possible to place the plant far from the window, but with backlight. The length of the day is critical. Phalaenopsis orchid blooms only when illuminated for at least 12 hours.
Content temperature when caring for a phalaenopsis orchid at home, it depends on the season. In summer, when the flower arrows are striking in their beauty, the shade should be 18-25 0 C. At higher temperatures, the flowers can quickly begin to crumble. In winter, if flowering is not expected and the plant is resting, coolness is needed, about 15 degrees.
During the rest period, when flower buds are laid, the night temperature should be 4-5 degrees lower than the daytime.
How to water orchids phalaenopsis at home? The fleshy roots feed the plant, but they can rot if the moisture is stagnant. Roots should be in an ultra-light substrate and not only supply the plant nutrients but also to produce chlorophyll under the influence of light penetrating through the transparent walls of the vessel. It is important to saturate the substrate with moisture after it has dried by immersion for 30 minutes. In this case, the leaves should not be wetted. It is possible to determine whether the soil in a pot is dry by weight, an indicator of moisture, everyone finds their own way of control. With a lack of moisture, the plant will shed flowers, with an excess, it will rot.
Microclimate for a flower- butterflies are created by everyone available ways... The orchid does not require regular spraying, the accumulation of water in the axils of the leaves can cause rotting. Humidity 40-45% is considered optimal for the plant. 
Phalaenopsis orchid soil is selected with the expectation that the plant is epiphyte. The substrate is prepared from a mixture of coniferous tree bark, charcoal, sphagnum moss and shells. The bark is taken from old fallen trees, soft, after boiling. In the lower part, like drainage, pebbles are poured with the addition of bark and coal. The acidity should be 5.5-6.0. To keep the acidic environment, a little peat is added to the substrate, or it is watered with acidified lemon juice water. But it is better to transplant in two to three years and not use acidifiers.
For long flowering, when caring for the phalaenopsis orchid, you should not change the place of the pot and maintain a uniform temperature in the room. Fertilizers for orchids have a specific composition and concentration; they need to be used once a month in the recommended amount. Root dressing for healthy flower preferred.
Leaves are required. You need to rinse them, then wipe them so that there are no drying droplets left. If the old lower leaves begin to dry out, they need to be cut off. Also observe the condition of the aerial roots, removing damaged parts. Be sure to sprinkle the cut with charcoal or cinnamon powder.
How to properly transplant Phalaenopsis orchid at home?
The roots of the orchid are not long, not branched, it is important that there are many of them, and they keep the plant firmly in the soil. The bush should not swing. To root system was healthy, the orchid needs to be transplanted correctly after it has faded.
 Transplant stages include mandatory operations:
- remove the plant from the container with minimal damage;
- soak a clod of earth and wash it off with a stream of water;
- remove damaged roots, sprinkle the cut points with coal dust or cinnamon powder;
- cutting off dry leaves and arrows, you need to leave hemp;
- dry the flower 3 hours before planting.
Boil the composition of the soil and leave in water until it cools. Filter out the solid part, rinse on a sieve hot water and put to dry until free-flowing. Treat the drainage composition in the same way. Place the prepared dried plant in the center and sprinkle the roots with the substrate, without deepening the rosette along the neck. Drizzle with warm water and let the filtrate drain. We bring the compacted and settled soil to normal level bedding. There should be no moisture on the leaves and in the axils after transplanting.
The transplant operation is necessary in order not to deplete the mineral supply, not to increase the acidity and not to use peat and acidified water, which will poison the plant. You can get acquainted with the transplant of the phalaenopsis orchid at home on the video, which will help you not to make mistakes.
Home breeding methods for orchids
Phalaenopsis orchid is propagated by seeds in special conditions. At home, you can get a new copy by the rudiment formed on the faded arrow with aerial roots. This is the easiest way to get a new plant.
 There is another, more time-consuming way - cuttings of faded arrows. The cut arrows are cut into fragments, each of which contains a dormant bud. Cuttings are germinated in a substrate in a humid environment, not every cutting will give a new baby.
The block culture method - the reproduction of the phalaenopsis orchid at home, as an epiphyte, on a wooden base is applicable if a humid air environment can be created. On a piece of vine, a branch of a tree, moss or a similar material is attached to retain moisture. A phalaenopsis orchid baby is pinned to this surface. So that the roots located in top layer, do not dry out, you need to environment was wet.
Diseases and pests of orchids
If you take care of the orchid incorrectly, then the colonization of pests and plant diseases are inevitable. Non-infectious ones arise from improper care, then the weakened plant is affected by insects and fungal and bacterial ailments. With phalaenopsis at home, yellowing leaves may become the first signal of trouble.
 Yellowness indicates incorrect content temperature, lack of light or moisture. But the worst thing will be steaming or prolonged hypothermia of the plant. Vegetative buds die and the plant dies. Elongated leaves signal a lack of light and become vulnerable.
Viral diseases include all kinds of small spots and mosaics. They are incurable. Therefore, if a specialist has diagnosed a viral disease, the plant must be destroyed by burning. Viruses carry insects, and the disease will inevitably spread to other flowers.
Bacterial spotting manifests itself dark spots, softened leaves and roots. Sore spots are cut out to healthy tissue, cauterized with iodine, and sprinkled with coal dust. In advanced cases, the leaves and roots are treated with fungicides.
 Anthracosis, powdery mildew, rust refers to fungal diseases, transmitted by spores or from the soil. It is easier to prevent these diseases than to cure them. To do this, you need to ventilate the room, avoid excessive moisture, do not leave droplets of water on the leaves. Various rot appears when the temperature regime is violated, especially with the greenhouse effect. A sooty fungus develops on the sweet secretions of insect pests.
A weakened plant can infest aphids, mealybugs. With proper care, the mealybug will not start. Aphids should be washed off with soapy water. After processing, wash the leaves with soft water and dry. To destroy insects, use only preparations recommended for orchids.

