How to make butterflies on the wall with your own hands. Decorative butterflies for wall decoration How to make beautiful butterflies on the wall
Today on the Internet you can often find a request on how to make a butterfly out of paper or other improvised material, because you don’t always have the desire and funds for major and even cosmetic repairs, but you want to change something in the interior.
This decor is an appliqué made of sheet material using special templates. You can make and fix such a panel on the wall in various ways, and the final result depends on how to do it.
Butterflies in the interior will please the eye every day, attracting the attention of guests. Let's get acquainted with how to make such a craft with your own hands. There are several original and uncomplicated ways. 
Where to begin
In the world of design solutions, such a trend as decorating walls with butterflies has recently appeared and gained popularity. These crafts create an atmosphere of sophistication, fill it with romance and lightness. However, as in any process, do-it-yourself interior decoration is preceded by preparatory work:
- Initially, you need to decide on the surface where you want to place the planned panel or image.
- You should calculate the shape and total area of the pattern, whether it will occupy a certain area or be distributed over the entire wall.
- It is important at the preparatory stage to choose the material from which the decorative elements will be created. It is also worth remembering about compatibility with the interior of the room.
- Consider the shape, size and color of crafts. A colorful composition on a light surface is the best solution. As for the size, it is better to make wings of different sizes and shapes than to stick to one pattern. Butterflies made with asymmetry turn out to be as realistic as possible. There is no need to observe strict mirroring; upon completion, slight deviations will add volume and dynamism to the composition.
- It should be thought up in advance, but it is better to draw a sketch of the overall composition on paper. It can be a descending stripe, a flying circle of moths, a heart of butterflies of the corresponding color, etc.
 Depending on the decision, it is necessary to prepare the necessary tools and material from which the wall decor will be made.
Popular and accessible materials
You can create decorative butterflies from various sheet materials, the main of which are the following:
- paper;
- cardboard;
- the cloth;
- film, including self-adhesive.
Each of the presented materials is good in its own way.
 Using paper, you can later paint it in any suitable color, which will allow you to stylishly place butterflies in the interior. You can immediately use colored paper, which is sold in any stationery store. If you want to make multi-colored wings, you can use already unnecessary glossy magazines, which in the end will allow you to get a colorful and beautiful composition. Paper crafts can be attached to the wall in any convenient way, while they will not protrude significantly above the surface level.
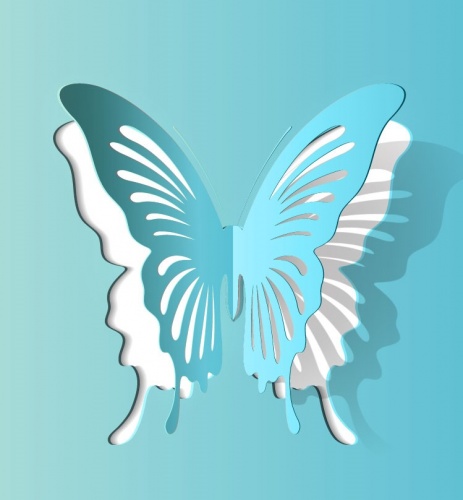
If paper products are too thin and fragile, you can use cardboard as a base. This option will be many times more reliable and stronger, although working with cardboard is somewhat more difficult. The advantage of cardboard is that it easily takes a given shape and retains it. So, wings or other parts can be rounded or bent, thereby making a voluminous butterfly. This is done by wetting the cardboard, giving the desired shape and drying in a given form. However, along with the advantages, cardboard has a significant drawback - if paper butterflies are easy to fix with your own hands, then you will have to tinker with cardboard. 
Butterflies made of vinyl records and plastic film look original. Such crafts will delight the eye with shape and color. It is as easy to cut crafts from film as it is from cardboard. You can fix plastic film butterflies like plain paper, and with vinyl crafts it’s completely easy - just peel off the protective layer of the film in the right place.
Another practical option is to make fabric wall butterflies. You can make a composition on the entire wall or select a separate panel. In any case, the fabric craft looks no less “soulful” than the previous options. It is better to fasten the fabric to the wallpaper with glue, and completely cover the craft with it. Or you can form a three-dimensional composition - soak the fabric in an adhesive solution, let it dry, and then attach the product to the wall. 
Butterflies made of paper or cardboard: step by step instructions
Paper or cardboard butterflies are the most budgetary, but at the same time original option on how to decorate a wall with your own hands. They can be multi-colored, decorative, openwork, silhouette, solid and even fluttering - it all depends on the creator's imagination.
One of the main advantages of such butterflies on the wall is the variety of colors and the possibility of additional transformation with the help of paints.
You can attach, as mentioned earlier, cardboard and paper moths both with double-sided tape and glue, and with a pin. 
So, let's start making a butterfly on the wall on our own. This will require the following:
- paper or cardboard;
- pencil;
- scissors;
- eraser.
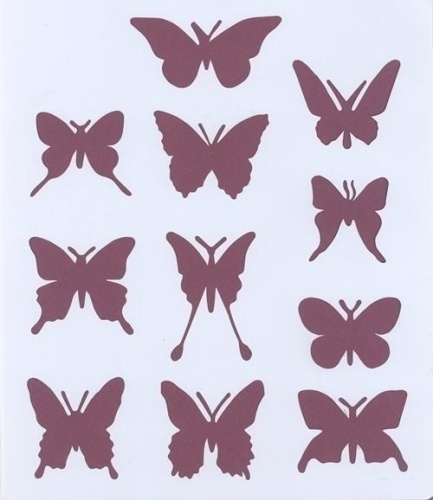
The whole technique for creating crafts comes down to how to cut a butterfly out of cardboard or paper. First, a square of arbitrary size should be cut from the base material, and then folded in half. Then draw a sketch of a moth in all details. For these purposes, there are various templates on the Internet. Of course, you can draw butterflies on your own, guided by your own imagination, but it is unlikely that you will be able to get a large number of absolutely identical blanks. That is why it is better to use ready-made stencils, which are enough to circle around the contour with a pencil and cut out. 
After the required number of products has been made, you can start decorating the walls with butterflies with your own hands. To do this, first on the surface you need to mark with a pencil the places where the crafts will be attached. After that, using glue or tape, you can fix the butterflies on the wall.
If cardboard butterflies are used in the interior, you can bend their wings to create a fluttering effect. For these purposes, the edges of the wings should first be wetted, then the desired bend should be given. When the craft dries, the given shape will be preserved. Origami butterflies can also be made from cardboard, and children can be involved in this process. 
Fabric butterflies: step by step instructions
Butterflies come out of fabric in a very original way, and you can use different materials. A predetermined pattern is cut out of thin fabrics, and then soaked in a soapy or adhesive solution. As soon as the products dry, start decorating the wall.
If you need to make a small number of crafts, then the option of a felt butterfly is suitable. For this you will need the following material:
- felt;
- decorative ornaments (beads, buttons, beads, etc.);
- tulle;
- glue;
- ribbon.
 Initially, you should draw a stencil on paper, then cut and transfer the workpiece to the main fabric. Separately, 6-8 petals need to be cut out of tulle. The rest is a matter of everyone's imagination. With the help of glue, decorate the fabric blank with decorative elements, and drape the wings with petals (2 for each wing), and for the lower ones, the tulle blanks will need to be folded in half. A ribbon should be sewn to the butterfly so that it can be hung. In general, the process of creating a bright felt butterfly is shown in the photo.
Such a craft can not only decorate a wall or other surface, but also use it as a souvenir, present and New Year's decoration.
Photo gallery
In our gallery you will find 32 more photos of original butterfly ideas for decorating your interior.
At the final stage of repair work, there is certainly a desire to add a twist to the updated interior. The opposite situation, when no major changes are expected in the near future, also gives rise to the idea of enlivening the atmosphere with original decor. In both cases, handmade butterflies will help to decorate the wall. The creative process is able to captivate all family members, depending on the chosen concept, everyone will find something to their liking.
Preparatory work
Butterfly wall decoration is a relatively new trend in the world of design solutions. Winged flowers will make the atmosphere refined, filled with romance, lightness and carefree dreams. The implementation of creative ideas into reality is preceded by a preparatory stage:
- Choose the most suitable wall for the butterflies. A wide view will allow you to more often admire the original decor.
- Calculate the shape and area of the image on the wall, whether it will occupy a small area or be scattered over the entire surface. In addition to direct mounting on the wall, butterflies can be made into a panel, framed or hung from a wall lamp.
- Decide what material is better to make butterflies. Take care of its compatibility with the interior of the room. The article provides traditional and extravagant ideas for creating moths.
- Consider the color, size and shape of the jewelry. Bright shades on a light wall are the best solution. Butterflies of different sizes look much more spectacular than those made from one stencil. Butterflies made with asymmetry will help to get as close as possible to the natural image. Mirroring should not be strictly observed, in the end, small deviations will add volume and dynamism to the appearance of the application.
- Depending on the chosen direction, prepare the material and tools with which you will decorate the wall.
Advice ! The overly intricate shape of the butterflies will create difficulties when cutting. If there are time constraints, it is better to focus on simple figures.
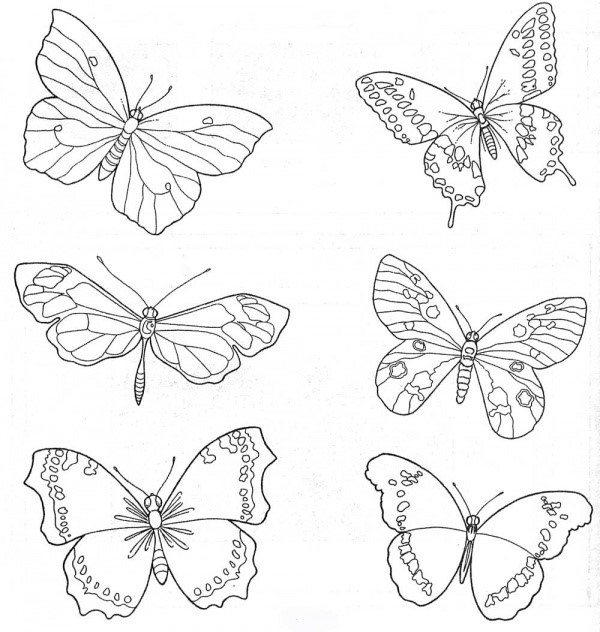

Possessing basic art skills, you can make a stencil for future butterfly blanks yourself on plain paper or using available drawing editing programs. In the absence of talent, ready-made butterfly patterns on the wall, designed for cutting, will come to the rescue.
paper moths
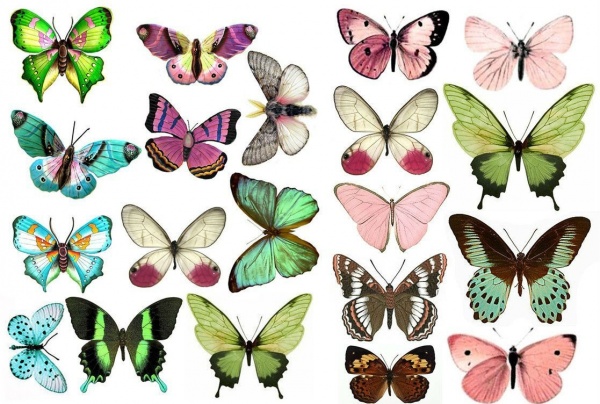
The most affordable way to decorate is to decorate the wall with paper butterflies. To make the moths monophonic or to combine two colors depends solely on the imagination of the novice designer. In the absence of the necessary shades, acrylic paint and white paper will solve the problem. Butterflies on the wall, made from bright sheets of glossy magazines, look interesting. The variety of shades is difficult to create on your own, and bright prints will decorate the wall in a whimsical way at no additional cost. A pre-composed palette will allow you to make smooth transitions in the composition.

Having picked up your favorite sketches of various sizes, they are determined with the required number of butterflies. After that, the images are printed and stencils are made. A simple shape is most convenient to attach to cardboard and cut out the inside. The drawing of complex structures is applied to a dense sheet and carefully cut out with a clerical knife. To speed up the process of preparing the figures, it is enough to fold several sheets of paper and cut them out at the same time.
Cardboard option
Making cardboard butterflies on the wall is more difficult. However, the material allows more variation in the design of the shape. To achieve the desired rounding, it is enough to slightly moisten the product and, having given the desired bend, fix it with a load. After drying, the butterfly will retain the desired shape.
Another interesting option on how to make butterflies out of paper on the wall is to make origami. This pastime is especially popular among children.

The idea of \u200b\u200bthe location of butterflies on the wall is initially drawn on paper. It is desirable to ensure compatibility with the wallpaper pattern and the general theme of the room. An extravagant look is a whirlwind of moths or a flock flying from one side of the wall to the other. To make a heart or a big butterfly out of small details - there are no limits to fantasy. The sketch is transferred to the wall with a chalk or pencil, carefully marking the lines along which the figures will be located.
Mounting methods
Butterflies cut out of paper or cardboard are mounted on the wall in several ways:
- PVA glue. If the task is not to maintain an attractive appearance of the wall after removing the decor, PVA glue or wallpaper solution is quite suitable. Fully glued butterflies will not create a natural effect. Volumetric applications look much more interesting. To do this, the wings of the moths are slightly bent and only the middle is fixed. When the air conditioner is running or in the summer breeze, the butterflies will come to life, fluttering from the air flow. Glue is applied to the base in small doses so as not to spoil the surface of the wall outside the template.
- To fix light moths, pieces of foam are used. Initially, the material is glued to the product, then to the wall.
- Double-sided foam tape, cut into small squares, is attached to the butterflies, after removing the protective film. Having done all the details, proceed to the design of the wall.
- If there is a prospect of removing butterflies from the wall without subsequent repair, it is better to make a pin mount. This is acceptable only for wallpaper, the option of plastered walls will not allow the proposed method to be applied. Having picked up hairpins decorated with beads or pebbles, they are bent with pliers at an angle of 90 °. Having fixed the upper part on the body of the butterfly with glue, the end is carefully wound behind the wallpaper. If necessary, the decor can be easily dismantled without leaving marks on the wall.
Remark ! When fixing cardboard products, take into account their large mass, unlike paper counterparts.

Decorating with a stencil
Butterflies made using a stencil will give originality to the design of the walls. Having picked up and printed out the sketches, the drawing is applied to a thick film or laminated with strips of adhesive tape, circled with an indelible marker and cut out with a sharp clerical knife. Several blanks will facilitate the work process, it is advisable to make one copy for each color. Luminous paints will add extravagance to the picture. At night, with directional light, the spectacle looks breathtaking. Further work includes the following steps:
- Butterfly stencils are attached to the wall with spray adhesive or construction tape.
- A sponge cut into several parts and equipped with a handle will allow you to make a suitable brush. The purchase of ready-made tools will shorten the preparatory period.
- Ordinary paints are applied regardless of the time of day, it is better to work with phosphor material in subdued light. Remove excess dye from the sponge, making sure that the hit on the stencil is minimal.
- To emphasize the image glowing on the wall will allow a blue outline made with a regular brush along the edges of the wings. After drying, the stencil is removed.
Tip! So that ordinary paints do not stretch, they are first drawn along the contour with a blade or a sharp knife.
In addition to paints, surface decoration with butterflies is made out with putty. To do this, after fixing the template on the wall, the building material is applied using a palette knife. At the end of the process, the stencil is removed and washed with water from the remnants of the putty. After the mortar dries on the wall, you can make an extraordinary coloring of butterflies.

Vinyl and plastic
The times when every house had an impressive collection of vinyl records are in the past. Butterflies on the wall made of vinyl are capable of recalling the past and usefully using a stale rarity. The template you like is applied to the plate, outlined with white chalk or a bar of soap. To make the material pliable, it is placed on a baking sheet lined with baking foil in the oven. The desired condition is achieved in a few minutes, curving edges will tell about this. Without wasting time, start cutting out butterflies from softened vinyl with sharp scissors. If you do not have time to do it before the moment of hardening, the procedure for placing in the oven will have to be repeated, so do not rush to turn it off. To make the edges of the butterflies less sharp, their processing with sandpaper will allow.
Advice ! While the vinyl is warm, make the products voluminous, whimsical curves will add personality to the decor on the wall.

Double-sided tape will help fix the butterflies on the wall. Pieces cut along the length of the moth's abdomen are initially glued to the wall, then the figures are fixed directly on them. Silicone glue is another way to securely fix the decor on the wall.
It is enough just to make a butterfly out of plastic, decorating the wall of a country house in the future. To work, you will need the middle part of the bottle and decor materials. Having picked up the stencil you like, the drawing is transferred to the plastic with an indelible marker and cut out. The butterfly is decorated with varnishes of bright colors, with sparkles, if available, you can use acrylic or those left after the repair. It will be interesting for little needlewomen to make a butterfly on the wall, decorated with rhinestones and beads. Don't forget the wire tendrils.
Fabric and metal design
On walls with liquid wallpaper or decorated with draperies, butterflies made of fabric look appropriate. This creates an atmosphere of special warmth and home comfort. Cut and processed butterflies are attached to the wall with glue. Thin fabrics will allow you to make a three-dimensional image on the wall. For this, the carved moth is soaked in a soapy or glue solution and dried in a specific shape.
Butterflies on the wall, made from tin cans, look radically opposite. To work with the material will require a lot of effort and accuracy. Golden spray paint can give the blanks an attractive look. Monotony is better to subsequently dilute with an additional pattern. The extravagant design on the wall will harmoniously fit into the interior designed for brutal men.

Regardless of which wall design option you choose, the decor will definitely give the room a personality, emphasize the refined taste and awareness of design art.
You can decorate a room and create an original design not only with the help of expensive items, but also with improvised means. So, do-it-yourself paper butterflies on the wall will be an excellent decoration option. Moths for many are a symbol of lightness, beauty and freedom. Butterfly decor will look great in almost any interior, it is only important to know how to arrange it correctly.

When creating paper butterflies, it is worth considering the interior of the room. Butterflies should look organic with other decor. It is recommended to use butterflies only in living rooms: bedroom, nursery, living room. But if you decide to decorate the kitchen or bathroom with them, then the decor will quickly lose its appearance due to the influence of external factors, such as high humidity, temperature.

Wall butterflies can be used not only as decoration. With the help of such an interesting detail, you can visually mask the unevenness of the walls, dirt or stains on the wallpaper and other defects.
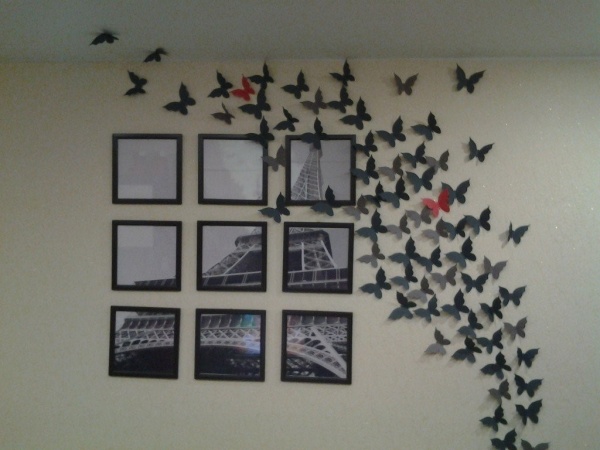
You can arrange a composition of moths both randomly and use them to depict a certain pattern or pattern. In addition, this decor can serve as a frame for photos. With moth décor, you can use just one wall to make a bright accent on it, or decorate the whole room. So, the composition of flying moths looks very interesting.
What styles are suitable for
Butterflies on the wall will look great in an avant-garde style, which is distinguished by a contrasting design, unusual shapes and original decor. Moths will complement the avant-garde room and will be able to emphasize its individuality.
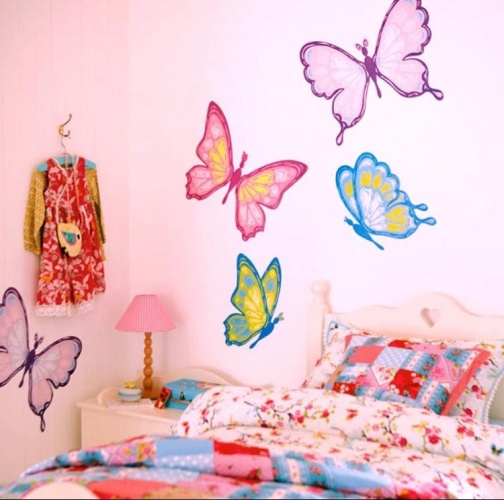
To decorate a nursery or bedroom in a contemporary style, paper butterflies in black or white are also suitable. This style is distinguished by classic forms, lightness of lines, inexpensive and functional items.

The pin-up style in the interior is characterized by an abundance of accessories, femininity, lightness, and playfulness. A room decorated in this style is suitable for a young and stylish girl. The final detail will be bright butterflies in the interior on the wall. They can be of various sizes, decorate both part of the wall and the entire wall.
The Scandinavian interior style is distinguished by light shades, natural materials, harmony and integrity of the interior. For many, classic plain white or light gray walls, typical of the Scandinavian style, seem boring, so glossy or velvet moths can complement the interior.
It must be remembered that there are also interior styles in which it is almost impossible to fit decor in the form of butterflies. These styles include all classic:
- Baroque;
- Victorian style;
- Renaissance;
- Classicism;
- Rococo.

Interiors created in this style are characterized by an abundance of expensive finishing materials, luxurious furniture, sophistication and sophistication. Moths will not be combined with decor made of marble, stucco and other similar items.
What are handmade butterflies made of?
Various materials can be used to make butterfly wall decor. Wall decoration will look different, depending on the material used. In addition, some materials are much easier to work with. The main materials used for manufacturing include:
- Cardboard paper (both plain and glossy or matte);
- Double-sided colored paper;
- corrugated paper;
- Paper with a velvet texture;
- Thin fabric.

There are also options in which moths are made of metal or wood, but such methods are much more difficult to implement.
Design options and wall decoration with paper butterflies
There are various ways to decorate walls with moths. Each interior has its own color, size, decor material.

black
Black moths are the perfect complement to a solid white, beige or light gray wall. We recommend choosing a glossy black cardboard paper to create a decor. Such an ornament will look more advantageous than one made from plain paper without glitter.

Volumetric
Volumetric decor is distinguished by lightness, grace. At the slightest breath of wind, such butterflies will move, which, of course, looks very advantageous. You can decorate with voluminous moths not only the wall, but also the mirror surface. So, white decor in the corners of the mirror will give it originality.
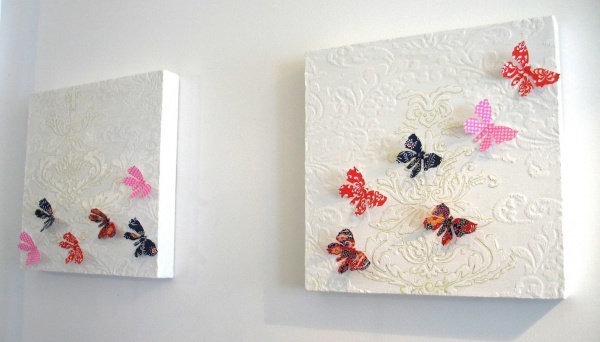
panel
The butterfly panel is a white or colored canvas on which the decor is pasted. The convenience of the panel is that the canvas is easy to remove, so you can change the interior design without damaging the wall. In addition, the panel will be an excellent gift option.
colored
Colored butterflies are suitable for decorating a plain wall in neutral shades: white, gray, beige. Bright color decor can be the only eye-catching detail, or complement the room in an art style. You can make such an application more vivid if you use paper of several colors.

And other possible options for paper butterflies
Among the original options, one can note the creation of luminous butterflies. The decor can be seen only in the dark, in daylight the butterflies remain invisible. To do this, stencils (templates) of butterflies are used for cutting paper on the wall and phosphor paint.
In large stores for home goods, ready-made wallpaper with butterflies for walls has already begun to appear. But creating decor on your own is more budgetary and interesting. In addition, if you do not like the resulting design, then the butterflies can always be removed.
Another unusual idea is a wall clock with moths. They can be both decorative and real.
The main ways to make paper butterflies with your own hands
There are several options for making paper wall decor. We present the most beautiful and simple options:
- Paper moths. To create moths, you will need thick paper or cardboard, colored or white paper, and scissors. On cardboard, draw a pattern of butterflies of different sizes to cut out of paper on the wall. Using the resulting templates, trace the outline of the design on colored paper, and then carefully cut out the required number of decorations. Attach the moths to the wall, fixing only the middle part, so that the wings remain free and create additional volume. You can attach the decor both in a chaotic manner, and create a specific pattern with the help of decoration.
- Panel with moths. To create a panel, you will need a blank canvas, scissors, glue or double-sided tape, colored paper or cardboard. Draw a pattern of moths on cardboard, cut it out. If you want the decorations to be of different sizes, then you will need several templates. Then circle the pattern on paper using a stencil, cut out the resulting shapes. Use glue or double-sided tape to stick the decor to the canvas. It is important to apply glue only to the base, without touching the wings of the butterfly, so that the picture looks lighter and more airy.
- Glowing decor. You can create butterflies that will glow in the dark using stencils, fluorescent paint, a pencil and a brush. In order for the final drawing to come out brighter, it is worth taking luminous paints of several colors. Take cardboard and cut out butterfly stencils of the desired size from it. Carefully attach the stencils to the wall with double-sided tape or spray adhesive. Apply paint to the stencil, then wait for the paint to dry before removing the stencil. When you turn off the light, you will see luminous butterflies fluttering on the wall.
- Origami. Beautiful, original and voluminous moths can also be made using the origami technique. You will need thick paper. Use the origami scheme, in which the paper must be folded in a certain way to get the desired element. You can fix the origami moth to the wall with tape or a pin.

You can also create a beautiful drawing, for example, a heart made of moths. In order for the drawing to come out more accurate, lay out all the details on the floor in advance and see how the finished picture will look. So you can correct the shortcomings at the preparatory stage of work.
It is worth noting that to create moths it is not necessary to have the talent of an artist. You can download the stencil from the Internet or easily make it with standard computer programs and then print it out.
Wall mounting options for finished paper butterflies
If the decor is not properly attached to the wall, you can damage both the moths themselves and the wall material (wallpaper, decorative plaster). Therefore, it is so important to choose the right mounting option.
- Double sided tape. The simplest and most budgetary mounting option, which is not recommended for use on expensive surfaces, such as silk wallpaper. Scotch tape can only support the weight of small moths, but it is not suitable for attaching large cardboard products.
- Pins. With the help of pins, you can fix the decor on the wallpaper or fabric surface. It is convenient to fasten large-sized figures made of dense materials with pins, but with this type of fastening, traces will remain on the wall.
- Glue. Glue is convenient to fix the decor on the panel. But gluing butterflies directly to the wall is not recommended, as it will then leave traces that will be difficult to remove.

A composition of butterflies on the wall will help not only decorate the interior, but also hide the unevenness of the walls, dirt on the wallpaper. When creating jewelry, it is important to choose the desired color, material, size of moths. You can show your imagination, create a picture of butterflies, arrange the decor over the entire surface of the wall, or decorate only part of the room with a pattern.
What to do if the design of the room is tired, and there is no money or effort for repairs? The fastest and not very expensive way is to change textiles and decor elements. And not all decor needs to be bought. For example, butterflies for decoration will help to bring an element of lightness. They make panels, wall compositions. Larger and brighter "live" on curtains or flowers.
What are they made of
Butterflies on the walls are made from different materials, sometimes even exotic ones. The appearance of the resulting decor depends on this choice. While there is no experience and you do not really imagine the end result, you can make several different decorative butterflies for testing. They can be attached to the location of the planned decor. So it will be easier to evaluate the effect and choose the most suitable option.
Paper
Butterflies for paper decor are the easiest and cheapest to make. There are several different techniques. If the product is flat and it is glued entirely to the wall / panel, only the front surface is important. If a three-dimensional composition is supposed, the paper should be double-sided - both sides should be painted, because the white often spoils the impression.

Instead of ordinary colored paper, you can take corrugated paper. The effect will be different - it is lighter, airy, translucent, with its help it is easy to make the decor with butterflies voluminous.

Butterflies for decoration made of corrugated paper are airy and light
You can make butterflies from an old magazine, newspaper, postcards, colored napkins, wallpaper of suitable colors, any other printed matter.

As you can see, there are a lot of options only from paper. Considering that they can still be slightly tinted, combined, made multi-layered, it is clear that there is a huge scope for imagination ...
Cardboard
Cardboard is not very dense. It's more of a thick paper. It is also available in color and double sided. With its help, they often make voluminous decor - you can easily bend the wings relative to the body. This material holds its shape even better. It is only worth remembering that you can no longer make corrugated wings - the material is too hard to make a small fold.

It is also easier to make openwork butterflies from cardboard. Having a sharp enough knife, they cut out the “extra” leaving only the partitions. Such decorations require perseverance, great patience and accuracy.

Cardboard is also used to make templates for the "mass" production of identical butterflies. With the help of such stencils, you can make insects of the same type and size and spend a minimum of time on it.
Textile
Having a template, you can make butterflies for decoration on a wall or a fabric chandelier lampshade. The fabric will need to be given additional rigidity, but otherwise the process is not much different: a contour is applied, cut out, decorated if necessary and mounted on the wall.

It is more difficult to work with fabric, although very interesting decorative crafts are obtained. This is an option for more advanced decorators and needle or sewing machine skills. With their help, you can recreate the veins on the wings.
Exotic materials
Old vinyl records will also be an excellent raw material for making butterfly decor. Since the vinyl is hard, to cut a butterfly out of it, you have to heat it up in the oven. And in order not to spoil the baking sheet, it must be covered with foil.

A contour is applied to the vinyl using chalk, the plate is placed in a preheated oven, as soon as it begins to soften, it is removed, and quickly cut out along the contour with scissors. Often it is necessary to heat the "workpiece" several times. After cutting out, heat for the last time and give the desired shape.
From beer cans or any other relatively soft tin, excellent flying beauties are also obtained. First you need to cut off the bottom and cover and align the piece of tin. Then, using an awl, transfer the contours from the template to the sheet, connect them with a marker and cut along the resulting contour.

Even beer cans can be used for "butterfly" wall decor.
You can decorate the back - the shiny part. This will require markers or felt-tip pens, you can try decorating with nail polish. Painted beauties are given the desired shape. One caveat: the edges are very sharp, you need to work carefully, otherwise cuts cannot be avoided.
How to make contour paper butterflies
We start with the simplest, but spectacular - contour butterflies. You will need colored paper or magazine pages, contour maps, etc. You can use old postcards or colored cardboard. You will also need ordinary cardboard - to cut out the template.

These are contour butterflies for decor - they are easy to make, but they look great.
Preparing a template
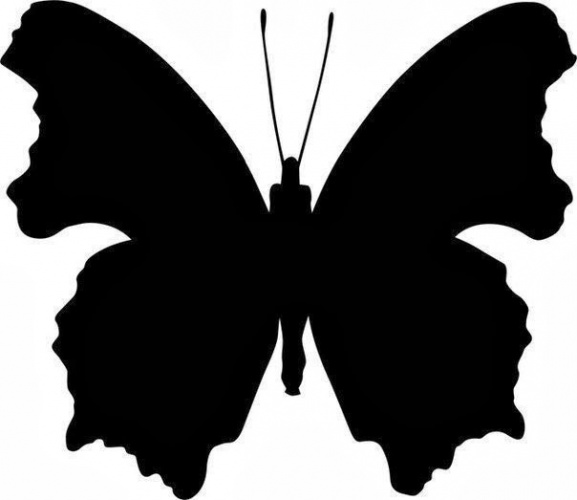
We take a piece of cardboard - any, you can even some kind of packaging (tea, breakfast cereals, cereals, etc.), the main thing is that the cardboard is dense and not cellular. We find the silhouette of a butterfly that you like, transfer it to cardboard and cut it out. There are several silhouettes in the photo gallery. They can be printed, then cut out and transferred to cardboard.
Moth on the wall - it will be good in color Swallowtail is attractive with its “tail”, but paper consumption is greater and work requires more accuracy Paper butterfly patterns for interior decoration are made by half. The second is obtained “automatically” after turning a piece of paper folded in half
Some tips for working with templates. Many butterfly outlines are given with two wings, but it is better to cut off one wing - it will definitely turn out symmetrically.
Decorations from winged insects of different sizes look good. Therefore, the same contour can be enlarged, reduced using the simplest functions of graphic editors - the same Paint that is on any computer. Since only the contour is important in this case, the quality of the drawing is not so important, so feel free to experiment with sizes. We cut out the printed template, apply it to the cardboard and circle it. We cut out a hard working template with which you can make dozens of identical elements.
Cut and fasten

We take a sheet of paper, fold it in half, apply a template, circle it. Cut along the drawn line. Next, we bend the wings from the "body", we get a workpiece. Having cut out a certain number of butterflies, we attach them to the chosen place - on the wall, a piece of cardboard, etc.
You can mount it on ordinary glue (PVA is usually the best option), small strips of double-sided glue. Wallpaper paste, etc. can be used. If in doubt about the result, stock up on sewing pins. They can be mounted on the wall several times without much risk of damaging the surface. When you place all the butterflies and the result suits you, you can glue or use adhesive tape.
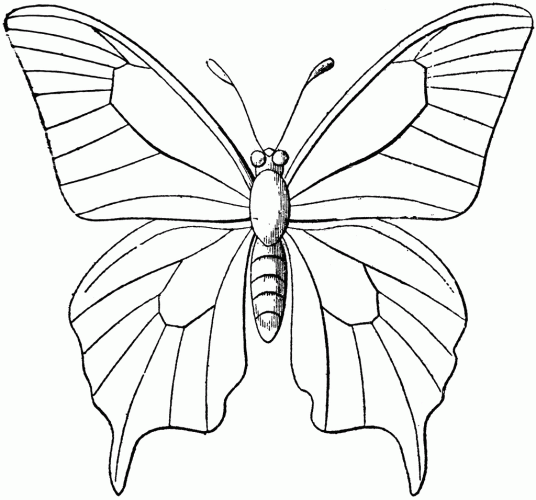
Openwork
The situation is a little more complicated with openwork butterflies. They are made from paper or cardboard. It is important to have a good sharp knife and a template with lines printed on it, along which you will need to cut out excess paper. Needless to say, this is hard work.
Patterns of butterflies with openwork wings - a variant of medium complexity The second half is symmetrical
The process is the same as described above: a template is prepared, then the required number of elements is cut out from it. The peculiarity is that small fragments are first cut out and removed, and then a contour is already cut out of a piece of paper. With such a sequence of actions, there is less chance of breaking thin jumpers, and it’s easier to work this way.

How to make an openwork butterfly out of paper - the process in pictures
You need to work with a knife with a thin and sharp blade. It’s better not on the table, but by placing something solid enough - you can use a piece of plastic, etc. But you need to understand that grooves and cuts will remain on the surface, so it will be problematic to use this piece for some other purpose.
Multilayer bulk
In the manufacture of multilayer volumetric butterflies, several pieces of the same shape are cut out (size and color may vary). They are stacked one on top of the other, the “bodies” are glued together, and the wings are bent at different angles. So these butterflies are more voluminous.

You can make a combination of openwork and contour butterflies. Take paper in contrasting colors or find the same color, but different shades. Make butterflies of the same shape out of them. Only some will be with openwork, others - without. Arrange them by placing a fragment without a pattern down. It turns out an interesting effect.

There is a technique that allows you to immediately cut out voluminous butterflies from paper. You will need two rectangles of paper - a larger one (for large wings) and a smaller one. We fold them diagonally once, then the second. There are two triangles of different sizes. Now, from two opposite sides, we bend the paper inward so that we get such a triangle as in the third photo (with a newspaper).

On the resulting triangles draw the wings. In large openworks, it can be located only along the edge, in smaller ones - over the entire area. We cut out the blanks and put one into the other, glue it. From above we glue the “body” cut out separately with antennae. Due to the fact that the paper is folded and the wings are double, the products have a larger volume.
Corrugated paper
It is easier to work with corrugated paper and butterflies for decor are more airy and light, since the paper is translucent. We select suitable colors, take threads, scissors, glue. Nothing else is required. We cut out rectangles from paper about 7 * 10 cm.

We sew the resulting rectangles in the middle with a needle and thread, tighten, make a couple of turns with a thread. It turns out something resembling a bow. We fold it in half, straighten the paper with our fingers, trying to leave as few folds as possible - we form wings.

When the result satisfies you, we take scissors, cut off a strip of a few millimeters from this edge - into the antennae. On the rest, we form a patterned edge resembling a butterfly wing.

We twist the strips of antennae with our fingers into thin tubes. Now they definitely resemble antennae. We unfold the wings and finally straighten them. We got light butterflies.
From folded paper
From double-sided colored paper or old magazines, you can make paper butterflies for decoration by folding them into a small accordion. We cut out two squares or rhombuses from paper (one a little more, the second a little less), fold them into a small "accordion", starting from one of the corners. The smaller the fold, the more interesting the product will turn out.

Two folded rhombuses are folded one with the other, tied in the middle with a thread or flexible wire in a shell of a suitable color. From the remnants of the wire we make antennae, straighten the wings, if desired, correct the shape.
Photo for inspiration
To begin with, a little about how and on what you can attach already made paper butterflies. The easiest way is on walls or panels with glue. The second no less simple way is with double-sided tape. But to make the decoration more voluminous, it is best to glue it not directly to the wall, but on a small piece of foam rubber. You will get a more airy composition, with clear shadows.

Paper butterflies are used to create voluminous decorative compositions on small hoops with a fishing line tied to them. Cut out paper insects are fixed on the fishing line. You can’t hang them on the wall, but they look very original, although creating such a composition is more difficult than on the wall.

Hoops and fishing line - all you need to create this beauty
And several wall compositions that use butterflies for decor, made from different types of paper.


Another option with a big butterfly…

Colored tornado….


The main thing is to find a bright picture and even a simple silhouette will look great.
Each of us in childhood cut paper butterflies as crafts, but then we did not even think that they could become an unusual element in interior design.
Butterflies on the wall - simple and original
The desire to update the interior often arises, and repairs are a very expensive and costly pleasure to do it too often. In such cases, design elements come to the rescue that can not only change the look of any room, but also create a special atmosphere in it. Such decor will cost mere pennies, but your family and guests will appreciate the original idea.
Decorating with paper butterflies is a budget, but at the same time, an original option to decorate any room, a little patience and imagination - and the room will completely change!
Creating butterflies for decorating the interior does not take much time, but it gives inspiration and is guaranteed to cheer you up. It is worth noting the mobility of such a decor, because if you wish, you can easily move or replace the elements of the composition from paper butterflies with others almost daily. With the right choice of shade, butterflies can both become the main color accent of the room, and unobtrusively complement the interior.
Many designers evaluate this method of decorating space positively and use it to decorate not only residential areas, but also shop windows, restaurant interiors and offices.
With the help of butterflies, you can attract the attention of visitors, whether they are your friends who have dropped in for tea or shoppers in a store.
Which room is suitable for decorating with butterflies?
Decor with paper butterflies can be called universal, and yet you need to observe some nuances. Butterflies look harmonious in the bedroom, living room, corridors and hallways, this design can be both permanent and seasonal. Professional designers claim that winged beauties are suitable for interiors of any style - hi-tech, country, classic ... With the right choice, they will be appropriate everywhere. Butterflies made of paper on the wall will help to give a boring room a festive or romantic look.
Designer butterflies in pastel colors blend harmoniously with the bedroom space. And by choosing bright, non-irritating shades, and building a whirlwind of butterflies on the wall, you can create a source of creative inspiration and cheerful mood. To create a romantic and relaxed atmosphere in the bedroom, you can choose laconic white butterflies, and if you want to add a little more magic, you should give preference to openwork carved models that will cast incredible whimsical shadows.
In the living room, butterfly decor can be created in many ways and serve different purposes. If the space is made in light colors, and you want to place bright accents in it, give preference to butterflies in saturated colors, while you can choose elements of the same shade for decoration or create an iridescent whirlwind. In the living room, paper figures can replace boring paintings or complement large wall mirrors. If you put a butterfly on a mirror, its reflection will add volume to the space. Therefore, such decorative elements look harmoniously on mirror wardrobes and glass partitions. You can also place them above the sofa in the living room, on the windows and even hang them on a lampshade.
Butterflies on the wall in the hallway will help create an atmosphere of hospitality. It will be interesting to look at a whirlwind of them, as if flying through the front door.
 With the help of paper figures, you can not only decorate the wall, but also decorate various interior items, for example, a switch
 Of course, butterflies can be considered one of the best options for decorating a nursery, while not necessarily a girl's room - choosing figures in dark shades, you can also decorate a boy's room. The wall design in the form of butterflies will give a sense of a fairy tale.
 Butterflies in the nursery will certainly bring joy to the baby
 By placing a similar decor above the crib, you will give the child a magical awakening. And the butterflies on the window will remind you of summer even in rainy autumn and cold winter.
Necessary tools and materials
So, you have decided to diversify the interior with such elements. What do you need to create paper butterflies with your own hands? A set of tools and materials depends solely on your wishes and capabilities. Modern interior butterflies can be made not only from paper, but also from textiles, plastic and even leather or metal. But, since paper butterflies are the most versatile and budgetary, we will talk about them. In the art supplies market, you can find metalized cardboard, corrugated paper, cardboard with a mirror or velvet surface, and even paper with a wood or leather texture.
Paper or cardboard
 When giving preference to cardboard, it is worth remembering that it should bend well without breaking.
 To create interior butterflies, we first need sheets of paper or cardboard. It is worth choosing a material that is suitable in shade and texture for the style of your interior. The number and format of sheets also depends on the size of the desired butterflies and their number. Therefore, before buying paper, we recommend making one template butterfly of the right size and, attaching it to the sheet, understand how many figures can be cut out of it. To the amount received, you need to add a few more in case of marriage.
You will also need sheets of ordinary thick cardboard to create fasteners for butterflies to the wall.
Scissors
When choosing scissors, you should give preference to medium-sized models with thin tips, with the help of which you can easily cut all kinds of curls on butterfly wings. It is also recommended to have small nail scissors in the arsenal. And if you want to make the wings especially openwork, you can use curly scissors with special nozzles, which, when cut in a straight line, already form a pattern along the edge of the paper.
Also, to create butterflies, you will need a simple pencil and double-sided tape. It is recommended to buy adhesive tape of the highest quality, so that it not only sticks firmly to surfaces, but also easily peels off without leaving marks on the wall.
stencils
You can create a stencil for paper butterflies yourself by hand or in a graphics editor. You can also find a high-quality image of a butterfly on the Internet, and print it on photo paper using a high-quality color printer, get a blank that you just have to cut and fix. If you still want to create a butterfly on your own to your taste, your attention is several stencils of various shapes and styles, which must be printed either immediately on design paper or on plain paper and transferred through glass or carbon paper on the selected material. You can find stencil options on the Internet or draw them yourself in various programs.
Step by step instructions for making
Butterflies for interior decoration can be made according to the following universal instructions, which, depending on your wishes, can be changed and supplemented with optional items:
- Come up with a sketch of the composition in advance, counting the approximate number of butterflies and the number of sheets of paper or cardboard.
- Print or draw stencils.
- Prepare all the materials necessary for creativity.
- Transfer the stencils to paper if necessary.
- Cut out the shapes along the stencil lines.
- Bend each of the butterflies so that the wings on both sides are symmetrical, and there is a place for fastening between them.
- Glue a small square of double-sided tape to the underside of the butterfly. If the figurine is made of thin paper, it is recommended that you first glue a small square of thick cardboard to the back, and only then attach double-sided tape to it.
- After making the required number of figures, start placing them on the wall. Mark the extreme points of the composition with small butterflies so as not to move from the desired zone, and then proceed with the gradual design from the center.
If you want to change something in the composition, you can always re-glue the butterfly to a new place.
There are also more complex options for creating these decorative elements - origami butterflies or openwork butterflies. Origami butterflies are made according to patterns that can be found on the Internet.
 Various ways of making decorative elements provide a wide scope for imagination, because they can be placed in the most unusual ways in different places.
 The creation of openwork butterflies practically does not differ from the manufacture of classic interior models, only in addition to cutting out the stencil and folding in half, various patterns need to be cut on the wings.
 To cut thin parts, you will need a special knife with a thin and sharp blade.
 Such butterflies look great on the walls next to a sconce or floor lamp, and also cast magical shadows in diffused lighting.
 Creating graceful figures is a very painstaking work, but the result looks very worthy.
 Double or multi-layer interior butterflies are created by stacking paper blanks of various sizes on top of each other - a large one on the bottom and a small one on top. This decor looks more voluminous and luxurious.
 Made of two layers of different colors and sizes, such butterflies look very lively and voluminous. Usually only butterfly bodies are glued together, the wings remain free and bend at different angles.
 A few ideas on how to decorate a wall with paper butterflies
Now let's talk about how to properly decorate the wall with butterflies so that they do not look pretentious, but only set the necessary style for the interior and create the right positive mood.
White concise butterflies
Such butterflies are in harmony with plain interiors of dark or muted shades, and are also great for decorating a country-style room, as they look like lace from afar. They will look good in an office or a crowded office, suitable for decorating a high-tech space using metal, glass or plastic.
 White paper moths will look gentle and seem to refresh the interior.
 Compositions of white butterflies can be made both in a simple style and in a more romantic one, it all depends on the purpose of the room for which it is created. White butterflies decorated in black frames look original. This design looks formal and suitable for office decoration. You can place whirlwinds of white butterflies in such a room and in a recreation area, in this case, preference should be given to more chaotic asymmetric compositions.
In living rooms, compositions of white butterflies can have various shapes - they can be used to decorate a round wall clock by placing it around the dial, or you can decorate the fireplace area by gluing moths over it. White butterflies in the bedroom look good in compositions where they scatter to the sides, or, conversely, twist into a spiral.
Black strict butterflies
 Black butterflies look very advantageous on the wall in a contrasting color.
 Black butterflies look rather strict and graphic in the interior. Therefore, the best areas for their use are office space, living areas and study rooms. The composition can have a strict form, form a square or a rhombus filled with a grid. Black butterflies can also be framed in contrasting white frames.
gradient butterflies
 Butterflies decorate anything: walls and ceilings, pieces of furniture, pillows, lamps, paintings and panels are made with them.
 Butterflies of several shades of the same color look extremely unusual and elegant - from the darkest to almost white. Compositions of such interior butterflies allow you to visually change the volume of space, creating new depth and unusual shadows. It is recommended to arrange them with a large mass in the form of a symmetrical or asymmetric vortex, since the necessary gradient effect in this case looks the most advantageous.
colorful butterflies
 You can decorate any room with butterflies, because they bring positive - it is only important not to overdo it
 Compositions of multi-colored butterflies help to improve mood, so they are best placed in children's rooms, hallways or living rooms. Colored butterflies look most harmonious in asymmetrical compositions, for example, in the form of a flying swarm. Remember that the design with colorful elements draws attention to the area in which they are located. Use this effect to highlight your interiors.
On a large plain wall, colored butterflies can be glued in the form of a circle, placing them quite close to each other. So you can achieve the appearance of additional volume. Colorful butterflies in a multi-storey building can be located along the stairs, for example, as pointers to the children's room. Butterfly compositions look interesting, which seem to fly out of vases or bottles standing on a fireplace or shelf. And also with the help of these decorative elements, you can create messages for relatives and loved ones, arranging them in the shape of a heart or composing whole romantic phrases from them.
Butterflies of various sizes
 Entering the room with moths, you want to take a deep breath, it seems that even the air here is unusual and saturated with the scent of flowers.
 The combination of butterflies of various sizes allows you to make the composition dynamic and light. In this case, you can arrange the figures both in a chaotic manner and in a “gradient” from large models to small ones.
Butterfly design is an up-to-date and stylish decorative solution for residential and office areas, the traditional design of which is rather boring. Butterflies create an atmosphere of joy, cheerfulness and freshness. Such decor is appropriate in any room, the main thing is to choose the right models in style and shades.

