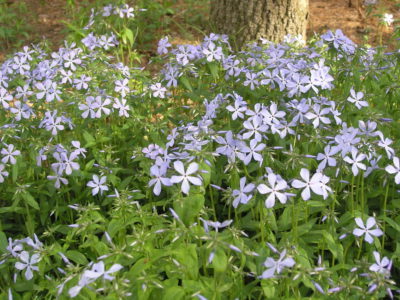
Reproduction of phlox by green cuttings. The value of growth biostimulants
To print
Tatiana Nikorovich 05/16/2015 | 2434
Phlox are among those plant species that are very easy to propagate: by dividing the bush, stem cuttings, eyes, layering, root shoots and seeds.
Each of the breeding methods suggested below has its own advantages and disadvantages, but when good care any method allows you to grow large and beautiful specimens phlox.
Reproduction by dividing the bush
The division of phlox in this way is done in spring or early autumn... For division, five-year-old plants are chosen. The bushes are dug up and, after clearing the rhizome from the earth, they are divided into parts so that each division has buds and roots. A phlox bush can be divided without digging: cut off with a shovel the part intended for planting, and fill the resulting void with earth and tamp it. The part of the plant remaining in the ground is watered abundantly. In extreme cases, the bush is divided in the summer, but cloudy days are chosen for this and regular watering is provided.
Propagation by stem cuttings
Cuttings are produced from the third decade of May to June, when phlox has a rapid growth of shoots. The stem is divided into parts, and each stalk should have 2 nodes. The upper leaves are cut in half, and the lower ones are removed completely. The lower cut is made close to the cutting node, and the upper cut is 2 cm higher than the second node.

Cuttings are planted in a box filled with fertile soil, to a depth of 2 cm, and watered at least 2 times a day warm water... After a month, the cuttings develop roots, and by autumn, young phloxes bloom. On the permanent place they are planted in the spring.
Reproduction by eyes
This method is often called leaf, since a leaf with an axillary bud is used for rooting, placed on a small cuttings no more than 2 cm long. The cuttings are planted in boxes with soil as follows: the buds are buried 1.5 cm, and the leaf is left above the ground. At a temperature of at least 18 ° C, roots form in a month, and small bushes grow by autumn. Plants can hibernate in boxes, and in spring they are planted in open ground.
Reproduction by layering
This method is good because it allows you to propagate phlox from a bouquet. Choose the sturdiest stems and remove the leaves from them and side shoots, leaving 2-3 apical leaves. Then the stems are laid horizontally in pre-prepared grooves up to 5 cm deep, covered with earth, leaving the tops with leaves uncovered. The beds are regularly watered, and after a month, an shoot grows from each bud, which by autumn reaches a height of 8 cm.
Plants hibernate without replanting, and in spring each stem is cut into pieces and planted with a lump of earth in a permanent place. Up to 7 bushes are obtained from one stem, which after a year turn into full-fledged specimens.

Reproduction by root shoots
The method is suitable for rapidly growing large quantities of planting material. In the spring, a phlox bush is dug up with a shovel, while leaving most of the roots in the ground. The hole is covered with nutritious soil. A month later, numerous shoots are formed. In spring, shoots are planted in a flower garden. The dug out part of the bush is divided into parts and planted in a new place.
Seed propagation
Phloxes are propagated by seeds less often than by the above methods. The largest seed is selected for sowing. Sow them in open ground or in any containers that are easy to dig in the garden. In winter, seeds are stratified in natural conditions, and germinate in spring. As soon as the seedlings reach 10 cm in height, the seedlings are transplanted into a flower bed.
To print
Read also
Read today

Soil cultivation Yeast as fertilizer for flowers
With fertilizers, you can grow even the most exotic flowers in the garden, and only achieve lush bloom those who are accustomed ...
FLOXES: SEVEN BREEDING WAYS
Division of the bush:
This is the most commonly used breeding method. The best time for this, either spring or early autumn (at the beginning or end of the growing season), so that the cuttings take root well before winter.
Summer division of the bush is also possible, but only as an exception, for example, for some reason an urgent transplant is required and, preferably, in cloudy weather. At the same time, the delenki should be large, with the preservation of an earthen coma and they need more careful care, regular abundant watering. In the fall, we start dividing the bush only when the plants have already laid the buds of renewal.
It is best to divide phlox bushes at the age of five to six years. Having chosen a bush that we will divide, we dig it out, carefully shake off the ground and clean the root collars of it. Then we carefully separate the root collars from each other and also carefully disassemble the roots going to each stem. It is best to do this operation with your hands, but if the selected bush is very old, then you will have to use a knife or a shovel. We divide the bush so that on each division there are eyes or rudiments of shoots and a small number of roots.
We plant the strips immediately in order to prevent the roots from drying out, but if the planting is delayed, then the roots must be dipped in a liquid clay mash or sprinkled with damp earth. And you can, when dividing, a whole bush and not dig it out, but separate only half of it and then disassemble it into parts. The resulting hole is covered with good fertile soil. The rest of the bush grows well during the summer, a full-fledged bush is formed, which can be dug up again the next year, but on the other hand, and divided.
Propagation by stem cuttings:
We take green, well-developed shoots for cuttings and only from healthy plants. We cut the shoots into several parts so that each stalk has 2 nodes. In this case, we make the lower cut directly under the stem node, and the upper cut 2 cm above the upper node. Then we cut off the lower leaves completely, while the upper ones are cut in half. We plant cuttings either in seedling boxes, or directly into open ground in loose fertile land... Pour vermiculite or sand into the boxes on top (with a layer of 2-3 cm), and on the beds first we put leaf humus or peat (with a layer of 8-10 cm) and then, with a layer of 2 cm, - vermiculite or sand. We moisten the soil and plant the cuttings to the upper node, pressing the earth tightly to them. In this case, the distance between the cuttings in a row should be 4-5 cm, and between the rows - 8-10 cm. Then we put the boxes with the planted cuttings in the greenhouse. After planting, shade the cuttings from the sun's rays and, for 3 weeks, water them 2-3 times a day.
After about 2-3 weeks, our cuttings will take root and young shoots will begin to form in the leaf axils. Then we transplant the rooted cuttings for growing in (a special planting bed) so that they feel more spacious. The distance between plants in a row is already about 15 cm, between rows - 20 cm. Here, cuttings can be left until next spring. In this way, phloxes can be propagated throughout the summer season. So, for example, as soon as the plants emerge from the ground in early spring and grow 10-15 cm, the shoots can be carefully broken off at the base with a "heel" and planted on a growing bed.
Just keep in mind that no more than 40% of the seedlings can be broken without damage to the bush. This method of grafting is the most productive, since when using it, we can achieve almost one hundred percent rooting. Cuttings cut from mid-July to mid-August ( summer cuttings) we plant it in a greenhouse under a half-open and shaded frame.
And cuttings of autumn cutting (the second half of September), it is best to plant them directly in open ground, placing them obliquely at an angle of 35-45o to the surface of the earth. We mulch planting for the winter with semi-fertile soil, peat or fallen birch leaves. In summer and autumn cuttings, only the upper part of the stem is used (approximately two-thirds of its length), since at this time the stems at the bottom are already lignified. Propagation by leaf cuttings. At the end of June - the first decade of July, you can start reproduction of phlox with leaf cuttings.
To do this, with a sharp blade, cut off a leaf with an axillary bud and a thin piece of the stem from a mature stem. Then we plant the leafy cuttings in boxes with light nutritious soil. After that, on top, with a layer of 1-1.5 cm, pour vermiculite or sand. We plant the cuttings at a distance of 5 cm from each other and to a depth of 2 cm, so that the axillary bud with a piece of the stem is in the soil, and the leaf is on the surface in an inclined state. After planting, we cover the boxes with glass and put them in a semi-warm greenhouse, where we maintain a temperature of 18-20 ° C.
Vermiculite or sand must be kept moist at all times. Further care for planting is as follows: daily spraying with warm water, airing and shading on hot, sunny days. Leafy cuttings will take root in about a month. To enhance bushiness, the tops of rooted plants must be pinched. Subsequent planting care is the same as for propagation by stem cuttings. This method of reproduction, of course, is more laborious, since it requires constant attention to planting, because when dry, the cuttings can dry out, and with excessive moisture, accumulation of condensate, they can rot. Leafy cuttings can also be rooted in open ground.
Propagation by root cuttings.
Phlox are rarely propagated by root cuttings, since this method is even more laborious than the previous one. It is recommended for use when it is necessary to get rid of pests such as stem nematodes. To do this, in late autumn or early spring, we dig out the plant and select the thickest fleshy juicy roots, which we cut into pieces of 5-6 cm.Then we plant them in boxes with earth, while making sure that the thickened end of the root is higher than the thin one end
We cover the planted cuttings with a layer of sand 4-5 cm thick. If we do this work in the fall, then for the winter we put the boxes in a dark basement with a temperature of 2-3 ° C and monitor the soil moisture, not letting it dry out. In February - March, we take out the boxes with cuttings into a heated room and cover them from the light with some dark material. Then we begin to gradually increase the air temperature every day, and when the sprouts hatch, we will gradually accustom them to the light. We plant cuttings in open ground for growing in May.
For a permanent place, the seedlings are best determined already next spring... But it will be much easier if we start propagating phlox by root cuttings in the spring. In this case, the stage of storing the planted cuttings in the basement is excluded, and the boxes are simply closed from light and the air temperature is maintained at 10-15 ° C for two weeks. Then we increase the temperature to 18-25 ° C and, as soon as the shoots appear, we remove the shelter, accustom the plants to light and plant them for growing. Reproduction by layering and ... leftovers. The method for propagating phlox by layering is very simple.
Phlox bushes are covered with fertile soil high. After a while, roots begin to appear on the stems covered in this way. Then, when the roots develop well, we carefully release the layers from the ground, cut them off and plant them in the ground. There is another way of reproduction, it is even simpler. When digging a phlox bush for subsequent division or transplantation, we prune the roots, leaving a good half of them in the ground, and fill the hole from under the removed bush with fertile soil and water.
If we carry out this procedure in the spring, then after 3-4 weeks young plants will appear in this place, which have grown from the left roots. In the future, they can be dug up and, having divided, transplanted to a new place. If you start breeding the remains in the fall, then the shoots appear, of course, in the spring of next year. In August, we dig it up, divide it and plant it on a distribution bed for further growing. Seedlings become full-fledged only by the fall of next year. Reproduction by seeds. Phloxes can also be propagated by seeds, but at the same time, the seedlings split in the offspring, and the varietal characteristics of plants are often not preserved.
As a rule, plants are obtained with completely different quality characteristics and other color of flowers. So seed propagation phlox are used only for selection. There are several nuances when phlox propagates by seeds. To increase the germination of seeds, we clean them of the capsules just before sowing. Since phlox seeds quickly lose their germination, it is best to sow them before winter. We select the darkest full-weight seeds and in September - November we sow them in open ground or in containers, which we then drop in the garden. In winter, phlox seeds will undergo natural stratification and friendly shoots will appear in spring.
In the spring (April - May), when the first pairs of true leaves appear on the seedlings and they grow up to 8-10 cm, it is necessary to start transplanting them to the growing bed. So that the plantings are not thickened, we plant the seedlings at a distance of 10-15 cm from each other. With good and proper care plants grown from seeds grow powerful and strong. In this article, dear summer residents, we have analyzed in detail how to propagate the most common paniculate, shrub phlox.
Seed propagation of phlox is used only for selection, and to preserve the characteristics of the variety, it is better to use vegetative methods: dividing the bush, growth shoots, stem, leaf and root cuttings.
Division of the bush. It is best to start dividing the bush in the spring or early autumn at the beginning or at the end of the growing season. If you still need to divide the bush in the summer, try to do it in cloudy weather. Having chosen a bush, dig it out, carefully shake off the ground, clean the root collars of it. Place the plant on an earthen mound and very carefully with your hands separate the root collars from each other, then disassemble the roots going to each stem. If the bush is very old, with a lignified underground part, use a knife or sharpened shovel. Each separated part should have eyes or shoot rudiments and a small number of roots. To prevent the roots from drying out, dip them in a liquid clay mash or sprinkle them with damp earth before planting.
Propagation by stem cuttings. This is a fairly simple method available even to novice growers. You can cut the phlox stem into pieces so that each of them has two leaf nodes and well-developed leaves. These pieces of the stem will become cuttings. Sometimes, to obtain cuttings, spring growth shoots are used, which have not yet had time to develop leaves. Can be used for propagation and leafy cuttings of phlox. From the end of May to the second half of July or in August-September, it is best to use cuttings with developed leaves. If you decide to start breeding in May-June, you can use the entire stem of your choice, which should be well developed. In July, when the stems are already lignified at the bottom, use only the upper part of the stem (about two-thirds of its length). Cut the selected stem with a sharp knife so that each part has two leaf nodes. The bottom cut should be just below the bottom knot and the top cut 5-10 mm above the top knot. Cut the two upper leaves on the stem in half, and cut the two lower ones completely.
Before planting the prepared cuttings, equip the beds by laying a mixture of leaf humus, garden soil and sand (1: 1: 1) on them. The thickness of the layer of this soil should be at least 10 cm. Water the beds well and, after the soil will settle, cover it on top with a layer of sand of 1.5-2 cm. Now you can plant the cuttings, making sure that their lower part (cut) does not come into contact with the fertile soil. After sticking the stalk into the sandy layer, lightly compact the sand with your fingers around the stalk. Plant the cuttings in rows so that the distance between them is 8-10 cm, and between the cuttings - 5-6 cm.
Water the bed with the planted cuttings from a sprayer, shade it or cover it with a film on the frame. When the first green shoots appear, and the cuttings acquire roots, you can remove the shading.
Rooted cuttings in July-August, you will need to transplant to another site so that they feel more spacious, that is, at a distance of 15-20 cm from each other. Make the soil composition on this bed the same as on the first one. Leave the grown phloxes here to winter, and here they will grow one more summer. Only in the spring of the third year can plants be planted in a permanent place.
If you decide to propagate by cuttings in July-September, plant the cuttings for rooting in cold greenhouses. The technology of work will remain the same as for the June cuttings. But, in order for a good root system to form, a growth stimulator (heteroauxin) should be used in a proportion of 50-100 mg per 1 liter of water. Tie the cuttings into a bundle with the lower ends and immerse in the solution for 8-12 hours. If you add talc or crushed charcoal to the solution, you get a paste in which the lower ends of the cuttings are dipped. The paste adheres better to the cuttings and lasts longer.
In cold greenhouses, cover cuttings for the winter with dry leaves, shavings or clean straw with a layer of 10 cm. Also cover the greenhouses with glazed frames or foil. In the middle - end of April, remove the frames from the greenhouses, and when warm weather finally settles, you can also remove the insulating layer of leaves.
If desired, you can even cut purchased flowering branches in a bouquet. In this case, lateral shoots from axillary kidney that form on the stem in July. Break off these lateral shoots together with the heel and root in July in the open field, and in August-September in cold greenhouses using the described technology.
In June-July phlox propagated by leafy cuttings... From the middle part of the stem, cut off the shield 8-10 mm long and plant it in a box filled with fertile soil, which is covered with a layer of sand 2 cm thick on top.The distance between the shields should be 10 cm.After planting, spray them with warm water and cover the box with glass, creating thus, a micro-greenhouse, the temperature in which will be about 25-28 ° C. Do not forget to constantly moisten the plantings, and then after two to three weeks the roots will appear on the shields, and by the beginning of autumn the stems will begin to form. From now on, start opening greenhouses. For the winter, move the box to a cold greenhouse, and when the ground is completely frozen, cover it with glazed frames or plastic. On top, add insulating material (leaves, shavings, straw), open ground you can plant plants in the spring, when the ground warms up.
In April, phlox can be propagated by spring growing shoots... When the leaves have not yet had time to develop and are scales covering the shoots, when thinning the center of the bushes or dividing their shoots, which have reached 5-6 cm, select and plant a greenhouse located in an open sunny place for rooting. The greenhouse should be filled with a mixture of the same composition as for green cuttings. Be sure to pour sand on top. When planting, press the sand firmly against the shoots (this can be done with your fingers or a peg). After completing the planting, cover the greenhouse with a film, and in case of cold weather and at night, insulate with improvised means. Rooted shoots in the second half of May - early June can be planted in open ground. If you do everything right, your phloxes will bloom the same year.
An even simpler way is as follows. For reproduction, bushes are taken from the age of three. In September, a phlox bush is cut out of the soil at a distance of about 10 cm from its base and no more than 8-10 cm in depth. The removed bush is divided in the usual way and planted in a new place. The hole from under the removed bush is filled with ordinary fertile soil. In the spring of next year, the place where the carved bush was ,
covered with dense shoots. In August, the shoots are dug up, separated and planted in the school. Part of the shoots (40%) forms inflorescences, which are removed. Planting material becomes full by the fall of next year.
Reproduction of phlox root cuttings is rare. This is a rather laborious way. However, it can be recommended for getting rid of pests - stem nematodes. Late autumn or in early spring, the plants should be dug up and the thickest roots taken, cut into pieces and placed in boxes filled with the same mixture used for the stem cuttings. When placing the cuttings, make sure that the thick end of the root is above the thin end. After placing the cuttings in boxes, cover them with a layer of sand 4-5 cm thick.
For the winter, after the autumn cuttings, the boxes should be placed in a dark basement and the soil moisture should be monitored. The air temperature in the room should be 2-3 ° C. In February-March, take the boxes with cuttings to a heated room, cover from light with a dark material and start gradually increasing the air temperature from day to day. When the sprouts hatch, they need to be gradually accustomed to light, and in May you can already plant the cuttings in open ground. Next spring, they can be planted in their permanent place.
It is easier to propagate phlox by root cuttings in the spring, because it excludes aging in the basement. The cuttings should be planted in boxes filled with soil mixture, protected from light and kept at a temperature of 10-15 ° C. After two weeks, the temperature should be raised to 18-25 ° C. As soon as the shoots appear, the shelter must be removed to teach the plants to light , and then plant for growing.
As we said, can be propagated by phlox and seeds, but they do this only in those cases when they are not aspiring to preserve the variety with the qualities fixed in it. In good weather conditions, phloxes produce seeds in abundance, which often, especially in early varieties, ripen on the bushes. The browning of the capsules and the beginning of wilting of the leaves testify to the readiness of the seeds. In late-flowering varieties, the seeds reach waxy ripeness in October. To get mature seeds, the stems are cut, tied in bunches and hung on cold veranda... If the room is very dry, then the capsules begin to crack, the seeds fly off, and they can be lost. Then the inflorescences are placed in gauze bags. Brownish boxes as they ripen can be collected from the bushes in paper bags and brought into the room. In a paper bag, the boxes dry up and burst with a characteristic crack. Phlox seeds quickly lose their germination, especially in a dry and warm room. It is best to cleanse the seeds just before sowing. P.G. Gaganov advised to mix peeled seeds with sand and store them in a cool room before sowing. The highest germination (up to 80 - 90%) is given by seeds when sown immediately after harvesting - in late November - early December. It is possible to sow in winter - in January-February, snow is removed from the bed on the bed prepared in the autumn. Then they are covered with a layer of sifted earth, prepared in advance, or sand 1 - 1.5 cm thick and snow. When sowing in winter, seed germination will be 70%.
For better germination, phlox seeds need freezing. The closer to spring sowing is done, the less germination of seeds. Starting in March, their germination rate drops sharply, and when they are sown in April without freezing, the seeds practically do not germinate anymore.
In early spring, often after the melting snow, seedlings appear. Seedlings in the stage of two pairs of true leaves dive into a well-prepared bed with fertile soil at a distance of about 20 cm. After a week they are fed with a solution of mullein (1:20) or saltpeter (15 g per bucket). Seedling care consists in systematic watering, top dressing, weeding, loosening the soil surface. The composition of the dressings is the same as for adult plants, only the concentration is taken 2 times less. You can carry out and foliar feeding urea, "Kemiroi-lux". Be sure to make sure that young plants are not attacked by slugs. In order to prevent disease of seedlings fungal diseases plantings are sprayed with a 0.5% solution of Bordeaux liquid. Seedlings grow very quickly, and by autumn 40% of them will bloom, especially early and early middle varieties, the rest will bloom next year. The plants you like are selected. In any case, plants obtained by seed will be the most resistant and hardy in climates with cold, harsh climates compared to foreign varieties or varieties bred in more southern regions. Of the seedlings of 70 varieties tested in Tomsk, Barnaul and Novosibirsk, "Biya", obtained from sowing seeds in Biysk, was distinguished by the highest winter hardiness, and the rest of the varieties were distributed in terms of winter hardiness as follows. The first 25 places were occupied by varieties of local selection and breeders of the Non-Black Earth Belt - P.G. Gaganova, M.I. Groshikova, ML. Nagibina, B.V. Kvasnikova, M.P. Bedingauz, M.F. Sharonova and others, and then already in this list, varieties of foreign selection appeared from among those that were brought to Russia at the beginning of the 20th century. and managed to acclimatize well ("Rayonant", "Viking", "Frau Paulina Scholhammer", "Elizabeth Campbell", "King", "Wintermerchen", "Vidar", "Feuerspiegel", etc.).
Timoshin I. "Flowers in your garden" - SPb .: "Parity", 1999
Konstantinova E. "Phloxes" - M .: "Fiton +" - 2002
Many gardeners do not even suspect that unpretentious phloxes, which reproduce and winter well in our conditions, come from America, however, northern. They settled in Europe more than three centuries ago, and since then it is difficult to find a flower bed or a front garden without these bright and fragrant flowering "caps".
This plant has more than fifty species, and only one of them is Drummond's phlox - an annual. However, there are not so many evergreen phloxes.
Most of them, in cold period, only the roots remain viable, and the aboveground part dies off. With the onset of warmth, new stems and leaves grow from the buds.
Phlox bloom very luxuriantly. If you choose the right varieties with different terms flowering, then their beauty can be admired for several months in a row during the entire warm season.
The color of flowers is very varied from white to purple. Also, their sizes, the shape of the petals, and the height of the stem differ.
According to these characteristics, phloxes are divided into three main groups: bush, loose sod and ground cover.
Bush phlox
They are distinguished by the absence of cuts on the petals, and are divided into two subgroups:
- Undersized- up to 60 cm high. Blossom in May - June. The most popular phlox are Candy Twist, Adorable, Thick-leaved, Hairy.

- Tall- up to 180 cm high. Distinguish between Spotted, Panicled, Smooth phlox. Planted in the background, they decorate flower arrangements in early summer and early autumn.

Loose turf phlox
Above ground level, these plants rise 30-50 cm. They bloom from the end of spring for a little more than a month. This group includes Phlox Escaping and Spreading.

Groundcover phlox
These creeping plants are distinguished by the earliest flowering dates - from April to early summer. They can decorate alpine slide, retaining wall, become a beautiful border for a flower bed.
The most common are Snow, Dwarf, Star, Subulate phlox.

It's pretty conditional classification, since breeders have created many interspecific hybrids that can form their own groups.
Popular varieties
It is impossible to list and show all the known varieties and hybrids of this plant - there are already more than one and a half thousand of them. When choosing phlox for your garden, focus not only on the decorative properties and color of flowers, but also on the height of the plants and the timing of flowering.
Look at photos of some popular varieties of gardeners. Perhaps some of them will appeal to you too.
Reproduction of phlox
You can propagate this plant different ways: seeds, layering, division of rhizomes, cuttings, spring growth shoots.
For reference. Only the last method requires the creation of special conditions and the maintenance of shoots in greenhouse conditions.
If you have not grown these flowers until now, then it is easier and faster to breed them by planting seedlings obtained from the division of adult plants:
- When buying, choose seedlings with 4-5 shoots 5-6 cm long.
- The skin on the stems should be greenish, rough, without signs of damage from pests and diseases.
- Large buds should already be formed at their base.
- Also pay attention to root system... She, too, should be healthy and shortened to 15 cm.
Dividing the bush
Bushes are subject to division at the age of 3-4 years. This is the fastest and least laborious breeding method that can be used at any time from early spring to autumn.
- Before digging up the plant, its stems should be cut to half the length.
- After removing from the ground and cleaning the rhizomes from the soil, they are divided into several parts using a sharp shovel or knife.

Note. Try not to damage the vegetative buds located at the base of the stems during division. Each new bush should have at least eight of them.
- If the roots are too long, they need to be shortened with pruning shears to 15 cm, but no more than one third.

- Delenki are transplanted to prepared places with straightened roots. They are buried three centimeters into the soil.
Layers
To propagate phlox in this way, the stems are bent to the ground before flowering and fixed along their entire length. Then a mixture of humus and peat is poured on top and watered.

By the fall, the cuttings will give roots, they can be separated from the mother bush and transplanted to another place.
Cuttings
If you need to get a lot of seedlings at once, for example, for selling or improving a large area, you can get them from cuttings.
For reference. Phlox can be cut at any time, but spring and summer cuttings take root faster and better.
Cutting is carried out in the usual way:
| Image | Description |
|
|
Young shoots are cut from the plant, on which there are at least two pairs of leaves. |
|
|
They are divided into segments with two internodes, cutting immediately below the lower node and half a centimeter above the upper one. |
|
|
The upper leaves are cut in half, the lower ones are removed completely, leaving only the axillary buds. |
|
|
The cuttings are planted in moist, loose soil, deepening to the upper node, shaded and covered with a jar. |
|
|
At first, cuttings are watered often, up to 5 times a day. Then as the soil dries up. After a month, they take root. They can be transplanted to a permanent place in the fall. |


Reproduction by growth shoots
You can not wait for the regrowth of long shoots, but propagate phlox in early spring with young spring shoots. They are broken out at the base of the stem with a "heel" from dense bushes and immediately planted in a greenhouse.

They take care of the same as for cuttings, pouring with warm, settled water. They are transplanted to a permanent place after the formation of roots in late spring or early summer.
Seed propagation
Phlox reproduce well by self-seeding. But, so that the plantings do not become too dense, it is better to avoid this by breaking off the faded branches and leaving only some of them to collect seeds.
- They are harvested in the fall, before the foliage begins to wither. By this time, the seed pods become brown, dry and easily open when pressed, giving off dense dark green seeds.

- From late September to early November, they are sown immediately in prepared beds. The most severe of them survive the winter frosts and begin to germinate immediately after the snow melts. In mid-May, seedlings can already be transplanted to a permanent place.
- You can also carry out a sub-winter planting from November to January immediately on the flower bed. For this desired site cleared of the first snow, the seeds are laid out on the surface of the earth and sprinkled on top, first with a centimeter layer of the same earth, and then with snow.

- In the spring of planting they dive, leaving the strongest shoots. The plants grown from them are distinguished by high resistance to diseases and early lush flowering.
Advice. To grow phlox seedlings at home, many conditions must be met, including mandatory stratification, the creation of uniform lighting and the maintenance of the air temperature no higher than plus 10-12 degrees. It is much easier to propagate them by seeds directly in the open field.
The best time to plant and transplant
Best of all, phloxes tolerate a transplant and actively develop after it in late April - early May.

Also the right time it is considered the very end of summer until the first days of September, when buds are laid on the basal necks. But before digging up, the top of the bushes must be cut off.
In any case, after transplanting, the plants must be watered regularly, avoiding overdrying of the root system.
If you cannot get the desired bush at a time favorable for planting, then it should not be planted immediately in place, but put into loose soil to a depth of 25 cm. Before the onset of cold weather, the buried plant is mulched and planted in the spring.
Perennial phlox care
These plants are surprisingly unpretentious and resistant to diseases and weather conditions. But for abundant, long-lasting and lush flowering, they still need to create certain conditions.
Seat selection
It is best to plant phlox in areas raised above the general ground level. They do not like damp lowlands with stagnant moisture.

You should choose places sheltered from the wind, in partial shade. Thick shade or constant exposure to sunlight is not suitable for them.
You should not plant them under large trees that will take away from phlox nutrients and moisture, hide from the sun. And, of course, you need to take into account the height of the plants and their color, which should be harmoniously combined with other flowers in the flower bed.

Soil preparation
Phlox roots are powerful and branched, but they lie at a shallow depth - up to 30 cm.Therefore, it will not be difficult to provide them with an optimal soil composition. It is enough to dig it up on the bayonet of the shovel and provide a slightly acidic or neutral reaction. Why add 200 g of quicklime per square meter to the overly acidic soil.
For good nutrition, a 20-centimeter fertile layer is enough:
- V clay soil sand should be added for looseness;
- Loam is mixed with ash, mature humus and bone meal at 100 grams per square meter;

- Peat is poured into the sandy soil.
In addition to this, the plants are moderately fed with complex fertilizers (5 times per season) and watered regularly.
Landing patterns
When landing perennial phlox free areas should be left between the plants, taking into account their growth and growth.
- A distance of 40 cm is made between the undersized and ground cover varieties;
- Between plants of medium height - 50 cm;
- Between tall ones - from 70 cm.

Advice. It is advisable to mulch these gaps with chopped straw, dry humus, sawdust or peat to retain moisture in the soil and limit weed growth.
Summer care
All that phlox needs is regular watering at the root, periodic loosening and weeding of weeds.

To increase bushiness, they can be pinched over 4-5 pairs of leaves. And for a longer flowering, fading inflorescences should be cut out in a timely manner.
Disease and pest control
One of the few diseases that threatens phloxes - powdery mildew that infects leaves and stems. To avoid it, you need to choose the right place for the plants and not allow the plantings to thicken too much.

And from the main pest - nematodes - phloxes will save others ornamental plants planted nearby. These are nasturtium, marigolds and calendula.
Conclusion
It is quite difficult to find another plant in our gardens that would be as decorative as phlox, and as unpretentious and undemanding to care for. And the many ways of reproduction and their ease make these plants favorite among many summer residents and gardeners.
Phlox are herbaceous crops belonging to the cyanide family. The genus of the plant consists of 85 species and over 400 varieties of bright flowers.
Translated into Russian, phlox means "flame". The plant received such an unusual name due to the fact that the first wild species phloxes had a bright red hue.
General information
The homeland of culture is considered to be North America, characterized by its harsh climate, thanks to which phloxes have become tenacious and unpretentious. Almost all plant varieties are perennials. However, there are annuals and dwarf shrubs among them.
Phloxes have a lush, compact and bushy shape, and thanks to their abundant and long flowering, they have become the favorites of many flower growers and decoration of most garden plots.

Phlox varieties with photos and names
- early flowering, light-loving variety of culture with lush and abundant flowering... Phlox bushes are not tall, lush with dense branching. The leaf plates are dark green, narrow, subulate. Inflorescences are large, of different shades. The flowering time of the culture falls in May and lasts until the end of June.

- is bright and beautiful shrub plant blooming from June to the first frost. Phlox inflorescences have a variety of shades - from purple to yellow. The plant is divided into two varieties and is star-shaped and large-flowered.

- the flowering time of the plant occurs in the middle of summer. This variety of phlox is used by breeders to develop new varieties. The bush of paniculate phlox is compact, with dense foliage and large, bright inflorescences various shades.

- this culture is of medium size and reaches a height of up to 40 centimeters. Phlox bushes have woody stems and dense, dark green foliage. The flowering time of the culture falls in the spring. Phlox inflorescences are blue or lilac. After flowering, no seeds are formed.
- this variety is compact and up to 80 centimeters high. The leaf plates are long, dark green with pointed ends. Inflorescences are medium white with greenish spots towards the center. The petals overlap to form round, dense, globular inflorescences. Phlox blooms in the middle of summer and is resistant to diseases and pests.

The culture reaches a height of 55 centimeters and has green, elliptical leaf plates with a pointed end. Inflorescences are bright pink with red streaks closer to the center of the flower. During blooming, the flowers form dense balls with a pleasant aroma and extraordinary decorative effect. The flowering time of the culture lasts from July to October.

- the phlox bush reaches a height of 75 centimeters. The leaf plates are green, with a slight burgundy tint. Inflorescences are large, pale pink with a bright center and curly edges. The flowering time of the culture lasts from June to September.

- the bush reaches a height of 50 centimeters and has a diameter of up to 4 centimeters. Stems are compact, not high branched. The leaves are dark green, lanceolate. Inflorescences are hemispherical, scarlet with a pleasant aroma. Phlox blooms from July to September.

- an upright bush, distinguished by its compactness. It reaches a height of up to 90 centimeters. Leaves are dense, dark green, pointed. Inflorescences are spherical, large, dense, light pink with grayish-white strokes in the middle. The culture blooms from July to September.

- this variety of phlox is considered one of the most exotic. It was withdrawn in 2016. The bush is compact and reaches a height of 90 centimeters. The leaf plates are dark green, elliptical with a pointed end. Inflorescences are spherical, lush yellow-green. Since the buds do not bloom completely, it seems that the phlox is terry. Flowering time lasts from mid-summer to early autumn.

This variety is medium in size and has aromatic bluish-lilac buds. In height phlox reaches up to 90 centimeters, and in width up to 60 centimeters. The leaf plates are dark green, elliptical in shape with a pointed end. The flowering time of the culture falls in July and lasts until the end of August.

- this variety is distinguished by winter hardiness and resistance to many ailments. It reaches a height of 90 centimeters and has lignified branches. The inflorescences are rounded-conical of a violet shade with a bright purple star-shaped center. Phlox blooms from July to August.

- A compact bush with strong, lignified branches. The leaf plates are dark green, elliptical with a pointed end. Inflorescences are round-conical, dense. Salmon-colored flowers with a white center and a purple center. The flowering time is in July and lasts until August.

- quite a capricious variety. The height of the bush is up to 80 centimeters, and the width is up to 60 centimeters. Leaves are green, long with a sharp end. The inflorescences are large, spherical, with a white-pink strip. The flowering period lasts from July to August.

- the bush reaches a height of 70 centimeters, has strong stems with dense foliage. Lilac inflorescences with diamond-shaped petals. They are distinguished by a hemispherical shape, density and pleasant aroma. The flowering time lasts from June to August.

This perennial reaches a height of 80 centimeters and has lignified, densely leafy branches. Inflorescences are spherical, velvety, dark purple in color with a persistent, sweet, pleasant aroma. Flowering time from July to August.

- herbaceous perennial, characterized by compactness, strength and dense foliage. The bush reaches a height of 80 centimeters. The leaf plates are long, dark green with a sharp end. Inflorescences are globular white-violet shade with a raspberry center and a pleasant aroma. The culture blooms from July to August.

- is a tall, durable, compact perennial with purple shoots and dark green leafy plates with a purple tint. The bush reaches a height of 80 centimeters. Inflorescences are spherical, bright crimson, star-shaped and pleasant aroma. The variety blooms from mid-July to late August.

- the culture is distinguished by its unpretentiousness, frost resistance and abundant flowering. The plant reaches a height of 70 centimeters and has a dense, dark green foliage. Inflorescences are burgundy with light lighter strokes. The flowering time lasts from July to August.

- the plant reaches a height of up to 100 centimeters, has strong, lignified shoots and dense, dark green foliage. Inflorescences are large, spherical, dense, strawberry shade with a light center. The flowering time of the culture lasts from July to September.

- the variety is winter-hardy and reaches a height of up to 50 centimeters. The leaf plates are dark green, elliptical with a pointed edge. Inflorescences are hemispherical, white with crimson stripes on leaf plates and a pleasant aroma. The flowering time lasts from July to September.

Phlox planting and care in the open field
In order for phlox to grow normally, develop and bloom magnificently, they should be planted in a well-lit garden bed. In addition, it must be protected from drafts and wind, since the plants are quite thermophilic.
If the selected variety prefers shade, then plant it under shrubs or trees. Light-loving varieties must be planted in the sunny part of the garden, since a lack of light will lead to the appearance of small and rare buds and their paleness.
You can not plant phlox in the lowlands and in areas with a close occurrence of groundwater. It is best if the bed is located on a hill.
The soil for planting plants should be nutritious and loose. Preference should be given to slightly acidic or neutral loams. Plants will feel perfect in them.
More often, cuttings are used for planting phlox, which are planted in the garden in late April - early May. Also, some gardeners root them in September, in this case, young plants will bloom next spring. When choosing autumn planting no need to wait for the frost to begin. It is very important to plant phlox so that they have time to take root before the first cold snap. If these conditions are not met, the flowers will simply freeze out.
There are also gardeners who plant phlox in the summer. However, it should be borne in mind that such a method is very problematic and laborious, since it will be necessary to constantly monitor the seedlings and prevent the soil from drying out.
When planting phlox on a garden bed in spring, you need to adhere to the following rules. The cuttings should be planted in a prepared area, keeping a distance of 30 centimeters between the bushes. However, if the varieties are tall, then they must be planted at a distance of 60 centimeters from each other, since they will need a lot of space when growing.
Immediately after planting, young phlox should be well watered. Watering should also be plentiful for the first couple of weeks to allow the plants to take root and grow faster.

Watering phlox
Phloxes are very fond of moisture, so they should be watered regularly. However, it is worth considering that waterlogging can negatively affect plants and lead to their death. The soil in the phlox bed should be constantly moist. If there is a lack of moisture, the flowers will slow down growth and may stop blooming.
When watering, it is very important to apply water exactly at the root, without getting on the leaves and stems. In extreme heat, the crop should be watered in the morning and evening. Once a week, after watering, the soil must be loosened and weeds removed.

Soil for phlox
As mentioned above, the soil for phlox should be loose and nutritious. It is best if it is slightly acidic or neutral loamy soil. When the soil becomes acidic, it should be calcified.
The plant bed is usually prepared a year before planting. To do this, the earth is carefully dug up by adding manure, wood ash and compost to it. If the soil is dense and clayey, then to give it lightness, peat should be added to it. If the soil is too loose, you need to add sod and compost to it.

Phlox transplant
Before carrying out a transplant, you should prepare the bed in advance, dig it up and bring it into garden soil necessary components... Then you should dig out the bush, gently shake off the root system from the ground and transfer the phlox to a new planting hole, taking care of the drainage in advance. The bush must be placed vertically, while straightening the roots. Then the hole must be covered with soil, tamped, mulched with peat and watered.
The plant will need about a month to acclimatize. The transplant is best done in the spring, so that the plant not only has time to take root for summer season but also better reset acclimatization.
Kobei is also a member of the Sinyukhov family. It is grown when planting and nursing in the open field without much hassle, if you follow the rules of agricultural technology. All the necessary recommendations can be found in this article.

Fertilizing phlox
Phloxes are very fond of organic and mineral dressing, for this reason, they should be applied 6 times per season from May to September.
- The first feeding consists of organic matter , or rather, manure diluted in water and wood ash... You can also add ammonium nitrate to the solution.
- The second feeding is also carried out with liquid manure. , but with the addition of superphosphate and potassium salt. A month later, organic fertilizers are applied again.
- Autumn phloxes should be fed phosphorus-containing and potash fertilizers so that the plants overwinter safely.

Blooming phlox
Phlox bloom depends on the variety. Some plants bloom from June to August, and the second from June until the first frost. Inflorescences are usually spherical, hemispherical and spherical. They are distinguished by their density, pleasant aroma and extraordinary decorativeness, for which gardeners love phloxes.
The colors can be completely different - from white to dark purple. In addition, there are bicolor and double crops, as well as phlox, which change their shade depending on the time of day.

Pruning phlox
To rejuvenate the bush and give it the desired shape, it needs to be trimmed from time to time. Before the onset of frost, you should cut off the entire aerial part of the plants, leaving only 5 centimeters of shoots from the ground.
If the gardener wants to get undersized and voluminous bushes of phlox, he needs to pinch the tops of the plants from time to time, starting in May. However, it should be borne in mind that such a molding will postpone the flowering process by a couple of weeks.
Reproduction of phlox by layering
For reproduction by layering, the lower shoots should be bent from the mother bush, pressed to the ground and covered with soil, while leaving the tops on the surface.
When they take root, they can be dug up and transplanted into a permanent growth site.

Phlox reproduction by dividing the bush
Bush division is simple and not time consuming. It can be produced both in spring and early autumn. However, a spring transplant is considered more successful.
This breeding method can only be applied to adult phloxes who have reached the age of five. For reproduction, the bush should be carefully dug out so as not to damage the root system. Then it is necessary to divide it into parts, carefully separating the root collars.
After the end of the procedure, the resulting cuttings can be planted on a permanent place of growth.

Growing phlox from seeds at home
The seed method is the most time consuming, so it is rarely used. Seed material is sown in a container with soil with a mixture based on soil, sand and humus to a depth of 2 centimeters in early autumn.
The container with future plants is left outside, covered with dry leaves for the seeds to pass through natural stratification. In the spring, when it gets warmer outside, the container with seeds must be brought into the room for seed germination.
After the seeds germinate, and young plants have several leaf plates, they can be transplanted into open ground.

Reproduction of phlox by cuttings
For propagation by cuttings, you can use the leaf, stem and root parts of the plant. To propagate the culture using root cuttings, in May, the plant should be dug up, strong areas of the root system should be selected and divided into parts of 5 centimeters. Then they need to be planted in a container with an earth-sand mixture at an angle.
So that they take root faster, they should be regularly moistened and the temperature in the room should be gradually increased, bringing it to 25 degrees. The resulting seedlings can be planted in open ground.
Stem cuttings
To prepare stem cuttings, you should take developed shoots and divide them into parts with two nodes. The top slice should be 3 centimeters higher than the first knot, and the second slice should be below the second knot.
For the cuttings to take root better, they should be placed in a root solution for an hour. Lower leaves it is necessary to remove, and make a small incision under the lower bud, and then plant them in the ground for rooting.
For better germination, cover the container with plastic wrap and store in a warm place to create a greenhouse effect. The rooting procedure can be carried out both in spring and autumn.
Leafy cuttings
Reproduction using leaf cuttings is carried out in early summer. For this purpose, cut off the lower part of the stem with a leaf and a bud.
The resulting cuttings are buried 2 centimeters in the ground and germinated in a greenhouse, providing them with regular moisture and airing.
In the fall, the cuttings will sprout, and next spring they can be planted in open ground.

Diseases and pests
The most common phlox pests are slugs, hookworms, earwigs, and cruciferous fleas.
If the plant is struck by nematodes, then the flower will begin dry shoots and curl inflorescences ... To destroy the insect, you should cut off the affected parts of the crop and lime the soil. With a strong defeat of phlox, in order to prevent its death, it is necessary to completely cut off the bush, and use the root system for propagation by cuttings.
If the culture is attacked by caterpillars and slugs, they must be collected by hand and destroyed. You can also treat phlox with special insecticides to combat these pests.
In addition to pests, the culture is susceptible to diseases such as phomosis, powdery mildew and spotting.
When a plant is damaged by phomosis, yellowing and twisting of sheet plates ... In advanced cases, the foliage turns brown and the stems begin to crack ... To eliminate this ailment, the culture must be treated with a solution of Bordeaux liquid four times, observing the intervals between spraying per week.
A disease such as powdery mildew refers to ailments of fungal etiology and manifests itself white bloom on sheet plates ... To eliminate the disease, the plant can be treated with Bordeaux liquid or Fitoverm. To avoid the occurrence of this ailment, young shoots should be sprayed with a weak solution of manganese in the spring.
With spotting, yellow and brown spots begin to appear on the leaf plates ... To get rid of the disease experienced gardeners it is advised to treat the plant by spraying with a 1% solution of Bordeaux liquid.

Conclusion
As you can see, grow phlox on your garden plot not difficult at all.
If you follow all the rules for caring for a crop and choose the right place for planting it, then bright spherical inflorescences will decorate the garden with their decorative effect and fill the air with a pleasant aroma until autumn.