Planting petunia seeds for seedlings - different ways. Growing seedlings on toilet paper
Correct cultivation seedlings in spring are the key to getting good harvest in the fall. But how to have time to plant all the planned plants quickly, with minimal cost and high quality? After all, there is not enough strength for everything. Earlier, according to tradition, in the fall, gardeners prepared the soil, then fiddled with it and before planting - calcined it, washed it, and so on. In addition, working with the ground is a large amount of debris and dirt. However, there is a method that will allow you to plant some seeds very quickly and at the same time keep the apartment clean. Seedling on toilet paper feels great, and the summer resident saves a lot of free time and effort by growing it in this way.

The method of growing seedlings on toilet paper has recently appeared among summer residents, but it is already very popular. The fact is that he has a lot of advantages that the horticultural community did not fail to note. For example, using paper as a substrate saves a lot of time and effort. Moreover, in order to implement this technology in life, in addition to the seeds themselves, a minimum is required additional materials- Directly a roll of ordinary toilet paper, water, a plastic bag, scissors and containers.

For the first time, paper for hygiene purposes was used in China in the 600s of our era. And after 700 years, specially created paper sheets were delivered to the emperor's court every year: especially soft - for the emperor himself and his family members, and harder - for the courtiers.

In the middle of the 19th century, the first toilet paper appeared in the United States, which was cut into sheets and packed in a box. In the same century, the production of this simple but ingenious invention began. And only at the beginning of the 20th century, the first roll paper with perforation appeared, which was invented in Germany.
The production of toilet paper is far from the easiest process; in the process of creation, it must acquire certain qualities:
- softness;
- the ability to tear easily;
- colorlessness (absence of chemical dyes in the composition) or coloration with certain harmless and hypoallergenic dyes;
- high hygroscopicity;
- the ability to easily disintegrate into individual fibers in water.

In its composition, toilet paper contains waste paper (gray paper) and cellulose (white paper).
On a note! As a substrate for growing seedlings, you can use not only toilet paper. Disposable paper handkerchiefs and napkins are also suitable (but not ideal) for these purposes. The main thing is that the material is soft, easily torn.

Why is paper good for gardening?
Due to some of its properties, toilet paper is excellent for use as a substrate for growing seedlings. It is soft, does not allow the emerging roots to get entangled in itself, makes it easy to carry out a dive. At the same time, to a reasonable question about nutrients you can answer the following: due to natural characteristics, plant seeds during germination do not need additional nutrients and useful elements obtained from the soil. For the first time, what was laid down during their formation and development will be enough for them.

Let's remember the structure of seeds, which was studied in biology lessons at school. In the seeds, it does not matter, dicotyledonous or monocotyledonous, there are special tissues that represent a supply of nutrients - these are proteins, starch, oils. This can be endosperm, cotyledons, and other tissues. Thus, we can say with confidence that at the beginning of their life, small plants feed themselves, and therefore the presence of nutrients in the substrate is not at all necessary. On the contrary, some advise using a less nutritious substrate for these purposes.

Advantages and disadvantages of the "paper" method
The "paper" method of growing seedlings has a lot of advantages that gardeners did not fail to note. It is because of these advantages that the method has become so popular and continues to be actively spread among summer residents.


The disadvantages of methods for germinating seeds for seedlings on toilet paper include the following.
- Some crops, for example, do very poorly on paper, as they require special conditions for development. For them, it is imperative to carry out pre-sowing preparation - for example, to stand in a solution of ash.
- It is important to pay a lot of attention to seedlings after the roots appear. The timing of planting sprouts in the ground (picks) must not be missed, otherwise the seedlings will die. To do this, crops should be checked every day.
- Plants may experience a lack of light when the planting is very dense.

What can you sow on paper?
The technology of growing seedlings on paper is theoretically suitable for all horticultural crops - peppers, tomatoes, cabbage, onions. However, it is not always advisable to use it for thermophilic plants in order to save space. The fact is that seedlings of peppers, tomatoes, cucumbers will still have to be dived into pots - after the emergence of seedlings, these crops are not yet ready to move to a greenhouse even in the southern regions of Russia. Both bulky pots and containers with seedlings will still stand on the windowsills and tables at home. This method is relevant only in certain cases - for example, if you need to germinate seeds with expired suitability.

But cold-resistant crops (for example, onion), which, after germination, are immediately planted in the ground, just can and should be grown on paper.
Cooking seeds
Many seeds germinate well on paper, but there are some that will not germinate under any circumstances. These are dead seeds to get rid of. In order to sort out "live" and "non-living" seeds, they must be kept in a weak salt solution (at the rate of 30 g per 1 liter of water). All bad seeds will float to the surface - they can be collected and discarded. Then the water is drained and the remaining seed is dried. After this procedure, it can be planted on paper.

By the way, there are different ways growing seedlings on paper. Let's consider two of the most common ones.
We grow seedlings in Moscow
You can germinate seeds in a way that is called "in Moscow" or the "hand-rolled" method. In order to implement this method, you will need water (spring or melt is best, although you can take regular tap water, but it should settle), a syringe or spray bottle, the seeds of the crops themselves, plastic breakfast bags, toilet paper and a plastic cup. In this case, toilet paper must be taken white or gray- it is undesirable to use color.
Step 1. Take one plastic bag and spread it flat on the table surface.

Step 2. Lay the toilet paper in layers on the surface of the bag. In this case, first lay the paper along the top edge, then along the bottom. And so several times. The entire surface of the bag should be hidden.

Step 3. Be sure to moisten each layer with water from a spray bottle or syringe.

Step 4. Gently spread the seeds in one row along the top edge. Step back about 1 cm from the edge. Maintain the distance between the seeds 1-2 cm.

Step 5. Now carefully roll the roll up. You can start folding from any edge. Try to roll the roll evenly and neatly.

Step 6. On the rolled roll, write the name of the crop in a marker, and also include the sowing date and seed quantity.

Step 7. Into the empty plastic cup pour in some water (about 5-10 mm).

Step 8. Place the seed roll in a glass of water with the bottom edge down (the one where there are no seeds).

On a note! To save space, you can put several rolls of seeds in one glass.
Step 9. Take another plastic bag and cover the roll with it. This will keep you warm.

Place the glass with rolls in a warm place. The first shoots will appear in a few days. The bag should be removed when the first "loops" of seedlings appear above the paper. At the same time, the glass is moved to a well-lit place. At first, you don't need to add water, but as soon as the roots of the plants reach the liquid at the bottom, you need to start adding it (water) regularly.
Video - Tomatoes by the Moscow method
We grow seedlings on paper in a bottle
Seedlings on paper can also be grown in a bottle. Using this option plastic containers, you will immediately receive a mini-bed, and. You will need seeds, water, toilet paper, a plastic bottle, and scissors.

Step 1. Unwind several strips of toilet paper, fold them together and cut into small pieces with scissors.

On a note! If the toilet paper is soft and highly absorbent, you can skip this step by simply cutting or tearing the strips.
Step 2. Cut the plastic bottle into two so that the bottom remains intact, and place pieces of paper on one of the halves.

Step 3. Water the paper so that it is well wet.

Step 4. Place the seeds on the surface of a damp toilet paper, cover them with other pieces of paper, and write the name of the crop on the surface of the bottle.

Step 5. Close the seed bottle with the cap.

Step 6. Place the bottle in a bag, tie it with an elastic band and place it on the floor under the battery.
Video - Seedlings in a bottle
Seedling care
When the seeds are sown, it remains to properly care for them and wait for the first shoots.
Table. Conditions for seedlings when grown on toilet paper.
| Conditions, procedures | Short description |
|---|---|
| Seedlings on paper are placed in a well-lit place after the seeds have thrown out the first "loops". IN winter period seedlings should be supplemented with lamps. |
| The temperature for seed germination should be about + 25-27 degrees. After the appearance of the entrances, it can be reduced to room temperature. |
| It is worth pouring water into a glass or bottle where the seedlings are on paper as it dries. |
|


Petunia seeds are so small that they are sown in open ground Is literally throwing money away. The slightest stream of air, and where to look for these tiny grains? It will not be carried away by the wind, so it will wash away with spring rains. Or it will bury it so deeply that they will not have enough strength to germinate. And even if natural elements do not destroy the seeds, it will be possible to wait for flowers with this method of cultivation only towards the end. summer season... In this case, how to grow bush petunia without incurring material and moral costs? Only possible way getting nicely flowering plants- through seedlings. There are many options for how to grow undersized petunia at home. It is better to arm yourself with the knowledge of everyone, and time and experience will show which one will become loved.
It takes about 90 days to get strong, suitable for planting seedlings of petunias from seeds or from a capsule. In this case, there are several immutable rules, non-observance of which leads to a disastrous result or even to its absence. All the subtleties of planting and leaving should be carried out "like clockwork", clearly and constructively.
Seedlings in a box - the old proven way
Many people associate a vertical flower bed with something unusual. In fact, a structure of this kind can look completely different. Pyramids, arches, screens, columns - all these are varieties of a vertical flower garden.
We carry out a flower bed for petunias
Out of the bag
The presented option is easy to do with your own hands.
- A tight bag is taken. Handles are sewn to it. The container is filled with soil.
- On one side, you need to make cuts every 20 centimeters. Plants are planted in them.
- The bag is then placed on a wall or other location.
- In order to prevent the soil from falling out, the inner surface is laid out with a film, and the canvas is quilted.
Old bags can be used instead of a bag. Also, to create a living wall with your own hands, you can use a canvas, and sew rows of pockets on it.

From bottles
The presented option is easy to do. Will need washed up plastic bottles without labels. The lids are not screwed on tightly so that water can drain if necessary.
The vertical flower bed is assembled according to the following algorithm.
- the bottle is cut in half;
- on its upper part, a fastener is made of wire or rope;
- soil is poured into the upper part with a lid - a flower will be placed here;
- the bottom of the bottle will be installed Plastic container;
- Then the structure is fixed to the surface to be decorated.
If desired, the product can be decorated.
How to make a vertical flower bed from bottles (video)
Application of car tires
A flower garden for petunias of a vertical type can be made from an ordinary car tire... The frame is not required in this case. Moreover, it is possible to install tires so that different sizes and shapes. For greater decorativeness, the tires are painted with acrylic paint.
Classic version
Basically, gardeners prefer to make a simple version of flower beds for vertical petunias.


- A metal mesh is taken. A cylindrical frame is made from it. It is inserted into a pot that fits in diameter.
- Agrofilm is placed inside the frame. The result should be a tower.
- The agrofilm should be fixed. Before filling the soil, a tube with holes is inserted into the frame, watering will be carried out through it.
- Soil is poured into the tower. Then it is watered so that the earth settles. This will fill the frame from the inside.
- In the pot, it is also necessary to compact the earth.
- Further, the material is cut in the form of a "plus" (vertically and horizontally). Flowers will be planted in the holes. It remains only to plant petunia!

You can see what the finished flower garden looks like in the photo.
Screen of flowers
An excellent option for making a vertical flower garden is horizontally fixed pipes. If you use heating pipes, it will be necessary to drill holes for the petunia, if the drainage pipes, side plugs are needed.


PVC pipes
This option is best suited for growing petunias. The design includes two pipes. Holes are drilled into them. Inner tube will be used to supply fertilizers and moisture, the outer one will be used for planting flowers.
The pipe intended for irrigation is closed with adhesive tape on one side. Among other things, it must be wrapped in a nonwoven fabric.

A watering pipe is inserted into the outer pipe. Then expanded clay and earth are placed. Plants are planted in the holes.
Using the pots
Any containers or pots are a great option for growing petunias. On the reinforced base of the container, they are strung through the drainage hole in a checkerboard pattern. You can see what the structure looks like in the photo.
The use of old pallets
This method is suitable for decorating a patio, balcony or gazebo.
- The base is made of plastic or wooden boxes, pallets that you no longer need.
- On the back of the box, install non-woven fabric or a net that is compacted with straw.
- Next, soil is poured into the container.
- Then you can plant the plants.

Important to remember, that when planting in a vertical flower garden, petunias and other plants get a little soil. It is necessary to select plants, the conditions for which are approximately the same. The best way- unpretentious species, such as stonecrops, alpine flowers, moss, ivy, bindweed.
- Petunia grows well indoors. Most good option- creation of multi-tiered vertical flower beds. They are composed using several individual elements... You can use a wooden screen by attaching horizontal containers to it.
- Convenient option- flower tower. It represents landing sections stacked one on top of the other. You can take several pots and fix them on an arched frame made of metal.
- Capacious containers should be selected. It is also worth making sure that they have drainage holes.
- Growing petunia indoors is somewhat more difficult than growing in open soil. The fact is that the plant gets a limited amount of the substrate. Ampel petunias require 3 liters of soil, spray ones - about two. Row ampel petunias grows in length up to one and a half meters, so a large capacity is required - 5-10 liters. It is about such varieties as "Opera", "Typhoon" and "Tornado".
- It is important not only to make a flower bed for petunia, but also to properly care for it. The plant requires watering and feeding. Watering on hot days is carried out once a day (in the evening or morning).
Ideas for your garden - vertical flower bed (video)
It is quite simple to make a vertical flower bed for petunias. Moreover, the design can be absolutely any shape. The soil in the vertical bed must be compacted. Petunia is planted with other plants with similar requirements. It is important to water and fertilize in a timely manner.
Reviews and comments
(No ratings yet)
Elena 11.09.2015
I liked the option of planting flowers in the cuts of a black film. In general, I really love petunias, on the site I built a flower bed of three tires lying on top of each other. But I have to wait a very long time for the flower to grow and cover the rubber. Here, you can simply plant seedlings more often and thin out over time, so that there is enough room for the roots, simply by cutting off individual plants.
Alena 09/18/2015
I like these vertical beds, but I haven’t had to do this yet. It’s just that our hands haven’t reached it yet, we still need to spend time, which is chronically lacking in the country. But next summer I'll try, I'm wondering what other flowers besides petunias are suitable for such flower beds? Maybe someone tried curly flowers, what came of it?
Masha Maslennikova 02.01.2016
My mom grows petunia seedlings for sale and is landscaping some organizations. It is imperative to offer her such a flower bed. I'm a little worried about whether the petunia will rot under such a dense shelter, I want the aeration to be tolerable, so that the flow of air to the flowers is good, otherwise a decent look cannot be achieved. Again, there may be problems with the availability of watering, because watering must be done from above. How high can such a flower bed be made and how laborious is it to care for?
Natalia 10/07/2016
Instead of black film, I use acrylic, you can water while the seedlings are growing not only from above, but also on the flower bed.
Add a commentMost flower lovers prefer petunia, as it is quite beautiful, moreover, not whimsical, that is, it can be, or in the country, and it will bloom equally. But you should know that certain skills are still needed to grow this flower.
Petunia species
- Ampelny
- Cascading
- Multi-flowered
- Large-flowered
- Surfinia.
Most often, there are large-flowered, with flowers up to twelve centimeters in size, and multi-flowered, with a flower of no more than five centimeters.
Large-flowered petunia is most popular with flower growers, as it possesses large quantity the most different forms and flowers.Also, growers distinguish and hybrid varieties given a flower, the most popular of which are: Polaris, Storm, Ultra, Dream, Hit parade.
Petunia cascade and ampelous: differences
Differences between varieties of petunias: cascading and ampelous
The main the difference between ampel varieties and cascade there is a property for growth:
- Cascading varieties grow strongly, characterized by long lateral shoots. They are grown in large terraces, balconies, gazebos, etc., planted in large containers. The most popular varieties of cascading petunias: Silver, Rose, Cherry, Ramblin
- Ampel petunias(mainly hybrids) are characterized by long flowing shoots and do not grow much. Accordingly, they are planted in hanging planters, on flower beds.
There will be no difficulties with the purchase of seeds of this plant, since they are sold in any flower shop... Typically, a package contains five or ten seeds. You need to know that the seeds of this flower are small enough. Also, on the packaging, the drained inscription rarely appears, which means that the seeds will not take root without water. But if the seeds were stored in a dry and hot place, then water will not help.
 Cascading variety
 Seedling petunia
Almost all growers claim that given view flowers must be grown in an apartment on the windowsill, if possible. As a container, you can use a five-liter bottle for water, you can also use a container where ice cream or cookies were stored.
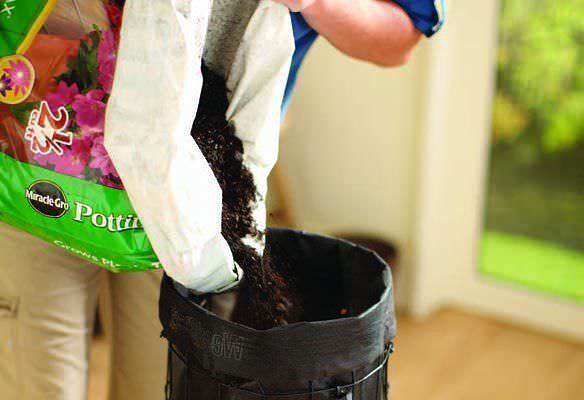
Do not forget to make drainage holes in the container, then you need to put a three-centimeter layer of small pebbles, expanded clay is still suitable. Sprinkle the soil on top of the first layer, with a layer of no more than five centimeters. By the way, the composition of the soil does not make a big difference, but if there is a ready-made one for seedlings, then it is better to use it.
 Flower photo
 The manufactured greenhouse should be placed above the container and watered abundantly with a solution of potassium permanganate, best of all, rather thick. In doing so, do not forget to ensure that moisture flows from drain holes if this happens very slowly, then the size of the holes should be increased.
After that, the greenhouse should be left in the same position overnight to drain all the water. After that, you need to start sowing seeds, they must be laid out at the same distance. To make it easier for the flower to take root, the seeds should be pressed to the ground, but not very hard. It is not recommended to fill up the seeds, because petunia is very fond of light. Next, use a spray bottle to spray the seeds and cover the greenhouse with a lid.

It is important to choose the right place where the greenhouse will be located. The main thing is that the flowers are not exposed to direct sunlight. It is also important to maintain a certain temperature within twenty-one degrees, until the shoots appear. After that, the temperature should be maintained within seventeen degrees.
Remember to ventilate for fifteen minutes, best done in the evening. It is also worth monitoring the condition of the soil, that is, not letting it dry out.
After two weeks, it is necessary to remove the lid from the greenhouse, and at this moment it is recommended to add coarse sand calcined in the oven to the plant, only it must be cooled before adding. This is necessary to get rid of excess moisture, to protect the plant from the black leg.

It is necessary to dive petunia at the moment when two real leaves appear.
Top dressing of seedlings
The plant should be fertilized every ten days. It is best to purchase a liquid complex mineral as a top dressing, which should contain not only basic elements such as phosphorus, nitrogen and potassium, but also additional trace elements.
You need to deal with seating after three or four sheets appear. But before seating, be sure to remove the lid for a while, about a couple of hours for several days. On the fourth day, the cover can be removed permanently. In order for the petunia to bloom in May, sowing seeds should be done in February.

The plant is best transplanted into a box where the soil has already been prepared with top dressing. They do this in order to preserve the flower in winter. If the plant is in a sunny place, then it will bloom until the end of the year. In the last winter month, only a thorough pruning will be needed.

For cultivation without soil, you need to find a film on which to lay out toilet paper, moisten it with a spray bottle, and then spread the seeds at a distance of about three centimeters. Next, the seeds need to be covered with another layer of toilet paper, and moistened again.

Then cover again with foil and roll into a roll. It must be placed in a jar, or a glass with the seeds facing up. The container must be filled with water with a layer of no more than four centimeters.
You can also plant seeds in peat tablets, see the photo below:
 Petunia in peat tablets step by step with photo
 Watch a helpful video.
In this case, you need to use a regular roll of toilet paper instead of snow. Planting is done in the same way as in the snow: you put paper on the soil, spray it well and scatter petunia seeds on top.
Planting petunia seeds in a hydrogel
All these methods have been tested by me. I practically did not know any problems with growing petunia seedlings. But these methods of planting petunias have one drawback - the petunia needs a pick! And this is a very laborious task. The next option planting petunias for seedlings saved me - and now you - from hard work on a dive of a petunia.


After planting the seeds, wrap the petunia container in plastic and place in a warm place. Do not worry for 7-9 days, petunia rises at 22 - 23 ° C. As soon as shoots appear, immediately expose the mini-greenhouse to the light. If you are planting in early spring, then you will need backlighting, at least 15 hours a day; but I plant seeds for seedlings in the first decade of April. Flowers have time to grow and bloom before planting on permanent place June 10th.
If you want to get more profuse flowering, then pinch the first bud on the petunia.
Do not overfill the petunia - it can tolerate some dryness of the soil, but it will die from high humidity. High humidity provokes such a disease as "black leg".
And the last thing. To protect petunia from diseases and grow not elongated, but plump stems, I spray petunia seedlings with a solution of Baikal EM with Zircon: 1 ml of rainwater - 1 ml. Baikal and 0.1 ml. Zircon.