Wallpaper gluing technology. How to glue wallpaper: common mistakes in self-sticking
So, the room is free from furniture, pictures and photographs are removed from the walls and cleaned in a dry, clean place, children and pets are sent for a short vacation to their relatives. We begin the process. If you are gluing for the first time, call someone for help, it is more convenient to do it together. But even without outside help, the first do-it-yourself wallpapering in life can turn out to be almost perfect if you follow our advice.
We stock up on tools and materials
Before you start moving and taking out furniture, you need to stock up on tools and materials. Here is the first "short" list of what you need:- Actually wallpaper and glue
- Wide and narrow spatulas for wallpaper stripping and puttying
- Containers for water or a special liquid for removing wallpaper: old wallpaper from the walls can be easily removed if it is properly wetted beforehand
- Container for diluting glue
- A special mixture or putty for leveling walls. Sometimes old wallpapers come off with small pieces of plaster, cracks and bumps are found under them - these holes must be repaired and leveled
- Sandpaper to finalize the wall
- Primer or primer (special solution for treating walls before gluing)
- Screwdriver, hammer, pliers for dismantling sockets, skirting boards and other things
- Scissors, and preferably a sharp wallpaper or clerical knife for trimming the edges of the wallpaper
- Tape measure to measure the desired length of the canvases
- Level or thread with a weight at the end (plumb) to align the wallpaper vertically
- Large wide brush or foam roller for applying glue and a couple of smaller brushes. With a wide brush or roller it is convenient to apply glue to the wallpaper and walls, and with a small one - to coat hard-to-reach places: corners, ledges, places behind radiators of radiators, etc.
- Soft plastic spatula
- Soft rags. Large dry rag - for smoothing the wallpaper. Wet clean cloth - to remove excess glue
- Stepladder or trestles
We count the number of wallpapers and glue
 How much to take? Let's count rolls. Most often, rolls with a width of 53 and 106 cm are on sale. They are also called "half-meter" and "meter". European manufacturers also produce wallpapers with a width of 68 cm. The length of the canvas in a roll is 10.05 m. It is most common. Vinyl wallpapers with a width of 53 cm are sometimes sold in rolls of 15 m each, and non-woven wallpaper for painting with a meter width is also supplied in 25-meter rolls. We recall the school geometry course, pick up a tape measure, measure the room and calculate the perimeter, summing up the length of all walls. For example, for a room measuring 3x4 m, the perimeter will be 3 + 4 + 3 + 4 \u003d 12 m. We multiply the perimeter by the height of the ceilings. Subtract the area of windows and doors from this and get the total area of the walls. S = (a * b) - ( (c * d) + (e * f)). S - the required area of the walls of the room, a - the perimeter of the room, b - the height of the ceiling, c - the width of the window, d - the height of the window, e - the height of the doorway, f - the width of the doorway. We calculate the number of strips as follows: divide the perimeter of the room by the width of the roll . For example, we divide our 12 m perimeter by the roll width of 0.53 m. We get 22.6. We round up and get 23 stripes. For wallpapers with a large ornament or pattern that needs to be combined, designers recommend multiplying the perimeter by a factor of 1.18 when calculating. We count further. The length of one roll is most often 10 m. The height of our room is 2.50 m. For convenience, another 10 cm must be added to the ceiling height. Thus, we get a strip height of 2.65 m. If we divide the length of the roll (10 m) by this number (2.65 m), then we will get 3 full strips from one roll of wallpaper. Do not worry about the rest: they can perfectly paste over the space above and below the window or above the door.
  Be sure to take one or two rolls for a spare. Even a super professional can easily ruin one or two wallpapers. It happens. If they do not come in handy, then whole unpacked rolls can be returned to the store within three weeks after purchase (if, of course, you have kept the receipt and labels). The amount of glue is also determined by the area of \u200b\u200bthe walls. For different types wallpaper, different types of glue are used. For paper, any universal one is suitable; for non-woven or vinyl, you need glue designed only for this type of wallpaper. Any box of glue is supplied with instructions, where it is written how to dilute the mass, in what proportion, and for what area it will be enough.
 Preparing the walls
 So, the materials are purchased, the tool is prepared. Now you can get to work. We start by preparing the walls.
 1. Remove the old coating
 If wallpaper was pasted on the walls, remove them. So that the old wallpaper can be easily removed, they need to be properly wetted. We take a rag or sponge in our hands and wet the wallpaper abundantly. You can use a special water sprayer - the one you spray houseplants or dampen the laundry while ironing. Washable wallpapers need to be cut a little so that moisture gets into the bottom layer. Attention: before removing old wallpaper with water, be sure to turn off the power so that moisture does not get into working sockets and switches. After the wallpaper gets wet, carefully remove the old panels. Five minutes is enough for paper wallpaper to peel off, vinyl and non-woven - a little more. If the wallpaper does not lend itself, we scrape it off with a spatula, being careful not to damage the wall. If the wall has been painted water-based paint or whitened lime mortar- Wash off with mild soapy water. oil paint can be removed with special removal solutions old paint. They are sold in any building supermarket. You can use large sandpaper and just peel off her paint. If the paint does not come off, peel it off with a spatula.
 2. Align and prepare the wall
 Even if you very carefully remove paint or wallpaper, the wall will have to be leveled and processed. Therefore, the cracked plaster is removed with a spatula. After that, we treat the wall with a primer solution and level it with putty or a special leveling mixture. Primer - useful thing. It not only contributes to better adhesion of the leveling mixture to the wall, but also performs an antibacterial function: it usually contains substances that prevent the formation of mold and mildew. If the damage to the wall is significant, it makes sense to re-plaster it - it's cheaper than leveling with putty. After puttying or new plaster dry, we process the wall again with a primer or primer (a special solution based on PVA glue). We apply it on the wall with a roller or a wide brush, without sparing. On such a treated wall, the wallpaper will hold much stronger.
 Gluing wallpaper
 First of all, prepare a place where you will measure, cut and smear wallpaper with glue. It can be a clean area of the floor or a piece of oilcloth spread on the floor. Prepare your tools so they are always at hand. Dilute the glue according to the instructions. Set up a ladder. And start.
 - Unwind the roll and measure the web to the desired length. Cut it off with sharp scissors or a special sharp knife. Cut the wallpaper strictly horizontally, use a metal ruler for this. In order not to damage the floor, place a large cutting board under the wallpaper at the cut point.
- Carefully read the instructions that come with each roll. Some wallpapers require glue to be applied to the canvas, some to the surface of the wall, some to both the wall and the canvas. Spread the canvas on the floor or oilcloth and apply glue to it (if you are gluing paper or vinyl wallpapers)

- Let the wallpaper absorb some of the glue. Five to seven minutes will be enough. After that, carefully lift the wallpaper by the upper edge and proceed to sticking
- Start gluing from the window. A window or other opening will be a great vertical reference. To align the wallpaper vertically, use a level. It is enough to level the first canvas, and glue the next ones, focusing on it
All types of wallpaper are always glued with closed windows and doors. The room should be warm, around 20°C. Draft is the first enemy of fresh wallpaper. Glue in a draft dries very quickly, and in some places the wallpaper simply does not have time to stick.

- Gently lift the canvas to the ceiling and stick to the wall, pressing well. Gently bring each next canvas to the previous one (end-to-end or with a slight overlap, if the type of wallpaper allows it) and smooth it. For smoothing, take a soft spatula or a large dry cloth. Smooth from the middle of the canvas to its edges

- If air bubbles appear under the wallpaper, they need to be smoothed out by squeezing the air over the edges of the canvas. This must be done very carefully so as not to damage the wallpaper. If the air bubble is not squeezed out or there is a risk of tearing the wallpaper, pierce it with a needle and gently squeeze out the air
- Paste the corners with two canvases, connecting them slightly overlapping. If you paste over the corner with one sheet, then with a high degree of probability folds form in this corner or the wallpaper will completely lag behind the corner after drying
- How to deal with sockets and switches? First, turn off the electricity. Remove covers from all sockets and switches. After the canvas is pasted, carefully make a cruciform incision in the wallpaper in place of the rosette. Bend the resulting corners and cut off the excess with sharp scissors.
After you have dealt with the sticking, close the room and try not to use it for at least a day. In no case do not open windows, do not create drafts, otherwise later a short time your new wallpaper will peel off the wall with a nasty crunch.

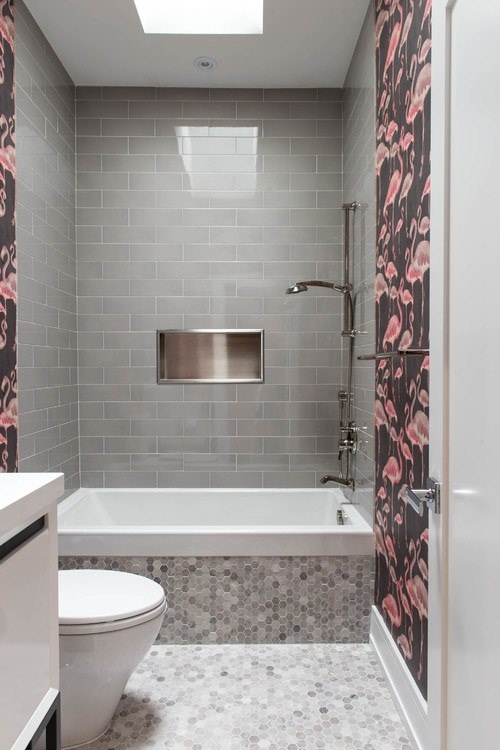
When choosing wallpaper, consider the type of room and the condition of the walls. For the living room, bedroom, corridor and other rooms where the walls are dry and smooth, any kind of wallpaper will do. For rooms with high humidity: kitchen, bathroom and toilet - choose washable vinyl wallpaper. Flaws uneven walls hide embossed wallpaper, as well as wallpaper with a large cell or a dense pattern.

To trim the edges above the baseboard and below the ceiling evenly, do this before the glue dries. Use a spatula as a stopper, and keep the cutter horizontally, otherwise the paper may accidentally tear. Useful life hack: in order not to scrape hardened glue from the knife, rinse it with hot water before trimming the edges.

For beginners, wallpapering is scary in principle, and when they see a battery that cannot be removed, this is a real reason to panic. In fact, everything is not so scary: cut the wallpaper at the places where the pipes are connected and the battery is attached, stick the wallpaper according to the instructions above, and smooth out the bumps with a mop wrapped in a clean rag, remove traces of glue. Done, you are amazing!
 That's all. As you can see, wallpapering is not such a terrible process as it seems at first. Only those who don't try don't succeed. We wish you everything went well and easily!
Wallpapering the walls is, without a doubt, one of the most popular ways of decorating rooms. Drapery of rooms with fabrics and tapestries has been known since ancient times - back in the Middle Ages, there were entire communities - workshops of artisan upholsterers, whose skill was highly valued and was constantly in demand. With time natural fabrics were mostly supplanted by cheaper paper tapestries, that is, they acquired approximately the form that we are used to now.
Of course, modern wallpaper are produced not only from paper - polymer components, various natural materials are actively used. But the most important thing is different: a convenient form of their release, good adaptation to various building structures, proven pasting technologies, high-quality adhesive compositions- all this greatly facilitates the process of such finishing, and for this it is not at all necessary to be a professional master. If there were any statistics on this score, then, of course, it would show that the vast majority of families wallpaper the walls on their own. Naturally, not everyone immediately succeeds in quality - errors, and sometimes even damaged sheets, are at first for everyone. But it's good that there is the Internet - you can always find a hint on how to glue the wallpaper correctly, avoiding the most common mistakes.
What wallpaper to choose?
The main types of wallpaper
The modern range of wallpapers is extremely wide. The buyer has the opportunity to choose a finish for every taste - by material, color and relief design, by operational and environmental characteristics and, of course, by the degree of affordability. Consider briefly the main types of modern wallpaper:
- Paper wallpaper - "old-timers" in a number of finishing materials. They attract with a low price, a wide variety of designs, and the relative ease of self-sticking. True, they do not differ in durability, as well as in resistance to moisture, and even more so to wet cleaning, therefore they are more suitable for living quarters and are not recommended for finishing the walls of kitchens, hallways, bathrooms, etc.
One of the main advantages of paper wallpaper is the environmental friendliness of the material and good vapor permeability - the wall remains "breathable".
However, and paper wallpaper may differ. The simplest ones are single-layer wallpapers, or, in other words, of the "simplex" type. They are usually thinner than multilayer, less resistant to all external influences, and when gluing them, special care is required - paper soaked with glue is easy to tear.
Two-layer ("duplex") wallpaper - higher quality. The lower base layer is responsible for the secure fixation of the finish on the wall, and the upper one gives the necessary decorative effect. Such wallpapers are denser, the print quality on them is higher, with more detail, and often, in addition to colorful, they also have a relief embossed design.

Sticking such wallpapers on the wall is already much easier, since they will not “creep” from soaking or greatly change their linear dimensions.
Paper wallpapers can be smooth, have the already mentioned relief embossing, or have a structural surface. During the production process, crushed wood waste, which gives the surface a chaotic structural pattern. Typically, these wallpapers are produced in monochrome (most often white) and are intended for pasting walls for further painting. This approach is convenient because if the fights are pasted with high quality, then the owners will have the opportunity to change the color that has become boring over time - the coating can withstand several repainting cycles.

In addition, paper can be the base layer for other types of wallpaper - this will be discussed below.
- Non-woven wallpaper. Relatively recently, interlining began to act as a serious "competitor" to plain paper. In fact, these two materials are "relatives" since both are made on the basis of natural cellulose, and the difference is only in the technology of its processing. Thus, interlining is also considered quite environmentally friendly, and it is even used in medicine.

On this nonwoven fabric paint is also easily applied, printing drawings are applied, it can be embossed, although non-woven wallpaper is still inferior to paper wallpaper in terms of the variety of design. Due to the fact that the material is less hygroscopic, much less susceptible to soaking and the accompanying deformation, it has become an excellent basis for making wallpaper. We can say that among all types of wallpaper, it is non-woven wallpaper that is the easiest to stick, and even an inexperienced master should be able to cope with the task.

In other words, non-woven wallpaper, while maintaining the main advantages of paper, is still a "step forward", as they have a lot of advantages, including greater durability and resistance to external influences. The only thing they seriously lose in is availability, since the price for them is already significantly higher.
Another one important feature which can be seen as both a disadvantage and an advantage. Non-woven has a translucent structure, so that through purely non-woven wallpaper, even the background of the wall surface can shine through. This is not always good, but on the other hand - why not take the opportunity to give the wall an interesting shade!
Like paper, interlining can be used as a base layer for other types of wallpaper.
To be more precise, these are two-layer wallpapers on a paper or non-woven base, having an external decorative coating of polyvinyl chloride.

The outer polymer layer is not afraid high humidity, abrading loads, so the finished wall can be subjected to periodic cleaning, including using detergents. This, in principle, predetermines the scope of such wallpapers - they are ideal for kitchens, bathrooms, bathrooms, hallways. But for residential premises, especially for a bedroom or a nursery, it is better not to use such a finish - the walls will not “breathe”, condensation may appear on them, and many may not like the light characteristic “aroma” of PVC.
Vinyl wallpapers are quite heavy, so a special composition is required for gluing them - this is always indicated on the packaging.
In terms of design, vinyl wallpapers are very diverse: from a textured pattern with a deep relief to multi-color bright canvases, including those with photo printing or with a very reliable imitation of stone, wood, and other natural materials.
- Fabric wallpaper, also on a paper or non-woven basis, is a rather expensive pleasure, although, we agree, they give the walls a very unusual design. They can be made from linen, silk, jute textiles, felt, velor.
Fabric wallpapers give the room a special comfort, and the walls add warmth and sound insulation. However, such a finish attracts dust well, which can firmly sit between the fibers, so cleaning with a vacuum cleaner will have to be carried out with enviable regularity.

Sticking such wallpapers is the lot of masters, and beginners should not take on such an activity - there is a great risk of spoiling very expensive material.
There are other, more "exotic" types of wallpaper - based on fiberglass or fiberglass, natural materials - cork, bamboo or palm fibers, quartz and metallized (foil) decorative coatings. We will not dwell on them, since the scope of such a finish is not wide, and an independent sticker without relevant experience is simply impossible.
Many have heard about liquid wallpaper". But this already generally lies on a different plane, and the finishing technology is closer to plastering work than to the sticker sheet material.
What is it - "liquid wallpaper"?
This technology gives a very interesting effect of wall decoration. , and even how to make the material necessary for this with your own hands - read in a special publication of our portal.
Before acquiring wallpaper, the owners must clearly determine which performance qualities of the material should become prevailing.
For living quarters, especially bedrooms and children, the emphasis should be on the environmental friendliness of the material - it is necessary to maintain a healthy, breathable atmosphere, completely eliminate the possibility of allergic reactions. At the same time, it’s a good idea to choose a material that can still be subjected to light wet cleaning at least occasionally.
But for the kitchen, coatings are required that will have to be washed often - greasy fumes from the stove will inevitably fall on the walls. For cramped hallways, wear resistance will probably come to the fore, for a bathroom - the hydrophobicity of the outer layer.
If there is a lot of sunlight in the room, you should pay attention to wallpaper that is resistant to fading, otherwise ultraviolet rays will quickly spoil the original look of the finish. Pets can also make their own adjustments - for example, cats often show obvious indifference to the soft, pliable surface of vinyl wallpaper.
The style of decorating the room with wallpaper is already a personal matter for the owners, although there are certain recommendations in this regard. They can be found on the pages of our portal.
When decorating rooms with wallpaper, it is necessary to adhere to certain canons
For example, the design of a sleeping room requires a special approach, so it is important to know how to do it right. If desired, you can create an exceptionally cozy one. And one more article of the portal will be useful to those apartment owners who want a wall in the room.
When buying wallpaper, you should not only listen to what the sales assistant tells you, but also familiarize yourself with the labels on the packaging of the rolls. There should be pictograms that carry a lot of extremely useful information. Samples of such marking badges are shown in the table below:
| Type of marking icon | Deciphering the meaning of the icon | Type of marking icon | Deciphering the meaning of the icon |
|---|---|---|---|
| Low moisture resistance, only for the period of wallpapering |  | Wallpapering does not require pattern alignment | |
 | Regular wet cleaning of wallpaper is allowed. |  | Symmetrical arrangement of the pattern combined when pasting, horizontal alignment |
| Wallpaper with increased resistance to moisture, unlimited wet cleaning. |  | The pattern combined when pasting requires the sheets to be shifted by half the repeat, diagonal placement of the pattern | |
| Wear-resistant coating that allows wet cleaning with a brush. |  | Rapport - the vertical step of the pattern (numerator) and the amount of shift of the sheets for its alignment (denominator) | |
 | Increased wear resistance of the wallpaper surface, an unlimited number of wet cleanings using brushes and detergents. |  | The wallpaper is glued with an overlap and leveled by cutting through both layers. |
 | Low resistance to ultraviolet sunlight. |  | Glue is applied to the wallpaper |
 | Wallpaper of satisfactory light fastness. |  | Glue is applied to the wall |
| Good UV resistance. | Wallpaper with an applied adhesive layer, which is activated by wetting | ||
 | Wall-paper of high resistance to an ultraviolet. |  | To this species wallpaper, related finishing materials can be offered - borders, cornices, curtains, etc. |
 | Wallpaper with maximum resistance to UV puddles. |  | duplex wallpaper with paper base and top embossed layer |
 | Wallpaper with increased surface resistance to mechanical stress (impact, scratching, etc.) |  | The wallpaper is removed in its entirety, dry |
 | All sheets of wallpaper are glued in one direction. |  | When removed from the wall, the wallpaper delaminates |
 | Reversible wallpaper - each next sheet is turned over by 180°. |  | Moisture is required to remove wallpaper from the wall |
Considering a large selection of finishing materials, it should be noted that wallpapers are the easiest option to make the atmosphere of the room original and unique.
because of great demand more and more offers from manufacturers appear for wall decoration with wallpaper - new types appear that have different structures and designs. At the same time, the possibilities of various combinations are taken into account - on different wallpapers they create patterns and shades that are combined with each other, and this makes a choice between different options for sticking is much easier.

Today, there are many varieties of gluing and wallpaper combinations.
The most fashionable now are:
- Use two types of wallpaper that have the same color but different tones. This combination is suitable for decorating one or more walls in a room. The best shade options for such wallpapers are beige, gray and blue. Strict shades will be an excellent choice to decorate your office.
- Combine plain wallpaper with wallpaper with drawings or ornaments. This option will give the interior dynamics. Also, with the help of this technique, zoning of the room is carried out, because attention will be focused on a certain area. When choosing, it is necessary to take into account that the wallpaper should match well in color. Taking bold decisions it is better to consult a professional.
- Use wallpaper different kind with drawing. Quite often they combine wallpaper with an ornament with wallpaper with horizontal or vertical stripes. Considering the compatibility of shades in this case is very important. With wallpapers that have an ornament, a woody theme or wallpaper with geometric patterns also looks beautiful.
Playing with contrasts will also help bring originality to the room. For this, wallpapers are used that differ in colors. Emphasis on bright colors help create zoning. The most common such pasting is among young people, because in modern style quite popular use of bright contrasting colors.
How beautiful to paste the wallpaper in the room
In addition to choosing which colors and how to combine them, there are many options for sticking them on the walls - depending on the direction, the number of species and other nuances.

Quite popular today is the technology of wallpapering horizontally. In this case, the wall should be divided into two parts and covered with wallpaper with different colors and designs, although there is a tendency to use wallpapers of the same color. Various textures in this version of gluing are also relevant. For the design of joints, special borders are used. They are offered large - paper, wood, plastic, PVC and others. The advice of professionals teach that the width of the bottom wallpaper should be at least 1 m wide.
The use of vertical stripes for wall decoration looks quite interesting. This option involves wallpapering two or more colors, identical in texture and width.
Ideas for this method can be very diverse - you can use both monochrome and contrasting materials.
Selection rules
When choosing wallpapers that have a pattern, you need them to fit well in design:
- An interesting choice is to wallpaper with different size and design. It is recommended to stick a molding on the joints between such wallpapers, as a result, a panel effect is obtained and the room acquires graceful appearance. Such an unusual sticking creates an interesting zoning.
- The selection of a certain wall is very popular. To do this, we glue accent wallpapers on it that imitate panels. Often, these methods are used in the design of bedrooms to highlight the wall at the head of the bed.
- A rather creative way of pasting is to use flaps. In order for everything to look beautiful, it is necessary to glue wallpapers that blend well with each other.

The sticker is as follows: first you need to cut from the wallpaper trim the right sizes, then stick them back to back. You can glue both randomly and following a certain sequence. Such original sticking will add style to any room.
- For vertical pasting, it is better to use the same type of wallpaper with the same thickness in order to avoid too pronounced joints;
- When choosing a combined wallpaper, it is worth attaching them to each other in order to assess how they fit;
- When choosing wallpaper with drawings, take into account the features of the room, because they can visually adjust the space.

If there are niches in the room, they can also be decorated with wallpaper. To do this, it is recommended to use either decorated wallpaper, or just a different color.
Sticking wallpaper: interesting ideas for different rooms
An important aspect when choosing wallpaper is the material from which they are made. Now manufacturers offer a fairly large selection, the main types are as follows.
paper wallpaper
The most affordable option. Many colors, patterns and patterns are offered. The advantage of such wallpapers is also their excellent breathability, plus this material is environmentally friendly. The downside is that they wear out faster than others and the fact that getting rid of them when planning the next repair is quite difficult.

Vinyl wallpapers
Pretty durable wallpaper. They look quite attractive and do not wear out for a long time. This a good option for uneven walls. The glued area looks even and smooth. If desired, in the future, paint can be applied to the glued wallpaper to change the color without any problems.

Non-woven wallpaper
They are new to the market. The advantage of this type is the ease of pasting. They breathe and there is no need to treat them with glue. In addition, when planning the next repair, it is quite simple to remove them from the walls.

Textile wallpapers
To create rich and luxurious interior suitable textile wallpaper. They are very good, the downside is the high cost and the need for additional care.

The choice of wallpaper color is very important, because the pasted wallpaper sets the overall atmosphere of the room.
Wallpaper color selection
Good effect on nervous system human cold colors. Therefore, quick-tempered and impulsive people are best suited for dark blue or green tones.

Light spots on this background will be out of place. It is not recommended for this type of people to use bright colors in the design (yellow, red, orange, purple, etc.).
Romantic persons will like the room, the interior of which is decorated in warm colors. It is important that they are not too bright, as this can be annoying. The best choice will use shades of pink, beige, orange.
Depressive tones, which include black, gray, brown, are best used for decorating small details.
Wallpapering (video)
Wallpaper is good way bring originality to the interior and give it an interesting look. You can use them to decorate any room in the house - they will help create comfort and give space for creative solutions.
(photo)


Knowing how to glue wallpaper by one person, you can avoid conflicts and complete the entire amount of work in a short time.
Most often, it is two people who are engaged in pasting the room with wallpaper. One stands on a raised platform (ladder, stool) and waits for the second to cut off the desired strip and smear it with glue.
Then the wallpaper is applied to the wall, combined with the joint efforts of the previous strip. Then one smoothes, removes irregularities, and the other watches the process.
Helpful information:
And everything would be fine, but in most cases such work is accompanied by disputes and often ends in a quarrel. Moreover, all stages of the process can be performed alone.
Preparatory stage
First you need to prepare the following set of tools:
- ladder;
- large capacity for breeding glue;
- cuvette for prepared glue;
- wallpaper ruler, tape measure, pencil, level;
- brush from 50 mm wide;
- paint roller (width 250 mm);
- rubber roller for smoothing wallpaper;
- rubber roller for smoothing joints;
- sponge, napkin for cleaning surfaces from excess glue;
- pliers, screwdriver, electrical tape.
You will also need material to cover the floor. It can be cardboard or wide film. If the wallpaper is too heavy, then a cone-shaped roller with ribs will be required. They smooth out the joints. When the wallpaper requires a particularly careful attitude, the roller is replaced with a special wallpaper brush. You can purchase a plastic wallpaper spatula. It is used to form geometric right angles. If the wallpaper has a nasty texture, you can smooth it out with such a spatula, replacing a regular roller.
How to prepare the surface?
On preparatory stage it is necessary to carry out a certain complex of works with the surface. No matter how fashionable and attractive the wallpaper is, general form will not be ideal as long as there is an uneven surface under the finishing materials, replete with potholes and ledges. That's why . And each layer requires a good primer. Such walls will last more than one year, the wallpaper on them can be changed many times.
Photo 2 shows how to make marks with scissors. The alignment of the strip in the area where there is an incision is shown in photo 3. The place of the inflection is smoothed out by hand.
Next, a strip of wallpaper is cut off with scissors. How to do this is shown in photo 4. The edge will turn out a little uneven. There is nothing wrong with this, because an allowance of 10 cm is left. It allows for a more accurate and even trimming already in place.
The strip that was previously used for marking should be set aside, only first you need to make a mark indicating the upper part. And put a number on it. How this can be done is shown in photo 5. Then the strip is folded as shown in photo 6.
It is more convenient to arrange the prepared strip near the wall for which they are intended. The vertical position will help save space. See photo 7.
Do the same with the next canvas. See photos 8, 9. This method the preparation of wallpaper allows you to subsequently dock the pattern correctly, quickly straighten the canvas, save space and time.
In the standard method of preparation, strips cut to size are stacked flat on top of each other. Next, the upper strip is smeared with glue, while the edges of the lower ones get damaged, get dirty, then the overall picture deteriorates.
How can you mark the surface of the walls?
Wall marking is a crucial stage. Usually the instructions say about the need to use a plumb line. But today, the use of a plumb line is a thing of the past. Enjoy . At the same time, both the water level and the laser level are taken. Using this tool, mark how the first strip from the corner should go. To do this, draw vertical lines. The level determines the direction of the position of the curb, fastened horizontally, coordinates the docking zones.
In photo 10 you can see how to use the water level. You need to pay attention to where the bubble should be. Experts recommend that when marking with a pencil, make light strokes without pressing on it. A clear bright line will show through the non-woven wallpaper and spoil appearance. Even if you take another type of wallpaper, they can also get dirty with particles of graphite.
Leave a tolerance for the width. If after measurements it turns out that the wallpaper strip has a width of 53 cm, it is necessary to deviate from the corner by 54 cm. In this case, the mark will be constantly visible. So the person sticking the wallpaper will be able to constantly see the landmark and will not allow failures and distortions.
How to apply glue and stick canvases?
If the preparation was successful, it is necessary to begin the pasting process. While the work was carried out with the last stripes, the first ones were already well straightened. Glue is diluted according to the instructions on the package. Regardless of the type of glue, prepare a clean cold water. Glue should be poured little by little, in a small stream. In this case, the composition must be constantly stirred.
No need to rush and pour 2 packs of glue into the bucket at once. The mixture will gradually begin to thicken, the lumps that appear will interfere with the work. When choosing glue, you must take into account the features of the wallpaper. Each variety needs its own type of glue. A wide cardboard or prepared film is spread on the floor. Wallpaper is laid on it with the base up. For more convenient use, a small amount of glue is poured into a cuvette, into which the roller is then dipped. The most common application method is shown in photo 11.
When applying glue Special attention give the edge part. Today they produce glue with an indicator. After dilution, it has a certain color shade, which allows you to know exactly where the glue has already been applied, and where it has not yet. If the glue gets on the surface under the wallpaper, there is no need to panic. It can then be easily removed. When working, you need to make sure that the adhesive layer is not too thick, and the application itself is even.
When the glue is applied, the wallpaper folds in half. How to do this correctly, you can see in photo 12. In this position, the wallpaper should be at least 3 minutes. This time is enough for the glue to be absorbed. You can increase the time to 5 minutes when the wallpaper is too thick. If the next section of the wall is even, without protrusions and various details, you can immediately prepare the 2nd strip. But you shouldn't get carried away with it. The number of prepared strips should not be more than 3. Otherwise, they will begin to dry out and stick together.
When the strip is ready, it is unfolded, gradually climbing the ladder. It is necessary to hold the strip by the part on which there is a mark indicating that this is the top. When applying wallpaper to the wall, it must be borne in mind that it is necessary to make an overlap from above. Its size is individual, depending on the characteristics of the room.
From photo 13 you can see where to start gluing and fitting. First, work with the upper part. When everything is ready there, they descend from the ladder and straighten it, apply lower part. When everything is docked, you can start working with a smoothing roller, spatula or brush. Movements come from the top, from the middle. Then they go down. How to squeeze out air can be seen in photo 14.
When the wallpaper is smoothed out, the air is removed, it is necessary to roll the joints with a special rubber roller. However, the seams do not like too active exposure. Therefore, you should not rub them and put pressure on this area. When excess glue appears, it is carefully removed with a sponge or napkin, they are subsequently rinsed in water.
If you do not put too much pressure on the seams, they will look almost perfect after drying.
How to paste over areas with sockets and switches?
All sockets, switches, other parts that violate the geometry of the walls must be removed before wallpapering. Firstly, this will allow you to subsequently change them to less voluminous models without any problems. Secondly, the look of the switch installed over the wallpaper is more aesthetic and modern.
The part of the wallpaper that remains under the outlet or switch, some advise cutting it crosswise, and then bending the paper to the sides. It is unsafe in case of fire. It is better to make a cutout that matches the shape of the device, only smaller. This can be seen in photos 16, 17.
Slots are made immediately after gluing the corresponding strip. Firstly, later you can make a mistake with the place. Secondly, after drying, the wallpaper will stretch, so it will be more difficult to make cuts. Before removing sockets and switches, turn off the current, and carefully isolate all contacts and put them inside the mounting box.
How to cut off excess?
Here you need a flexible ruler plastic tool 60 cm long, a stainless steel strip is mounted in its body. It is flexible, so the ruler can be pressed tightly even against uneven surface. What such a tool looks like and how to use it can be seen in photo 18.
The peculiarity of using a wallpaper knife is that after each cut it is necessary to break off a small fragment of its blade. In this case, it will always maintain good cutting ability. When the excess is cut off, the surface is rubbed off. Photo 19 shows exactly this moment.
From photo 19, you can see that despite the wet state of the wallpaper, the cut surface is even, does not have any villi, fibers. Such accuracy can only be achieved through the use of a flexible ruler.
How to paste over the area where heating radiators are installed?
The installation site of heating radiators is considered the most difficult for the wallpapering process. To do all the work qualitatively, you will have to make every effort. There are fewer problems in new buildings, there you can find radiators that can be dismantled, and after pasting, install them in their original place. Photo 20 shows how the radiators are dismantled. After its removal, wall fasteners and floor outlets are left, equipped with "American" type connections.
In this case, pasting will not be big problems. However, the process of removing the battery and then installing it will take time. Before disconnecting, it is necessary to shut off the water supply, then the return line, drain everything that is inside the radiator. At the same time, we must not forget about pressure. It is reduced by unscrewing the shut-off screw on the drain valve.
If the situation is such that it is impossible to remove the radiator, you will have to put about 15 cm strips under it. If the battery is working, you need to additionally coat the surface under it with glue.
Video of wallpapering alone
- A stepladder is better than scaffolding and "goats", which often damage the surface of the walls.
- or with fiberglass, glue must be applied directly to the wall. Therefore, there is no need to pre-cut the wallpaper into separate strips.
- A small allowance (1 - 2 cm) for the slopes will allow you to get a neat edge. You just have to wait until the wallpaper is dry, and then evenly cut off the excess.
- Docking panels in the corners is impractical. Most often, a transition is made from one wall to another, leaving a large allowance equal to the vertical deviation of the wall. The second canvas is glued to the first overlap, guided by the indication of the level. Then both canvases are cut through, and the excess is removed.
- It is better to lay the floor covering after pasting the walls. The exception is tile and parquet.
- The parquet is covered with cardboard before pasting. You can not lay a film on cardboard.
- In the process of work, it is necessary to monitor the cleanliness of hands. They are periodically wiped with a napkin, which is thoroughly rinsed from time to time.
tweet
Pin it
Like
Wallpaper for walls is a very flexible finishing material, which makes it possible to fantasize and be creative from the heart. They are used not only as the main wall decoration, but also for accentuation, decoration, ennobling. Wallpaper helps to create the desired mood, highlight desired areas, create visual effects. You can use wallpaper in different ways: on the entire wall or on small area, whole strips or pieces, one sheet or several.
Wallpaper art, among other things, allows you to save money. Stores often sell leftover wallpaper at bargain prices. You can buy interesting samples for a penny and arrange them together. For some people, this turns into a hobby: they buy wallpaper one roll at a time and use it not for basic decoration, but for decoration and decoration. Fortunately, there are many ways, and here are just a few of them.
1. One vertical stripe
This is a pretty bold move. Used to bring color or thematic notes to the interior. Creates external diversity, relieves smooth plain wall from visual emptiness. Wallpaper is preferably bright, active.


2. Several vertical stripes in different areas
Single lanes can be located at a distance from each other or even different walls. This technique helps to emphasize or designate symmetry. For example, stripes can be glued on two sides of a sofa, bed, wardrobe.


3. Combination of different wallpapers on one sheet
The composition of unequal wallpapers is spectacular and very unusual. It is recommended to combine wallpaper sheets that have something in common. For example, only pastels or only saturated ones, etc. You can take different wallpapers with the same background color.

They usually combine two or four sheets, thereby creating a small accent fragment behind a sofa or bed.


But sometimes a series of different wallpapers is allowed along the entire wall or only along its lower side. If you managed to collect a luxurious wallpaper collection, why not go “breaking bad”?

4. Wallpaper patchwork
Another option for collectors. If a fair amount of different wallpapers has accumulated, you can turn the wall or its fragment into a “patchwork quilt”.

This design method is most suitable for vintage and “shabby” interiors (country, Provence, shabby chic). But if desired, suitable design wallpaper can fit patchwork into a modern setting.


5. Wallpaper panels and imitation panels
This is a popular and very common wall decor option. The method consists in sticking wallpaper fragments on the wall with their subsequent framing. To create frames, moldings or planks made of wood, polyurethane, plastic, aluminum are used. Framed wallpapers might look like decorative panel or as classic panels.


Wallpaper panels and false panels are an inexpensive and easily implemented technique that allows you to bring into the interior classic features and quickly refresh the environment without a global rework.
6. Wallpaper friezes
The interior frieze is a wide border located under the ceiling. Internal friezes are typical for classic, traditional interiors, but they are often found in modern design. With the help of a frieze, you can visually lower an excessively high ceiling and visually expand the room.


Friezes are overhead (for example, plaster or wood) and simulated. Friezes are imitated by applying paint or wallpapering. Wallpaper friezes are especially interesting and expressive. They can become a real decoration and highlight of the interior.

7. Wallpaper sheets are not back to back, but at a distance
This technique allows you to be a little original and save a little on wallpaper - it takes significantly less of them than with classic solid wall pasting. The step between the wallpaper can be narrow or wide, up to the width of the wallpaper sheet.

Unfortunately, you won’t be able to save a lot, because you have to spend money on paint for basic surface preparation - the gaps between the wallpaper should be perfect. However, instead of paint, you can use simple plain wallpaper that reproduces the texture of a painted wall.


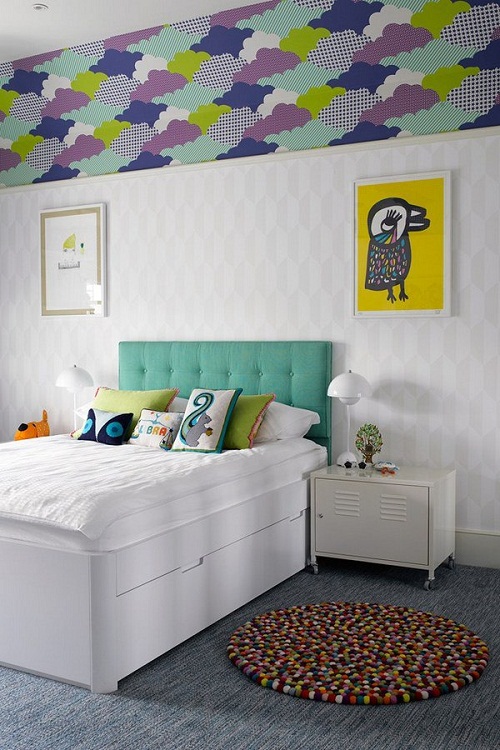
8. Catchy wallpaper on the ceiling
Light plain wallpaper is glued to the ceiling quite often, but colorful samples with a pattern or ornament are almost never found here. It looks unusual and impressive. The ceiling, pasted over with expressive wallpaper, persistently attracts attention and has a huge impact on the perception of the interior. Walls and floors with such a ceiling should be restrained and calm.


9. Wallpaper in niches
Wall and furniture niches "play" in a new way, being highlighted in color or pattern. They deepen, separate, acquire "character".
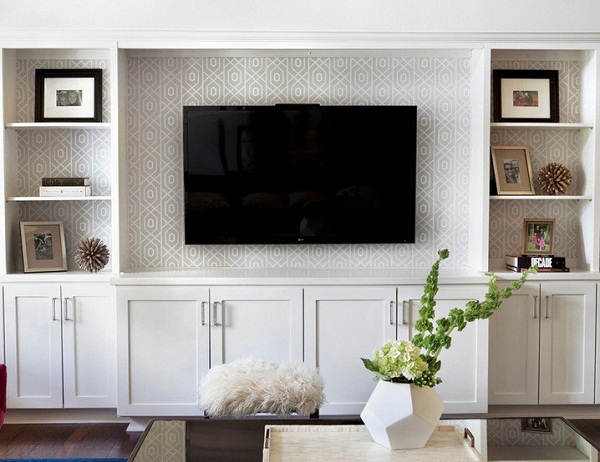


If there are several niches in the room, you can arrange them different wallpapers. This will not only enliven the situation, but also zone it.

Sometimes different wallpapers are pasted over the niches of the rack. Furniture a la patchwork (with niches, drawers and doors various colors) is very relevant today. Such items are accents, so the rest of the furniture adjacent to the "patchwork" should be "quiet and modest."


