How to lay porcelain stoneware on the floor. Laying porcelain stoneware on the floor with your own hands: photo of step-by-step installation and video instructions We lay porcelain stoneware on the floor with our own hands
Many modern materials for floors have excellent operational characteristics and durability. Among them, porcelain tiles stand out, which can become suitable option to decorate any space. A variety of shapes, sizes and shades allows you to choose perfect option for any room. If desired, laying porcelain stoneware on the floor with your own hands can be done even by a person without experience.
Surface with porcelain stoneware
Why porcelain stoneware?
The choice in favor of this facing material done for various reasons. Its advantages include the following:
- Resistance to mechanical and chemical influence;
- Water resistance. The material does not absorb moisture, and therefore you can not be afraid that after a certain period of operation it will lose its appearance and swell;
- Frost resistance. Therefore, the laying of porcelain tiles is carried out both inside the building and outside it;
- Resistance to temperature fluctuations;
- Long service life;
- Wide range of. Stylistic and color scheme the space doesn't matter. For each room there is sure to be a suitable option.
Attention! It is possible to finish the floor with porcelain stoneware of different sizes. Universal material a 600 x 600 mm tile is considered, but other models are also presented in the manufacturers' catalogs.
 Base and border tiles
 Choosing a laying scheme
There is various ways laying porcelain stoneware on the floor. Depending on the size of the tile, its shade and shape, you can choose a scheme that emphasizes the merits of the material and the room.
Before deciding how to lay porcelain stoneware on the floor, it is worth reading possible options layouts. The following options are considered the most common:
- Traditional (straight);
- Diagonally;
- Off the beaten track;
- Herringbone;
- Modular;
- With shift.
Which option is preferable depends on the area of \u200b\u200bthe room and the size of the tile itself. When drawing up a layout diagram, be sure to take into account the size tolerances that any product has. Because of them, the actual size of each element differs from the declared one up or down. However, the deviation is not so significant, and therefore it is easy to level it in the future by choosing the appropriate layout.
 Scheme with a central pattern
 Traditional
The most common way. Tiles are placed in even rows. It is important to achieve parallelism of stacked rows. Suitable Solution for square or rectangular tiles. Often used material of different colors.
Attention! This is a quick and easy option that a person can perform without special training.
To get the desired result, take care of the following points:
- The absence of factory defects on the surface, which are immediately noticeable during direct installation;
- High-quality implementation of all steps: inaccuracies and irregularities are striking;
- Choice of seamless ceramic tiles.
 Traditional scheme
 Diagonal
A difficult option, which anyone who has the basic skills of such operations can translate into reality. In order for the result to be aesthetic, it is important to correctly mark the diagonal axes along which the tiles are to be laid. Suitable for small facing material.
Porcelain stoneware is decorated with diagonal laying. However, before laying the tiles diagonally, evaluate the possibility of doing the installation on your own.
Attention! Diagonal styling tiles levels porcelain stoneware, hides irregularities and curvature of the base, visually expands the space.
The rules assume the location of the tiles at an angle of 45 degrees. Square tiles in this case are easier to cut than rectangular or other options. Starting laying, it is necessary to cut the square in a diagonal direction.
The flooring device begins with the formation of the first row. It consists of a whole tile, the length of which is equal to the length of the diagonal cut line. The second row is formed with the help of ceramic triangles placed downwards by the hypotenuse. Subsequent rows are horizontal. It is important to observe the principle of diagonal layout.
 Diagonal Solution
 Off the beaten track
Outwardly, this method is similar to brickwork. The surface turns out to be original, so they resort to the layout quite often. In this case, a rectangular monochromatic tile looks better, which hides minor defects present on the surface.
This method is suitable for a corridor or kitchen, the location of the tiles helps to avoid monotony and transform the room. Those who have laid tiles know that all elements are arranged in horizontal rows. In this case, a consistent displacement of the side seams is necessarily ensured.
 « Brickwork»
 Herringbone
One more original way. The appearance of the laid material resembles parquet. The flooring looks interesting and unusual. For laying out the Christmas tree choose rectangular tiles. You can implement the method using the same material or with an attachment. The last option involves the use of a mosaic tile-insert or elements of the same size, but of a different color.
Advice! To get a beautiful floor, you should purchase a rectangular tile with wood imitation. With tiles like a natural stone, such flooring looks unnatural.
Modular
Forms an original pattern on the surface, as it involves the use of tiles of different sizes. Prior to installation, a detailed diagram for the entire area of the room. This helps to calculate required amount each type of material. The diagram shows the dimensions of each element and the location of the seams. Features of laying porcelain stoneware in this way make this method relevant for small rooms.
Attention! Manufacturers offer ready-made model kits that include a special mesh and all materials.
 Modular scheme
 If you do not know how to properly lay out the tiles, heed the following tips:
- With a small area of \u200b\u200bthe room, you should refuse to buy a large tile: it will visually reduce the space;
- To increase the dimensions, the tiles are placed across to make the room wider and along to lengthen;
- A through drawing will unite the zones into a single whole;
- A single drawing will help highlight a specific area;
- Light colors will visually increase the space of the room.
Installation sequence
If you are interested in how to lay porcelain stoneware on the floor, be sure to read the recommendations of professionals, watch video tutorials. This will help to avoid typical mistakes, which are often committed by people without specialized education.
The technology of laying porcelain stoneware on the floor involves sequential steps. With careful adherence to the recommendations, it is possible to achieve the formation of a quality floor covering capable of withstanding the operating load.
Porcelain stoneware is laid on the prepared floor. High requirements for the foundation require a responsible attitude to preparatory stage. The surface should not be smooth, clean and even. It is recommended to use a self-leveling compound first.
Attention! The floor is prepared for porcelain stoneware in stages. If you do-it-yourself porcelain stoneware installation on an old tile, it must be degreased with caustic soda.
To securely fix the facing material, you need a dry surface. To do this, the base is carefully primed, and then the primer is allowed to dry. If it was planned to install a floor heating system, all laying and commissioning works completed before fixing the tiles.
 primed base
 After the floor warms up the base well, the heating is turned off. The tile is glued only on the cooled surface. The next time the heating circuit is turned on after the glue has completely dried. Depending on the composition and thickness of the formed layer, this will take up to two weeks.
If porcelain stoneware flooring is formed on wooden base, it is worth laying a special substrate that levels out periodic changes in the size of the wooden base. Otherwise decorative material may crack. How much a particular type of substrate costs, it is worth clarifying at the time of purchase of the facing material. The final amount of finishing costs will actually be calculated after purchasing everything you need.
Having prepared the base, the plates are placed over the entire area of the room in accordance with the selected scheme. For fixing, use a suitable composition designed specifically for porcelain stoneware.
Knowing how to lay porcelain stoneware on the floor, if desired, it is easy to do the entire amount of work on your own. To do this, you should familiarize yourself with the existing layout schemes, carefully study the sequence of steps. In this case, the flooring with porcelain stoneware will be done quickly and efficiently.
To avoid problems in the process and receive quality work without difficulty and from the first time, it is worth familiarizing yourself first with the features and properties of materials, the technology of execution - how to put porcelain stoneware on a floor base.
Choosing a tile
Porcelain stoneware is a floor covering that is durable, wear-resistant, durable, has low thermal conductivity and is resistant to frost. Usually the tiles are packaged in the same size, so the process of laying with your own hands is not difficult. It is enough to know how to properly lay out the tiles. When buying, you should take into account such factors as:
- roughness so that the tiles are not unnecessarily slippery when laying, for example, in the toilet, in the kitchen in order to avoid injury;
- caliber, since the geometric dimensions of the tiles, even in the package, may differ slightly, for example, not 400x400, but 398x398 m;
- no chips, cracks on the surface.
Porcelain tiles are available in matte or glossy. The second option is more convenient to use, and an epoxy composition can be used as a grout.
It will not be superfluous to check the uniformity of the tiles in the package so that the floor covering is uniform and solid.
surface requirements
Porcelain tiles are suitable for laying on a wooden or concrete floor, but in order for the cladding to pass without difficulty, it is important to consider:
- the presence of cracks on the floor surface, which should not be:
- if there are cracks, then first you need to putty epoxy resin, adhesive composition, elastic mixture;
- exposure and when laying porcelain stoneware on cement concrete;
- it is necessary to observe the time for its shrinkage in order to avoid the appearance of cracks and peeling of the tile in the future;
- it should be remembered that cement gains strength completely 28–30 days after pouring;
- temperature regime in the case of laying tiles on a warm floor with a rough floor base;
- cleanliness and lining will be of poor quality in the presence of rust, grease, oil stains on the floor.

Laying tiles on the floor
It is allowed to lay porcelain stoneware on a horizontal or vertical plane under a slope, but only on a flat one, without excessive pits, bumps, height differences, when the laying process becomes difficult, and the glue consumption is greater.
When applied to drywall, it is enough to prime the floor superficially so that the elements do not deform in the future. When laying porcelain stoneware on a concrete floor, it must first be impregnated with a special primer with the addition of microcomponents and sealed expansion joints along the perimeter of the entire room, laying strips of polystyrene foam 1 cm thick.
Often, a cement-concrete screed cracks during operation, so it is desirable that the squares of the tiles during laying do not exceed dimensions of more than 6x6 m. In addition, concrete after pouring will emit moisture vapor for another 1 year, and when laying it is necessary to leave gaps between the tiles in 4–5 mm.
The adhesive must fully comply with the operating conditions of the floor covering. Before use, be sure to read the composition, use only suitable for this type of coating. What adhesives are applicable:
- reactive, in the composition with epoxy resin suitable for wood, other non-heavy bases;
- dispersion, with high adhesive properties for laying tiles on drywall.

According to the classification, glue is distinguished:
- improved;
- fast setting;
- long-lasting;
- elastic;
- super elastic.
When laying tiles on or underfloor heating, it is better to use glue brand C1. Distinguished by the quality of such glue manufacturers as:
- CERESIT CM 17;
- LITOKOL;
- SUPERFLEX K77;
- SOPRO #1;
- Knauf Flex.
The adhesive mixture must withstand the expected load, be sufficiently strong, durable, elastic during the drying process. It is better to purchase mixtures in specialized stores and taking into account the fact that porcelain tiles have a rather greater weight and thickness. The hardest thing is to put porcelain stoneware on a wooden floor, plywood, because as it dries, it will begin to move.
It is equally important to take into account the temperature regime in the room and the composition of the adhesive, which should be more durable, grippy, elastic with excessive wood dynamism. If it is planned to lay tiles on walls, a vertical plane, then it is better to use a viscous adhesive with an accelerated drying cycle.
Tile adhesive
Preparatory work
Laying porcelain stoneware on the floor with your own hands is not complete without the presence of a number of devices and tools at hand to facilitate the work. The tile is durable and it will be difficult to cut it with a conventional tile cutter if necessary. What are the main tools you will need:
- level;
- tile cutter;
- Bulgarian;
- spatulas in the set;
- container for mixing the solution;
- construction mixer;
- tile adhesive;
- perforator;
- diamond crowns when drilling round holes in tiles.
known different variants porcelain tile installation. If the floor is rough and without a base, then it is necessary:
- clean the coating from dirt and debris;
- set the logs horizontally and pour expanded clay between them to the top;
- fix the boards on self-tapping screws, leaving gaps up to 10 mm;
- lay a waterproofing layer.

Fastening the board with self-tapping screws
Next option:
- lay a metal mesh, secure with screws;
- set beacons;
- pour cement screed by leveling the floor horizontally with a level;
- lay moisture-resistant gypsum-fiber or plywood sheets and fasten to the logs with self-tapping screws;
- close the seams, grind;
- apply a layer of primer.
In the presence of a plywood base, a polyurethane-based adhesive is used in the work.
Step-by-step instruction
Porcelain tile is placed in much the same way as facing tiles, however, a significant difference between the materials is in weight. Several laying options are known: in the usual or checkerboard pattern, in the form of a mosaic using different colors.
It is good if the work is done by an experienced tiler and has already laid porcelain stoneware on the floor. First of all, it is important to determine the type and direction of the layout of the material on the floor, given the width of the base of the surface.
Also, to achieve the reliability and durability of the cladding on the floor, eliminate all problem areas, irregularities, roughness. Laying porcelain stoneware on a warm floor implies the obligatory leaving of gaps or additional laying of a layer of plywood.
The installation process is standard, but if you don’t know how to lay porcelain stoneware on the floor, it’s better to first consult with experts. When laying on the walls is carried out:
- pre-treatment of walls and tiles on both surfaces with glue;
- laying porcelain tiles from the bottom up with screwing the profiles to the upper tier;
- installation of a temporary support at the level of the second tier to support the top row;
- applying porcelain tiles to the mortar;
- tamping;
- grouting after the adhesive has completely dried.

To put porcelain stoneware on the floor you need:
- start work from the middle of the room with symmetry in relation to it;
- draw a marking line using twine;
- lay porcelain stoneware in the center of the room, and trimming - along the edges with the obligatory leaving gaps between the tiles;
- knock with a rubber mallet for better adhesion with glue;
- check the evenness of the application of the first layer using the building level;
- process tiles protective layer for the purpose of long-term preservation;
- seal the seams using special crosses.
Solid tiles are best placed in the center of the room in places more overview, and trimmings and leftovers - along the edges and hidden areas.
After about 4 days, the tile will begin to gain strength, after which it will be possible to wipe the seams rubber spatula removing adhesive residue from the surface. Wipe the tiles with a sponge soaked in kitchen cleaning solution and leave to dry completely.
After 2 weeks, the tile will be completely dry and will be suitable for processing with conventional detergents. The technology of laying porcelain stoneware on the floor is not complicated, and it is quite possible to lay it out with your own hands, but with the observance of the technology, the presence of the necessary necessary tool at work.
Porcelain stoneware has quite unique specifications. High-quality styling will delight the eyes of the owners for many years.
Video: Do-it-yourself porcelain tile laying
Laying porcelain stoneware is much more difficult than conventional ceramic tiles. The key to a successful renovation is choice the right materials and careful observance of laying technology, taking into account the features of this amazing finishing material. For you our detailed instructions for the installation of porcelain stoneware with your own hands in an apartment, cottage or house.
Leveling the floor and walls before laying
Porcelain stoneware is a rather capricious and demanding material. It can only be laid on a perfectly prepared surface: clean, even, smooth. Only then will it last for many years, will not crack and show its best qualities: exceptional strength and durability.
What should be the technology of laying porcelain stoneware on the floor and walls? This process has its own rules and features. Previously, the walls and floor must be thoroughly vacuumed and washed - cleaned of any contaminants, whether it be dust, grease residues, paint and any other contaminants. All of them can prevent porcelain stoneware from "adhering" well to the surface.
Before laying porcelain stoneware on the floor, professional builders recommend leveling the base with special self-leveling compounds. Modern plasters are usually used to level the walls.
Using glue for these purposes is an unjustified waste. Although this is often the fault of inexperienced, unprofessional or dishonest lone builders and repair teams offering porcelain stoneware laying services.
Needless to say, the mixtures for preparing the walls and the floor must be of high quality - it is on them that the final result, quality and service life of the cladding largely depend.
If you decide to lay porcelain stoneware on top of old tiles floor must be degreased. For example, wash it with water and caustic soda.
It is very important that the porcelain tile surface is completely dry before installation. To make the laying of porcelain stoneware better and more reliable, it is worth treating the surfaces with a primer.
The warm floor must be turned off before starting laying work and not turned on until the tile adhesive is completely dry.
Preparing porcelain stoneware for laying
Ordinary ceramic tiles are often soaked in water before installation. It is believed that this way it will hold on better. There is no point in soaking porcelain stoneware. This finishing material does not absorb water at all. That is why the glue for its installation must be special.
Ordinary cement when laying porcelain stoneware will be completely useless. He is not able to hold heavy large-format tiles. Features of the material and the installation technology of porcelain stoneware require the use of exclusively special adhesive mixtures with polymer additives. You can read a detailed article on how to choose them.
Before installation, the back surface of porcelain stoneware tiles must be cleaned of any contamination, especially dust.
Preparation of glue for laying porcelain stoneware
To get an excellent result and avoid problems with porcelain stoneware in the future, remember: you should not experiment with the proportions of water and dry adhesive mixture. Strictly adhere to the recommendations indicated by the adhesive manufacturer on the package. Accurately maintain the right time and follow the order of the necessary operations.
Keep in mind: the dry mixture is poured into the water, and not vice versa. It is necessary to continuously stir the mixture until a homogeneous plastic mass is obtained. It should not contain any lumps. It is important to remember that the finished glue retains its properties for only a few hours. Therefore, it is very important to correctly calculate your strength.
Porcelain stoneware laying technology
Glue is applied to the surface with a special notched (comb) trowel. This tooth size construction tool depends on the size and format of the tiles. For example, for porcelain stoneware 20 * 20, it is recommended to use a trowel with 8 mm teeth, and for tiles over 30 * 30 - from 12 to 15 mm.
By default, most often tile adhesive is applied to the floor or walls. The layer should be as even and uniform as possible. Experts recommend: the thickness of the adhesive composition should not exceed 5 millimeters. As a rule, it varies from 2 to 5 mm. Thinner - for walls, thicker - for the floor.
If this work is not done carefully enough, voids may appear under the porcelain stoneware. They are the ones who cause various defects. In the future, porcelain stoneware tiles may peel or crack if something heavy is stepped on or dropped on them.
Experienced tilers give the same advice when laying porcelain stoneware on the floor, facing facades, plinths and other surfaces with high loads and difficult operating conditions.
After that, the tile is applied to the surface and gently pressed, as if smoothing. When laying large-format porcelain tiles, a rubber mallet can serve well.
As a general rule, most porcelain tile adhesives partially dry within 24 hours. However, it may take up to two weeks for complete drying.
As a rule, it is possible to grout tile joints on the walls already 6-8 hours after the end of laying. On the floor - not earlier than in a day.
- The optimum temperature for laying porcelain stoneware is not lower than plus 5 and not higher than plus 40 degrees.
- The tile adhesives that are used when laying porcelain stoneware tiles contain cement. Therefore, be sure to use gloves and goggles to protect your skin and eyes from contact with the solution.
- Keep in mind: when applying glue to both surfaces - the base and the tile - the consumption of the dry mix increases. This should be taken into account when buying finishing materials.
- Porcelain stoneware is not recommended to be laid end-to-end, without seams. The joints between the tiles provide sufficient elasticity - a kind of guarantee that porcelain stoneware will not crack, for example, when heated. Therefore, seamless installation of porcelain stoneware is not recommended if a floor heating system is used.
- The viability of the solution (the so-called period of time when the adhesive retains its fixing properties) ranges from 1.5 to 8 hours, depending on the manufacturer. Read the label carefully! Therefore, knead the glue in batches.
- Apply glue to a small part of the surface. Only the one that you have time to fully tile in 10-15 minutes.
Porcelain stoneware for interior decoration is used quite often. And this is quite understandable. High quality material and the resulting result can satisfy any requirement. The work on finishing the premises is quite responsible and is usually done by professionals, but it is also possible to lay porcelain stoneware with your own hands. In order not to make common mistakes, the following are the basic rules for doing this work.
General information and concepts
The size, color, shape of porcelain stoneware tiles are extremely diverse. But without even using special types porcelain stoneware, it can be laid out in a variety of ways. Some of them are shown in the figures below.
By choosing any of possible ways laying porcelain stoneware on the floor, you can use simple monochrome tiles to get a beautiful image, especially if you combine different sizes and material colors.
However, it should be borne in mind that the premises are irregular shape, in this case, the installation of porcelain stoneware can be carried out in accordance with the figure below.
It should be remembered that there are several subtleties associated with laying tiles. They are due to the peculiarities of image perception and are as follows:
- the tile affects the visual evaluation, big size reduces, and small increases the size of the room;
- for visual magnification the width of the room is better to lay out the pattern across, and to visually increase the length - along the room;
- you can combine different zones into one whole using a through pattern. You can divide into zones using a single drawing.
- light colors of tiles when laying porcelain stoneware on the floor visually enlarge the room;
when the tiles are placed at an angle of 45°, the edges of the tiles must be parallel to the diagonals of the room. This requirement can be seen in the figure below.

The procedure for performing work on the installation of porcelain stoneware
The following material can be considered as instructions for the installation of porcelain stoneware.
To fulfill necessary work, you need the following tool:
materials
- porcelain tiles;
- silicone sealant;
- glue for porcelain tiles;
- grout for sealing joints;
- crosses;
- primer for base treatment;
- water.
Preparing porcelain stoneware for laying
Work should begin with the preparation of a porcelain stoneware installation plan. In this case, it is necessary to determine how to perform laying, drawing, method of application and thickness of the adhesive. It is possible to lay porcelain stoneware without a seam, end-to-end. The disadvantage of this method is the use of tiles of exactly the same size, otherwise some of them cannot be used. And also the inability to ensure the same length of the seams and the uniformity of their filling.
The advantage of this laying method is the possibility of obtaining a uniform surface and saving materials. However, it is considered optimal traditional way stitching with seams.
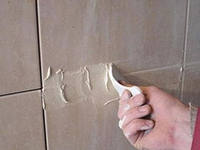
Before starting to work with a tile, its surface must be cleaned of a protective layer, which is usually applied by manufacturers to protect the product from damage during transportation. Most often, technical wax is used for protection, it can be removed warm water using cleaning agents. Paraffin is easily removed with a spatula.
Foundation preparation
If the base where porcelain stoneware will be laid is uneven, then it must first be leveled. For this, a screed is made on the surface, working surface for laying tiles must be flat and dry, without voids, cracks and dirt. glossy, shiny surfaces must be sanded to a matte finish.
When performing a screed and bringing the floor into a condition suitable for laying porcelain stoneware on the floor, it is necessary to remember about bearing capacity overlap. Excessive load on them can have unpleasant consequences.
Works can be carried out at a temperature above plus 5 ° C, when the heating is turned on and when the floor is heated, it is impossible to lay porcelain stoneware.
Adhesive selection
One of distinctive features stoneware is zero water absorption. This is decisive when choosing an adhesive, it should provide increased adhesion to the surface. Therefore, the application cement mortar undesirable and it is necessary to use adhesive mixtures with a maximum addition of polymers.
When choosing an adhesive, follow the manufacturer's instructions. In addition, it is necessary to take into account the nature of the base and the load at the installation sites of porcelain stoneware; with significant loads, it is better to use mixtures designed for use in such conditions.
Laying technology
When laying porcelain stoneware, it is necessary to choose the right tool - you need a comb, a rubber mallet, crosses, grout. The size of the material used will determine the choice of trowel - the larger the dimensions of the tile, the larger the teeth should be on the trowel. To obtain a constant width of the seams, crosses must be used.

Before laying porcelain stoneware on the floor, it is necessary to mark the middle of the floor. For this, a cord is most often used. It is stretched along a long wall. Laying starts from the middle so that the middle of the whole tile or its seam runs along the cord line.
Porcelain stoneware is laid symmetrically, along the edges of the lined surface there are whole or cut tiles of equal width. That is why the layout should start from the middle.
On the ledges of the walls and outer corners, the installation of porcelain stoneware must begin with whole tiles, during inside corners circumcised are installed. In the passages between separate rooms, the seams are placed along the line of transition from one room to another.
The laying surface in niches is distributed so that cut tiles of the same width are in the middle of the surface or symmetrically along its edges.
First, the adhesive solution, well mixed to the consistency of thick sour cream, is applied to a small part of the area and leveled with a smooth, and then with a notched trowel.

The adhesive composition is also applied to reverse side tiles, after which it must be laid in no more than 15 minutes.
To do this, the tile is placed on the edge and abutted against the previously laid one. Then the entire tile is applied to the surface with the adhesive composition, it must be slightly moved away from the adjacent one, the tile to be laid is slightly pressed into adhesive composition. The gap between adjacent tiles must not be filled with adhesive. Crosses are used to ensure a constant gap.


The even position of the laid tiles is checked by a level. You can change the position of the tile (move, move, press) within ten minutes. If you have to take a break in laying porcelain stoneware on the floor, then you should take into account that the previously laid porcelain stoneware donkey, and the one that is laid later will still settle. So, if they continue to be laid at the same level, then in the future this may lead to a difference in levels.

It is necessary to ensure that there are no voids in the adhesive seam. Otherwise, the tile may crack during operation.

The process of drying the glue lasts a day, and the full strength of the seam occurs after 3 days.
End of laying
After exposure, when the glue is firmly connected to porcelain stoneware, grouting can be done. To do this, use a grout of a suitable color. Although there are some nuances here. Contrasting grout will emphasize the pattern, and matching grout will make the surface of the cladding more neutral and uniform.
Before grouting, check that the seam is clean. Any foreign material can ruin the joint and make it difficult to grout. The work itself is done with special tool- it's called grout.
The size of the seam (cross) for porcelain stoneware 30x30 cm is three to five millimeters. The gaps between the floor and the wall, as well as in the places where pipes pass through the cladding, must be filled with silicone.
The grout must be applied to the cladding diagonally with respect to the joints. The remains of the joint filler are removed with a clean and damp sponge. Regular washing of the lined surface can be started after two weeks, not earlier.
For more details, you can see the procedure for laying tiles at the link:
How to assess the quality of work
The following criteria are used to assess the quality of the work done for a lined surface:
This is what the order of work, technology and techniques for laying porcelain stoneware with your own hands looks like.
The market for ceramic products is saturated with new types of tiles. Today, even a professional is not so easy to navigate in all the variety of choices of ceramic tiles, which differ in textures, drawing method and manufacturing technology. Exist tile, which is a classic option for finishing walls in the bathroom, floors and kitchen backsplashes.
As well as products made of porcelain stoneware, which are heavier and fit on a special glue. Porcelain stoneware is very popular due to its high fracture strength and abrasion resistance, therefore it is successfully used in places with a large flow of people. For example, in shopping malls and various organizations.
In a hairdressing salon or dining room, in a shop or cinema, you can find porcelain stoneware as a beautiful floor covering. Thanks to the attractive appearance porcelain stoneware is also laid at home. For example, in the hallway, where ordinary tiles will quickly wear off shoes or crack, unable to withstand a blow with a heel.
Tohow porcelain stoneware has a largeweight, it is most often used in flooring.
Ceramic tiles are produced by a single firing method, and porcelain tiles are produced using the “monocottura” technology, in which the product is not covered with glaze. With this method of production, the color is distributed over the entire plane, and the product has high strength characteristics. To date, this technology has been modified.
 Porcelain stoneware and ceramic tiles
 Glaze began to be applied to porcelain stoneware, so it acquired various textures and is successfully used at home.
Also, porcelain stoneware differs from ceramics in the components that are part of it and give additional weight to the product. Porcelain stoneware is fired together with glaze, which as a result has greater strength and less porosity. This property of the glaze makes it possible to use the product for finishing walls and floors in wet rooms, since due to the low porosity the material almost does not absorb water.
Ceramic tiles are fired twice - with and without glaze. This technology is called "bicottura". Products made by this method have a lower weight and a higher moisture absorption parameter, it is 10%. While in porcelain stoneware this figure is 0.05%. Conclusion: ceramics is inferior to porcelain stoneware in terms of strength and moisture absorption, but has less weight.
The main advantage of this material is low moisture absorption, so if it is used in a room where the temperature can drop below zero, it will not crack. The strength of porcelain stoneware allows it to be used in places where the flooring is subjected to heavy loads, such as in a garage. In this room, it is possible that the floor covering is contaminated with various oils and other materials that are difficult to clean. The resistance of the described material to chemical attack allows cleaning with any synthetic detergents.
In the living room or bathroom, in the corridor or in the kitchen, porcelain stoneware looks great thanks to the original texture.
 Porcelain stoneware looks great thanks to the original texture
Classic variant
The main advantage of this method is the material savings. After laying, a minimum of segments remains, and the process itself is faster compared to complex types of layout.
 Classic variant
 To make the floor more interesting, combine several colors. This layout is used in small rooms up to 10 m2.
When combining several colors, mashing seams is used various colors grout. The result is a neat and beautiful finish.
In a run
This method is used when laying rectangular collections. The photo shows products that imitate parquet.
 In a run
 This option is one of the simplest that a novice tiler can handle. But it is recommended to use special leveling systems designed for fast and high-quality installation, which will be discussed below.
Diagonal layout
Widely used for flooring in various rooms.
 Diagonal layout
 After completing the flooring work in this way, many segments remain, so the material is purchased with a margin. The difficulty when laying with your own hands, according to this layout, is that it is necessary to accurately display the diagonal of the room. An inexperienced master can watch videos on the Internet and master this method.
Modular layout
Requires some experience from the tiler.

Modular layout
When working, it is necessary to have a layout layout on paper in order to properly stack.
Chess
For such a layout, they buy an appropriate collection of finishing materials.
 Chess
Chess If you try to lay the tiles with your own hands in this way, cutting the fragments yourself, then this will not lead to anything good. Since manually it will be very difficult to cut the tile perfectly to the exact size. This layout is applied to large areas from 10 m2 to 50 m2.
Which glue to choose? The adhesive must be designed for porcelain stoneware. Here are the most popular adhesives:
Clay Knauf- resistant to low temperatures and high humidity.
 Clay Knauf
 Suitable for outdoor and indoor use. Bag weight 25 kg.
Adhesive Unis– easy to use due to increased elasticity.
 Adhesive Unis
 Possesses frost resistance and moisture resistance. The weight of one bag is 25 kg.
Glue Ceresit- environmentally friendly material that securely holds the cladding on the wall surface.
 Glue Ceresit
 Bag weight 10 kg.
Calculation of the number of tiles per floor
To calculate the amount of material, calculate the area of \u200b\u200bthe room. For example, in a bathroom 2.5 by 2 meters, the floor area will be exactly 5 m2. The area of a 0.3–0.3 meter tile is equal to 0.09 m2. To calculate, you need to divide 5 m2 by 0.09 m2. As a result, 55 tiles per 5 m2 room will be required.
When facing the floor, the weight of porcelain stoneware does not matter, since the adhesive is not subjected to vertical loads, as it is when finishing walls. Laying porcelain stoneware on the floor begins with the preparation of the base, which must be clean, dry and strong. To fix the base, it is covered with a primer.
 The base is coated with a primer
 To do this, use a roller or brush. When applying the primer, you can be guided by the video.
At the next stage, it is necessary to mark the surface, depending on the type of layout. At classic version the lining is laid from the wall opposite the door.
 Perform surface marking
 In this case, you should measure the distance between the walls. If the wall with the door has a tile segment smaller than half of the tile, then the first row should be shifted so that the walls get the same segments.
 The glue is spread with a notched trowel.
 Then porcelain stoneware is laid and with the help of a rubber mallet the tiles are set horizontally in all directions.
 Install plastic crosses
 Plastic crosses are installed between the tiles, which will determine the thickness of the seam.
After 8 hours, proceed to the last stage. Clean the seams with a spatula or clerical knife. Then, the seams are mashed.
 Seam rubbing
 After all the seams are processed, the excess grout is washed with a sponge.
Despite the large weight of the tile under it, you can make an electric or water heated floor.
These are devices that are plastic clamps and wedges.
 Plastic clips and wedges
 The system allows an inexperienced person to do the laying with their own hands at the professional level, regardless of the area of \u200b\u200bthe room, which can be 5 and 50 m2. On the Internet you can find a video on which work is done using this system. To create a smooth floor, place two clamps under each tile and tighten them with wedges.
The wedge presses the cladding elements and aligns them relative to the horizon.
 The wedge presses down on the cladding elements
 After the adhesive has dried, the alignment tools are removed by hitting the clamp with a hammer in the direction of the seam. Using this system, laying tiles is very simple.
If you follow the technology, choose the right glue and creatively approach the process of finishing the floor, then you can create a beautiful and respectable coating with your own hands without involving specialists. You can clad the bathroom and or lay the flooring in the living room and corridor no worse than on the video on the Internet.
Video
In today's video you will learn how to lay porcelain stoneware on the floor.
Thanks to this material, you will receive a lot of useful information.
Photo source: eleosstroy.ru, trans-mix.ru

