Is it possible to put tiles on old tiles on the floor: the complexity of the work and instructions for installing tiles on top of the old one. Can new tiles be put on old tiles on the floor Tiles can be put new tiles
During repairs in the kitchen, bathroom or toilet, the question arises whether it is possible to put tiles on the tiles that were laid earlier. Some craftsmen believe that old tiles should be removed, others prefer to put new tiles on top of the old ones. In any case, you need to examine the state of laying the old tiles and only then make a decision.
How to assess the condition of an old tile flooring
Dismantling the old coating is associated with certain difficulties: additional costs of money and time, laboriousness of work, a large amount of garbage, dust, discontent of neighbors. As a result, after the old coating is removed, irregularities may form that need to be leveled.
When laying on old tiles, if they were laid with good quality, there is already an almost flat surface of the floor or wall, which greatly simplifies the work.
In order for the new coating to last a long time, it is necessary to conduct a thorough examination of the old one. For this you need:
- find out how firmly it holds. To do this, tap each tile with a wooden mallet or hammer. If at the same time the sound of emptiness is heard, the tile vibrates, after tapping, cracks have formed on it, it should be removed. If the percentage of defective areas is significant, you will have to remove the entire coating;
- if the tiles are laid on the floor, it must be taken into account that the floor level will rise. This can affect the opening of the doors, it may be necessary to change the fasteners of furniture and plumbing fixtures.
Surface preparation for laying
The technology of laying tiles on a tiled base differs only at the stage of its preparation. If the previously laid ceramic has an even and slippery coating, then it is doubtful whether the adhesion (adhesion) forces will be sufficient for the adhesive to reliably hold the new tile. To ensure a secure grip, you can do two things.
On the tiles of the old layer, notches and cuts are applied with a grinder with a disc on concrete. The entire glazed layer can be removed with a disc, but 50% is sufficient.
Notches can be made with a flat-head puncher. The rotation mode should be disabled. This method is less effective as it creates depressions that are too deep, which leads to an increase in the consumption of glue.

The work is laborious, noisy and dusty. It must be carried out observing safety measures: work in a respirator and goggles.
A faster and more efficient way is to use a special primer "Concrete-contact". This primer is capable of roughening any glossy surface, thereby increasing the adhesion of the surfaces. There is a wide range of primers on the building materials markets.
The primer is applied with a roller or brush. The drying time is indicated on the packaging, usually 2-4 hours.

If there is no such or a similar primer, you can treat the glaze with cement mortar. It is prepared in a 1: 3 ratio of cement and fine sifted river sand.
After the primed surface has dried, you can start laying the tiles. The adhesive is applied with a flat trowel, then leveled with a notched trowel. The notched trowel is moved in two perpendicular directions or in a circular motion.
It should be noted that the glazed surface does not absorb moisture, therefore the glue applied to it dries longer. This creates additional problems, especially when laying tiles on walls: tiles, if not laid off the floor, can "float". Therefore, the entire bottom row must be fixed from below with stops, wait until the glue is completely dry. Only then can you start laying the next rows.
When you can't put tiles on tiles
If over time the old tile has cracked, then this is the first sign that it is made of low-quality material. In this case, the tiles cannot be placed on the tiles. The old coating will continue to deteriorate, forming a fragile layer between the base and the new tile, and the new coating will fall off over time.
If we put the tiles on a floor with a significant slope, then it will not be possible to level it with glue. In this case, you need to remove the old coating, level the floor in the usual ways: with a concrete screed, leveling mixtures. After that, lay the tiles. Likewise, when facing walls that have a deviation from the vertical, depressions or bulges.
Cracks in floor tiles can form due to uneven shrinkage or deformation of the substrate. In this case, the old coating must be removed. Next, you need to take measures to level the base with a reinforced concrete screed.
New tiles can be laid in two ways: on the old tile or on the base from which the old one was previously removed. Both methods have their own advantages and disadvantages. The choice of laying method depends on the owner's decision based on the specific conditions.
M.U.O (Mr. N)
We are thinking of starting repairs in the bathroom (cosmetics) and, in order not to dilute the dirt, put the tiles on top of the old tiles. Is this normal or is it not done?
It is difficult to unequivocally answer the question: is it possible to put tiles on old tiles. It is important to take into account many nuances here. But in principle, problems should not arise if the old surface has no voids and does not play.
Assessment of the situation: "for" and "against"
From a theoretical point of view, everything is possible, but to what extent such a solution will be practical and expedient, this is the other side of the coin. First, it is worth considering that laying a new tile is possible only if the old coating meets certain requirements.

Before placing new tiles on top of old ones, make sure the substrate is solid.
- There should be no voids under the tile, they are determined by tapping;
- The tile itself must be distinguished by its integrity. If there are cracks or breakaway areas on individual tiles, and all others are normal, it is better to carry out partial repairs;
- Often, the coating in old buildings does not differ in an even horizontal line, respectively, this will affect the quality and durability of the new one. For the tile, the permissible difference is set: 4 mm per 2 m of the lath laid on the surface;
- Another disadvantage (only in rare cases it is a plus) is that the height of the floor or the thickness of the walls will increase. This must be taken into account, especially if the flooring will be laid in the bathroom or in the toilet, where the floor level by standards should be lower than in the corridor.

Laying tiles on top of the old one conceals the volume of the room
- If the old coating, as they say, is laid out conscientiously and in itself can be a solid foundation for a new one, then the option with tiles on tiles may well be considered. In addition, this will help to avoid time-consuming and dusty dismantling, which will certainly entail additional work on waterproofing, leveling the floor with a screed and removing construction waste.
Features of surface preparation
If the issue is resolved in favor of an unequivocal “for”, you can proceed to the preparatory stage. It consists in improving the adhesion of the glue to the old tiles.
- On the old coating, notches are made with a grinder or the glazed layer is completely removed. If this is not done, the smooth glaze will repel the glue. It should be said that other types of tiles do not have sufficient porosity.
- The next step will be to cover the surface with a specially developed mixture - "concrete contact". It is available from many manufacturers and is an acrylic based primer containing cement, sand and fillers. It is designed for hard-to-absorb surfaces to increase their adhesion.

Prepare the surface thoroughly before laying new tiles
- Before applying the composition to the tiles, it is necessary to remove the remnants of debris, dust and degrease from it. It is important to close pipes and taps from Betonokontakt with polyethylene. Especially if they are located in a conspicuous place, since the dried composition is practically not removed from the surface.
- The primer is applied with a roller or brush. Hands must be protected with rubber gloves. After processing, the surface of the tile should become rough, like a sheet of coarse sandpaper.
- The prepared base is left to dry completely, usually it takes 3-5 hours.
- If there are irregularities and the level of the walls or floor is poor, you will also have to spend time on plaster or screed and subsequent primer.
- Only after careful preparation can work begin on laying a new coating.
What glue can be used
When choosing an adhesive, it is recommended to pay attention to mixtures intended for problematic and critical substrates or increased fixation. When the material is chosen correctly, you can follow the standard tile laying pattern depending on the surface.

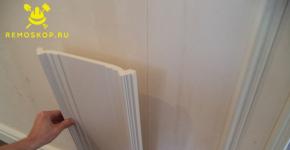
Scheme: laying tiles on old tiles
Laying tiles on old tiles
The process of laying tiles on walls or floors is not fundamentally different. The main feature lies in the technology for preparing the base and several nuances:
- The layout of the new tile must be done in such a way that its seams do not coincide with the old ones;
- Only the base (wall or floor) is lubricated with an adhesive solution;
- The height of the spatula teeth can be different, it is better to use the one recommended by the manufacturer of the glue on the package;
- Many defects appear due to the usual non-observance of the evenness of the laying, the level must be carefully monitored.
How to lay new tiles on old tiles: video
New tiles on top of old ones: photo


Very often, when carrying out repairs in an apartment, especially in the kitchen or in the bathroom, the owners wonder about the old tile flooring. Can i lay tiles on tiles? What to do: dismantle or lay the tiles on top of the old tile? If you remove the old coating, then the time period for the repair can be significantly delayed, and more finance will be required. This is due to the need to level the surfaces after dismantling works.

Laying tiles on tiles is done after determining the condition of the old tile.
And even more time will need to be spent on the very process of removing tiles from the walls or floor of the bathroom (kitchen) and on the subsequent removal of construction waste. It is in connection with these factors that the logical question arises about the possibility of laying new tiles on top of the old ones. This is a perfectly acceptable situation, of course, given some requirements.
Criteria for assessing the condition of the old tile layer
To make your decision about laying new tiles on a layer of old ones weighed and correct, carefully examine and evaluate the quality of the old tile covering of the walls of the bathroom or kitchen.
The most important thing is to find out how firmly it adheres to the wall (floor).

If the old tile is cracked or chipped, it is best to remove it.
- At the very beginning, the old tile is inspected for a variety of damage, such as cracks, chips or parts of the tile that are lagging behind the wall. Don't just trust your eyes. Even if visually it seems that the tiles are located on the bathroom wall reliably enough, this is not always the case.
- It is necessary to arm yourself with a wooden mallet and tap all suspicious areas. If you hear a characteristic rattling sound or, after this procedure, cracks appear on the surface of the tile, then the fastening of the tile does not meet the reliability requirements.
- Remove such old tiles from the bathroom (kitchen) wall (floor) surface. If there are a large number of these areas and they make up a significant percentage of the total surface area, then you will still have to be patient, time, financial and proceed with the procedures for the complete dismantling of the tile. Next, an operation to level the surface awaits you, and only after completing it, you can lay the tiles.
When it comes to ceramic bathroom flooring, another point is important here: the floor level. It is necessary to check whether it will not exceed the height of the threshold in the room, and only then lay the tiles on the existing tile layer.
Back to the table of contents
Preparing the surface of an old tile for laying a new coating

Layout of tiles on old tiles.
So, you carefully examined all areas of the tiled surface and came to the conclusion that the old ceramic bathroom coating can be left. So, we will lay tiles on top of it. And this requires the use of a special technology, slightly different from the usual styling.
In order for the adhesion between the two tiled layers to be strong, the old tile layer needs to be roughened. This is necessary for good adhesion. How to do it? There are several easy ways.
- You can simply peel off the top tiled layer, as it is usually glossy. In this case, it will no longer interfere with the good adhesion of the two coatings.
- Another option is to apply incisions to the tiled surface.
- The third method suggests treating the old tile surface with a special kind of primer.
All three of these options are quite feasible with your own hands. But keep in mind that the first two methods will be more time consuming. In the process of their implementation, a lot of dirt and dust is generated. If that doesn't stop you, you can use one of them. The third method is simpler, but requires certain financial costs aimed at purchasing a special primer composition.
To implement the first option, you will need a tool such as a grinder. With its help, it is much easier to remove the glossy layer of the tile, and the notches are made faster and easier.

In order for the laying of the tiles to be possible, you need to prepare the old layer, for example, apply incisions.
By performing this procedure, you will improve the quality of the contact of the adhesive with the layer of the old tile. Please note that you do not need to remove the entire top layer of the old tile, it is enough if the percentage of the area treated in this way is 60%. If you settled on a method that involves applying incisions, then usually the distance between them is from 1 to 2 cm.
Now - with regard to the treatment with a primer. This is the most modern way to make a smooth surface suitable for finishing with any material. This method gives any surface roughness properties. Such a primer is called concrete-contact. Coating with this type of primer will provide you with high-quality adhesion to the glossy surface of the old tile, on such a layer the adhesive intended for ceramic tiles is very well applied.
Back to the table of contents
How to properly lay tiles on old tiles: technological order of work
If you have never finished with tiles, then it is best to familiarize yourself with the basic rules and requirements for this process in advance. This way you can avoid many of the mistakes that beginner masters make.

When laying floor tiles on old tiles, it should be borne in mind that this will significantly raise the level of the floor.
- First, you need to carry out surface treatment in places of chips and other damage. For these purposes, a solution of cement and sand is used. You can also replace the solution with a special tile adhesive. Sealing of irregularities is carried out flush with the main surface, after which it is necessary to wait until it is completely dry.
- At the next stage, it is necessary to carry out the final cleaning of the treated surface from the remaining dirt. These may be the remains of mortar, glue, etc. All of them are cleaned off, and the surface is wiped dry with a piece of cloth or sponge.
- Now, as noted above, it is the turn of applying the concrete-contact primer composition. This is done with a roller (brush). It takes 2 to 4 hours for it to set. The exact time is indicated in the instructions that come with the primer.
If you have chosen another method of preparing the old tiles for the subsequent laying of a new coating, then the glossy surface must be removed using a grinder. This method is described in more detail above. Just do not forget to provide yourself with reliable protection when performing this procedure. Hands must be in gloves and the use of safety glasses is also a prerequisite. Working with a grinder implies the possibility of getting parts of the tiles in the eyes, to prevent this, never neglect personal protective equipment.
After these procedures, you can lay tiles.

1. Application of glue.
2. Laying tiles.
The tile adhesive is applied using a trowel (smooth). But the alignment and giving it a relief shape is performed with the help of a toothed tool. Tiling is done in the usual way.
Another important point: if you put the tiles on the old tiles, the adhesive will dry a little longer than usual. This is due to the low absorbency of the base. All this does not allow to carry out subsequent work related to grouting immediately after installation. It is better to wait about 3 or 4 days before finishing the seams. A rubber trowel is best for applying the grout.
When repairing, you always want to save money. Especially when renovating a bathroom or a bathroom, because there are the most expensive finishing works. We will tell you when you can lay tiles on old ones, and when you can't.
Tools for work
- Spatulas (smooth, embossed)
- Master OK
- Building level
- Grinder and velcro disc for sandpaper
- Tile cutter
- Rubber hammer and wire cutters
We leave the old tile
To determine the condition of the coating, it is enough to “tap” it with a wooden or rubber hammer. There should be no voids.
Surface preparation
If you decide to leave the old tile, then you can start preparatory work:
- Removing the top (glossy) layer on the tile. The roughness will provide reliable adhesion to the adhesive. The top glaze is removed with a grinder. The grain size of the circle is medium. Complete cleaning of the surface is not required, 60% of the area is sufficient for contact with the adhesive.
- Notching (1-2 cm apart). Using a grinder or manually using a chisel and hammer.
- The use of primers, concrete contact. After applying the composition, the surface is completely ready for applying conventional tile adhesive. This method is considered to be the most modern. The only negative is the expense for the purchase of additional material.
Advice! To achieve the best results, experts recommend using all preparation options at once. This will provide excellent grip.
The main stages of laying tiles
- Removal of small scratches and chips with a cement mortar. Cleaning, degreasing the surface. A baking soda solution will work well for old greasy stains. Dry and clean tiles are completely ready for use.
- Application by brush or roller of primer (concrete contact). Make sure that the composition does not get on parts of the plumbing, pipes. It will be difficult to remove it. Cover these elements with plastic wrap beforehand. The time for drying the composition is 2-4 hours. This stage can be replaced with a partial removal of the gloss using a tool, or they can be carried out together.
If necessary, level the surface with a primer, apply a leveling mixture. The solution hardens quickly and does not shrink. - Apply tile adhesive with a wide smooth tool. The relief is given with a notched trowel. Tiles are being laid.
Advice! Tile adhesive is applied to an area of no more than 1m2, since the substance quickly loses its elasticity. Correction of the position of the plates is possible until the adhesive begins to set.
Experts advise laying the first tiles near the wall opposite the entrance. First, the whole parts are laid, then cut off.
When laying a new tile layer, the seams of the coverings must not match. Support of seams only on solid elements. Do not forget about the expansion joints between the fragments of the cladding. They should also be left between the tile and the wall. In these places, they will be closed by the plinth. The width of the seam is curled according to the size of the material. This is usually between 1 and 4 mm. For the convenience of fixing the width, it is good to use crosses for tile seams. After a day, the seams are filled with grout.
Moistening the surface after completion of work is not required. Drying with the help of any devices is also not needed, the glue will dry out by itself. Wipe the tiles with substances free of abrasive components. You can start using it in 3-5 days.
When laying on old tiles is not possible
- Unevenness in the floor, strong slope. Here, it would be wise to remove not only the finish, but the entire screed, or at least do it.
- There are hidden communications under the cover without free access. It is necessary to make inspection hatches. Tiling the hatch door will hide the presence of holes and will not spoil the appearance of the room. Large-scale dismantling work in this case is quite justified.
- Fragile, brittle tiles. The base for laying must be solid and strong. A surface prone to cracks and chips is absolutely not suitable for laying a new layer. Dismantling of a separate "unreliable" fragment is possible. After extraction, the place is filled with cement mortar and left to dry completely. Layer 1cm. will harden for at least 1 week.
- The presence of voids under the finishing layer. In this case, the base will not withstand the load and will collapse very quickly.
Curved walls are not uncommon in old houses and you may need them.
The technology of laying "tile on tile" differs from the usual only preparatory work. If you neglect this stage, then a large-scale and costly rework cannot be avoided. Compliance with all specifications and the use of quality materials will significantly speed up the process and ensure the desired result.
Tweet
Zapin
Like
The possibility of installing new flooring on the surface of the old one allows you to skip several stages of repair and significantly save on this process.
Examination of the old floor
If you don't remove the old tiles from the bathroom floor then:
- you do not need to purchase a punch and a number of other tools;
- it will be possible to avoid the time-consuming and dirty work of dismantling tiles and removing debris;
- no screed alignment is required, which will greatly reduce the repair time.
Before proceeding with the repair of the bathroom floor, you need to examine each tile of the old coating. A visual inspection is required first. If the tile is covered with cracks or its surface is swollen, then this indicates poor adhesion of the material to the base of the floor. Such tiles cannot serve as a solid foundation for a new floor covering.
Important: When examining the floor, you need to pay attention to the condition of the tile joints. The crumbled grout is poured with cement mortar or filled with tile glue.
Tip: In order for the mortar to evenly fill the joints, it is best to use a trowel or putty knife.
The absence of defects in the appearance of the tiles is not yet complete proof of the strength of the coating. If, when tapping with a hammer, a floor element emits a ringing or rattling sound, then it is poorly adhered to the base. An old floor is suitable for tiling only if only a few defective tiles are found during the revision.
Preparing old flooring for tiling
Degraded floor elements are completely removed. The resulting holes are poured with a sand-cement mixture. The repair is continued after the solution has completely hardened.
Tip: It is necessary to pay attention to the level of the floor in the bathroom, which, after the completion of the repair, should remain below the threshold.

This recommendation must be followed by everyone who wants to know whether it is possible to put tiles on tiles on the floor in the bathroom and who use its sidewalk variety for this. This type of tile is much higher in height than similar materials designed for bathroom flooring. Its use can significantly raise the floor level, which will allow spilled water to flow freely into the living space.
The glazed surface of ceramic tiles can significantly reduce the adhesive properties of the adhesive. To enhance the adhesion of the subfloor to the adhesive, it is notched, holes are drilled or the glaze is completely cleaned, right down to the ceramic. Depending on the chosen method of affecting the surface of the tile, you will need the following tools:
- hammer and chisel;
- electric drill;
- grinder with a diamond disc.

The second factor that negatively affects the adhesion parameters of adhesives is dust. To completely remove it, the bathroom floor is swept and vacuumed. Wet cleaning of the room will also be required, without the use of detergents.
An invisible fatty film is removed from the floor surface, otherwise it will become an obstacle for the glue. The degreasing procedure consists in carefully treating each tile with gasoline or acetone. The same effect is obtained by washing the tiles three times with caustic soda. The gaps between the tiles, in which dust and grease always accumulate in large quantities, are washed with special care.
Floor primer
To improve the adhesion of the base of the floor and the tile covering, its surface is primed. It is recommended to use the primer "Betonokontakt", "Ivsil Basis-Beton" and "Ceresit CN94". This finishing material, along with sand and cement, contains additional components. Their presence gives the plastered surface a pronounced roughness.
Advice: particles of the cured primer are removed with great difficulty, therefore, before using it, you need to close the walls, pipes and plumbing equipment with polyethylene.

Advice:
You need to buy a primer at the rate of 300 g per 1 sq. m. area. To apply it, you will need a roller or brush. Using the tool, the primer is evenly distributed over the floor surface, being careful not to leave untreated areas. The use of "Betonokontakt" simplifies the priming process, because the surfaces treated with it acquire a pinkish tint.
After priming, the floor must dry. This will take about three hours. A properly plastered floor surface after drying, in its texture, will resemble sandpaper.
Choosing adhesive for tiles
Answering yes to the question of whether it is possible to lay floor tiles on old tiles to obtain a solid structure, it is recommended to cover the floors with a thin layer of glue. Its thickness should not exceed 2 mm. This composition is applied to the surface as soon as the primer is dry. The next stage of the repair is started after the glue mass has completely solidified.
- Ivsil Profit;
- Ceresit CM17;
- Vetonit Renovation.

Tip: In order for the structure of the glue to be uniform, it is best to knead it with a construction mixer.
"Ivsil Profit" is intended for fixing porcelain stoneware. Its use allows you to always get a reliable tile flooring. A similar result is guaranteed even if the tile is mounted on an old tile base.
Adhesives "Ceresit CM16" and "Vetonit Renovation" have the highest adhesion characteristics. They are used to work with various complex surfaces. One of the options for their use can be an old tile flooring.
Installation of a new tile covering
The technology of laying tiles on tiles has some differences. The initial row is positioned so that the seams of the old and new coatings do not coincide. A spatula with a comb height of 1.5 cm is suitable for applying the glue.
The adhesive mass is evenly distributed with a spatula over the entire surface of the tile. Then, it is pressed firmly against the base of the floor. A small gap is left between adjacent tiles - 2-3 mm.
Tip: The distance between the floor elements will be the same if you put special "crosses" between them during the installation process.

After all the tiles have been laid, the tile dividers are removed and the inter-tile joints are processed. For the final process, you will need a matching color grout and a rubber trowel. After the grout has dried, wipe the floor surface with a damp sponge or a well wrung out soft cloth.
48 hours after the installation of the tile floor, you can begin to use it intensively. This flooring will prove to be durable, despite the fact that several stages of renovation work were skipped in the process of its creation. It is important that the tiles are laid on the old tiles in accordance with all the rules given in this article.