Syberia 3 how to leave the room. Siberia (Syberia) - full walkthrough of the game on Android, iPhone and computer with pictures
Sometimes it's better not to come back. Terrible Syberia 3 review
The genre of classic quests is dead - whatever one may say, it's time to admit it. They morphed into what the industry calls adventure games. These are adventure games where the emphasis is on storytelling, deep storytelling, character elaboration, rather than finding a tiny key in a huge estate. The second part of Syberia was released in 2004, when such a mechanic was still appropriate. After a long time, the developers took up the third game and tried to bring it up to modern standards. It turned out that this was not worth doing.
During the passage of Syberia 3, it seems that the French from Microids at the top have studied Dreamfall: The Longest Journey and The Walking Dead, looked at their budget, sighed and decided to add elements of adventure at least for the sake of appearance. There is no other way to explain the changes that have occurred. Syberia 3 even pleasantly surprises at first: the game offers different lines behavior in dialogues, shows how your remarks affect the mood of the characters, and when you are silent for a long time, the interlocutor will also hurry you up - why, they say, you are silent, say something already. Everything would be fine, but before the series did excellently without this tinsel and was about something completely different.
And it was about the fabulous adventure of the lawyer Kate Walker, who from the bustling New York went to the provinces to make up something model contract on the sale of a factory for the production of mechanical toys. Soon, the girl forgot about her former life and went to look for a brilliant inventor and the only heir to the company, who left to look for mammoths in a mysterious land. Perfectly written character images, subtle humor, complex but logical tasks, study of documents and cozy atmosphere became firmly associated with Syberia.


Don't say that in new game none of this. Kate is once again in a mess: the Yukol tribe finds her in the snow. Nomads have a peculiar tradition: they periodically migrate from one place to another on snow ostriches so that creatures can reproduce in a new location. Local residents, in whose territory the tribe is stuck, are not happy with this way of life. These people are more advanced and dislike wanderers, so they are in no hurry to solve their problems. Keith starts helping the Yukols.
The game has moved entirely into a three-dimensional dimension. But the camera is not attached to the back of the heroine, but hangs at the corner of the location. The movement is controlled from the keyboard, and together with the unsuccessful (not always, but often) viewing angles, this translates into a disaster. To move forward, sometimes you need to hold the stick or buttons in any direction: up, down, left, right or diagonally - depending on which angle we see Kate. But the problem lies in the change of perspective when moving to another location. First, look at Kate from the back, she goes forward. Loading next card- the heroine is already shown to us from the front, and, accordingly, you need to press "downward movement" so that she walked straight.
Sometimes the controls do not work correctly or you did not set the side accurately enough - then Kate slowly turns around and goes to the last map, you cannot interrupt this animation. The worst thing is with the stairs: the heroine barely crawls along them, and the step up to the first step is more difficult for her than for Neil Armstrong when going to the moon. Walker crashes into walls, rams characters, stops in front of ankle-high bushes and can get stuck where girls will not stagger on stiletto heels, not like hiking boots.
The real hell begins when the heroine goes somewhere in the background. It's hard to see where she got confused. This situation happened in an underwater episode: it's dark, you can't see it, Kate doesn't go further - is this the edge of the location or is she stuck? But after all, she cannot go back and forth - it means she got stuck after all.
Walker runs into walls, rams the characters, stops in front of ankle-high bushes and can get stuck where the girls walk on stiletto heels without staggering.
The main puzzle here is not to find the damn chain or to find out what time the watchmaker will deign to have supper, but to master the controls. When this is difficult to succeed, you can start, in fact, the study of the game. Syberia 3, although it has passed in terms of characters, is still addictive with a story. You take the problems of the Yukols as your own: either the ostriches risk drinking poisoned water, the character needs help with a prosthetic leg, or something else. Of the minor heroes, perhaps the best was the captain of the ship: at first he was always drunk, but if you take him "weakly", then he will help a lot and, in general, will show himself on the good side.
Puzzles are one of the few that Microids did not break in Syberia 3. Most of the problems are solved in a logical way, only in a couple of cases a real "gag" can arise, which is passed by brute force available options... Otherwise, there should be no problems: we pick up everything that we see, remember the principle of operation of the devices, and then think about how to put it all into practice. There were even situations typical for quests: the character became ill, you need to find his medicine. It will take about thirty minutes, if not more, but the hero stoically endures the seizure - remains conscious and will never say where he left the potion.


The developers only changed the approach to solving puzzles. As a rule, before we first found a ton of junk, and then we tried to understand why all this is needed and how it fits under Kate's jacket. Now they often set a clear goal: find something to do sho. In terms of simplification and orientation towards the "new generation" of players, this approach is appropriate, but for fans of the first parts of Syberia, the quest may seem too simple.
The sequel to the cult series of adventure games from the French studio Microids. This time there is even more mystery, adventure and, of course, puzzles!
Clinic Valsembor
After a dialogue with Kurk, we try to leave the room, but the door is closed. The bell next to the door also does not respond to our efforts. You can pick up a knife from the table and use it to open the bell by unscrewing the screw from it. Inside, we see how the green wire is lying around, and this needs to be fixed by putting it back into an empty slot.
After leaving the corridor, we need to get to Dr. Mangeling - only with his permission can we leave this strange place. His office can be easily identified by the two orderlies standing right under his door. After a dialogue with the doctor, we get the key and now we can try to open the elevator, sealed with a fancy lock. This is the first puzzle, and it is solved quite simply - you need to arrange all the tentacles so that they cover the holes. It is difficult to get confused here, since all the puzzles repeat exactly the rotated elements, and it is more difficult to find two similar options here than just putting everything in its place.
As you might have guessed, the key did not fit, or rather, it did fit, but the grate remained closed. If we examine the key carefully, we understand that something is missing in it, as if something was pulled out of it. We'll have to look for a working version. We return to the office of Dr. Mangeling. In the drawer of the table, rummaging among the books, we find the magazine "Clinic Valsembor". Having looked through it, we open the page with the image of the key. Then we open the inventory, find our "broken key" and use it on the magazine. Everything becomes clear - only one hairpin is missing. But where can I get it?

We return to our room and talk with Kurk. Having shown him a brochure from Mangeling's office, we find out that the blacksmith of his tribe can easily make such a detail, and you can transfer the drawing to him through an owl. She is perfectly visible from the balcony, she sits on the next roof, but does not react to us in any way. Need to come up with something. To the left of the doctor's office is the local cafeteria, where two patients play chess. After talking with them, we learn that one of them is so "well" affected by the new treatment that he falls asleep on the go. Going out into the corridor and waiting a little, we find one of the chess players in the center of the hall, who complains about his friend, saying that he fell asleep again during the game. Such an opportunity must not be missed, we go to sleepyhead and take the key from his neck. Now you can get into the room with the animatron birds (we have the key) and take one of them with you. This will be our owl bait. We put the iron bird on the rail of the balcony in our room and give the owl a brochure with a key diagram. Returning to the ward, we will meet with Madame Olga.

After an extremely unpleasant dialogue with Dr. Efimova, we need to return to the balcony and take the key from the owl, which the yukols have already managed to repair. Now nothing prevents us from leaving the floor, just talk to Kurk. He will tell you the main reasons why he cannot leave the clinic, and hint that the chief doctor, Dr. Zamyatin, is quite himself good man and you can trust him. So, we insert our serviceable key into the unlocking mechanism and, voila, the grill opens. We go down to the first floor.
It is also dark and somewhat depressing here. After talking with the nurse behind the counter, we understand that the hospital is in quarantine, the funiculars do not work, and, in general, we have one way - to Dr. Zamyatin. The door to his office is ajar, but you can also navigate by the two orderlies who are talking nearby. Kurk was right - Zamyatin turns out to be a very good-natured old man, but Kate does not work to convince him that Dr. Efimova would rather cripple his patients than treat them. And we can get out of here only with the permission of Madame Olga herself.
We run to Doctor Efimova, her office is very close. Having overheard the insidious plans of Madame Olga and a certain colonel, we learn that soon another American will appear in the clinic, Detective Nick Cantin (the same one from the second part), with whom it would be nice to contact. But this is later, first we investigate the office, while Efimova disappeared somewhere. Let's start with the computer. After examining the letters, we can chat with Nick. He, too, will add sad news, promising to arrest Kate at the meeting and send her back to New York.
It's time for the next puzzle. Pull the rope on the wall next to the knight. Now let's move our attention to the hilt of the sword. After removing the three latches, we begin to rotate the wheels so that the three elements form a symbol that can be seen on the computer at the top of the monitor. This will cause the sword to come out of the fastener and reveal the color code for us. This code should be used on the shield that hangs nearby, and then we can open hidden passage where Madame Olga disappeared.


We go down behind Efimova and find ourselves in the local sewerage system in the best traditions of the catacombs. And then we hear the familiar voices - Dr. Mangeling and Efimova, who figured out how to annoy the nomadic tribes. We listen to their dialogue, and then we are in no hurry to cross over to the other side. If you go all the way to the left, then you can find a canister, which will come in handy right now. Now we go to iron door where the villains have gone. There is a barrel of acid next to it, here we use our canister. Now our goal is a boat, which can be reached by passing the chemical tanks. It remains only to deal with the chain that holds the boat, but here the acid will help us out. That's all, we got out of the hospital.
Yukol parking
A couple of ostriches have already managed to get poisoned by the water from the lake, and we will have to help the Yukols - after all, these guys helped us. After talking with the shaman woman, we go to the right of the tent. We need to get back to the dam we sailed while escaping from the clinic. Actually, there are four valves waiting for us that regulate the water pressure (they are numbered from 1 to 4 in the screenshot below). If you turn it counterclockwise, then the flap closes, and water cannot pass in this place, and if in the opposite direction, then the water increases the pressure. Thanks to the hint next to the pressure on the dam, we find out that valves 1 and 4 should be closed completely (fully counterclockwise). And valves 2 and 3 should be open, but if you open them completely, then the pressure will be too strong. We need the barometer needle to remain in the green zone, so we carefully turn valve 2. That is, the second flap should only be slightly open, as you can see in the image below.

It's time to head back to camp where we are greeted as a hero. But we need to go to Ayahuasca. We go into the tent and go left to the statue of either a squid or an octopus. In fact, this creature is called Quilak, and it lives at the bottom of the lake. On the opposite side of the statue is the shaman's room, we should look there. After a dialogue with Ayahuasca, we learn that we need to get a pass if we plan to get to Valssembore. This is what we will do.
Now we need to leave the tent on the other side and go to the policeman who checks the passes and does not let hares into Valsembore. It will not work to persuade him - he has a strict order from the mayor of Bulyakin, so we go to his lodge next to his post. There is an apparatus with which you can put a seal on a document, but the print itself and the document are not enough. Now we need to pick up a dry sponge and a print liner.

We return to the market, but turn right in front of the tent. There is a dead squid lying on the beach in a pool of its own ink, and this is where you need to use a sponge to soak it with ink. In the market, you can find a man from Valsembore who runs a tavern there. You can identify him by his hat, vest and red caftan. After talking with him, we get a form of a document that was intended for his wife, but she got sick, but the document remained, but, of course, without a seal. In addition, we need to get into the house of one of the yukols using the stairs. He's the only one here, so you won't get confused. Here we are interested in a box with trash: there is a lot of all sorts of nonsense, but if you dig around, you can steal a bunch of candles, which will come in handy for us now. There is only one thing left - to talk to the blacksmith. He is ready to help us, we just need to show him the lining for the seal and give the candles. Print with us. The "Printing for Valsembor" puzzle is almost solved, all that remains is to correctly apply all the components on the "printing apparatus".
We put the lining, the form itself lays down on it, then we fix the paper with clamps "4" and "5" (see screenshot below), put the sponge on the support "3", where we took it, now we use the seal in the place numbered "2" "And clamp it by turning the handle" 1 "down. We move the stand "3" under the seal and use the machine. Then this stand "3" needs to be taken aside and once again we make a stamp, only this time on the document. That's all, we remove the clamps "4" and "5", take the document. But it's too early to rejoice, the same detective Kantin, with whom we talked through Efimova's computer, enters the gatehouse.


The detective doesn't want to listen to Kate, and ties us up to take us to court in New York. As soon as you distract his attention, you should first drop the cabinet with the bottle, and then break the last one with a lamp that stands on the table next to the door. We go out into the street and show the pass to the policeman.
Valsembord
Our the main objective- get a leg for baby Kurka. Therefore, we are heading to Steiner's workshop. We run around the giant ship "Crystal" to the right. If you meet a drunk captain, then you are on the right track. Then you should meet a "Moskvich" without a back door, and right behind it - a blue sign "Cafe" and the entrance to a tavern, the owner of which helped us a lot in the Yukol camp. There you can chat with Sarah Steiner. Yes, yes, the daughter of the very watchmaker we are looking for. Sarah is a very nice girl, she will tell you how to get to your grandfather. We go out into the street. If you stand with your back to the door of the Tavern, then you need to turn left, reach the crossroads and turn left again. It will take a long time to go, but there will be no more forks. You will not miss the watch workshop, you can navigate through the windows.

In the workshop we immediately meet Mr. Steiner. He became very interested in our medallion, Oscar's heart. Nervous, the old man grabs his heart. We need to help him - find the pills. We take a mug on the counter opposite the watchmaker. You can examine the drawers of the table at which Steiner is sitting. This will give us a hint that usually the old man should take the pills during his afternoon snack. Another clue hangs on the wall in the basement. We go to the old man and interact with the clock behind him. We put a mug on the bottom stand, then open the glass and set the arrows to 5:00. It is at this time that Steiner usually takes his medication. Now we see that the clock starts beating and pills appear. We give the medicine to the old man.

Apologizing for his mistrust, Steiner promises to complete a mechanical leg for Kurk and take it to the hospital for Dr. Zamyatin. However, it remains to understand how to help the Yukols get across the lake. The watchmaker invites Kate to go down to his basement and watch a film about Baranur - the city where the ostriches go. The film itself lies under a pile of junk in a box next to the basement exit. What can we do, since we need to go there, we will have to look for a solution, and we have only one thing - to use that giant ship that we saw when entering the city.

But we also saw the captain, and his form, to be honest, did not inspire confidence. At this time, Sarah comes and promises to help with this impenetrable drunkard, Captain Obo. We return to the tavern and talk to Obo, he sits next to the fireplace. As we thought, the local "legend" does not really understand what is happening around. We go to Sarah and the innkeeper, who will help us again, promising to give the captain some sobering cocktail. Talk to Obo again. The cocktail really helped us strike up a constructive dialogue. Do not be rude in conversation, use flattery and play on the pride of the sailor: this is what will help you to persuade the former "storm of the seas".
We rise to the "Crystal" and go to Obo: he is waiting for us on the captain's bridge. His first task will be to replenish coal reserves. To do this, we need to do three things: open the hatch on the ship, where we will fill the coal, then get into the hangar and get some fuel there, and then, finally, use the crane to move the coal to the ship. The first is the simplest - you should turn the valve, which is located very close to the place where we are going to the ship.

Now we go down to dry land and go to the hangar. It is located directly opposite the gangway, next to the crane. To get there, you need to enter the code that the captain gave us. This code is "0509". Inside, we immediately take the gutter and reinforcement, they lie next to the path change lever. We will use the lever itself later. Now we grab the cart and roll it to the other end of the hangar. On the sides of us there will be racks with sashes. Here we will use our gutter on them. This will have to be done until we find our coal, since it will not be available everywhere. The armature can be used to determine if there is something in the rack or not. Kate just hits the box with the rebar, and we have to understand from the sound whether this is our "client", or if we can go further.

After filling the cart, Kate will no longer be able to push it so easily. We'll have to use the blue jalopy, which stands at the far wall. But before you sit down for it, pull the lever that we saw a little earlier to change the direction of the rail. Now we sit down at the typewriter: we see 3 buttons and one empty slot on the control panel. Pressing these buttons will not lead to anything, so we pick out the first of them with a knife and insert the resulting part into the empty hole on the right. Click on the "new" button (it should light up green), and then pull the switch up.

The last thing left is to load the coal onto the ship. We climb onto the crane using the same code as for the hangar. The code for the crane is "0509". A rather interesting control panel awaits us there (see screenshot). Lever "2" changes the direction of movement of the crane: in the upper position the crane moves parallel to the ship, and in the lower position - perpendicularly. Lever "1" moves in one of two directions, determined by the position of the lever "2". Lever "3" allows you to rotate the crane about its axis. The "4" buttons switch the cameras of our view so that we can pinpoint the location of the crane. Finally, the buttons "5" lower / raise the lifting mechanism itself.

Next, we first move the crane as close to the cart as possible, deploying it in front of it. Press the top button from the block "5". Now we move the crane in the opposite direction as far as it will go, turn it to face the ship, use the lever "2" to move closer and use the button from the block "5", but now the lower one. Here are two screenshots of the correct crane positions:


Well done, they loaded the coal, and now we need to replenish the water supplies. We go up to the ship and next to the valve, which we have already twisted earlier, we see a hose from the water tower and a pipe where to pour water. First, uncork the pipe by turning the switch to the right, then push the hose into the opened hole and return the switch to its original state. Here we have done everything, it remains to turn on the water supply on the tower itself and you can go report to the captain.

Obo distinguished himself again - he lost the ship's ignition key. Well, I lost it, I threw it out a long time ago, so that I would never get up at the wheel of the "Crystal" again, but that's not the point. As it becomes clear from the dialogue, the ship was designed by Steiner himself, and if anyone has a duplicate, it is only him. We go to the watch shop again.
What a nimble old man, he has already fled to the hospital to Zamyatin and even grabbed a leg for Kurk. But in the workshop we will be met by Sarah, who does not know if there was a spare key, but will tell you that there is a model of "Crystal" in the basement, and will give us a handle from the locking lock. We go down to the basement, insert the handle into the lock under the display case, behind which is the ship, and we get access to the model itself. There is a handy toggle switch on the side - pull it to turn on the lights. Examine the rear wheel on the ship and see numbers with an arrow. We need to type the following code: 30 - 80 - 60 - 100. One division equals ten. To get 100, simply deflect the arrow to the maximum and release. With each successful action, the anchor will sink lower and lower. In the end, we ourselves will have to pull it down until it stops. After that, the upper part of the ship will drive off to the side and a part of the key will appear. We will turn it and take out the whole key.

The key is too small, it is not for nothing that 50% is engraved on it. But old Steiner in the basement has a solution for that too. Directly opposite the model of the ship there is a machine, with the help of which we will make a duplicate of the size we need. Insert our mini-key into the left compartment and press the button to fix it. On the right - a blank for a key (you can get it under the same table in a special box). With the help of the knob, set 200% (this is a double increase) and press the red button. That's it, we take out the finished key of the correct size from the right compartment and return to the captain.


The ship is ready to sail, but Valssembore won't let us go just like that. The port is locked, and the doors can only be opened with the permission of the Mayor of Bulyakin. No, dynamite is also possible, but we are civilized people, we will first try the method of healthy dialogue. If you cannot find the mayor's office, then here is an instruction for you: stand with your back to the door of the cafe, turn left and walk until the intersection with the car. Behind this very car there is a passage between the houses, after passing which just go straight. A rally of disgruntled shopkeepers is taking place near the city hall, and it is difficult to miss this event. We start a dialogue. Correct options answers:
- "I'm sorry to trouble you..."
- "Leave the city with the Yukols"
- "You are at great risk"
- "Show them who's boss!"
- "This will benefit you"
You can make a mistake a couple of times, but it is not difficult to persuade the mayor. As a result, he gives the go-ahead for our enterprise, but we will have to open the locks, plunging into the cold waters of Valsembore.

For advice it is worth going to our bosom captain. About will tell you that the diving suit can be taken from the warehouse. This warehouse is located right under the lighthouse, and a lone fisherman hangs out nearby. We go there. Inside, you need to find three things: a helmet, a suit and empty oxygen tanks. The diving suit hides behind other things hanging on a hanger. There are cylinders lurking next to him at the entrance, and the helmet lies in the most conspicuous place. We put the cylinders on a special stand and fix them with a metal holder, lowering it down. Go to the control panel, select 180 and press the green button. We return to the cylinders - here we just have to pull the oxygen supply lever and that's it, the suit is assembled. We go into the locker room.

Going down under the water, Kate will have to open two locks. They have the same mechanism. The first bolt on the way looks completely disassembled, and at this stage we just need to collect all the parts lying around: 3 gears and a square key. Now we stomp further to the second castle (second screenshot below). Use the square key on the hole under the valve and open the lid to see the insides of the mechanism. We turn the valve to the left and lower the lever. One flap slowly crawls to the side, and we return to the first shutter (first screenshot below). On the shaft under the number "1" we insert a large gear, on "2" - an ordinary gear, and on "3" we put on the remaining stepped part. Turn the valve all the way to the right and use the lever. Perhaps this is a bug, but this is how this quest was counted by the game in my case, but it is known for certain that there is also a normal passage (find a chain in the wreckage of a destroyed ship and add it to the rest of the details in the first gate). The gear puzzle has been solved.


After the exciting video we return to the "Crystal". First, we will talk with Ayahuasca on the bow of the ship, and then on the descent from the ship we will meet an agitated Sarah. It turns out that Steiner never returned from the hospital, and Kurka is still not there. We'll have to return to Efimova's lair, where another type has already settled, with whom Kate would have wished not to have anything to do with, a certain colonel with an eye patch. But there is nothing to do, we need to find and use the funicular. You can get to it either by going through Steiner's workshop or through the mayor's office. I would advise you to go the second way, since you can get an achievement for this by talking to the worried mayor there. Immediately after the mayor's office, a local lift station lurks, the door of which is closed. The funicular itself is not visible, but most likely it is at the other end. Now we need to move away from closed door and go through a couple more houses, go down the stairs and enter the alley, fenced off with a lattice. There will be a cart with wedges under the wheels to prevent it from rolling away. We take one wedge, the second will enter the inventory automatically, but the third, the smallest, will need to be lifted from the place where some kind of cart seemed to be standing, yes, in the past, it was exactly what “stood”.

We return to the closed door and examine it lower part... We need wedges. The sequence of actions for solving this puzzle is as follows: on the left we insert a small wedge, next to it we push a regular wedge, now we take out a small wedge and insert it on the right. We push the last wedge that remains to us even to the right of the small "brother", and we take out the "small" one and squeeze it over the right wedge. The door falls and Kate gets inside. There is no electricity in the room, so we open the power panel with our knife and call the funicular through the control panel. The booth arrives, and we go into it and use the remote control already inside it.


And so we returned to the Valsembor hospital again. Before going inside the building, go around the helicopter, as the passage to it will be open from the back side. In it, among all sorts of unnecessary things (grenades, cartridges and other things), we will find and take the radio with us. Now we open the door and get to the hospital. We will distract the colonel and his soldiers at the counter where we once communicated with the nurse with the help of a new radio. We go to Doctor Zamyatin, and then to Madame Olga's office - there we will find Kurka in a very bad condition.
It is necessary to save the young guide, but first, take the statuette from the table. Now we examine Kurka's chair. Under his right hand, a tablet with documents is attached to the chair; we need to take a paper clip from it. We turn the view to the back, open the lid to the side and clamp the wires with this paper clip. After that, you need to deal with the tranquilizer. We take the needle of the syringe to the side, thereby pouring out its contents. We return the needle to its place, but open the upper part of the syringe and fill in the shamanic potion that Ayahuasca gave us with her. You need to give Kurk this injection, and then he will come to his senses. However, the clamps remained on the hands. There is another cover under the left hand of the trigger, behind which the panel is hidden. A password is needed here. We don't have it, but we have a statuette - we use it on the panel. That's all, we freed the Yukola. It's time to leave this place!


When the ship hits the ice, the captain will send Kate to the engine room to fire up the super icebreakers. There, another "scary" panel awaits us. Puzzle solution scheme:
- We turn the valve all the way.
- Press the red button and select the first gear.
- We lower the lever down.
- We switch the third gear, and then immediately select the second.
Here it should be borne in mind that the main thing is to quickly change from third gear to second. I don’t know how difficult it is to do it on a joystick, but with a mouse it’s definitely not as easy as it could be.

We almost arrived in Nakhodsk when something hit the rear of the ship. Who will go to check? In general, let's go to see what happened. Kraken! Here, however, they call him Kvilak, but the essence is the same. As Captain Obo suggests, the monster attracted the light from the searchlights, and you need to knock them out in any way. I advise you to start from the right side, since there is a crowbar next to the box, with which we will extinguish the light. Two spotlights on the left, two on the right, one at the bow of the Crystal, and one at the very rear of the ship under reliable protection tentacles. One lantern has a broken trigger, and Kate needs to move the box to it, climb this box and then let the pry bar finish what she started. Now we run inside the ship, where the yukols are hiding. There, on the floor, you need to find homemade matches and one secret hidden between the benches (screenshot below). In this cache lies the "Emergency Flashlight", they should distract the monster from the last searchlight, and then calmly approach and "deactivate" it.

Apparently, it was not only the light that attracted Quilak to our ship. We must turn off the engine, so we go down to the engine room to the icebreaker control panel - the switch we need is very close to the right of this control panel. We rise back to the stern and talk to the captain - he climbed into the lifeboat on the starboard side of the ship. He wants to distract the squid from the Crystal, but he needs a light source. We rise to the captain's bridge, but not to the steering wheel, but to the bookcases, where the gramophone used to be. Examine the books that have fallen from the shelves; one of them contains a bottle of vodka. You need to look at a suspicious book twice, since Kate will first only show interest, and then she will look inside. We get down back to the engine room to the workbench, next to which the yukols rub. There is a lamp on it, we collect it, pour vodka, set fire to this case and return to the captain.

Baranur
While Kate was passed out, the ship managed to run aground, and not in Nahodsk, but in Baranur itself, where we so did not want to get. And then there was radiation all around! It is necessary to get special anti-radiation goggles from the machine, which is on the nose of the "Kristall". True, it is blocked, but this is easy to fix by inserting the same ignition key into it that Kate, one might say, made with her own hands. You can find this key next to the captain's wheel. Putting on glasses, it becomes clear that the beach is relatively clean in terms of background radiation. Therefore, we go ashore, because we need to somehow pull the ship to the beach so that the ostriches can safely leave the ship's hold, otherwise they will simply drown. Looking around, you can see a special tractor that will be able to pull the "Crystal" to the shore, but you still need to get to it. We also immediately see that cables go from the tractor in our direction, hanging on a pole next to the yukol. Remember them, we need to remove them somehow.

We go down to the beach from the wooden pier along the leaning board. A staircase is visible in the distance, and an automaton sits on a bench next to it. Keith immediately notices that Oscar's heart can be inserted into it, but until we can open the chest plate, so we will return to it later. We do not climb the stairs yet, but go to wooden house at the end of the beach. After climbing the stairs, examine the veranda of this house - there is an "automatic probe". Now we return to our ship and remove the wires from the pole with a probe. Nearby, the shorty Burut "assures" that he will be able to insert them into the socket, and we will believe him.

Now you need to enter the park itself through the massive rusty gates and turn into the first house along right hand Kate. It will be something like Voralberg's workshop, but we do not linger here yet, but run to the other end and leave the back door. We need to get to that tractor at the beginning. We go along the rails, and, in between times, examine the two broken cars on the tracks. Kate will remove this obstacle with a skillful movement of her hand. We interact with the rear of the tractor - the winch is quite tolerable, but the automaton driver is no longer capable of anything. But he has a key in his hands. We take it away and return to the workshop. Thanks to this key, we open the box and get the Voralberg cross-shaped wrench and a wrench. Right opposite there is a box, in it you can find a gear. And the most delicious thing is that there is a map on the wall that promises an extremely "tasty" puzzle of Baranur Park.


The Yukols threw up another headache - here is their way through the poisonous fumes and that's it. Let us add this goal to the end of our tasks. Let's go back to that automaton into which we wanted to insert our friend's heart. We can now open the chest plate. An old heart beats slightly inside, we take it out and insert our "medallion". Raise the upper flaps and insert the plugs into them. Using a wrench, unscrew the bolt and raise the shiny cover. And there is another lock, and for it you need an even more individual Voralberg key.


We go back to the park, but before entering Kate draws our attention to the roller coaster machine. Yes, this is the puzzle that needs to be solved now. However, first you need to get one thing: there is a giant headless diver in the park (from below it looks like a teddy bear), and if you go behind him, you can pick up a twig next to the bench.


Now we go to the building above which we saw the typewriter. This is to the left of the entrance to the park, if you stand with your back to it. We rise to the roof of this house and sit down in a typewriter on the rails. We see the control panel of the attraction in front of us, and on the right, on the next seat, we need to raise the second iron rod. Now, in fact, the puzzle:
- Scroll the handle so that the arrow reaches the stop and stops there.
- We stick one twig in "15", and the second in "25".
- We lower the right lever down.
- When the trolley stops, take out the twig from "25".

The cart brought us to the attraction, which we could not get into because of the rubble at the entrance. We go down and go to the trailers. The very last one looks very habitable. We go into it, take away the photo album and leave. And on the way out we meet the owner of this cozy place, the former military Katerina. If you don't be rude to her and be polite, then you can very easily get the key to all the automatons in the park. Right answers:
- Apologize.
- [Introduce yourself].
- Lie about the cozy environment.
If it was not possible to immediately get the key, then you will have to walk to the rubble at the entrance and find the token of Katerina's deceased husband there. And already this token can be exchanged for a key. We return back to the park.

We go to the automaton at the entrance to the park and, finally, start his heart. Oscar is with us again! And he doesn't like the prospect of walking "naked" at all. We'll have to drive to Katerina again and ask her for the clothes of her late husband. She doesn't mind if we return the park robot key. We agree, and the Oscar gets an extremely fashionable suit.

We return to the tractor and start a dialogue with Oscar. He is ready to start towing, but there is no energy, and the ship is not yet tied to a tractor. To supply energy, we will have to go back to the engine room and turn back on the lever that we used to turn off the engines. When leaving the ship, there are nomads, talk to them so that they tie the cable to the tractor and you can give the command "Start" for Oscar. The first attempt showed that in this way we only drive the "Crystal" deeper into the sand. " Unscrew the bolt at the rear of the tractor and loosen the cable. Again we ask Oscar to start the process. Now everything went much easier. We ask two Yukols nearby to unhook the hook and tie it to the Ferris wheel. Going around the wheel on the right, we go up the stairs. Next, insert the gear into the mechanism and pull the lever. We press the red button and enjoy the result.


The ship was pulled ashore, so that the ostriches can finally be released. Through the beach we go to the back of the ship and pull the switch there. Nothing keeps us in Baranur anymore.

Metro station "Historical Center"
Let's go check the red-eyed tunnel, and then we'll talk to Kurk. We need to scare the bats somehow. We go into the passage to the right, inside which the sign "Center for Atomic Research" flaunts. Going down the stairs, we find ourselves in a flooded tunnel: at one end you need to pick up algae, and at the other end you need to pick up the root from the yukola. We return to the central hall.

At the very beginning there are ostriches, from one of them you need to pick up a rag (left screenshot below). Climb the ladder on the right and examine the blacksmith's table (right screenshot below). We take away the bottle, flint, and insert the root into the hole. We wrap a piece of wood with a rag, pour out the contents of the bottle and light the torch with a flint. Trying to scare off the mice.


The bats were very scared, but they could not fly away - they just had no place. But from above, Kate notices a ventilation hatch, therefore it is necessary to open it. We go into the left passage, where Oscar is already waiting for us. He understands that no one except him can take out the street radiation and volunteers for this trip.
We go out into the street, inspect the sunroof, which we need to open, and go in the direction of the monument. There is a fire engine not far from it. We sit down in it and start it with the key (the key is in the glove compartment). We remove the handbrake and drive closer to the hatches we need.


Let's go back where the fire engine used to stand and reach the end of the street. If you walk on the right side, you can go to the bank, where you can go. We select locksmith scissors there. Now we go up to the fire station to the staircase control panel. The easiest way is to first raise the ladder all the way up, then turn it sideways over the hatches, lengthen it with a lever and lower it down until it rests on the roof. We rise to the hatch and open it with scissors like a tin can.


The hatch cover falls down with a crash and catches the attention of the automaton dogs. We must somehow get rid of them. We go down a little lower to the fire hose. We take out two plugs on the chains, insert the hose into the front hole, turn the valve and rebuff angry dogs... You can go back to Kate.


When Oscar begins the disinfection procedure, it turns out that there is not enough iodine in the system. We will not leave a friend, especially since we have algae - there is more than enough iodine in them. We put them in a special compartment and wait for the end of the check. We return to the blacksmith's workbench and leave the subway.
Temple of the Red Moon
After talking with Kurk and Ayavaska, it turns out that somewhere nearby is hidden the sacred temple of the Red Moon. And Yukols definitely need to make a pilgrimage to him. But go find him. We go to the stadium and turn right, passing through the gate. There we see a couple of short men who are afraid to enter a small lighted passage. And rightly so. After all, we will soon understand that this path leads to the cemetery. But we definitely need to go there. The daughter of the previous guide, Dunyash, lives in the undertaker's house. She will share a very useful diary from her father and ask Kate to arrange a meeting with Kurk.

Before leaving here, you need to run to the left of the house, if you stand facing it. There is a tombstone in a small cave, and a lens is inserted above it. We take it away and return to the fire to talk to Kurk. He will translate the diary for us.

These records contain the history and description of the Yukol signs, which will help in solving the next puzzle. We return to the cemetery, but we do not go into it, but into the stadium. Now just go straight ahead until we come across a lonely chair. Opening the lower part, we get combination lock of six elements. It separates us from the second lens. Correct solution in the screenshot below, and the correct sequence of characters is as follows:
- Death.
- Victim.
- Sorrow.
- Death.
- Pain.
- Madness.

Let's go back a little and go up the escalator to the second floor. There you have to find a room with trophies. We examine the glass and use the scarf to get to the last third lens.

We leave the stadium and run to the left. We go along the wall almost all the way until you see a turn to the left of Keith, marked by a pair of lamp posts. This is the path to the pool (see the screenshot below), we now need to go to it. Once inside, we immediately climb the ladder for jumping into the water. At the very edge, you can see three pits, you need to insert lenses into them:
- The first fossa is Lens "2".
- The second fossa is Lens "1".
- The third fossa is Lens "3".

And the Yukols knew how to hide their temples. We have to solve a puzzle with mirrors in the pool. There are only three rays at the entrance, and at the end we must illuminate one red stone, two green and four blue ones. You can always click on the door of the temple and Ayavaska will show Current state cases.
Let's start with the green ray. The pictures below show the mirrors that need to be rotated for each specific case. For the blue beam, just evaluate any leftover unused mirrors and use them. As a result, the starting blue beam should split into four separate beams and illuminate all stones of the desired color.


Sacred bridge

The old Yukolsky bridge has been destroyed, and in order to cross the new one, you need to receive the blessing of the guard who sits on the other side of the river. We return to the house, which we ran when we went to Kurk. In the back there is a passage and a staircase downward. We go down below, and then along another staircase we fall to the very bottom and pull the lever here. Now we return to the bridge and knock on the window to the customs officer.

Having got to the other side, we go into the yurt to the guard. He is very friendly and ready to help us, but he needs vodka to appease the spirits. And after that, a prayer with a special ritual, so that it’s absolutely certain. We return back across the bridge. The customs officer was caught extremely timid, and he simply could not stand it, escaping on a motorcycle. We go to the place where the "iron horse" stood and pick up a brick there.

We go around the building on the right where the "fugitive" was sitting, and with the help of a brick we open the back door.

You need to find vodka and paper inside. A flask of vodka is waiting for us in a basket with fresh fish, and the paper lies a little further, on the table next to the radio.


We leave the building and go down one floor below. Here we run into the room, where you can press the button and call the cart. We throw the flask into this cart and send it back. In exchange, the guard sends us sawdust. Almost everything is ready so that we can proceed to the final puzzle, but first we run to Ayavaska's tent (Oscar is standing next to her). The shaman's chest contains a rod with extremely useful information for us.
Now let's start to deal with everything in order. In front we see four drawers. In each of them, you need to fill in sawdust. Now we examine the lower part. Press the button and open the doors of the lower compartment. We take away tar, three funnels for smoke and a log from here. We put a tree in the center, put paper and set it on fire with a flint.


We close the flap and examine the back of the device. We see four chimneys here, each one opening. We take the last funnel and start placing them in correct order... All funnels are numbered. We begin to place them in reverse order... Funnel "4" will go to the first chimney, and funnel "1" to the last one. We close all the doors and return to the front side.

We examine the pipes - they also open, like the flaps of the chimneys. We take all the resin and move away from the apparatus. There is a stump behind us, we put a semicircle of blue resin on it and use a knife to cut out a quarter. We return to the pipes that were just opened. Everything is somewhat more complicated here. Each pipe has a special mesh, one quarter of which is empty. Under this grid is located special unit with the same empty quarter. We need to make sure that the empty slot on the bottom is not under the empty slot on the grid. If this happens, then lift the mesh up to the stop, twist the lower part to change the position of the hole and lower the mesh back.

It remains to decompose the resin. We put the quarters on the grid so that there is nothing in the lower part of the pipe under this place. Four pipes are four quarters of resin. One yellow quarter will remain superfluous. The colors should be arranged in the following order according to the wand: Red - Blue - Blue - Yellow. We close the front flaps and turn the lower handles on each pipe to a vertical position. The same knob must be turned on the pipe that exits the apparatus on the left.

If you did everything correctly, you will get exactly the same result:

) begins with the Yukol tribe finding the half-frozen main character and taking her to a nearby hospital. At the same time, during a cutscene, an unknown person calls the head of the hospital and gives the order to detain Kate (the main character) by all possible methods as long as possible. And now, waking up, the girl sees that next to her lies Kurk, a member of the Yukol tribe, who was also left for treatment. Talk to him. As soon as control passes into your hands, go in search of a doctor and report that Kate is completely healthy and therefore wants to leave the hospital, but it turns out that the doors to the hall from the ward are locked, so they need to be opened. How to open the doors in the ward? The step-by-step steps are listed below.
First of all, examine the red button on the right side of the doors. ... Examine carefully the table and take a knife on it. ... Now, using the found knife, unscrew the screw on the red button (use the knife on the bolt from the top right). ... When unscrew the box, attach the wire Green colour back into place (it dangles). ... After that, close the box and press the button again.
Now you can leave the room, so go out into the hall and pay Special attention: first, a cage with mechanical birds; secondly, on two chess players who are playing in the winter garden (it will be possible to talk to them more). After that, you can safely go to the doctor's office. He, in turn, will conduct a conversation and a humiliating interrogation procedure, after which Kate will receive a key to the exit in the form of a squid and the ability to pick up things. The key will need to be used on the lock of the lattice doors that lead to the elevator. Now attention, because you need to rotate all the tentacles so that they coincide with the holes.
“How to open the elevator doors? Solving the Puzzle ".
Despite the fact that the location of the key is correct, the doors will not open, so go back to the doctor, but before that, carefully examine the key in your inventory. If you are careful, then you will notice that one detail is missing in the key. What to do next? While the doctor will wander along the corridor, go to his office and open the drawer in the table.

“The first step is to examine the key, otherwise Kate will refuse to examine the doctor's office. And when examining the key, you need to point the circle at the hole in the key - this is where the key detail is missing. "
So, when you start examining the drawer in the doctor's desk, your goal is to have a red-covered hospital brochure. And it will lie at the very bottom of the box. When you find it, open it and flip through the pages until you come across an image of a key with tentacles. Next, you use the key from the inventory on the picture in the brochure, after which Kate comes to the conclusion that there is not enough hairpin.
It's time to go back to your ward and talk about everything with Kurk, and plus to everything to show him the brochure found. From him you will learn that a blacksmith from his tribe can easily make a similar detail. However, the fact is that the brochure can only be transmitted through the messenger owl, with the help of which Kurk sends messages to his tribe. So you have to use this owl.
Therefore, go to the balcony and call the owl sitting on the spire, although this will not work. Now go back to the Trigger and say that the owl does not respond to commands at all. He, in turn, will tell that the owl is quite old, so you need to find a way to call her to you.
To find bait for an old owl, you will need to get into a barrier with mechanical birds, but first this barrier will need to be opened. So go out to the hall and go back to the chess players in winter Garden, where one chess player will already sit, although to be more precise, he will sleep.

“How to open a cage with mechanical birds? First of all, you will need to find the key, which lies in the pocket of a sleeping patient named Anton. Do not be afraid, he will not wake up. Take the key and leave. "
After opening the cage with mechanical birds (with a new key), take the parrot and go back to the room. Go to the balcony. Then everything is simple: go to the active zone, take out a mechanical parrot from your inventory, put it on the windowsill, wind the key in the back and a screensaver begins, during which Kate will give the brochure to the owl and that, in turn, will fly away. It's done, so go back to the room.
In the ward, the main character will see that Kurka was hypnotized and then, with the help of modern technology, an unknown drug was injected (if it was a drug at all). A rather heavy conversation with unpleasant consequences with the head, about whom they talked so much, Olga Efimova. However, if you do not anger Olga Efimova, but leave calmly, then the stern woman will not inject anything and the girl will not lose consciousness. Will not change anything significantly in either the first or the second case. It's just that in the first version, the main character will wake up on the floor after some time. And that's all.
However, no matter how you behaved, in any case, you will need to go back to the balcony and pick up a new key from the waiting owl. Therefore, it will now be possible to leave the department. Before leaving, you can talk to Kurt again, because he will wake up and it will be clear from his condition that he is very bad.
After the descent, you will need to talk to the receptionist. From her, the main character learns that a closed regime has now been introduced in the hospital. Therefore, you will have to go to the manager / head physician Dr. Zamyatin. A story about what Olga Efimova is actually doing will not give anything, so Dr. Zamyatin will react quite good-naturedly and ask you to go back to his ward.
When you talk to Zamyatin, leave his office and go to Olga Efimova’s office to overhear a rather interesting conversation with an unknown colonel, whom Kate is very interested in. In addition, in addition to this, you can thus find out that an American detective named Cantin who is looking for a girl is to arrive very soon. But when Olga Efimova leaves her office, turn on the computer and read all the messages. And pay attention to the "squid image in the upper left corner of the monitor." On top of that, quite unexpectedly, Cantin will get in touch, who learns about Kate Walker and tells that the girl is wanted for a bunch of uncommitted crimes.
Now a new puzzle awaits you. So, first of all, go to the knight model and click on the lever on the wall. After this action, the game will point to the sword hilt and shield. Switch to the sword, where you will need to bend the clamps on the left side and collect the next picture of the squid.

“How to solve the sword puzzle? The handle of the sword is spinning and all you have to do is collect the image of the squid that is found everywhere in the hospital. "
After you open the secret of the sword puzzle, stones will open to your attention. Pay attention to the stones (2 - blue stones, 1 - green and 2 - red). So on the shield there will be exactly the same stones and in order to set the desired colors, you just need to twist them.

“Switch to the shield now. This screenshot shows the correct sequence of stones to help solve the small shield puzzle. "
Once you get it right and the entire puzzle (which is split into two parts) is solved, a secret passage will open. Go forward along the corridor, get into the elevator, press the button and go downstairs.
Below, walking a little forward, Kate will stumble upon Efimova and her faithful assistant, who decided to open the taps with some oil products in order to prevent the Yukols from crossing the lake. When the doctors leave, and control will pass to you, take the canister on the left. Now go along the bridge to the other side and near the same bridge you will find a barrel with hydrochloric acid. Collect the acid in the canister and with it go to the boat to burn down the metal chain, which prevents the boat from going down the sewers to the lake. The splash screen will start.
Part - 2: "The Yukol tribe - Lake"

How to set up a dam / dam? How to purify lake water? How to get to the city? Where can I get a stamped pass?
Keith will safely sail on her boat to the Yukol tribe's temporary anchorage. As soon as control returns back to you, talk to the Yukols and warn them that the water is polluted, therefore it is not suitable for drinking, the animals could be seriously injured. And yet, warning is only the smallest part of the job. Because now the water in the lake has to be cleaned. So where do you go now after talking to the Yukols? Go to the right side along the path, which in turn goes along the lake (there is a passage to the path with a yukol ostrich and a red banner).
Follow the path until you reach the dam (or dam - whichever is more convenient for you). There will be a sensor near the stairs on the dam, which shows the level of water pressure. The only problem now is that near the sensor there is a hint with an image in poor quality, which shows how to properly set up the operation of the purification dam.

“The table in question is marked in the screenshot above and I want to note that four waves are marked on this line, two of which (1st and 4th) are prohibited by an exclamation mark in the triangle. To make it easier to understand, all the signs are marked in the screenshot above. "
On the first and fourth lines, there are exclamation marks in triangles, which imply a prohibition, but on the second and third, the thickness of the drawn lines (which represent water) show how much to close the shutters.

« How do I open or close the damper? It is quite easy to get confused with this matter, so remember: to close the damper - twist to the left, to open - twist to the right. "
Now go to the flaps that are near the stairs above. I'll start with the flaps that need to be closed: the first flap - close it completely (turn it all the way); the fourth damper - the point is that this damper is closed by default, so you can not touch it at all. Dampers that need to be opened: the third damper - you open it completely, so again turn the lever all the way, but in the other direction; the second damper - this damper is not so simple, because you just need to open it, and not open it completely.
Now you can safely go back to the leader of the Yukols (who will stand out from the rest of the people with his gray clothes) and talk about the fact that the water has been purified. After a fairly long conversation with him, enter the tent, which stands right in front of the main character. Inside, talk to the shaman named Ayahuasca. It will be necessary to talk with her about the future plans of the Yukols, and about Kurka, of course. After talking, it will be decided that you need to help the young Yukol get out of the terrible hospital as soon as possible. However, to do this, you will have to somehow go into the city and, in addition to everything, get a ready-made prosthetic leg from the master.
But before you go further, I recommend that you carefully examine the yurt and collect all the useful items that will come in handy during the further passage of "Siberia 3". First of all, I suggest visiting the only available mini-yurt on an ostrich. There is a box in the yurt, and there are candles in the box under the junk: remove the garbage from above, take the candles and go out. Below is a screenshot of the marked box in the yurt with candles inside.

« How and where to find candles? Candles are in the yurt. Therefore, I do not think that it will be problematic to find the only available yurt on an ostrich in this large hut. Another thing is that in this yurt you can see many things. So in the box it will be possible to find candles that lie at the bottom of the box under various junk. "
Now you can leave the big hut and go to the checkpoint. At the exit there will be two paths: one leads - to the right, the other - to the left. Now you need to follow the path that leads to the left. You will go to the right side to the lake a little later.
In any case, at the end of the trail (which goes on the left side), Kate Walker will stumble upon a watchman who will refuse to let the girl through, even though she clearly does not look like a Yukola. In general, this comrade requires a stamped pass. End a useless conversation with this person and enter the checkpoint (checkpoint). The entrance to the building is right behind the girl's back.
First of all, inspect the table, and on the table there is an apparatus for stamps. Now everything is simple: unclench the fasteners (just turn them to the side, one fastener - to the left side, the second fastener - to the right side), take a leather tablet (on which the official stamp was successfully printed) and take an ink sponge (the sponge will lie on the same apparatus near the stamp).

“Be sure to inspect the print liner (specifically, the print itself in the top corner). The bottom line is that if you don't inspect the item, no further interaction will start. Therefore, you can at least walk in circles around the locations, but nothing will happen corny due to the fact that you have not examined the lining with the seal in this case. For the future, remember: you must always inspect objects. "
After you take the lining and examine it (and I want to note that it also depicts a squid), leave the house and go back to the large yurt (market), where now turn to the right side, which in turn leads towards the lake ... At the end, near the lake on the shore in a pool of blue slime, there will be a dead squid. So, at the same place you take a sponge and dip it straight into this puddle of blue liquid (if Kate refuses to do this, then it is enough to examine the sponge in the inventory for the heroine to think that the sponge is dry).
Now it's time to go back to the tent to the market and find there a local Yukola blacksmith (to create a pass), who can be shown the trace of the stamp on the tablet. He will also ask for more wax (candles), but if you followed this passage, then you should already have the candles, if not, look Syberia walkthrough 3 above. In any case, literally in a minute, Kate will receive the seal of the city of Valsembor, but that's not all. In addition, in the market in the same large tent, you will need to find a merchant with a hat with earflaps on his head, and he himself has a black beard. Talk to him and soon you will receive his wife's pass, only without a seal, but you will already take care of this yourself. The main thing is that you now have all the necessary things on hand.
Return now back to the checkpoint. A logical question arises: how to make a pass?... Place a leather print pad on the table. ... Now you select a pass without a seal in your inventory and place it too. ... Close the clamps back. ... On a specially made "spoon" now put a sponge that has been soaked in ink. ... Next, set the seal. ... Lower the lever on the right side of the machine. ... Now turn the "spoon" with the sponge into the place of the print. ... At the top, now press the main lever (the largest). ... After that, move the "spoon" with a sponge back to the side (this is the left side). ... And at the end, press the main lever from above again. Ready.
As soon as the print is ready, the cutscene will start, during which Mr. Cantin will enter the house. As a result, the girl ends up with her hands tied, but soon after the conversation, Kantin will leave, so the girl will have time to escape. First of all, grab the shelf with the bottle, although after the fall, the bottle will not break. Next, grab the lamp on the table: push it so that it falls, then sit down on the floor and use the shards of glass. As soon as you are free, leave the house, show the pass to the guard and Kate will calmly pass. Soon, Cantin will notice how Kate leaves, but his attempt to stop the girl will end in complete failure, because the Yukols will take up the case, which will interfere with the agent and take the order for Kate Walker's arrest.
Part - 3: "City of Valsembord - Watchmaker"

How to save a watchmaker? Where can I find the cure? How to set the time correctly?
Now Kate Walker, thanks to you, is in a city called Volsembore. As soon as control is transferred back to you after the cutscene, it will be possible on the embankment from the locals, or from the drunkard (Captain Obo) a little further ahead to hear about the lake monster and the ferry called "Crystal". In any case, do not linger around him for a long time and go straight to the tavern, near which another drunkard is sleeping on a bench. Inside, go to the bar and talk to the bartender, who turns out to be the same merchant who passed his wife's pass back to the Yukol tribe. After him, be sure to talk to Sarah, the granddaughter of the watchmaker Steiner.
In any case, you will need to leave the tavern soon and turn to the right towards the car. Turn left from the car and go forward along the road. The path will be linear, so soon you will reach the watchmaker's shop. Enter, the screensaver will start inside. Talk to Steiner.
During the conversation, Steiner will notice that Kate wears the heart of an automaton around her neck - a medallion of unique work from Gangs Voralberg. It turns out that Hans was not only a friend to Steiner, but also a mentor. Therefore, he will suspect the main character of stealing the mechanism and no excuses will help. Because of this incident, Steiner is very nervous and he will feel very bad, so he will have to find a cure as soon as possible. The first step is to grab an empty cup for about an hour.

“When Steiner gets sick, first of all take an empty mug, where the actual medicine will be. The mug stands for about an hour on the next shelf. "
Did you get the mug? So, go around the table at which Steiner sits and carefully examine all the shelves that will be in the table.

“There will be only nine shelves in the table: three shelves in three rows. You will not find a cure there. All that can be found among all these shelves is a recipe. The recipe is in the third row from Steiner in the second shelf. "
Since there is nothing else in this part of the house (including medicine), go down the stairs next to it. Below, in addition to the unfinished prosthesis, you can still find a note with the words: "Grandpa, do not forget to take your medicine three hours before lunch." However, the subtitles will tell you to take your medication before dinner. Therefore, if you are faced with the same error in the game, then know that the correct hint is three hours before dinner. Climb back to Steiner and go behind him, where a clock with an inconspicuous blue backlight will hang. Switch to your watch, then place an empty mug to start. After that, put on the dial "17:00".

« How to solve the clock puzzle? It's pretty simple. In the screenshot above, the time has already been set correctly, so you can easily do exactly the same. Just don't forget to put the mug first. "
Together with the medicine, turn back to Steiner, open the inventory and use the mug on it. Moreover, it is imperative to go into the inventory and use the mug - it will not work to automatically give grandfather the medicine. In general, when you talk to him, follow him down to the basement.
When you find yourself far below to go immediately do not rush and immediately look into the box near the exit. Remove all the trash and grab the reel of film (it's just a film), which Steiner will now ask for. Now go to the watchmaker. Next, use the reel found on the projector and the film will begin, thanks to which Kate learns what role the ferry "Crystal" played with Captain Obo. Therefore, soon the girl in her head comes up with an ingenious idea to ferry the yukols. The only problem is that Captain Obo drinks terribly, but in any case, you still need to find him and you can do this in the tavern where Steiner's granddaughter works.
Part - 4: "City of Valsembord - Ferry" Crystal "

How to remove coal from the warehouse? How do I get the key from the ferry model? How to operate a crane?
Now you need to persuade Captain Obo to transport the Yukol tribe on the Kristall ferry. Obo, in turn, sits in a tavern and you can go directly there, but you can also visit the ferry "Crystal" before that. It is not necessary to inspect the ship at all, but if you want to have a compelling argument in conversation with the captain, or just want to Syberia 3 walkthrough was full, then it is better, of course, to inspect the ferry. If you are not interested in the ship, skip this part of the walkthrough and move on to the next part of the article below.
Return back to the "Crystal", board and go to the deck. There will be no one on the deck, so climb higher straight to the captain's bridge. There is a table on the upper deck, and on the table is Captain Obo's logbook, so take it and be sure to go into your inventory after that to read the logbook: you flip through the pages and read. Why read it? Thanks to this magazine, the main character learns that the captain keeps the key to the ferry in his jacket. Now you can go back to the tavern.
Captain Obo will be sitting at the last table on the left side, so go to him and try to talk to the drunkard. In general, talking with the captain will do nothing, because he is simply insane. So now you should turn to the owner of the tavern and the watchmaker's daughter Sarah for help.
The conversation with them will turn out to be quite long, but in the end, Kate will receive a sobering drink. Go back to Obo and soon Sarah will bring the "drink" at the house's expense. Captain Obo will now be much more accommodating, so after a few weighty arguments of yours, he will agree to transport the Yukol tribe to the other side. So now you can go back to the "Crystal". On board the ferry, go up to the captain's bridge and Obo will issue the first task: he will order coal to be loaded onto the ferry and for this he will provide the heroine with a code from a coal warehouse and a loading crane. The code looks like this - "0509".

"The code given by Captain Obo to get Kate Walker into the coal warehouse and be able to operate the loading crane (0509)."
You go back to the deck, be sure to tear off the hatch right there (into which you then unload the coal) and go downstairs. The warehouse is located opposite the ferry. Near the large gate that leads to the warehouse, on the side (on the left side) there is a coded lock, on which you will need to dial the code - "0509".

“The same code panel, which is on the left side of the warehouse doors. Due to the fact that the controls are sharpened for the console, it will be a little inconvenient to enter, but you will be guided by the center of the circle, even though the circle will cover several buttons at once. "
Now Kate is in the warehouse. Go forward and you will see a minecart on the right side. Go further to the mesh fence and take the gutter there. There will be a box near this gazebo (on the left side). Go to the box and take the crowbar nearby.

“Be sure to inspect the gutter in your inventory for further interaction. Otherwise, Kate will never understand that the chute is connected with coal. "
How to remove coal from the warehouse? To do this, you will need to follow the next few steps. ... From the box (near which they took the crowbar), go to the left side. Now you have to knock on rectangular iron pipes (boxes) to determine where the coal is (if you don't want to waste time going through all the iron boxes, then see the screenshot below). ... After determining where the coal is, go back to the minecart and push it towards the desired box. ... When the cart is in place, carefully examine the box and install the gutter (the place where you need to install the gutter will be the only one, so there will be no problems with this case). ... Have you installed it? Now press the button on the right side of the box, after which the coal will begin to fall directly into the minecart. ... Then go back and pull the lever, which will change the position of the rails in the desired direction. ... Now Kate must definitely try to move the trolley from its place, although nothing will work. ... So now get into the car behind the trolley. Use a knife to pick out the top green button on the left. ... Next, you need to attach the same button to the lower right switch (below is a screenshot that will help you better understand what needs to be done). ... Finally, you click on the button (which you installed). ... And pull (push) the lever until it stops.

"This screenshot shows the location of the desired box."

“The topmost green button on the left side needs to be picked out with a knife. And the resulting button will then need to be installed on the lower switch on the right side. "
If you do everything right, then the girl will successfully take out the trolley loaded with coal. And literally in a couple of minutes the coal will have to be loaded onto the ferry. To do this, go now to the tap and enter a rather familiar code - "0509". The panel with the code, in turn, is located on the side of the same crane. After the code is entered, the stairs will go down, so climb into the cabin. Now a rather difficult puzzle lies ahead, which raises a logical question: How do I load coal onto a ferry? Below the screenshot below, the steps you need to take to load the coal onto the ferry will be listed.

". Move the first lever in the screenshot forward until it stops. ... Turn the second lever, which moves in a circle, so that the top of the crane is above the coal (turn a quarter to the left). ... Press the button to open the tentacles of the crane, after which the trolley will be captured (if the tentacles have not lowered, then press the second button). ... Next, pull the lever to the right until it stops, return to the first lever and lower it down, after which you pull the lever under the number “4” to the right side again. ... Again, all the way up, pull the lever under the number "1" and again to the right side pull the lever under the number "4". ... Now it remains to use the lever under the number "2" to turn the cab so that it is above the hatch and the job is done. The main thing is to carry out the described actions step by step and everything will work out. "
Return to Captain Obo after all the coal shenanigans. The captain will be pleased with the work done, so he will provide the following task: now you have to fill the ferry tanks with water. At the bow of the ship, near the hatch (into which you unloaded the coal), go to the pump. Now you need to connect the hose to the pipe, after turning the lever. And when the hose is connected, the lever will need to be turned again in order to secure the pump in this way. Now get down to the shore.
Go to the water ladder and go up the stairs. Above, near a huge pipe, pull the lever. When the short cutscene has passed, go back to the captain and report on the work done (Obo is on the captain's bridge).
So, in the course of the dialogue, Kate learns that Obo lost his ignition key 20 years ago and comes to the conclusion that the trip is canceled. However, he let slip that at one time the ship was designed by Schneider, so perhaps he has a key. Go back to the watchmaker's shop and learn from Sarah that her grandfather went to the hospital for the Kurk. But all is not lost, because Sarah gives permission to go to ground floor and inspect the model ferry, which may contain a key. So get downstairs. The model with the ferry model stands in the center of the room and a logical question arises: how to get the key from the ferry model?


« How do I remove the grate from the model ferry or solve the ferry puzzle?... The first step is to press the button to turn on the backlight for the layout. ... On the side of the model there is a hole for the handle that Sarah gave the heroine earlier, so insert the handle and twist it all the way until the model is completely open. ... When the grate is lowered, be sure to read the inscription near the layout and remember the following numbers: 30, 80, 60.. The wheel will be available on the ship's layout, so switch to it and enter the numbers in the following order: 30, 80, 60. After that, be sure to set the pointer all the way to the right side (in general, where the number 100 could be). And attention: you need to type numbers from end to beginning. ... If you do everything correctly, then the anchor chain will become active and you can pull it. ... When the layout opens, take the key. "
But since Kate got only a model of a real key, it turned out to be too small, therefore, it does not fit a real ferry, and for the same reason now I have to make a new key. First of all, pay attention to the workbench next to it: go to it, look at the shelf below and find a box with blanks for keys. Take one piece and go to the machine on the table. How do I make a copy of the key? See the description below the screenshot below. The sequence of actions in the description, as usual, is numbered, so I strongly recommend that you follow the numbering.

« How to make a copy of the ferry key?... Open the round door on the left side and insert the key from the ferry model into the center. ... Now, so that the key does not slip, clamp the inserted key in a vice using the button next to it. ... Next, open the doors on the right side and insert now the blank for the key. ... There is a bar in the center where 250% will be set, but you need 200%. ... Now all that remains is to press the red button and the key will soon be ready. "
Now Keith has acquired a real key to the Kristall ferry, so she can go further. Success can be reported to Captain Obo. However, it will not be on the captain's bridge, so insert the key yourself and the splash screen will start.
The problems do not end, because Captain Obo says that now he has to talk to the mayor, otherwise the port will not be able to leave. To find Mayor Bulyakin, go to the square, where he will deliver his speech. On the way, you can talk to the protesters, but you go up to the mayor and talk to him. And to persuade him to remove the "locks" in order to sail away from the city will not be difficult. The only problem is that there is no engineer who would plunge into the water and remove those "locks". So go back to Captain Obo and tell me everything. During the conversation, it turns out that it is Kate who will have to dive into the water. In addition, the captain will tell you about the monster that lives in these waters.
Part - 5: "City of Valsembord - Lake"

How to fill the cylinders with air? How to open the gate under water? Where can I find the chain from the mechanism? How to start the funicular?
It's time to head to the warehouse where you can pick up the appropriate diving equipment. Captain Obo will be standing near the warehouse. Go inside to get a diving suit.

“Although Captain Obo will suggest choosing the right equipment, only the orange diving suit will be available. So put things aside and take it. "
After picking up the suit, do not rush to enter the fitting room, because first you must fully prepare for the dive. Therefore, go to the table nearby and take a diving helmet on it. Have taken? Now take the cylinders, which in turn will lie directly under the hanger from which Kate previously removed the diving suit.

“Be sure to inspect the cylinders in your inventory, otherwise Kate will not be able to fill them with air. The main character must see that the required pressure is 180. ”
But now a logical question arises: how to fill the cylinders with air? It's really simple. Below is a screenshot of the correct sequence of actions.

". So, first of all, insert the cylinders into the air apparatus. ... Now lower the metal shutter (not the red knobs, but the shutter). ... Now switch to the panel above and use the gray arrow, with which you need to set the pressure value to 180.. As soon as you set the correct pressure, press the green button and do nothing yet, because the air is slowly entering the pipes, wait for the camera to change position. ... And now you can finally pull the two red taps, thanks to which it will be possible to fill the cylinders with air. "
Now take the cylinders and go to the locker room, after which the cutscene will start. Kate is now going down to the lake to clean up the mess. So, once in the water, move to the right side (sticking to the wall) until you find yourself near the mechanism. Keith's mechanism needs to be repaired. The first step is to lift all the gears and the square wrench - everything is right next to the mechanism, so just be careful.


“The correct arrangement of the gears is as follows. Above, you can see the scheme that the city mayor issued to Keith. "
How to find a chain from a mechanism? We go in search. Continue to move to the right along the wall. At the very end there will be doors - insert a square key into these doors and turn the valve. It will be quite difficult to twist, especially with the mouse, but you twist anyway. When you hear a click (characteristic sound), you can pull the lever. As a result, the first gate leaves will open.

« Chain location for mechanism can be seen in the screenshot above. You need to find a boat broken in two, among the wreckage of which you can find a chain for the mechanism. "
Together with the chain, feel free to return back to the mechanism in order to repair it completely. The chain is not a problem to insert, so do it yourself. Then turn the valve to the right until a characteristic sound is heard. After that, boldly pull the lever. The splash screen will start.
Part - 6: "City of Valsembord - Funicular"

How to start the funicular? How do I open the station door? How to solve the wedge puzzle? Solving the puzzle.
After talking with Captain Obo, you need to go back to the Yukols and talk to Ayahuasca, because everything is ready to sail. The only problem is that Semyon Steiner never brought Kurk from the hospital, so the main character will have to go after him personally. In any case, after the conversation with the shaman, the cutscene will start.
In general, to save Kurka, you will have to go to the funicular. He, in turn, is located near the city hall on the stairs higher from the square. Go there. Although all the paths in the city lead to the station with a funicular, so you won't get lost.
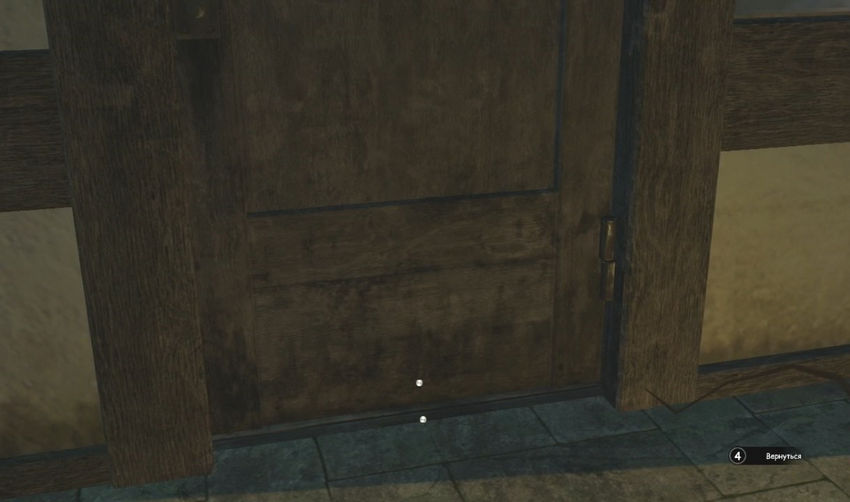
« How do I open the station doors? Problems may arise with this, and all because when inspecting the doors, you just need to look at the lower part. "
Upon arrival at the right place, go to the funicular rails and inspect them, then go inside the booth. And now you can get confused, because at the moment you just need to lower the camera down to the threshold, and then go down the stairs (which is located on the left side of the station), on the side of which there is a cart behind the bars.
There will be wedges under the wheels of the cart - knock them out. After that, the cart will roll down, and you, in turn, need to take these wedges with you. And next to it in the same place there will be a small wedge - you must also take it, otherwise you will not be able to move further. Now it's time to go back to the station doors. Click on the door and lower the camera down again.

« How to insert the wedges correctly? The bottom line is that you need to lift the door with the help of these boards. ... First of all, insert a small wedge in the marked place under the number "1" in the screenshot. ... A little to the right, then insert the first large wedge to raise the doors even more. ... After that, attention, take out the small wedge and insert into the left accessible point to raise the left side of the doors. ... Now, near the small wedge, insert the large wedge (slightly to the right). ... And now pull out the little wedge again to push it over the big wedge on the right this time. "
So, when you manage to open the doors, they will simply fall, so you can safely go inside. It will be incredibly dark inside and the only thing that can be seen is a shield on the left side of the entrance. Of course, you can't open the flap with your bare hands, so take a knife and use it to open it. Opening the flap, lower the red switch down and thus turn on the light.
Now pay attention to the control panel in front - approach it. Lower the lever down and the funicular will go down to the heroine. The splash screen will start. Exit the booth, go inside the funicular and click on the control panel, after which the next screen saver will begin.
Part - 7: "Hospital - Salvation"

How to release the trigger? Where can I find the password for the code panel?
Returning back to the hospital, first of all, get to the helicopter on the left side, which you can enter from the back side. Inside the helicopter, there will be a chest in the back, and inside this chest you can find a walkie-talkie (there is an object right under the helmet). Now you can enter the hospital. The splash screen will start.
So, Kate will hide behind a column and at a certain moment, after a conversation between two armed people in the waiting room, they can be clicked on. So, click on them and choose a walkie-talkie in the inventory, after which the main character will conduct a small and short scam - she will make a false call. The security will eventually leave, and control will pass to you.
Examine the inverted cart and go to the offices where Steiner will be found. In general, after the conversation, return to Dr. Efimova's office, where you have already been before. This time Kurk will be in the room.

« How to release the trigger?... To begin with, take a paper clip on the side of the piece of paper below. ... Next, switch to the back of the chair: open the flap, take out a paper clip and insert it into the mechanism to stop the pendulum. ... Now switch to medication and open the bottom of the syringe to empty the contents. ... And now you need to pour into the same syringe (using the inventory) the medicine that Ayahuasca gave. ... The trigger will come to its senses, but now you need to remove the shackles, so to do this, switch to the locker on the side of the chair and the code panel will appear. "
Where can I find the code for the code panel on Kurk's chair? Examine Efimova's table, on which you will find a statuette and a note. The note in your inventory will need to be read. The corner of the letter with the password will be torn off from the coded lock, so nothing else will be left but to smash the coded panel with a heavy statuette of Olga Efimova. A rather long splash screen will start.
Part - 8: "Sea Monster - The Path to Nakhodsk"

How to start ice axes? How do you break the floodlight at the stern? How to remove or distract the monster? How do I turn off the engine? Where can I get a lamp?
A new problem arose - ice. The problem is that a thick layer of ice has formed along the way, and it takes too long to sail by the detour, so Captain Obo orders the icebreakers to be launched. So you will need to turn on the icebreakers, lower them onto the ice and apply voltage.

"After talking with Obo on the captain's bridge, Kate will go downstairs, where you, in turn, will need to pick up the homemade matches, the location of which is marked in the screenshot above."
Have you got the matches? Then go down to the engine room (this is the adjacent staircase, which is located near the staircase that leads to the captain's bridge). At the bottom, head down the stairs below and climb another staircase nearby to reach the ice ax control panel. But now the most important thing: how to turn off ice axes? Pay attention to the screenshot below and its description. But as soon as you do everything right, the splash screen will start.

". First of all, turn the red valve (or the knob - as convenient) as far as it will go. ... After that, open the lid on the red button and click on it. ... Now the most difficult thing: the handbrake needs to be switched by numbers 1-3-2 (moreover, after switching to "1", it will be necessary to pull the lever down necessarily). And do not forget to do everything quickly, otherwise the captain will scream a lot. "
During the cutscene, problems will arise and therefore Captain Obo will send the main character to check what is going on. After going downstairs, as usual, do not rush to go further and carefully inspect all the seats, because under one of them you can find an emergency signal in a box.

"After you turn on the icebreakers, the captain will send Kate on the mission again, then pay attention to the seats below, because under one of them there is a box, inside which you can find an alarm signal, so do not miss it."
Either way, come out through rear doors... The splash screen will start soon. A sea monster will appear, whose attention was attracted by the light on the ship, so Obo will order to cut out all the light. With bare hands, of course, you won't be able to break the spotlights, so as soon as the control goes back to you, go to the right side and find the box. There will be a crowbar near the box. Now you need to break six spotlights: 2 on the left, 2 on the right, 1 at the stern, 1 at the bow.

“The only problem will arise with the searchlight on the port side, because it cannot be lowered, so you have to climb to it. In order to rise, you need to move the box next to it. Then everything is simple: get up, break the searchlight and move on. "

“As for the searchlight at the stern of the ship, you won't be able to simply approach it for the reason that the monster's tentacles will drive away the heroine, so open your inventory and use the emergency signal. Thus, the girl will distract the attention of the sea monster. "
After the cutscene, Captain Obo will order to turn off the engine, because the monster is still not lagging behind, so go back to the engine room. This time, go through the icebreaker control panel a couple of steps forward. Next, you just need to pull the lever and go back to Obo. Upon arrival, the captain will order to find the lamp. The bottom line is that he plans to distract the monster, but this will require a gramophone and a lamp. The gramophone is, so all that remains is to find the lamp. Where can I find a lamp? Return once again to the engine room.

“Be sure to visit the captain's bridge and examine the books lying on the floor, among which Kate will find a cache. There will be vodka inside the cache - take it. "

« Where can I find a lamp? How to light a lamp? So, in the engine room, behind the stairs, along which you go down to this part of the ship, there will be a table. There will be lamp parts on the table. You collect the lamp, pour vodka inside and use the matches you found earlier. "
With the lamp lit, return now to Captain Obo. The splash screen will start. Obo will sacrifice himself to distract the sea monster and it will, of course, retreat, thereby leaving the Kristall ferry alone.
Part - 9: "Baranur Park"

How to get the ferry ashore? How do I connect the power? How do I remove the cable? How do I turn on an automaton? How do I get anti-radiation glasses? How to open the box?
So, the ferry "Crystal" went off course, ran aground and ended up in Baranur. There are many problems now, but the main problem so far is that the ostriches cannot get out of the hold, since they will simply drown, so we need to find a way to pull the ship ashore.

"First of all, pay attention to the box on which it says" Radiation Goggles "- they will now need to be obtained."
Before going down, you need to get the aforementioned glasses. If you open the box with glasses now, then the heroine will not receive anything, so in Baranur we will start with this. Return to the captain's bridge and take out the key near the helm, which you once made from the watchmaker Steiner. With the key, you can go back to boxing. Switch to the box, turn the camera to the left side and there will be a place on the side where you can insert the key. Insert the key, scroll through it, open the drawer and get anti-radiation glasses. Now you can go downstairs. If you look around carefully, you will find ropes that cannot be used because there is no power. In any case, get down to the beach and move to the wide stairs on the shore, near which there will be a small splash screen.

"Be sure to climb the stairs up to this guard house to find the telescopic rod at the top."

"The telescopic rod must now be used to remove the rope from the pole."
Found a telescopic rod? Have you removed the rope with it? Perfectly. Return now to the engine room. Now everything is simple, because there you need to go to the same lever with which you turned off the engine during the attack, well, and pull it. In general, in the end, thanks to the Kristall ferry, power will be connected to the city.
So, now you have three important tasks: the first is to pull the Kristall ferry ashore, the second is to try to restore the automaton, and the third is to take the yukols out of Baranur. Climb back down to the shore and go to the gates of Baranur Park.
In the park, turn to the right and climb the stairs above. Pick up the crumpled note on the ground above, then examine it carefully in your inventory. Next, be sure to inspect the trolley next to it. Get down. Now go to the left side and enter the building through the accessible doors.

"Inside, examine the poster on the wall and memorize the numbers 15 and 25. They will still come in handy."
Near the poster that is presented above, examine another casket with the Voralberg emblem. So far, the box cannot be opened, but you will remember where it is.

“Don't rush to leave. In the same room, in addition to everything, there is a box, inside which you can find a gear. Be sure to take it. "
When you fully and completely inspect the room, leave it, but through another door (which is on the opposite side). Outside, move to the right side until you come across the lying trolleys. Look carefully at the trailers, after which they will fall down. After that, turn to the right and move on, until this time you stumble upon a train that once dragged the wagons. There will be a winch behind, thanks to which it will be possible to tow the "Crystal". When Keith reports that the train will not work without an automaton, be sure to take the key from the hands of the robot lying on the ground.

« How to open the box? Thanks to the key found, which, by the way, must be examined in the inventory, it will now be possible to open the box, so go back to the room. "
When you insert the key, be sure to scroll it, because everything needs to be done manually. In the opened box, take the Voralberg key (cruciform) and take the Voralberg wrench. All this will come in handy in order to repair the automaton. Outside, Kate will be greeted by the Yukols. The splash screen will start. In any case, after the conversation, you can go back to the automaton sitting on the beach to turn it off.

"You will need to insert the corresponding Phillips wrench into this cruciform hole, and then turn this wrench to open the chest."

« How to connect Oscar's heart?... First, insert Oscar's heart to replace the usual one. ... Be sure to open further the flaps on the heart (there are only two of them and resemble caps). ... Now you insert tubes into these open valves. ... Now switch to the central ball and unscrew the bolt that prevents the heart from opening (unscrew it with a wrench). "
If you do everything correctly, then the main character will see and understand that it is now necessary to find another key, with which it will be possible to launch the automaton.
When Kate comes to her senses, talk to Kurk, who is tied to the chair next door. Next, examine the hospital ward and go to the door on the left side, trying to press the red button, you will not see the result. Examine the box to which the button is attached, there is a diagram on the side that needs to be inspected. To set up this cunning device, you first need to open the frame, for which you need a knife, which you will find on the table with soup in the center of the room.
Continue the passage of Syberia 3, opening the box with the same knife (use it on the screw of the box), and when the frame is open, connect the green wire to the hole, push down the mechanism from which two wires come out, now close the lid - the button will work. Press it, thereby get the opportunity to leave the room.
Look for the doctor's office, for which you need to go to the side of the lower part of the screen (opposite wall), talk to the doctor, proving that you are in order and ready to leave the clinic. When the dialogue ends, he will hand you a key, which will come in handy a little later. In the meantime, take things from the chest of drawers in the corner of the doctor's office, leave the room, following to the elevator. This is where our key comes in handy: you need to apply it to the hole and move the petals so that they coincide with the cutouts on the elevator door.
True, all these efforts will eventually convince Kate that the case is at a standstill. Go into inventory and examine the key, click on the hole in the center of its handle, the main character will note that something was pulled out from there. When she says this, go back to the doctor and talk to him, he will say that you are not yet ready to be discharged from the clinic. In the doctor's office, you need to examine his table, where you will find a red brochure in a drawer.
Examine it in your inventory, continuing the passage of Syberia 3 to find a page with a diagram of the ill-fated key, when you examine the key and its image in the brochure in sequence, you will understand what part is missing, you need to get it or take it from the doctor. First, go to Kurk to talk to him, tell him about the key, show the brochure. After listening to the answer, we are looking for a way to transfer the key and the brochure to the Yukol camp, where there is a skilled blacksmith who can make a part.
We leave on the balcony on the right side, click on the window, you can see an owl in the distance on the tower, an attempt to lure it will give nothing, go back to Kurk and tell him about the situation. He will advise you to find some kind of bait. Leave this room, go to the hall, we need the opposite end, which is to the right of the elevator. There you will find a green grate with open door- get behind it, you will find a sleeping person on the bench.
From his neck you need to steal the key, then go to the elevator, there you need to find a cage with automaton birds, for which go from the elevator deep into the screen to the window, from there - to the left. After opening the cage with a stolen key, take the bird, this will be our bait for the owl.
.
10. Sacred bridge.
Walkthrough
4. Preparation of the ferry "Crystal"
Syberia 3. Walkthrough
Objective: Load coal on the "Crystal"
We go to the ship, inside we climb to the very top - to the captain's cabin. Obo begins preparing the ferry to sail. He instructs us to load the supply of coal on board. We receive from him a sheet with a code from a warehouse and a tower crane.
1. We leave on the deck. To the right in front of the ladder there is a white hill - this is a hatch, we open it by twisting the round lever. Charcoal will need to be poured into the hatch.
2. We go down to the shore, to the right of the crane we approach the large gate. On the panel, enter the code received from the captain: 0509 .
3. Inside the warehouse we see a trolley. We take the gutter behind the lattice door. To the left of the grate there is a box with a crowbar on it, we also take it away.
4. Front mounted square pipes, four on each side. Only one of them contains coal. To find the filled pipeline, we knock on all the pipes with a crowbar. Empty pipes will make a ringing sound, and hitting a full pipe will make a dull sound. (The full pipe is the penultimate one on the right).
5. Push the trolley forward, stop it opposite the desired pipe. Now you need to put the chute between the pipeline and the trolley. (We aim at the active point, turn the mouse wheel so as not to hit with a crowbar, but to apply an object to the pipe). On the right side of the pipe, press the button to start loading coal.
6. On the railroad, move the arrow so that the path leads outside the warehouse.
7. A full trolley can no longer be moved by hands, so we get into the loader on the rails. To turn it on, we use a knife on the upper button, remove it, and then put the button in the right empty space. Press the right button, move the lever forward to start moving. We tow the trolley to the street to a dead end.
On the street we change into a tower crane. The access code to it is the same: 0509 ... There are many buttons and levers inside. A couple of small buttons on the screen change their appearance, the rest control the tap itself.
1. Turn the left lever to the right so that the crane approaches the trolley.
2. We turn the circular lever to the left, from this the crane boom will turn.
3. Press the upper big button, so we will grab the cart.
4. Move the left lever to the left several times to drive closer to the ferry. At the crossroads railroad push the right lever to rotate the circular platforms under the tap. Thus we get to the left dead end of the railway.
5. Turn the circular lever upwards, the crane arm will turn towards the ferry.
6. Press the bottom large button, this will lower the cart into the hold of the ship. If this does not happen, we move the crane further, again try to lower the load.
Objective: fill the water tanks on the "Kristall"
We report to the captain on the completion of the assignment. We receive a new order: pour water into the ferry tank.
1. We go to the deck. There is now a pipe hanging near the coal hatch, we examine it. Move the lever to the right to widen the hole. We insert the hose there. Move the lever to the left to fix it.
2. We get down from the ship, we climb to the water tower. We just press the lever on it and wait for the water to fill up. We go to the captain.
Objective: Look for a duplicate key for "Crystal"
Captain Obo recalled that 20 years ago he deliberately drowned his only ignition key on the ferry. Steiner was the designer of the mechanical ferry, so he might have another key.
We go to the Steiner's shop. The master has already finished the prosthesis and went to the hospital, so we are talking with Sarah. She will give us a handle to open the layout, we pass into the basement.
1. Inspecting the Kristall ferry model. Turn on the backlight. We insert the handle into the hole on the side, twist it to remove the model fence.
2. We read the plaque in front of the ship, we memorize all the numbers found in the text.
3. We examine the model itself, on the running wheel we see numbers and an arrow. We enter the combination: 30, 80, 60, 100 ... From this, the anchor of the ship will move lower and lower.
4. Pull the anchor, the model will open, the key is hidden inside.
Goal: Find the right size ignition key
The found key is too small for a real ferry. From it you need to make an enlarged copy. We go to the workbench, we start making the key:
1. We examine the key, on it we find the inscription 50%. This means that to create a full-size key, you need to make it twice as large. Turn the knob to the right to set the value to 200% on the machine.
2. On the left, open the round door, install the original key there. Press the key inside to fix the key.
3. At the bottom of the shelf we take the key blank. We install it in the right door.
4. Press the red button in the upper right part of the machine. We receive the "Crystal" key. We return to the ferry, use the key, watch how the mechanical engine starts.
|
Master locksmith(Master locksmith) When solving the puzzle, make the correct copy the first time. You need to immediately set the correct proportion of 200%. |
|
|
Mechanism awakening(Mechanical awakening) Thanks to your efforts, the mechanical masterpiece is working again. Subject. Start the engine of the Kristall ferry. |
Objective: To convince the mayor to open the locks
The ship is completely ready, but there is another obstacle outside. The port of the city is closed with underwater locks; permission from the mayor is required to enter the open sea.
We go to the city square. The mayor just came out to talk with the protesters. We are trying to persuade him to open the port. In the dialogue, you can click on the lights next to the phrases to listen to Kate Walker's thoughts. Sooner or later, the mayor will agree.
Objective: Prepare diving equipment
We return to the captain. Together with him we go to the lighthouse, we enter the room with underwater equipment. Inside, to the left of the entrance, we take empty cylinders, we take out on a hanger for clothes diving suit, on the left on the table is a diving helmet. It is necessary to fill the oxygen cylinders in the wall installation:
1. We examine the cylinders in the inventory, we find on them an inscription with the pressure level. We examine the device on the wall, put pressure on it 180 bar.
2. Press the green button.
3. Install the cylinders in the recess.
4. Lower the semicircular holder from above.
5. Alternately lower the left and right levers to fill both cylinders. We can change.
Objective: Open two locks under water
1. In a suit we go down under the water, go to the right side. We find the left huge round lock. It cannot be opened yet, so we pass by.
2. Near the right lock we find three gears and a square key. Here, too, there is still nothing to be done to the end.
3. We return to the left castle. We insert the square key into the well. We can open the lid and see the inside of the mechanism. We twist the red flywheel counterclockwise to the window. Then we push the lever. This will open the left port flap.
5. We return to the right castle. We put three gears on the axis: a large one on the left, a smaller one on the right, and a stepped one from below. Installing the chain. We turn the flywheel, push the lever. The port is open.
5. Evacuation of Yukols
How to get through Siberia 3
Purpose: Tell Ayahuasca that everything is ready to go
We return to the Yukol camp to bring them to the ferry. Together with the yukols we break through the cordon riding on ostriches.
|
Stepping on his rake(Turning the tables) Secret achievement. 2. At the entrance we look into the checkpoint window, we see how the policeman interrogates the detective. |
|
|
A little care ...?(A little tenderness, maybe ...?) Tell one of your companions three times that you really like him. You need to stroke the same snow ostrich three times: 2 times - we return to the camp in the evening, when the yukols begin to collect their things, we stroke the middle ostrich at the right wall. |
Objective: Return to the clinic
We find ourselves on the ferry. All the Yukols are already here, and Steiner and Kurk never returned. We go to the bow of the deck, there we communicate with the shamaness. We go to the exit from the ship, we meet Sarah. She will tell you that the hospital was surrounded by soldiers, and her grandfather was captured.
It is better to go through the city along the right path - through the central square in order to meet the mayor. He will also tell about the arrival of the soldiers, but will not help in any way, only asks not to talk about the deal with him.
To the left of the city hall, we go up the stairs, we come to the funicular station. The entrance is on the left under the sign. There is no cab at the station, the building is closed, and we need to get inside somehow.
We go down the left stairs. On the left behind the bars we see a cart, we get it out from under it three wooden wedges... We return to the funicular building, examine the door, its lower part. It is necessary to lift the door from its hinges, knocking wedges under it:
1. Small wedge on the right.
2. Large wedge on the right.
3. We take out a small wedge, put it on the left.
4. Large wedge on the left.
5. Take out a small wedge, place it on top of the right wedge.
The raised door will fall, we can go inside. In the room on the left we examine the right wall, open the cabinet, turn on the switch to supply power.
In the left room we approach the control panel, lower the lever so that the monorail cabin descends towards us.
We enter the cabin, go up the monorail to the hospital on the rock.
Objective: Find the Trigger
At the top we see a military helicopter, we go around it, a ladder is lowered on the left side, we go inside along it. On board we search the box, take the walkie-talkie, although it would be better to take a grenade.
We imperceptibly enter the hospital building, eavesdrop on the dialogue between the colonel and the soldiers. We use the radio, we tell the colonel in the voice of Olga Efimova that we need help. All the military will go up to the top floor.
On the left we can enter the office of the head physician Zamyatin. Here the doctor takes care of the beaten Steiner, who got into a fight with the military. Steiner is no longer going on a journey, and he tells us for the future that the heart of an automaton can be used to animate one of the robots.
|
Colonel, can you hear me? Welcome!(Colonel, are you receiving me? Over) You showed the soldiers that cunning always beats brute force. Subject. Use a walkie-talkie to distract soldiers. |
|
|
Cassandra(Cassandra) Prove to the hospital staff that you are right no matter what. Talk to Dr. Zamyatin twice: 2 times - when we return to the hospital for the Kurk. |
We enter Efimova's office, it turns out that Kurka was transported here. We try to talk to him, but he is in a trance and does not answer. We are trying to bring him to his senses with a potion, which was given by the shaman:
1. On the left we examine the table, we find the object Holguin figurine squid, and a scrap of recipe from Mangeling.
2. We examine the armchair of the Kurka. Move the mouse cursor to the left to rotate the screen. On the left, a tablet with papers is fixed, from above we remove a paper clip from them. (If the camera shows the paper a little lower, and the paper clip is not visible, then you need to restart the game).
3. We inspect the back of the chair, open the back cover, inside there is a mechanism with gears and cables. We use a paper clip to secure the cables.
4. Examine the drug delivery system on the right side. Move the needle back to pour out the green liquid. We open the syringe from above to pour in the purple shamanic potion, make an injection.
5. Open the code panel at the bottom right. Apply the figurine to break up the panel screen. Kurk will free himself from the handcuffs.
We run together to the funicular and get to the ferry. We say goodbye to Sarah and sail away until the soldiers overtook us.
6. Lake monster
Siberia 3. How to start an icebreaker
Objective: Turn on the icebreakers in the engine room
On the lake, a large ice floe blocked our way. The captain asks to turn on the ice ax system. We get down to the engine room, we go to the platform in front of the gears. Examining the control panel:
1. Turn the valve in the upper right corner to connect the shaft to the motor.
2. Press the button below the valve to start the device.
3. We turn on the 1st gear, pull the lever to the right of the panel, the icebreaker will start working.
4. Quickly engage 3rd gear until the needle goes down and the engine stalls.
5. Quickly shift into 2nd gear until the needle exceeds the maximum and the engine overheats.
Objective: inspect the stern of the "Crystal"
A little later, the ferry will stop again. We go to inspect the stern, and we see the tentacles of a huge octopus. The captain will save us in time by firing a gun. After conferring, we decide that the lake monster attracted the light of the searchlights. Now you need to break 6 lamps on the ship.
1. On the right stern near the box we find a crowbar with a red handle. First, we twist the handle to lower the flashlight, then hit it with a crowbar. So turn off 4 spotlights.
2. The fifth spotlight does not go down. There is a box next to it, we move it closer, climb onto it and break the lantern.
3. The approach to the last 6th searchlight is guarded by a monster. We need to temporarily distract him. We enter the passenger compartment, examine the second row on the left, under the seats we find a box. We open it, inside there is an obvious fake of Russian brands: "food survival" dry rations, an incomprehensible "strange package", and a "hand of fire" lantern. We take from the box emergency flashlight, which is actually a signal checker. We go out onto the deck, light the saber and throw it into the water. While the monster is distracted, we break the last searchlight.
Objective: Turn off the engine "Kristall"
The monster returns. Now we decide that the giant squid can be attracted by sound. We go down to the engine room, go to the ice ax, lower the lever to the right of it, this will stop the engine.
It doesn't help either. The captain decides to distract the monster from the ship with a lifeboat. He settled there with a gramophone, and asks us to bring a lamp.
1. We get down into the hold. Near the coal furnace in the corner we examine the table, there is a disassembled lamp on it. We connect the two parts. But the lamp is empty, you need to find fuel for it.
2. On the first passenger floor in the center we examine the floor, find homemade matches yukols.
3. We rise to the captain on the intermediate floor. On the right we examine the books lying on the floor. We open the rightmost book, there is a cache inside, we take out a bottle of vodka from it, and in fact - 90% alcohol.
4. We get down into the hold. Pour alcohol into the lamp, light the wick.
With the lamp ready, we run to the captain. But he deceived us: while we were busy with the lighting, he managed to swim away. He made the decision to sacrifice his life to distract the monster from his ferry.
|
Achievement "Honorary reader of the site" Did you like the article? In gratitude, you can like it through any social network. For you, this is one click, for us - another step up in the ranking of gaming sites. |
||
|
Achievement "Honorary Sponsor Site" For those who are especially generous, there is an opportunity to transfer money to the account of the site. In this case, you can influence the choice of a new topic for the article or passage. |

