How to turn on the Internet in android. How to set up a Wi-Fi connection
It's hard to imagine a modern Android smartphone without Internet access. In this article, we will tell you how to turn on the Internet on an Android smartphone using mobile communication and Wi-Fi.
To enable Mobile Internet on Android, you need to follow a few simple steps. First, you need to turn on the Mobile Data feature. To do this, open the Android settings and go to the "Data transfer" section.
In this section, you need to find the "Mobile data" function and enable it. Also in this section there is a function "Saving traffic". It is better to disable it, otherwise it may block Internet access for some applications in the background.

After that, you need to return to main screen with settings and go to additional settings The Internet. To do this, open the "More" section.


To enable the Internet, here you need to select the type of network: 2G, 3G or. Now, the 3G network works with almost all operators and in all countries. But, if your mobile operator supports 4G LTE, it is better to choose this type of network. Because 4G LTE provides the fastest internet access speed. Also in the subsection "Mobile networks" there is a function "Internet roaming". If you want to turn on the Internet while roaming, then this function must also be activated.

In most cases, the above steps are enough to turn on the Internet on your Android smartphone. But, if your Internet still does not work, then most likely you do not have access points (APN) configured. In order to configure them, you need to open the settings and go to the "More - Mobile networks - Access points (APN)" section.

Here you can select one of the Internet access points and change its settings. You can also add an access point here. For this there is a button with a "Plus" sign. If you do not know what settings to specify, contact the technical support of your Internet provider.
How to connect the Internet on Android via Wi-Fi
If you want to connect to the Internet on Android by connecting to a wireless Wi-Fi network, then everything is much easier than in the case of using the mobile Internet. All you need to do is open your Android settings and go to the "Wi-Fi" section.


After that, a window will appear asking for a password. Enter the password for Wi-Fi and click on the "Connect" button.

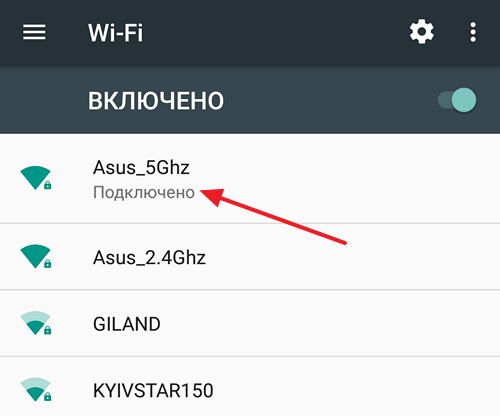
After entering the password, the Android smartphone will connect to the Internet via wireless network Wi-Fi. In this case, next to the selected Wi-Fi network, an inscription will appear: "Connected".
If, after connecting to a Wi-Fi network, the Internet still does not work, then, most likely, the problem is the lack of access to the Internet on a router or point- Wi-Fi access.
To set up the Internet on your phone with operating system Android, it won't take long if you have it in front of the user's eyes detailed instructions on how to connect the Internet to Android. The guide below provides instructions on basic methods to accomplish the task at hand. You can connect to the World Wide Web using the mobile Internet, for which the owner of the smartphone will have to regularly pay the cellular operator for the provision of the relevant services.
If the user does not have money on his balance sheet, then instructions on how to set up the Internet on Android using wireless Wi-Fi hotspots, which are currently organized in almost all public places and provide free access to the global web, for example, train stations, will suit him. cafes and restaurants, shopping centers, educational institutions etc.
Of course, a significant number of people have their own Wi-Fi routers at home, so the guide will be useful for both them and their guests. If you have a computer connected to the World Wide Web, then at the end of this article, the user will find instructions on how to set up the Internet on his Android phone via a cable connection from a PC.
Internet speed
One of the main parameters is the value of the possible speed of data reception and transmission, therefore, in the case when the user is just about to purchase a smartphone for subsequent work on it on the Internet, it is recommended to study its characteristics. First of all, you need to turn Special attention on what communication standards the device supports, for example, GPRS, EDGE, 3G, 4G (LTE), LTE-Advance.

You should also be aware that not every mobile operator provides 4G speed, so often you should not overpay for a function in your phone that you will never use, or you will have access to high-speed Internet only in rare cases, for example, when traveling to big cities, where free Wi-Fi zones are already organized everywhere.

The most commonly used standard is Wi-Fi " 802.11n". However, nowadays more and more routers are released with the support of " 802.11ac”, Therefore, when planning to purchase such a router, it is advisable to take care in advance that the smartphone also has the ability to work on this high-speed communication standard.
Method 1: Using Wi-Fi
You must perform the following sequence of actions:
1. Swiping your finger down from the top of the screen, bring up the notification panel and enter the " Settings"By touching the" Cogwheels". Also " Settings»Can be opened through the main menu of the system;

2. Then open the tab “ Wi-Fi»And activate it by setting the slider to the on state or by touching the Wi-Fi icon itself;

3. Then, in the displayed list of access points, touch the desired network and, if necessary, enter the access code to it;

4. Then click “ To plug»;

5. Done! The next time the smartphone is within the range of this wireless access point, it will connect to it in automatic mode, and the user will not be required to enter the password, the main thing is that at this time Wi-Fi is active in the phone.
Method 2: Using WPS technology
There is an even easier connection method to the Wi-Fi router than the previous one, but you can use it only with direct access to the wireless device itself. For example, when visiting friends, you just need to press the button " WPS»Located on the body of the router and you will no longer need to type the access code and login to access the Internet.
The algorithm of sequential stages of actions consists of the following steps:
1. Using the description of the first step from the above instructions, open “ Settings»;

2. Next, go to the " Wi-Fi»;

3. Enable " Wi-Fi"(If it is inactive) and click" Options»(Usually a button in the form of 3 dots located vertically);

4. Then go to the section " Additional functions", But in latest androids began to post " WPS»Directly in the options menu;

5. Then click “ WPS button»;

6. Click the button on the router with the inscription or icon " WPS»;

Ready! The phone is connected to the Internet.
3.method: Via SIM card of a mobile operator
Immediately after installing the SIM card in the smartphone, the configuration and connection to the global network are automatically performed. The cellular company sends special information to the phone, and the parameters are set independently without the intervention of the owner of the gadget. Unfortunately, there are always exceptions in our world, and sometimes manual configuration is required. To do this, you need to take the following steps:
1. Using the description of the first step from the first instruction of this manual, open “ Settings»;

3. Click " Mobile networks»;

4. Go to " Access points (APN)", But sometimes you do not need to navigate, and the required menu opens already at this stage of actions;

5. Add an access point, more often this is done by clicking on the icon " +
»;

6. In the section " Authentication type"Indicate" PAP»;

7. In " APN type»Print« default, supl»;

8. Click " Ok»;
9. In the column "" type the name of the mobile company providing access to the global network;

10. In the column “ Access point"Or" APN»Print the address of the service provider, for example, for« TELE2"You must enter" internet.tele2.ru", for " MTS»Print« internet.mts.ru", and for " Megaphone"You will need to indicate" internet"(The picture below shows a screenshot with an example for subscribers of the company" Beeline»;

11. Click " Ok»;
12. Then print the login and access code, for example, to clients “ Beeline"In both fields you must enter" beeline", Subscribers" MTS" respectively " mts", Operator" Megaphone"Uses" gdata", and for " TELE2»You do not need to enter anything;

Method 4: Using a USB cable
This method allows you to provide the computer with Internet from the phone and vice versa. To organize access to the World Wide Web of a laptop or stationary computer via the mobile Internet, you will need to carry out preliminary settings.
You need to do the following:
1. Enter the PC in the menu " Network connections»;
2. Place a check mark on the section “ Allow other network users to use the internet connection from this PC»;
3. Install the program “ Android Debug Bridge»;
4. In the smartphone, open “ Settings"And go to the section" Developer options»;

5. Set a check mark on the line "";
6. Connect the smartphone to the computer " USB cable»;
7. Launch the application “ Android Debug Bridge"(You can do this by double-clicking on" AndroidTool.exe»);
8. In the window displayed on the PC monitor, click " Refresh»;
9. In the paragraph " Select DNS to use"Indicate" DNS"And then click" Connect»;
10. Done! Access to the global computer network is provided and a cell phone is used as a modem.
Note: sometimes a notification appears in the smartphone asking for user rights, and you have to click " Allow».If the owner of the PC (with access to the global network) has the opposite situation, and he needs to connect the Android device to the Internet, then the following steps must be taken:
1. In the settings of the computer's Internet connections, open the “ Access», Where to provide access to users of the global network through a PC;

2. Disable Wi-Fi and data transmission function in the smartphone. Connect phone to computer " USB cable»;
3. Then follow the steps described from the previous instructions, just in the DNS list you need to indicate the one that the PC uses;
6. Click " Connect" in the application " USB Tunnel" in computer;
7. Done! Now the phone has access to the global network.
Now you know - How to set up Internet on Android.
Probably, even 10 years ago, we could not have thought that the Internet would become an integral part of our life. But today, having bought a new one for ourselves, the first thing we do is copy the address book and figure out how to set up a network on Android. And if suddenly something does not work, we immediately begin to panic. For some, setting up the World Wide Web is easy, but there are those who need advice.
There are several ways to configure mobile internet
There is simple ways settings for mobile and wireless access for Android gadgets, as well as the use of the World Wide Web via a USB cable in the "Computer - Android" format and vice versa.
When using a SIM card for the first time in a new or flashed phone, in most cases, the setting is automatic, but if this did not happen for some reason and access does not work, then you need to configure the gadget yourself. The easiest way is to order automatic settings from your network operator. From SMS from the operator, they are saved with one click, and the Internet will be connected in a few seconds.
If this option does not suit you, then you can configure Android manually, having previously asked the operator of the cellular network to send them to you in a text message.
Setting up the network manually will not take you more than 5 minutes, you will not need anything except a gadget, not even a USB cable. For manual configuration, go through the "Menu" Android smartphone in "Settings" and under "Wireless / Wireless & networks" click "More". In the expanded menu, select the item "Mobile networks" of interest to us. Next, click "Access Points (APN)", after that a list of the existing access points of mobile operators, whose SIM cards were used in your gadget, will appear on the screen. Next, choose from the list the required mobile operator whose network services you will use. After that, just check the correctness of the existing settings with the ones sent to you by the operator. Perhaps you will find an error due to which the global web does not work.

If the phone does not have a list with access points, then press the "Menu" key and select "Create APN". After that, fill in the fields manually according to the data from the SMS with the settings. Be extremely careful, as the Internet does not work if at least one number is entered incorrectly.
Setting up Wi-Fi on Android
Now that we figured it out, let's get down to setting up the Wi-Fi, because it doesn't always make sense to pay mobile traffic especially when you are at home or near a free hotspot.
Usually, the connection to the Wi-Fi network occurs automatically as soon as you activate this function in your device. However, sometimes there are connection problems. Why is this happening? It happens that the web does not work if you are in the range of several access points at once, then the phone or tablet may get confused and not connect to any of them. But in this case, you do not need to panic, you just need to help the phone set up the Wi-Fi.
So, you just need to select the desired access point, your home router or public network. But how to do that? Go through the "Menu" of the phone to "Settings", and in the item "Wireless / Wireless Networks" click on Wi-Fi and simply activate it with one flick of your finger by selecting the "On" button. After that, a list of available wireless networks will immediately appear. But if the network is protected with a password, then a lock will be displayed next to its name and wi-fi icon.
Select the network you need by name and click on it. Next, enter your password and click "Connect".

If Wi-Fi is on, but there is no Internet
You can connect to a network without a lock in the same way, but you do not need to enter a password. However, difficulties may arise here as well. You may have already wondered: "Why is Wi-Fi connected, but?". The reasons are different, for example, the connection may be hidden in the parameters of your router or the DHCP function is turned off, in which case you will have to configure the network manually. How to do it? Activate wi-fi according to the above scheme. Next, select "Add network". But in various Android versions the real menu can be found in different places: under the list available networks wi-fi or at the top of the screen in the form three points near the magnifying glass icon.
After you have selected "Add network" on your Android, enter its name, then specify the security type and do not forget, it must match the one specified in the router parameters. Now save the settings, restart your phone or tablet and use the wifi, it already works.
But if the DHCP function is disabled on your router, then when you add a new connection, check the box "Show additional parameters". Next, you will need to register the DNS server, IP address, IP parameters and other data. To make some configuration items available, in the "IP Settings" line, select the "Static" value. This Android setup will take you about 10 minutes. If the wi-fi does not work, restart your router and gadget.

To specify the IP address, gateway and DNS server addresses yourself, you need to check the "Advanced" item
How to use your smartphone as a modem for your PC using USB
Now let's look at one more important point: if you do not have the Internet at home or you are on the go, then it will be useful to know how to transfer the Internet from your computer to Android via USB and configure your phone as a modem.
To use the mobile Internet via a PC, you first need to configure it. To do this, activate this function in your laptop. Open "Network Connections" and check the box next to "Allow other network users to connect to the Internet from this computer." Now download the Android Debug Bridge to your computer and unzip the files. It is one of the most user-friendly Android control software.
After that, activate USB debugging mode on your phone. Enter through the "Menu" in "Settings", find the item "Options for the developer" and put a check next to "USB debugging".

Enable USB Debugging on your phone
Now connect your phone or other mobile device to your PC using a USB cable. Next, open the folder with the unzipped Android Debug Bridge program and find the AndroidTool.exe file, run it. A window will appear on the computer screen in which you need to click Refresh, and from the drop-down list called Select DNS to use, select DNS and click Connect. A black window with a scrolling line and the text Connection Done will immediately appear on the screen, which means that the Internet is already connected.
Please note that some gadgets then ask for permission for the user. In this case, just click "Allow" in response to the message that appears on the smartphone screen. Your phone is now connected as a modem. Important: Do not disconnect or loosen the USB cable while using the network and setting it up. Why can't this be done? Due to poor contact, the Internet often crashes or does not work at all.
How to use the Internet of a PC on your smartphone using USB
And finally, let's figure out how to connect the Internet to Android via a computer via USB. There is nothing difficult in this, the already familiar Android Debug Bridge will help us to set up the network. Through it, it is very easy not only to distribute, but also to receive the Internet.
But do not rush to launch the application, first on your PC in the Internet connection settings, in the "Access" tab, allow all users to connect to the Internet of your computer.

Share the Internet on your computer
Now take USB, with it you need to connect the phone to the PC, but do not forget that you must turn off Wi-Fi connections and data transfer. Next, follow the instructions described in the previous paragraph, only from the list select the DNS server that your computer uses. Then in the program, click the Show Android Interface button, the application will offer to install a USB Tunnel on the phone or other used gadget, approve this proposal and after installation give the program superuser rights. Now click the Connect button in the USB Tunnel software on your PC. That's all, you have the Internet connected and working.
As you can see, connecting a network on Android is not at all difficult, you don't need to be a great computer expert to set up your smartphone, tablet and PC yourself. All you need is some patience, gadget, PC and USB. So set up the internet faster and read others useful tips about Android on our website.
Today, mobile devices are in great demand; literally everyone has them. They are used not only to call relatives or send SMS messages, but also to access the World Wide Web. Unfortunately, when buying a device, consultants rarely explain how to set up the Internet on Android or iPhone, and the owner has to figure it out on his own.
V modern world a phone without the Internet surprises others
To solve an urgent problem, the owner of any portable device needs to independently decide how exactly access to the Global Web will be carried out. Today there are several options for gaining access to the network:
- Wi-Fi connection.
- Mobile Internet connection.
- Connection via a personal computer.
Wi-Fi is a wireless network that can be easily connected in specially designated places, for example, at home, on the subway, in fast food chains. Unlike 3G internet, Wi-Fi provides much faster data transfer speeds and the connection is free.
In order to connect your own smartphone to such a network, the owner does not need any special programs or utilities, since the procedure is quite simple and takes a minimum of time. First you need to open the main menu on the iPhone. Next, in the list of all applications, find the "Settings" parameter and go there. A new window will appear with a list of available Wi-Fi connections. If it is not there, then the user needs to switch the slider to the on position. All that remains is to choose the type of Wi-Fi to which you want to access. Perhaps if the network is blocked, you will have to enter a password. If all the data is entered correctly, the smartphone can be connected to the network and used.

Mobile Internet connection
Connecting a phone to the network via a mobile operator (mobile Internet) is the most popular service. The fact is that the owner of a smartphone with this service can connect anywhere. Perhaps this is the only significant advantage of such an Internet. At the same time, a prerequisite is the presence of traffic from the user and funds on the iPhone, nevertheless, it is this method that provides the opportunity to get data everywhere.
In most cases, the owner of the device receives all the settings automatically when connecting for the first time, but it happens that this does not happen and everything has to be done manually. To manually configure this type of data access on the iPhone, you need to open the "Settings" menu and go to the " Mobile network". First you need to find a service provider. This is done in the "Telecom operators" menu. Using the "Search" button, a list of all available connections will appear. The choice should be based on the telecom operator and the type of connection you need to get (2G, 3G).

It happens that this option does not help either. In this case, a complete manual configuration is required. On a smartphone, in the "Mobile network" menu, select the "Access points" parameter and create a new one. Here you will need to enter the following data:
- Connection name - you can specify any.
- APN - different for each operator (indicated in the format - internet.beeline.ru).
- Username - corresponds to the operator's name (beeline).
- Password - also corresponds to the name of the operator.

All data for manual configuration can be found on the official website of the service provider. If the entered data on the smartphone is correct, then you should go directly to the connection. To do this, just slide your finger across the screen from top to bottom, and in the menu, click on the "Mobile data" button.
PC connection
In the event that there is no Wi-Fi network nearby, and 3G on the iPhone is not able to perform the necessary tasks, a personal computer with the Internet can come to the aid of the user. This will also require a USB cable through which the two devices will be connected.

First, you need to open the connection settings on the computer itself and go to the "Advanced" tab. Here the user needs to perform only one action - put a checkmark in front of the item "Allow other network users to use the connection." This is so that the Internet used by the computer can be transmitted and used by other devices on the same network. After that, you need to download and install a special utility - USBTunnel on your smartphone and AnroidTool on your computer. The phone in debug mode is connected to the computer via a USB cable. Upon completion of this operation, you need to launch the AndroidTool program and refresh the list of devices using the "Refresh Devices" button. In the "Select Domain Name" list, you can specify any name, and transfer information to a mobile device using "Show Android". The program can clarify whether the user has the necessary rights, where it is required to give a positive answer. Further, when the smartphone and PC are synchronized, it remains only to click on the "Connect" button and start using the Global Web.
It doesn't take much time to set up the Internet on a phone with the Android operating system, if the user's eyes have detailed instructions on how to connect the Internet to Android. The guide below provides instructions on basic methods to accomplish the task at hand. You can connect to the World Wide Web using the mobile Internet, for which the owner of the smartphone will have to regularly pay the cellular operator for the provision of the relevant services.
If the user does not have money on his balance sheet, then instructions on how to set up the Internet on Android using wireless Wi-Fi hotspots, which are currently organized in almost all public places and provide free access to the global web, for example, train stations, will suit him. cafes and restaurants, shopping malls, educational institutions, etc.
Of course, a significant number of people have their own Wi-Fi routers at home, so the guide will be useful for both them and their guests. If you have a computer connected to the World Wide Web, then at the end of this article, the user will find instructions on how to set up the Internet on his Android phone via a cable connection from a PC.
Internet speed
One of the main parameters is the value of the possible speed of data reception and transmission, therefore, in the case when the user is just about to purchase a smartphone for subsequent work on it on the Internet, it is recommended to study its characteristics. First of all, you need to pay special attention to what communication standards the device supports, for example, GPRS, EDGE, 3G, 4G (LTE), LTE-Advance.
 You should also be aware that not every mobile operator provides 4G speed, so often you should not pay extra for a function in your phone that you will never use, or access to high-speed Internet will be available only in rare cases, for example, when traveling to large cities, where this is how free Wi-Fi zones are organized everywhere.
 The most commonly used Wi-Fi standard is "802.11n". However, at present more and more routers are released with support for "802.11ac", so when planning the purchase of such a router, it is advisable to take care in advance that the smartphone also has the ability to work on this high-speed communication standard.
Method 1: Using Wi-Fi
You must perform the following sequence of actions:

Method 2: Using WPS technology
There is an even easier connection method to the Wi-Fi router than the previous one, but you can use it only with direct access to the wireless device itself. For example, when visiting friends, you just need to press the "WPS" button located on the router case and you will no longer need to type the access code and login to access the Internet.
The algorithm of sequential stages of actions consists of the following steps:

 Note: it is imperative to complete the 6th step within 60 seconds. if the user did not manage to press the button during this time (1 minute is given to perform the action), then he will need to wait three minutes and try again.
- Ready! The phone is connected to the Internet.
3.method: Via SIM card of a mobile operator
Immediately after installing the SIM card in the smartphone, the configuration and connection to the global network are automatically performed. The cellular company sends special information to the phone, and the parameters are set independently without the intervention of the owner of the gadget. Unfortunately, there are always exceptions in our world, and sometimes manual configuration is required. To do this, you need to take the following steps:


Note: all companies providing cellular services indicate passwords and logins on their official Internet resources, so if the above examples did not contain data to enter, then you can find out by visiting the operator's website or by calling them by phone.
Method 4: Using a USB cable
This method allows you to provide the computer with Internet from the phone and vice versa. To organize access to the World Wide Web of a laptop or stationary computer via the mobile Internet, you will need to carry out preliminary settings.
You need to do the following:

Note: sometimes a notification appears in the smartphone asking for user rights, and you must click "Allow".
If the owner of the PC (with access to the global network) has the opposite situation, and he needs to connect the Android device to the Internet, then the following steps must be taken:


