Installing Minecraft: All the ways and solutions to errors. How to install the game MINECRAFT (Maincraft)
In this article, I will go into great detail how to install minecraft mods, so if you want to diversify your minecraft with mods, but do not know how to install them in the game, then here is a great installation guide.
The guide is suitable for both the licensed version of minecraft and the pirated version, there is no difference.
What is needed to install mods on Minecraft?
Minecraft game one of the versions.Arms.
99% of modern mods are installed by copying the mod file into the Mods folder, but let's go through this in order:
At the moment, 98% of mods use a special mod loader called , and about 2% use .
Therefore, this article will be shown using the example of Minecraft Forge, it is installed in a completely similar way.
Let's install the mod:
Step 1.
Find out what version of the game you have, run the game and in the game menu you will see the version:Step 2
Great, let's say we have Minecraft 1.12.2, now we need (link), download it for minecraft 1.12.2.
There are 2 kinds of automatic installer, file installer as program .exe and installer file .jar, there is no difference between them at all, but for many players the .jar file opens as an archive, or stupidly does not start, therefore it is simply download the .exe installer and run it.
Installation example:

Step 3
Now open your minecraft launcher (the program that launches the game). It should contain a new version of Minecraft with the forge attribute:
Here is an example of two launchers:


Choose minecraft version with a Forge postscript, run, if it starts, excellent, close the game immediately.
If it doesn’t start, you probably already have mods or mod files in the game folder that prevent the game from starting, you need to look at the error. Read about the reasons for not launching the game at the bottom of the news.
Step 4
Now we need to select the desired mod for minecraft, the version of the mod must match the version of the game, i.e. mods for 1.12.2 are only suitable for 1.12.2, rarely (or if indicated) mods from 1.12 can fit version 1.12.1 or 1.12.2, try it.
Download the desired mod, also read the brief installation for each mod, in some cases there may be some additional steps.
Step 5
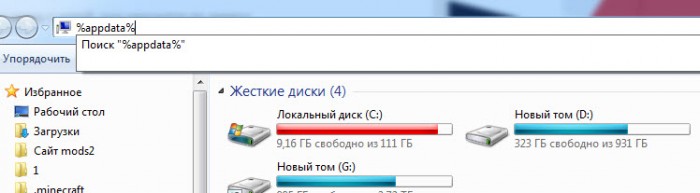
Just in any folder, type %appdata% in the address bar and press Enter:
Installing the mod in the game, first we need to get into the game folder, it is located at:
C:\Users\ Your_User\AppData\Roaming\.minecraft
If you cannot find the folder
Appdata:
You need to enable showing hidden folders and files.
Or press start - in the find field enter this:% APPDATA% and press enter, there you will find the .minecraft folder.
Or you can enter the combination Win + R on the keyboard (the Win button is a button between Ctrl and Alt on most keyboards, it has a Windows icon on it).
In the window that appears, enter% APPDATA% and press Enter there you will find the Roaming folder, and .minecraft in it.
Some launchers can change the name of this folder to something else, for example, to .tlauncher
If you have Windows 10, then open the explorer, go to the "view" tab. Then click on the "show or hide" area and check the "hidden items" option. 
Next, you can find this folder where it should be.
Inside a folder .minecraft you will find a folder mods if it doesn't exist, create it.
Copy the downloaded mod file to the mods folder, run the game - the version of the game with the Forge signature.
Done, you are beautiful.
Possible problems and solutions:
Can't open Forge installer like forge-1.12.2-14.23.1.2556-installer.jarAnswer: download and install.
After installing some mods, the game does not start, crashes at startup without an error:
Answer:
This happens, there is a problematic mod, or one mod is not compatible with another mod, or some mod requires an additional mod to work. Look for incompatible mods by deleting mod files, update mods to more recent versions. (mod versions, not game versions).
Perhaps the mod requires additional libraries, usually the authors and those who post the news indicate the need to install additional mods, read the news with the mod in more detail.
Extremely rare, but it happens that the version of the mod is not compatible with new version Forge, if the mod is old, you will probably have to find and install more old version Forge.
You will probably have to stop using the problematic mod.
The game starts, but the message is displayed, there is no game menu.
Answer: As a rule, if a critical error has not occurred, then Minecraft Forge tries to report possible reason, For example:
1) Some mod requires a more recent version of Minecraft Forge. (For example forge-1.12.2-14.23.1.2556-installer.jar - where 1.12.2 is the version of the game, 14.23.1.1.2556 is the version of the loader itself), you will probably have to install a more recent minecraft forge loader.
2) Some kind of mod requires an additional mod, it will be written there, mod name requires: name, you need to find this mod and drop it into mods.
3) You copied a mod for another version of the game into Mods, then it usually says that this mod requires a game version of such and such.
What to do if after installing Forge the game does not start, or does not start at all.
Answer:
Save your minecraft world, delete everything in the .minecraft folder, redownload the game version, and go through the installation of Forge again.
Or find another launcher for minecraft, similarly delete everything from the .minecraft folder, install the game with another launcher,
Disclaimer: This article is educational, and is aimed primarily at the most "green" computer users. This installation is only suitable for licensed Minecraft users.
For minecraft installations we need to have on hand JRE (Java Runtime Environment), since this game is written in the Java programming language, we need some kind of engine to run this game. Where to get it, you ask? But everything is not so scary, this engine is on every second Minecraft site, but we will use official sources.
So, first we need to download and install the JRE.
You should have a page similar to this one:
Click on the big red button in the center of the screen, then select your operating system (if necessary). You are most likely running Windows and the download should start automatically.
Step 2 Install the downloaded package.

Depending on which installation method you choose, you will be given two different options installation (Installation in automatic mode, a small file is downloaded, then the installer itself will download and install Java, you only need to specify the path to the folder where to put it, and the installation is semi-automatic, the only difference is that in one of the cases you will have to download larger file. It's not critical).
After completing the installation of Java, you can proceed with the installation of Minecraft itself.
Step 3 Installing Minecraft
To start the installation, you need to download Minecraft from the official site, you can download it by .
After downloading, put the file in Minecraft.exe somewhere convenient for you. (I recommend putting it in a separate folder, because the exe will create folders for itself). After you have everything put in place, run Minecraft.exe.
On first launch, you will see a screen like this:

In the login field, enter your username, in the password field, your password, respectively. Click on the Login button, and you will start downloading files with the game, along the way, folders will be created next to the exe file. You should have the following picture in front of you:

After the download is complete, the installation of Minecraf will be completely finished. You will find yourself in the main menu of the game, after which you can start playing.
Ask your questions in the comments, we will be happy to answer them.
Even the most novice gamer knows that before playing a game, it needs to be installed. Installation is the first step on the way to an exciting activity. This post is dedicated to all those who do not know how to install this game shku.
Even the server owners themselves have repeatedly requested that installation information be made widely available. So that for a person who is interested in the game, there are no unnecessary problems already at the installation stage.
Installing the Minecraft game consists of 3 stages.
So, let's deal with the installation step by step:
1. First step.
This stage begins with the installation of the JAVA environment. First of all, you need to download JAVA, especially for, on which this game is written. You can do this on the official website. It is very important not to make a mistake when choosing the bitness of the operating system of your PC. It is known that it can be 32 or 64 bit.
To determine the bit depth, in the Start menu (except for WINDOWS 8) on the Computer icon using the context menu, the Properties window opens. In this window there will be a line System Type. It tells you which system you have.
2. Second step.
You need to find the file with the extension - exe in the game folder. They are commonly referred to as launchers. This file is designed to run the game.
This file needs to be moved to the desktop. They differ depending on:
Which server is selected (different servers may have different launchers);
what version of the game itself;
which build of the game (that is, various mods, INDUSTRIAL CRAFT or DECORATIVES MOD can be installed)
3. Third step.
At the last decisive stage of installing the game, you need to work with the files of the game itself. The files must be dropped in order for the system to determine the installed game.
- If your operating system is WINDOWS XP, then copy the game files to the APPLICATION DATA / APPDATA folder. It is located on the C:/ drive, in the DOCUMENTS AND SETTINGS folder.
- If you have WINDOWS VISTA or WINDOWS 7, then you need the USERS folder on the C: / drive. The next thing to do is to find the APPDATA folder in the USERS folder. And in the APPDATA folder you need to find the ROAMING folder and drop all the game files here.
APPDATA folders may be hidden. To display hidden folders on XP - select C: / -> Tools -> Folder Options -> View ->

On WINDOWS VISTA/7 select Start -> Control Panel -> Folder Options -> View -> Display hidden files and folders.
On this note, the installation of the game is fully completed and you can start playing.
Today is a post about the most important event of minecrafter - about installing minecraft itself. It is from this action that the path of the Kubach player begins. And, if you know how to install minecraft, then read the post!
And the owner of craft-x.ru asked me to tell you how to install minecraft, as he wants those who begin to play minecraft already know how to install the game on their computer. By the way, it is not always necessary to reinstall minecraft, maybe I described the error with it on .
So, let's start installing the lane. The very first and most important thing to do is to install the Java environment.
Step 1 – Download Java for MineCraft
It is on it that the game minecraft is written. You can download Java from the official site. The main thing is to choose the correct bit depth of the operating system (x32 or x64).
To determine the bitness of your system, you need to open Start (for XP, Vista and Seven), call the properties of the Computer (right-click on Computer and select Properties). In the window that opens, there will be several lines, one of them is called "System Type" and opposite it is written what system you have.
Step 2 - Launcher or launcher.
Usually, this is the game's EXE file. In other words, the launcher of the Minecraft game. It must be thrown to the desktop. The Minecraft game can have a huge amount of these launchers. They may differ due to:
- Servers - the game server can have its own launcher.
- Versions - people don't always update their minecraft.
- Assemblies - maybe Minecraft with installed mods, for example or
Step 3 - MineCraft Files
Now last but not least milestone Installing Minecraft. It is necessary to drop the files of the game itself so that the system knows that the game is installed. Depending on the operating system, the path where you need to drop the files differs.
- If you have Windows 7 or Vista, then you need to go to the C: / drive and find the Users folder. In it, click on your user (I don’t know what user you have, but it was asked when Windows installation), then search AppData folder, and in it Roaming. This is where you need to put the files.
- If you have Windows XP, then we also go to the C: / drive, but now we are looking for the Documents and Settings folder, in it we go to the folder with your username. And there is already Application Data.
Author, you're a fool, I don't have an Application Data/AppData folder
No, I'm not stupid, it's just hidden (unless of course you turned on the display of hidden files), and if you haven't turned it on, let's do it!
- If you have WinXP, then when you go to the C: / drive, select “Tools” on the top panel, and then Folder Options, then on the “View” tab in the list you need to find and select “Show hidden files and folders”.
- If you have Win7 / Vista, then open the “Control Panel” (you can find it in Start), there “Folder Options”, there “View” and in the list you need to find and select “Show hidden files, folders, drives”.
That's all. Good luck with Minecraft.
Minecraft is very popular in Lately computer game in the sandbox genre, the plot of which is built on the basis of various resources of the game world, using which virtual characters build their world, settle down in it and defend themselves from hostile forces. Moreover, you can build a civilization both alone and by collective forces in a network multiplayer game. It is difficult to say due to what this game with very primitive by today's standards "square" graphics was able to gain great popularity. The only way to find out is to install Minecraft on your computer and try to play it.
How to install Minecraft on Windows
Minecraft is written in the Java programming language and in order for the game to work on a computer, it needs support in the form of a virtual machine that will execute Java code. Therefore, first of all, we check the presence of a Java machine on the computer and only then proceed to install the game. To do this, follow these steps.

By using the Java programming language, Minecraft can run on a wide variety of platforms and operating systems: Windows, Linux, Android, Mac OS, iOS, Xbox and more.
After installing the Java virtual machine, you can proceed to install the game itself. Minecraft is a paid game. You can find on the Internet, download and install the Minecraft client program for free. We will not provide links to resources that distribute this game, as this does not comply with the rules of our site and violates the rights of Minecraft creators.
Instead, we will tell you how to buy and install a licensed version of the game.
- Open the official website of the game on the new user registration page at .
- Fill in the required fields: email address (it will be your login in the game), password, first name, last name, date of birth and three answers to selected security questions in case you forget your password and want to restore it. Agree to the terms and conditions of use by checking the appropriate box and click the "Register" button.
- open email and find the registration confirmation letter in it. Follow the link it contains to complete the registration process.
- Log in with your username and password to the site minecraft.net and go to the payment section using the link, then click on the button that says "Buy Minecraft for this account".

- To purchase, you will need a Visa or MasterCard plastic card on which an amount of 19.95 euros will be available, which corresponds to about 800 rubles. If you have a ruble card, then there is nothing wrong with that. Money will be converted automatically at the exchange rate of the payment system.
On the page that opens, enter your address in Latin, select the type of payment system Visa or MasterCard and click the green button "Proceed to Payment Details".
- At the final stage of payment, select your country, indicate the name and surname engraved on plastic card, as well as its expiration date. Enter the three-digit CVV code located on the back of the card and click the "CONFIRM AND PAY" button.

- After completing the payment on the page, download the Minecraft.exe installation file and run it on your computer.
- In the installer window, enter your username and password and click the "Login" button.

- The game installation process will start. The files and folders necessary for the game will be downloaded to the folder with the installer. You can observe the installation process on the filling green bar status bar.

- Once the download is complete, Minecraft will be completely installed on your computer. You will find yourself in the main menu of the program and can start playing.

