Power supply with voltage and current regulation. How to assemble a power supply with regulators with your own hands Diagram of an adjustable power supply with output
This power supply, based on the LM317 chip, does not require any special knowledge for assembly, and after proper installation from serviceable parts, does not require adjustment. Despite its apparent simplicity, this unit is a reliable power source for digital devices and has built-in protection against overheating and overcurrent. The microcircuit inside itself has over twenty transistors and is a high-tech device, although from the outside it looks like an ordinary transistor.
The power supply of the circuit is designed for voltages up to 40 volts alternating current, and the output can be obtained from 1.2 to 30 volts of constant, stabilized voltage. Adjustment from minimum to maximum with a potentiometer occurs very smoothly, without jumps or dips. Output current up to 1.5 amperes. If the current consumption is not planned to exceed 250 milliamps, then a radiator is not needed. When consuming a larger load, place the microcircuit on a heat-conducting paste to a radiator with a total dissipation area of 350 - 400 or more square millimeters. The selection of a power transformer must be calculated based on the fact that the voltage at the input to the power supply should be 10 - 15% greater than what you plan to receive at the output. It is better to take the power of the supply transformer with a good margin, in order to avoid excessive overheating, and be sure to install a fuse at its input, selected according to the power, to protect against possible troubles.
To make this necessary device, we will need the following parts:
- Chip LM317 or LM317T.
- Almost any rectifier assembly or four separate diodes with a current of at least 1 ampere each.
- Capacitor C1 from 1000 μF and higher with a voltage of 50 volts, it serves to smooth out voltage surges in the supply network and the larger its capacitance, the more stable the output voltage will be.
- C2 and C4 – 0.047 uF. There is a number 104 on the capacitor cap.
- C3 – 1 µF or more with a voltage of 50 volts. This capacitor can also be used with a larger capacity to increase the stability of the output voltage.
- D5 and D6 - diodes, for example 1N4007, or any others with a current of 1 ampere or more.
- R1 – potentiometer for 10 Kom. Any type, but always a good one, otherwise the output voltage will “jump”.
- R2 – 220 Ohm, power 0.25 – 0.5 watts.
Assembling an adjustable stabilized power supply
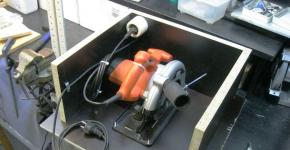
I assembled it on a regular breadboard without any etching. I like this method because of its simplicity. Thanks to it, the circuit can be assembled in a matter of minutes.


Checking the power supply
By rotating the variable resistor you can set the desired output voltage, which is very convenient.Every novice radio amateur needs a laboratory power supply. To do it correctly, you need to choose a suitable scheme, and with this there are usually many problems.
Types and features of power supplies
There are two types of power supplies:
- Pulse;
- Linear.

A pulse-type block can generate interference, which will affect the settings of receivers and other transmitters. A linear power supply may not be able to supply the required power.

How to properly make a laboratory power supply from which you can charge the battery and power sensitive circuit boards? If you take a simple linear power supply of 1.3-30 V, and a current power of no more than 5 A, you will get a good voltage and current stabilizer.


Let's use the classic diagram to assemble a power supply with our own hands. It is designed on LM317 stabilizers, which regulate voltage in the range of 1.3-37V. Their work is combined with KT818 transistors. These are powerful radio components that can pass large currents. The protective function of the circuit is provided by LM301 stabilizers.

This scheme was developed quite a long time ago and was periodically modernized. Several diode bridges appeared on it, and the measuring head received a non-standard switching method. The MJ4502 transistor was replaced by a less powerful analogue - KT818. Filter capacitors also appeared.

DIY block installation
During the next assembly, the block diagram received a new interpretation. The capacitance of the output capacitors was increased, and several diodes were added for protection.

The KT818 type transistor was an unsuitable element in this circuit. It overheated greatly and often caused breakdowns. They found a replacement for it with a more profitable option TIP36C; in the circuit it has a parallel connection.


Step-by-step setup
A self-made laboratory power supply needs to be switched on step by step. The initial startup takes place with LM301 and transistors disconnected. Next, the function regulating the voltage through regulator P3 is checked.

If the voltage is well regulated, then transistors are included in the circuit. Their work will then be good when several resistances R7, R8 begin to balance the emitter circuit. Resistors are needed so that their resistance is as low as possible. In this case, there must be enough current, otherwise in T1 and T2 its values will differ.

This adjustment step allows the load to be connected to the output end of the power supply. You should try to avoid a short circuit, otherwise the transistors will immediately burn out, followed by the LM317 stabilizer.


The next step will be the installation of LM301. First, you need to make sure that there is -6V on the op-amp in pin 4. If +6V is present on it, then there may be an incorrect connection of the BR2 diode bridge.

Also, the connection of capacitor C2 may be incorrect. After inspecting and correcting installation defects, you can supply power to the 7th leg of the LM301. This can be done from the output of the power supply.

At the last stages, P1 is adjusted so that it can operate at the maximum operating current of the power supply. A lab power supply with voltage regulation is not that difficult to adjust. In this case, it is better to double-check the installation of parts than to get a short circuit with subsequent replacement of elements.

Basic radioelements
To assemble a powerful laboratory power supply with your own hands, you need to purchase the appropriate components:
- A transformer is required for power supply;
- Several transistors;
- Stabilizers;
- Operational amplifier;
- Several types of diodes;
- Electrolytic capacitors – no more than 50V;
- Resistors of different types;
- Resistor P1;
- Fuse.

The rating of each radio component must be checked with the diagram.


Block in final form
For transistors, it is necessary to select a suitable heatsink that can dissipate heat. Moreover, a fan is mounted inside to cool the diode bridge. Another one is installed on an external radiator, which will blow air over the transistors.


For the internal filling, it is advisable to choose a high-quality case, since the thing turned out to be serious. All elements should be well fixed. In the photo of the laboratory power supply, you can see that pointer voltmeters have been replaced by digital devices.

Photo of laboratory power supply


![]()


Here is another version of a laboratory power supply with a voltage from 0 to 30 V and adjustable current consumption of 0-2 A, which is always useful when a power supply is used to configure homemade circuits or when unknown devices are started for the first time.
IP circuit with current and voltage regulation

The power supply circuit itself is a popular set of the following elements:
- The adjustable stabilizer itself, in which T1 - BC337 is replaced with BD139, T2 - BD243 with BD911
- D1-D4 - 1N4001 diodes replaced with RL-207
- C1 - 1000 µF / 40 V replaced by 4700 µF / 50 V
- D6, D7 - 1N4148 to 1N4001
The transformer used has voltages of 25V, 2A and 12V, which is useful for controlling the fan that cools the radiator and power diodes on the panel. For this purpose, a small board was created with a bridge rectifier, filter capacitors and an LM7812 stabilizer (with a heatsink).

Inside the housing of the laboratory power supply there is a transformer, a board of the most regulated power supply, stabilizer boards - 12 V and 24 V, a radiator with a cooling fan (starts at 50 C).


On the front of the case there is a switch, three LEDs informing about the status of the power supply (220 V mains, fan on and protection - current limiting or short circuit), blue and red LED displays with a darkening film glued to them. Next to the displays are the control potentiometers, and to the right are the power leads. On the back of the case there is a power connector, a fuse and a 60x60mm cooling fan.

As for the indicator displays, they show:
- blue- current voltage in volts V
- red- current current in amperes A
The power source turned out to be really convenient and reliable. The entire assembly took several days. As for cooling, it turns on only under high load and then for a short time, about a couple of minutes.

With the current level of development of the element base of radio-electronic components, a simple and reliable power supply with your own hands can be made very quickly and easily. This does not require high-level knowledge of electronics and electrical engineering. You will soon see this.
Making your first power source is quite an interesting and memorable event. Therefore, an important criterion here is the simplicity of the circuit, so that after assembly it immediately works without any additional settings or adjustments.
It should be noted that almost every electronic, electrical device or appliance needs power. The difference lies only in the basic parameters - the magnitude of voltage and current, the product of which gives power.
Making a power supply with your own hands is a very good first experience for novice electronics engineers, since it allows you to feel (not on yourself) the different magnitudes of currents flowing in devices.
The modern power supply market is divided into two categories: transformer-based and transformerless. The first ones are quite easy to manufacture for beginner radio amateurs. The second indisputable advantage is the relatively low level of electromagnetic radiation, and therefore interference. A significant drawback by modern standards is the significant weight and dimensions caused by the presence of a transformer - the heaviest and most bulky element in the circuit.
Transformerless power supplies do not have the last drawback due to the absence of a transformer. Or rather, it is there, but not in the classical presentation, but works with high-frequency voltage, which makes it possible to reduce the number of turns and the size of the magnetic circuit. As a result, the overall dimensions of the transformer are reduced. The high frequency is generated by semiconductor switches, in the process of switching on and off according to a given algorithm. As a result, strong electromagnetic interference occurs, so such sources must be shielded.
We will be assembling a transformer power supply that will never lose its relevance, since it is still used in high-end audio equipment, thanks to the minimal level of noise generated, which is very important for obtaining high-quality sound.
Design and principle of operation of the power supply
The desire to obtain a finished device as compact as possible led to the emergence of various microcircuits, inside of which there are hundreds, thousands and millions of individual electronic elements. Therefore, almost any electronic device contains a microcircuit, the standard power supply of which is 3.3 V or 5 V. Auxiliary elements can be powered from 9 V to 12 V DC. However, we know well that the outlet has an alternating voltage of 220 V with a frequency of 50 Hz. If it is applied directly to a microcircuit or any other low-voltage element, they will instantly fail.

From here it becomes clear that the main task of the mains power supply (PSU) is to reduce the voltage to an acceptable level, as well as convert (rectify) it from AC to DC. In addition, its level must remain constant regardless of fluctuations in the input (in the socket). Otherwise, the device will be unstable. Therefore, another important function of the power supply is voltage level stabilization.
In general, the structure of the power supply consists of a transformer, rectifier, filter and stabilizer.
In addition to the main components, a number of auxiliary components are also used, for example, indicator LEDs that signal the presence of supplied voltage. And if the power supply provides for its adjustment, then naturally there will be a voltmeter, and possibly also an ammeter.
Transformer
In this circuit, a transformer is used to reduce the voltage in a 220 V outlet to the required level, most often 5 V, 9 V, 12 V or 15 V. At the same time, galvanic isolation of high-voltage and low-voltage circuits is also carried out. Therefore, in any emergency situations, the voltage on the electronic device will not exceed the value of the secondary winding. Galvanic isolation also increases the safety of operating personnel. In case of touching the device, a person will not fall under the high potential of 220 V.
The design of the transformer is quite simple. It consists of a core that performs the function of a magnetic circuit, which is made of thin plates that conduct magnetic flux well, separated by a dielectric, which is a non-conductive varnish.
At least two windings are wound on the core rod. One is primary (also called network) - 220 V is supplied to it, and the second is secondary - reduced voltage is removed from it.

The operating principle of the transformer is as follows. If voltage is applied to the mains winding, then, since it is closed, alternating current will begin to flow through it. Around this current, an alternating magnetic field arises, which collects in the core and flows through it in the form of a magnetic flux. Since there is another winding on the core - the secondary one, under the influence of an alternating magnetic flux an electromotive force (EMF) is generated in it. When this winding is shorted to a load, alternating current will flow through it.
Radio amateurs in their practice most often use two types of transformers, which mainly differ in the type of core - armored and toroidal. The latter is more convenient to use in that it is quite easy to wind the required number of turns onto it, thereby obtaining the required secondary voltage, which is directly proportional to the number of turns.
![]()
The main parameters for us are two parameters of the transformer - voltage and current of the secondary winding. We will take the current value to be 1 A, since we will use zener diodes for the same value. About that a little further.
We continue to assemble the power supply with our own hands. And the next order element in the circuit is a diode bridge, also known as a semiconductor or diode rectifier. It is designed to convert the alternating voltage of the secondary winding of the transformer into direct voltage, or more precisely, into rectified pulsating voltage. This is where the name “rectifier” comes from.
There are various rectification circuits, but the bridge circuit is the most widely used. The principle of its operation is as follows. In the first half-cycle of the alternating voltage, current flows along the path through the diode VD1, resistor R1 and LED VD5. Next, the current returns to the winding through open VD2.

A reverse voltage is applied to the diodes VD3 and VD4 at this moment, so they are locked and no current flows through them (in fact, it only flows at the moment of switching, but this can be neglected).
In the next half-cycle, when the current in the secondary winding changes its direction, the opposite will happen: VD1 and VD2 will close, and VD3 and VD4 will open. In this case, the direction of current flow through resistor R1 and LED VD5 will remain the same.

A diode bridge can be soldered from four diodes connected according to the diagram above. Or you can buy it ready-made. They come in horizontal and vertical versions in different housings. But in any case, they have four conclusions. The two terminals are supplied with alternating voltage, they are designated by the sign “~”, both are the same length and are the shortest.

The rectified voltage is removed from the other two terminals. They are designated “+” and “-”. The “+” pin has the longest length among the others. And on some buildings there is a bevel near it.
Capacitor filter
After the diode bridge, the voltage has a pulsating nature and is still unsuitable for powering microcircuits, and especially microcontrollers, which are very sensitive to various kinds of voltage drops. Therefore it needs to be smoothed out. To do this, you can use a choke or a capacitor. In the circuit under consideration, it is enough to use a capacitor. However, it must have a large capacitance, so an electrolytic capacitor should be used. Such capacitors often have polarity, so it must be observed when connecting to the circuit.

The negative terminal is shorter than the positive one and a “-” sign is applied to the body near the first one.

Voltage regulator L.M. 7805, L.M. 7809, L.M. 7812
You probably noticed that the voltage in the outlet is not equal to 220 V, but varies within certain limits. This is especially noticeable when connecting a powerful load. If you do not apply special measures, then it will change in a proportional range at the output of the power supply. However, such vibrations are extremely undesirable and sometimes unacceptable for many electronic elements. Therefore, the voltage after the capacitor filter must be stabilized. Depending on the parameters of the powered device, two stabilization options are used. In the first case, a zener diode is used, and in the second, an integrated voltage stabilizer is used. Let's consider the application of the latter.
In amateur radio practice, voltage stabilizers of the LM78xx and LM79xx series are widely used. Two letters indicate the manufacturer. Therefore, instead of LM there may be other letters, for example CM. The marking consists of four numbers. The first two - 78 or 79 - mean positive or negative voltage, respectively. The last two digits, in this case instead of two X's: xx, indicate the value of the output U. For example, if the position of two X's is 12, then this stabilizer produces 12 V; 08 – 8 V, etc.
For example, let's decipher the following markings:
LM7805 → 5V positive voltage
LM7912 → 12 V negative U

Integrated stabilizers have three outputs: input, common and output; designed for current 1A.

If the output U significantly exceeds the input and the maximum current consumption is 1 A, then the stabilizer gets very hot, so it should be installed on a radiator. The design of the case provides for this possibility.
If the load current is much lower than the limit, then you don’t have to install a radiator.
The classic design of the power supply circuit includes: a network transformer, a diode bridge, a capacitor filter, a stabilizer and an LED. The latter acts as an indicator and is connected through a current-limiting resistor.

Since in this circuit the current-limiting element is the LM7805 stabilizer (allowable value 1 A), all other components must be rated for a current of at least 1 A. Therefore, the secondary winding of the transformer is selected for a current of one ampere. Its voltage should not be lower than the stabilized value. And for good reason, it should be chosen from such considerations that after rectification and smoothing, U should be 2 - 3 V higher than the stabilized one, i.e. A couple of volts more than its output value should be supplied to the input of the stabilizer. Otherwise it will not work correctly. For example, for LM7805 input U = 7 - 8 V; for LM7805 → 15 V. However, it should be taken into account that if the value of U is too high, the microcircuit will heat up very much, since the “excess” voltage is extinguished at its internal resistance.
The diode bridge can be made from 1N4007 type diodes, or take a ready-made one for a current of at least 1 A.
Smoothing capacitor C1 should have a large capacity of 100 - 1000 µF and U = 16 V.
Capacitors C2 and C3 are designed to smooth out high-frequency ripple that occurs when the LM7805 operates. They are installed for greater reliability and are recommendations from manufacturers of stabilizers of similar types. The circuit also works normally without such capacitors, but since they cost practically nothing, it is better to install them.
DIY power supply for 78 L 05, 78 L 12, 79 L 05, 79 L 08
Often it is necessary to power only one or a pair of microcircuits or low-power transistors. In this case, it is not rational to use a powerful power supply. Therefore, the best option would be to use stabilizers of the 78L05, 78L12, 79L05, 79L08, etc. series. They are designed for a maximum current of 100 mA = 0.1 A, but are very compact and no larger in size than a regular transistor, and also do not require installation on a radiator.

The markings and connection diagram are similar to the LM series discussed above, only the location of the pins differs.

For example, the connection diagram for the 78L05 stabilizer is shown. It is also suitable for LM7805.

The connection diagram for negative voltage stabilizers is shown below. The input is -8 V, and the output is -5 V.

As you can see, making a power supply with your own hands is very simple. Any voltage can be obtained by installing an appropriate stabilizer. You should also remember the transformer parameters. Next we will look at how to make a power supply with voltage regulation.

Hello everyone. This article is a companion piece to the video. We will look at a powerful laboratory power supply, which is not yet fully completed, but functions very well.

The laboratory source is single-channel, completely linear, with digital display, current protection, although there is also an output current limitation.

The power supply can provide an output voltage from zero to 20 volts and a current from zero to 7.5-8 Amps, but more is possible, at least 15, at least 20 A, and the voltage can be up to 30 Volts, but my option has a limitation due to with transformer.


Regarding stability and ripples, it is very stable, the video shows that the voltage at a current of 7 Amperes does not drop even by 0.1 V, and the ripples at currents of 6-7 Amperes are about 3-5 mV! in class it can compete with industrial professional power supplies for a couple of hundred dollars.

At a current of 5-6 Amps, the ripple is only 50-60 millivolts; budget Chinese industrial-style power supplies have the same ripples, but at currents of only 1-1.5 amperes, that is, our unit is much more stable and can compete in class with samples for a couple of hundred dollars
Despite the fact that the side is linear, it has high efficiency, it has an automatic winding switching system, which will reduce power losses on transistors at low output voltages and high current.


This system is built on the basis of two relays and a simple control circuit, but later I removed the board, since the relays, despite the declared current of more than 10 Amps, could not cope, I had to buy powerful 30 Ampere relays, but I have not yet made a board for them, but without a system The switching unit works great.

By the way, with the switching system, the unit will not need active cooling; a huge radiator at the rear will be enough.


The case is from an industrial network stabilizer, the stabilizer was bought new, from the store, just for the sake of the case.


I left only a voltmeter, a power switch, a fuse and a built-in socket.


There are two LEDs under the voltmeter, one shows that the stabilizer board is receiving power, the second, red, shows that the unit is operating in current stabilization mode.

The display is digital, designed by a good friend of mine. This is a personalized indicator, as evidenced by the greeting, you will find the firmware with the board at the end of the article, and below is the indicator diagram


But essentially this is a volt/ampere wattmeter, there are three buttons under the display that will allow you to set the protection current and save the value, the maximum current is 10 Amps. The protection is relay, the relay is again weak, and at high currents there is quite a strong heating of the contacts.

There are power terminals at the bottom and a fuse at the output. By the way, foolproof protection is implemented here; if you use the power supply as a charger and accidentally reverse the polarity of the connection, the diode will open, burning the fuse.


Now about the scheme. This is a very popular variation based on three op-amps, the Chinese are also churning them out en masse, in this source it is the Chinese board that is used, but with major changes.


Here is the diagram that I got, with what was changed highlighted in red.

Let's start with the diode bridge. The bridge is full-wave, made on 4 powerful dual Schottky diodes type SBL4030, 40 volts 30 amperes, diodes in TO-247 package.

There are two diodes in one case, I paralleled them, and as a result I got a bridge on which there is a very small voltage drop, and therefore losses, at maximum currents, “that bridge is barely warm, but despite this the diodes are installed on an aluminum heat sink, represented by a massive plate The diodes are isolated from the radiator with a mica gasket.


A separate board was created for this node.

Next is the power part. The original circuit is only 3 Amperes, but a modified one can easily give out 8 Amps in this situation. There are already two keys. These are powerful composite transistors 2SD2083 with a collector current of 25 Amps. It would be appropriate to replace it with KT827, they are cooler.
The keys are essentially parallelized; in the emitter circuit there are equalizing resistors of 0.05 Ohm 10 watts, or rather, for each transistor, 2 resistors of 5 watts 0.1 Ohm are used in parallel.


Both keys are installed on a massive radiator, their substrates are isolated from the radiator; this can not be done, since the collectors are common, but the radiator is screwed to the body, and any short circuit can have disastrous consequences.


The smoothing capacitors after the rectifier have a total capacitance of about 13,000 µF and are connected in parallel.
The current shunt and the specified capacitors are located on the same printed circuit board.

A fixed resistor was added on top (in the diagram) of the variable resistor responsible for regulating the voltage. The fact is that when power is supplied (say 20 Volts) from the transformer, we get some drop on the diode rectifier, but then the capacitors are charged to the amplitude value (about 28 Volts), that is, at the output of the power supply the maximum voltage will be greater than the voltage supplied transformer. Therefore, when connecting a load to the output of the block, there will be a large drawdown, this is unpleasant. The task of the previously indicated resistor is to limit the voltage to 20 Volts, that is, even if you turn the variable to maximum, it is impossible to set more than 20 Volts at the output.
The transformer is a converted TS-180, provides an alternating voltage of about 22 volts and a current of at least 8 A, there are 9 and 15 volt taps for the switching circuit. Unfortunately, there was no normal winding wire at hand, so new windings were wound with mounting, stranded copper wire 2.5 sq. mm. Such a wire has thick insulation, so it was impossible to wind the winding to a voltage of more than 20-22V (this takes into account the fact that I left the original filament windings at 6.8V, and connected the new one in parallel with them).