A detailed breakdown of how the sharpening tools work in Photoshop. Background blur tools in Photoshop
Improving pictures, giving them sharpness and clarity, contrast of shades - the main concern of the Photographer. But in some cases it is required not to sharpen the photo, but rather to blur it.
The basic principle of the blur tools is to blend and smooth the borders between shades. These tools are called filters and can be found in the menu "Filter - Blur".

Here we see several filters. Let's briefly talk about the most commonly used ones.

This filter is used most often in work. For blurring, the principle of Gaussian curves is used here. The filter settings are extremely simple: the strength of the effect is controlled by the slider with the name "Radius".

Blur and Blur +

These filters do not have any settings and are applied immediately after selecting the corresponding menu item. The difference between them is only in the strength of the impact on the image or layer. "Blur +" blurs harder.

Radial blur simulates, depending on the settings, either "curling", as when rotating the camera, or "expansion".

Twisting:

Result:


Result:

These are the basic blur filters in Photoshop. The rest of the instruments are derivatives and are used in specific situations.
Practice
In practice, we use two filters - and .
The original image is like this:

Using Radial Blur
- Create two copies of the background layer ( CTRL + J twice).

- Next, go to the menu "Filter - Blur" and looking for .

Method "Linear", quality "Best", the number is the maximum.

Click OK and look at the result. In most cases, a single application of the filter is not enough. To enhance the effect, press CTRL + F repeating the action of the filter.

- Create a mask for the top layer.

- Then select the brush.

The shape is soft round.

Black color.

- Go to the top layer mask and paint over the effect with a black brush on areas not related to the background.

- As you can see, the radiance effect is not very well pronounced. Let's add some sun rays. To do this, select the tool "Free figure"

and in the settings we are looking for a shape of the same shape as in the screenshot.

- Draw a shape.

- Next, you need to change the color of the resulting shape to light yellow. Double click on the layer thumbnail and select the desired color in the window that opens.

- Blurring the shape Radial Blur repeatedly. Note that the program will offer to rasterize the layer before applying the filter. You must agree by clicking OK in the dialog box.

The result should look something like this:

- The excess parts of the figure must be removed. Remaining on the layer with the shape, hold down the key CTRL and click on the mask of the bottom layer. With this action, we will load the mask into the selected area.

- Then click on the mask icon. On top layer a mask will be automatically created and filled with black in the selected area.

Now we need to remove the effect from the child.
We're done with the radial blur, now let's move on to the Gaussian blur.
Using Gaussian Blur
- Create an imprint of the layers ( CTRL + SHIFT + ALT + E).

- Make a copy and go to the menu "Filter - Blur - Gaussian Blur".

- Blur the layer hard enough with a large radius.

- After pressing the button OK, change the blending mode for the top layer to "Overlapping".

- In this case, the effect turned out to be too pronounced, and it must be weakened. Create a mask for this layer, take a brush with the same settings (soft round, black). Set the opacity of the brush to 30-40%
.

- We brush over the face and arms of our little model.

- Bend the curve up.

- Then go to the layers palette and click on the Curves layer mask.

- Press the key D on the keyboard, resetting the colors, and press the key combination CTRL + DEL filling the mask with black. The lightening effect will disappear from the entire image.
- Take a soft round brush again, this time white and opacity 30-40%
... With a brush, go over the face and arms of the model, lightening these areas. Don't overdo it.

Let's improve the composition a bit by brightening the child's face. How to create an adjustment layer "Curves".

Let's take a look at the result of our today's tutorial:

Thus, we have explored two main blur filters - and .
13.08.2016 27.01.2018
Detailed lesson, instructions on blurring in Photoshop. You will learn how to create a blur of any objects and images.
Group filters blur exists in the program Adobe photoshop a long time ago, from the earliest versions, the group includes many options for blurring - Gaussian Blur, Motion Blur, Surface Blur and many others, this group of filters is located in the menu Filter Blur (Filter-Blur). Starting with version CS6, new types of blur have appeared, with a wider range of settings, you can open a subgroup with new filters by going to the menu Blur Gallery Filter (Filter-Gallery Blur).
In the lesson, we will get acquainted with the most popular type of blur and, using an example, we will learn how to make a blur in Photoshop.
Gaussian Blur gives a blur effect throughout the image, you can go to this filter through the menu Filter-Blur-Gaussian Blur (Filter-Blur-Gaussian Blur).
Let's open the photo with the girl (https://cloud.mail.ru/public/C9Q6/jDda1wyej), the background and the girl in this image have the same degree of clarity, which is why the girl is lost in the background. According to one of the rules of aerial perspective, the main object should be clearer and more contrasting, then our eye will immediately catch where the main things are in the composition, and where are the secondary ones. File-Open (File-Open):

Duplicate the layer (Ctrl + J) or double-click on the layer in Layers Panel - Duplicate Layer. Opening the filter Gaussian Blur, Filter-Blur-Gaussian Blur (Filter-Blur-Gaussian Blur). The following window will open:
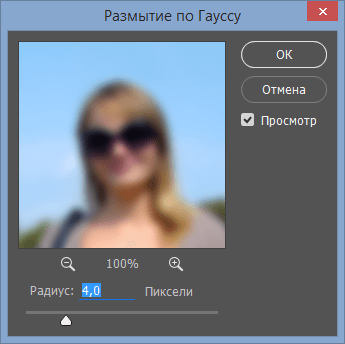
Radius blur directly depends on the size and resolution of the image, as well as on the desired result. Let's choose a radius in 5 pixels- so the effect will become clearly visible. For this picture, this value of the blur radius is a bit too much, but we chose it in order to make the difference more obvious.

Add to the blur layer layer mask, click on the icon layer masks v layer panels:

We choose Brush tool (Brush), tool hotkey V(in English layout):
Colour foreground - black:
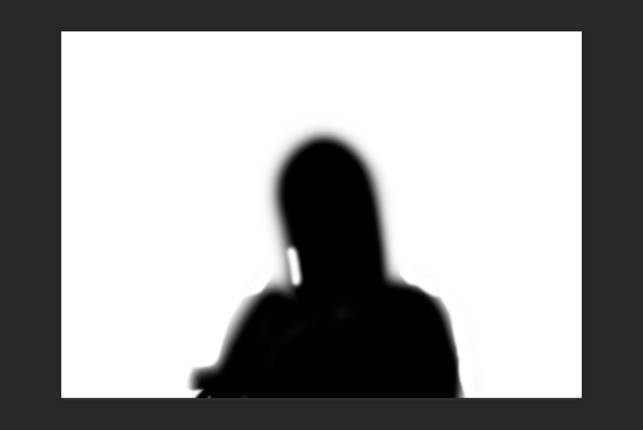
Making sure that mask layer active, erase black brush on layer mask blur with a girl. If you accidentally erased the excess, we change Colour tassels on White and return the deleted fragment. Black color on layer mask- erases, White- restores the visibility of the image.
This is how it looks mask layer after processing black brush:
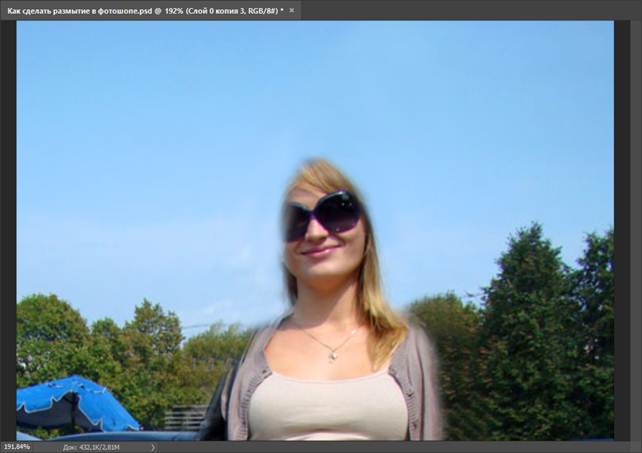
And the picture as a whole:

Usage masks layer has one negative point - a halo appears at the junction of the main object and the background, this can be easily avoided if before blurring with tool Stamp (Clone stamp tool) , function Content-Aware Fill or any other convenient tool for you to clone the background at the junction with the object, inside the object itself. In the case of our photo, it looks like this (forgive me, this lovely girl!):
Briefly about work instrument Stamp (Clone stamp tool).
Tool shortcut key - S. Using the tool, you can clone parts of the image to other areas. In order to select a sample for transfer, click left keymice with a clamped keyAlt then let go Alt and move a piece of the selected image to the desired area, click again left mouse button- and the piece "takes root" in a new place.
Again, at the junction of the object and the background, we take a sample from the background and transfer it to the object, and so on along the entire outline of the main object.
And here's what the image looks like if you blur not the original layer, but the processed along the contour the Clone Stamp Tool and then erase by layer mask blur from the girl:

There is no halo, the boundaries are clear, the emphasis is on the girl, the background does not distract attention.
So we learned how to blur in Photoshop.
Let's take a closer look at the retouching tools: Blur, Sharpen, Smudge.
Under retouched
Blur(blur) Sharpen(sharpness), Smudge(lubrication). To work with these tools, you need to move the mouse pointer to a place on the image,
which requires correction, and by pressing the left mouse button, make changes. The radius of the tool depends on the selected brush size in the Options palette. All three tools have the ability to customize the blend mode ( Mode) and impact forces ( Strength).
Tools group Eraser (Eraser). are designed to delete the selected fragment of the image. There are three types of rubber bands in Photoshop: Eraser(elastic), Background eraser(elastic for the background), Magic eraser("magic" elastic band).
Retouching tools: Blur, Sharpen, Smudge.
Under retouched means editing an image in order to improve (or change) its quality, for example, sharpening, decreasing sharpness (softening), and so on. There is a group of tools for this: Blur(blur) Sharpen(sharpness), Smudge(lubrication). To work with these tools, you need to move the mouse pointer to the place on the image that requires correction, and by pressing the left mouse button, make changes. The radius of the tool depends on the selected brush size in the Options palette. All three tools have the ability to customize the blend mode ( Mode) and impact forces ( Strength).
- Blur- used to soften sharp edges in an image.
- Sharpen- on the contrary, it increases the contrast of the borders, and, consequently, the sharpness of the image. You need to be careful with this tool - if you apply it several times in a row to one area of the image, just colored dots may appear that do not correspond to the content of the image.
- Smudge (smudge)- an interesting tool that simulates the effect of smearing wet paint with a finger, it captures color and, as it moves, mixes it with the surrounding colors. He has an option in the settings Finger painting(drawing with a finger), when enabled, a foreground color is added to the image at the location of the tool. It is absent in the Blur and Sharpen tools.


The figure shows the action of the Smudge tool. When processing the upper part of the image, the Finger Painting option was enabled.
Comment. Sharpen and Blur tools do not work with black and white or indexed images.
Eraser toolset.
 These tools are designed to delete the selected area of the image. There are three types of rubber bands in Photoshop: Eraser(elastic), Background eraser(elastic for the background), Magic eraser("magic" elastic band).
- Eraser... A simple eraser is designed to remove part of an image regardless of color. In its settings there are: options Mode, Opacity, Flow, airbrush mode - see the section of the first lesson "Brush"; option Erase to history- when this checkbox is enabled, the eraser restores the newly erased image. You can also choose the shape of the eraser: Brush - a brush, Pencil - a brush with hard edges, Block - a square.
- Magic eraser... "Magic" eraser removes part of the image of the same color or similar colors, depending on the settings. You have already met all the settings previously for the PaintBucket tool. (The principle of operation is similar to the PaintBucket fill tool, only deletes instead of filling.)
- Background eraser... Background eraser - removes everything, but leaves the background set by the foreground color when the option is enabled Protect Foreground Color... In settings Limits(Borders) you can choose the way the elastic will work:
- Discontiguous - removes everything
- Contiguous - removes adjacent similar colors and shades,
- Find Edges - leaves intact parts of the image with contrasting colors (a sharp transition from one color to another).
Option Sampling- sets the method for choosing a color.
Photos taken with most digital cameras sometimes lack sharpness. This even happens with high-end camera shots that have a high-resolution display. A clear understanding of the sharpening process and how to apply it in Photoshop is essential to create perfect focus and sharp images.
What is digital sharpening?
Sharpening is the process of enhancing the outline of an object. Sharpening a digital image means sharpening the edges of an image or objects. The sharpening process is done by enhancing the contrast between light and dark pixels. This edge contrast is defined within adjacent pixels or an adjacent group of pixels. Edge contrast is also known as local contrast or clarity. Sharpening sharpens edges by increasing contrast and creates sharper transitions between light and dark pixels, showing the beginning and end of an object.
Why is sharpness needed?
Every photograph needs sharpness to bring out details, otherwise they can get lost when transferring an image from a camera to a computer or when printing. Sharpness works by increasing the contrast at the edges of the image to improve focus and detail. It doesn't matter if you are getting images from a digital camera or from a scanner, sharpening will make them more expressive.
The negative side of sharpness
Sharpness cannot compensate for poor focus. Also, no amount of sharpness will make up for the depth of the image. The best way to get a sharp photo is to take such a photo. Nothing can replace an optically sharp image.
Another thing is applying filters that change pixels. Note that sharpness cannot correct a very blurry image. Be careful, over-sharpening will create a very rough texture in the image, as well as jagged edges and shadows. Sharpening can also add damaged pixels or artifacts to an image, and color fringing or halo.

Before you start
I left links to images at the beginning of the tutorial if you want to follow my directions exactly. I advise you to use your own images to get a solid understanding of the principles of sharpening. This lesson is more exploration than step-by-step instruction... So, don't focus on the process or steps to achieve a certain effect, think more about why we are using sharpness. How can we use the same principles in other projects? What are the benefits?
Common methods of using sharpness
We will always start by duplicating the background layer to ensure that the image is non-destructive. Later, if we don't like the result, we can delete this layer, create a copy again and start over. After sharpening, you can control the sharpening effect of the layer by adding a pixel mask. Alternatively, you can adjust the sharpening effect using the layer's opacity or blending modes.
Sharpen with Smart Filters
You can sharpen without duplicating the background layer. Open the photo and right on the background layer go to the Filter? Convert For Smart Filters and click OK. Photoshop will automatically convert the layer to a Smart Object that you can apply a Smart Filter to.
The smart object will retain the original image content with all its original characteristics, allowing harmless editing of the layer. To expand or collapse the Smart Filter menu, click on the small black triangle next to the Smart Filter icon that appears on the right side of the Smart Object layer. There you will see a mask that is connected to the filter. Use it to selectively mask Smart Filter effects. It works in the same way as a regular pixel mask on a layer.
The advantage of Smart Filters is that you don't need to use a separate layer mask. In this tutorial, we'll take a look at the traditional approach of duplicating a background layer and then applying a filter to it. But don't be afraid to use Smart Objects and then add Smart Filters to them.

Sharpening tools in Photoshop
Let's take a look at some of the sharpening tools available in Photoshop.
Sharpen Tool
The Sharpen Tool is located in the toolbox.
Sharpness filters
There are several sharpening filters in the filters menu: Smart Sharpen, Unsharp Mask, Sharpen, Sharpen More and Sharpen Edges.
Another powerful filter that is used for sharpening is High Pass and is in the Others category.

Sharpen Tool
Sharpening tools increase the contrast around the edges of an object, thereby increasing the overall sharpness of the image. The more you paint over an area of the image with this tool, the sharper it will be. The main advantage of this tool is that you can use it on any part of the image just like the Brush Tool.
Using the Sharpen Tool
Open the face image in Photoshop. Right click on the background layer and choose Duplicate layer. Name the duplicate "Sharpen" and select the Sharpen Tool.
In the property bar at the top of the screen, select a soft brush and change the blending mode of this tool to Luminosity. Check the box next to Protect Detail and Sample All Layers to sharpen details and reduce pixel artifacts. Now drag the Sharpen Tool over the details you want to sharpen.

For this image we are using the Sharpen Tool at 100% opacity, but ideally at first use a low opacity and gradually increase it.
Since the Sharpen Tool creates a halo effect (halo) or colored fringes around the edges, change its mode to Luminosity. This mode will only use the luminance information and will skip the color information.
The screenshot below shows the fringe after using the Sharpen Tool in Normal mode - it was reduced when using the Luminosity mode.

Sharpen Filters
Sharpness filters improve the focus of blurry images by increasing the contrast of adjacent pixels. Let's take a look at each of these filters separately.

Preparation before applying filters
Never apply filters directly to the image itself. Always duplicate the image by copying the background layer and apply the filter to the created copy. The advantage of this method is that in the future we can experiment with different blending modes, as well as add a mask to the duplicate layer to control the sharpening effect.

Using the Sharpen and Sharpen More filters
The Sharpen filter enhances sharpness by enhancing the contrast of adjacent pixels. The Sharpen More filter performs the same operation but is more powerful. Both of these filters have no parameters and are executed immediately.
Applying Sharpen and Sharpen More filters
Select the layer to sharpen and go to the Filter? Sharpen? Sharpen / Sharpen More. To intensify the effect of the filter, press the keyboard shortcut Ctrl + F.

Sharpen Edges filter
This filter finds areas in an image where significant color changes are observed or sharpens them. It only works with edges and keeps the overall smoothness of the image. The disadvantage of this filter is that it works in automatic mode and it cannot be customized.
Using the Sharpen Edges filter
Select the layer to which you will apply the filter and go to the Filter? Sharpen? Sharpen Edges.

Smart Sharpen filter
The Smart Sharpen filter uses the same algorithm as the Unsharp Mask filter. It allows you to remove the previously added blur from the Gaussian Blur, Lens Blur and Motion Blur filters. You can adjust the sharpness settings or control the amount of sharpness in the dark and light areas.
Using the Smart Sharpen Filter
Open the fish image in Photoshop and duplicate the background layer. Go to the Filter? Sharpen? Smart Sharpen. Enable the Basic option if it is not active and set the Amount parameter to 300%.
Set the Radius to 3 pixels. Then, from the Remove drop-down list, select Lens Blur to remove the blur of the camera lens. Gaussian Blur will give the same result as Unsharp Mask, but Lens Blur will give better detail.
Turn on the More Accurate parameter - it will give a more accurate sharpening effect. In fact, the More Accurate parameter is more or less similar to the Unsharp Mask filter.

Understanding Smart Sharpen Filter Settings
In the parameters of this filter, you can adjust the sharpness of the dark and light areas using the Shadow and Highlight tabs. But first, you need to enable the Advanced option at the top of the window. There are three common parameters for the Shadow and Highlight tabs: Fade Amount, Tonal Width, and Radius.
Fade amount
The Fade Amount parameter reduces the amount of sharpness separately in shadows and highlights. A large Amount setting tends to reduce the amount of finer detail in highlights and shadows that can be protected with Fade Amount.
Tonal Width
This parameter determines which tonal value will depend on the Fade Amount parameter. Smaller values will only affect light lights, while large values will affect a wide range of lights.
Radius
The Radius parameter determines the size of the shadow and light. Basically, you define the number of data samples that will be used in determining the Tonal Width.
Sharpness without shadow correction. Sharpness in the form of noise appears in the dark areas of the image.

Sharpness with shadow correction. Use the Fade Amount parameter to remove noise in dark areas.

Sharpness without Highlights setting. Notice how the noise is amplified in the lighter areas.

Sharpness with Highlights setting. Noise can be removed from light areas by adjusting the Fade Amount parameter.

Unsharp Mask filter
The Unsharp Mask filter allows you to adjust the sharpening. It finds pixels that are different from others and then increases the contrast of the surrounding pixels. Basically, this is done by finding areas of high contrast between pixels and then highlighting the difference between them.
Using the Unsharp Mask filter
Open the face image in Photoshop and go to the Filter menu? Sharpen? Unsharp Mask). In the window that opens, set the value of the Amount parameter to 50% and the Radius parameter to 1.0

Radius
Use the Radius parameter to define the width of the area around the found border. A small value for the radius means that sharpness will be applied directly near the edges. A larger radius of sharpness will affect the area far from the edge. For high-resolution images, we recommend using a radius value between 1 and 3.

Amount
Adjusts the degree of contrast enhancement. To print high-resolution images, the effect value must be between 150% and 200%.

Threshold
Sets the minimum value for the brightness and color levels that the filter defines as a border. For example, a threshold of level 2 affects all pixels that have tonal values other than 2. That is, pixels with a tonal value of 10 and 12 will be affected, but pixels with a value of 10 and 11 will not.
The default threshold (0) sharpens all pixels in the image. In addition, you need to specify the radius of the area with which each pixel will be compared. The larger the radius, the greater the effects on the edges. In other words, if a pixel is darker than the areas that surround it, then the adjacent areas of the image become lighter.

Conclusions:
Sharpening an image creates a halo (halo or fringe) around the edges. The effects after applying the Unsharp Mask filter are more pronounced on screen than when printed at high resolution. If the image is to be sent for printing, you will have to determine the most suitable parameters empirically.
Sharpening control
- Sharpen only a copy of the background layer of the image so that if necessary, you can remove it and start over.
- If you need to reduce noise in the image, do it before applying the sharpness filters.
- Add sharpness to the image gradually. Use a small value for the Amount parameter each time.
- The value of the Amount parameter varies depending on the output values of the image.
- Use a pixel mask to adjust the sharpness.

Case Study 1: Sharpening an Image Using a Luma Mask
This method involves choosing the channel with the best contrast. Since each channel contains only grayscale information, we can eliminate unwanted color fringing or halo effects.
Step 1
Open the banana image and in the Channels palette select a channel with good contrast. Finding a channel with good contrast is important to get a good luma mask. In the banana image, the red channel shows good contrast between the banana and the background.

Step 2
Duplicate the Red channel by dragging it onto the Create Channel icon at the bottom of the Channels palette. Alternatively, you can right-click on the channel and select Duplicate Channel. Hold down the Ctrl key and click on the red channel to select it.

Step 3
Go back to the Layers Palette, duplicate the background layer and name it "Sharpen". With active selection of the red channel, enter the Select? Inverse or press Ctrl + Shift + I to invert the selection. Then go to the "Sharpen" layer and add a mask to it by clicking on the icon at the bottom of the layers palette to create a mask based on this selection.

Step 4
Go back to the layer (click on the layer thumbnail next to the layer mask), go to the Filter? Sharpen? Unsharp Mask and in the window that opens, set the values as in the screenshot. If necessary, you can use the Levels correction (Ctrl + L) on the copy of the red channel to increase the contrast. The sharpened image can be hidden by painting over it on the mask with a soft black brush.

Case Study 2: High Pass Filter
First of all, let's find out how this filter works. It removes low-frequency image details while preserving edges and smoothing other areas in the middle. grey colour... After applying the filter, we'll change the layer's blend mode to Linear Light to only use the contrast information. This sharpening method is harmless. Combined with a pixel mask, you can adjust the sharpening effect.
Step 1
Open the face image in Photoshop and duplicate the background layer (Ctrl + J). Rename the copy of the background layer to "Sharpen" and change the blending mode to Linear Light. This Blending Mode will darken or lighten colors by decreasing or increasing brightness depending on dark, bright, or composite lighting. The purpose of this blend mode is to sharpen the edges of the image, making them more visible.

Step 2
Apply Filter? Other? High Pass. Experiment with the sharpness filter radius. At a low value, only the edges will be sharpened.

Step 3
Reduce the opacity of the layer if the sharpening effect is too strong. If you want to make the sharpening effect stronger, duplicate the layer to which it was applied. To control the sharpening effect, add a pixel mask to the filter layer and paint over the areas where this effect needs to be weakened with a soft black brush.

Using smart filters
For those who use smart filters, working with the High Pass filter looks a little different.
Step 1
Open the face image in Photoshop, select the desired layer and convert it to a Smart Object from the Filter menu? Convert For Smart Filters. Then apply the Filter? Other? High Pass.

Step 2
We need to change the Blend Mode to Linear Light and we haven't duplicated the background layer. On the right side of Layer 0, click on the small arrow to reveal a panel with a High Pass filter hidden in it. There is a small slider icon next to the filter, double-clicking on it will open the Blending Option (High Pass) window.
In the window that opens, change the blending mode to Linear Light, and if you double-click on the name of the applied filter (High Pass), a window will open in which you can change its parameters. To control the effect of the filter, use its mask. It works the same as a layer pixel mask.

Conclusion
You might be interested in this question: which of the considered ways to add sharpness to an image is the best? Unfortunately, there is no better way. The best way depends on the complexity of the project, the level of skill of the user and the amount of time he is willing to spend on work. The most common method is to apply the Unsharp Mask filter in combination with the Luminosity blend mode. It offers great flexibility and ease of use.
Share your lesson
legal information
Translated from psd.fanextra.com, the author of the translation is listed at the beginning of the lesson.
Photos taken with most digital cameras tend to require some degree of sharpness correction, even if it comes about a professional camera with a highly sensitive sensor. Therefore, a clear understanding of the sharpening process and its application in Photoshop is paramount to create perfectly focused, crisp images.What is sharpening for digital photos?
Roughly speaking, sharpening is a technique that allows you to emphasize or emphasize the outlines of objects, lines and borders to make them more pronounced and visible. The process is carried out by enhancing the contrast between pixels or, more precisely, between light and dark pixels. Contrast change at borders occurs between adjacent pixels or groups of adjacent pixels. Borderline contrast is also known as local contrast, or simply clarity. When sharpened, edges are exaggeratedly emphasized by enhancing contrast and thus creating very crisp edges with sharp transitions between light and dark that tell us where the subject begins and ends.Why sharpen?
Of course, every photograph needs sharpening to some extent in order to bring out details that are somehow lost when transferred from a camera to a computer and printed. Sharpness is enhanced by increasing the contrast around the lines and edges of the image, while good contrast adds detail to help focus the image. Sharpening sharpens edges and lines in an image. Regardless of the origin, be it a digital camera or a scanner, most images can only benefit from sharpening.The dark side of sharpening
Sharpening does not compensate for poor focusing, and no matter how hard it does, it does not make up for depth of field. The best way to get a clear photo is to take a sharp shot initially. Nothing can replace an optically clear image. The next point is the application of filters that perform destructive correction, irreversibly changing the pixels. But on the other hand, an image that is not well focused will be blurry if you do not take appropriate measures to improve sharpness. Keep in mind that sharpness cannot correct a very blurry image. When striving for perfect clarity, be careful as over-sharpening distorts images with jagged, jagged edges and shadows. In addition, sharpening too much can produce damaged pixels or "artifacts" as well as color fringing or halo effects.
Before you start
At the beginning of the tutorial, I provided links to images so that you can repeat everything after me, but I would recommend using your own images to get a clear understanding of the principles of sharpening and how to apply them. And remember that this lesson is more an exploration than just a learning process or step by step guide... Therefore, you do not need to unnecessarily bother at the process or at specific stages in order to certainly achieve a certain effect. It would be more reasonable to ask such questions: "Why are we sharpening? How can we use the same principles in some other projects? What are the advantages of this or that method?" Now let's get started!General scheme of work
We will always start by duplicating the background layer. Thus, we insure ourselves against destructive consequences. Later, if the result does not suit us, you can always delete this layer and start over. Having completed the sharpening procedure, we can further adjust it on the current layer by adding a layer mask to it, which is visible in the screenshot below. In addition, you can adjust the sharpness effect using the layer's opacity or blend mode settings.Let's take a look at this process:
Sharpening with Smart Filters
Without duplicating the background layer, apply the Smart Filter directly to it. Select the layer, go to Filter> Convert For Smart Filters and click OK. Photoshop will automatically convert a regular layer to a smart layer and apply a Smart filter to it. Smart Objects retain the original content of an image with all its original characteristics, allowing you to perform gentle layer editing. To expand or collapse smart filters in the layers palette, click on the triangle next to the smart filter icon located on the right of the smart layer. Expanding the smart object, you will see that a so-called filter mask is already connected to this layer, which can be used to selectively adjust the effects of smart filters by painting on it with a black brush. The advantage of Smart Filters is that you don't need to use a separate mask layer to adjust the sharpening effect on it later.However, in this lesson, in order to convey the essence of the topic under study to the vast majority of users, we will use the traditional approach, which involves copying the background layer and applying a filter to the duplicate. But you can go by creating a smart object and then applying smart filters. 
Photoshop's arsenal of sharpening tools
Let's take a look at some of the sharpening tools available to us in Photoshop.Sharpen Tool
The Sharpen Tool itself is located on the general toolbar.
Sharpen Filters:
In the filter menu there is a sharpen submenu, in which the following sharpening filters are available to us: Sharpen, Sharpen Edges, Sharpen More, Smart Sharpen ) and Unsharp Mask.
Another powerful filter used for sharpening, but unknown for its abilities in this regard, is the High Pass filter (Color contrast), hidden in a group of filters with an undefined name Others (Other). 
Sharpen Tool
The Sharpness tool enhances contrast along lines to emphasize undefined elements. The more you hover the cursor over the picture, the more the sharpening effect appears. The main advantage of this tool is the ability to use it locally, like the Brush Tool.Using the Sharpen tool
Open in Photoshop image faces. Right click on the background layer and choose Duplicate layer. Name the copy layer "Sharpen". Turn on the Sharpen tool on the toolbar. Select a soft brush in the settings panel, change its blending mode to Luminosity and check the Protect Detail checkbox to emphasize details and minimize mosaic artifacts. Now move or hold the cursor over the area of the image where you want to sharpen.
In our example we use the Sharpen tool with 100% opacity, but ideally it should be lowered and sharpened gradually. The Sharpness tool tends to create halo or colored fringes around lines and borders, and the Luminosity blend mode is applied to avoid this. When blending in Luminosity mode, only the luminance data of the mixed colors is used, and color information is not taken into account.
The screenshot below on the left shows the Color Fringing visible in normal blending mode, and on the right you can see the result in Luminosity mode. 
Sharpness filter group
Sharpness filters focus blurry images by enhancing the contrast between adjacent pixels. Let's take a look at each of them.
Preparing filters for use
Never apply filters directly to the image itself. Always duplicate the image by copying the background layer and apply the filter to the newly created duplicate. The advantage of using a copy is obvious, since later we can experiment with different blending modes on it, and also apply a mask to adjust the effect if necessary.
Sharpen and Sharpen More filters
The "Sharpen" filter focuses the selection and improves its clarity. The "Sharpen More" filter, by increasing the sharpness, creates a stronger effect than "Sharpen". Both filters are single-acting and have no settings to further adjust the effect.Applying Sharpen and Sharpen More Filters
Select the layer, then go to Filter> Sharpen> Sharpen or Sharpen More. To intensify the effects, apply the filters again by pressing Ctrl + F. 
Sharpen Edges filter
The Sharpen Edges filter finds areas of color contrasts in the image and sharpens them. As the name suggests (sharpness at the edges), this filter only sharpens the edges, leaving the overall image smooth. There is the same drawback here as in the previous two filters, where we cannot influence the strength of the effects due to the lack of a settings function.Using the Sharpen Edges filter
Select the layer, then go to Filter> Sharpen> Sharpen Edges. To increase the effect, apply the filter again by pressing Ctrl + F. 
Smart Sharpen filter
The Smart Sharpen filter, using the same algorithms as the Unsharp Mask filter, allows you to remove (remove / delete list) the effects of previously applied blur filters Gaussian Blur, Lens Blur and Motion Blur You can adjust the sharpening algorithm or correct shadows and highlights separately.Using the Smart Sharpen filter at work
Open the fish image in Photoshop and duplicate the background layer. Then go to Filter> Sharpen> Smart Sharpen. Select the basic mode, if not selected, increase the amount to 300% and set the radius to 3 px. Then expand the Remove drop-down list and select Lens Blur to remove blur caused by camera lens movement. Choosing the Gaussian Blur algorithm will give a similar effect to the Unsharp Mask filter, the Lens Blur option is most effective for images with a lot of detail. For a slower but sharper effect, check the More Accurate line, and without this option, the Smart Sharpen Filter will essentially behave like the Unsharp Mask filter. 
Features of Smart Sharpen filter settings
By going to the advanced settings, you can adjust the sharpening effect separately for light and dark areas using the Shadow and Highlight tabs, but first select Advanced under the Preview checkbox. Highlights and shadows are controlled by three general parameters called Fade Amount, Tonal Width, and Radius.
Fade Amount
The Decrease Effect option will by definition attenuate the sharpened effect separately in shadows and highlights. The stronger the sharpness, the more the loss in the amount of fine details in the shadows and highlights, from which the Fade Amount setting can prevent.
Tonal Width
This parameter specifies, in percent, the amount of the tone range that will be affected by the Fade Amount adjustment. Lower values will affect only the lightest areas, while higher values will cause changes in a wide range of shadows and highlights.
Radius
Radius sets the size of Shadows / Highlights. It essentially defines the amount of data sampled to be used in determining the tonal width.
The screenshot below shows the result of sharpening without shadow correction, which led to the appearance of grains in the dark areas. 
And here the sharpness is increased with shadow correction. The Fade Amount setting removed grains in dark areas. 
Sharpness without highlight correction. Note the graininess in highlights caused by sharpening. 
Sharpness with highlight correction. As a result of applying the Fade Amount setting, the grains disappeared from the highlights.