DIY deep metal detector. How to make a metal detector with your own hands: detailed instructions and diagrams The most powerful with metal discrimination
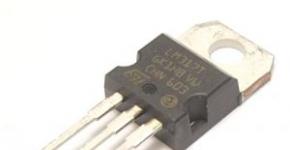
I can say without a doubt that this is the simplest metal detector I have ever seen. It is based on just one TDA0161 chip. You won't need to program anything - just assemble it and that's it. Another great difference is that it does not make any sounds during operation, unlike a metal detector based on the NE555 chip, which initially beeps unpleasantly and you have to guess the metal found by its tone.
In this circuit, the buzzer starts beeping only when it detects metal. The TDA0161 chip is a specialized industrial version for induction sensors. And metal detectors for production are mainly built on it, giving a signal when metal approaches the induction sensor.
You can purchase such a microcircuit at -
It is not expensive and is quite accessible to everyone.
Here is a diagram of a simple metal detector

Metal detector characteristics
- Microcircuit power supply voltage: from 3.5 to 15V
- Generator frequency: 8-10 kHz
- Current consumption: 8-12 mA in alarm mode. In search state approximately 1 mA.
- Operating temperature: -55 to +100 degrees Celsius
An old cell phone battery works well for power supply.
Coil: 140-150 turns. The diameter of the coil is 5-6 cm. Can be converted to a coil of larger diameter.

The sensitivity will depend directly on the size of the search coil.
In the scheme I use both light and sound signaling. You can choose one if you want. Buzzer with internal generator.
Thanks to this simple design, you can make a pocket metal detector or a large metal detector, depending on what you need more.
After assembly, the metal detector works immediately and does not require any adjustments, except for setting the response threshold with a variable resistor. Well, this is standard procedure for a metal detector.
So, friends, collect the things you need and, as they say, they will come in handy around the house. For example, to search for electrical wiring in a wall, even nails in a log...
You can buy it for about 100-300 dollars. The price of metal detectors is strongly related to their detection depth; not every metal detector can “see” coins at a depth of 15 cm. In addition, the cost of a metal detector is also greatly affected by the presence of a metal type recognizer and the type of interface; fashionable metal detectors are sometimes equipped with a display for convenient operation .
This article will look at an example of assembling a powerful metal detector called Pirat with your own hands. The device is capable of catching coins underground at a depth of 20 cm. As for large objects, it is quite possible to work at a depth of 150 cm.

Video of working with a metal detector:
This metal detector received this name due to the fact that it is pulsed, this is the designation of its first two letters (PI-pulse). Well, RA-T is consonant with the word radioskot - this is the name of the developers’ site, where the homemade product was posted. According to the author, the Pirate is assembled very simply and quickly; even basic skills in working with electronics are enough for this.
The disadvantage of such a device is that it does not have a discriminator, that is, it cannot recognize non-ferrous metals. So it will not be possible to work with it in areas contaminated with various types of metals.
Materials and tools for assembly:
- microcircuit KR1006VI1 (or its foreign analogue NE555) - the transmitting node is built on it;
- transistor IRF740;
- K157UD2 microcircuit and BC547 transistor (the receiving unit is assembled on them);
- wire PEV 0.5 (for winding the coil);
- NPN type transistors;
- materials for creating the body and so on;
- electrical tape;
- soldering iron, wires, other tools.
The remaining radio components can be seen in the diagram.


You also need to find a suitable plastic box for mounting the electronic circuit. You will also need a plastic pipe to create a rod on which the coil is attached.
Metal detector assembly process:
Step one. Creating a printed circuit board
The most complex part of the device is, of course, the electronics, so it makes sense to start there. First of all, you need to make a printed circuit board. There are several board options, depending on the radio elements used. There is a board for NE555, and there is a board with transistors. All the necessary files to create the board are included in the article. You can also find other board options on the Internet.
Step two. Installing electronic elements on the board
Now the board needs to be soldered, all electronic elements are installed exactly as in the diagram. In the picture on the left you can see the capacitors. These capacitors are film capacitors and have high thermal stability. Thanks to this, the metal detector will work more stably. This is especially true if you use a metal detector in the fall, when it is sometimes quite cold outside.


Step three. Power supply for metal detector
To power the device, you need a source from 9 to 12 V. It is important to note that the device is quite voracious in terms of energy consumption, and this is logical, because it is also powerful. One Krona battery will not last long here; it is recommended to use 2-3 batteries at once, which are connected in parallel. You can also use one powerful battery (best rechargeable).

Step four. Assembling a coil for a metal detector
Due to the fact that this is a pulse metal detector, the accuracy of the coil assembly is not so important here. The optimal diameter of the mandrel is 1900-200 mm; a total of 25 turns need to be wound. After the coil is wound, it needs to be thoroughly wrapped on top with electrical tape for insulation. To increase the detection depth of the coil, you need to wind it on a mandrel with a diameter of about 260-270 mm, and reduce the number of turns to 21-22. In this case, a wire with a diameter of 0.5 mm is used.

After the coil is wound, it must be installed on a rigid body; there should be no metal on it. Here you need to think a little and look for any suitable housing. It is needed to protect the coil from shock while working with the device.
The leads from the coil are soldered to a stranded wire with a diameter of about 0.5-0.75 mm. It is best if there are two wires twisted together.
Step five. Setting up a metal detector
When assembling exactly according to the diagram, you do not need to adjust the metal detector; it already has maximum sensitivity. To fine-tune the metal detector, you need to twist the variable resistor R13, you need to achieve rare clicks in the speaker. If this can only be achieved in the extreme positions of the resistor, then it is necessary to change the value of resistor R12. The variable resistor should set the device to normal operation in the middle positions.
The design of a deep metal detector is similar to a regular one, with the exception of some technical details. It also differs in its increased sensitivity to metal objects, which makes it possible to detect them at greater depths compared to a simple metal detector. In addition, there is a selective search function, that is, the ability to find objects of a certain size without reacting to those that do not fit the parameters.
Diagram of a deep metal detector
It is quite simple, despite its apparent complexity. The metal detector consists of two parts – receiving and transmitting. The main device is a high frequency transmitter generator. Two loop antennas, one of which serves as a signal transmitter, the second as a receiver. They must be located strictly at an angle of 90 degrees to each other to prevent the receiving antenna from picking up the generator signals. When a metal object is found, the magnetic field created by the generator is distorted and subsequently picked up by the receiving antenna. In this case, the mass of a metal object is used as a source of radiation, sending the energy produced to the receiving antenna.
Metal detector receiver circuit
The transmitting device includes a thyristor with a power of 0.25 to 1 W and a sound generator with a frequency of 200 Hz. When a metal object is found, the operator hears a sound with a frequency of 200 Hz, the strength of which depends on the size of the object found and the distance to it.
A detector receiver whose oscillation circuit responds to a frequency of 120 kHz, and consists of two diodes. The amplifier can be absolutely any low-frequency generator that can be found in an old radio. An amplifier with transistors in the amount of 5-6 pieces is enough. A transistor is also used as a current amplifier for a pointer instrument, allowing the level of the received signal to be measured. That is, the device contains two types of indicators - visual and acoustic. The operating frequency is adjusted so as not to interfere with the operation of the signal receiver.
 Transmitter circuit
Required parts and tools for assembly
To assemble such a metal detector, you must first prepare a set of necessary parts and tools.
In the case of a pulse metal detector, approximate parts list will look like this:
- Electrolytic capacitors with a voltage of at least 16 V in the following capacities: 2 capacitors with a capacity of 10 μF, one with a capacity of 2200 μF, 2 pcs - 1 μF.
- Ceramic capacitors: 1 piece with a capacity of 1 nf.
- Film capacitors of the lowest voltage value, for example, 63 V - 2 pieces of 100 nf each.
- Resistors of 0.125 W: 1 k - one, 1.6 k - one, 47 k - one, 62 k - two, 100 k - one, 120 k - one, 470 k - one, 2 ohm - one, 100 ohm – one, 470 ohm – one, 150 ohm – one,
- Resistors of 0.25 W: 10 ohms - one.
- Resistors 0.5 W: 390 ohm - one
- Resistors 1 W: 220 ohm - one.
- Variable resistors: 10 k – one, 100 k – one,
- Transistors: BC 557 – one, BC 547 – one, IRF 740 – one,
- Diodes: 1N4148 - two, 1N4007 - one.
- Microcircuits: K157 UD2, NE555.
- Panels for each of them.
 Metal detector parts
From tools When performing work you will need:
- Soldering iron, tin, special solder, other soldering supplies.
- A set of screwdrivers, wire cutters, pliers and other plumbing tools.
- Materials for the production of printed circuit boards.
Metal detector assembly steps
The process of assembling a deep metal detector with your own hands includes the following steps:
At the first stage, it is necessary to assemble the electronic part, namely the control unit.
The step-by-step process looks like this:
- Cutting PCB to the required size.
- Preparing a PCB design and transferring it directly to the board.
- Preparing the etching solution. It contains table salt, electrolyte and hydrogen peroxide.
- Etching the board and drilling technological holes.
- Tinning the board using a soldering iron.
- Next comes the most important stage in assembling the control unit. This is the selection, search and soldering of parts directly onto the board.
- Winding a test coil. There are several options for winding it. The simplest option is to use PEV wire size 0.5 and wind it 25 turns on a suitable frame with a diameter of about 19-20 cm.
The best option would be to solder everything directly, and after the setup is complete, select the necessary connectors and adapters. It is better not to twist, as this has a negative effect on the sensitivity of the device.
The second good option would be to make such a ring from twisted pair wire. You will need about 2.5 - 2.7 m of wire.
To achieve maximum sensitivity, do the following:
- Wind 25 turns of wire.
- Perform a test by cutting small pieces of wire and observing the increase in sensitivity.
- This must be done until sensitivity begins to decrease.
- Count the number of turns, wind the final version of the coil, adding 1-2 turns. Thus, the maximum sensitivity value is achieved.
Upon completion of the main work, the control unit, coil and other parts are fixed in place on the rod. The metal detector can be turned on and checked.
Possible problems during assembly
- The assembled device does not react to metal objects. The cause may be a breakdown of the diodes or transistor. Faulty parts need to be replaced.
- Excessive heating of the transistor. You should install a resistor of lower resistance, reducing it until the heating stops.
Assembly of this type of metal detectors is not too difficult, provided all rules and instructions are strictly followed.
With the onset of spring, more and more often you can see people with metal detectors on the banks of rivers. Most of them are engaged in “gold mining” purely out of curiosity and passion. But a certain percentage actually earn a lot of money from searching for rare things. The secret to the success of such research is not only in experience, information and intuition, but also in the quality of the equipment with which they are equipped. A professional instrument is expensive, and if you have a basic knowledge of radio mechanics, you have probably thought more than once about how to make a metal detector with your own hands. The editors of the site will come to your aid and tell you today how to assemble the device yourself using diagrams.
Read in the article:
Metal detector and its structure

This model costs more than 32,000 rubles, and, of course, non-professionals will not be able to afford such a device. Therefore, we suggest studying the design of a metal detector in order to assemble a variation of such a device yourself. So, the simplest metal detector consists of the following elements.

The operating principle of such metal detectors is based on the transmission and reception of electromagnetic waves. The main elements of a device of this type are two coils: one is transmitting, and the second is receiving.

The metal detector works like this: the magnetic field lines of the primary field (A) of red color pass through the metal object (B) and create a secondary field (green lines) in it. This secondary field is picked up by the receiver and the detector sends an audible signal to the operator. Based on the principle of operation of emitters, electronic devices of this type can be divided into:
- Simple, working on the “receive-transmit” principle.
- Induction.
- Pulse.
- Generating.
The cheapest devices belong to the first type.

An induction metal detector has one coil that sends and receives a signal simultaneously. But devices with pulse induction differ in that they generate a transmitter current, which turns on for a while and then turns off abruptly. The coil field generates pulsed eddy currents in the object, which are detected by analyzing the attenuation of the pulse induced in the receiver coil. This cycle repeats continuously, perhaps hundreds of thousands of times per second.
How does a metal detector work depending on its purpose and technical device?
The operating principle of a metal detector varies depending on the type of device. Let's consider the main ones:
- Dynamic type devices. The simplest type of device that continuously scans the field. The main feature of working with such a device is that you must be in motion all the time, otherwise the signal will disappear. Such devices are easy to use, however, they are poorly sensitive.
- Pulse type devices. They have great sensitivity. Often, such a device comes with several additional coils for adjustment to different types of soils and metals. Requires certain skills to set up. Among the devices of this class we can distinguish electronic devices operating at low frequencies - no higher than 3 kHz.

- Electronic devices, on the one hand, do not give a reaction (or give a weak one) to unwanted signals: wet sand, small pieces of metal, shot, for example, and, on the other hand, they provide good sensitivity when searching for hidden water pipes and central heating routes, as well as coins and other metal objects.
- Depth detectors designed to search for objects located at impressive depths. They can detect metal objects at a depth of up to 6 meters, while other models “pierce” only up to 3. For example, the Jeohunter 3D depth detector is capable of searching and detecting voids and metals, while showing objects found in the ground in 3- measured form.

Depth detectors operate on two coils, one is parallel to the ground surface, the other is perpendicular.
- Stationary detectors- these are frames established at particularly important protected sites. They detect any metal objects in people's bags and pockets that pass through the circuit.

Which metal detectors are suitable for making yourself at home?
The simplest devices that you can assemble yourself include devices that operate on the principle of reception and transmission. There are schemes that even a novice radio amateur can do; for this you just need to select a certain set of parts.

There are many video instructions on the Internet with detailed explanations of how to make a simple metal detector with your own hands. Here are the most popular ones:
- Metal detector "Pirate".
- Metal detector - butterfly.
- Emitter without microcircuits (IC).
- Series of metal detectors "Terminator".
However, despite the fact that some entertainers are trying to offer systems for assembling a metal detector from a phone, such designs will not pass the battle test. It’s easier to buy a children’s metal detector toy, it will be more useful.

And now more about how to make a simple metal detector with your own hands using the example of the “Pirate” design.
Homemade metal detector “Pirate”: diagram and detailed description of the assembly
Homemade products based on the “Pirate” series metal detector are among the most popular among radio amateurs. Thanks to the good performance of the device, it can “detect” an object at a depth of 200 mm (for small items) and 1500 mm (large items).
Parts for assembling a metal detector
The Pirate metal detector is a pulse type device. To make the device you will need to purchase:
- Materials for making the body, rod (you can use a plastic pipe), holder, and so on.
- Wires and electrical tape.
- Headphones (suitable for the player).
- Transistors – 3 pieces: BC557, IRF740, BC547.
- Microcircuits: K157UD2 and NE
- Ceramic capacitor - 1 nF.
- 2 film capacitors - 100 nF.
- Electrolytic capacitors: 10 μF (16 V) – 2 pieces, 2200 μF (16 V) – 1 piece, 1 μF (16 V) – 2 pieces, 220 μF (16 V) – 1 piece.
- Resistors – 7 pieces per 1; 1.6; 47; 62; 100; 120; 470 kOhm and 6 pieces for 10, 100, 150, 220, 470, 390 Ohm, 2 pieces for 2 Ohm.
- 2 diodes 1N148.
DIY metal detector circuits
The classic circuit of the “Pirate” series metal detector is built using the NE555 microcircuit. The operation of the device depends on a comparator, one output of which is connected to the IC pulse generator, the second to the coil, and the output to the speaker. If metal objects are detected, the signal from the coil is sent to the comparator, and then to the speaker, which notifies the operator of the presence of the desired objects.

The board can be placed in a simple junction box, which can be purchased at an electrical store. If such a tool is not enough for you, you can try to make a more advanced device; a diagram for making a gold-oriented metal detector will help you.

How to assemble a metal detector without using microcircuits
This device uses Soviet-style transistors KT-361 and KT-315 to generate signals (you can use similar radio components).
How to assemble a metal detector circuit board with your own hands
The pulse generator is assembled on the NE555 chip. By selecting C1 and 2 and R2 and 3, the frequency is adjusted. The pulses obtained as a result of scanning are transmitted to transistor T1, and it transmits the signal to transistor T2. The audio frequency is amplified using the BC547 transistor to the collector, and headphones are connected.

To place radio components, a printed circuit is used, which can be easily made independently. To do this, we use a piece of sheet getinax covered with copper electrical foil. We transfer the connecting parts onto it, mark the fastening points, and drill holes. We cover the tracks with a protective varnish, and after drying, we lower the future board into ferric chloride for etching. This is necessary to remove unprotected areas of copper foil.
How to make a metal detector coil with your own hands
For the base you will need a ring with a diameter of about 200 mm (ordinary wooden hoops can be used as the base), on which 0.5 mm wire is wound. To increase the depth of metal detection, the coil frame should be in the range of 260−270 mm, and the number of turns should be 21−22 vol. If you don't have anything suitable on hand, you can wind a reel on a wooden base.
Copper wire spool on wooden base
| Illustration | Description of action |
 | For winding, prepare a board with guides. The distance between them is equal to the diameter of the base on which you will attach the reel. |
 | Wind the wire around the perimeter of the fastenings in 20-30 turns. Secure the winding with electrical tape in several places. |
 | Remove the winding from the base and give it a rounded shape; if necessary, additionally fasten the winding in several more places. |
 | Connect the circuit to the device and test its operation. |
Twisted pair coil in 5 minutes
We will need: 1 twisted pair 5 cat 24 AVG (2.5 mm), knife, soldering iron, solder and multitester.
| Illustration | Description of action |
 | Twist the wire into two skeins. Leave 10 cm on each side. |
 | Strip the winding and free the wires for connection. |
 | We connect the wires according to the diagram. |
 | For better fastening, solder them with a soldering iron. |
 | Test the coil in the same manner as the copper wire device. The winding terminals must be soldered to a stranded wire with a diameter in the range of 0.5-0.7 mm. |
Brief instructions for setting up a DIY metal detector “Pirate”
Once the main elements of the metal detector are ready, we proceed to assembly. We attach all the components to the metal detector rod: the body with the coil, the receiving and transmitting unit and the handle. If you did everything correctly, then additional manipulations with the device will not be required, since it initially has maximum sensitivity. Fine tuning is performed using variable resistor R13. Normal operation of the detector should be ensured with the regulator in the middle position. If you have an oscilloscope, then use it to measure the frequency at the gate of transistor T2, which should be 120−150 Hz, and the pulse duration should be 130−150 μs.
Is it possible to make an underwater metal detector with your own hands?
The principle of assembling an underwater metal detector is no different from a conventional one, with the only difference being that you will have to work hard to create an impenetrable shell using sealant, as well as to place special light indicators that can report a find from under water. An example of how this will work is in the video:
Do-it-yourself metal detector “Terminator 3”: detailed diagram and video instructions for assembly
The Terminator 3 metal detector has occupied an honorable place among homemade metal detectors for many years. The two-tone device operates on the principle of induction balance.

Its main features are: low power consumption, metal discrimination, non-ferrous metals mode, gold only mode and very good search depth characteristics, compared to semi-professional branded metal detectors. We offer you the most detailed description of the assembly of such a device from folk craftsman Viktor Goncharov.
How to make a metal detector with your own hands with metal discrimination
Metal discrimination is the ability of the device to distinguish between the detected material and classify it. Discrimination is based on different electrical conductivities of metals. The simplest methods for determining the types of metals were implemented in old instruments and entry-level devices and had two modes - “all metals” and “non-ferrous”. The discrimination function allows the operator to respond to a phase shift of a certain magnitude, compared to a configured (reference) level. In this case, the device cannot distinguish between non-ferrous metals.

Learn how to make a homemade professional metal detector using improvised materials in this video:
Features of deep metal detectors
Metal detectors of this type can detect objects at great depths. A good metal detector, made by yourself, looks to a depth of 6 meters. However, in this case the size of the find must be substantial. These detectors work best for detecting old shells or large enough debris.

There are two types of deep metal detectors: frame and transceiver on a rod. The first type of device is capable of covering a large area of land for scanning, however, in this case, the efficiency and focus of the search is reduced. The second version of the detector is a point detector; it works directed inward over a small diameter. You need to work with it slowly and carefully. If your goal is to build such a metal detector, the following video can tell you how to do it.
If you have experience in assembling such a device and using it, tell others about it!
Metal detectors or metal detectors are a diverse family of measuring instruments, the operation of which is based on differences in the electromagnetic radiation of objects.
Using a metal detector
Professional highly sensitive metal detectors are used in the daily work of various inspection points; they are used to conduct search and investigative activities of police and rescue services.

A huge army of amateur treasure hunters around the world practice long and leisurely hikes with metal detectors. Sometimes such entertainment brings income and even fame.

Nowadays, an industry of detector (recognition) devices has already been established for all occasions, differing not only in operating principles, but also in a wide range of prices and technical characteristics.
Simple magnetic detectors
The operating principle of the simplest metal detector is based on electromagnetic induction - the device contains an electromagnetic coil, which, due to oscillations and distortions of its field, detects nearby electrically conductive and ferrous-magnetic materials, creating an audio or visual signal.

The first experience of assembling a metal detector at home can be the beginning of a serious hobby: new design solutions and even inventions in this field of applied radio electronics are not excluded even at the amateur level.

The diagram shows the structure of a simple low-frequency magnetic detector.

Hundreds of different designs are used in the production of metal detectors. In order to implement one of them yourself, you will need to make a printed circuit board with your own hands, purchase the necessary coils, transistors, resistors, capacitors, etc., and assemble the device.

Metal detector made from improvised means
Another option is to assemble a metal detector from available materials; it is more suitable for humanists and novice technicians with a passion for finding treasures and lost artifacts.

During operation of such a homemade device, electromagnetic waves emitted by the calculator are caught on the AM band of the receiver.

An indicator of the location of an object in this device is the rotation of the electromagnetic field during re-emission, which changes the parameters of the sound signal. A photo of such a do-it-yourself metal detector can be found on the Internet and at the end of our material.

To use such a prefabricated version, you do not need a detailed diagram or assembly instructions, but compliance with certain requirements for the two main components of a homemade detector, namely a properly working calculator and a radio receiver.

Both devices must be from the cheapest category, the receiver must have an AM band and a magnetic antenna, and the calculator must emit pulsed radio interference during operation.

To work on the model, you will also need a suitable sized plastic box with an opening lid, like a book, which will become the body of the finder.

An old CD box is ideal for these purposes. To attach the parts you will need double-sided tape.

Metal detector assembly
- Securing the instruments inside the case: a strip of tape is attached to the back of the instruments, then the calculator is placed at the base of the box, the receiver is on the inside of the lid.
- Setting up the receiver: you need to turn on the receiver at maximum volume and select the upper position of the AM range, free from radio broadcasts and interference.
- Adjusting the calculator: when the calculator is turned on, the receiver should respond with a sharp noise, hum or wheezing; if this does not happen, you need to adjust the range.
- Fixing the position: we begin to smoothly close the box until the sound disappears or becomes more uniform and fix the box doors in this position, using a cube of foam plastic, rubber bands, etc.
- The metal detector is ready. If there is a product with electromagnetic radiation nearby, the receiver will sound an alarm.
By combining elements of other radio devices in a simple detector, you can observe the operating principle of metal detectors in action and enjoy your first search expedition.
Note!


Such a detector, assembled at home, can be tested to search for coins or metal construction debris lying in the surface layer of the earth in almost any area, on any open ground.

Photos of do-it-yourself metal detectors


Note!


Note!