How to make a box of drywall in the bathroom - step by step instructions. Installation of a box made of moisture-proof drywall in the bathroom Do-it-yourself box for pipes in the bathroom
Speaking of pipes in the bathroom, it should be noted that they do not look very attractive. Therefore, the question of how to make a pipe box in the bathroom worries many people. more aesthetic look.
Installing the box is the most common method. Only before installation, it is necessary to calculate everything so that there is unhindered access to the wiring of the highway.
Otherwise, repairs cannot be carried out without dismantling the box.
Tools required for work:
- ticks;
- electric drill;
- square;
- marker;
- hacksaw;
- hammer;
- scissors for metal;
- screwdriver;
- level;
- roulette.
Initially, you need to make a frame
Regardless of the material of the sheathing and the location of the box, the frame is always made the same. Consider this on the example of a box located vertically.
Begin work with the installation of two guide profiles. If the box is placed in the corner, then they are mounted on one and the reverse side of the corner. And in the areas where the highway runs straight, it must be installed on both sides of the pipe.
It is necessary to strengthen the guides with the help of a level, and they should be fixed with dowels or self-tapping screws.
IMPORTANT! In order not to lose a lot of space in the bathroom, you need to make sure that the profiles are located closer to the pipes.
 Next, we proceed to the installation of guide profiles in the bathroom on the ceiling and floor. From the edge of the wall profile on the wall, lines are drawn parallel to the wall.
The place where the lines intersect will show the length and direction for mounting the guides. The necessary blanks are cut off (two for the floor and two for the ceiling).
Then they are fixed with dowels, and withstand the direction that the lines indicate. This is necessary in order not to violate the vertical angle, which is formed later.
First, you need to do the installation on the ceiling, and then, using a plumb line, transfer the docking point to the floor. In this place floor profiles are brought together.
They must be fastened with self-tapping screws with a diameter of 3.5 mm and a length of 9 mm (texas).
This corner element is cut according to the height of the room and inserted into the guides on the ceiling and floor. The whole structure is then fastened with texas.
The next stage of work will be the connection of wall and corner guides with blanks of bearing profiles.
They are placed after 5 cm, otherwise the frame will not have the necessary rigidity. And now you can move on to the skin.
Which material is better to choose
Most often, plastic or drywall is used for cladding. The main difference between these materials is that the plastic structure is more convenient.
If necessary, it is easily and quickly disassembled. And it also adds up very simply. A box made of plastic panels does not need additional finishing, and drywall requires this.
Gypsum plasterboard
 The box in the bathroom from drywall is not difficult to do. Work sequence:
- Drywall sheets are cut into pieces of the right size.
- Then these pieces are screwed to a metal profile. For this, 27 mm screws are used. Fastenings are performed with an interval of 30 cm using a screwdriver or screwdriver.
- A small chamfer must be removed from the place of joining the sheets of drywall, and the resulting gap is sealed with putty.
Finishing of this material is done in the same way as wall decoration. To do this, use plastic panels, paint, wallpaper, or ceramic tiles.
Access to communications - an important detail when installing the box
Keep in mind that sometime the network needs to be repaired, so you need to provide convenient and quick access to it. For such purposes, a hole must be made in the structure.
The small dimensions of such a hole make it difficult to access, so consider this point in advance.
The hole is closed with a special hatch. In construction stores, the choice of these designs is extensive. Buyers can choose any color, size and modification of the model. The device is mounted with magnets.
Even for the hole, blinds are used. Not everyone likes this solution, but you can get to the pipes in a couple of minutes.
Removable plasterboard and tile box
A removable duct box in the bathroom is suitable in cases where it is necessary to sew the pipes inexpensively and carefully. In this case, the advantage is that if a pipeline breakthrough occurs, it is easy to gain access to the problem place.
Video 1
For a removable design, moisture-proof drywall and metal guides are taken. The entire structure is made of attached parts, which are installed one on top of the other.
All sections are a corner element and are attached to the wall with simple hinges, which are used for hanging shelves.
 The structure is hung on the screws, and it simultaneously rests on the floor. This design is resistant to shear. As an additional fixture, a metal corner is used from its inner part.
Access to communications is made possible through the hatch and after the upper part is removed. Inside the sections, handles are attached. This is done for convenient movement during installation.
The final lining of the removable box is best done from a tile mosaic, which is glued with liquid nails. In the middle section, a hatch is mounted for access to ventilation and meters.
The seam between the sections can not be overwritten, but you can use a rubber seal or silicone.
Removable pipe boxes are not lightweight, but they are easily and quickly disassembled, which makes them very convenient to use.
Trim box plastic panels
This design is considered a good alternative. This material is not particularly inferior to the tile, which occupies a leading place among finishing materials.
It is easy to look after plastic, it is easily cleaned of dirt, of grease stains.
 This material is not afraid of temperature differences, and for the bathroom it is very important. The popularity of this material is also based on the fact that its installation is a simple process that does not require a lot of time and money.
If you decide to make a box of plastic panels in the bathroom, then you can not think about leveling the walls. Plastic panels are mounted, like a laminate (using the puzzle method).
The installation process itself takes a couple of hours. A distinctive feature of this material is its resistance to deformation.
If the box is finished with tiles in a new house, then it can shrink over time. The tile is destroyed, but this does not happen with the panels.
Plastic panels have another advantage. They are much cheaper when compared to tiles. In addition to its high cost, the costs of its installation need to add the costs of glue, grout, corners, alignment of the walls.
For plastic panels, all this is not needed. Replacing tiles is also difficult. A damaged panel is much easier to replace. For these reasons, a plastic pipe box in the bathroom is used more often than others.
IMPORTANT! To make this design last longer, the places where the panels are fixed are coated with silicone sealant.
Plastic sheathing of pipes in the bathroom
- In this case, it is advised not to install the entire profile immediately. Initially, only a wall starting element is installed.
- Sheathe start one side. Plastic is cut into small pieces and inserted from bottom to top (do it horizontally). Mounting for them is not required. In those places where you need to control the highway, make cutouts and mount the door.
- Decorative element for the corner. A plastic corner is put on the protrusion of the typed plastic. When it falls into place, it must be secured with tesami to the frame.
- The second side of the structure is sheathed similarly to the first.
- The wrong side shelf is removed from the last starting profile. It is coated with silicone and glued into a corner.
- Slots and joints of the box with tile are filled with sanitary silicone. Excesses are carefully removed with a damp cloth.
Video 2
Whatever box you choose, the main thing is that it fully copes with its functions. It should close ugly pipes, and give an opportunity to comfortably get to them.
With all this, this design should be in harmony with the overall design of the design of the entire room. Using the above information, and watching the video, you will learn how to make a pipe box in the bathroom yourself. Such work will not be problematic for you.
Posts
In this material, we will talk about such a method of hiding pipes in the bathroom as installing a box of drywall or plastic, and also consider the main points for its installation.
As a rule, pipes laid for a view of cold and hot water in the bathroom look at least unattractive. Naturally, the owners of the apartments are doing their best to hide them. Currently, there are several simple ways to solve this problem, the most common of which is installing a pipe box in the bathroom.
Before you make a box for pipes, you need to organize the possibility of access to the laid pipes after installing the finished structure. This will make it possible to greatly simplify the implementation of possible future work for preventive or repair purposes.
Box frame manufacturing
There can be several designs of boxes for plumbing pipes, but the stages of their installation in any case will be the same.
First you need to decide on the material for the frame and cladding. The frame can be made of aluminum profile or wooden battens. Next, the dimensions of the space occupied by the pipes are measured, after which they proceed to the assembly of the frame from the sections. The structure is attached to the wall and floor with self-tapping screws.

It is worth noting that in order to facilitate the work, wooden bars can be installed in advance at the points of attachment of the frame.
After collecting and arranging the frame, they proceed to facing operations.
Varieties of boxes
Drywall box
Most often, the box for closing pipes in the bathroom is made of drywall.
This method consists in the following work:
- First of all, draw reference lines on the wall, retreating from pipes by 3-5 cm on both sides. To make the lines smooth, you can use the construction level.
- Next, a profile of a certain size is set along the drawn lines, and a cut piece of drywall with a thickness of 9.5 mm is fixed to it.
- Now cut another piece of the profile and attach it to the outer ends of the workpieces. The front part is mounted on the base, which is fastened with self-tapping screws every 25 cm.
- Docking places are thoroughly puttyed, and then the surface is either painted or faced with any material that the owner liked the most.

It is worth noting that the place where the drywall adheres to the wall can be hidden by installing a decorative baseboard, for example, a corner designed for the bathroom.
Using polystyrene panels as a box
Also quite a popular material for decorating bathrooms and toilets are polystyrene panels. It can be installed without constructing a frame. That is, a plastic box for polystyrene pipes is also perfect for solving our problem. These panels have special legs that can be adjusted in height, which is also a big plus when used in rooms with a slightly curved floor. The legs will make it possible to take into account all the bumps, up to 10 cm.

Installation of the duct for plastic pipes is carried out in the following sequence:
- An end support is attached to the wall.
- The edges of the panels, located on the sides and on top, are lubricated with glue, then they are installed and customized.
- Adjust the legs of the panels with a wrench to obtain the desired height. After that, we can assume that the installation of the box is over.
The finished box of plastic material is very high quality and durable.
Tiled box
Ceramic tile is suitable as a cladding for a box made of fiberboard, water-repellent plywood or drywall. The tile is most suitable for use in the bathroom, because it is very durable, not afraid of moisture.

In addition, it comes in many shades and textures. Facing, as a rule, begins from the front side, and after that they pass to the sidewalls.
Note that the tile is fixed using special glue.
Marking, creating a work plan, installation
The pipe box in the room can be mounted anywhere it is required. The main thing is to make the entire list of calculations on time, even before installation, so that, thanks to a correctly selected place for placing the box, you can make the most of the available space.
Before purchasing all materials, you need to make an estimate and make markup. In order to make the calculations as accurate as possible, you need to consider not only the dimensions of the box, but also the furniture and plumbing that will be installed in the bathroom.
There is nothing complicated in the installation of the box, since this structure is nothing more than a typical frame assembled from profiles for arches, partitions and other similar structures. It is noteworthy that it is even easier to use it in the bathroom, because there is no need to give the frame a complex shape - you just need to make an even rectangle.

In addition, the frame is most often installed in the corner, which makes its installation even easier and slightly cheaper. To mount the box in the corner, you need to buy only three profiles in height from floor to ceiling, and a fourth profile for cutting jumpers. To install the box, you need to fix the profile to the walls, ceiling and floor, and then fasten with jumpers to each other to get a strong structure.
It is important to know that in order to fix the finishing materials after installing the box was easier, you can install pieces of wood timber in the middle of the box.
The last stage: lining and lining of the box
The final stage, which consists in lining the box, can also not be called difficult, because all the marking has already been done, you just need to precisely cut the material and begin to sheathe the frame.

The covering material must have moisture repellent qualities, since the bathroom belongs to rooms with excessive humidity. Under such conditions, the service life of a large number of materials is greatly reduced.

It is worth noting that the box must be additionally insulated and sealed so that condensation does not collect on the pipes inside. To do this, you can use mounting foam, sealants and other thermal insulation materials.
In the article above, we examined how to make a box for pipes in the bath. We can conclude that to complete all the work is quite simple, most importantly, to acquire high-quality and correct materials, and to make accurate marking.
Very often, repair work in the bathroom and toilet is carried out in order to make the image of the room more attractive. The presence of communications sometimes spoils even the most fashionable and stylish repair. Hide the unsightly communications will wash the box made of drywall. The box in the bathroom from drywall with doors and without them can be done with your own hands. To do this, you must first study the instructions, after which you can proceed with the repair work. For the manufacture of boxes moisture-proof drywall is best suited.
A plasterboard box will help not only hide communications, but also provide them with reliable protection against unforeseen mechanical rooms. This material allows you to make a convenient design that will provide free access to the pipes at the right time. For repair work to be successful, you need to carefully prepare for them.
Properly selected tools are the key to successful repair work. For work you will need: a hammer, tape measure, pencil, level, plumb line, knife.

First of all, the master should draw a markup, which will determine the size of the frame. It is important to note that the profile must not come into contact with the pipes. Allowances should be made for the strip of drywall sheets.
How to make markup:
- Determine the top marking point, taking into account the floor drawing.
- Make a straight line from the top mark to the bottom.
The success of the entire construction depends on the correct layout. In order to markup clearly and evenly, it is necessary to use a plumb line and a level. After completing the preparatory work, you can proceed to the assembly and installation of the frame.
How to make drywall boxes in the bathroom: installing the frame
Before assembling the frame, you must select the material for the profile. It is best to use aluminum. This material is ideally combined with drywall, and also has anti-corrosion properties.
The use of wooden beams when installing the frame will make the work silent and will allow you to create additional mounts.

It is important to use a sufficient number of bars, which is determined depending on the height of the profiles. The bars prevent the deformation of the profile under the weight of the drywall sheets. It is important to pay particular attention to the process of cutting drywall sheets.
Stages of work:
- Cut two sidewalls.
- Install side panels.
- Cut the third panel.
- Place the last panel on top of the side sheets.
When fixing self-tapping screws, it is important to pay attention to the fact that they need to be embedded in the profile. In this case, do not touch the end sides. Do not forget that in the box you need to cut holes that provide access to communications.
Sheathing and how to make drywall boxes in the bathroom:
Elements for skinning the frame must be solid. The edges of the side parts must match the profiles of the frame. The last part serves to close the side panels.
When fixing the elements, it is important to correctly measure and take into account the indentation between the screws, which should not exceed 2.5 cm.

Places for monitoring the health of the pipeline are also made of drywall sheets. For their fastening, special magnets are used. The box can be made completely collapsible.
Options for decorative finishes:
- Ceramic tile;
- Paint;
- Decorative plaster.
After installing the box, the bathroom will look much more attractive. The noise level from the pipes will be much lower. It is important to ensure that the duct does not interfere with pipe maintenance.
Technological holes: how to close the pipes in the bathroom with drywall:
When forming the box, it is important to leave available counters, valves, valves, gearboxes and expansion joints. The holes in the material need to be cut large from the size of the doors themselves. The door is fixed after installing the frame.
In order to monitor the sewage, the hole must be located in front of the duct.

The door can be placed on the side, if it will serve to regulate the condition of valves and pipes. The pipe holes in the duct should be slightly larger. The space between them is filled with foamed polyethylene or tow.
Component doors:
- Frame;
- GKLV;
- Push lock;
- Sealant;
- Door.
For the manufacture of doors and the box itself, moisture-proof drywall is used. It is treated with a special impregnation resistant to moist air. HCLF inhibits mold and mildew. After installation, the box is better faced with ceramic tiles. Then the bathroom will look stylish, the pipes will be protected from mechanical influences, and the box will be protected from moisture. The bathroom needs a special finish that will not deteriorate from moisture and temperature changes.
Making a box in the bathroom from drywall (video)
The bathroom is filled with pipes that adversely affect the appearance of the room. For this, we close them with a box. It can be made from materials of various kinds. One such material is drywall. It is better if it is moisture resistant. You can make a box yourself, having previously studied the instructions and made the markup. It is important not to forget to leave the inspection doors in the box, so that there is the possibility of constant access to communications in case of breakage.
Communications in the bathrooms look unattractive, so in most cases, starting apartment renovation, the owners of the living space want and, building a box of drywall for pipes. Someone invites the master for this, but if there is at least a minimal idea of \u200b\u200bthe construction tool, you can close the pipes yourself.
Material selection and necessary tools
The construction of the box is not a complicated process, but in this work there are some nuances that you should know for a positive result. For installation, you need to buy materials, and:
- fasteners - connection elements, “seeds”, dowel-nails;
- plaster;
- silicone-based sealant - useful for sealing joints with the floor;
- revision hatch;
- drywall
- profile - and.
 Material for creating a drywall construction
 You will need tools to work, there are not so many of them, so preparing it will not be difficult:
- spatula;
- screwdriver;
- hammer drill;
- 6 mm drill;
- scissors for metal;
- screwdriver;
- level;
- roulette;
- knife and hacksaw;
- bath;
- container for mixing the mixture.
 Drywall Tools
 Once everything is ready, you can assemble the box from drywall, consider step-by-step instructions.
Step-by-step instructions for manufacturing a pipe box
Before you begin to assemble a box of drywall, you need to make a project. Do not ignore this stage, since it is one of the most important, since the quality of the box made on its own depends on it.
A step-by-step instruction for assembling a drywall box to hide sewage pipes will be described with an example of a bathroom and a toilet, the installation process for hiding pipes in a kitchen is identical to that described.
It is not necessary to create an accurate drawing, it is enough to simply make a schematic drawing with the dimensions of the future design transferred onto it.
 Scheme of a drywall box for pipes
 Watch the video: how to close the pipes with a plasterboard box.
- Next, it should be noted on the floor and ceiling, the location of the guide profile, for this you need a building corner. Substitute the corner with a short edge to the corner at the intersection of the floor and the wall, and draw a straight line on the floor. The angle between the strip on the wall and the strip on the floor should be 90 degrees;

- It’s also worth doing on the ceiling.

The markup is ready, you can proceed to the next step.
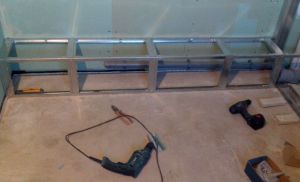
Mounting and installation of the frame from profiles
Before the construction of the metal frame, you need to cut the desired number of segments of the profile equal to the marked lines.
Watch the video: frame assembly for the future GKL box.
How to install:
- You need to start by installing the guide profiles on the floor and ceiling, and then on the walls. They are installed strictly along the lines, and are fixed using dowels, nails. To do this, firmly press the profile to the floor and directly through it drill holes in the floor at a distance of 15 cm from each other. Insert the dowels into the holes and screw the screws;


- After that, you can proceed with the installation of rack profiles. It is inserted along the guides above and below. The profile is pressed and fixed using dowels, nails. The ends of the flexible joint are bent inward, or cut off. The main requirement in this situation is that the profile should be level;
- The next step will be the installation of an angular connecting profile, it is screwed with small screws to the intersection of the guides on the corner of the future box;

 Fastening the rack profile to the guide using self-tapping screws
- Then the stiffening frame is mounted in the pipe duct - the profile near the wall and the profile at the corner are connected in small segments. The segments are located strictly parallel to the floor at a distance of 30 cm from each other, along the entire height of the frame on both sides.

Important! The entire assembly must be controlled by level, even a small deviation, which can lead to poor-quality assembly of the structure. These instructions will help you assemble and install a duct that can block the heating pipes.

Firstly, under this design, reinforcement is made of profiles, in size.
Secondly, such hatches are quite heavy, so you need to fix it carefully, not sparing the screws.
Also at this stage it is necessary to determine where the ventilation grill will be installed, it is necessary so that condensation does not form inside the duct.
The modern plumbing room has many communications designed for water supply, sewer system and heating. All of them significantly spoil the interior of the room, and therefore there is a need for their shelter. An ideal solution for the purpose of such a disguise is considered to be a pipe box in the bathroom, which is a simple but quite functional design.
Pipe Box Specifics
The rooms of the bathroom and toilet are characterized by a characteristic microclimate and contain various engineering systems for general use. Meters are usually mounted on these pipes to control the flow of all types of water and shut-off valves. All this requires periodic maintenance, which consists in checking the integrity of the connections, cleaning the filters and repairing any malfunctions.
There are a variety of ways to aesthetically close communications. One of them is a hidden wiring, in which special strobes are created for pipes in the walls, but this option cannot be considered universal due to a number of drawbacks. Installation of the box will provide access to technical systems, it can be completely collapsible or have special doors.
Design requirements
Certain requirements are imposed on the duct masking pipes, the main ones are as follows:
- 1. The exception of cluttering the room, the decorative box should occupy a minimum amount of space, since the sanitary-technical room has a small area. However, in the manufacture of the structure, the necessary distance of its elements from the pipes should be strictly maintained, which should be at least three centimeters.
- 2. Providing access to communications without any difficulties. The structure of the box should allow the specialist to freely carry out the necessary operations with elements of the engineering system. For these purposes, the removable design is an ideal solution, otherwise the installation of multiple doors will be required.
- 3. Safety, not allowing physical injuries of a person during operation.
- 4. Harmony with the decoration of the room, the ability to fit into the overall interior.
Taking into account the microclimate of the bathroom, the decorative box should be moisture resistant.

Advantages of the camouflage box
When decorating modern bath rooms, it is quite common to install a box that closes the pipes. Its popularity is due to the presence of a number of advantages:
- 1. Aesthetic appearance due to the quality of materials used for manufacturing.
- 2. Simplicity of assembly, allowing the construction of the system not only during major repairs, but also cosmetic, since it is allowed to install the structure on top of the finished decoration.
- 3. Providing unhindered access to the engineering system, which allows to control its condition, carry out repair work when necessary and record meter readings.
- 4. The possibility of productive use of the bathroom area by combining the design with the installation for the toilet, various shelves and other elements.
A neatly made box can be both functional and aesthetic, becoming a decoration of the room.

Communication Barrier Options
You can hide pipes in the bathroom in various ways, the most popular of which are the following:
- 1. Boxes in the form of cabinets, a similar solution is usually used for systems with a vertical arrangement, such as risers. The design provides for full access to the pipeline, meters and other elements. Its advantage lies in the ability to have shelves and various devices for storing household items inside it. That allows you to effectively use the area in the bathroom and toilet.
- 2. A box like partitions installed along the entire length of the room and in its entire height, thereby making a certain space separate. The disadvantage of this option is to reduce the area of \u200b\u200bthe room, but at the same time, its appearance becomes ideal due to the complete hiding of all engineering systems. Such partitions are especially suitable for spacious rooms and toilets with a hanging toilet, since the installation is also masked along with communications.
- 3. Compact box located around the pipes. Such designs are used quite often due to the fact that they do not take up space and give the room an aesthetic appearance. These systems can be located both vertically and horizontally, adjacent to the ceiling or floor.
Types and characteristics of the material
To perform a decorative box, masking pipes, you need to choose the appropriate material, which must meet certain requirements. The main ones are expressed in resistance to increased humidity, light weight and small thickness. Also, the design must be made of components that are environmentally friendly.
Of all the materials offered by the market, moisture-resistant drywall and plywood, MDF or plastic meet these criteria. PVC panels and GKLV boards are especially popular.
PVC panels
Working with this material is the easiest way to close the pipes. Its positive aspects are as follows:
- 1. A box for masking PVC pipes does not require additional work related to finishing.
- 2. If necessary, dismantling retains all components, which is especially important for pipelines with fitting and threaded types of connections.
- 3. Easy installation, completely do-it-yourself.
- 4. Unsustainable deformations and easy maintenance. The material is distinguished by its ductility and reliability; if individual panels are damaged, each of them can be easily replaced.
- 5. Insignificant thickness, contributing to the compactness of the design.
- 6. The PVC product withstands repeated assembly and disassembly and provides the ability to store various accessories inside, creating all conditions for this.
PVC material has not only advantages, but also weaknesses. One of them is a little resistance to temperature extremes. The material has a specific odor that cannot be eliminated. Plastic has the ability to disintegrate over time, releasing harmful components into the air during this process.

Moisture-resistant drywall
Compared to PVC panels, drywall has many more advantages. Of these, the main ones should be distinguished:
- 1. Easy installation. GKLV material is easily fixed on a basis made of galvanized profiles, which allows you to create a duct for pipes with any configuration and size. Carrying out such work does not require special skills and the involvement of sophisticated equipment.
- 2. Drywall sheets are lightweight, which eliminates the additional load on the structural parts and suggests using weightless galvanized elements to hold them.
- 3. The flexibility of the material, providing the opportunity to give the product the desired shape. For this, one of the sides of the HCLF is moistened and trimmed.
- 4. Smooth surface, simplifying the process of decorating the box. In this case, no additional leveling is required by plastering the beacons.
- 5. The texture of drywall allows the decoration of various types of materials for decoration. Typically, tiles are used for this purpose, but you can finish the box for pipes from GKLV lining, paste over with wallpaper or just paint.
- 6. Fire safety of the material, due to the fact that it consists of sheets of cardboard and hardened gypsum, averse to slight ignition. In case of contact with open flame, drywall does not emit toxic substances that have a negative effect on human health.
- 7. Ecological safety due to the zero emission level of drywall formaldehydes. The material will not cause harm both during installation and during subsequent operation.
- 8. Affordable price, making the material available to every consumer.
It is important to remember that the pipe box must only be made of moisture-proof drywall painted in green. This option is well tolerated by high levels of humidity and is designed for use in such conditions.

Manufacture and installation
Before proceeding with the construction of the system, it is necessary to carry out preparatory work. When laying new pipes, it is recommended to design them in the wiring as few connections as possible. Before installation, it is necessary to carry out a thorough check of the pipes for the presence of various damage leading to leakage.
The material for the execution of the box should ideally be suitable for sanitary facilities. After carrying out the measurements required for subsequent work, a preliminary drawing of the future design is drawn. It should provide free access to all devices and elements on the pipeline.
Preparation of tools and supporting materials
The design of the box for masking pipes in the bathroom includes a frame, sheathing and fasteners. In turn, the frame can be made either from metal profiles or from wooden beams. Due to the fact that wood is significantly inferior to metal in durability, it is recommended that you choose the second option when choosing.
As mounting material it is necessary to prepare:
- dowels for mounting the frame to the wall;
- wood or metal screws with which the frame is assembled;
- self-tapping screws used for working with sheathing material.
Before manufacturing a system for masking pipes in sanitary rooms, care should be taken about the availability of tools such as:
- roulette;
- square;
- building level;
- screwdriver;
- hammer drill;
- plane;
- scissors for working with metal or a hacksaw;
- knife with a sharp blade;
- UD and CD profiles.
Measuring operations
Before the start of construction, the place where the structure will be placed is specified, and all necessary measurements are carried out. This will exclude amendments during installation, which are always accompanied by certain difficulties. It is almost impossible to resize an already prepared element without affecting other parts of the structure.
At this stage, the location of the inspection doors or removable box parts is immediately considered. In the drawing, where the dimensions of the system will be indicated, it is recommended to add the thickness of the finishing material. The marking for the execution of the frame begins immediately from the floor, while the dimensions between the walls of the structure and the pipes, which should not be less than three centimeters, are strictly maintained.
After the contour of the box is determined, by means of a construction plumb it is applied to the sections of the ceiling and walls, which in the future will come into contact with this structure.
Assembly of the frame for the box
The fittings around the pipes are usually made of galvanized profile or wooden battens with excellent moisture-resistant characteristics. The latter option requires mandatory treatment with antiseptic agents. The interconnection of the frame parts is carried out by means of a notch or self-tapping screws. In addition, dowels and special screws are needed. The work consists of several stages:
- the profile is mounted on the walls;
- racks are installed that will act as the front face of the box;
- guides are mounted on the ceiling and on the floor.
The length of the racks can exceed one and a half meters, in this case, jumpers must be arranged between them, which may still be required if the frame width exceeds twenty five centimeters. The distance between these structural elements should be no more than one meter. Jumpers will add the necessary rigidity to the structure.
When performing reinforcement made of wood, sections of cuts are processed with special building mastics. This prevents the process of decay and deformation due to temperature changes and fluctuations in humidity.

Sheathing process
After the cutting of all the required elements is completed, sheathing is performed. It is not recommended to make cutting from fragments of material, it is best to use whole pieces. This will minimize the possibility of distortions and discrepancies in size. During the implementation of the cutting, it is necessary to look beyond the edges of the elements, which should not go beyond the parts of the frame. Ideally, all elements should coincide with each other. The cut front face of the structure should cover the side parts.
The cutting material is mounted on reinforcement posts using self-tapping screws, the distance between which should not exceed two and a half centimeters. This will give the box stiffness and strength and eliminate the need for additional jumpers.
To control individual sections of the communication system, special openings and doors are provided in the casing material. They can be purchased ready-made in specialized stores or do it yourself. In order to prevent spontaneous opening of the inspection doors, magnets or various locking parts, such as latches, are installed on them.
In the manufacture of a fully collapsible design, the sheets of material for decoration are fastened with screws to its very edge, and in the process of performing the final finishing work nothing is closed. Only plastic corners or baseboards are mounted, having the ability to easily disassemble if necessary.