Scheme of smooth switching on of a DC motor. Application of the KR1182PM1 microcircuit
When studying the starting characteristics of starter electric motors, it was revealed that when voltage is applied to the electric motor, a reverse current pulse with a voltage of more than 2000 volts appears. The insulation of electric motor windings may fail and result in interturn breakdown. Sparking of the collector at high starting currents leads to burnout of the collector plates. You can avoid breakdown and an emergency situation when starting an electric motor by using the method of accelerating speed over time.
The starting current in this circuit is reduced to an acceptable value from 220 amperes to 20. Soft start conditions are created by a double current level - the first is created by the regulation characteristic of the field-effect transistor for a time of 0-10 ms, the second - by the contacts of the starting relay from 10 to 60 ms. The current during the starting mode increases almost linearly, which does not lead to destruction of the electrical part of the electric motor.
The circuit in the figure is a hybrid of a powerful field-effect transistor and a start relay.
After pressing the “Start” button, the field-effect transistor is opened by applying voltage from the battery GB1 to the gate through resistor R1. A circuit parallel to the gate of the transistor and the minus of the battery protects the transistor and slightly increases the turn-on time from 0.02 to 1 ms, depending on the values of resistors R1, R2 and capacitor C1 - it supplies power to the starting motor M1 with increasing voltage. The electric motor will accelerate to rated speed, at the end of this process the powerful contacts K1.1 of relay K1 will close, the current through the field-effect transistor will stop, and the operating current of the electric motor will not create sparking of the contacts, since the acceleration mode has been completed.
Opening the “Start” circuit will lead to the opening of circuit K1.1 and de-energizing the electric motor, with the current decreasing exponentially.
A zener diode is introduced into the gate circuit of the field-effect transistor in the circuit to protect against exceeding the threshold voltage; in the source circuit of the transistor, in parallel with the starting electric motor, a circuit is connected to suppress the pulse voltage of reverse polarity - diode VD2 and capacitor C2.
The winding of relay K1 is protected from reverse polarity pulses by a bipolar LED HL1 with a discharge resistor R4; resistor R3 limits the supply current to the winding circuit and reduces its heating during prolonged operation. Diode VD3 eliminates the penetration of impulse noise into the power circuit.
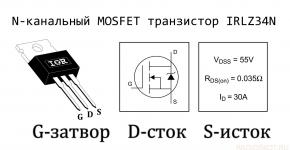
There are no scarce radio components in the circuit: field-effect transistors are installed for a total operating current of 212 amperes. Resistors type MLT-0.25, R3 for one watt. Diodes VD2, VD3 pulse type. Automotive relay - type MG16566DX for a contact current of 30 amperes and a voltage of 12 volts, the turn-on voltage of such a relay is 7 volts, the release voltage is 3.5 volts. We will replace the HL1 LED with KIPD 45B-2 or KIPD 23 A1-K, start button type KM 1-1. The design used an Italian-made starter motor; research was also carried out on other types of electric motors with power from 10 to 300 watts.
The structure is assembled in a housing measuring 110 * 35 * 55 and is fixed next to the starter, the start button is installed in a place convenient for turning on and is connected by a multi-core insulated wire with a cross-section of 0.5 mm. The field-effect transistors are secured with a common bolt to the radiator.
The LED can be used as a start indicator or left on the board.

The power supply circuits of the electric motor must be made with stranded wire with a cross-section of at least 10 mm and as short as possible in length to reduce voltage losses.
The circuit was tested on a bench with the specified 250-watt motor; for reliability, install two field switches in parallel, securing them on both sides of the radiator, the starting current can then reach 220 amperes. A current of 130 Amps is taken from the battery by the starter of the Zhiguli VAZ 2107.
List of radioelements
| Designation | Type | Denomination | Quantity | Note | Shop | My notepad |
|---|---|---|---|---|---|---|
| VT1 | MOSFET transistor | IRL2505L | 1 | To notepad | ||
| VD1 | Zener diode | KS818E | 1 | To notepad | ||
| VD2, VD3 | Rectifier diode | 1N4003 | 2 | To notepad | ||
| HL1 | Light-emitting diode | L-57EGW | 1 | To notepad | ||
| C1 | Capacitor | 0.1 µF | 1 | To notepad | ||
| C2 | Electrolytic capacitor | 100 µF | 1 | To notepad | ||
| R1 | Resistor | 120 kOhm | 1 | To notepad | ||
| R2 | Resistor | 75 kOhm | 1 | To notepad | ||
| R3 | Resistor | 1 ohm | 1 | To notepad | ||
| R4 | Resistor | 3.3 kOhm | 1 |
Complicated by large values of starting currents and torques that occur during startup. But unlike asynchronous motors, in DFC starting currents exceed the rated currents by 10-40 times. Such a huge excess can lead to engine failure, damage to engine-related mechanisms and large voltage drops in the network, which can affect other consumers. Therefore, they try to limit the starting currents to values (1.5...2) In.
For low-power motors (up to 1 kW), provided there is no load on the shaft, direct starting can be used, that is, directly from the network. This is due to the fact that the mass of the moving parts of the engine is not large, and the winding resistance is relatively large. When starting such motors directly, the starting currents do not exceed the values of (3...5) In, which is not critical for such motors.
When the motor is running with constant voltage and armature winding resistance, the armature current can be found using the formula
In this formula, U is the supply voltage, Epr is the back EMF, ∑r is the resistance of the armature windings. Back EMF Epr occurs when the armature rotates in the magnetic field of the stator, while in the motor it is directed against the armature. But when the armature does not move, Epr does not arise, which means that the expression for the current will take the following form
This is the expression for determining the starting current.
Looking at the formula, we can come to the conclusion that reducing the starting current is possible either by reducing the voltage or increasing the resistance of the armature winding.
Starting the engine by voltage reduction is used if the engine is powered from an independent energy source that can be regulated. In practice, such a start is used for engines of medium and high power.
We will look in more detail at the method of starting a DC motor by introducing additional resistance into the armature circuit. In this case, the starting current will be equal to

Thus, it is possible to achieve a starting current value in the desired range that is safe for the engine. Additional resistance can be either in the form of a rheostat or in the form of several resistors. This is necessary in order to change the resistance in the armature circuit while starting the engine.
You should know that with additional resistance in the armature winding, the engine does not operate on a natural, but on a softer artificial characteristic, which is not suitable for normal operation of the engine.
The engine is started in several stages. After some acceleration of the engine, Epr will limit the current, and therefore the starting torque, in order to maintain it at the same level, you need to reduce the resistance, that is, switch the rheostat or shunt the resistor.
Let's assume that we have four stages, then the mechanical characteristics will look like this

At the first stage, when the additional resistance is maximum and equal to R1+R2+R3, the engine begins to accelerate. After reaching a certain point, which is obtained using calculated data, resistance R3 is shunted. At the same time, the engine switches to a new characteristic and accelerates to the same point. Thus, the engine reaches its natural characteristic without being affected by high starting currents and torques.
When controlling DC motors, sometimes there is a need for a sudden change in speed (for example, starting from 0% to 100% power or changing speed to the opposite). But this mode of engine operation requires very high currents - several times more than simple movement. If, for example, when rotating at a constant speed, the motor consumes a current of about 500 mA, then at the moment of starting this value can reach 2-3 A. Because of this, it is necessary to use a more powerful power supply subsystem and controller.
The problem of inrush currents can be solved by gradually increasing the speed. Those. Instead of instantaneous acceleration, the motor will accelerate gradually, while smoothing out the peak current consumption at the moment of starting.
Let's connect the motor to the motor-shield on the meringue L298P, as in the previous example:
Do not forget that the motor does not have a feedback connection, so to control the current speed we use the additional variable motorPower
unsigned long StartTimer; // Timer for soft start
pinMode(I1, OUTPUT);
for (motorPower=0;motorPower (
delay(StartTimeStep);
The engine now accelerates more smoothly. Accelerating from 0 to 255 will take almost half a second, and setting the change interval to 1 ms will generally take a quarter of a second. The difference is not very noticeable to the naked eye. But such overclocking is much more gentle on the power unit. In addition, we can adjust the acceleration speed to achieve the desired acceleration.
But the use of delay() does not allow parallel use
no other actions, so we implement a soft start using timers, as with.
byte E1=5; // Motor speed control - connection to output 5
byte I1=4; // Control the direction of rotation - connect to output 4
unsigned long StartTimer; // time counter for soft start
int StartTimeStep=2; // Engine power change interval, in ms
int StartPowerStep=1; // One step change in engine power
int motorPower; // Engine power
pinMode(E1, OUTPUT); // Set the operation of the corresponding pins as outputs
pinMode(I1, OUTPUT);
motorPower=0; // Initial power - 0
digitalWrite(I1, HIGH); // Pin I1 is set to a high logic level, the motor rotates in one direction
if (motorPower if ((millis()-StartTimer)>= StartTimeStep) // Check how much has passed since the last speed change
// if more than the specified interval, increase the speed by one more step
motorPower+= StartPowerStep; // increase speed
analogWrite(E1, motorPower); // At the ENABLE pin a control signal with a new speed
StartTimer=millis(); // Start of a new step
Now the engine accelerates smoothly, and in parallel with acceleration, you can perform any other actions
Smooth start
brushed DC motor
(DPT)
There may be a need to smoothly turn on a commutator motor, for example, to prevent current surges in power circuits. Or preventing sharp impacts on the drive transmission. It’s a good idea to set the headlights to turn on to increase the life of the lamps.
In my case, it was necessary to supply maximum power to the running electric motor of an electric vehicle with the electronic control key removed from the PWM control mode to prevent it from overheating at maximum load.
In Fig. 1 and fig. 2 shows two implementation diagrams of such devices.
Design 1:
A simple circuit of a soft start circuit using an integrated timer KR1006VI1 (or imported 555 series)
Fig.1. Design 1
When a voltage of 12V is applied, the timer with trim elements (PWM) starts and begins to generate pulses at the output of IC 3 with a constant frequency and a pulse width that varies over time. The time is set by the capacitance of capacitor C1. Next, these pulses are fed to the gate of a powerful field-effect transistor, which controls the load at the output of the device. R3 is strictly 2Mohm. The operating voltage of electrolytic capacitors is 25 volts.
Note: This device is located as close to the fan as possible otherwise, interference may arise that will interfere with the normal operation of the car (of course, the Zhiguli is not an obstacle).
Design 2:
An equally simple circuit based on the same integrated timer.

Fig.2 Design 2
Design 3:
Circuit applied to an electric car. The device is started using the "Start" button. 
Fig.2 Design 3
The value of resistor R2 must be at least 2.2 mOhm, otherwise there will be no full (100%) opening of the transistors.
The power supply of the circuit is limited at 7.5V using a KS175Zh zener diode in order to limit the control voltage supplied to the gate of the transistors. Otherwise, the transistor bases go into saturation.
The device is turned on using the "On" button by applying power, while simultaneously unlocking the power transistors. When the device is turned off, linear mode is prevented when the power supply to the control circuits decreases, the transistors instantly close.