How to build a greenhouse at home. How to build a winter greenhouse with your own hands
The arrangement of the greenhouse should include the use of its space with maximum benefit. Each option for the location of beds, paths, auxiliary structures and equipment has its own pros and cons. The choice of the optimal solution depends on the design of the structure, the type of plants grown and the capabilities of the owner.

In a greenhouse, heating occurs naturally, but in a greenhouse you will have to build additional heating elements that must maintain a temperature of 13 to 25 ° C.
Differences in the purpose of a greenhouse and a greenhouse
Unlike a greenhouse, a greenhouse is a more permanent structure for growing lemons, tall cucumbers, tomatoes, flowers and other plants. A greenhouse is a small-sized structure, most often used for preparing seedlings that will subsequently be planted in open ground. Only crops with early ripening (radish, lettuce, etc.) undergo the entire development cycle under greenhouse conditions.
For plants that require warmer conditions for ripening, greenhouse structures with artificial heating systems are needed.

It is necessary to arrange the inside of the greenhouse taking into account the purpose of its use. The room can be planned for growing vegetables in the ground or preparing seedlings on shelves or in pots. It can reach three or more meters in height.
The greenhouse cover usually rises above the ground by no more than 1.5 m. Another difference of the greenhouse is that it is heated naturally: by the sun's rays and the heat generated by the oxidation of plant residues and manure. Setting up a greenhouse is much easier than setting up a greenhouse. There are no special differences in the formation of beds and the location of passages in both structures.
It is more practical to select the design of a greenhouse or greenhouse based on the types and number of plants intended for cultivation. But if you have already built a structure or it is of a standard shape, then the beds in it will have to be adapted to the existing conditions.
Return to contents
Location of beds and passages
There are several options for arranging beds, from which the gardener must choose the most suitable one for his greenhouse or greenhouse and the plants being planted.

Layout of beds. Option 1.
- In narrow and long greenhouses, beds about 1 m wide are placed on the sides, leaving a convenient passage for caring for plants. If the transverse size of the room does not allow making the paths in the greenhouse comfortable enough, it is better to sacrifice the width of the beds. Even if there is not enough space for the third row, the first two can compensate for this with a larger harvest. With less shading of plants, they will receive a larger portion of light.
- Three beds with two aisles. A more convenient option for processing the outer rows, but inside the greenhouse, the paths take up even more space. The middle row can be made 1.5 m wide, the side rows - no less than 45 cm and no more than 95 cm. The width of the passage should be at least 60 cm; it is better to pave it with boards or bricks.
- A wide bed in the middle and two narrow ones at the edges. This placement increases the usable area compared to the previous option, but the greenhouse or greenhouse in this case must have a larger width.
- Pyramid beds. Low-growing plants with root systems located close to the surface are planted at different levels. More often, this placement is used for growing strawberries and wild strawberries.
- Landing across a slope. If the greenhouse soil has a slope, the beds are arranged in a transverse direction. This arrangement is effective due to the uniform incidence of sunlight on the plants.
In small greenhouses, two beds with one aisle are usually arranged. The width of the path should ensure free movement of the wheelbarrow. If the plants being grown are not tall, the beds are traditionally directed from north to south. Tall crops are planted in rows from east to west. With this direction, the low morning rays of the sun penetrate through the rows and illuminate the bushes evenly.
Return to contents
Height and formation of beds

Layout of beds. Option 2.
The height of the beds also affects the yield. They should rise above the ground level by at least 30-60 cm. The soil at an elevation warms up faster in the spring due to the sun's rays and warm air currents. It is also more convenient to care for plants planted at this level. A thicker fertile layer promotes better plant development.
If you plan to plant seedlings of early ripening crops in a greenhouse, you need to protect the plants from lower temperatures. In this case, the height of the bed is made at least 80 cm, and fences made of boards are installed for insulation.
The disadvantage of high beds is the need for more frequent watering; they have increased drainage properties.
Not only the location and height of the beds is important, but also their preservation of the given shape. To prevent the soil from crumbling, sides made of various materials are used to delimit the rows. More often, boards are used for this, but this material rots quickly and only lasts one season.
The factory version comes with aluminum sides. They are sometimes included with the purchased prefabricated greenhouse. They can last for several decades. For these purposes, slate and metal profiles are also used, and old car tires are used.
You can purchase frame borders made of galvanized iron or polycarbonate at gardening stores. These are collapsible devices, covered with a special polymer coating and are rust-proof during long-term use. For low embankments, soft strip borders are used. They are cheap, practical to use and create a pleasant appearance in a variety of colors.
Return to contents
Soil preparation (“pillow”)

The “pillow” soil is laid in three layers, the first is wood chips, then food waste (vegetable peelings) and lastly sawdust.
To speed up the growth of plants, the beds in the greenhouse are “insulated” by equipping a kind of “cushion”. It is an organic mass that releases heat during decomposition. Horse manure has the best heat release properties.
Components such as finely chopped wood chips, food waste (potato peels, peelings of other vegetables, etc.) and sawdust are used to make the “pillow.” The composition is laid in three layers in the order listed.
The soil of the greenhouse must be fertilized, retain water well and be free from insect pests. The prepared soil composition can be purchased at a specialized store or prepared independently. To do this, mix garden soil, river sand, humus and peat in a ratio of 1:1:2:5. To improve the quality of greenhouse soil, this mixture is added to the soil at a rate of 3 kg/m3
Another composition that increases the nutritional properties of the soil is mixed from straw cuttings, manure and decomposed peat (1: 1: 2). 2 kg of sodium chloride, 3 kg of superphosphate and 300 g of urea per 1 m 3 are also added to the mixture. The resulting fertilizer is poured in a layer of up to 18 cm, then garden soil is added until the height of the bed reaches 25 cm. Before planting seedlings, you can additionally fertilize the soil with superphosphate (30 g/m3) and sodium sulfate 20 g/m3.
Ecology of consumption. Estate: With the onset of spring, every summer resident is faced with the task of planting seedlings and their further planting in open ground. The simple and cheap design of a greenhouse made of plastic pipes is suitable for all summer residents and owners of country houses without exception.
Many summer residents strive to provide themselves with self-grown vegetables for the whole year. But due to climatic conditions, it is not always possible to achieve this goal in those areas that are located in the northern regions of our country. An excellent solution to this problem is to build a greenhouse on a garden plot.
True, not all gardeners have the financial ability to purchase a ready-made factory greenhouse. For such people, a way out of the situation may be to build greenhouses from plastic pipes with their own hands.
You can design and build a greenhouse from plastic pipes yourself, without resorting to outside help. And such a greenhouse made of plastic pipes will serve throughout the year, for several seasons in a row. An obvious advantage when building greenhouses from plastic pipes is the prevalence, long service life and low cost of polypropylene products.
CHOOSE A LOCATION FOR CONSTRUCTION
When choosing a future location for building a greenhouse made of plastic pipes, you should take into account a number of factors that affect the quality and quantity of the future harvest.
There are the following options for placing a future greenhouse made of plastic pipes on a garden plot:
- You need to place a greenhouse made of plastic pipes, created with your own hands, in an open space, away from other buildings on the site and large garden trees. This placement option can be combined with the placement of small shrubs and plants around the greenhouse. This will add aesthetic appeal to the building.
- If, due to the small area of the site, it is not possible to use an open space of sufficient area, you can provide for the location of the greenhouse with one side adjoining the wall of an already erected building, house or barn. With this option, an important condition will be the location of the other sides of the greenhouse on the south side in order to receive the maximum amount of sunlight.
SELECTION OF FORMS
The most common form when constructing a greenhouse from plastic pipes is an arched structure. This is primarily due to ease of construction and relative cheapness.
When choosing a form for the construction of a future greenhouse from plastic pipes, it is necessary to take into account the characteristics of the garden plot and the location chosen for the installation of the structure.
If the greenhouse made of plastic pipes will be located in an open area, then it is better to choose a gable model. In the case where the greenhouse will adjoin one side to the wall of an existing building, it is more advisable to choose a lean-to model.
The base of the greenhouse can be made in different geometric shapes, be it square, rectangle, circle, oval or trapezoid. Recently, tent-shaped greenhouses have been gaining popularity.
Attention! Greenhouses of this design have greater light transmission than classic versions.
PROS AND DISADVANTAGES OF BUILDINGS FROM PLASTIC PIPES
Construction of a greenhouse from plastic pipes has a number of advantages over structures made from other materials:

The main and, apparently, only drawback when building a greenhouse from plastic pipes is its lightness. This can cause the entire structure to sway in strong winds. At the same time, this problem can be solved by using additional metal rods driven into the ground to strengthen the structure.
MATERIALS AND TOOLS REQUIRED FOR CONSTRUCTION
Before you make a greenhouse from plastic pipes, you should calculate the necessary materials and tools. It is recommended to do this immediately after determining the location on the site for the future structure. Such measures will help to avoid additional costs already at the construction stage of the structure.
So, for work you will need:
- Timber or boards to form the base of the greenhouse. Before starting construction, it is recommended to treat wooden elements with special protective substances that will protect the wood from rotting.
Advice! To save money, it is recommended to use improvised ones rather than branded professional wood processing products. For example, impregnate wooden beams with resin, coat them with drying oil several times, and treat them with a blowtorch.
- Polypropylene pipes. It is necessary to calculate how many linear meters will be needed to build a greenhouse. For a more accurate calculation when building a greenhouse from plastic pipes with your own hands, it is recommended to make a drawing of the future structure. After obtaining a certain footage of plastic, you can add 10% of the total length for reserve.
- Polyethylene film is used to cover the polypropylene structure. It should be strong enough. High strength will protect it from tearing and allow it to be used for several seasons.
- Several metal rods. The reinforcement must be at least 1 m long.
- Nails and screws.
- Handles with locks and hinges for installing doors and windows in the greenhouse.
- Additional metal loops for fastening individual plastic structural elements.
CONSTRUCTION OF A GREENHOUSE
If, at the stage of calculating the materials used, a detailed drawing of the future structure was drawn up, then you can immediately begin directly building the greenhouse. Otherwise, it is recommended to draw up a detailed diagram of the structure - this will significantly simplify and speed up construction work.
INSTALLATION OF FOUNDATION
Before you make a greenhouse yourself from plastic pipes, you need to create a foundation. For the future foundation of the greenhouse, you need a flat, flat area with a small depression. Therefore, before starting work, you must level the ground and make a small depression of a few centimeters. As a material for the foundation, you can use either boards or wooden beams.
Attention! Before proceeding with the installation of the foundation, the wooden boards must be cleaned with a plane or sandpaper, and also treated with protective substances.
To strengthen the foundation of the future structure, it is recommended to use additional metal brackets or corners. A metal corner is attached to each internal joint of wooden boards. If timber is used as the material for the base of the greenhouse, it is more advisable to use staples that are driven in at each external joint of the structural elements.
The finished foundation should lie tightly on the soil prepared for it. If there are gaps between the foundation and the ground, they must be covered with earth.
FRAME INSTALLATION
After building the foundation, along its outer perimeter, metal reinforcement should be driven into the ground in increments of no more than 100 cm. Pre-prepared and cut sections of plastic pipe of the required length are placed on these metal rods.
To secure plastic pipes, self-tapping screws are used, with the help of which the base of the pipe must be pulled to the wooden foundation. Plastic couplings, corners and crosses are used as connecting elements in the horizontal plane of the structure, which must first be drilled inside. This will allow the pipes to pass through the connectors.
WE CREATE A ROOF
When choosing a material for building a greenhouse roof, you should take into account the features of some of the most common options:
- The optimal and common material for covering a greenhouse is polyethylene film. If financial capabilities allow, you can use a special reinforced polyvinyl chloride film as a covering. This material has good thermal insulation, which will allow you to maintain the desired temperature in the greenhouse even at night. At the same time, this material is highly transparent and transmits up to 95% of sunlight during the daytime.
- A polycarbonate roof has the longest service life, but is more expensive and can present additional difficulties during construction. In addition, such a roof cannot be quickly dismantled, unlike a polyethylene one.
- Textile material for covering such as “agrotex” has low thermal insulation. True, the lightness and simplicity of this material allow installation and dismantling work to be carried out in the shortest possible time.
CONCLUSION
To summarize, we can say that the option of independently building a greenhouse from plastic pipes in a garden plot seems to be the most acceptable option. Such designs have a number of undeniable advantages. These include the lightness and strength of the structure, its durability, ease of installation and dismantling. In addition, such greenhouses are ultimately the cheapest option, and from an aesthetic point of view they are in no way inferior to expensive factory-made counterparts.
We will learn how to build a greenhouse from plastic pipes with our own hands from the video
SUBSCRIBE to OUR YouTube channel Ekonet.ru, which allows you to watch online, download free videos from YouTube about human health and rejuvenation. Love for others and for yourself, how the feeling of high vibrations is an important factor in healing - website
Please LIKE and share with your FRIENDS!
The correct internal arrangement of a polycarbonate greenhouse should solve several main problems. Firstly, it is the creation of an ideal microclimate for plants, including the optimal combination of humidity, temperature, sunlight and ventilation. Secondly, organizing a convenient place to work. Thirdly, maximum use of all useful internal space of the structure.
How to arrange a polycarbonate greenhouse inside, determine the optimal number of beds and paths, and use shelves and racks correctly? You will find answers to these questions in this article.


Beds and paths
The number and arrangement of beds is selected based on the width of the greenhouse itself. For a 3x6 m construction, 2 beds are considered optimal. The width of one should not exceed 1.2 m, and the width of the paths should not exceed 50-70 cm.

Diagram of how to set up a greenhouse inside; in the photo there is a version of a small width greenhouse with two beds
The width of the bed can vary depending on the length of the gardener's arms. 1-1.3 m is considered optimal, when to care for plants you do not have to step on the soil, compacting the soil. Thus, air circulation is reduced and the top layer has to be further loosened.
For greenhouses with a larger width of 4-4.5 m, the optimal placement of growth zones is the arrangement of three beds. Two narrow up to 1 m on the sides and one up to 1.5 m in the middle. This width is due to the possibility of access to the central bed from both sides.

How to arrange a polycarbonate greenhouse inside, photo of arrangement of three beds
The width of the paths is selected based on ease of use and the presence of an automatic watering system in the greenhouse. To avoid touching plants with buckets or watering cans. In addition, if you plan to use auxiliary equipment such as garden one-wheeled wheelbarrows and other equipment, the path should not only be made wider, but also covered with dense material.
Path covering
The coating material for paths in a greenhouse is subject to not only high demands on strength and wear resistance, but also heat resistance. The material should not be afraid of moisture, and be resistant to biological damage, mold, fungi, and rotting. Modern industry produces a variety of materials suitable in their performance characteristics for covering paths in greenhouses:
- Seamless dense rubber;
- Garden parquet;
- Plastic modules for garden paths;
- Geotextiles and other non-woven materials made from thermally bonded polypropylene fibers.

Arrangement of the greenhouse inside, photo of the rubber track
Despite all the ease of use in a greenhouse, these products are not widely used among gardeners, the reason is their high cost. The track equipment is used with more budget-friendly materials:
- Paving concrete slabs;
- Brick;
- Mulching with sand, gravel, conifer bark;
- Laying boards on a roofing felt lining.
The height of the beds and the material of the sides
When arranging a greenhouse inside, high beds are widely used, which have a number of advantages:
- With a high groundwater horizon on the site, the possibility of wetting the root system of plants is eliminated;
- When arranging at a significant height, up to 1 m, it is much more convenient to care for low-growing plants;
- Possibility of developing agricultural areas on a site with heavily compacted earth or a significant amount of construction debris.
However, there is also a significant drawback. It is difficult to grow moisture-loving and/or perennial crops in such beds. The soil dries out quickly and freezes heavily in winter.

Photo of the arrangement of the greenhouse inside, high soil level, brick sides lined with tiles
The following materials are used for sides when arranging a polycarbonate greenhouse inside:
- Wood - boards, beams, small diameter logs. The disadvantages of its arrangement are the fragility of the material, all 2-3 seasons and replacement is necessary. Using antiseptics to prevent rot can have a detrimental effect on plants.
- Branches of vine or hazel are an even less durable material, used in the form of hand-made wattle fence. Its use is justified only with high aesthetic requirements. It is often used for decorative cladding of more durable, but externally unsightly materials;
- Stone, brick, concrete are durable materials that provide the necessary tightness to the side walls of a raised bed. Their arrangement will require significantly more time, but their service life can be tens of years.
- Polymer products are used mainly for arranging low-level beds of 15-20 cm. They have high resistance to biological damage, but are not strong enough.
Racks and shelves
To increase the area for seedlings, it is often practiced to arrange shelves on which additional soil is placed. Thus, the usable area is significantly increased.

Multi-tier greenhouse, interior arrangement of racks with plants
Minimum set of equipment
Modern manufacturers can provide an impressive list of high-tech equipment for polycarbonate greenhouses and agriculture:
- Equipment for irrigation system;
- Automatic ventilation;
- Lighting and various types of heating equipment.
All this automated greenhouse equipment inside can significantly make life easier for a gardener and significantly increase productivity. The only drawback is the high cost. However, there are budget alternatives for how to equip a polycarbonate greenhouse inside. Any gardener can afford these devices.
Drip irrigation
To set up drip irrigation you do not need complex equipment. A hose and several plastic tees are enough. The irrigation network is placed inside directly on the ground. If desired, you can connect the water supply system to pumping equipment, but if there is no electric pump of the required power, then you can make an ordinary water tower by installing a barrel of water at a height of 1.5-2 m. By connecting power equipment and a controller with a timer to the tap, you can

Schematic diagram of an irrigation system for self-production, in the photo there is an autonomous battery-powered timer equipped with a water supply device
Ventilation equipment
In order to equip an automatic ventilation system, there is no need to buy expensive climate control equipment. It is enough to purchase an autonomous mechanical device - a thermal drive. Such equipment will be able to open ventilation vents in the greenhouse when the threshold temperature is exceeded. Video that describes the principle of operation and shows the operation of thermosetting equipment:
Lighting and heating
Any lamps are suitable as lighting equipment, however, when installing electrical wiring, you should remember that the humidity level in the room is constantly increased. So sockets, switches and other electrical equipment must be housed in a protected housing. It is better to use IR heaters as heating equipment in late autumn and early spring.

Arrangement of a polycarbonate greenhouse inside, photo of IR heating equipment
The presence of a greenhouse on a summer cottage is a common occurrence. Using different materials, you can build greenhouses of a wide variety of shapes and sizes. Work in them begins in early spring and ends in autumn. Having your own vegetables is not only economical, but also safe, since you can be confident in their quality. That is why many people have a desire to equip a winter greenhouse. You can grow vegetables and fruits in it all year round, even if it’s frosty outside.
Can an amateur summer resident build such a structure? In fact, the construction and arrangement of a winter greenhouse does not require much time and money, so you can handle the tasks yourself. In this article we will tell you how to build a winter greenhouse with your own hands, demonstrate the necessary drawings, as well as photo and video instructions.
Features and differences from a summer greenhouse
When constructing a winter greenhouse, unlike a summer greenhouse, a strong and reliable structure is made. It stands on the foundation. In addition, the winter greenhouse has a heating system. The quality and consistency of the temperature inside will depend on the latter. Every winter greenhouse must contain:
- lighting;
- heating;
- ventilation;
- watering.
The size of the greenhouse must be selected in accordance with the number of crops that will be grown. The coating material must be reliable. A simple film will not protect crops from frost and snow. It is also important to provide for the possibility of additional wall insulation.
When developing a winter greenhouse, several conditions must be met for good plant growth: light and temperature conditions, as well as air humidity.
Main types of winter greenhouses

A modern winter greenhouse can be built from various materials. Today, the construction market is filled with innovative materials. They are distinguished by increased strength, lightness and affordable price. This allows you to choose everything you need within even a small planned budget. At the preparatory stage it is necessary to plan the design. Her choice will depend solely on the plants that are planned to be grown.
The types of winter greenhouses are distinguished not only by the materials used, but also by their external forms.
- Single-pitched - wall-mounted and with an earthen fill.
- Gable - with main walls and a glazed roof.
- Polycarbonate arched.

- First of all, the parameters are calculated, since further calculations will depend on this.
- It is also necessary to take into account functionality, that is, to know in advance the features of growing crops. In modern and modernized winter greenhouses, you can grow not only vegetables and fruits, but also mushrooms, herbs, and flowers.
- The microclimate inside the structure will depend on the correct location of the greenhouse at ground level. If desired, the structure can be deepened inside and get the effect of a thermos, or construction can begin on the surface. Some people prefer to set up greenhouses in old buildings (garage or barn).
- A wide variety of architectural solutions allows you to realize any ideas and plans. You can build the structure yourself or buy a ready-made structure. You can also seek help from specialists.
Many people grow flowers of various crops for sale. When choosing exotic plants, it is necessary to calculate all costs, as well as study the requirements for the structure.

When developing a project, it is necessary to take into account the material with which the frame will be sheathed. The winter greenhouse must be durable and airtight, so for arranging the frame choose:
- tree;
- metal.
Both materials are very durable, so it is quite difficult to choose one or the other. Metal is strong and reliable, but wood is much easier to work with. In addition, the wood will not heat up in high summer temperatures. To support the weight of the entire structure, as well as the load of snow on the roof, it is necessary to use strong and thick racks.
Frame covering material:
- film;
- glass;
- cellular polycarbonate.
When choosing a film, it is necessary to sheathe the frame not in one layer, but in several. In addition, you should not use it to arrange the entire structure. Glass also has many disadvantages: heavy weight, fragility and difficulty in installation. The most suitable material for a winter greenhouse is cellular polycarbonate. The advantages include: light weight, light transmission, and ease of installation.
According to experts, the microclimate in a greenhouse made of wood is several times better than one made of metal. When choosing a tree, it must be treated with modern antiseptics and protective agents.

When choosing a site for the construction of a winter greenhouse, it is necessary to take into account three main factors:
- Light. The winter greenhouse should receive the maximum amount of sunlight. The greenhouse is best placed lengthwise from west to east.
- Wind. If the chosen location often experiences gusty and cold winds, it is necessary to consider protection. This will save on heating costs and constantly maintain an acceptable temperature and microclimate.
- Convenience. Access or passage to the greenhouse should be wide and convenient. Thanks to this, it will be very convenient to use the greenhouse for its intended purpose.
When organizing protection from strong winds, you can plant a hedge. It must be remembered that the fence must be placed at a distance of at least 10 m. The distance is calculated depending on the height of the ridge.

The most important thing in a winter greenhouse is heating. This process is the most labor-intensive and complex. To organize it, the help of specialists is required. But you can do everything yourself. It is necessary to choose the right type of heating, on which the productivity of the greenhouse will depend. Today there are many ways to heat even a large area. Each of them has its own advantages and disadvantages:
- Sun. Affordable and cheap option. But it is not suitable for winter, since the sun's rays are not so strong and will not be able to heat. It can be combined with other heat sources.
- Biological heating. Biologically active substances decompose, resulting in the release of heat. The simplest biological substance is manure. As with the sun, this method will not be able to completely heat even a small area.
- Electricity. An affordable and popular heating method. It can be installed in any area away from home. You can use different electrical appliances for it: convectors, air heaters, infrared radiation, cable heating, heat pump and water heating.
- Air heating. It is organized at the initial stage of construction of a winter greenhouse, in particular, when pouring the foundation. With the help of heating and ventilation units, warm air is supplied to the middle and upper part of the greenhouse.
- Gas. Gas heaters are installed in the greenhouse, in which direct combustion occurs. To avoid oxygen burnout, it is necessary to provide a good ventilation system.
- Bake. An affordable and economical option involves installing a stove and heating the entire area of the winter greenhouse. Gas, wood and coal can be used as fuel. Among the disadvantages is the heating of the walls, so planting plants next to the stove is not recommended.
It is necessary to choose the type of heating individually for each specific case. You must be guided by such criteria as local climate, planned budget and plant type.
Stages of construction of a winter greenhouse

Since the construction stages and technologies completely depend on the materials and design, there is no need to talk about standards. Using an example, we will look at the construction of a winter greenhouse, which is adjacent to the house. A brick is selected for the foundation. The frame is erected from wooden beams or profile pipes. The entire structure will be covered with polycarbonate.
To create the effect of a thermos, you don’t have to go deep into the ground, but only raise the base. The depth of the foundation is 50 cm, the width is 40 cm. For convenience, it is better to make a strip foundation. Do not forget about the sand cushion or use fine gravel. The execution steps are standard and do not require any professional skills or equipment. After pouring, it is recommended to keep the foundation for a week. On hot days, the surface is moistened with water. A layer of waterproofing should be laid between the foundation and the plinth.
You can use used bricks to build the basement. If the financial side allows, then a new brick is selected. The height of the wall should be about 1 m. The thickness of the walls can be half a brick or a brick, at your own discretion. The frame is constructed from durable and pre-treated wooden beams. Anchors and dowels act as fasteners. Thus, a skeleton is installed that will be a reliable support for heavy loads. The frame for the roof must be made at an angle of 30° from the horizon.
The frame should be sheathed with polycarbonate according to the standard scheme and technology. For a good result, several conditions must be met:
- marking;
- precision cutting;
- accuracy of installation;
- use of special fasteners;
- sealing polycarbonate seams for tightness.

Several vents installed around the entire perimeter can serve as ventilation.
For greater savings, it is recommended to choose a location near your home. Thanks to this, one of the walls is already completely ready, so you don’t have to waste time, effort and money. In order for the main part of the greenhouse to be constantly warm, it is necessary to attach a vestibule at the front door. For high-quality sealing, you can use polyurethane foam and special sealants.

After all construction and sealing work has been completed in full, you can begin arrangement. So, it is necessary to supply water and electricity for lighting to the greenhouse. It is also important to take care of the shut-off valves, which will ensure a high-quality water supply.
When choosing light scattering sources, it is necessary to take into account the characteristics of growing the selected crops. An equally important issue is the soil. The substrate is prepared, fertilizers and special additives (feeding) are added. They will ensure fast and proper growth of all vegetables and fruits that have been selected.

Guided by the tips provided, you can build and prepare a winter greenhouse for growing various crops in the winter in just a few days. It is enough to use all available materials and purchase missing ones. You can handle all the work alone, but it is better to have an assistant, especially when it comes to installing the skeleton of a winter greenhouse.
Video
To learn how to make heating in a winter greenhouse, watch the video:
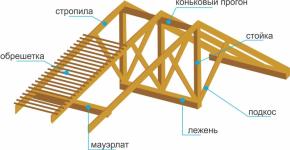
Blueprints


![]()


Photo


Goals and objectives:
- creating an optimal microclimate for plants: humidity, temperature, lighting and ventilation;
- organizing a comfortable workplace;
- rational use of space.
Planning the interior space
So, one of the main questions in arranging the internal space is how to make beds in a polycarbonate greenhouse. This is the first thing that needs to be thought about at the stage of creating drawings. From how they will be located, yield depends- and this is the main task of a gardener.
Arrangement of beds in the greenhouse depends on its size and location on which it is located. Possible options:
- two ridges with 1 passage between them;
- three ridges with 2 passages;
- transverse beds.
It all depends on the capabilities of the gardener. If it is too expensive to build, you can make the calculation for 2 beds 80-95 cm wide. The minimum passage width is 50 cm, the most convenient is 70 cm.
If financial capabilities allow, the greenhouse is designed for three beds. Moreover, the middle bed can be wider than the side ones. It is accessible from two sides, so it can be made 1.5 m wide.
Relief of the site may be with a slope, and this also affects the location of the plantings. In this case, it is advisable to place the beds across the structure. This will help maintain the light regime for the plants and will not allow water to flow down the slope from the beds.
Construction of beds and passages
 Beds in a greenhouse must be raised above ground level 20-30 cm and fenced.
This will make it easier to care for plants, increase the fertile layer of soil and prevent soil from falling from the bed onto the paths.
Material that can be used for the edges of beds:
- Tree. These can be boards, timber and small-diameter logs.
Disadvantages of such a fence:- fragility - wood rots under the influence of moisture;
- the use of antiseptics for impregnation can harm plants.
- Brick, concrete or stone. The most durable material, but it will take much longer to arrange the beds. But it will also serve for decades.
- Flat slate or polymer materials resistant to aggressive environments and biological influences.
Often fences are sold complete with.
Planning aisle width, we must take into account that not only will a person walk along them, he will also carry buckets and watering cans. If the passage is too narrow, they will touch and injure the plants.
Greenhouses always have high humidity, so it’s worth thinking about what they will covered paths. They shouldn't be slippery.
Best coverage options: 
- dense rubber;
- geotextiles;
- decking (garden parquet).
Budget options:
- fine gravel with sand;
- paving slabs;
- brick;
- roofing felt with boards laid on top.
Don't forget about aesthetics. It is much more pleasant to work in a beautiful and clean interior space.
Partition in a polycarbonate greenhouse
The need for them arises when they are nearby adjacent not exactly friendly culture. For example, they have completely different requirements for temperature and humidity.
The most reliable way to separate different cultures from each other is to install solid polycarbonate partition with a door.
It will harmoniously fit into the interior of the greenhouse and will reliably fence off the beds. It is possible to install the same partition with an open doorway.
This option is best used when there are tomatoes in the greenhouse that need constant air movement in the greenhouse.
If it is not possible to install a polycarbonate partition, it can be made from a film stretched over a frame.
The main condition when installing any partition is to ensure sufficient ventilation in the room to quickly regulate temperature and humidity.
 To do this, you will need additional vents or a forced ventilation system.
"Pantry" in the greenhouse
Agree, it’s not very convenient to carry the necessary things from home every time inventory for working with plants. This means that it must provide place to store it. At the stage of creating the drawing, you can calculate the space for the “hallway”.
This could be a small vestibule where there will be buckets, watering cans, a shovel, a rake, fertilizers and everything else that is necessary to care for the plants.
Shelves, cells or other storage amenities are limited only by the gardener’s imagination. If it is not possible to make a vestibule, utility compartments can be organized directly in the greenhouse.
It is especially convenient to do this when plants are grown not in the ground, but on racks. The least convenient levels - lower and upper - can be adapted for these purposes.
Photo
In the photo below: the construction of a greenhouse made of polycarbonate inside, how to arrange the beds in a polycarbonate greenhouse


Equipment in the greenhouse
To facilitate work and create ideal conditions for plants, it can be equipped with technical devices and equipment. Its minimum set is as follows:
- additional lighting;
- irrigation system;
- forced ventilation.
It will require hoses and several plastic tees. The hoses will be located on the beds, and outside they can be connected to an electric pump.
If there is none on the site, a garden barrel installed at a height of 1.5-2 m will do. You will only have to spend money on a controller with a timer, which is installed under the tap. 
Ventilation
For a greenhouse, instead of expensive equipment, a hydraulic thermal drive is quite suitable. It will trigger when the temperature rises above the specified threshold. Such a device will not require electrification of the greenhouse.
Greenhouse lighting and heating
If the greenhouse is used for vegetables, electricity is needed. The specificity of the installation of the electrical network and equipment is that it must be carefully insulated, since there is always high humidity in the greenhouse.
For heating, it is best to use a miracle of technology of the latest generation. The system is good for its efficiency and the fact that the plants underneath will never overheat.
Phytolamps are used for lighting.
Growing crops on racks
If the greenhouse is intended for growing low-growing plants, it is advisable to equip it with shelving. It is convenient to place boxes with them, pots with them, or plant them in the autumn-winter period.
Shelving is installed instead of beds and assumes a similar layout in a greenhouse. This method of arranging plants allows you to save space by planting a much larger number of plants. Most often, racks are used for growing strawberries.
 Advantages of shelving:
- ease of plant care;
- efficiency of space use;
- increase in yield;
- saving on heating.
Shelving can be installed above the beds. The lower tiers are planted with crops that will tolerate light shading from the shelves; on the upper tiers there are pots or boxes with more light-loving plants.
Making racks with your own hands
There can be no recommendations for the height of the racks; each owner builds them to suit his own height. But the width can be similar to what the beds are made in a greenhouse. If they stand in three rows, then the width of the shelves can be 80 - 150 - 80.
You can simply determine the height of the main shelf - measure the height of the kitchen table. If you are comfortable cooking with it, then it will be comfortable caring for your plants.
The length of the structure can match the length of the greenhouse itself or be shorter. For the strength of the structure (and it must withstand a lot of weight), intermediate racks are installed. Their number depends on the length of the rack.
The most widely used material for shelving is wood. It can withstand quite heavy loads and is cheaper than others. Timber is used for racks, and boards with a thickness of at least 4 cm are used for shelves.
All parts of the wooden structure must be treated with a special impregnation that protects against moisture and painted. Shelves should have sides with a height of 15 to 20 cm. The bottom of the shelf is lined with boards with a gap of up to 5 mm between them so that water does not accumulate in them. 
Disadvantages of wooden construction:
- the need for constant processing and painting;
- heavy weight of the structure;
- inability to use with a drip irrigation system.
A much more acceptable option is a design made of metal and plastic. The assembly principle is similar to a wooden rack. Metal or steel profiles are used for racks. It also requires anti-corrosion coating and painting.
The cost of the rack will be higher, but it has advantages:
- durability;
- ease of design - if necessary, you can rearrange the greenhouse;
- possibility of using any irrigation system.
If there is no bed under the rack, you can arrange another shelf below for storing equipment and fertilizers and chemicals for processing from. In general, the number of shelves depends on the organization of access to them. If it is possible to use stairs in a greenhouse, then they can be made in several tiers.
The internal equipment of a greenhouse is no less important than what material it is made of and how it is made. By arranging it correctly, you will receive not only a good harvest, but also the pleasure of working in it. And we hope that we have answered the question of how to build a greenhouse inside using polycarbonate.
Useful video
In the video below: how to equip a polycarbonate greenhouse inside
If you find an error, please highlight a piece of text and click Ctrl+Enter.