Do-it-yourself paths in the country: consider the process of work, how to make a path. Beauty underfoot: making garden paths from a mold Tool for laying garden paths
Garden paths winding elegantly among the trees add to the plot neatness and completeness... And it is not at all necessary to buy paving slabs for their arrangement, to hire a designer and builders. You can ennoble the paths in the garden on your own, putting your soul into their creation, and in return get a durable, well-groomed coating that can delight you for many years. We will tell you more about how to make a garden path from a variety of materials with your own hands.
Types of garden paths
Garden paths can be classified according to many characteristics, ranging from material of manufacture, size and arrangement to design and suitability for a particular style. Consider what garden paths you can equip on your site with low costs for their manufacture.
Garden path made with a plastic mold
Improving garden paths with plastic molds- a relatively new method, which, due to its simplicity, has found many fans among the owners of summer cottages.
Proof of this is the numerous photos from specialized forums, where you can see just such garden paths.
Merits This method is not only simplicity, but also low cost and production speed, because the manufacture of garden paths using molds is, in fact, ordinary concreting.
The cheapness of this method is due to the use of one form, which is sufficient for smooth operation. Of course, the strength of the tiles made in this way is inferior to the products made by vibrocasting in the factory, however, for the path in the country, they are one of the best options.
Garden path from paving slabs
For garden paths, the same applies. tile, which is laid on the sidewalks. The indisputable advantage of this material is strength... The tile, laid in the form of a track in the country, will serve you for many years without losing its appearance, and if some elements of the track are damaged under the influence of external factors, they can be easily replaced. V limitations we write down the tiled covering labor intensity and high cost... What do you want? Durability doesn't come for free.
Garden path made of stone
Very often, the stone left over from the construction of a house is used to refine the paths. In this case, we can assume that the price of such a garden path is equal to the cost of one's own labor. We will not talk about the durability of the stone, paths of this type have been known since ancient times. In disadvantages, as in the case of tiles, we define the complexity.

Laying the stone correctly is not an exercise for weaklings, but it will more than pay off with the result obtained. Do-it-yourself stone paths will give the appearance of your garden a real nobility and a kind of unshakable durability, moreover, they will remain for your descendants in their original form.
Garden path made of chocks and wood
If the country house is built of logs, then your choice is a do-it-yourself path made of wood. This is one of the cheapest options, very easy to repeat, but nevertheless one of the most effective against the backdrop of trees in the garden. Unfortunately, the service life of such paths is limited due to the fragility of the material, so only the hardest types of wood will have to be used.

Bulk material garden path
If you want to build garden paths with your own hands at low cost, then this method is what you need. It is enough to dig a trench of the required width and fill it with suitable material, starting with pebbles and screenings and ending with crushed stone or marble chips. You can even lay pieces of marble or concrete slabs in a chaotic manner, the main thing is to set their upper plane in level and fill up the cracks between them. These garden paths are not suitable for heavy loads, but they can provide the necessary cleanliness and excellent appearance of your garden.
Instructions for creating garden paths in photos
Garden path using a form with your own hands. Step-by-step instruction
To start equipping garden paths using a plastic mold with your own hands, look at the photos of such stencils and get the one that you like the most.
Pay attention to the height of the forms and "stones" - they can vary widely.
A lot has been written about how to make paths in the country with your own hands. We suggest using the following instruction.
Choosing a place for a garden path and mark it up with our own hands. To do this, we hammer in the pegs at all bends of the path, and then we tighten them with a cord around the entire perimeter. We immediately set the cord according to the level, taking into account the required height of the track above the ground. A water level can greatly facilitate this task.


If the soil on your site is soft, then you need to dig a trench a depth of 10-12 cm, fill it up to half with sand, after which you need to spill everything with water and tamp it. With sufficient soil strength, you can do without a trench, but it is imperative to make a sand bed followed by compaction.
If the paths in the country house are planned to be used for the passage of a car, then you should dig a trench with your own hands, fill it with a sand-gravel mixture, and then lay a reinforcing mesh made of a steel bar over it.


Preparing the solution ... To do this, mix cement grade 400, sand and crushed stone in a ratio of 1: 3: 4. If you plan to use coloring and plasticizing additives, then add them at the rate of 1-3% dye and plasticizer. You can take 4 parts of sand, but make sure that the cement is as fresh as possible, and its brand is not lower 400 .
We start the production of garden paths by mixing all the components in a dry form, after which we add water (if a concrete mixer is used, first half the volume of water is poured, and the rest of it is added during the mixing process).
We start to prepare the mortar Add concrete dye And liquid plasticizer Mix dry Add water with plasticizer and mix again
Immediately, we note that excess water negatively affects the strength of concrete after setting, therefore, the amount of liquid should be no more than required for high-quality filling of the form. Application plasticizer will greatly facilitate this process, add strength to concrete and reduce cement consumption by 15-20%. Fiber can also be added to the mortar, which will prevent shrinkage cracks on the surface and increase the abrasion strength of concrete by 100%.
For the convenience of using the stencil, we attach handles to it using special technological holes in the housing. For those who plan to make garden paths at low cost, we will tell you that the mold can be lubricated with an automobile " working off».
Of course, this is not the most ideal option, because the oily surface of the tiles can only be painted after a while. The use of a soap solution is no less budgetary, but even such an environmentally friendly method also has the disadvantage described above.
Lubricate the molds for the garden path with a special lubricant Lubricating the mold will make it easy to remove it from the finished product
And here is the application special grease for molds, although it will entail additional costs, it will save you from the need to constantly lubricate the mold for making a garden path with your own hands. The form lubricated immediately before work will not leave greasy marks, so you can paint such a path immediately after setting.
If the soil compacted by you has time to dry , then be sure to spill it with water. Further, focusing on the previously stretched cord, as well as controlling the level, we establish a mold for pouring garden paths, which must be pressed a little into the sand.
We fill the stencil with the prepared solution , avoiding voids in its corners. Using a small rammer, which we work as a vibrating plate, we try to compact the concrete as much as possible, and then level its surface with a spatula. After the 30-50 minutes required for the preliminary setting of the concrete, the mold is carefully removed and placed side by side, repeating the process until the finish line.
We begin to gradually fill in the form, do not forget that the concrete should not be very liquid. Pay special attention to the corners, it is necessary to fill them with concrete as much as possible. Since we used a plasticizer and made the mortar thick, after 15-20 minutes you can remove the mold. Here the first plate is ready! We leave to freeze for a day, after which we actively begin to use
To avoid animal prints , self-made garden paths are covered with plastic wrap and wait at least 3-4 days before taking a new path and taking a photo as a souvenir. The full load on the concrete product can be given no earlier than 20 days later.

The last step in the construction of garden paths do it yourself at low cost is painting and backfilling of tile joints with river sand.
There are several ways to paint a new path.
- The first is to add a dye at the final stage of concrete preparation. ... After that, you can lightly stir the concrete, achieving an uneven color, or mix the components thoroughly to obtain a uniform color.
- The second method requires sprinkling the wet concrete surface with dry paint each time after removing the mold. , however, in this case, only the topmost layer will stain, which will wear off over time. Garden paths with stains wiped out after such a painting can often be seen in the photo on the net.

DIY tracks video tutorial
Garden paths, painted with their own hands with the help of dye dissolved in deep penetration soil , which allows you to achieve similarity with natural stone at low cost. Tiles that look like stone, painted in different colors, will look especially impressive in your garden. And the last tip: after painting, do not forget to treat the surface of the path with a water repellent - it will not allow moisture to penetrate into the pores of the concrete, destroying it from the inside.
Do-it-yourself concrete path
Easy to manufacture, durable and visually attractive are monolithic concrete paths laid along the suburban area. Next, read on how to make concrete garden paths.
We mark the future track by hammering the pegs along its edges and pulling the cord between them at the required height. We take into account that the optimal fill thickness is from 7 to 10 cm.

Preparing the sand pillow ... To do this, we dig a trench up to 20 cm deep, level its bottom, install beacons and lay geotextiles, covering the slopes of the trench with this material as well. After that, fill the hole with 2-3 layers of sand with intermediate pouring and tamping of each layer. You can put a layer of fine gravel between two adjacent layers of sand. This will enhance the drainage properties of the pillow.
Laying agrofibre Sand cushion arrangement Sand cushion leveling
Preparing concrete ... You can use the recipe from the instructions for filling forms. If you need a sidewalk of increased strength, for example, for driving or parking a car in the country, then take 1 part of cement (not lower than 400 grade), 1.5 parts of sand and 2.5-3 parts of crushed stone or gravel. The ideal volumetric ratio is 1 part water to 3 parts cement, but a little more is added to increase the plasticity of the liquid. Do not forget that the less water is in the solution, the stronger the concrete will be.

Formwork is used for garden paths made of wooden boards with a thickness of at least 20 mm. It is better if the width of the boards is equal to the thickness of the fill, otherwise you will have to dig them into the ground. The boards need to be nailed to the inside of the pegs.

Install dividers at regular intervals in order to create expansion joints. When making a track in the country, dividers can be used from scrap material. For these purposes, even, narrow strips of drywall, glass, thin boards, laminate trim, siding, etc. are suitable. In order to remove the spacers after the concrete has set, lubricate them with any suitable lubricant.

We carry out the reinforcement of the structure to increase its strength. As a reinforcing mesh, a mesh netting, trimming of reinforcement, pipes, etc. are used. Of course, it is best to use a welded reinforcing belt made of rods with a diameter of up to 8 mm, with a cell of 100x100 mm. The reinforcement is set at half the height of the track, using fragments of bricks or clamps from the same rods.

Garden paths are poured up to the upper edge of the formwork ... Next, using a rammer, we compact the surface until the cement laitance appears on the surface of the path, and then level it using the rule. Next, cover the path with plastic wrap and wait at least 5 days before removing the formwork. The full load on concrete can be given no earlier than after 3 weeks.
Decorate the path can be done in several ways.
- First, the surface can be painted or tiled with marble or ceramic tiles.
- Secondly, you can apply a pattern to it using a curly spatula, screwdriver or coarse brush.
- Thirdly, you can paint the concrete itself at the preparation stage.
- Fourthly, gravel or pebbles can be pressed into the wet layer, laying out intricate patterns.
In a word, a concrete garden path can be original and attractive, as in numerous videos of popular Internet resources.

DIY garden path from paving slabs
If you plan to equip garden paths with your own hands at low cost, then this method will not work for you. Paving slabs cannot be called cheap material. On the other hand, such tracks have a lot of advantages and are practically devoid of disadvantages. Watch a video in which such a garden path is laid with your own hands. Not that hard, is it? At first glance, this is how it is. In fact, in order for the sidewalk path laid in the country to please the eye for a long time, careful preparation of the base and maximum accuracy and precision in work are necessary. So, how to make a paving slab track with your own hands:
- Choosing a tile ... At the same time, we focus not only on design, but also on its operational features. For example, the ability to withstand increased loads is important for a tile on which you plan to drive a car.
- Stocking up with a tool ... For work we need: a trowel, a rubber hammer, a tamper, a level, a cord, pegs, a pipe or I-beam, sand and cement.

- Marking future tracks ... To do this, we hammer in the pegs and pull the cord at the required height.

- Preparing the base ... The successful operation of the track throughout its entire service life will depend on this work, so we approach this stage most responsibly. To do this, we level the base as accurately as possible, removing part of the soil on the hills and pouring it in the lowlands. In the process of work, we constantly compact the soil, wetting its surface with water.
We calculate the depth of the base based on the height of the tile plus the height of the sand layer. Add a couple of centimeters to the resulting value for shrinkage. As a rule, the depth is 20-30cm. Do not forget to create the necessary slopes for water flow from the surface.
- After leveling the base, we lay geotextiles ... It will prevent weeds from growing into the tile joints.
- Pouring a sand pillow , spill it with water and ram. After that, we level its surface with a profile, leaning on pipes or beams installed at the required distance from each other.

- Preparing the mixture from 1 part of cement and 3 parts of sand, which we spread on the base and screed with an I-beam or channel.
- We start laying the tiles from the curb in the direction "away from you" ... We lay out the initial row clearly along the cord installed along the chamfer. In this case, you can use 1-2mm crosses to form seams of the same thickness. To ensure the required height, sand is poured or removed with a trowel, tamping it in the process. At the same time, do not forget to constantly monitor the quality of laying with the help of a level and a mallet. If you need to dock the tile to other buildings, then if necessary, you can cut it with a grinder with an installed circle for working on stone.
- After the last row has been laid, fill the seams with a sand-cement mixture and fill them with water.
A curb installed along the edges of the sidewalk will prevent tiles from shifting and preserve the integrity of the structure. During operation, the sand from the seams can be washed out with water, so it will be necessary to add it periodically.
Garden path made of wood
Many summer residents are thinking about how to make garden paths out of wood, because this inexpensive and affordable material is always at hand. In addition, you can use not only the classic version in the form of installed cuts, but also install beautiful and functional paths in the country, for example, from such an improvised material as Euro pallets.

The material for the cuts can be either a purchased log house or fallen trees from the grove, which is located next to the site. Making wooden garden paths at a low cost will help a chainsaw, which you do not have to buy if you can ask a friend for help.
To arrange the track, follow the instructions below:
- We mark a place for the path and dig a trench 10-20 cm deep.
- We lay waterproofing, taking into account the overlap of not only the bottom, but also the slopes.
- As a drainage, fill the bottom of the trench with rubble.
- Pour a 10 cm layer of sand as a pillow under the cuts.
- We install cuts, alternating thick logs with thin branches to fill the space as much as possible.
- We fill up the gaps between the cuts with sand.
You can set the saw cuts in such a way that their upper part will rise 3-5 cm above the surface. A track of this type will be much less polluted by slush and rain.
In the video, you can often see how great a garden path made of wooden planks looks like. But such material as Euro pallets is excellent for our purposes, and the cost of such material includes only its delivery to the site. At the same time, pallets are made of durable wood, which, when treated with antiseptics, can last for a long time.
To prepare the boards, they are cut into 50 cm pieces, polished, treated with a protective agent and painted or varnished. The flooring itself is performed according to the following algorithm:
- Logs are made of wooden bars, which are fastened together with the same bars, using "half-tree" knitting.
- Cover the structure with bitumen mastic, which will protect the frame from decay. The lower part of the boards is covered with the same mastic.
- Plank the boards, leaving a gap of 10-20 mm between them for water drainage.
- Additionally cover the track with varnish or paint.
When hammering in nails, try to sink their heads into the wood as deeply as possible. This will allow you to walk barefoot along the path without getting hurt.
Prices for forms and materials
Everything you need for arranging garden paths can be found in the corresponding sections of the Leroy Merlin store. Garden paths and other sections of the catalog contain hundreds of positions of the necessary tools and materials. At the same time, one cannot fail to note the rather democratic prices.
So, the cost of a mold for a garden path in Leroy is 507 rubles, which, you see, is quite inexpensive, given its reusable use. A concrete mixer, of course, will cost you more - a 120 l unit has a price of 5690 rubles, but it will greatly facilitate concrete work.

Dyes for concrete
Dyes for concrete start at 603 rubles. for a 700 g can, while plasticizers can be bought for a minimum price of 149 rubles. for a container weighing 600 g. Shop consultants will be able to answer questions about how to make paths in the country with their own hands or tell about the peculiarities of using certain materials. A garden path mold bought from Leroy Merlin will save you quite a significant amount when arranging paths in your garden.
If you have not yet decided how to make a path in the country, look at the photo gallery located on our website. Interesting solutions using various methods of arranging garden paths will help you choose the best option, make the necessary edits to it and create your own unique design. And maybe soon a photo of your site will appear in the first lines of search results.

FORUMHOUSE users are well aware that life outside the city is not only a pleasant pastime in a hammock in the garden, but also constant chores. Everyone equips their "ten hectare" to their liking. And if the creation of landscape design is a matter of personal preference, then garden paths are simply vital on any personal plot and at any dacha. Indeed, in addition to purely decorative purposes, it is the paths that allow us to move freely around the site, regardless of the season.
Therefore, increased requirements are imposed on materials for paving garden paths, such as durability, safety, environmental friendliness and presentable appearance. Paving slabs meet all these requirements. With expert advice and step-by-step instructions from users of our forum, this article will help you lay the tiles for the path in the country yourself!
How to make a tile track. Planning.

Any construction should begin with a careful planning of all work. The laying of paving slabs will not be an exception. First of all, you should pay attention to the following points:
The total number of tracks and their location on the site. Tile for the path in the garden.
The key rule can be formulated as follows: "The central path in the garden should lead from the entrance to the site to the house." If there is a garage, workshop or gazebo on the site, then paths should be put to them. Thus, you can ensure the zoning of the site, providing an unobstructed passage to each building.
Sidewalk width

The path leading to the house should be of such width that two adults walking towards each other could easily miss each other on it. On average, this value ranges from 1 to 1.5 meters.
Paths that are not used as often and lead to flower beds or beds can be made from 0.5 to 0.8 meters wide.
You should also clearly define the functional purpose of the tracks.

Denis Bogdanov Landscape improvement specialist, nickname on the forum Denis Vlad-ch
- For myself, I clearly divide the paths into decorative, leading to the gazebo, and functional, which are subject to great stress and lead to the house or garage.

Tracks that are heavily loaded require more thorough foundation preparation than those tracks that are used from time to time.
Denis Vlad-h
You also need to consider how you will care for the garden path in winter and autumn.
Unlike a gravel path, paving slabs are easier to care for. By removing snow and fallen leaves, you will not throw rubble aside.


The second most important characteristic of a garden pathway after functionality is how pleasant it is to walk on it. And in order to understand this, you can use the secret of landscape designers.


Vladimir Petriv Director of Petriv Landscape Designe
I always advise you to first walk along the pre-marked paths and make sure that everything is comfortable, and it is convenient for all households to move along them. I can say that after such a "walk" you almost always have to make adjustments to the original plan for marking the track.
In addition to determining the functionality of the garden path, it is necessary to choose the thickness of the tiles. And here it is better to adhere to the following rules.
How to make a sidewalk walkway: step by step instructions
In addition to determining the functionality of the garden path, it is necessary to select the thickness of the tread tiles. And here it is better to adhere to the following rules.

Konstantin MerzlyakovExpert at Factory GOTIKA, Moscow:
For garden paths and the adjacent territory, where cars do not enter, the paving slabs of the path can be no thicker than 40-50 mm. And for a path that provides the passage of a passenger car and a parking lot, the thickness of the tiles must be at least 60 mm.


Vladimir Petriv:
The initial preparation for laying garden paths is usually associated with excavation, and this should be linked to the geoplastics of your site. With large differences in elevation, slopes, etc., it will be necessary to move and remove large land masses - a very costly event that requires the use of construction equipment

Geoplastics is the artificial formation of the relief and architecture of a site.
How to lay a tile garden path. Recommendations of specialists.
Paving slabs are an environmentally friendly and durable coating for a garden path. And its durability and beauty, first of all, will depend on the quality of paving slabs and compliance with the laying technology. You can do the tiles on the tracks with your own hands.


Konstantin Merzlyakov
Modern paving slabs are made of concrete. The shape of the tile can be absolutely any, which allows you to successfully fit the garden paths into the landscape design of any site.
The service life of concrete vibropressed tiles is on average 15 years, provided that the base is properly prepared.
And, like any coating, paving slabs require maintenance during operation (cleaning, use of water-repellent coatings, etc.).
The first stage of the preparatory work for the laying of paving slabs is the breakdown of the contour of the area to be laid and the setting of control "beacons". The angles of the territory, binding to the existing areas, slopes are taken into account. After the work on the breakdown of the contour has been carried out, they begin to prepare the base, which includes the following types of work: layout, installation of the supporting layer, installation of curbs and the device of a leveling sand layer under the tiles.
DIY sidewalk paths

We make a path from paving slabs in the following step-by-step sequence:
- Earthen boxes are torn off under the side stone;
- A side stone is installed along the perimeter of the site. The curbstone is necessary for firm fixation of the paving slabs;
- The underlying layer is poured;
- The base is being laid;
- Tiled flooring is laid;
- The tile joints are filled.
You also need to remember that when laying tiles, you should be guided by the following standards.

Alexander LoginovTechnical Director of TD BRAER
Work on the arrangement of pavement coverings must be carried out in accordance with SNiP 3.06.03-85 "Highways" and SNiP III-10-75 "Improvement of territories".

And the independent installation process can be broken down into a number of successive stages.
- Planning and designing a garden path. It is necessary to determine the type of soil on the site. Then develop the layout of garden paths, choose the design and pattern of the tile layout;
- Calculation of the cost of the required materials;
- Carrying out works on laying a garden path.
 Garden paths made of tiles.
Let's take a closer look at each of the points.

Alexander Loginov:
The choice of the method of laying the tiles depends on the state of the suburban soil and the subsequent operating conditions of the site: the blind area of the building, the pedestrian zone, the area for the passage and parking of cars, etc.
It should be remembered that the result of your work, first of all, will depend on the thoroughness of the preliminary marking and preparation of the base for laying the tiles.
The planning includes the following points:

- draw the layout of the site to be paved;
- measure the area in order to dimension the plan;
- on the basis of the above points, calculate the required number of tiles for laying, as well as the amount of materials for preparing the base of the track from tiles with a border.
After developing the plan, they begin to mark future tracks.

Alexander Loginov
First of all, determine the direction of the water flow. Please note that water must go along the blind area of a building or along a path to drainage wells or lawns. The slope can be made longitudinal, transverse, longitudinal-transverse, but not less than 0.5%, that is, 5 mm per meter.
The direction of the slope must be such that water flows from the paving into the drainage system or onto the lawn, but not to the building!
After the place for laying the tiles has been determined, the boundaries of the path are designated. To do this, pegs are driven along the boundaries of the site, along which a cord or fishing line is pulled. After that, you can start excavating, adhering to the following recommendations:
- The excavation is carried out so that after laying the front surface of the tile goes to the specified level of your site;
- The site formed after excavation is leveled and tamped;
- If the soil is soft, it must be moistened (spilled with water from a hose) and tamped.

Vladimir Petriv
Drainage and drainage into a storm drain or a storage well must be thought out and installed at the preparatory stage of laying garden paths.
Tiling garden path

Konstantin Merzlyakov
When laying paving slabs on a complex curved surface and with a large difference in heights, it is necessary when planning to lay a larger percentage on the consumption of tiles (trimming, fitting, etc.).
Preparation of the base of the sidewalk path
The most important step in laying paving slabs is preparing the base. The correct base will not allow the track or platform to "sink", ensuring their longevity. It should be borne in mind that, despite the tight seams between the tiles, the base is still saturated with water. Therefore, a permeable drainage bearing layer (gravel, crushed stone) is needed at the base. Then part of the water from the surface will be diverted through the paving stones and the supporting layer into the soil.
 How to make tile tracks.
It is also important to understand what layers the correct version of the base cake consists of.

Alexander Mishin Expert of the company "Wienerberger Brick"
The cake consists of several layers: a natural subsoil, a sub-base, an underlying layer, a "bed" and, in fact, a "sidewalk".
"Bed" is a layer of sand or fine gravel. The sub-base is a fill layer of soil, and the underlying layer consists of gravel or crushed stone.


Alexander Mishin
The thickness of the "bed" for any type of soil base is on average 3-5 cm. The thickness of the remaining layers should be formed based on such parameters of the soil base as moisture, density and composition.

Alexander Loginov
For the main bearing layer, frost-resistant material, homogeneous in grain composition, is used (crushed stone, gravel). This material must be laid evenly in height and with the correct slopes.
To build an ordinary pedestrian path for a summer cottage, you will need to make a carrier layer 10-20 cm thick.When arranging areas for passage and parking for cars, a 20-30 cm layer is used.Under heavy loads, the carrier layer is increased and placed in 2-3 layers, each layer is compacted vibratory plate or vibratory roller.

As mentioned above, the method of preparing the base largely depends on the expected load on the garden path. It is also necessary to take into account the bearing capacity of the soil.
 The user of our forum, Oleg Novitsky, advises how to build a sidewalk path from tiles in difficult soil: if there is so-called heavy or clay soil under the base, or you have a swampy summer cottage, then the thickness of the crushed stone base must be at least 10 cm.
Then geotextiles are laid.
Geotextiles are highly water permeable and do not allow materials to mix (mixing of materials leads to the formation of voids and dips in the coatings).
Alexander Mishin
The use of geotextiles is appropriate when the natural subsoil is located in a swampy area and has high humidity. A layer of geotextile is arranged over a natural soil base.

The next layer of our "pie" is screening on the geotextile base.

Oleg Novitsky
We fill the site with screenings (or sand). The dropout layer must be at least 10 cm. This layer must be compacted very carefully. At this stage, it is necessary to accurately level the entire base for laying using a rule or other tool.
Screening has a not very good property - caking. This means that over time, the base becomes almost monolithic, and then, due to its low strength, it cracks, and cracks and cavities form in the coating. To avoid this problem, use a vibrating tool for compacting and ramming and do not work in rainy weather. The best screening for such work is dry.
We then proceed to create the base level using the following algorithm:
- The boundaries and center lines of the site are marked with a rope;
- Loose sand can be smoothed out just below the edges of the curb;
- We compact the resulting pillow with a vibrating plate.


Oleg Novitsky
For compacting a layer of sand, an electric or gasoline vibratory rammer with a rubber sole is well suited. With its help, it is possible not only to qualitatively prepare a gravel-sand cushion, but also to avoid further subsidence and sinking of the soil under the laid tiles.

Alexander Loginov
It must be remembered that all base layers are poured, leveled and compacted, taking into account the 0.5% slope!

The preparatory stage is completed by filling with river sand or a cement-sand mixture. To do this, a layer of clayless river sand with a thickness of 1-2 cm is poured onto the base without compaction, the layer must be loose.
DSP (cement-sand mixture) is taken in a ratio of 1: 8-1: 10, because cement is needed to bind the sand so that it can be washed out with water.

Alexander Mishin
The use of a cement-sand mixture as a "bed" is justified only in the case when an intensive traffic of vehicles on the surface of a tile is expected. The garage and pedestrian area of a private house does not apply here, because traffic and load are not so intense here.
Laying paving slabs
In order for the garden path to be durable, and the tiles lay flat on it, the summer resident must also break its laying into several successive stages. 
Laying begins:
- from the bottom point;
- from optically important boundaries;
- from conspicuous elements: porch, front entrance to the house;
- manual laying of the tiles is carried out diagonally in the direction "away from you" so as not to disturb the prepared top layer.
Before laying the first row of tiles, in order to maintain the exact position of the seams, it is necessary to pull the cord along the entire length and width of the object. After that, sticking to the cord, proceed with the installation.
It is recommended to check the location and straightness of the joints every three rows of laid paving slabs. Laying is done with a rubber mallet (mallet), lightly hitting the tiles. Every 3-5 square meters of paving slabs laid, but not yet compacted, its surface is controlled using a two-meter rule or a building level.


Alexander Loginov
As a framing of paths in a suburban area, curb stones should be used. These barriers should be made prior to laying the outside of the walkway to prevent lateral movement and tile settling.
Along the edges of the marked area of the trail, along a stretched cord, dig a trench of small size and depth (so that the curb goes into this trench to the required level). The base of the trench must be tamped, poured, and the curb must be installed on concrete.
The border can be visible or hidden - it depends on the desire. If the border is hidden, then it must be placed so that the top of the tile exceeds the top of the border by the height of the chamfer.

Oleg Novitsky
To reduce the number of tiles per cut, start the longest row from the curb, placing whole tiles directly in front of it. The resulting voids should be exactly half of the tile. When slicing from one piece, you get the two halves you want, and I guess waste can be completely avoided. This technique can be used for curly symmetrical tiles.
The main enemy of any paving slabs is freezing water. Therefore, you cannot put the tiles on monolithic, waterproof substrates, concrete screed. Do not lay tiles on mortar outdoors.
Seam sealing and vibratory ramming
After laying the tiles, the coating is compacted with a vibrating plate. After the first vibration compaction of the coating, dry sifted clean sand is poured onto the surface in such a way that the sand is easily and densely poured into the cracks between the tiles. The scattered sand is scattered evenly with a brush over the entire area and hammered into the seams, "tying" the entire coating into a single whole.

And in order to build a durable coating, when working, you must adhere to the following recommendations:
- Do not install tiles in rainy weather without a special canopy.
- Do not sprinkle joints with a mixture of sand and cement.
- If the site has a "complex", heaving soil, it must be borne in mind that its displacement can deform the tile. Then a more complex installation is performed - with a phased preparation of a concrete pad as a base, which guarantees durability.
Thus, when laying garden paths yourself, you need to take into account every little detail and carefully plan all stages of work. After all, the path to your home begins with a garden path made!
Beautiful paths play an important role in giving the site a certain style and personality. They are not only comfortable and allow you to move on it in any weather without the risk of staining your shoes, but they are also able to decorate the yard and garden. It is not difficult to make concrete paths with your own hands, but they will last a long time only if the work is done correctly.
There are many options for performing beautiful paths. Narrow continuous concrete canvases have long been in the past. Special plastic molds for garden paths allow you to create paths that look like sidewalks lined with tiles or stone. To complete the work, you will need the following building materials:
- crushed stone;
- fine sand;
- cement;
- geotextile (dornite);
- plasticizer;
- dyes;
- polymer forms.
Polymer form
Plastic form for tracks - a stencil, which is filled with concrete. It is made of polypropylene and is designed for 1000 fillings. The thickness of the outer walls is 6 mm, the inner partitions are 3 mm. Shapes vary in configuration and size. The thickness of the tiles depends on its height - usually it is 50-60 mm. The lintels can be the same size or be several centimeters shorter. In this case, at the base of the molding, a solid plate of 2-3 cm is obtained, on which "pebbles" with a thickness of 3-4 cm are located.

How to make a concrete walkway - construction sequence
Design
Before starting work, you should decide on the most convenient location for future tracks and their shape. In the classical style, they are performed along straight lines, with a rectangular intersection. By organizing concrete paths in the country in a more free, landscape design, you can give free rein to imagination. These are various bends of paths, rounded shapes and intersections. When developing a scheme for their laying, one should take into account the habits of people and the convenience of their movement around the site.

Preparation of the base
- According to the drawn up scheme, the tracks are marked.
- With the help of a tape measure, cords and pegs, their boundaries are marked.
- Then, to a depth of at least 20 cm, the top layer of the soil - sod is cut off.
- The bottom of the trench is compacted and covered with a layer of rubble 10-15 cm thick, which is covered with geotextiles. The material will prevent weeds from germinating and will prevent the sand from going into the ground - the garden concrete path will be more durable.

- Geotextile is covered with sand with a layer of 4-5 cm and compacted again.
- A 4 cm sand / cement mixture is the last layer in the prepared substrate, although this layer is often not used. In this case, before pouring the molds, the sand is poured abundantly with water from a spray bottle. This is to prevent the soil from pulling moisture out of the concrete. When installing the base, a slight slope is created to drain precipitation.
Preparing mortar and filling forms
After the substrate for the path is ready, a mortar of cement, sand and gravel is mixed in a ratio of 1: 3: 3. The concrete must have a thick, plastic consistency, otherwise it will flow. It is not easy to cook it manually, without experience. The best option is to use a concrete mixer. The addition of a plasticizer will improve the quality of the mortar and increase its frost resistance. It is believed that the plastic mold for the concrete walkway does not require lubrication. But if you use machine oil, it will be easier to get it out of the solution.

- The oiled mold is placed on wet sand and poured with concrete.
- With a trowel, the solution is distributed over the form, filling it to the brim.
- The surplus is removed with a wide spatula or any flat, even strip.
- If the solution is made correctly, then 10-20 minutes is enough for it to "grab". After this time, you can gently take out the form and transfer it to the next place to continue working.
- Having two or three stencils will speed up construction.

In order to diversify the concrete paths, the photos of which are easy to find on the Internet, a coloring pigment is added to the solution. In addition, they can be decorated with colored stones, shells, tile shards or other suitable materials. The decorative elements are pressed into the wet mortar and, after it dries, they hold quite tightly.

Concrete fully hardens in 3-4 days. During this time, it is advisable to regularly water it with water and cover with a film or tarp. This is especially important in hot summer weather - the longer the concrete hardens, the stronger it is.
The gaps between the tiles are filled with a cement-sand mixture and filled with water. This prevents the soil from getting into the seams and the germination of grass. But in some cases, the gaps are specially filled with soil with lawn grass seeds.

The main stages of the construction of a concrete walkway:
- drawing up a diagram;
- track markings;
- sampling of soil, compaction of the bottom of the trench;
- crushed stone backfill;
- laying geotextiles;
- filling and compaction of sand;
- preparation of the solution;
- filling forms with concrete;
- backfilling of joints with DSP, sand or soil.
Each well-groomed area requires attention and work. A little effort and its space will be decorated with original paths - straight or winding, colored or monochromatic - it all depends on the owner's desire and taste.
An important role in the design of a suburban area is played by the arrangement of garden paths. After all, they greatly facilitate the movement of residents within the boundaries of the allotment. In addition, they twist beautifully around the garden, they serve as its decoration. But that's not all. The paths can be called a kind of strings that connect all the individual parts of the site into an inseparable whole, being the final touch of the design of its appearance. In order to equip them, it is absolutely not necessary to buy expensive paving slabs and involve a team of professional builders for the work. It is not too difficult to make garden paths on your own, using various materials for this. You can lay them out using special forms. This method is quite popular today. You can buy a mold for making garden paths in a store or do it yourself, especially since it is not so difficult.
Of course, some people prefer a more traditional approach, laying out paths on their site with tiles or paving stones. But this design looks somewhat standard, and it will cost a lot. Therefore, many owners of summer cottages and country houses solve the issue differently, making paths on their site using special forms. This allows you to show all your imagination in the arrangement of the surrounding space.
Paths in the garden, laid out using forms, are usually very elegant. And, in comparison with traditional methods, they have such significant advantages as:
- low cost of construction work;
 Shaped tracks - pretty budget and pretty
 - the ability to manufacture tracks of any size and configuration;
- simplicity of the whole process of performing work.
Laying out paths on the site using forms, it is possible to supplement them with almost any material - marble chips, pebbles or something else, which will give the appearance of the paths a special appeal and originality. But before you start making a garden path, you need to do some preparatory work.
Preparing the foundation of the future track
Using a special shape, you can make a very attractive track. It is possible that such a coating is somewhat less durable than that made by some other methods. But it has a right to exist and is quite popular with summer residents and owners of suburban real estate due to the ease of manufacture and the low cost of the whole process.
Attention! When arranging a walkway, you must definitely think about drainage. To do this, you can place it in elevated places or do it at a certain slope for water drainage. Otherwise, cracking of the coating may occur during frost.
But in order for the garden path to serve for a really long time, it is necessary to make a high-quality foundation for it:
- first you need to outline the boundaries of the planned track. For this, twine or nylon cord and pegs are usually used;
 Remove the top layer of soil before laying the track
 - if the soil at the place where the path was laid is weak or has been previously disturbed, it will be necessary to cut off its top layer for the device of the path. But if the soil on the site is strong enough, then you can not remove it, make an additional bedding on top of it;
- after excavating part of the soil and leveling the place for the track, it is necessary to make a backfill in order to strengthen the base. First, a layer of sand is poured, and gravel is placed on top of it. The next layer will be sand again. At the same time, each layer is well compacted. Such a base usually can withstand fairly heavy loads and has a long service life.
Advice. When preparing the base for the track, tamping of the bedding layers is required. In case there are no special devices for ramming, you can use something that is at hand, for example, a log, or simply spill the layers with water so that they settle and become denser.
Preparation of a solution for pouring forms
For casting molds to create a track, you need to prepare a solution. It is made from cement and sand in a ratio of 1: 3. The brand of cement can be M300-500, but for a higher quality coating it is better to take at least M400. Water is added gradually during the preparation of the solution. It should turn out to be not too thick in consistency, but not spreading either. If significant loads are planned on the future track, reinforcing fiber, a small size fraction of crushed stone or gravel can be additionally added to the solution.
 Strengthening the future path with gravel and sand
 Making a track using a mold with your own hands
Using new forms that can be found on the market today, walkway tiles are cast directly on the spot. Sometimes just one mold is enough, which is enough to cast a large number of these homemade tiles. It is no longer necessary to wait until the solution has completely set. The shape can be freed almost immediately to fill another fragment.
Work on the manufacture of a track on a prepared basis using a special form is carried out in the following sequence:
- first you need to determine the place of pouring the first part and moisten the base where the tile will be laid out;
- install the form in the chosen place, fill it with a solution, evenly distributing it over all the cells, tamping it so that there are no voids;
 Making a track using a mold
 - level the mortar laid out in the cells on top with a wide spatula. To do this, you can use some other object, the main thing is that it is even and flat. It is better if the tile to be produced is slightly convex on top, this is convenient for removing precipitation from its surface in the future;
- the form filled with a solution is kept for 15-20 minutes, then carefully removed, lifting it up, and set next to it, again repeating the whole process. Before each use, the form is cleaned from the remains of the solution. At the end of the work, it must be washed.
Thus, you can lay out the entire track in a fairly short time. If some elements of the tile were accidentally deformed, you can correct them a little later. You just need to wait until the solution dries slightly. The gaps between the tiles can be filled with small pebbles or lawn grass can be planted there. Moss looks very interesting in the grooves of the tile. To make it appear there, the seams are spilled with kefir or yogurt.
Forms for the track: how to make them yourself?
Special forms for the manufacture of garden paths today can be found in retail or bought over the Internet. Despite the low cost, many make them on their own, especially since it is not difficult to make such forms.
For the manufacture of the form, a wide variety of materials at hand are used - wooden bars, hoops taken from barrels, metal sheets and more. Some craftsmen even make them from the correct size of non-stick baking tins.
One of the most common options for making a mold frame is wooden blocks. To create a framing frame, it is convenient to use bars with a section of 50 by 50 mm. After fixing the joints of the bars, jumpers are installed inside the frame. For them, it is better to take bars with a section of 30 by 30 mm. The internal jumpers themselves are randomly positioned.
 Any shape can be adapted to make the track
 Those who prefer the irregular shape of the tiles for the garden path can use metal sheets or hoops taken from an old wooden barrel to make the frame. If this option is chosen and it is decided to make a form from a flexible material, then the iron sheet must be cut into strips, giving them the preferred shape, securing the joints by welding. In the case of the hoops removed from the barrel, they are first straightened and then bent, giving the desired shape.
Creating a track with your own hands using a form that was also made independently is an exciting activity that allows you to realize your fantasies. In addition, the cost of such a track will be minimal, which is also important when decorating your suburban area.
How to make a track using a shape: video
Walking barefoot on asphalt is less enjoyable than walking on seashells, polished cobblestones, or sun-warmed logs. The road surface, without which the metropolis is unthinkable, is inappropriate in a country estate. Almost every day, the owners walk around its territory without shoes, and the kids generally crawl on all fours.
When doing gardening, it is important to pay attention not only to high-quality care of fruit plantations, but also to remember about the general arrangement and appearance of the garden. Hand-made garden paths not only create the convenience of moving around the household, but are also a special part of the overall design. In this article we will talk about arranging the tracks with our own hands.
Garden paths - how to combine beauty and convenience
A dacha, a private house, a cottage require not only the arrangement of the interior, exterior, but also embellishment of the area around. Often the owners want to combine practicality and aesthetics in one project. The idea can be realized by laying garden paths.
What you need to know and take into account during construction
Any design begins with an idea, a thorough study of the area and a plan. The first step is to determine the directions, length, width of future tracks, to present their shape, decoration. Next, you need to analyze the bearing capacity of the soil in order to choose the right type of building material and only then plan.

It is necessary to draw up a drawing on paper, it will be possible to correct, alter, supplement. There are several important factors to pay attention to:
- The constituent parts must be resistant to the aggressiveness of the environment - high humidity, fungi, corrosion.
- It is good to tolerate temperature fluctuations in different seasons.
- Provide for possible increased loads (car, loaded wheelbarrow).
- The optimal angle of inclination of the web to avoid the accumulation of water from precipitation.
Advice from a landscape designer - in compact areas it is better to lay not straight garden paths, but with undulating bends, turns. This visually expands the space, deepens the niches for plants.
From what to build a track, each owner decides independently, based on financial capabilities, needs and fantasies. Every cover needs a base. The ideal option would be a tamped earth mound or crushed stone pillow.

The most popular materials for do-it-yourself garden paths:
- A natural stone. It looks noble, aesthetically pleasing even with non-smoothed corners.
- Artificial substitute. The grace of nature, cut by man.
- Clinker bricks will add bright colors to the garden.
- Gravel or coarse polished pebbles will provide originality.
- Wood is an affordable, simple, but short-lived look. Looks impressive separately and in the composition.
- Decking - plastic garden parquet. New material, resistant to UV, water, mold, rot.
The decorativeness of the structure largely depends on the methods of laying the blanks. The canvas can be solid, even, or consist of separately located elements of different geometric shapes. Having laid out a path of large "leaves", "butterflies", "flowers", it is easy to get pleasure from comfort and a pleasant walk.

Varieties of garden paths
Everyone who has a summer cottage and even a small but own personal plot will think more than once about ways to decorate and transform it. There is not always enough finance to implement ideas and fantasies. Many will ask: "What then to do?" The answer is quite simple: if you want to refine the garden paths, but there are no funds for a landscape designer and expensive components, then you should pay attention to the available and more affordable materials.
For arranging garden paths with your own hands, various types of stones, boards, wood cuts, river pebbles and even plastic bottle caps are useful. Now a little about each of the options.
Natural stone paths
They fit into any site design. They look natural and, if styled correctly, can last forever.
These tracks look very impressive. If there are stones left after the nearest construction, you can use them. Or those that remain after laying the alpine slide will do. They are irregular in shape making them ideal for scenic trails.
 Natural stone walkway
 Initially, you need to calculate the number of pebbles. One of the methods is a rough layout of stones. This way you can estimate if the amount of material you have is enough.

Sprinkle the place for the path with sand and tamp it well. It turned out to be a kind of "pillow" for pebbles. They need to be processed, adjusted in shape, made more uniform. For good joining and grinding, you can use a grinder or other not too powerful types of tools. Having prepared the stones, they are laid in a mosaic composition.
Since all stones are different in size, they are adjusted to each other using a rubber mallet. At least one of the sides of the stone must be flat for the path to turn out right.

When the mosaic is ready, you need to start sealing the joints between the stones. Otherwise, they will start to overgrow. Although some may prefer another option, the most natural: cement-sand mortar is used for grouting.

Concrete paths
They are very similar to stone ones. First, make a bed, the depth of which is approximately 10 cm. Then pour sand on the bottom and tamp. Pour on top with a mixture of concrete and sand, set the formwork around the edges. While the solution has not frozen, pour pebbles into it. Lay out the intended pattern from it. A drainage system must be installed next to such a path.
Sometimes a concrete path is made using a ready-made form. It is not difficult to buy it at a hardware store. And then just pour the concrete mixture into the mold in the place you need, level it with a trowel, remove the excess and remove the mold. This is a very easy and quick way, in addition, you can lay out such a shape in at least several rows.
 How to make concrete paths with your own hands using ready-made forms
Wooden walkways
The paths made of wood will serve for a long time, but at the beginning they require maintenance. You can lay them out from sawn boards or timber, using what is left from the construction of the house.
 Wooden walkways
 Prepare boards and blocks, the latter can be replaced with steel corners or pipes. Treat them with protective impregnations or bitumen mastic. After soaking, nail the boards to the blocks. Mount the track from above using different caliber hemp. Paint them one or more colors.
But in domestic climatic conditions, the most modern impregnations will not protect the boards from deformation, decay and corrosion, therefore, imitation of wood is often used as a material for paths - tiles with a corresponding pattern.
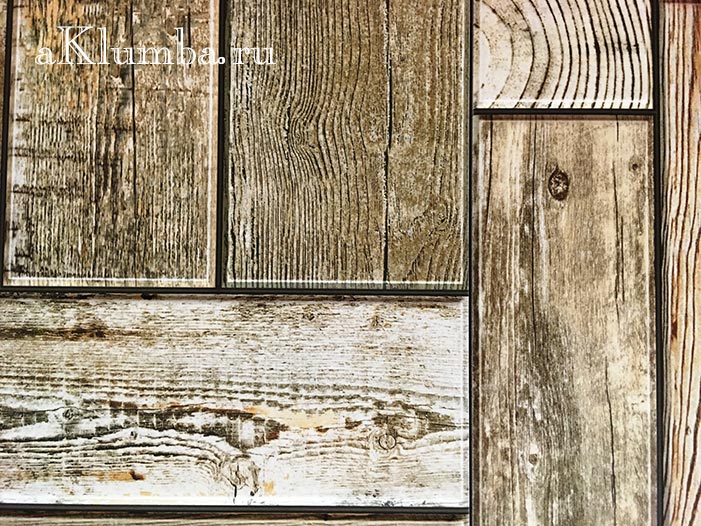
It will be possible to select such perfect samples that no one will detect the difference at a distance. It is felt only after tactile contact. The tiles reliably depict the natural texture of pine, beech, oak and other species in section - as a result, the ersatz turns out to be indistinguishable from the original.
DIY gravel garden paths
Gravel is a simple material that has good flowability, moisture permeability, and is relatively cheap. Paths of any width and length can be poured from it, it is even possible to give them different shapes. Such a path looks neat, harmoniously fits into any landscape. Doing it yourself will not be difficult.
 DIY gravel garden paths
 The order of execution of a gravel path
- First you need to mark the track along the site. The markings are carried out with pre-prepared wooden pegs. You can pull a string between the pegs if you find it difficult to determine the direction "by eye".
- Next, a bed is prepared according to the markings. To do this, dig a trench in the ground. The depth of the trench can be about 14 - 17 cm.
- Gravel is prepared. It is advisable, if possible, to view it and remove unwanted impurities (broken glass, sharp large stones, etc.). Busting gravel should be done with tight gloves.
- Gravel is backfilled to the depth of the trench. You can level it with a rake or with your hands (also use gloves).
- Next, the laid gravel is rammed.
- At the end, a curb can be placed along the edge of the walkway. This will give an even more effective and finished look. The stone is fixed with a cement foundation. It can be laid both flush with the canvas, and slightly above it.
This algorithm is also suitable for the construction of a garden path made of sand. Accordingly, gravel is replaced by sand, and then all work is carried out according to the same scheme.
DIY brick garden paths
It is a very fragile type of material. Before laying, check for strength. First, mark the path with string and pegs.
Remove the soil (25 cm), put a drain underneath. In this case, it will be simple, but the main thing is that the water does not penetrate. Crushed stone must be poured onto the drainage system on top. Boards are laid sideways along the edges. Then the brick is laid. You can come up with many different brick designs.
 Clinker brick path
 The garden path, lined with brick chips, looks great. It is permissible to pour it onto a concrete track. A beautiful mosaic is laid out of broken bricks. If the bricks are of different colors, beautiful patterns are laid out of them. You can leave space between them to fill it with small pebbles, pebbles or soil, so that later there was a green island.
 Homemade brick and stone path
 Sandstone path
They are made dry or use cement grout. This method is similar to laying a stone path, and the first is more natural and original.

Dig a trench by removing some of the soil. Pour sand there and tamp. The middle section should be higher than the edges. It is necessary to walk a little up the slope. This is such a dehumidification system. This is followed by the processing of pebbles.
Sandstone can be of very different sizes and shapes. Try each stone on before finishing.
Level the stones by making the gaps as small as possible. The processed stones are laid out as you like. For a classic track, you need a bucket of sand and the same amount of mixture with cement. Under each pebble, you must first put the first, then the second. Moreover, the cement should protrude slightly. You need to press the stone tightly. The made path must be washed so as not to spoil the aesthetics with the remains of cement. Seams are filled with soil or sand.
Saw cut path
Such a path will look very beautiful and attractive.
 Saw cut path
 Cuts must be taken of different sizes, laying them so that there is no free space between them. Before laying, round timber must be treated with an antiseptic composition.
 Garden path saw cuts
Another option is to use round timber in the form of curbs, and fill in a layer of gravel between them.
Staying at the dacha, you want to move away from city life, because all around, if not a forest, then a garden, some lucky people even have a lake or a river. In a word, whatever the surrounding landscape may be, it encourages closer proximity to nature.
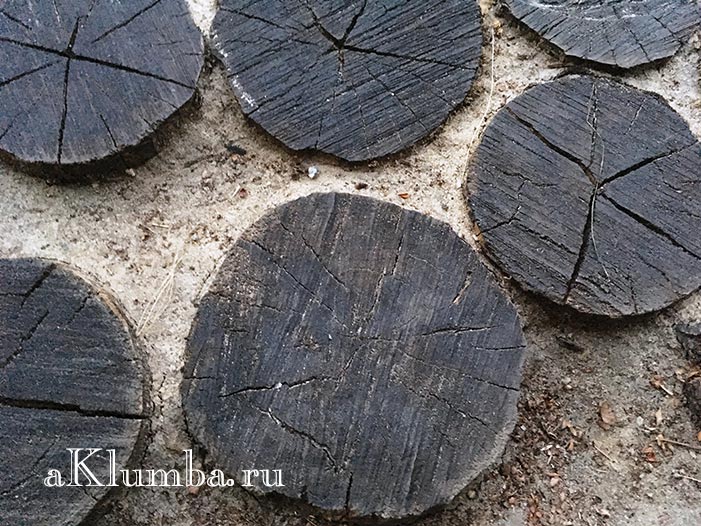
An interesting idea is a forest trail. It represents fragments of common tree stumps. Round plates of different sizes are laid along the edge of the pond and concreted.

The side of an artificial reservoir is also made of them. It is pleasant to sit on such stumps to sunbathe, the contact of the feet with them also gives rise to positive sensations.
Plastic garden paths
Such country paths are sold as ready-made modules. Their installation does not require preparation and surface treatment. They are very simple and quick to attach, very economical, are characterized by strength and long service life. They can be laid out on any site, in the form of any composition. They are environmentally friendly and aesthetic.
River pebble paths
Working with these stones will be difficult, time consuming and will not end quickly. They are laid in a predetermined space in wet sand and compacted to the desired depth. The process takes several days.
 River pebble paths
 It happens that the design of summer cottages is based on imitating the styles of bygone times - the antique era, British classicism, etc. Then you should choose slabs decorated in accordance with the general concept of the site and the residential building. They may have impressions of Mediterranean pebbles, ancient bricks, etc.

Tracks from plastic bottle caps
The most original and interesting way is to lay out the path or part of it with plastic bottle caps. Due to the fact that the covers have a variety of colors, you can make patterns and mosaics, even coming up with whole pictures.
The only drawback of this improvised material is its collection, because a lot of covers will be needed.
Reinforced concrete tile garden path
Stages of work:

 DIY ready-made garden path from reinforced concrete tiles
  Veneered ceramic mosaic tiles
  Paving stones, stone path
  The slabs were laid on a layer of sand, lawn grass was sown in between. The mowing is done with a conventional electric lawn mower. The photo was taken 3 years after installation.
 These are just the basic materials from which you can make suburban paths with your own hands. Human imagination is limitless, so they will probably come up with something else by the next summer season. Paths for summer cottages are made by hand from any, sometimes unexpected material. For example, from glass bottles. You can create combinations of different types of material in one composition.


Remember that such paths carry not only convenience and benefit, but also beauty, joy for the eyes, harmony. Imagine, invent, create.

The independent choice of materials for garden paths and the driveway to the cottage sometimes makes it difficult. Then you just need to allocate time for a scrupulous study of catalogs or funds for consultation with specialists. The result will justify all these costs.
Video master classes


