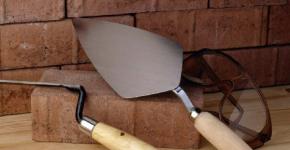
How to bury a wooden post. How to treat fence posts to prevent them from rotting? What to pay attention to
Despite the constant emergence of new modern materials on the construction market, natural wood has not lost its privileged position. Due to its presentability, ease of finishing and installation, it is most often used for the construction of fences. Wooden fence posts reduce the cost of the fencing structure and reduce the time for its construction.
The use of wooden posts provides the fence with:
- beautiful appearance. This natural material has a unique texture, which can be further developed with the help of special impregnations;
- high strength at low cost. By choosing wooden supports of a suitable cross-section and installing them correctly, you can strengthen the fence structure and make it resistant to strong gusts of wind and mechanical damage. Moreover, the cost of the material will be lower than metal, stone or brick;
- ease of installation. Wooden poles are lightweight, easy to process, and you can easily install them yourself without having carpentry skills;
- the ability to combine with other raw materials and building materials. To build a fence on such racks, you can use not only sections made of boards, but also sections made of metal or corrugated sheets;
- environmental friendliness.
Please note: a wooden post is sensitive to moisture, which causes it to rot. You can avoid this and extend the service life of the support by treating it with a protective compound before installation.
Wood selection
The strength and service life of wooden supports depends on the type of material. The best characteristics are found in oak, pine, larch and walnut wood. The beams made from them are not only durable, but also resistant to moisture.
Advice: you should not use posts made of aspen, poplar, or birch for fencing - they are prone to rapid rotting.
When choosing posts for a wooden fence, you should give preference to dried planed timber. The humidity of the raw materials should be no higher than 15%. If the material is not dried correctly, it will end up curled.
If there is wood with bark, it must be thoroughly cleaned and treated with insect repellent. This will get rid of bark beetles and other pests that can damage the product.
Lumber should be inspected for knots. If there are many of them, the strength of the beam is significantly reduced, and it becomes unable to withstand loads. Also, the wood should not have any delamination or moldy areas. This material is not suitable for supports.
Installation
Due to the lightness and ease of processing of raw materials, installation can be performed by 1-2 people without special training in a short time. To support low fences (up to 2 m), square/round beams with a cross section of 90-100 mm are used. Fences over 2 m are fixed using posts concreted in the ground. When constructing a blind fence, posts are used whose cross-section is 20-30% larger than the standard one.
There are several ways to install a wooden pole:
- manually driving into the ground. This is a temporary measure when it is planned to replace the racks with brick or metal ones;
- installation into a piece of pipe driven into the ground;
- backfilling with stone (gravel, crushed stone, rubble);
- by concreting in a well.
Advice: when installing them yourself, the simplest and most reliable way is to fill them with stone or concreting them. This makes it easier to level the racks using only a cord stretched over the top and a building level.
Injection
If you have no experience, you can buy ready-made supports and install them yourself. After processing the ends, they are buried in the ground, compacted well. As you deepen, the vertical position of the timber is checked with a level. If the tilt is slight, the position of the stand is corrected by hitting its side with a hammer.
Attention: larch supports are not hammered directly like oak ones, since this type of wood is prone to splitting. They are installed in the ground, having previously deepened the pipe there. The resulting guide hole will simplify driving in posts made of this type of wood.
After 5 years, a check should be made to detect fungus or rot. If you use high-quality impregnation, the racks will remain intact.
Installation using pipe
For installation you will need a metal cylinder, preferably steel. An analogue can be a piece of asbestos-cement pipe.
Attention: the workpiece must be of such a diameter that the timber fits tightly into it. If the pipe is wide, the pole will wobble.
How to install the stand correctly using this method? The lower part of the support (30 cm) is cut down so that its end fits into the pipe. Then it is covered with drying oil, leaving it for several days to absorb it. After this, the end of the column is treated with hot tar, pressing it into the pipe section. All cracks are filled with the same material. After this, the support should be dug into the ground so that the top of the pipe rises slightly above the ground (by 5 cm).
Backfilling with stone
A hole is made in the ground using a drill with a depth of over 1 m. The width of the hole should be twice the diameter of the post. Its bottom is covered with gravel. Then the support is inserted, after which all the side gaps are filled with stone, compacting it tightly.
Note: before installing wood posts in heavy loamy soil, the soil should be pre-soaked. To do this, a hole 30-40 cm deep is made in it, which is periodically filled with water throughout the day. The next day you can begin installing the beams.
Concreting
Installing wooden poles using this method is similar to the procedure for filling them with stone. The difference is that after installing the support, it is secured with wooden spacers, and then the gaps are filled with small portions of gravel, filling them with a concrete mixture.
Building a fence with wooden posts is a simple and affordable option for fencing a site. If you choose the right raw materials and follow the installation technology, such supports will last a long time.
Wood is the first and universal building material. The first houses and huts were built from it, the first fences were built, which recorded ownership of plots of land, fertile land, and cattle pens. And today, wooden fence posts are in demand and relevant among owners of suburban areas and dacha owners. This article will tell you what to consider when choosing wood, how to process it, and under what conditions wooden poles will be used for decades.
When buying beams for supports or enclosing sections of a fence, it is important to remember the characteristics of the material:
- protection from moisture is required. The tree actively absorbs water from both the atmosphere and the soil. If the surface has not been thoroughly treated beforehand and the bark has not been completely removed, then after a few years the pillar will turn into a full-fledged tree, sprouting roots and shoots;
- Without timely treatment with septic tanks, dry wood will be eaten away by wood-boring beetles.
The correct choice of source material is a guarantee of long-term operation (at least 25 years). If you neglect the necessary treatments, the entire fence or individual components will have to be replaced after 10 years.
Advantages of wooden fences and supports
Despite all the difficulties with processing and operation, poles and sections made of wood have a number of advantages over other materials:
- strength. A column thickness of 10 cm is enough to withstand even strong winds;
- the work does not require complex and expensive equipment. Sections or cross beams are attached using a standard screwdriver;
- with the right selection of companion materials, you can find a solution for a building in any style. The wood lends itself well to processing. Any shape can be cut out of it with your own hands, without lathes or milling machines;
- environmental Safety. Wood, even after treatment with septic tanks, is not a source of harmful volatile substances;
- low cost compared to metal, forging or brick.
Disadvantages of wooden fencing
Among the disadvantages of wood and products made from it, we highlight:
- periodically (at least once every 5 years) all surfaces must be treated with special compounds that prevent the appearance of rot and insects;
- A columnar foundation is being prepared for the support pillars. Ideally, the support does not touch the ground at all. Otherwise, it will be difficult to ensure integrity during the period of operation;
- overdried wood will crack very quickly, while damp wood will become covered with rot. In both cases, replacement is inevitable.
How to select logs for pillars
It is necessary to select wood and logs for the fence according to the same principles as boards for the floor of the veranda, arrangement of railings, and side railings. They have similar operating conditions, they are equally affected by rain and sunlight. If further improvement of the territory is planned, then wood for both the fence and the arrangement of the veranda can be purchased in one batch, observing a number of conditions.
Each log or timber must be carefully inspected before purchase. It must meet the following requirements:
- absence of bark. Most pests do not settle in the thickness of the wood, but directly under the bark;
- a straight trunk without knots, cracks, or dark spots indicating the presence of rot or mold. The presence of knots significantly reduces the strength of the entire product. The support may break with minor mechanical impact;
- there should be no peeling of wood or separation of individual fibers;
- It is better not to purchase twisted logs and beams with a curved shape, since the drying technology is broken.
Optimally, it is better to pay attention to beams made of oak, pine and larch. Oak is the most ideal option. In St. Petersburg, buildings built 200-300 years ago and standing on oak stilts are still in use today. A relative disadvantage of oak beams is their high price.
Ways to protect poles from rotting and bugs?
Only painting and varnishing is not enough to protect wood from pests and rot. If it is not possible to install supports on the foundation, it is necessary to periodically carry out treatment with special septic tanks.
Sooner or later, rot appears on wood of any species. The closer to the soil layer, the more intensely mold develops. Higher up, the wood has less contact with moisture, and there are fewer conditions for the appearance of mold.
Weevils cause no less problems for owners of wooden fences. They choose the most humid places, areas in contact with the soil. If there are few affected areas, you can get rid of pests by treating the poles with special compounds. It is better to replace supports completely covered with bugs; burn the affected ones.
All surfaces are carefully treated with preparations based on zinc chloride, sodium fluoride, copper sulfates, and creosote oils. Traditional chemicals are also used: chlorophos or hexachlorane. The principles of action of the drugs are different, but the result is the same - the colonies of bugs die. It is better to dispose of logs that are completely affected immediately, without wasting time on processing. It will no longer be possible to completely get rid of pests, and after a while they will spread throughout the entire fence.
Treatment of wood against mold involves the use of one of two types of compounds:
- a durable film is formed on the surface, preventing the development of mold colonies;
- the liquid penetrates into the wood, creating an unfavorable environment for microorganisms.
When choosing a composition, it is necessary to check compatibility with varnishes, paints, and the presence of an additional advantage in the form of fire protection. It is better not to purchase water-based preparations for treating fence posts. They will help create a favorable environment for fungal colonies.
How to install wooden fence posts
Construction of a fence requires adherence to a certain technology:
- at the first stage, all parts of logs and beams immersed in the ground are fired, treated with resin or special compounds that prevent rotting. In the optimal case, the underground part of the pillars and beams is kept in a septic tank for at least 48 hours, followed by thorough drying;
- then the points of future placement of the pillars are marked on the ground. Test pits are prepared for placement up to 1.5 meters deep, depending on the height of the fence, complexity and weight of the structure;
- The bottom of all pits is covered first with sand, then with crushed stone. Then the pillars are installed and filled with concrete. It is important to control deviations from the vertical and height, so that later you do not have to waste time filing the tops. Concrete will not only hold the support in one place, but will also protect against rotting and mold. It is not recommended to replace full-grade concrete with cement mortar.
It is better to begin further work on the installation of logs and intermediate sections after the concrete has gained strength and completely hardened - 3-4 weeks.
Wood is a unique natural material. If you follow wood processing technology during the construction of a fence, it will delight you with an attractive appearance for decades.
The quality of the supports determines the service life and reliability of the entire fence. Wooden fence posts deserve special attention, namely the purchase of well-dried raw materials. Unlike metal supports, they require pre-treatment and periodic maintenance. But with proper use and compliance with the stages of the construction process, they can compete with any other material.
For such purposes it is better to use logs or beams.
Regardless of the type, the material must be well dried (humidity no more than 15%). Damp will lead to deformation during operation, which will lead to deformation of the entire fence structure.
The surface should not contain:
- Bark. Pests live underneath it. If you decide to save money and buy untreated timber, you should manually clean the surface of the bark, sand it and coat it with an antiseptic.
- Suchkov. In areas with knots, the timber is no less strong, so over time, under the weight of the fence sections, it can crack or break off.
- Mold. Damp, infected wood will continue to rot even after cleaning and treatment.
- Bundles. Such raw materials are unsuitable for construction.
 Photo: installation of log posts
 When choosing logs for fence posts, you should pay attention to the following species:
- larch;
- pine.
The first two types are the most durable, durable, and are not afraid of exposure to the external environment, but their prices are unreasonably high.
Larch and pine will be cheaper. This is an excellent option for creating a fence frame. Raw materials with a dense structure, almost do not deform when dried, are less susceptible to moisture, and do not attract insects.
Users often search:
You should not buy maple, birch or aspen materials. They have low strength, are unstable to loads and quickly deform.
In addition, it is worth considering that for fences up to 2 m high, it is better to use square or round beams with transverse dimensions up to 10 cm. For fences over 2 m or with a blind type of fastening of sectional material, the cross-sectional size of the supports increases by 25%.
What are the advantages of wooden poles
 Photo: logs pointed at one end
 Among the main ones are:
- high strength, which means resistance to strong gusts of wind;
- low weight of material;
- ease of assembly and installation allows you to create a fence with your own hands, without outside help;
- service life, subject to periodic processing, is up to 30 years;
- environmentally friendly, natural raw materials;
- affordable price;
- good compatibility with brick, metal, corrugated board, stone, picket fence;
- aesthetic appearance;
- the ability to paint in any colors;
- no need for special equipment.
 Photo: timber pillars with embedded joists
 Disadvantages include:
- susceptibility to rotting;
- the need to pre-treat with protective agents;
- strength is lower than that of metal or concrete pillars;
- likelihood of minor repairs;
- need for regular care.
Methods and means of protecting supports from moisture
The parts of the pillars in contact with the ground are most susceptible to destruction. The site will have constantly high humidity and an ideal environment for the development of rot and damage by insects, therefore, in addition to pre-treating all the wood with antiseptics, the bottom is coated in several layers with bitumen mastic and resin. For reliability, you can also wrap it in roofing felt.
 Photo: places where wooden poles are treated with bitumen mastic
 Of the insects, raw materials are most often affected by the house borer and weevil.
If you come across a superficially damaged log or beam, it can still be saved using special impregnations. Insect control solutions are toxic, so it is recommended to apply them in the fresh air and wear a protective mask and gloves.
Suitable:
- sodium fluoride;
- zinc chloride;
- creosote oils;
- copper sulfate;
- hexachlorane;
- chlorophos.
Popular:
- Polyex Woodpecker;
- Aquatex;
- Aqua-varnish Bor.
In the case when the raw material is damaged through and through, it is no longer possible to extend its service life, and it is unsuitable for construction.
To protect against moisture, it is better to impregnate the material with deep penetration solutions or those that create a durable film on the surface.
The first type is considered more effective. This includes:
- Belinka Interior Sauna;
- Pirilax;
- Aidol Langzeit-Lasur;
- Senezh Ecobio and other products.
Any commercial water-based preparations are not suitable for protecting fence posts.
Detailed information about other wood processing methods:
Wood Post Installation Methods with Step-by-Step Guide
It is worth choosing the most suitable one after a thorough analysis of the type of soil, the climatic conditions of the region, the size of the fence and the future load on it.

There are the following methods:
- Concreting.
- Driving into the ground.
- Butting of supports.
Sometimes there is the option of installing bars inside a part of a metal pipe or steel cup tightly fixed in the soil.
We will consider the first three - the most popular and accessible.
Concreting
Tools you will need:
- roulette;
- pegs with rope;
- level;
- spacers;
- crushed stone (broken brick);
- concrete.
 Photo: 50x50 timber is concreted, it’s time to start installing the fence sections
 Work order:
- They make markings. You need to start it from the corner along the length of the section line. In these places, pegs are driven in, onto which the rope is pulled tightly. The recommended span width is from 2 to 3 m.
- Next, they begin drilling holes for supports. If you don't have a drill, you can use a regular shovel. The depth should be at least ⅓ of the height of the pillars. They will not stagger and be subject to swelling of the soil in frosty weather. Often this figure is 1-1.5 m. The width is 20 cm larger than the diameter of the support.
- But the bottom is filled with crushed stone and compacted.
- The bottom of the pillar is coated with mastic and wrapped with roofing felt.
- Now you need to try to install the beam. Verticality is checked with a level.
- Spacers are placed on the sides. If somewhere the height does not agree, add more crushed stone, pour water on it, and tamp it down.
- The remaining space is filled with concrete mortar.
Let the racks stand for up to 2 weeks. After that, the spacers can be removed and you can begin covering the fence sections.
Driving into the ground
It is considered a temporary but budget-friendly method of fixing supports. Not suitable for rocky, soft soils.
It is used in the construction of low fences on stable soil.
To make it easier to hammer the timber into the ground, the lower part is sharpened symmetrically to form a stake. A board of soft wood is placed on top to avoid damage to the upper part of the support. Vertical installation is checked with a level. If the tilt is incorrect, it is changed by side blows on the beam. The soil around the fixed support is carefully compacted.
Butting
Suitable bottles:
- old broken brick;
- crushed stone;
- gravel of different fractions.
The stages of work until the installation of the pillars are similar to the stages with the concrete fixation method.
 Pole butting scheme
 - Sand is poured into the bottom of prepared holes 1-1.5 m deep and compacted.
- The pillars are dug in and spacers are installed.
- The entire space around the beam is filled to the top with crushed stone and compacted.
The fixed racks are checked with a level, allowed to stand for a while, then the spacers are removed.
By choosing wood as a material for future fence posts, you get environmentally friendly raw materials that look good and are inexpensive. This is the optimal solution for dacha owners who are ready to change the color and design of their fence every few years.
Question. Hello! A neighbor at his dacha was putting up a wooden fence and filling the round wooden posts with concrete. Tell me, is it possible to fill wooden pillars with concrete?
Answer. Good afternoon Fence posts are filled with concrete so that they do not sag due to time and the load of the fence fabric. Therefore, wooden pillars are not just “possible”, but “necessary” to be filled with concrete mixture. The only question is how to prepare such pillars for contact with concrete. Below we present the technology for installing wooden fence posts “on concrete”.
The best types of wood for posts are oak or larch. Oak and larch, even in their untreated form, are highly resistant to decay. However, for reliability, the part of the column located in concrete should be treated with two layers of BT 577 bitumen varnish or two layers of MBI bitumen mastic.
The length of the part of the column buried in the hole is taken to be approximately 30% of its total length. In this case, the surface should be covered with mastic or varnish in the format of 30% of the total length plus 5-8 centimeters to ensure reliable protection from splashes of rain and snow.
If the groundwater level is high, the column is buried below the freezing depth of the soil in the area, and drainage is poured into the bottom of the hole - fine crushed stone in a layer of 20 cm.
It is best to drill with a hand-held garden drill with an attachment with a diameter of 200-250 mm. A garden drill can be purchased in a store or online store of gardening supplies. The need for this tool in a private home arises constantly, so it should be in the arsenal of every private household.
So, the wooden posts and holes in the ground are prepared, you can either buy ready-made concrete or proceed to preparing the concrete solution yourself. The following materials and tools will be required:
- Portland cement CEM I 32.5N PC (old marking M400);
- sand;
- small crushed stone or construction waste (broken bricks, broken tiles, etc.);
- halves of red brick (battle);
- water;
- building level;
- putty knife;
- bucket;
- shovel;
- steel trough or sheet of iron;
- a piece of reinforcement with a diameter of 12-20 mm, a length of 1.5 meters (rammer).
In a trough or on a sheet of iron, the concrete components are mixed in the following proportions: 3 buckets of crushed stone, 3 buckets of sand, 1 bucket of Portland cement and approximately 0.5 buckets of water. Everything is thoroughly mixed to a homogeneous creamy mass. If necessary, you can add more water.
The post is placed in the hole, leveled vertically and secured with brick halves hammered between the post and the ground. Next, the volume of the hole between the post and the ground is filled with concrete and “bayoneted” with a piece of reinforcement.
Important point! The column is poured 3-5 centimeters above the ground level. The part of the fill protruding above the ground is smoothed with a spatula “from the pillar to the soil surface”, ironed and covered with polyethylene for 2-3 days.