Do-it-yourself suspended ceiling made of drywall. Do-it-yourself installation of gypsum plasterboard on the ceiling: four stages of proper installation
A design such as a plasterboard ceiling is an ideal solution for arranging any type of premises. This material is extremely popular in construction and repair work. GKL ceiling has many advantages over other types of finishes. First of all, it is an opportunity to hide the curvature and other defects of the floor slab.
Ceiling drywall is an environmentally friendly material that is completely harmless to humans. The finished surface is perfectly flat, without the slightest hint of sagging or differences in height. In the gap between the drywall and the base plate, electric wires, telecommunication cables and a ventilation system can be placed.
With proper processing, gypsum board ceilings can not only be painted and glued with wallpaper, but also trimmed with ceramic tiles and mirror panels. Let's look at how to make a ceiling of drywall with your own hands, without attracting hired labor?
During construction and repair, any type of gypsum plaster can be used for the ceiling. However, it is advisable to dwell on the ceiling version. Drywall for the ceiling has a smaller thickness (9 mm), which makes sheets easier and easier to work with. The decision about which gypsum board is best for the ceiling should be made only after evaluating the conditions in which the suspended structure will be used.


Varieties and applications of GCR for the ceiling
When decorating various rooms, you can sheathe the ceiling with plasterboard of the following types:
- ordinary. This material is used for facing office, residential and office buildings, where constant temperature and humidity are maintained. The outer coating of such products is gray in color and blue marked. Such a sheet has a small weight, which allows to save on material for the frame and reduce the load on the floor slab. The standard ceiling gypsum board is available in the form of plates with a width of 120 cm, a height of 250 and 300 cm. The ordinary gypsum board bends well when wetted and retains its shape after drying. The figured box made of it and the steps look very impressive;
- moisture resistant. In the manufacture of the filler, silicone and antifungal drugs are used for this material. To counter dampness, the mixture is placed in a special impregnated cardboard. It must be borne in mind that waterproof boards do not absorb moisture at all. Therefore, to give them a curved shape will not work. Install waterproof slabs in rooms with a high level of humidity or in apartments where there is a great threat of flooding from the upper floors. The outer surface of this finishing material is green in color;
- fire resistant. Refractoriness is achieved by adding special reinforcing additives to the material and impregnating it with antipyrine. A suspended ceiling is made of fire-resistant material in rooms where there should be an increased level of fire safety. It can be cash desks, archives, panel and bank vaults. Manufacturers paint refractory sheets pink or gray with red markings.

Having examined the models of drywall that can be used in the work, it is worthwhile to dwell on how to make a ceiling from drywall. This is a fairly simple job, which even a beginner can do, it is important to look at the manual for working with the material.
Tools and materials
The manufacture of a suspended structure from plasterboard sheets is an event that does not require the use of professional equipment.
To install GCR on the ceiling, you will need such tools:
- hammer drill;
- screwdriver;
- scissors for metal;
- building level;
- hammer;
- roulette;
- plane;
- square;
- marker;
- wide and narrow steel spatula;
- mixer for mixing the solution;
- set of drills and crowns.

In order to protect the respiratory system and eyes from dust, it is necessary to purchase a respirator and safety glasses. Since the work will be carried out at height, then stable goats or a stepladder will be needed.
To find out the required amount of material, we advise you to use our
The calculation of building materials is based on a prepared project. It indicates the type of construction (single-level, multi-level), frame diagrams, wiring, location of drywall sheets and insulation, the location and type of lamps, sensors and other devices.
To make plasterboard ceilings with your own hands, you will need such materials and devices:
- start and finish putty;
- mounting plastic tape;
- metal screws;
- jack cord;
- sandpaper;
- abrasive mesh;
- liquid primer;
- drywall sheets.
Before making a ceiling of plasterboard plates, they must be allowed to lie down for several days indoors. This is necessary in order for the material to acquire humidity and temperature corresponding to the working conditions.
Preparatory Activities
Despite the fact that GCR completely covers the floor slab, it is necessary to take measures for its preventive repair and preservation. If this is not done, then it is quite possible the appearance of leaks, the development of fungus and mold. Underestimating the preparation of the carrier plate for installation can lead to the most unpleasant consequences, such as populating the space between the ceilings of rodents and insects.
Before you start making plasterboard ceilings, you must perform the following activities:
- if your house is being repaired, then check the condition of the roof and rafters. If necessary, carry out restoration of the roof;
- remove all interior items from the room that could be damaged during the repair process. Cover the rest with plastic wrap;
- remove all communications, sensors and lighting fixtures from the base plate. Assess the condition of the wiring. If necessary, replace it;
- remove the decaying finish and fragments of the floor slab that are not firmly held on it. To clear slots and holes;
- close all existing defects of the base plate with cement mortar or synthetic sealant. To treat its surface with an antiseptic and a deep penetration primer.

Immediately after the primer dries, further work can begin. In the course of their implementation, it is necessary to strictly carry out all stages of activity in a certain sequence. Step-by-step instructions for each phase of work will help to make repairs efficiently and quickly.
Building a frame for drywall
The most practical and reliable option for creating a frame is the use of a steel profile. The profile is equipped with extension cords and connectors of various configurations and purposes. This allows you to assemble both flat and complex suspended structures on the ceiling.
We make the frame of steel galvanized profile in the following sequence:
- measured the height of the walls in all corners of the room. In the lowest corner, a mark is made 10 cm from the floor slab. From this mark, a horizontal line is drawn along all the walls. On a carrier plate with an interval of 60 cm, lines are drawn parallel to the wall;
- holes are drilled along the drawn line with a step of 30-40 cm. After plastic dowels are inserted into them, the UD guides are screwed to the wall of the profiles;
- vertical suspensions are mounted on the ceiling plate. The mounting step should be between 60-80 cm;
- blanks of the bearing CD profile are sawn. Their length should be 35-40 mm shorter than the distance between the edges of the supporting profile;
- the supporting profile is inserted into the openings of the guide profile. One end is rigidly fixed with a self-tapping screw. The bearing profile is fixed in suspensions. After fixing with screws, the edges of the suspension are bent upwards or broken off. A screw is screwed at the other end of the supporting profile;
- transverse parts are sawn and fixed. For their fastening, a cross connector (crab) is used. The result of the work is a steel grate with cells of 50x60 cm.
After checking the frame for strength, wiring is carried out and communication lines. Electric wires must be laid in a plastic PVC tube, rigidly fixed to the floor slab.
Gypsum plasterboard casing
To fix the ceiling from drywall with your own hands, an assistant will be required, since the sheets are quite large in size and weight. Work begins with the installation of a whole plate in one of the corners. GKL installation is carried out in rows. Each subsequent row is attached with an offset of 100 cm or 120 cm, depending on the choice of direction of attachment. The last row is cut so that the cut edge is facing the wall.
When carrying out the sheathing of the frame with drywall, the following rules must be adhered to:
- joints of drywall sheets should be located only on the frame, otherwise sagging and cracks are inevitable;
- screws need to be screwed into the frame through the sheets over its entire area. The fixation interval should be 15 cm. Hardware caps should be recessed in the surface of the gypsum board by 1 mm. In this case, it is necessary to control the screwing process so that the screws do not break through the cardboard shell of the plate;
- between the masonry fragments it is necessary to leave a 2 mm gap. It is necessary for the thermal expansion of the material;
- cutting drywall is best with a sharp clerical knife. An incision is made on the front side of the plate. After that, it moves to the edge of the table, where the excess is cracked and cut off. Torn edges are aligned with a planer.
After attaching the gypsum plaster to the frame, the quality of the work performed is checked. The protruding screws are screwed on, next to the self-tapping screws that have broken through the cardboard, new hardware is screwed.
Putty plasterboard ceiling
Drywall alone cannot be the basis for finishing. Its surface and structure are too fragile for such a purpose. After fixing the plates, there are many seams and recesses left by the hats of the screws.

Putty application technology between GKL sheets
Putty of drywall is done in the following sequence:
- gKL surface is cleaned of dust and small parts of gypsum. The identified defects are eliminated. The seams are treated with a primer;
- mix the plaster solution. It is pressed with effort into the joints and holes from the screws. Over the joints, a serpyanka tape is superimposed and embedded in the solution. It will prevent cracking;
- the leveled surface is treated twice with a deep penetration primer. This is necessary in order to strengthen not only the outer shell of the GCR, but also its filler;
- drywall coating is carried out with a solution of starting putty. The solution is collected from the container with a narrow spatula and applied to a wide tool, with which putty is applied to the surface with wide sweeping movements. All protrusions are immediately smoothed out;
- a primer is applied to the frozen starting putty. After the soil has dried, the solution of the putty is applied, which removes all the irregularities;
- the surface is treated with abrasive mesh and sandpaper. The quality of grinding and polishing is determined by the type of finish. For painting, the surface must be aligned with jewelry accuracy;
- the ceiling is cleaned of dust and primed. After that, he is ready to apply the finishing cladding, which can be used as paint, wallpaper or tile;
- connection and fixing of lighting devices, fans and various sensors is carried out. The joints between the drywall and the wall are covered with skirting boards. If a wide baseboard is glued to the wall 5 cm from the suspended ceiling, then it will serve as a good basis for attaching the backlight in the form of an LED strip.
How to make a drywall ceiling on your own, it is known that it is important to consistently complete all stages of work.
Photo gallery of finished ceilings from GKL
Overhaul in an apartment or house involves the complete replacement of all finishing materials, flooring and ceiling. According to experts and ordinary people, the most difficult process is the repair of the ceiling. To bring the old ceiling in proper form is a long and laborious process. This is due to the unevenness of tile ceilings by their multilevel. In order to eliminate such defects, it is necessary to resort to modern technologies, as an option, you can use the system of suspended ceilings. But such a ceiling is quite an expensive option.
In order to save money and time, you can make a suspended ceiling made of drywall. Its advantages include relatively simple installation and not very high price. How to make a false ceiling from drywall do it yourself in this article.
Necessary installation tools
In order to independently make a suspended ceiling from drywall, you must initially prepare all the necessary materials and tools. So that in the process of work there are no problems with the lack of a tool. Because, it will delay the work. In order to get started, the following tools are needed:
- Water or laser level, it is necessary for the most accurate marking, along which the guide profile will be installed. The water level is not expensive, but it has great accuracy. Two people are needed to work with him. If the budget is not limited, you can purchase a more expensive option - this is the laser level.
- Level. The length should be at least 2 meters, which will determine the evenness of the fixed drywall.
- Hammer, required during installation of the profile frame.
- Screwdriver, you can also use a drill. They are necessary for fixing the profile and drywall.
- To smaller tools, but no less important are: roulette, not less than 5 meters, an installation knife, with spare blades, a pencil, metal scissors. Also, if possible, you can use a grinder with a circle for cutting metal or a hacksaw.
False Ceiling Materials
After all the necessary tools have been prepared, it is necessary to purchase the materials from which the suspended ceiling will be mounted.
False ceiling profile
In order to properly make the metal-profile frame, you need to purchase two types of profiles: guide and ceiling. To obtain a high-quality design, it is recommended to use profiles from the manufacturer's company. In order to calculate the amount of the guide profile, it is necessary to measure the perimeter of the room. For example, for a 5x4 room, you need to purchase 7 pieces (and one spare) of three-meter profiles. If you buy profiles 4 meters long, then they will need 5 pieces. If you plan to install a multi-level ceiling, you must calculate the length of the additional structure. The ceiling, C-shaped profile is calculated according to another scheme. Gypsum plasterboard has a width of 1250 mm, its fastening must be done in increments of 600 mm. For such an example of a room, it is better to use a profile 4 meters long, this will reduce the amount of waste. For marking, a five-meter wall must be divided into equal parts of 60 cm, as a result, 8 ceiling profiles are needed. This calculation serves as the basis for calculating the required number of profiles. If the design is more complex or has several levels, they are calculated separately and added to the main part.

False gypsum plasterboard
This material is available in 3 types: ordinary, refractory and moisture resistant. For a room in which there is no increased humidity, you can use the usual type of drywall. Do not take drywall for a suspended ceiling with a thickness of more than 8-10 mm. Large thickness will only increase the weight of the entire structure, while not doing any good. Also, the installation of a suspended ceiling with gypsum board of large thickness will be complicated, due to the large weight. The calculation of the suspended ceiling, namely the required number of sheets, is possible by the formula. For this, the total area of \u200b\u200bthe ceiling must be divided by the area of \u200b\u200bone drywall sheet, as a result, the required number of sheets will be obtained. As an example, we use the previous room size. The area of \u200b\u200ba standard drywall sheet is approximately 3 square meters. For a room of 20 sq.m, you need 7 sheets. For reinsurance, it is better to take 1 sheet more.

False Ceiling Mount
For a room with an area of \u200b\u200b20 square meters, and a ceiling design on one level, you need to purchase 40-50 pieces of direct suspension. This fixture is relatively inexpensive, so the exact amount can not be calculated. If the suspended ceiling involves several levels, and the sheets of drywall are thick, it is better to buy more suspensions, this will provide greater reliability. If the design involves several curly levels, then the suspensions can be calculated independently, given the pitch between them of 600-700 mm. You may also need connecting elements - crabs, or replace them with a connection of direct suspensions. To attach the guide profile to the wall, use an 8x10 dowel. To connect profiles to each other, self-tapping screws are used. They will need a sufficient amount. To fix gypsum plasterboard sheets to the profile frame, you need to use self-tapping screws 25 mm long, they also need a lot.

Installation of suspended ceiling made of drywall
After preparing and purchasing all the necessary materials and tools, you can begin to work. The first thing you need to start is markup. In order to correctly mark the location of the guide profile, it is necessary to use a water level. In order to install spotlights in a suspended ceiling, or to fix a layer of thermal insulation, it is necessary to deviate from the ceiling at least 10 cm. After this, a water level is achieved on opposite walls to achieve the same water level, and set out guidelines. This procedure is carried out on all walls and corners.

The installation of the frame for the false ceiling begins with a guide profile. After the basting is ready, it is necessary to make holes for dowels using a puncher. Attach the guide profile to the wall with dowels with an interval of 30-40 cm, in the corners, reduce the interval to 10-15 cm.
When the guide profile is installed around the entire perimeter of the room, using a tape measure it is necessary to make a markup with an interval of 60 cm. This marking is necessary for the exact location of the ceiling profile. If the ceiling is at one level, the ceiling profile is mounted in one direction, therefore, marking is needed on two opposite walls. If the design of the ceiling is more complex, and you need to make a grid from the ceiling profile, then marking must be done on each wall.
When all the markings are applied, you can proceed to fasten the direct suspension to the ceiling. The interval between suspensions should be 60-70 cm. Deviation in a couple of centimeters does not play any role. When all the suspensions are installed, you can proceed with the installation of the frame for the suspended ceiling. For this, the main part is installed - the ceiling profile. It is fixed along the entire length with direct suspensions and at the points of connection with the guide profile.

In our example, we use a ceiling profile 4 meters long, with the same width of the room. This allowed the use of a single profile. If the length of the metal profile is not enough, you can use two profiles. For this case, the joints should be strengthened with additional fasteners with direct suspensions. All other fastening must be performed as in the case of a solid profile.

It is very important to control the level of the ceiling profile. It must be checked with a two-meter level throughout the entire process of connecting with direct suspensions. If this indicator is not controlled after the end of work, and the installation of drywall sheets, the surface will have a wavy nature. The frame for the false ceiling should be checked by the level in different directions, and in different places. If irregularities occur, they must be corrected immediately. When the metal profile frame is ready, it is necessary to conduct electrical wiring for future fixtures, if it is necessary to insulate the ceiling, a heater is fixed between the profiles. And so the frame is ready for the beginning of the next stage, to fix the drywall sheets.
Gypsum plasterboard cladding and puttying

After the frame is ready, you can proceed with the installation of drywall sheets. The process itself is quite simple, you need to lift the sheets and fix them with self-tapping screws. The interval between fastenings should be 10-15 cm. It is worth paying attention to a whole sheet of drywall, their edges are beveled, this is necessary for the putty process. Thus, there will be more putty at the joints, and this will prevent the appearance of cracks. If pieces are used during puttying, the edges need to be cut a little. The whole ceiling is “sewn up” with plasterboard sheets.

When installing drywall, you should pay attention to the heads of the screws. In the process of fastening, they must be deepened into drywall by 1 mm. If the screws protrude above the surface, this will interfere with the putty. After fixing the entire drywall, it is necessary to cut holes for the fixtures. To do this, it is better to use a special nozzle for a drill or perforator.
Ways to decorate a false ceiling
Today, there are many ways that will allow. The very first way is to use different colors, especially it looks advantageous on ceilings with different levels. Also, the ceiling can be decorated with polyurethane or foam baguettes. How and what to decorate the ceiling depends on personal preferences and tastes, since it is for you to live under this ceiling. Therefore, the ceiling must meet all the requirements of the residents of this house or apartment.

So, the conclusion of this article: a suspended ceiling with drywall can be done independently. The main thing is to carefully markup, and check the level of all planes. And as a result, an even ceiling with a good finish will be obtained.
Video: DIY plasterboard ceiling
The traditional material for suspended ceiling structures is drywall. This ceiling can hide all communications in the inter-ceiling space. You can make an ordinary, single-level ceiling, or complicate its design by making the ceiling a room's zone.
The first step in the big work will be to draw up a plan that also indicates the consumables, a drawing is required (especially if the ceiling is complex), in the case of a figured ceiling, you may have to make templates.
Direct work will go according to the following plan:
- Training;
- Metal frame installation;
- Ceiling decoration;
- Putty on the ceiling surface;
- Finishing
- Installation of lighting devices.

Each of the steps can be done independently. The manufacture of such a ceiling is not the easiest undertaking, but it will allow not only to level the surface qualitatively, but also to create a ceiling decor - original and aesthetic.
The device frame for the ceiling
First you have to mark the ceiling horizontal plane. Usually, they use a laser or water level. It is difficult to do it alone, it is better to enlist the help of a partner.
What should be done:
- After applying the level, put marks on the perimeter of the wall. The minimum by which you can lower the ceiling is 3 cm, and if you are going to make recessed fixtures, their size will be a guideline for the height of the ceiling lowering.
- Connect the marks together. Make it just a painting thread. Mark the ceiling surface in order to install direct suspensions and CD-60 supporting profiles.
- After the marking is completed, the guide profile is fastened. It must not be installed on the walls around the perimeter of the room with orientation to the markup. You need to fasten the profile with dowels, the interval is from 300 to 450 mm.
- For ceiling markings with an interval of 600 mm, self-tapping screws and dowels need to be attached with direct suspensions. At an angle of 90 degrees, lower their ends in the form of the letter P. 12-mm self-tapping screws with a drill to the U-shaped suspensions fix the bearing profiles.

If necessary, the profiles are joined by a direct connector, it, by the way, can be made of a supporting profile. Crabs are attached to the supporting profile with an interval of 600 mm. To do this, use the sections of the profile UD-27. Connect them between the crabs and the guides with 12mm screws.
DIY plasterboard ceiling cladding: step-by-step instructions
The frame is ready, but this does not mean that you can already attach the GCR.
The work goes like this:
- Lay the wiring in corrugated plastic pipes, fasten with clamps to the floor slabs. According to the plan for the placement of luminaires, release the loop of wires in the places where the lighting equipment is connected.
- Then you can sheathe the frame. Fasten starting with a solid sheet. The pitch of the screws is 200 mm. Lay the first row correctly, the second is fixed to the ceilings with an offset. Necessarily the joints of the first row will be blocked by plates of the second row not less than by the transverse profile (one).
- Mount the GCR so that there is a five-millimeter gap at the walls. It serves as a kind of compensation for the moisture and temperature expansion of the material. If this is not done, the gypsum ceiling risks cracking.
Installation of a single-level plasterboard ceiling (video)
The final stage of the installation of drywall ceiling
The work has not yet been completed, but ahead, perhaps, is the simplest and most pleasant stage. It is necessary to putty the ceiling and repair the seams. To do this, thoroughly treat the seams with a primer, wait for the primer to dry. Cardboard from sheets do not tear off!
An ordinary putty is not used for sealing joints, you need a very strong one, there are such ones in the Knauf line.

- Separate the putty according to the instructions, first of all close all the seams against the wall, then grab the joints. Do not forget about the caps of the screws.
- To close the factory seam, first fill it with the composition, and then with a wide spatula align the recess along the edge of the sheet.
- After the putty has dried, glue the serpentine onto the seams. At intersections, it must be glued with an overlap. Dilute the fillers a little more and coat the dander, as well as minor defects that remain. It is easier to putty with an angular spatula.
- Enhances the effect of protection against cracks fiberglass spider web. Even if some protrusions remain after the seams are closed, their further decoration will be adjusted.
- After this, the joint treated with putty is overwritten (the fine grout method is used). It will turn out a smooth, even surface.
- After grouting, allow drywall to dry, and then grind the joints again with a primer. Then a finishing putty layer with a fine-grained structure is applied, usually a white putty is taken.
Do not forget that the work is carried out with closed windows and windows, there should be no drafts. Otherwise, the finish may lead, and cracks, too, with such a disturbed mode of operation can not be avoided.
Finishing putty is not carried out if you are going to paste the ceiling with wallpaper or other decorative options (glossy finish). You just need to putty the joints, and smooth the surface after the seams.
Putty of drywall joints (video)
Such a “sandwich” made of cardboard and gypsum like gypsum plaster in almost any home can become the future beautiful and original ceiling. Spy on ideas in a photo gallery, make sketches, plan a plan, and a self-installed ceiling will be your pride.
The most widespread today are ceilings that do not require great preparation for work, such as several layers of plaster or putty for leveling, when finishing. One of these finishes is plasterboard ceiling. Therefore, we consider the installation of a ceiling made of drywall with your own hands.
- Thanks to this method, time and the amount of finance spent on repairs are significantly saved.
- An additional level of sound insulation is provided.
- Wiring and other communications can be hidden under sheets of drywall, while the appearance of the room is significantly improved.
How to make a drywall ceiling?
The first thing that needs to be done will be the purchase of basic material, consumables and the necessary tools, if they suddenly are not in your home.
There are two ways to mount plasterboard ceilings with your own hands: glue sheets of material or fasten them with metal profiles. The first method is only suitable for perfectly flat, pre-prepared surface. In this case, the horizontalness of the ceiling must be carefully verified, and gluing occurs in small stripes. Therefore, unlike walls, installing gypsum plasterboard on the ceiling with the help of profiles is much easier than gluing it.
Do-it-yourself material selection for installing a gypsum plasterboard ceiling
Unlike the conventional wisdom that drywall cannot be used in the bathroom or the bathroom, it can nevertheless be used in these rooms subject to certain rules. Depending on the room in which we will mount the ceiling, we choose the usual material or moisture resistant. The thickness of the sheets can be 8, 9.5 mm or 12, 5 mm, but it is preferable to choose a thinner material, since it will not experience a large load, but the main weight of the structure will significantly decrease.

In addition, metal profiles of different sizes will be needed:
- Guides PN / UD 27-28.
- The main PP / CD 60x27.
- Direct suspension.
- A “crab” or single-level connector that matches the size of the ceiling profile.
- Self-tapping screws for fastening profiles.
- Additional consumables, such as putty, serpentine or masking tape, primer and sandpaper.
Tools required for installation:
- Rotary hammer and screwdriver for fastening profiles and the material itself. In an extreme case, an electric drill with different operating modes and reverse.
- Metal scissors for profile cutting. With proper skill, you can apply the grinder.
- A fine-toothed hacksaw or knife for cutting drywall.
- Level, pencil or chopping line for marking.
- Spatula, brush and roller for finishing the ceiling.
Drywall ceiling: step by step instructions
Before starting the main work, we conduct a full inspection of the state of the topcoat. In the presence of large cracks or defects, we eliminate them by plastering the surface. If the ceiling is poured or there is doubt about the strength of the top coating, we clean off all unnecessary and treat the surface with a primer in 2-3 layers. This will strengthen the base and eliminate most of the dust.

Surface marking.
The marking cannot be missed under any type of finish, it is on it that the final appearance of the repair depends. Therefore, the first step in the gypsum board ceiling instructions , there will be just a marking under the frame, on which sheets of material will subsequently be attached.
The most convenient option is to mark up using a laser level. We find the lowest point of the ceiling, retreat an additional 25 mm (this is the minimum thickness of the profile) and mark the point on the wall, which we later transfer to the remaining vertical surfaces. In the absence of a laser level, you can do this procedure and using the usual, you just have to more carefully check the compliance of each mark.
If you plan to hide any communications, the indent from the lowest point may be more. If the ceiling will hide not only electrical wiring, but also water pipes and other communications, then the inter-ceiling space should be at least 5 cm. It is also necessary to take into account the height of the recessed fixtures, if they are planned. But do not forget that at the same time the top cover will fall on the inter-ceiling space, so do not get carried away.
Draw the connecting line at the marks with a pencil or a chop cord, along which we fasten the guides. To do this, using a puncher, drill holes for dowels in increments of 35-40 cm, along which we fasten the metal profile PN / UD.
Now you need to mark the ceiling itself under the suspensions. As a rule, sheets are attached along the length of the room, and two conditions must be observed. Firstly, for reliability, the joint of the sheets should fall on the profile and one more should go in the middle of the sheet. Since the standard sheet width is 120 cm, the gap between the profiles should be 60 cm. The second condition: the sheets are mounted in a checkerboard pattern, this subsequently eliminates the appearance of cracks and deformations.
Based on the foregoing, it is necessary to draw several parallel lines along the ceiling along with a gap of 60 cm. We fix the suspensions along the lines with a step of 40-60 cm.
The next step is the installation of ceiling profiles. The length of the profiles corresponds to the width of the room minus 5 mm, so it will be easier to install them in the guides. Before mounting, pull a thin cord or nylon thread along the bottom of the frame along the line drawn along the ceiling. Now, when the profile sags under its own weight during installation, you will easily notice this by the deflection of the cord, and you can adjust the level. We insert the profiles and fasten them with screws to the suspensions, not forgetting to monitor the horizontal level. The protruding ends of the suspensions are cut or bent to the ceiling.
As an additional reinforcement and increase the rigidity of the frame, transverse profiles are installed using crabs. The ceiling profile is cut into a length of 60 cm and fastened taking into account the chessboard fastening of the sheets.
We make a suspended ceiling from drywall.
If the creation of the frame was carried out in compliance with all the rules and the exact layout, then mounting is not particularly difficult. The only point is that it is simply impossible for a beginner to complete these works alone, it will take at least two, and preferably three pairs of hands. Two will hold the sheet, and the third will fasten it to the frame.
There is an option to do this work alone, but for this it is necessary to cut drywall into small paintings, which will increase the complexity of fixing it. In addition, in this case, it will be necessary to carefully adjust the sheets to the frame, and subsequently carry out more finishing work. Therefore, it is much easier to invite two assistants.
Installation procedure for suspended plasterboard ceiling
First of all, we fix the whole cloths of the material, observing the following conditions:
- Joints of sheets should be on the metal profile.
- The mount should be no closer than 1.5-2.0 from the edge of the canvas.
- Fastening is done with TB or TN screws with a step of 10-15 cm.
- A self-tapping screw must be drowned into the body of the material by about 0.5 mm.
As a rule, it is not possible to use only whole sheets, so unclosed sections of the frame will have to be sheathed with pre-cut pieces.
We cut out pieces of the required size from the canvas, while taking into account that there should be a gap of 3-4 mm near each wall. Fiber cutting can be done using a special hacksaw or knife. If a knife is used, the following rules must be observed when cutting:
- After marking the sheet, the top layer is cut exactly along the line.
- Break the sheet with a bar or profile placed under the canvas.
- We cut the bottom layer of cardboard.
- We process the edge using a special planer.
We put the cut sheet in the prescribed place and fasten it to the profiles. Such pieces are much lighter, so they can be fastened in increments of 20 cm for the long side and 30 cm for the short side, while observing the rest of the conditions. When fastening sheets, we observe a tight combination of joints and conformity of sizes.

This is a direct process: how to make a drywall ceiling. But there are many more nuances during installation, here are some of them:
- If it is planned to install recessed luminaires in the ceiling, then the electrical wiring laid in the corrugated pipe must be carried out before the installation of the canvas, while leaving the loop from the wire for subsequent connection. Subsequently, holes are drilled under the lights using a special nozzle on the drill.
- When attaching the frame to the walls and ceiling, glue a sealing tape on the back of the profile, this will provide additional sound insulation.
- If it is planned to install multi-level gypsum plasterboard ceilings, it is imperative that the first level be given additional rigidity with the help of additional transverse profiles. It is especially necessary to strengthen the first layer of the ceiling in places where the second level will be fixed.
- If additional soundproofing is necessary, it is made of mineral wool, cut in size slightly larger than the cells from the profile, and laid in them.
Drywall ceiling after installation.
Finishing the ceiling is carried out according to the same rules that apply to any work using drywall.
Initially primed in several layers. Before filling the seams between the sheets embroider.
Putty is applied at the joints of the sheets, on which, without waiting for it to dry, a serpentine tape is laid. This will prevent subsequently the appearance of cracks in the joints. We wait for the putty to dry completely and apply another leveling layer. We prime and, depending on the finish, apply one or more layers, grind and carry out other necessary procedures.
A few more tips that will come in handy when installing drywall.
- If you do not know what material to choose for installation, use material from well-known companies, the most common brand of high quality drywall is Knauf. It is available in both conventional and waterproof versions. In addition, one of the latest developments of this company is the release of sheets with specially machined edges, which do not need to be further strengthened with a serpentine tape when using putty of the same brand.
- Plain drywall is gray, moisture-proof, has a greenish tint.
- When calculating the required material, add 5% of the total volume just in case, for example, to inaccurate measurement or just spoilage.
- If you use a normal building level when marking, its length should be 2.0-2.5 cm.
- Marks for the level are best done with a hammered clove or self-tapping screw, on which a nylon thread or cord is attached.
- If possible, lower the ceiling level by 10 cm, this will allow you to easily hide the wiring and all communications, as well as provide additional ventilation to the room.
- Usually, 6 mm self-tapping screws are used for installation, in this case, take 5 mm dowels, so a stronger connection is ensured.
- When attaching rails to a wooden ceiling, it is better to use self-tapping screws with a larger thread without dowels.
- To seal the cracks between the wall and the ceiling, we use acrylic putty.
- During puttying, it is not necessary to use serpentine tape or reinforcing mesh; now many companies engaged in building materials offer docking putty.
- Do not forget to let each layer of putty dry out.

If you follow these simple rules and follow the instructions for installing a plasterboard ceiling, even a novice in construction can carry out such a repair, while getting a really high-quality result. Drywall has recently become very popular. Especially the creation. Also often used in the interior or.
The snow-white ceiling always looks stylish and harmonious, combined with any design decoration of the room. However, the monotony in the decoration of the upper part of the apartment begins to oppress over time - you want something new, unusual, which neighbors and friends do not have. Modern materials and technologies allow us to solve this problem, gradually pushing whitewashing and painting to the background.
Finishing craftsmen offer a variety of ceiling finishes. The following types of ceiling are most in demand:
Tension - The most common technology for designing a ceiling space. Its essence lies in mounting plastic or aluminum profiles of synthetic fabric (polyester) or polyvinyl chloride (PVC) film. In this case, the tension material is desirable to have without seams. They make it to order after measuring the ceiling. Therefore, independent work on this method of designing the upper part of the room is difficult;
Suspension. The technological process is somewhat similar to the previous ceiling design method. The difference in the rigidity of the frame (metal profiles are used if the ceiling is concrete, wooden beam for floors made of wood or, as in attics, rafter systems) and the type of material for covering the ceiling - plasterboard, wood, metal, plastic, fiberglass or mineral fiber boards are fixed. Despite the complexity of the technology, such work can be done independently;
Rack and pinion. The surface of the ceiling is mounted from aluminum or steel plates, treated with several layers of varnish. It is installed, as a rule, in unheated rooms (frost-resistant) or in rooms with high humidity (kitchen, bathroom);
Mirrored. This type of ceiling decoration is similar in design to a false ceiling. The only difference is that instead of gypsum plasterboard, mirror plates are used. They visually change the volume of the room, doubling the height of the ceiling. This design of the upper part of the rooms was in fashion 30-40 years ago. It is very difficult to meet the mirror ceiling;
Bindery. This is a simplified version of a false ceiling. The ceiling surface of this design is also formed from rigid sheets. However, they are not mounted on a suspended structure, but on a wooden or metal frame fixed directly to the floor slabs. For such ceilings there is no way to make a hidden wiring of various communications and use built-in LED lights;
Glue - The easiest and most cost-effective option for finishing the ceiling space. There is nothing complicated here - the technological process is even more understandable for the beginner-finisher than whitewashing or painting.
The essence of the method is gluing to the ceiling surface polystyrene square panels (another name is styrofoam) 50x50 cm in size. The tile can be smooth or embossed, painted in the same color or with imitation of wood, granite or plaster, simply painted or with a laminated protective film and etc .;
Plastered. According to this technology, the ceiling is primed, putty, and then covered with decorative plaster. Of the advantages of such a ceiling, it should be noted its durability and low cost, two minuses: high complexity and the standard appearance of a painted ceiling with simple painting;
Raster or cassette. It is assembled from small rectangles 60x10, 120x60 cm in size, which professional builders call cartridges (plates). Made of glass or pressed mineral wool. Mounted to the ceiling using special frames. Cassettes have a diverse design, which allows you to implement the most unusual ideas on the arrangement of the interior in any room of the apartment (house).
Gypsum plasterboard ceiling
In the decoration of ceilings, the tendency to reduce the cost of repairs and the complexity of obtaining the maximum possible aesthetic effect is becoming more pronounced. The most beautiful design of the ceiling space is obtained when using suspended structures with sewn drywall. This technological solution for finishing the ceiling allows you to:
- hide the problems of the ceiling (distortion, cracks, chips, visible joint, etc.);
- hide various wiring and cable;
- do not level, primer or putty the base of the ceiling, which allows you to save on labor costs and materials during these operations.
The plasterboard ceiling is a rigid structure made of a metal frame in the form of a lattice attached to the ceiling with suspensions, and on the walls to a metal profile. Cladding sheets, mainly drywall, are attached to the assembled grating with self-tapping screws.
The advantages and disadvantages of using drywall
GKL suspended ceilings have many advantages:
- long service life - 20-30 years;
- high strength - does not collapse when pressed or scratched;
- work with drywall does not require special tools and skills;
- installation of the frame is possible for any novice builder;
- good heat and noise insulation with the ability to improve these characteristics using insulation;
- does not require special care - sometimes it is enough to walk with a vacuum cleaner or a damp cloth;
- the broadest possibilities in interior decoration - gypsum board can not only be cut out curly, but also get curved curved shapes after soaking and drying with warm air;
- affordability of materials for all categories of the population;
- environmental friendliness - it is not toxic, does not pose any threat to allergy sufferers, and therefore it can be installed in any premises of an apartment or house (bedroom, children's room, etc.);
- ease of installation of any kind of backlight.
At the same time, this type of ceiling has its drawbacks:
- need constant repainting every 7-8 years of operation;
- steals the height of the room;
- requires finishing processing of GKL joints, grooves from hardware, primers and putties for finishing;
- it becomes unusable when a small amount of water seeps from above, even when using moisture-resistant sheets;
- collapses with minor calculation errors;
- there is no possibility of mounting alone - at least 2 people are required.
As can be seen from the above pros and cons, the choice in favor of a suspended ceiling allows you to solve many problems with minor difficulties. However, stretch ceilings are more popular with customers. Why is this happening?
Which is better - drywall or stretch ceiling
A comparative analysis of what is better - a stretch ceiling or drywall for decorating a ceiling space shows:
- The service life of PVC and drywall films is different: film manufacturers in the passport indicate a 10-year life (actually last about 15 years), and GCR can not be changed for 20-30 years - it is enough to repaint regularly;
- In terms of heat and sound insulation, both types of ceiling are approximately equal;
Important: if necessary, improve sound insulation or insulate the ceiling, mineral wool can only be used with suspended ceilings.
- The strength of the suspended ceiling is its strength - it does not collapse from the slightest touch of a sharp object or concentrated impact of a small force, unlike a PVC film;
- In terms of elasticity, drywall and stretch ceilings have parity - surprisingly, but the film can withstand loads of up to 100 kg / m 2, which is clearly manifested during the flooding of the apartment by neighbors from above. In the experiment, a 6 m 2 PVC ceiling withstood 500 l of water and only after 2 hours did small trickles of water begin to appear due to the delamination of the film;
- In terms of opportunities to turn design ideas into reality, the stretch ceiling gives a significant head start to the suspended structure, especially in texture and color.
When comparing the installation cost, the stretch ceiling also has a significant advantage. If we compare the prices in St. Petersburg, then for 1 m 2 of installation of the hyproc you will have to pay 2,500-3,000 rubles. for a full cycle of work, and for a stretch ceiling, prices start at 700 rubles.
When performing work on a plasterboard ceiling on your own, the costs will decrease and will amount to 700-800 rubles / m 2 (the rate also includes transport costs for the delivery of material in the amount of 200 rubles / m 2, this figure can be changed in any direction, but slightly).
It is necessary to take into account the speed of work. The stretch ceiling is installed in a day, the suspension cannot be mounted during these periods.
Output: in some respects, the stretch ceiling has a significant advantage. But if you consider the issue in the long term, professionals advise installing a suspended ceiling - cheaper and there are no problems with the next repair.
Where can plasterboard ceilings be installed?
Installation of a false ceiling steals in a room 5-10 cm of its height (an increase in the distance between the floor slabs and the hemmed gypsum board is always determined by the installation of hidden lights). Therefore, in the "Khrushchev", with their small size both in area and in height (2.5-2.6 m), it is not recommended to mount a suspended ceiling made of drywall.
Based on the sanitary and technical requirements for the size of the living room and the design approach to interior design, the one-level installation of drywall on the ceiling at its height of 2.7 m, two-level at an apartment height of 3.0 m and multi-level at very high, 3.3 m is considered optimal. and more, indoors.
Materials and Tools
It is considered an axiom that before starting work you should buy the necessary materials and assemble a set of tools. In this case, an exception applies. The exact amount of profile, connecting elements, fasteners and drywall sheets can be found out only by completing some of the preparatory work, which, in turn, requires the appropriate tools.
In order not to break the section of the article into several parts, let's run a little ahead and consider buying materials earlier than the calculations, but relying on them, i.e. about the fifth stage of preparatory work, we will tell before they begin.
In order to have an idea of \u200b\u200bthe cost of repairs, for people installing the suspended ceiling on their own, we will reduce the costs of purchasing materials and a set of tools to tables.
Materials
| Name of materials | amount | Price per one. | Cost |
|---|---|---|---|
| Drywall 3000x1200x6.5 | 6 sheets | 360 | 2160 |
| UD profile (PN) 28 * 27 * 3000 | 7 pcs | 85 | 595 |
| CD profile (PS) 66 * 27 * 3000 | 21 pcs. | 100 | 2100 |
| Direct suspension | 126 pcs. | 10 | 1260 |
| Mount "crab" | 55 pcs. | 12 | 660 |
| Self-tapping screws 3.5x25 mm | 1 pack 1000 pcs. | 300 | 300 |
| The expansion bolt shield self-tapping screws 6 * 60 | 266 pcs. (3 pack) | 230 | 690 |
| Bedbug Screws | 560 pcs. (3 pack) | 100 | 300 |
| GKL soil | 5 l | 100 | 100 |
| Gypsum putty | 5 kg | 200 | 200 |
| Mesh "Serpyanka" | 2 units | 50 | 100 |
| Damper tape | 20 m | 550 | |
| Water-based paint | 1 bucket 9 l | 1900 | 1900 |
| Electric wires | 19 m | 80 | 1520 |
| Light bulbs | 11 pcs | 420 | 460 |
Attention: in some retail chains, the “crab” mount is indicated by a suspension, which does not correspond to its function.
Thus, the total cost is 13,895 rubles. The cost of finishing 1 m 2 of the ceiling is 655 rubles. This is only based on materials.
Part of the family budget will be required to purchase or rent the necessary tool. Here, too, the numbers are not small.
Instruments.
| Tool name | Rent price | Purchase price |
|---|---|---|
| Perforator with nozzles | 300 | 2450 |
| Screwdriver | 200 | 3630 |
| "Bulgarian" | 200 | 2140 |
| Laser level | 300 | 2746 |
| Water level | do it yourself | |
| Plumb | do it yourself | |
| Roulette | no | 76 |
| Level | no | 100 |
| Construction knife | no | 78 |
| no | 92 | |
| Beat cord (can be done) | no | 55 |
| Faux fur roller | no | 29 |
| Ditch | no | 23 |
| Narrow spatula (up to 10 cm) | no | 100 |
| Wide spatula (30-35 cm) | no | 225 |
Preparatory work
How to make a drywall ceiling yourself? The technology is not complicated. It consists of preparatory work, frame assembly, installation of gypsum plaster and surface finish. Installation of the false ceiling begins with preparatory work. They include 5 stages:
- room preparation;
- drawing up a project;
- calculation of the amount of material;
- marking the ceiling and walls;
- purchase of materials.
Attention: on many sites that consider how to fix drywall to the ceiling, gross errors of a different nature are made. Leading portals are no exception. Therefore, before starting work, we recommend that you study several articles on the topic, critically digesting the information posted. Examples of inaccuracies:
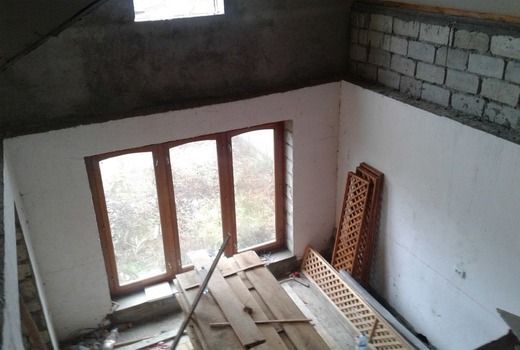
- they suggest mounting drywall only on longitudinal CD profiles, which are also fixed parallel to the window (see photo);
- incorrectly indicate the pitch between the ceiling profile CD (50 and 70 cm);
- recommend backing away from the wall by 10 cm for the first line of the frame;
- place suspensions at the intersection of profiles, etc.
Room preparation
In a new building, the entire preparation of the room for the installation of the ceiling is reduced to cleaning it from debris. In a habitable apartment you must:
- Remove all furniture from the room to provide unhindered access to any point on the ceiling;
- If it is impossible to complete the first step, close the armchairs, sofa or cabinet with plastic wrap from dust generated during drilling of the ceiling and walls under the dowels. In this case, you need to be prepared for the repeated movement of furniture from place to place, to gain access to the entire ceiling space, and to clean armchairs and a sofa, because dust tends to wade under the film, finding the smallest holes;
- To clear a ceiling of the retarded paint, traces of mold (fungus), soot.
Project drafting
To perform design work, you will need a tape measure, a simple pencil (ballpoint pen) and a double notebook sheet, in a box. All work is done in several steps.
1. Tape measure measures the length of each wall, excluding protrusions and niches. If they are in the room, the perimeter of the walls is additionally measured. The first size is needed to calculate the number of lines of the ceiling profile, the second, the perimeter, to determine the length of the guide profile.
2. The obtained sizes are applied on a notebook sheet at a certain scale. The result should be a drawing of the ceiling.
3. A frame passage scheme is being developed, as well as mounting points for suspensions. The following points are important here:
- Longitudinal profiles can be attached in increments of 40 or 60 cm, due to the weight of drywall. The larger it is, the more often profiles should be installed. Builders adhere to the following recommendation: for gypsum coatings up to 9.5 mm thick, inclusive pitch of 60 cm, for thicker, of course, and heavier - 40 cm. Why are these values \u200b\u200bexactly? These numbers are multiples of the standard width of the drywall sheet of 120 cm.
- Cross profiles are fastened only in increments of 50 cm (not 60 and 70 cm, as indicated in many materials), which is a multiple of the length of the gyro sheet;
- With a distance of 40 cm between the longitudinal profiles, only they are mounted on the ceiling suspensions, and “crabs” are enough for the transverse profile. At a step of 60 cm, transverse profiles should also be attached to the ceiling.
4. Marking of the passage of the wiring and the location of the fixtures.
The result should be a drawing similar to the drawing in the photo below.
Material quantity calculation
To illustrate the methodology for calculating materials, we take the real dimensions of the room, and not the simplified ones: 5.6 m in length and 3.8 m in width, while one of the walls is 5.9 m long due to a protrusion of 15 cm.
1. Determine the footage of the guide strips (PN), size 28 × 27 mm - are attached to the walls under the ceiling, serve as a support for the frame:
- We calculate the perimeter of the walls: 5.6 + 5.9 + 3.8 x 2 \u003d 19.1 m.
- We find the number of PS profiles: 19.1 m / 3 m \u003d 6.36 pcs., Where 19.1 m is the perimeter of the walls; 3 m - profile length; 6.36 pcs - the number of strips required for ceiling installation. Since this amount is not for sale, you have to purchase 7 pieces.
2. We calculate the number of ceiling profiles (PS) with a cross section of 60 × 27 mm - a grid is assembled from it for the installation of gypsum plasterboard. To do this, we determine the number of longitudinal and transverse rows. Since it is planned to install GCR with a thickness of 6.5 mm, the pitch for longitudinal profiles will be 60 cm, transverse - 50 cm.
Attention, it is very important: the construction industry does not stand still and constantly eliminates problem areas. False ceilings were constantly faced with the fact that vibration violated the integrity of the drywall joints: they were covered with a network of cracks. Therefore, experienced GKL builders glued wallpaper or applied decorative plaster. Today, the seams are closed with fiberglass mesh, which eliminates the problem.
The calculation is carried out according to the formula: K \u003d P / L - 1where:
- K is the number of profile lines;
- P is the length of the room;
- L is the step size (0.6 m).
Substitute the numerical values \u200b\u200bin the formula and get the amount:
- Longitudinal rows: 3.6 / 0.6 - 1 \u003d 5;
- Transverse: 5.8 / 0.5 - 1 \u003d 10.6. As a result of rounding up we get 11 rows.
The total length of the ceiling profile will be 68.6 m (5.8 x 5 + 3.6 x 11). On sale you can find a ceiling profile with a length of 2.5 m to 4 m. In our case, the most optimal option is 3 m. Then you have to buy 23 slats (68.6 / 3).
3. The length of the room is greater than the length of the profile, so they will have to be increased. In our example, the connection of the longitudinal parts of the frame will occur in the crab, since the step of the transverse profiles is a multiple of the length of the strap.
4. The number of "crabs" is equal to the number of intersections of longitudinal and transverse profiles - 55 (5 x 11).
S \u003d (D + 1) x N + (N + 1) x Dwhere:
- S is the number of direct suspensions;
- D is the number of rows of longitudinal profiles;
- N is the number of rows of transverse profiles.
Substituting specific numbers into the formula, we get that for work it is necessary to buy 126 suspensions ((5 + 1) x 11 + (11 + 1) x 5).
6. The expansion bolt shield self-tapping screws 6 × 60 mm (8 × 80 mm) for installation of directing profiles and fastening of suspensions. They are screwed into the wall every 30 cm, 2 pieces are required for attaching 1 suspension. A total of 266 pcs.
7. Self-tapping screw “bug” LN 11 (3.9 x 11), for connecting profiles to each other on the wall - 2 pcs., With a crab - 4 pcs., With a suspension - 2 pcs. It will take 3 packs of 200 pieces.
8. Self-tapping screws for attaching drywall 3.5x25 mm. They GKL are attached to the crate. It will take 1 pack of 1,000.
9. Drywall must be purchased 3 m long so as not to make inserts (with a GKL length of 2.5 m, a piece of 0.8 cm in length will have to be cut in addition to 2 whole sheets). In total, 6 sheets ((3.6 x 5.8) / (1.2 x 3)) are required, where the first 2 digits are the size of the room, the second are the length and width of the sheet.
Marking the ceiling and walls
In a new building, using the hydro or laser level, the horizon line is beaten off. Then, after numerous measurements, there is the lowest point of the ceiling. From it, a minimum of 5 cm is measured down (when installing built-in fixtures - 10 cm) and a ceiling line is formed. For those who first encounter such concepts and methods of finding the ceiling line, we recommend that you look at the article "". Here everything is one to one, only upside down.
In an apartment with a laid floor, it is not necessary to beat off the horizon line - the floor will successfully fulfill its role. After finding the key point (the lowest part of the ceiling space minus 5 cm), using the hydraulic level (laser level), a line is drawn on the wall along which the ceiling will be installed.
On it, every 60 cm, starting from the wall, marks are placed on the passage of longitudinal ceiling profiles. A similar operation is carried out on the opposite wall. Using a plumb line, a metal ruler (rule) and a pencil, vertical lines are drawn from the marks to the ceiling, after which the mark along which the profile passes is struck along the ceiling with a building cord (twine spread with colored chalk). If everything is done correctly, a series of lines parallel to each other and adjacent walls is obtained.
Attention: longitudinal profiles must be perpendicular to the window, regardless of the size of the room. Therefore, the initial marking is placed on the wall with a window, then on the opposite side.
A similar operation is carried out with another pair of walls, but with a step of 50 cm. Places of fastening of plumb lines are marked at a distance of 30 cm from the wall and 60 cm between themselves for longitudinal profiles and 25 cm from the wall with a step of 50 cm. : suspensions are mounted in the middle of each side of the rectangle formed by profiles (see diagram).
Materials purchase
This subsection is considered above in the section “Materials and Tools”.
Frame assembly
Work on the installation of a drywall ceiling begins with the installation of a supporting frame. We will analyze step by step how to assemble it.
Step 1. Holes are drilled around the perimeter of the walls for fastening the guide profile. To do this, the guide is firmly pressed against the adjacent wall, while its lower edge should go strictly along the drawn line of the ceiling. Marks for mounting dowels are drilled through the metal through the wall.
The first hole should be located 10 cm from the edge of the wall, the next - every 30 cm. There are recommendations to place dowels through 50-70 cm, but this reduces the rigidity of the structure.
Step 2 Holes are drilled according to marks, dowels are driven into them. A damper (sealing) tape is glued to the back of the profile to prevent sound waves from entering the ceiling from the wall, after which the guide is firmly attached to the wall.
To avoid possible deflection of the ceiling at the junction of the two rails, experienced builders advise reinforcing the joints. To do this, inside the profiles, at the junction, a plate of tin, plastic or plywood is wound and attached at least 2 screws. Thus, the UD (PN) profile is installed around the entire perimeter of the room.
Important: The vast majority of authors recommend installing guides only for longitudinal CD profiles, which is fundamentally wrong. With this arrangement of the frame, large parts of the GKL corners adjacent to the wall remain completely unfastened. The result is manifested within a couple of months, when the sealed joints are torn and one of the sheets sags by 1-2 millimeters.
Step 3 Direct suspensions are installed across the ceiling, across the line drawn. At the same time, it is necessary to ensure that the line is strictly in the middle of the fastener. You can fix them with a dowel-self-tapping screw (2 pcs. For each suspension) or anchor bolts, which is more reliable. After fixing the suspensions, their whiskers, with their hands or pliers, are bent down at a right angle.
Step 4 With the help of fishing line or kapron thread, a ceiling plane is formed. Such an operation is needed to control the ceiling level in the center of the room - under its weight, the frame strives to bend down. The thread (fishing line) is pulled along each line of the longitudinal profile. So that the thread does not sag, it is additionally fixed on the mustache of the suspensions (2-3 are enough), bent up at the desired height.
Step 5 Mounted longitudinal ceiling profiles. First, the PS-profile is inserted into the groove of the PN-profile at the place of the mark and is attached to the guide bar with “bugs” screws. Then, sequentially, it is fixed in suspensions. The horizontal is controlled by a tense fishing line and level. The protruding mustache of the suspensions are bent to the side.
Step 6 At the places where the frame intersects the longitudinal profile with the “bugs”, the “crab” fastening is screwed on - one screw on each side.
Step 7 Transverse profiles are fastened, ends in a “crab”, in the middle by a suspension.
Heat and sound insulation
If there are noisy neighbors or the top floor above, the ceiling can be insulated with mineral wool, which also absorbs sounds well. Inside the frame, it is attached with the so-called "fungus" - a special fastener system.
Drywall Installation
To mount the ceiling from drywall yourself, step-by-step instructions are given below:
- Drywall is brought into the room where it will be installed, and left for 2-3 days. This will allow the GCR to adapt to new conditions and take a geometric shape for a specific temperature and humidity. It is stored only in a horizontal position;
- GKL is cut into size: the sheets are shortened, a notch under the ledge is cut;
Important: in our example, for the odd rows of the hyproc, only the last sheet is cut. In even rows, the first sheet is always shortened by 50 cm, and then the last sheet is sized. This is done so that the seams do not match.
- With a construction knife, at an angle of 45 degrees, the chamfer is cut along the edge of the cut;
- The first sheet is applied to the frame so that a technological gap of 1-2 mm remains near the wall - it is necessary for the exchange of air (ventilation) between the room and the ceiling space. The first self-tapping screw is screwed at a distance of 10 cm from the wall, the subsequent ones every 20 cm. GCRs are attached to each row of profiles, as well as along the edges. It is better to heat the heads of hardware into drywall manually, using a Phillips screwdriver, which will prevent them from twisting. Along the edges of the sheet, at the seams, the screws are screwed “apart”, not against each other.
Final finish
After the installation of the false ceiling, the most crucial moment comes: the finish of the drywall. The appearance of the ceiling space depends on the quality of its implementation. Here it is necessary to highlight the following stages of work:
- sealing of connecting seams and traces from the heads of hardware;
- puttying the entire surface of the ceiling;
- cutting holes for fixtures;
- painting the ceiling with water-based paint;
- installation of fixtures.
Stitching
Joints of sheets are sealed with reinforcing tape, "serpyanka". A plaster putty is rubbed into the seams through it. At this stage, it is necessary to putty also all damage to the sheet and the head of the screws.
Drywall Putty
Many recommendations for finishing gypsum plaster indicate a prerequisite - applying a primer before puttying. However, for modern putty mixtures (Vetonit LR +, KR, JS, Founded Econsilk, Plitonit KP, Kreps KR), a primer is not needed. GKL putty instructions can be studied in the article “”, paragraph 2.5. "Drywall putty."
Cutting holes for fixtures
Using the diagram drawn at the beginning of the installation of the ceiling, the places of installation of the lamps are marked on the drywall sheets. A removable crown for a perforator or electric drill drills holes. The crown can be bought at any hardware store. Its price is 140-350 rubles. In the crown there are sets of cutting blades for cutting holes with a diameter of 26, 32, 38, 45, 50, 63 mm.
Painting the ceiling with an aqueous emulsion
How to make a highlight
Without design solutions for light, the device of a false ceiling practically loses its meaning - the same effect also comes from a simply painted ceiling (except for the ability to hide some defects of the ceiling - in this case, a simple ceiling repair is several times cheaper).
In practice, various backlight options are used:
- Contour - light is directed from the bottom up, from the first level of the ceiling to the second, around the entire perimeter of the room;
- Directional - streams of light run parallel to the surface of the ceiling. LED lamps are also located around the perimeter of the room. They can shine inside the premises, but can and vice versa - from the center to the walls;
- Standard - plafonds are installed in the GKL, the lamps shine down;
- Curly - all lamps shine in different directions, creating an unusual lighting effect;
- Spotlight is the most complex, reminiscent of the night sky, when, along with conventional LED lamps, miniature LEDs are mounted to indicate a luminous point on the ceiling.
You can install such lighting yourself without resorting to the help of an electrician. There is only one difficulty here - to come up with a ceiling lighting for a particular room.
How to make several levels
In apartments (houses) with high ceilings, it becomes possible to arrange multi-level false ceilings. In this case, the number of decisions on interior design tends to infinity. There are no particular difficulties in this design of the ceiling space. The order of work is not much different from the technological process for the installation of one level:
- plan and draw a level layout diagram on paper in advance;
- transfer the drawing to the walls and ceiling: mark the levels of fastening of drywall and load-bearing profiles;
- mount the frame for the first level;
- bend the side profile under the selected scheme;
- install the side frame;
- mount the frame of the second level;
- to distribute the wiring for the lamps;
- cut drywall for both levels;
- attach GCR at both levels;
- cut, and then bend the GKL strip for installation on the side frame;
- close the box;
- to finish the installed ceiling;
- cut holes for fixtures, and then paint the ceiling;
- install lights.
Thus, the installation of a false ceiling is not difficult. There is only one problem - such work cannot be done alone.