How to raise a summer cottage. How to properly fill a site: what to pay attention to

To lower the groundwater level, soil drainage is used on the site. Comprehensive measures for site drainage almost always help get rid of problems with high groundwater levels (GWL). But sometimes soil drainage does not lead to complete victory over ground water. This usually happens when several negative factors are combined in one area - high groundwater level, unfavorable soils, lack of natural drainage, etc. We have already written about this in an article about it on our website.
If it is not possible to abandon such a site, and drainage work has little effect on the groundwater level on your site, then there is virtually the only option left. This site elevation. As a last resort, site elevation can eliminate persistent surface water problems. This path is quite expensive, but it solves the problem with water supply radically.
In order not to needlessly bury several tens of thousands of rubles in the soil, you need to understand how to properly raise the site.
To what height the site will be raised is not so important. It is more important to correctly distribute all stages of lifting work and follow the work technology. It is also necessary to understand that raising the site does not cancel drainage work, but only complements it, being a decisive factor in changing the upper level of the site relative to the groundwater level.
So let's get started.
The first thing to do is backfilling the area with soil. The soil for backfilling is used exactly the same as what was originally present on your site. If the surface of the area is composed of clay, then it is necessary to add clay. If it is loam, then it is necessary to add the same soil. Any addition of lighter soil, such as sand, at this stage can lead to the formation of a lens at the boundary of the soil and light soil. Water will accumulate in this lens. And in the future, the foundation of a building built on such a lens may “float.”

Followed by soil compaction. It is imperative to compact the added soil in order to prevent its further uncontrolled shrinkage. After this, a layer of geotextile is laid on the ground, which prevents mixing and mutual penetration of the bedding layers.

Then follows filling the area with sand. Precisely sand, not ASG. Since sand is better suited for subsequent compaction. It is compacted sand that is actually the ideal foundation for the construction of any buildings and structures on a variety of foundations.
Sand compaction, produced at the next stage, allows us to achieve sufficient strength of the sand layer. After compaction, you can begin construction work or site planning.

Surface layout of the site- This is the last stage of work. Depending on the plan, foundation work is carried out. And soil is brought into the landscaping areas, leveled, and trees, grass and ornamental plants are planted.
At the beginning of the article, we already mentioned that the height of the lifting of the site is not as important as compliance with the lifting technology. The thickness of each layer is selected individually for each area. Additional layers may consist of crushed stone of various fractions, crushed brick, etc. The main rule is that all these layers must be above the ground level. That is, lie on layers of compacted soil. Additional layers are also separated by geotextiles.

For example, when the groundwater level is equal to the level of the site, the correct elevation of the site by only 40 centimeters, coupled with drainage measures, allows you to forget about problems with surface water once and for all.
So, the soil pie on our site after it has been lifted (from bottom to top):
— Compacted soil is similar in composition to bedrock.
— Geotextiles.
- Compacted sand.
— Geotextiles.
— Possible additional layers (crushed stone, crushed brick).
— Geotextiles.
— Imported soils for lawns or for growing plants.
To receive notifications about new articles on our website, subscribe to our email newsletter.
The need to increase the level of a land plot is most often dictated by various unfavorable conditions of its use.
The most common reason for raising the level of a site is the need to level it.
In such cases, it is very important to correctly plan and implement a set of measures that will simultaneously raise the level of land area and increase its operational capabilities.
The main situations when it is necessary to raise the level of a land plot can be considered:
- high in this particular area;
- the low location of the land plot in comparison with neighboring areas, which causes regular and unwanted accumulation of water on it;
- with an uneven surface.
Let's consider a set of works that will help correct the situation in all of the above cases.
Required materials and tools:
- shovels, buckets, rakes, cord, hose;
- water, sand, cement, crushed stone, gravel;
- measuring tape, hydrostatic level;
- wooden board 30-40 mm thick (for formwork);
- vibrating plate, concrete mixer.
Preliminary activities and preparation

Before leveling, it is necessary to clear the area of debris, roots, and dry branches and let it sit for a week in dry weather.
A preliminary study of the land plot will provide the necessary information for drawing up a plan for its improvement. To do this, you need to study the topography and soil of the site, assess the depth of groundwater, and the proximity of reservoirs.
It will be useful to monitor neighboring areas: perhaps somewhere holes are being dug for fence posts, drainage channels are being laid, someone has dug a foundation pit for building a house. It is worth looking carefully at where the water flows and where it stands, at what depth it is concentrated in the wells. What kind of soil was removed from the pit: sand, clay or peat. Such information will allow you to carry out the planning correctly in the future and avoid the mistakes that were made by your neighbors. It would also be a good idea to consult with specialists.
Before carrying out any subsequent work on the site, it is necessary to remove debris, roots, stumps of old trees and weeds. After removing debris and weeds, it is better to let the area sit for a week in dry weather.

The strip foundation is stable in unstable soils.
During the period of settling of the site, it is time to carry out work on the construction of a strip foundation along its perimeter. The height of the foundation must exceed the ground level of neighboring plots. To do this, a trench with a depth of 20 cm is dug along the perimeter of the site and wooden formwork is installed. For formwork, a wooden board 30-40 mm thick is used, fixed with stakes at a distance of 50-100 cm.
Cement-gravel or cement-crushed stone mortar is poured inside the formwork in a ratio of 1:3:5, where for 1 unit of cement there are 3 units of sand and 5 units of gravel (crushed stone). At an ambient temperature of 15-20°C, the strip foundation will gain 70% of its strength within 7 days, which is sufficient for the next stage of work.
Return to contents
Surface layout
After carrying out preliminary activities, you can move on to the goal of making the required changes to the topography of the land site. The optimal planning result is a flat surface with a slight slope to improve soil drainage. The slope difference in the desired direction should be approximately 3 cm per 1 m of length.

Before starting work, it is necessary to remove the top fertile layer of soil and place it in one place.
Before carrying out work on leveling and raising the site, the fertile layer of soil, which is on average 10-20 cm, is carefully removed from its surface. It must be placed in a separate place on the site before the final stage of work begins.
To locally level the ground level on a site, you can use wooden pegs placed along the strip foundation and across the site at a distance of about 2 meters, with a cord stretched between them. Level adjustment is carried out by removing or adding soil between the pegs to the level of the guy wires. The uniformity of the required height of the land plot is controlled by the hydrostatic level.
Return to contents
Leveling and raising the ground level
Having carried out all the preparatory activities and site planning, you can get a general idea of the scope of the upcoming work. At this stage, it will be necessary to correctly distribute the areas for the upcoming soil laying. Where the lawn or beds will be located, you can raise the level by adding sand. In places with utility rooms, paths and not intended for growing plants, sand mixed with clay and sandy loam can be used for backfilling, and construction waste can also be used for deep filling.

If it is necessary to raise the ground level by more than 30 cm, it is reasonable to use sand backfill.
If there is a general rise in the ground level to a height of up to 30 cm, then it would be reasonable to get by by adding imported soil in layers of 5-10 cm, compacting it with a vibrating plate and filling it with water for a day. The next day the procedure is repeated, and so on until the surface is leveled and the required level is reached. When adjusting the level, you should take into account the thickness of the removed fertile layer, which is laid last on top of the compacted layers.
In situations where the thickness of the bulk layer is expected to be above 30 cm, leveling and raising the site begins with the use of sand and gravel (“leveling”) mixtures, and ends with adding sand and laying the fertile layer. The sand and gravel filling is also laid in layers of about 5 cm and compacted. It is recommended to place small layers of fertilizer in the form of a peat pad in the middle of the bulk layers.
Please note that the final height of the laid soil layers should be slightly higher than the required level, because the resulting layered “pie” will shrink over several months. The shrinkage period depends on the thickness of the laid layers, the amount of precipitation and other factors.
In the spring, many owners of land plots are faced with a problem: it gets a little warmer, and the plot is already knee-deep in water. Especially often those whose land is low or on a slope suffer from this: no grandfather Mazai can save them. And this is instead of pleasant spring chores in the garden! It’s a mess, however... But this problem can be solved - you just need to raise the site by a few dozen sentiments. We tell you how to do this correctly and economically.
Where to begin
A flat plot without flaws or depressions is, of course, the dream of any summer resident. But even if your allotment doesn’t look like a piece of paper, don’t despair. It is not necessary to raise the entire area to avoid flooding. There are also separate zones.
It is advisable to think about possible flooding in advance, before you start building a house. This will make it easier to clear the area and plan the location of objects. Study the topography of the site and the soil on it, evaluate the depth of groundwater, the proximity of a reservoir, etc. It is better to invite a specialist to evaluate the soil. He will tell you what part of the top layer needs to be removed before laying, as well as the best way to fill the new level.
However, working after the construction of a home has its advantages. What will probably remain from the construction site is the earth from the excavated pit and construction waste. They will come in handy for styling.
The costs of arranging the site depend on the height to which you plan to raise it. For example, to “increase” one hundred square meters of land by 1 meter, you will need about one hundred cubic meters of soil. This is about ten KAMAZ trucks (each with 10 cubic meters). The price of the mixture depends on its composition. Calculate everything carefully: it may turn out that it is cheaper to sell the site (if it is still empty) and buy another one than to fill it.
How to fall asleep
What should your earthen “pie” consist of? First of all, distribute the laying zones. It is advisable to first fill the places where the beds or lawn will be located with sand. It will cost more, but sand conducts water better.
Where plants are not expected, you can save money. In this case, a coarser soil is suitable for the lower layer; it is also called “substandard”. It contains numerous impurities (clay, sandy loam) and is not intended for growing plants. This soil is good for laying under paths, utility rooms, etc.
By the way, if there is a large construction site near you, try asking for soil there. All the same, the workers will have to take it somewhere. You will get the filling for reasonable money or even free of charge.
Many summer residents pour clay into the lower layers; it is less susceptible to shrinkage. However, keep in mind: clay slowly allows moisture to pass through, so water may not immediately leave the area after rain or melting snow.
Finally, the lower layers are often filled with construction waste (broken bricks, concrete, etc.). You can purchase them from companies that dismantle buildings.
How to lift
So, all the calculations have been made, the material has been ordered and delivered. Work begins.
Before laying a new layer of earth, part of the old layer containing humus, small debris, etc. is usually removed. Having cleared the space, sand, gravel or construction waste is filled and leveled on the site. To prevent the sand from floating, some summer residents lay geotextiles underneath it. But this is an expensive pleasure. The layer is then carefully compacted with a vibrating plate or, more labor-intensive, by hand.
The thickness of the fill should be 10-20 cm higher than the neighboring area. Fertile soil or cheap soil is poured on top of the “rough” material. Please note: the resulting “pie” will shrink for some time (from several months to a couple of years - depending on the amount of precipitation, layer thickness, etc.).
Of course, on peaty soils, as well as in places with high groundwater levels, the problem cannot be solved by backfilling alone. Here you cannot do without a drainage device. Dig deep trenches along the entire perimeter of the site, sloping in one direction. Lay drainage pipes there, wrapped in geotextile, and fill them with crushed stone. To drain the water, you will also need a receiving well - it is made in the lowest place on the site. As it fills, water is pumped out of it with a pump (How to organize a drainage system).
Popular wisdom: to secure the poured “pie”, plant it with plants with a well-developed root system, for example, winter rye. If there is no opportunity or means to do backfilling, summer residents advise this. Plant currant bushes in the place where water collects. This plant consumes a lot of moisture and will help drain lowlands.
Now that suburban construction is rapidly developing, the acquisition of land for the construction of a summer house or cottage is becoming especially relevant. However, it often turns out that if the terrain is not carefully studied, the owner ends up with a plot on two levels, which leads to problems both in the construction of structures on it and in the development of the territory. To imagine how to deal with this, let's look at the most common ways to solve the problem.
Types of land plots
Land plots differ significantly in their topography and geological features. Among them are:
- Land areas above sea level. Their peculiarity is their location in mountainous or elevated areas. This usually leads to more precipitation in such an area and a lower average annual temperature. The soils here are predominantly podzolic, clayey or sandy, but sometimes carbonate or podzolic chernozems are found. The relief of a land plot located above sea level can be both flat and hilly. In the latter case, it is impossible to do without raising the level, that is, without eliminating the most noticeable depressions.

- Land areas below sea level. They are often characterized by significant swampy soils, sometimes the formation of salt marshes, but fertile silty soils are also common. Therefore, you should not immediately refuse such an acquisition, but it is advisable to raise the level of the site in order to avoid future flooding of the foundations of buildings and create optimal conditions for growing garden and vegetable crops.

- Land plots below ground level. Here, raising the level on the site is mandatory, since its territory appears to be in a lowland and water will flow onto it from neighboring sites, a nearby highway, etc., leading to soil washout and a decrease in the service life of structures. The high level of groundwater typical for such areas can have a particularly detrimental effect.
- Land plots above ground level. At first glance, they are practically free of drawbacks, but the uneven terrain creates additional difficulties in cultivating the garden, caring for the garden, and simply moving around the area, where it is very easy to trip. However, raising the level of the site, which is necessary here to smooth out unevenness, allows you to quickly solve this problem.
Why raise the land?
If, at first glance, the difference in levels on the site is not too obvious, many people have a desire to save money and improve the territory without the hassle of raising the level of zones located in the lowlands compared to the rest. But there are several cases when experts recommend strongly considering this operation:
- Groundwater flows too close to the soil surface, which can cause waterlogging and erosion of the upper, most fertile layer of soil.
- The site has several pronounced hills and depressions. This makes it difficult not only to build a house, but also to improve the area adjacent to it: for example, lanterns installed in lowlands will do a poor job of illuminating the area, and flowers or vegetable crops planted on a hill will not take root well due to the gradual sliding of the soil.

- Neighboring areas are located much higher than this area. And this automatically means that during heavy rains or floods, there will be constant and regular water in the area around the house.
Methods for raising a plot of land
In practice, there are not so many ways to increase the level of a land plot, but all of them have proven themselves quite well. They differ depending on the height to which the site area needs to be raised:
- If this figure does not exceed 30 cm, soil is usually used (imported or taken from the hills of the site). Additionally, it is compacted with a vibrating plate and laid on top of the previously removed fertile soil layer.

- If the difference in levels between the zones of the local area reaches 30 cm or more, they proceed differently: they take the so-called “planning” mixtures, in which sand is combined with gravel. They are laid in layers, between which it is recommended to place layers of fertilizers, and on top of them - the top fertile soil layer, without which planting any plants will be impossible.

Particular attention is required when it is necessary to raise the level of the area where it is planned to create a lawn. In this case, they usually resort to one of three options:
- If water regularly stands on the lawn, flooding it, then before raising the level of the area, you should make sure that there is no clay layer inside the soil. Otherwise, this operation will not achieve anything in terms of drainage, even if the groundwater flows deep. After confirming the presence of clay, it should be completely removed and replaced with a layer of sand, on top of which black soil is laid. Then the water will drain much better.
- If there is a road above the area where the lawn is located, and this leads to water flowing onto the area, it is best to raise its level using porous soil. Usually they use river sand. To prevent such soil from eroding, it is advisable to fence the lawn with a concrete fence with a height of 3-4 cm, but the depth of its installation in the soil should be at least 20 cm.
- When it is precisely established that the depth of groundwater is really no more than a meter or two, then, in addition to pouring an earthen or sand layer on the lawn area, it is necessary to take care of the additional installation of a drainage system.
Preparatory work for raising the land plot
In order for landscaping of a personal plot to be effective, before raising the level of the plot, it is necessary to carry out a number of preparatory work. For this:
- They carefully study the topography of the territory, determine the type of soil and the depth of groundwater flow, as well as the proximity of water bodies.
- It will always be useful to observe the neighboring areas, where they may be digging pits for laying the foundation of a house, holes for fence posts, or laying a drainage system from the territory. This will allow you to visually determine the depth at which the water is in the well, find out in which direction the water flows from the site, and where this is generally impossible and the area partially resembles a swamp, especially at certain times of the year. Also, this kind of “spying” on neighbors makes it possible to determine, without expensive geological exploration, whether the soil is sandy, clay or peat.
- After preliminary orientation on the area, it is necessary to clean the area: remove old tree roots, debris, stumps, and weeds. Next, it is advisable to give the soil time to settle for a week, but provided that the weather is dry.

- During the settling period, you should begin to create a strip foundation along the entire perimeter of the site. Its height is chosen so that the foundation rises above the soil level in neighboring areas. To achieve this, the perimeter is surrounded by a trench, the depth of which must be at least 20 cm. Wooden formwork is installed in it. To make formwork, take a wooden board with a thickness of approximately 30-40 mm, which is fixed with stakes installed at a distance of 50-100 cm from each other. Cement-crushed stone or cement-gravel mortar is poured into the middle of the formwork. The ratio of the components in it should be as follows: for one part of cement there are 3 parts of sand and 5 parts of gravel. If the air temperature is 15-20 degrees, the strip foundation will acquire 70% of its safety margin within a week. This will allow us to proceed to the next stage of work.

Land raising technology
When raising the level of the site we will need:
- Shovels.
- Cord.
- Hose.
- Rake.
- Buckets.
- Sand.
- Crushed stone.
- Water.
- Gravel.
- Cement.
- Vibrating plate.
- Hydrostatic level.
- Yardstick.
- Concrete mixer.
In order for the different levels of the site to turn into a flat surface with a slight slope (about 3 cm per meter of length) to improve soil drainage, the following operations must be performed:
- Carefully remove the fertile layer of soil 10-20 cm thick. It is stored in a separate place until the final stage of work.
- If you intend to level the ground level on a site on a local scale, it is advisable to place small wooden pegs across this area and along the perimeter of the strip foundation at a distance of approximately 2 meters from each other and stretch a cord between them. This will allow you to adjust the soil level by removing or adding it between the pegs until the level of the above cord is reached. To ensure that the required height of the area is uniform, it should be controlled using a hydrostatic level.

- Correctly distribute the areas where soil will be added. Thus, the level of the area in which the beds or lawn will be located is usually increased by adding sand. If the place is not intended for growing plants and paths pass through it or there are utility rooms, the level is raised by adding sandy loam or clay. If there is a very large difference between the levels, it is permissible to place even construction waste at a depth.
Further actions depend on the thickness of the layer that needs to be added to raise the level of the area:
- If the soil level needs to be raised to a height not exceeding 30 cm, we bring soil to the site and lay it in layers, the thickness of which is 5-10 cm. After laying one layer, it should be compacted with vibrating plates, filled with water and left for a day. Only after this is it allowed to proceed to the next layer. We repeat the procedure until the desired height is reached. In this case, be sure to take into account the thickness of the previously removed fertile soil layer, which is returned to its place, placed on top of all well-compacted layers.
- If the terrain of the area is far from a perfectly flat surface, and the difference between the levels exceeds 30 cm, the algorithm of actions is almost the same, but instead of earth they take a sand-gravel mixture. It is laid in layers 5 cm thick. It is recommended to place a layer of fertilizer, usually a peat pad, in the middle of each of them. Each layer of the “planning” mixture of sand and gravel must be compacted well and left to settle for a day before pouring the next layer.
- At the final stage, the height of the laid layers of earth or sand-gravel mixture should be slightly higher than the required level, since the soil with a kind of filler inside shrinks. Its duration depends on the volume of precipitation, the thickness of the laid layers and other factors.
All of the above is valid only for small areas. If the territory that will have to be leveled occupies several hectares, use special equipment as follows:
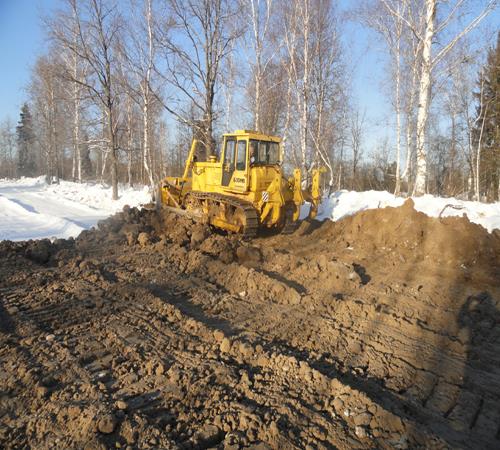
- First, the fertile soil layer is removed using a special bulldozer. It is equipped with a hinged knife, which allows you to cut and move soil to other places. After the fertile layer has been deposited in a safe place, a bulldozer is used to cut off the high mounds and fill the depressions with this earth. At the same time, the advantage of a bulldozer is that it is able to perform its functions not only on a relatively flat surface, but also in areas with complex terrain, where there are hills, ravines, dried up stream beds, etc.
- Then the area is plowed twice: in the transverse and longitudinal directions, and after that it is treated - also twice - with a cultivator. The next stage is compaction of the top layer. A barrel filled with water is often used for this operation.
- The final stage is to sow lawn grass seeds, which are sprinkled with earth or sand. Then the surface is rolled with a barrel again.
Very good results are obtained by raising the level of the land plot if it is accompanied by the arrangement of a drainage system that prevents flooding of the plot. To do this, trenches are dug along the perimeter of the territory, the slope of which should not be less than 3-4 cm per meter.
On my site, on the border with the swamp, there are such lowlands - “saucers”, in which water stagnates for a long time during rains. So I decided to raise this area by digging trenches and filling it with various tops, mostly weeds. This is how I came up with a unique country “nano-technology” of high beds in low-lying areas. Any crops will grow well on such ridges. And the summer resident does not need to worry every time about flooding during the seasonal rains.
Tools to raise the site
You can't do anything with a shovel. You can't drive an excavator - there are fruit trees and bushes all around, beds with carrots, radishes and pumpkins are still in the way.
The best tool for me was not a hoe or a shovel, but a garden fork with plate teeth, bent in the shape of the letter “L”, or correctly called - corner garden forks (I talked about them in the article "").
I call these pitchforks a “kile”, and also jokingly, a “mini-excavator”. They not only loosen the soil, but also remove perennial and annual weed roots from it. They also help me a lot when climbing low areas.

Photo: pitchforks to raise the area
How to raise the soil on a site
1. With a small swing, I thrust the teeth of the fork (pick) into the ground.

2. Then, like a lever, I move the cutting away from me, the block of earth loosens and lags well behind the surface of the trench.

3. Then I lift the earth out of it. Together with the tool this is not difficult.

Using this technology, I dig trenches 40 cm deep, 70 cm wide, 8-10 m long.
The big advantage of a pitchfork over a shovel:
- no need to lift a heavy clod of earth above yourself,
- It’s more difficult to pull out this lump with a shovel, but with a pitchfork you just pull it out of the trench and immediately put it on the path next to it,
- there is no need to throw soil, and this also makes the work much easier.
Exactly the same principle of operation of the mechanism of a conventional excavator. It took me no more than 1 hour without much difficulty, and a young summer resident could have done it even faster.
These are the trenches we get.

Photo: trench for a high bed
Then I fill the trench with weeds and earth on top.

Photo: we make a high bed from a trench, filling it with plant debris
How much to raise the site
Last fall, several trenches were filled with stems, covering them with about 30 cm of soil.
This height is quite enough for growing vegetables and berries. Due to this, the level of the beds, even after the soil settles, increases to 20 cm. And the plants will not suffer from flooding.
__

Raised bed to raise the area
The trenches filled with plant debris and excavated soil will look like high beds. This is my way of raising the site. I don’t have enough tops and weedy plant residues to be enough to raise the area. I solve the problem by filling the trenches with stems of raspberries, sunflowers and topisunflowers.
Raspberries for raised beds
Every year, immediately after frost, the stems of fruiting raspberries have to be cut down to the base. The mass of such stems is large.
Jerusalem artichoke for high beds
The stems of Jerusalem artichoke or topis will also be of great benefit for raising the area. Topisunflower is distinguished by the fact that at the ends of its shoots flowers are formed that resemble a sunflower basket). But the sunflower, as you know, grows with one stem, and a separate area needs to be allocated for it. Jerusalem artichoke and its hybrids are multi-stemmed, up to 2.5 m high, and can grow in a continuous mass on inconvenient areas. The green mass is much larger than sunflower. In addition, Jerusalem artichoke and topisunflower have edible and medicinal tubers in the ground.
__________________________________________________________________
__________________________________________________________________
Few people know that with the help of Jerusalem artichoke you can quickly increase soil fertility by leaving crushed stems on the ground. Tubers, rotting in the ground, enrich the soil with iron, potassium and other minerals and organic matter. Thus, everything works out for the best.
___________________________________________________________________
When to fill raised beds
I’m not in a hurry to fill all the trenches for high beds with soil; this can be done later: let the excavated soil be cleared of anaerobic bacteria that convert minerals into harmful oxides. The weed tops in the air will be processed by aerobic microorganisms into compost.
____________________________

