Peltier element which is better to put on the refrigerator. Peltier thermoelectric cooler
Refrigeration equipment has become so firmly established in our lives that it is even hard to imagine how it was possible to do without it. But the classic refrigerant designs are not suitable for mobile use, for example, as a travel cooler bag.
For this purpose, installations are used in which the principle of operation is based on the Peltier effect. Let's briefly talk about this phenomenon.
What it is?
This term refers to a thermoelectric phenomenon discovered in 1834 by the French naturalist Jean-Charles Pelletier. The essence of the effect is the release or absorption of heat in the zone where dissimilar conductors come into contact, through which an electric current passes.
In accordance with the classical theory, there is the following explanation of the phenomenon: an electric current transfers electrons between metals, which can speed up or slow down their movement, depending on the contact potential difference in conductors made of different materials. Accordingly, with an increase in kinetic energy, it is converted into heat.
On the second conductor, the reverse process is observed, requiring replenishment of energy, in accordance with the fundamental law of physics. This is due to thermal fluctuation, which causes cooling of the metal from which the second conductor is made.
Modern technologies make it possible to manufacture semiconductor elements-modules with the maximum thermoelectric effect. It makes sense to briefly talk about their design.
Device and principle of operation
Modern modules are a structure consisting of two insulator plates (usually ceramic), with thermocouples connected in series between them. A simplified diagram of such an element can be found in the figure below.

Designations:
- A - contacts for connecting to a power source;
- B is the hot surface of the element;
- C - cold side;
- D - copper conductors;
- E is a p-junction based semiconductor;
- F is an n-type semiconductor.
The design is made in such a way that each side of the module contacts either p-n or n-p junctions (depending on polarity). Contacts p-n are heated, n-p are cooled (see Fig. 3). Accordingly, a temperature difference (DT) occurs on the sides of the element. For an observer, this effect will look like a transfer of thermal energy between the sides of the module. It is noteworthy that a change in the polarity of the supply leads to a change in the hot and cold surfaces.
 Rice. 3. A - hot side of the thermocouple, B - cold side
 Specifications
The characteristics of thermoelectric modules are described by the following parameters:
- cooling capacity (Q max), this characteristic is determined on the basis of the maximum allowable current and the temperature difference between the sides of the module, measured in Watts;
- the maximum temperature difference between the sides of the element (DT max), the parameter is given for ideal conditions, the unit of measurement is degrees;
- allowable current strength required to ensure the maximum temperature difference - I max;
- the maximum voltage U max required for the current I max to reach the peak difference DT max ;
- the internal resistance of the module - Resistance, is indicated in Ohms;
- efficiency coefficient - COP (abbreviation from English - coefficient of performance), in fact, this is the efficiency of the device, showing the ratio of cooling to power consumption. For inexpensive elements, this parameter is in the range of 0.3-0.35, for more expensive models it approaches 0.5.
Marking
Consider how the typical marking of modules is deciphered using the example of Figure 4.
 Fig 4. Peltier module marked TES1-12706
 Marking is divided into three meaningful groups:
- Element designation. The first two letters are always unchanged (TE), indicating that this is a thermoelement. The next indicates the size, there may be letters "C" (standard) and "S" (small). The last digit indicates how many layers (cascades) are in the element.
- The number of thermocouples in the module shown in the photo is 127.
- The value of the rated current in Amperes, we have - 6 A.
The markings of other models of the TEC1 series are read in the same way, for example: 12703, 12705, 12710, etc.
Application
Despite the rather low efficiency, thermoelectric elements are widely used in measuring, computing, and household appliances. Modules are an important operating element of the following devices:
- mobile refrigeration units;
- small generators to generate electricity;
- cooling systems in personal computers;
- coolers for cooling and heating water;
- dehumidifiers, etc.
Let us give detailed examples of the use of thermoelectric modules.
Refrigerator on Peltier elements
Thermoelectric refrigeration units are significantly inferior in performance to compressor and absorption counterparts. But they have significant advantages, which makes their use expedient under certain conditions. These benefits include:
- simplicity of design;
- vibration resistance;
- lack of moving elements (with the exception of the fan blowing the radiator);
- low noise level;
- small dimensions;
- the ability to work in any position;
- long service life;
- small energy consumption.
These characteristics are ideal for mobile installations.

Peltier element as a generator of electricity
Thermoelectric modules can work as electricity generators if one of their sides is subjected to forced heating. The greater the temperature difference between the sides, the higher the current generated by the source. Unfortunately, the maximum temperature for the thermogenerator is limited; it cannot be higher than the melting point of the solder used in the module. Violation of this condition will lead to the failure of the element.
For serial production of thermogenerators, special modules with refractory solder are used; they can be heated to a temperature of 300°C. In ordinary elements, for example, TEC1 12715, the limit is 150 degrees.
Since the efficiency of such devices is low, they are used only in cases where it is not possible to use a more efficient source of electrical energy. Nevertheless, 5-10 W thermal generators are in demand among tourists, geologists and residents of remote areas. Large and powerful stationary installations operating on high-temperature fuel are used to power gas distribution units, meteorological station equipment, etc.

For CPU cooling
Relatively recently, these modules began to be used in cooling systems for the CPU of personal computers. Given the low efficiency of thermoelements, the benefits of such structures are rather doubtful. For example, to cool a heat source with a power of 100-170 W (corresponding to most modern CPU models), you will need to spend 400-680 W, which requires the installation of a powerful power supply.
The second pitfall is that an unloaded processor will emit less thermal energy, and the module can cool it below the dew point. As a result, condensation will begin to form, which, guaranteed, will disable the electronics.
Those who decide to create such a system on their own will need to carry out a series of calculations to select the power of the module for a specific processor model.
Based on the foregoing, it is not profitable to use these modules as a CPU cooling system; in addition, they can cause computer equipment to fail.
The situation is quite different with hybrid devices, where thermal modules are used in conjunction with water or air cooling.

Hybrid cooling systems have proven to be effective, but the high cost limits their circle of admirers.
Air conditioner on Peltier elements
Theoretically, such a device will be structurally much simpler than classic climate control systems, but it all comes down to low performance. It is one thing to cool a small volume of a refrigerator, another thing is a room or a car interior. Air conditioners based on thermoelectric modules will consume more electricity (3-4 times) than equipment operating on a refrigerant.
As for the use as an automotive climate control system, the power of a standard generator will not be enough to operate such a device. Replacing it with more productive equipment will lead to significant fuel consumption, which is not cost-effective.
In thematic forums, discussions on this topic periodically arise and various home-made designs are considered, but a full-fledged working prototype has not yet been created (not counting the air conditioner for a hamster). It is quite possible that the situation will change when modules with more acceptable efficiency become widely available.
For cooling water
The thermoelectric element is often used as a cooler for water coolers. The design includes: a cooling module, a controller controlled by a thermostat and a heater. Such an implementation is much simpler and cheaper than the compressor circuit; in addition, it is more reliable and easier to operate. But there are also certain disadvantages:
- water is not cooled below 10-12°C;
- cooling takes longer than the compressor analogue, therefore, such a cooler is not suitable for an office with a large number of employees;
- the device is sensitive to external temperature, in a warm room the water will not cool to the minimum temperature;
- installation in dusty rooms is not recommended, as the fan may become clogged and the cooling module will fail.
 Desktop water cooler using a Peltier element
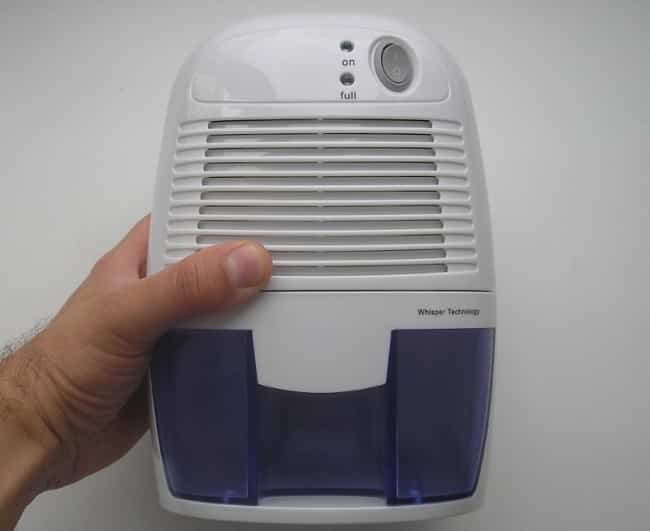
 Air dryer on Peltier elements
Unlike an air conditioner, the implementation of an air dryer on thermoelectric elements is quite possible. The design is quite simple and inexpensive. The cooling module lowers the temperature of the heatsink below the dew point, causing the moisture contained in the air passing through the device to settle on it. The settled water is discharged into a special storage tank.
Despite the low efficiency, in this case the efficiency of the device is quite satisfactory.
How to connect?
There will be no problems with connecting the module, it is necessary to apply constant voltage to the output wires, its value is indicated in the datasheet of the element. The red wire must be connected to the positive, the black wire to the negative. Attention! Reversing the polarity swaps the cooled and heated surfaces.
How to check the Peltier element for performance?
The easiest and most reliable way is tactile. It is necessary to connect the module to an appropriate voltage source and touch its different sides. For a workable element, one of them will be warmer, the other colder.
If a suitable source is not at hand, you will need a multimeter and a lighter. The verification process is quite simple:
- connect the probes to the terminals of the module;
- bring a lit lighter to one of the sides;
- observe the readings of the device.
In the working module, when one of the sides is heated, an electric current is generated, which will be displayed on the instrument panel.
How to make a Peltier element with your own hands?
It is almost impossible to make a self-made module at home, all the more it makes no sense, given their relatively low cost (about $4-$10). But you can assemble a device that will be useful on a hike, for example, a thermoelectric generator.

To stabilize the voltage, you need to assemble a simple converter on the L6920 IC chip.

A voltage in the range of 0.8-5.5 V is applied to the input of such a converter, at the output it will produce a stable 5 V, which is quite enough to recharge most mobile devices. If a conventional Peltier element is used, the operating temperature range of the heated side must be limited to 150 °C. In order not to bother tracking, it is better to use a pot of boiling water as a heat source. In this case, the element is guaranteed not to heat up above 100 °C.
It can be considered a luxury. But this is quite a useful thing. Here you can put ice cream, sparkling water, transport any frozen food and much more. In the store for such a device they will require a considerable amount, so it makes sense to assemble a car refrigerator with your own hands. In addition, it is interesting, simple and several times cheaper. You can also make a refrigerator of any shape and size so that it fits comfortably in the place prepared in the car. According to the author, the cost of such a homemade product is within 1000 rubles.
A Peltier element is used as a cooling element (this is a plate that, when voltage is applied to it, heats up on one side and cools on the other). You will also need one or more (depending on the size of the refrigerator) computer coolers with heatsinks. They can also be obtained for free if there are computers that are not needed.
Materials and tools for homemade:
- extruded polystyrene foam;
- ruler;
- a pen, felt-tip pen or other writing instrument;
- stationery knife;
- Peltier elements (you can buy, they are not expensive);
- computer coolers with radiators;
- polyurethane foam;
- wire with a connector for the cigarette lighter;
- thermostat board;
- soldering iron, scissors and more.
Refrigerator manufacturing process:
Step one. Container manufacturing
In general, the author initially wanted to make a thermos container that would keep the cold inside. That is, for transporting chilled products over short distances. But then the container turned into a full-fledged refrigerator.
A container is assembled from expanded polystyrene, polyurethane foam is used as glue. This is good because the foam hermetically seals all the cracks. The most important thing in the design is good thermal insulation, the better the cold is kept, the more efficient and economical the refrigerator will work.
You can choose any dimensions, according to your needs, the author needed a sheet of expanded polystyrene with dimensions of 1200x600 mm and a thickness of 50 mm for assembly. The sheet is simply cut according to the template, and then glued into the treasured box using mounting foam.

In the picture you can see a diagram for cutting a sheet, if you want to assemble exactly such a refrigerator. There are sides on the sheet, the thickness of which is 20 mm, they must be cut off from all sides, leaving the bottom.
For gluing, the foam is applied and wait 1 minute, then you need to press the parts for 5 minutes and at the same time make sure that they do not move. As a result, only a small piece of polystyrene foam will be superfluous, it is marked in gray in the diagram.

After the box is ready, it can be painted. You need to paint in two passes, as the paint can corrode the polystyrene foam. However, it is desirable to choose a suitable paint for these purposes. The container weighs 820 grams, it contains frozen food for quite a long time.
Step two. Cooling element installation
To make a full-fledged refrigerator, a cooling element is needed, here it is electric - this is the Peltier element. The peculiarity of this device is that when voltage is applied to it, one side of it becomes very cold, while the other heats up. So, in order for the Peltier element not to burn out, heat must be removed from its hot side. A cooler from a computer with a radiator that cools the processor does an excellent job with this task.
The most powerful Peltier element will cost about 130-150 rubles (power 60 W).

So that the radiator does not freeze on the inside, and the air cools evenly, it was also decided to install a cooler on the inside of the refrigerator. For the system to work autonomously, you will need a temperature controller with an external sensor, its cost is within 170 rubles.
Now the degree of cold in the refrigerator will be controlled by electronics, this will also reduce energy losses.


The author installs the Peltier element between two radiators; thermal paste is used for better heat transfer. As a result, one radiator will cool one side of the element, and the other radiator will be located inside the refrigerator and distribute cold over it. One such element is enough to keep the temperature inside the refrigerator at -3 degrees at an ambient temperature of +26. If you install 2-3 such elements in series, then theoretically the temperature in the refrigerator can be lowered to -18 degrees.

The radiators are interconnected using standard brackets, with which they are attached to the motherboard. Still need plastic clamps. The greatest efficiency was achieved when both fans worked for blowing out from the radiator.
Pieces of thermal insulation for round pipes were used as thermal insulation.
Step three. Construction assembly
A hole must be made in the lid of the refrigerator to install the cooler. The shape of the hole should be the same as in the photo. Then the seams are smeared with sealant and a construction of radiators is installed. It is important here not to confuse where the cold side is, and where the hot one is. The cover can be pre-painted, which increases the rigidity of the polystyrene foam.
A great craft for the summer is to make a miniature low-voltage refrigerator. A variety of supply voltage (220 V, 12 V, 5 V) makes it possible to use such a refrigerator almost anywhere: in a car, office, at home, etc. This is the perfect piece to keep drinks cold on a hot summer day.
It will take

Making a miniature refrigerator on a Peltier element
The case was made in arbitrary sizes, taking into account the placement of the cooling unit, power supply unit and the beverage chamber. It will consist of two sections: one for the technical part, the other for cooling products.We make the body. We mark a piece of hardboard with a pencil and a ruler.

We cut out all the elements with a hacksaw.

All parts of the body are ready.

From the middle part, dividing the refrigerator into two parts, we cut out a window for a radiator with a Peltier module.

We apply the cooling unit to the side of the case.

And drill a lot of holes on both sides. That is, the air flow will enter from one side through the holes in the side. Pass through the radiator taking heat and exit through the holes on the other side.

We paint with spray paint from a spray can all the details of the refrigerator body.

Let's start assembling.

We glue the separating part of the cooling block with hot glue.

We glue all parts of the body, on both sides.


The cooling block rests on a piece of wood that is glued to the base.

For backlighting, you will need two sections of a 12 V LED strip. One color is white, the other is colored.

Screw on a small fan.

The technical part of the refrigerator is divided into two parts. The power supply will be located at the top. The dividing wall is placed on square pieces of wooden lath glued to the sides.

Installing the back wall.


The door is made from a piece of acrylic glass. Mark with a ruler and pencil.

You can buy miniature loops or make your own. Glue them on with instant glue.

We glue the sides of the acrylic glass with black self-adhesive tape.

Glue the handle to the door.

Organize lighting. Solder the contacts to the mini limit switch.

Solder the wires to the segments of the LED strip. We glue the segments on a mini shelf made of the same acrylic.


We connect the backlight, fans, Peltier element.

Install the switch on the side.

Isolate all open twists.

Close the compartment with the cooling unit. This must be done so that hot air does not rise up and heat up the power source.

We drill a hole for the power wire 220 V.

To prevent the refrigerator door from opening, we will install small neodymium magnets from a broken cider on the side.

We close the top cover, but before that we cut in the power switch, solder the wires. Now the refrigerator can be turned off with the button on top.

Close the lid and fix with glue.

For proper thermal insulation, we paste over the inside of the refrigerator with thin foam. We plant the cut foam panels on hot glue.
And finally, the result of the work is such that in thirty minutes the temperature inside the chamber dropped from 42 to 16 degrees Celsius. Drinks were cooled to a temperature of 20 degrees Celsius. And all this in 30 minutes!

Of course, the efficiency of such a refrigerator is much lower than that of a compressor one, but it also has its advantages, one of which is low-voltage power, which can be not only 12 V but also 5 V! Naturally, it is quite possible to power it from the USB port of the computer, although the return will be lower than when powered by 12 V.
The total power consumption when powered by 220 V is about 100 W. More detailed assembly instructions in the video below.
The master who built this refrigerator is an electronics engineer with a wide range of hobbies, from history to sports, from law to travel. The last hobby of the master is making wine in domestic conditions. This is where his engineering knowledge comes in handy. Not for making wine, for storing it.
Wine must be stored at low temperatures between 10 and 18°C maximum, and refrigerators are expensive to store it properly. Then the master decided to make such a refrigerator himself.

Tools and materials:
- Extruded polystyrene foam;
-Aluminum tape;
-Roulette;
-Glue;
-Knife;
-Pencil;
-Aluminum profiles;
-Aluminum radiator;
- Fasteners;
-Drill;
-The Peltier element;
- Textolite;
-Fan;
-Controller for powering the Peltier element;

Step One: Refrigerator Requirements
When designing, the master tried to take into account the following requirements:
-The temperature inside the chamber is not higher than 18°C
-Low power consumption 15-20W
- Work on the Peltier element
-Controller with system of control and management of the set temperature
Step two: hull design
When posing the question of what to make the body of, the master settled on foam. The master explains his choice of material by its low thermal conductivity, moisture resistance, strength, and ease of processing.
For the refrigerator, the master used plates 4 cm thick. The internal dimensions of the refrigerator are 380 x 360 x 320 mm. In such a refrigerator, four five-liter bottles of wine are placed.

Step Three: Making the Camera
The craftsman took the foam sheet to the furniture workshop and there it was cut to size. The master assembles the camera using glue.


After assembling the camera, it is pasted over with aluminum tape.


Step Four: Cooling Node

The design of the cooling unit is simple. As we know, when voltage is applied, one side of the Peltier element cools, the other heats up. Therefore, placing the element inside the refrigerator is inefficient. The master places the element outside with the cold side to the internal radiator, and the hot side to the external one. A fan is installed below the element. The design is visible in the photo.


The master installs the internal radiator at the top of the chamber, this is due to the lowering of cold air down.
Step Five: Controller
The controller has the following parameters: measuring and adjusting the temperature with an error of 0.1 degrees in the chamber, limiting power consumption, controlling the temperature of the external radiator and turning on the fan, continuous power supply to the Peltier element, smoothing ripple and power surges.
The master emphasizes that the Peltier element works constantly, just with different power. Such a scheme will allow the element to work much longer. The controller diagram is located below, and you can get information in more detail