Toys from CDs. Ideas for using old CDs
Find out which original and useful things can be made from CDs.
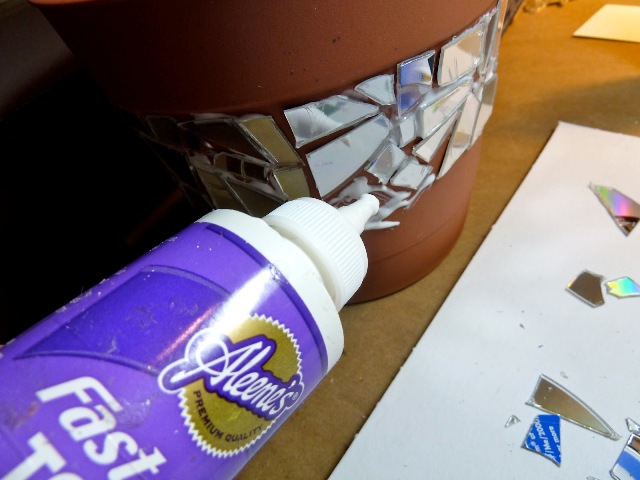
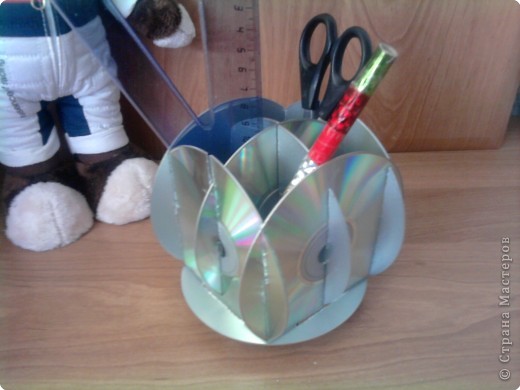
What to make of disks with their own hands. Mosaic for flower pot.
You will need:
Compact discs (3 or more)
Scissors
PVA glue (or superglue)
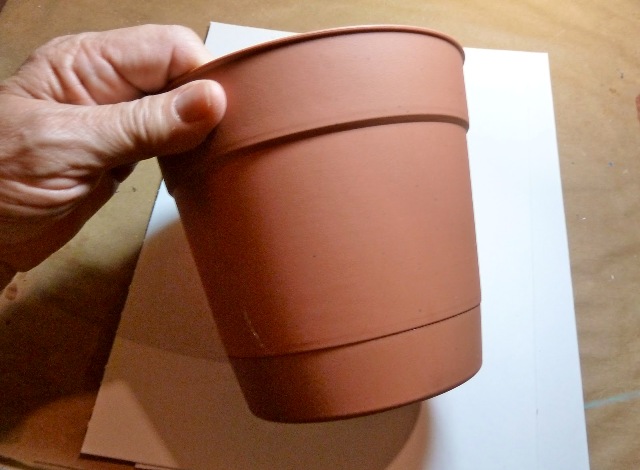
Plastic pot
Acrylic paint (or plain)
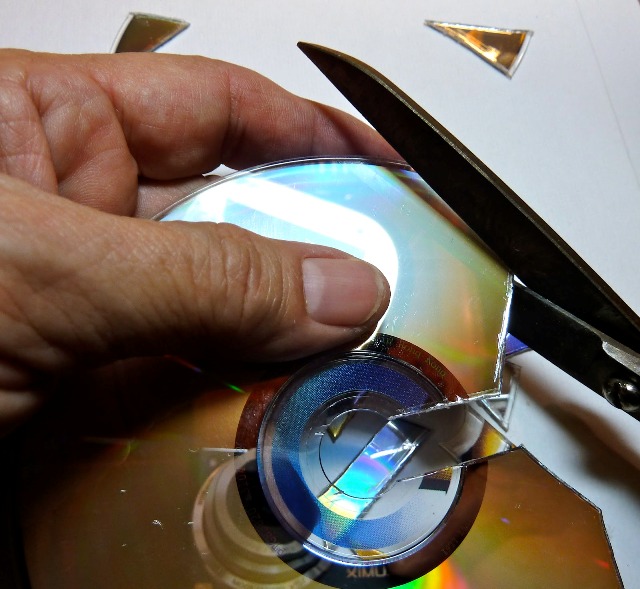
* Before you start cutting the disc, you should wear safety glasses - this will help you to avoid injuries, in case parts of the discs “fly up” during cutting.
1. Cut the discs into pieces of different sizes and shapes.

2. Gradually apply glue to the flower pot and begin to glue the disc pieces.
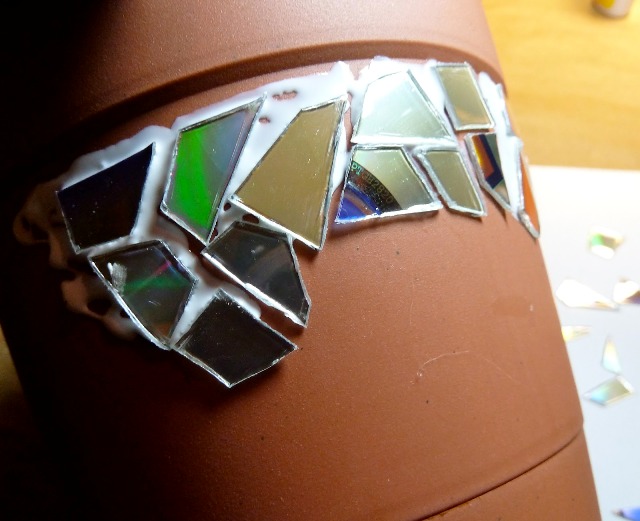
* Do not forget to leave some space between the parts.
3. Continue to glue until you cover the intended part of the pot and leave the glue to dry.
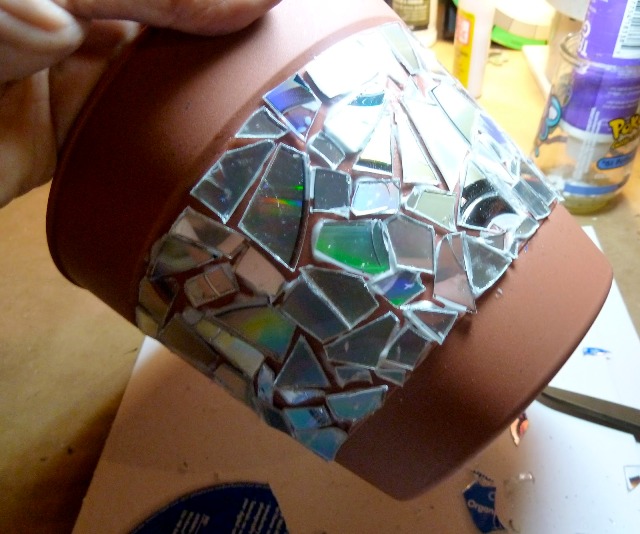
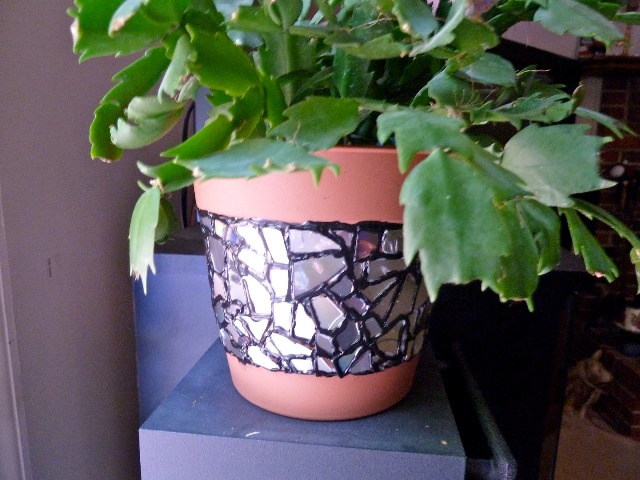
4. Prepare the paint and start to put it in the gap between the pieces of discs. Try to keep all the lines neat. When you have filled all the cracks with paint, leave it to dry.

* When the light falls on the pot, it will "glow" where the sun's rays are reflected.
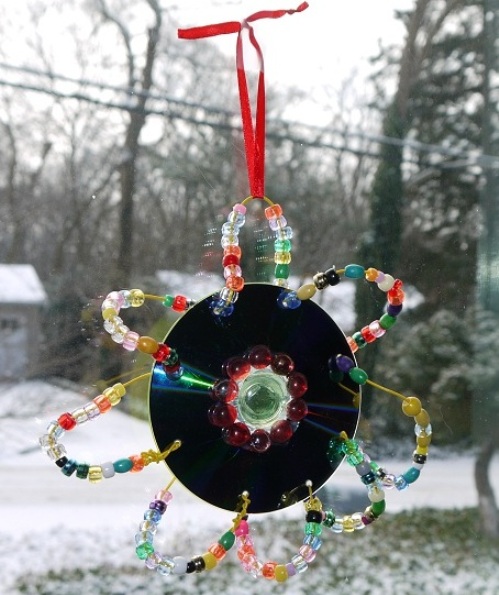
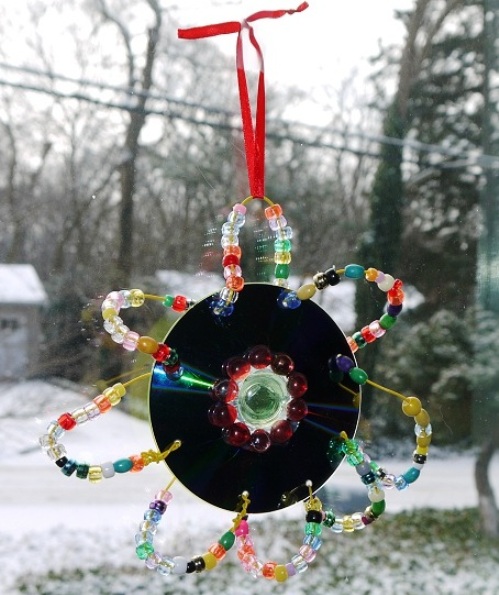
Crafts from CDs. Spring Flower.
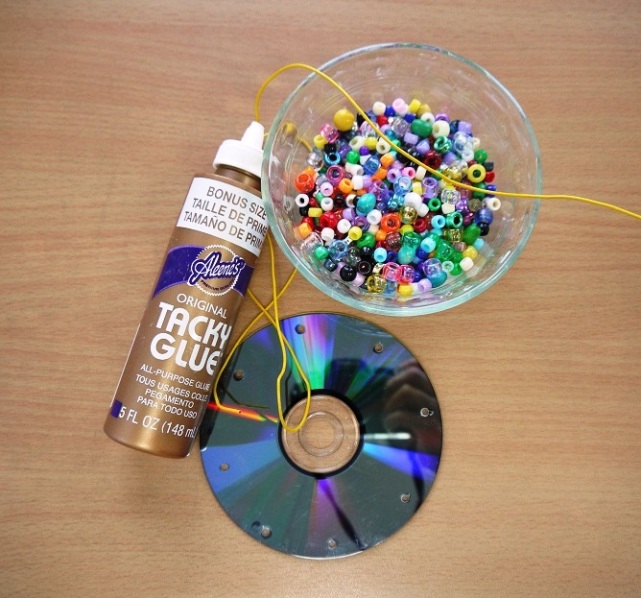
You will need:
1 CD
Thin wire
Nippers or scissors
Dremel or electric drill
1. Drill make small holes in the disc - it should make about 8 holes.
2. Thread the wire through the holes, securing it at the first hole and then threading it into the next ones.
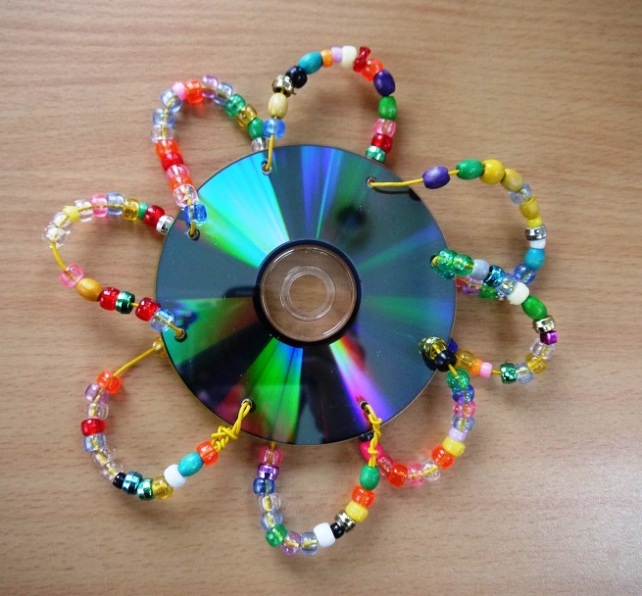
3. Alternately, after each threading the wire, thread the beads into the hole. Add as many beads to cover the arch of wire (see picture).
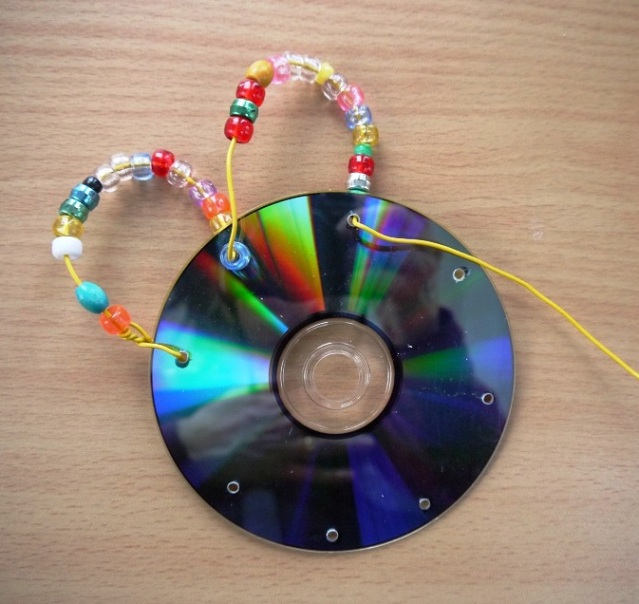
* If the wire is not enough, purchase more (in the stationery store) and simply insert it into the last hole and continue to “weave”.
4. You can decorate the hole in the middle of the disc with beads or other ornaments - feel free to fantasize.
* This flower can be hung on the window - for this, simply tie a ribbon or thread.
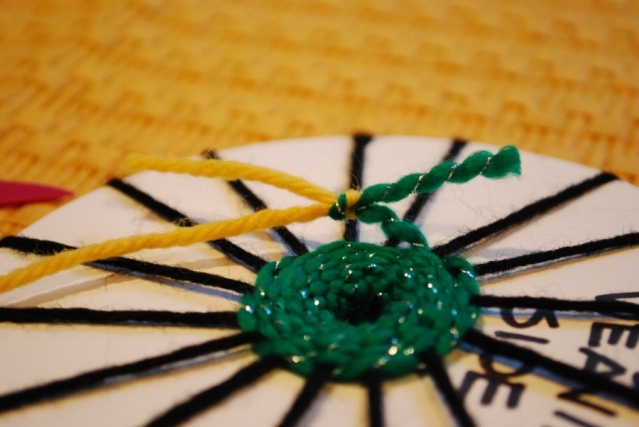
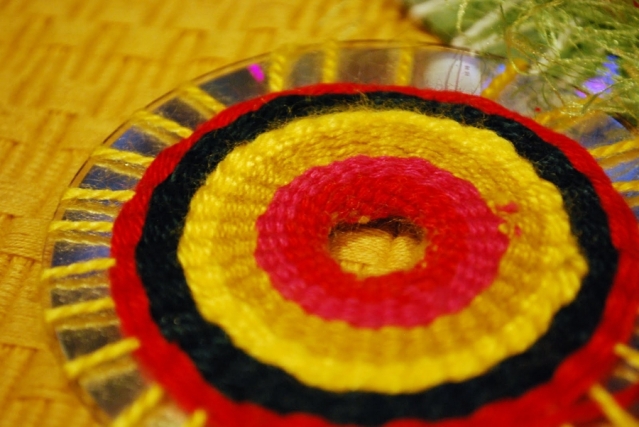
Crafts from CDs. Stands for hot.
This craft is suitable for the house to put on it a hot kettle, pot or mug.
The pictures - clear instructions on how to make a stand.
You will need:
CDs
Thread of different colors
Colored paper
Scissors

![]()
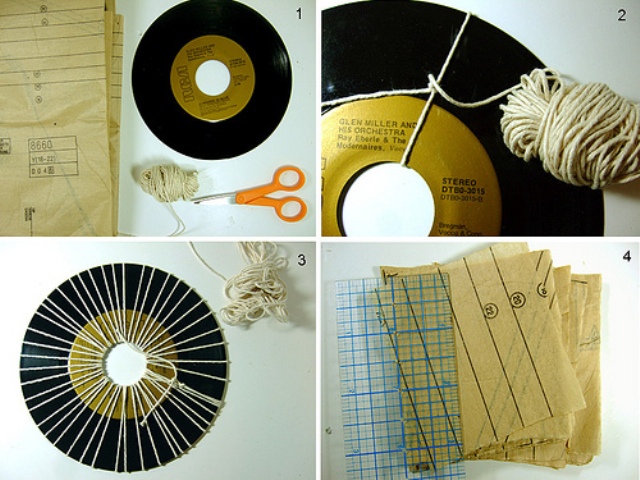
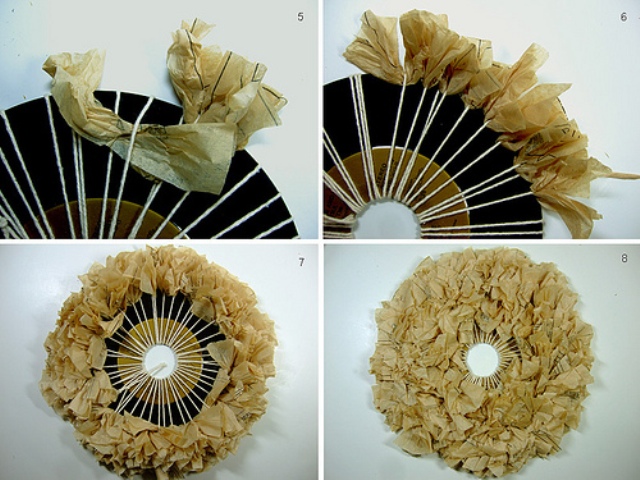
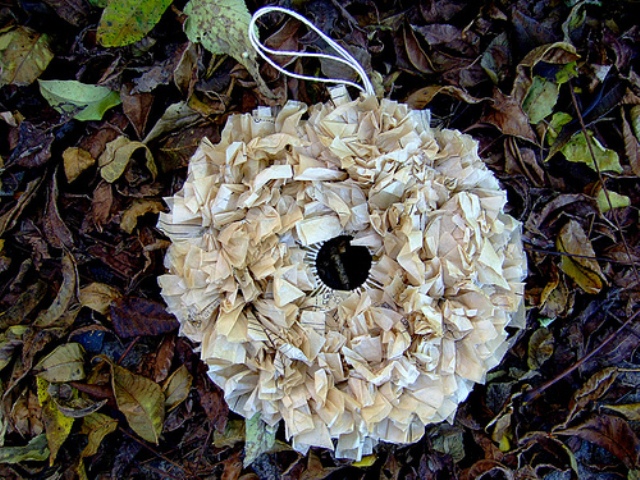
Crafts from old drives. Bright wreath for interior decoration.

This wreath can decorate the room, porch or entrance door. Making it very simple - follow the instructions in the pictures.
You will need:
CDs or records
Thread of different colors
Colored paper
Scissors
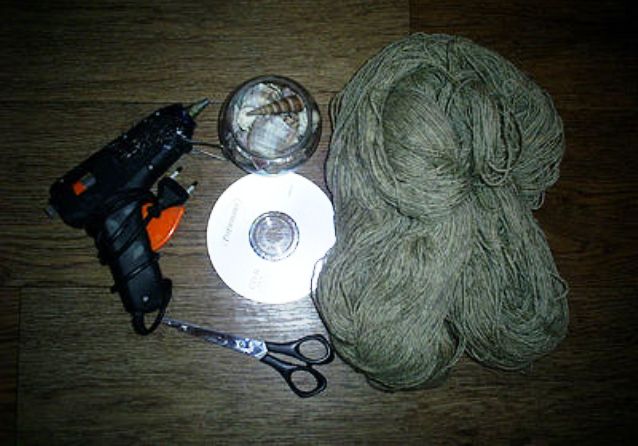
Crafts from disks (master class). Panel with seashells.
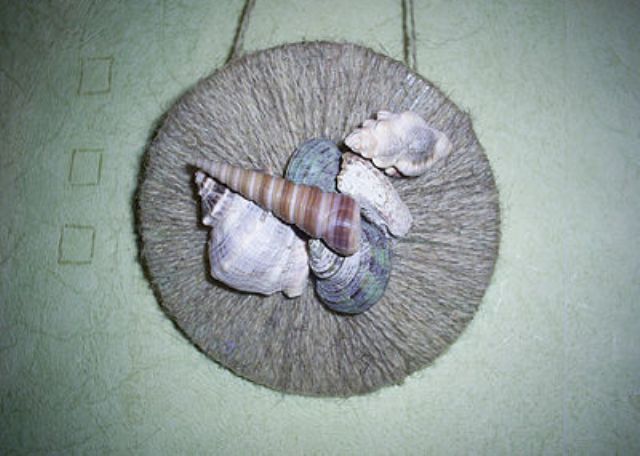
You will need:
1 CD
Wool thread of the same or different colors
Seashells
Glue (glue thermogun)
Scissors
1. Wind a disk with a thread in a circle.
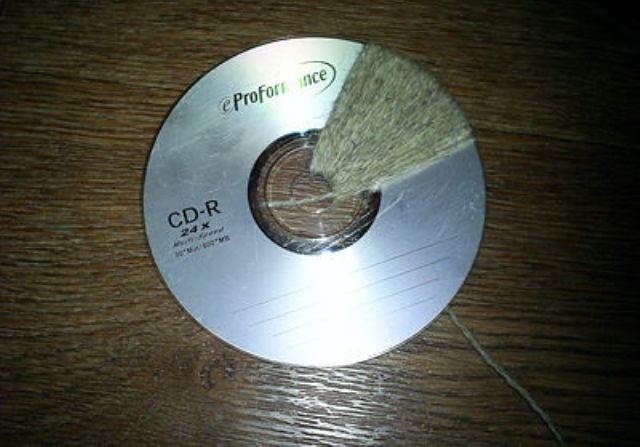
2. The ends of the thread can be bonded with glue, pre-tied in a knot.
* To make it easier to wind the thread, you can use several not very long pieces.
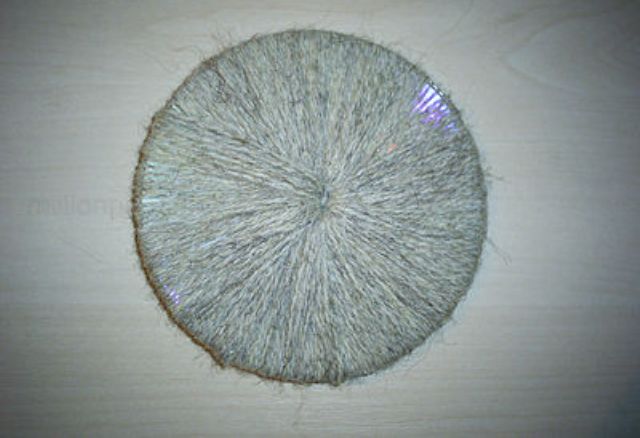
3. It remains to glue the shells using glue thermogun. If not, you can use superglue.
* You can tie a thread or a ribbon to the back side to hang the craft on the wall.
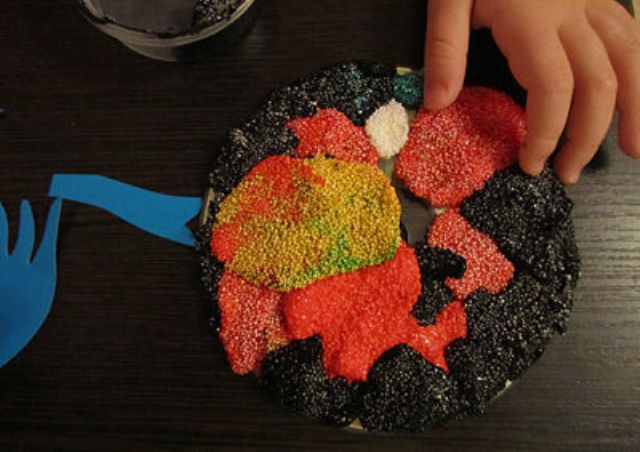
Children's crafts from disks. Fish.
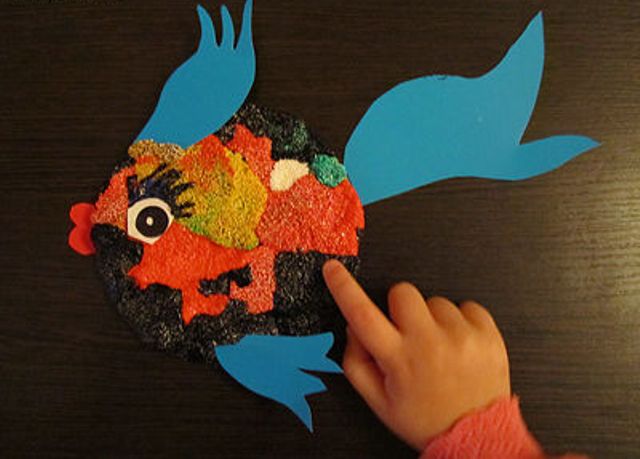
This crafts can be done with small children. Fish from the disk can be used to decorate the room or as a colorful postcard.
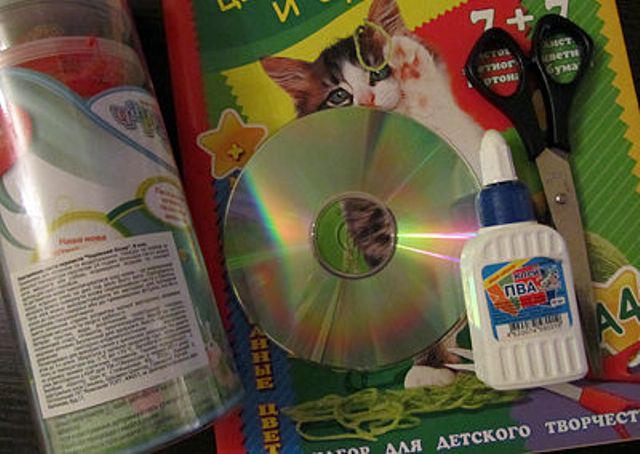
You will need:
1 CD
Colored cardboard
Ball clay
PVA glue
Scissors
Markers
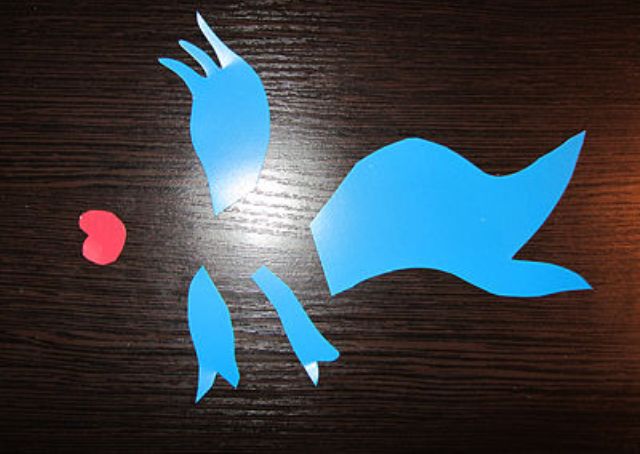
1. Prepare colored cardboard and cut out the fins, tail and mouth of the fish.
2. Take a few pieces of ball clay of different colors and cover them with the entire surface of the disk.
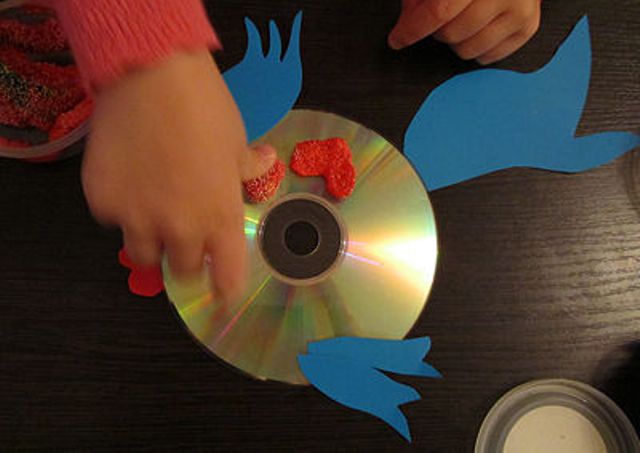
3. It remains to glue the carved details of the fish, add eyelashes from plasticine and ready.
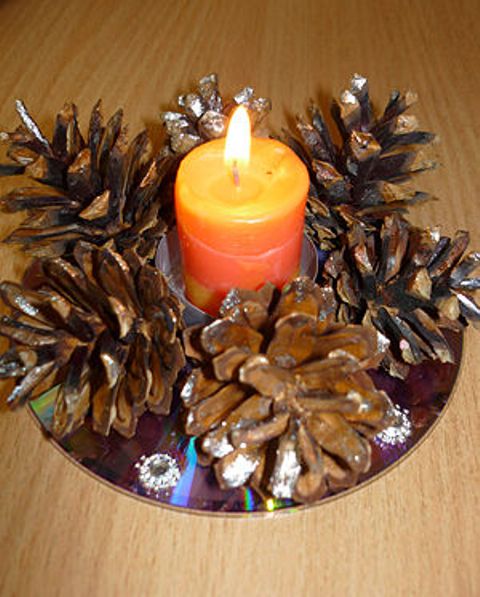
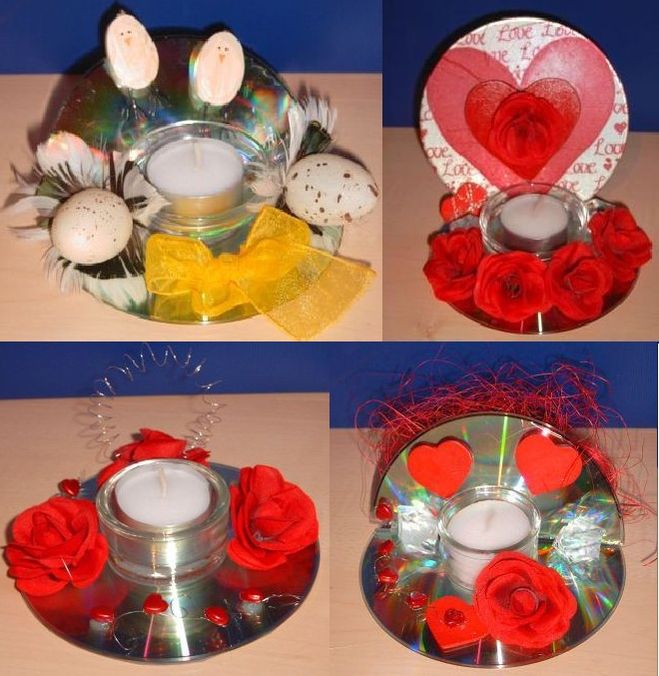
What to make of disks. Christmas candlestick.
Old discs can also be used for making Christmas crafts, such as a candlestick.
You will need:
1 CD
Superglue (Moment glue)
Silver-colored nail polish or glitter polish
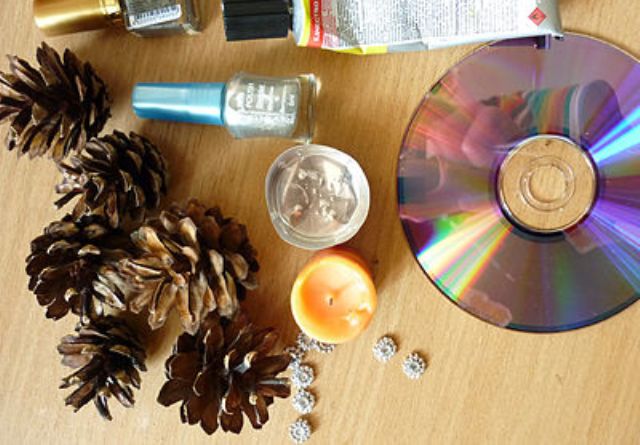
1. Glue the cones to the disc using superglue. At the same time, leave room for the candle.
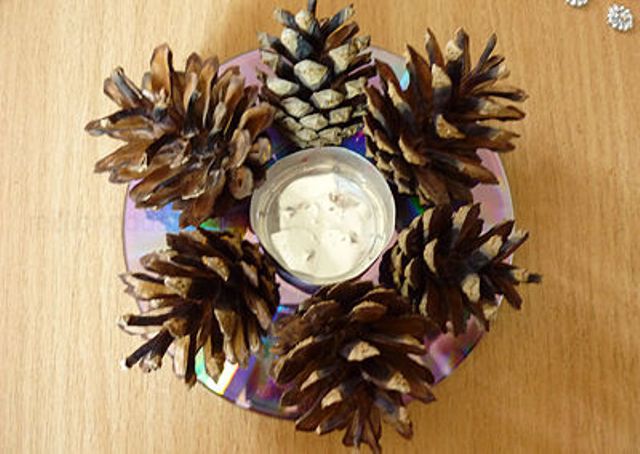
2. Cover the bumps with varnish and let the varnish dry.
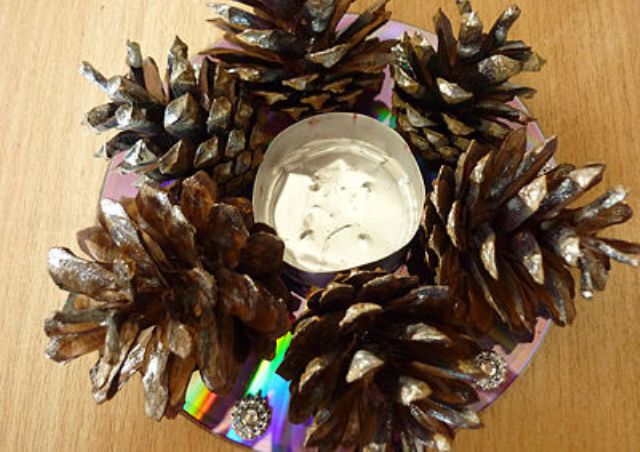
3. Between the cones can glue rhinestones and leave to dry.
4. Now you can insert a candle in the middle of the composition.
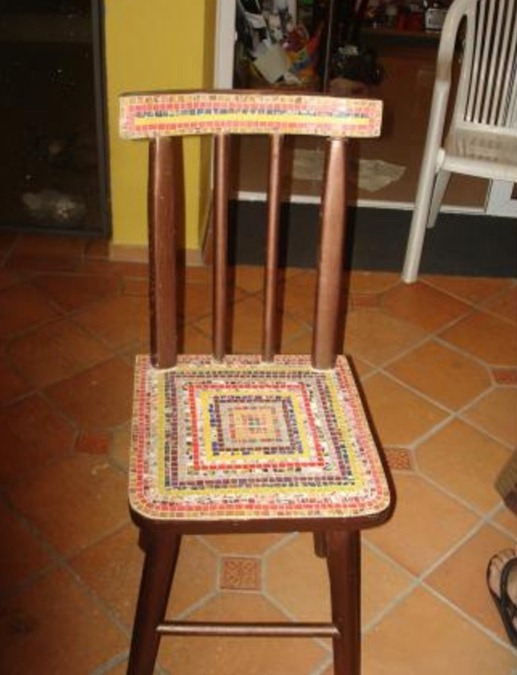
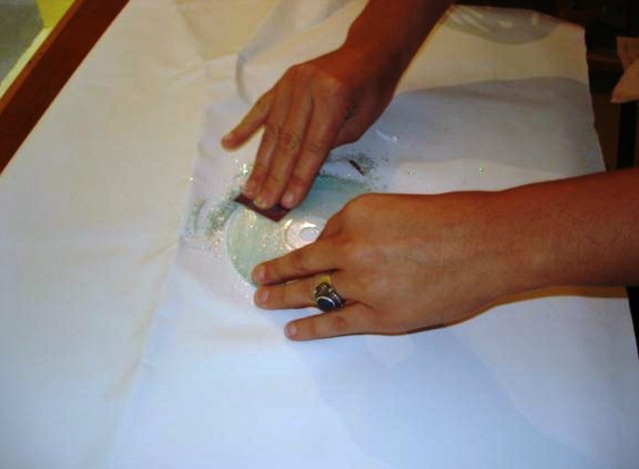
What can be made of disks. We decorate the chair with mosaics.
You will need:
About 50 CDs
Sandpaper
PVA glue
Waste glossy magazines
Scissors
Wet rag
Construction putty
1. The mirror surface is not needed, which means that the mirror part of the disks must be treated with emery paper. After that, each disc must be rinsed with running water.
Almost in every house there must be a bunch of old CDs and DVDs lying somewhere. When we, as a rule, download or buy films, music and TV shows on the Internet in digital formats, there is no need to store and collect them.
So, what to do with these old CDs that you simply can’t store? You can make them useful again by applying a little imagination and creativity. Here are some ideas that can be made from old CDs that will help turn them into something beautiful.
Ideas for using old CDs.
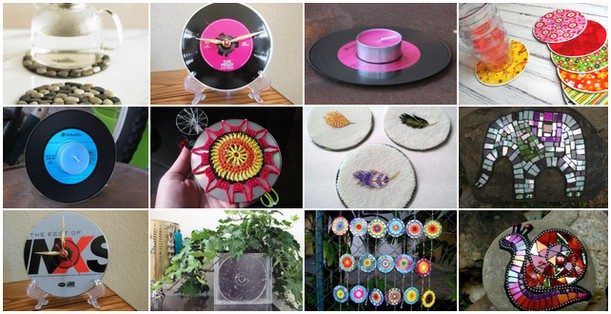
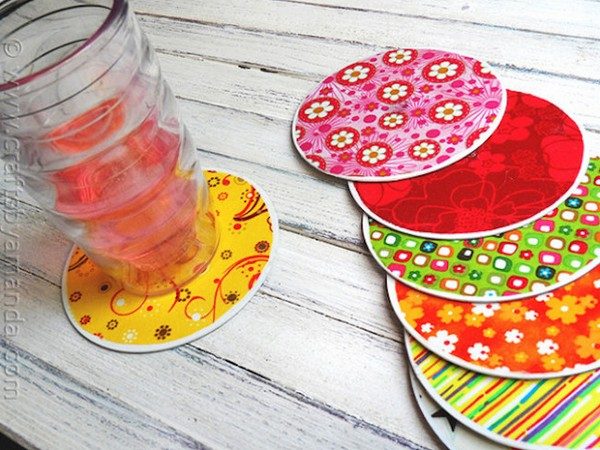
Decorative coasters for glasses from old CDs
Have you ever thought that compact discs are ideal for coasters for glasses or mugs? We suggest using stencils or self-adhesive films to create beautiful patterns on CDs. Thus, they can be in harmony with your interior.
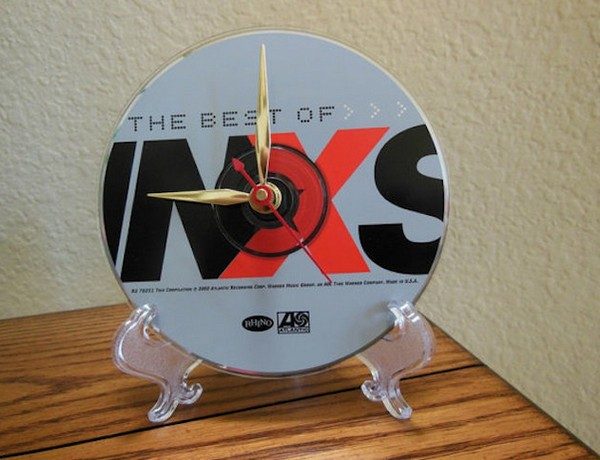
Watch face
One of the most interesting ideas for using old discs will be turning them into a dial for analog clocks. If you like this idea, you can try to make such a watch yourself. The mechanism is easy to find in stores for creativity.
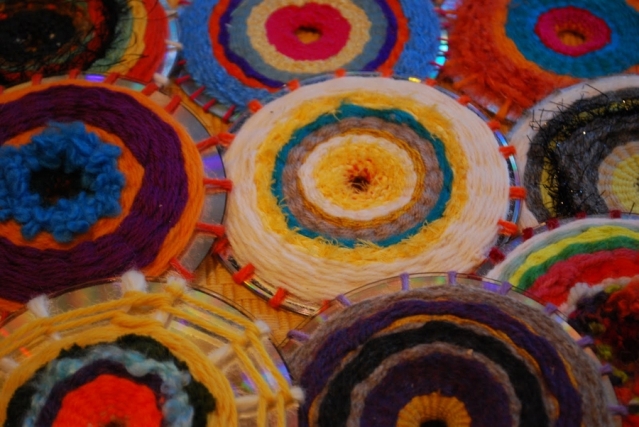
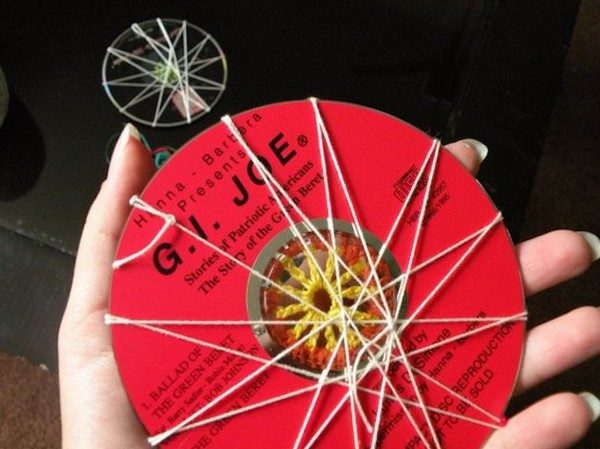
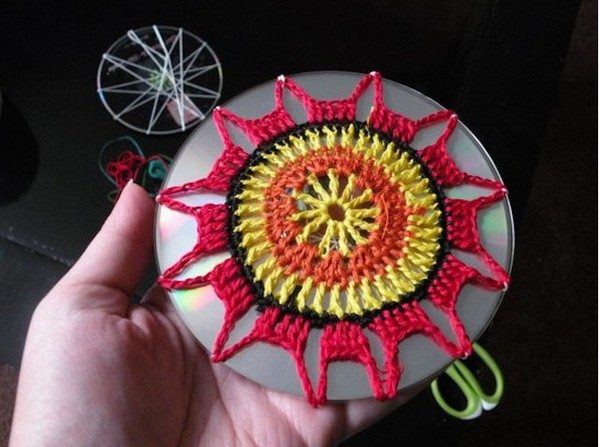
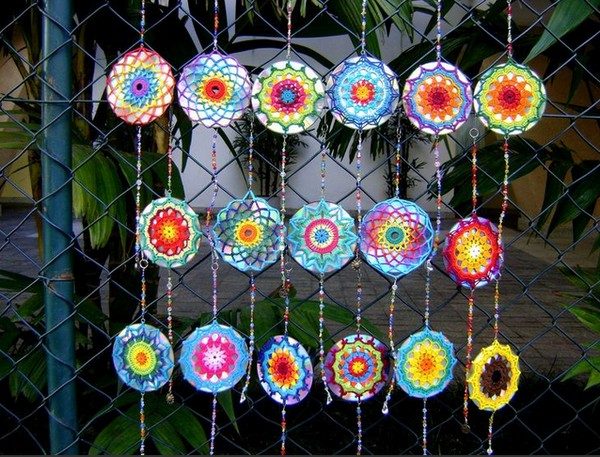
Embroidered flowers
If you have any knitting, crocheting or embroidery skills, you can experiment with using CDs as a base! The disks tied with threads look like bright flowers against a shiny surface. Such an unusual chain will certainly become a decoration indoors or outdoors, giving a soft light that reflects the rays of the sun, and a variety of colors.
Candlestick
This is probably one of the simplest projects you can make from old CDs. Simply stick a candle of the appropriate color to the center of the circle. This is an interesting solution for a simple candlestick. You can also do with old vinyl discs.

Wildlife Mosaic
Cutting old CDs into small pieces to create a mosaic has become fashionable, because they always look amazing! Such a creation looks beautiful when light enters. Why not do something to decorate the yard? These mosaic pictures on stones, depicting animals, will be a beautiful addition to any garden or paths.

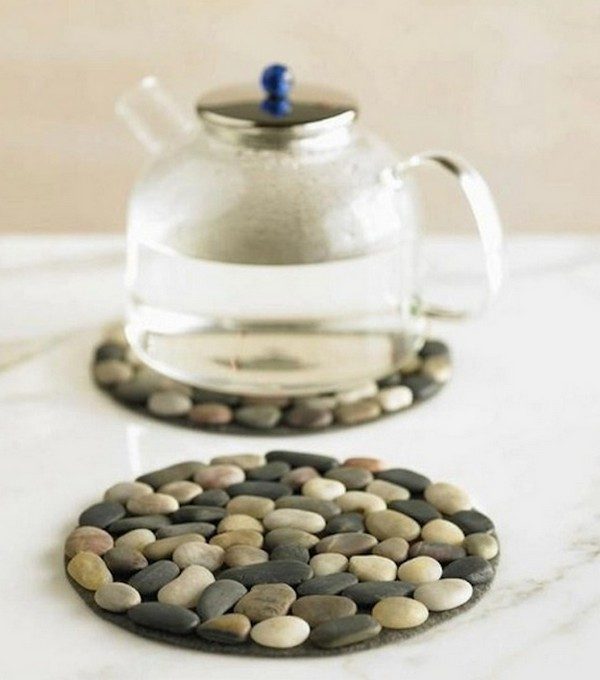
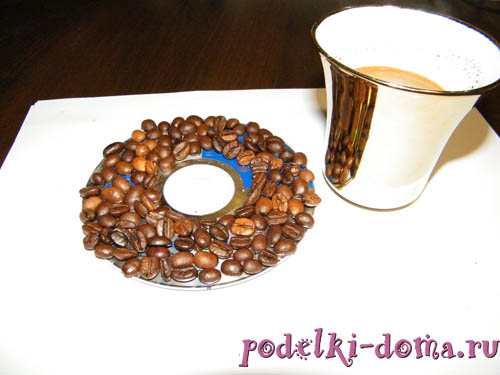
Base for hot stand
Here is another project stand. But now the disk is used as a base on which you can glue small flat stones to use as a stand for teapots and hot dishes.
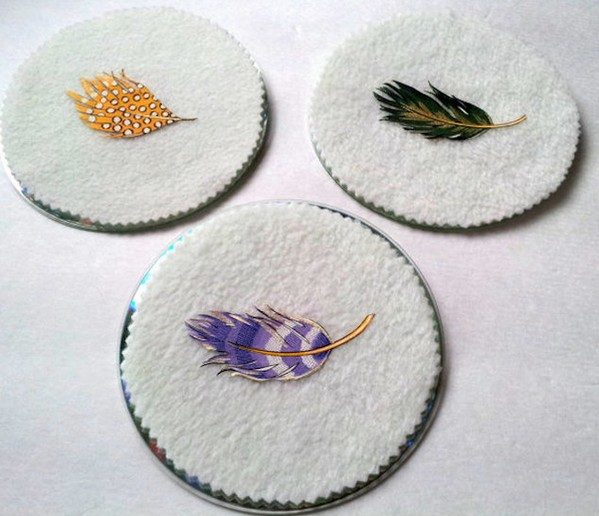
Wall decoration
Older CDs and DVDs are ideal in size and shape to use to create unique wall decorations. Not too big, not too small and completely round. It is enough to stick a woolen fabric on the surface and add bright feathers.
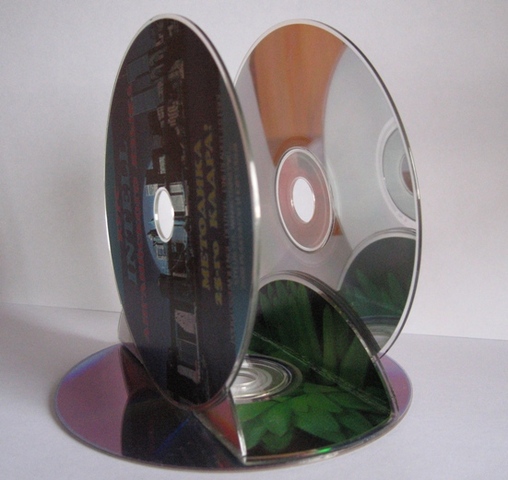
Transparent pots
If you have a lot of old disks, for sure, and a lot of plastic boxes from them. This interesting project shows how to make a flower pot out of such boxes. It looks great even without extra decorations.
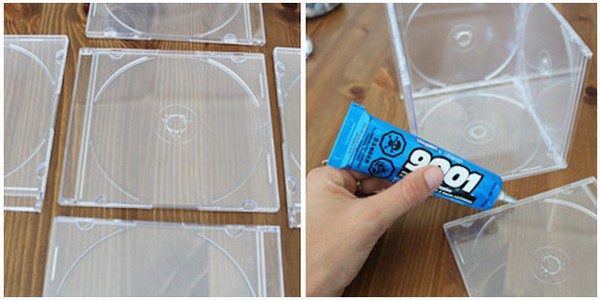
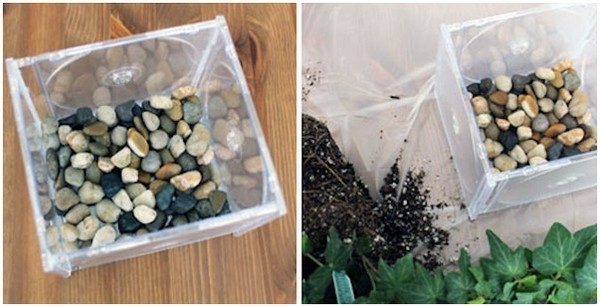

If you wish, you can add a little paint, stickers, stencils or anything else to create a more colorful look!
This is how the era of recording information on discs passed almost unnoticed. The size of the hard drives now allow you to hold all the necessary information, fast Internet eliminates the need to write something on the blanks, and flash drives are so cheap that rewritable discs also become history. Maybe you have some old CDs and DVDs lying around, and we offer you several options for using them in everyday life. For example, you can attach a drive as a reflector to your bike or mailbox, fix several discs in the garden to scare away birds, or make an excellent desk lamp.
(12 photos total)
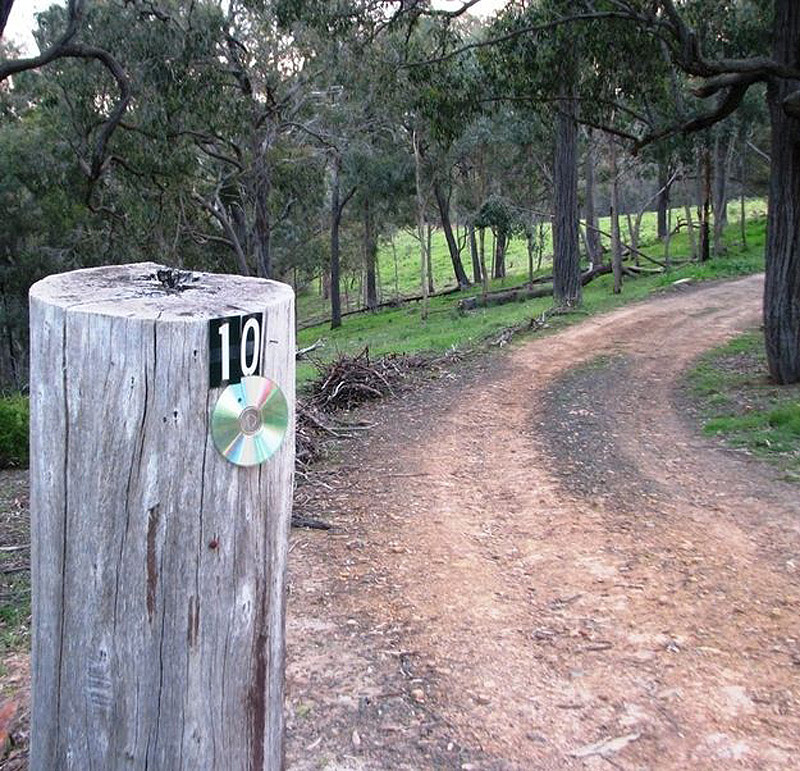
1. A pillar at the turn of a rural road can be marked with a disk.
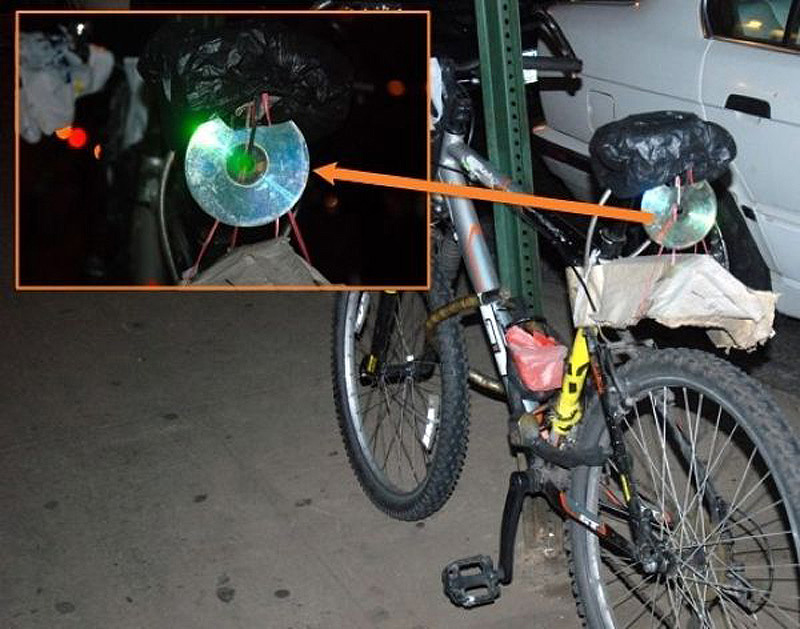
2. Its reflective properties will help the cyclist on the night road - a budget replacement for reflectors.
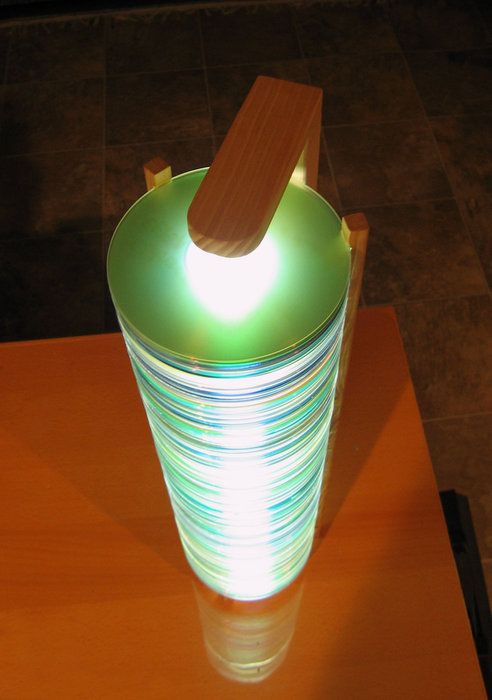
3. An unusual lamp can be made from a stack of old discs.
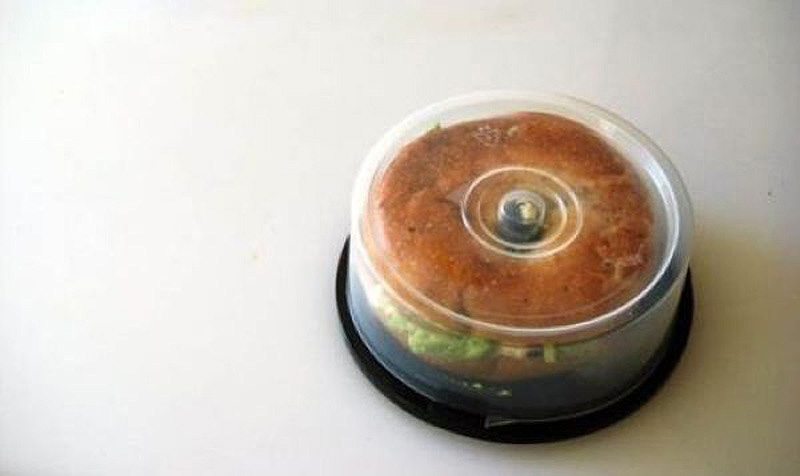
4. A box for pigs will fit as a case for office or school snack.
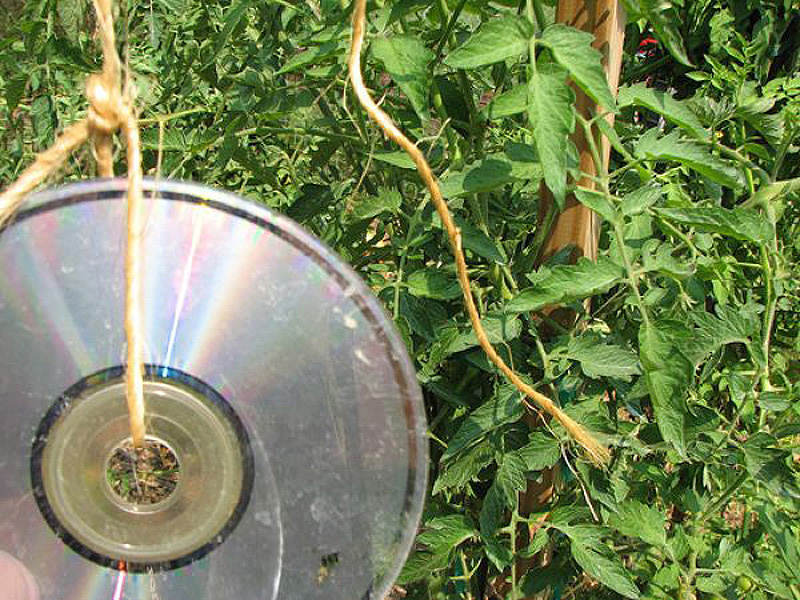
6. Drive as a "scarecrow" - the reflected rays of light scare the birds away and protect your plants.

7. "Tron" for home "lord" can be installed on the illuminated legs, recruited from old blanks.
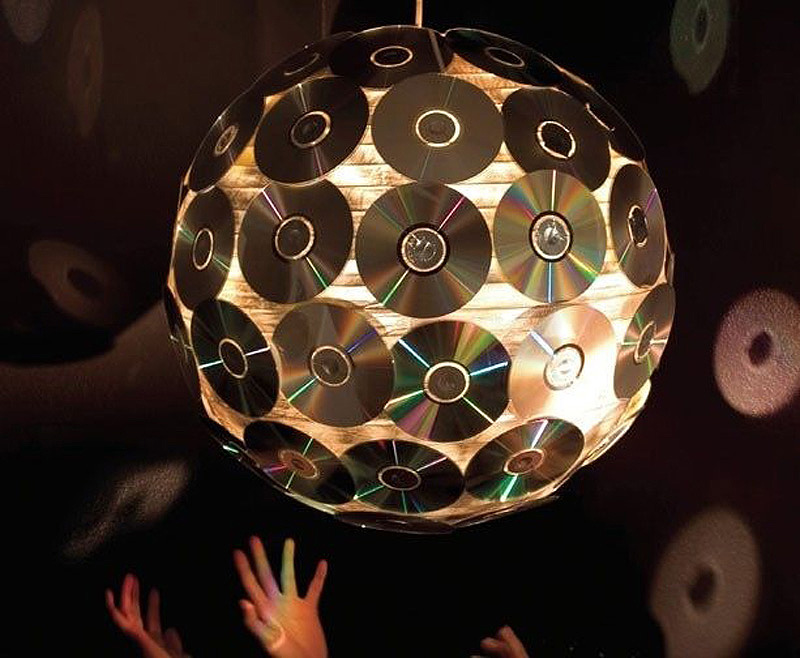
8. Another disco ball option.

9. The disc is perfect as a scraper for icy windshield.

10. Such a figure is the result of hard work.
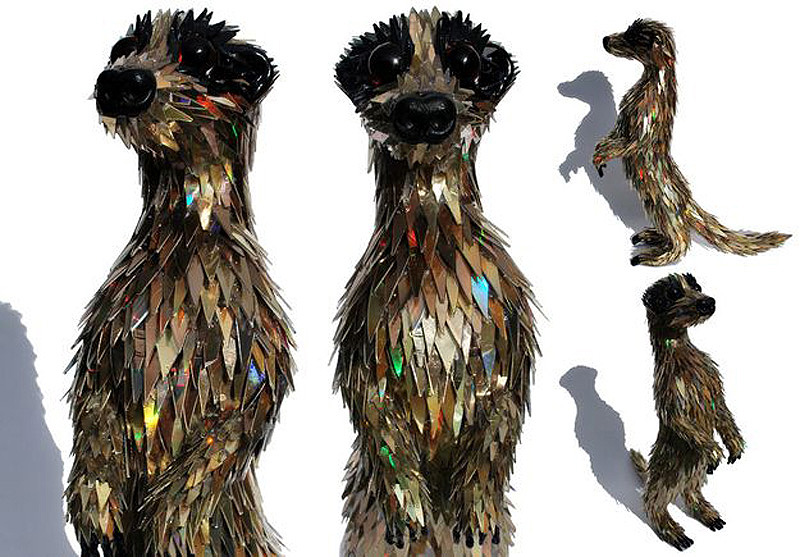
11. But quite an impressive result ...
![]()
12. And if there are a lot of disks and creative fuse - you can make a three-dimensional installation.
Due to its shape, texture, weight and other indicators, disks are very convenient material for creating various kinds of creative handicrafts. And how do you use old disks, or only as a stand for a cup of coffee?
Today we will consider several options that can be made from CDs.
An old CD is a great base for creating original desktop or wall clocks. To complete the image, you will need a mechanism from the old clock, you can just as well create a dodge clock, which will serve exclusively as a decor element.
Create a box from the discs - easy. You will need: cardboard, 2 discs, glue, fabric for plating, thread, ribbons or beads for the decoration of the cover, a little imagination.
Tired of old wallpaper and no opportunity to glue new ones? You want to visually enlarge the room - glue the wall with the mirror side up. this way, something like a huge mirror will turn out, and the old faded walls will disappear from view giving way to hi-tech elements.
From the discs you can get a great curtain - a bright decorative element. Agree, not every home can be seen. In the care of such a curtain is also convenient - it does not need to be washed - just wipe the dust.
Tying two discs and lacing the zipper between them can get a small handbag or a convenient cosmetic bag. Try to decorate this craft with beads, artificial flowers or ribbon embroidery.
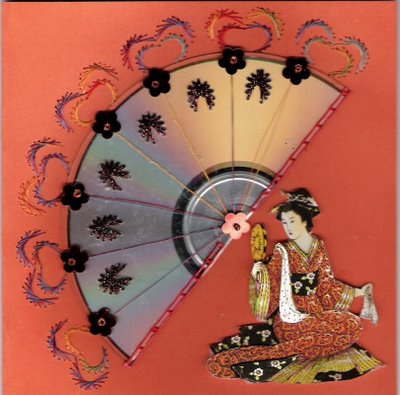
Before the New Year is not close yet, however, excellent Christmas-tree decorations and just home decor can be done like this: use the decoupage technique or paste the pattern you like on the disk. You can hang the disc on a golden ribbon, and on top of the picture decorate with sparkles, beads, sequins, rain. Devote this type of discs and Easter theme, birthday, March 8, other holidays.
Vases, jugs and large dishes can be updated by pasting small pieces of CDs, you get a full-fledged mosaic with a mirror effect.
There are many photos, but there is little frame - it doesn’t matter, attach photos to the mirror side of the disk - it’s done. Hang on the wall, or make the legs of the wire to put on the shelves. For the legs go and hairpins, crabs for hair.
If the old disks have a not very presentable appearance, use them not for decoration, but for creating homemade dumbbells, every man and woman will find this useful in everyday life.
Sculpting various compositions of candles, figurines, shells and other beautiful nonsense requires a basis where it will all be attached. Yes, precisely, and here the disc is indispensable.
I also wanted to suggest the use of disk fragments to create a more voluminous and original picture, for example, as in the picture above.
And of course, the use of discs as a stand for hot is already mentioned. You can crochet them for beauty.
So many wonderful and creative things can be created using old and unnecessary CDs. Send your ideas on this topic will be very happy.
Crafts from the disks with their own hands. Master class with step by step photos.
Razumova Valentina Nikolaevna, educator of the kindergarten "Shukhobodsky kindergarten", the village of Shukhobod.
Description: In this master class there are options for making handicrafts from unnecessary CDs. The material can be used to organize workshops with children, parents, teachers; and also in circle work with children in kindergarten and at school. Children from 5-6 years under the guidance of an adult will cope with the work.
Purpose: souvenir-magnet on the fridge with a notebook or with a decorative hook for towels, tacks; A gift for loved ones.
Purpose: making crafts from the CD.
Tasks:
* show options for decorating the disk;
* to acquaint with various techniques for decoration: decoupage, stained glass painting, drawing details, applique from natural material;
* develop creativity, the ability to make a composition, select colors;
* to form the ability to use for the manufacture of crafts dump material.
This master class is a continuation of the master class for teachers on the production of fridge magnets, which was held as part of a methodical association based on our kindergarten. View these materials here:
In this master class, priority is given to the method of conducting. Today I want to elaborate on making handicrafts in more detail.
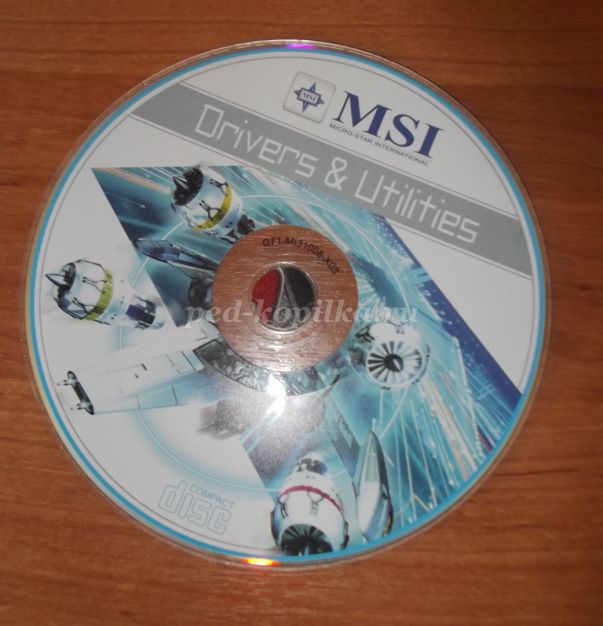
In each house, I think there are some unnecessary, already spoiled CDs that do not work. You can throw them away or use them in your work and make beautiful fridge magnets.
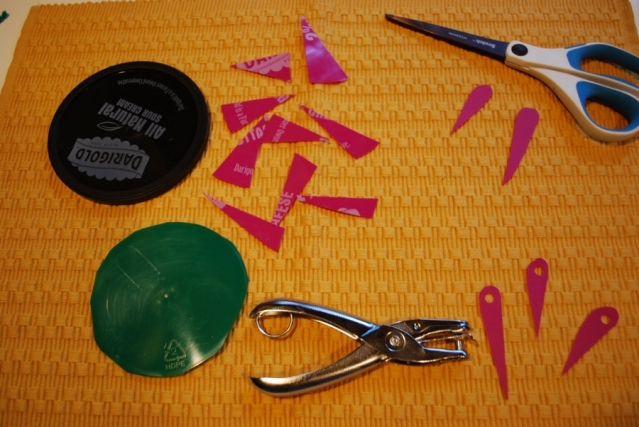
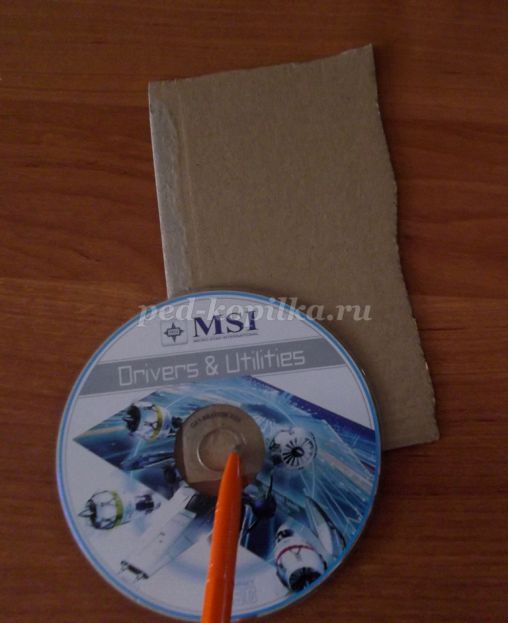
Disc preparation.
First you need to prepare a disk for the manufacture of crafts. Wipe it with a cotton swab moistened with alcohol, removing possible contamination. Cut a thick cardboard circle to fit the hole in the disc. Using transparent scotch tape and a cut out cardboard box, we close the hole in the disk.

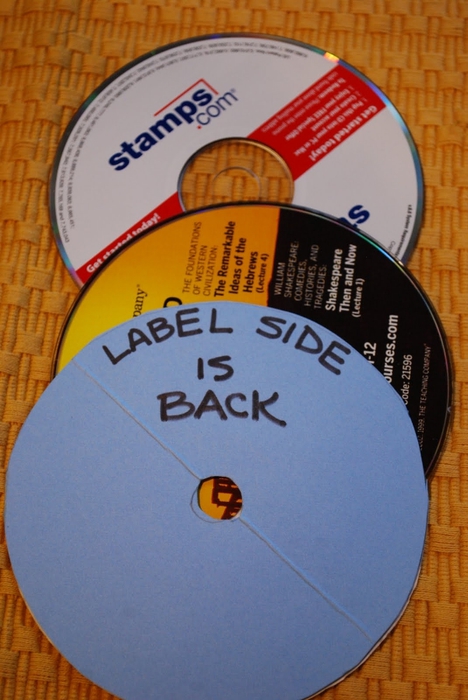
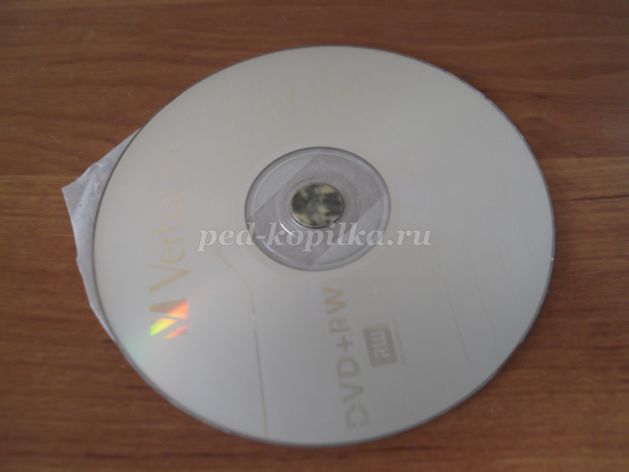
This is how the disk looks from different sides:
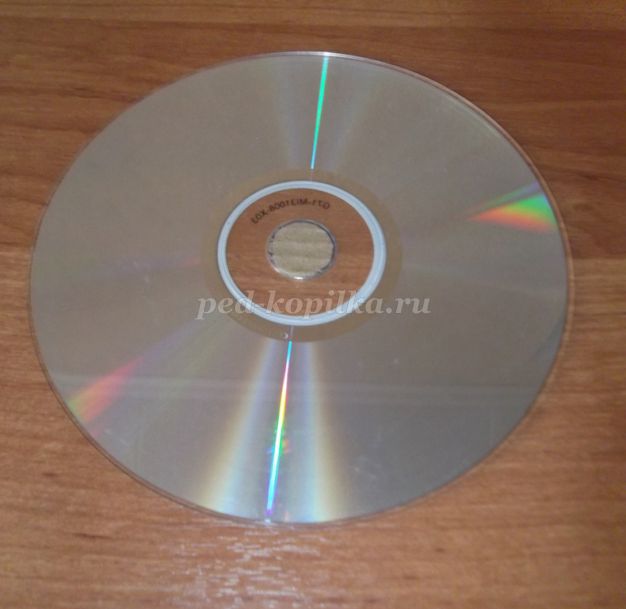
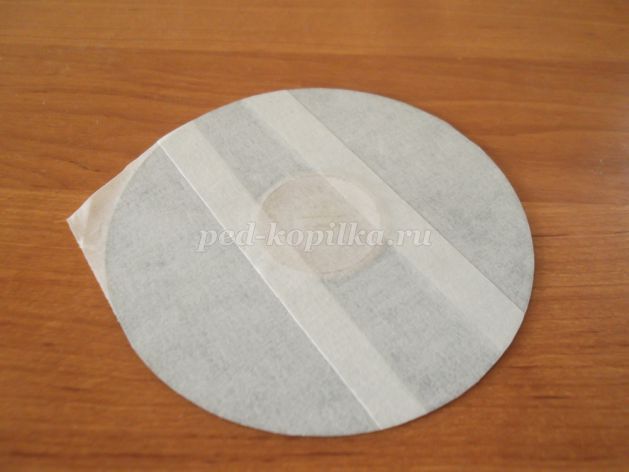
We seal the transparent side of the disc with masking tape so as not to stain it during work.

We cut off the excess around the edges, leaving a small corner so that it is more convenient to remove the adhesive tape later.
Paint the disc with white acrylic paint.

We are waiting for the paint to dry. If shines through, you can primed again. After that, the disc is ready to go. Consider several options for crafts.
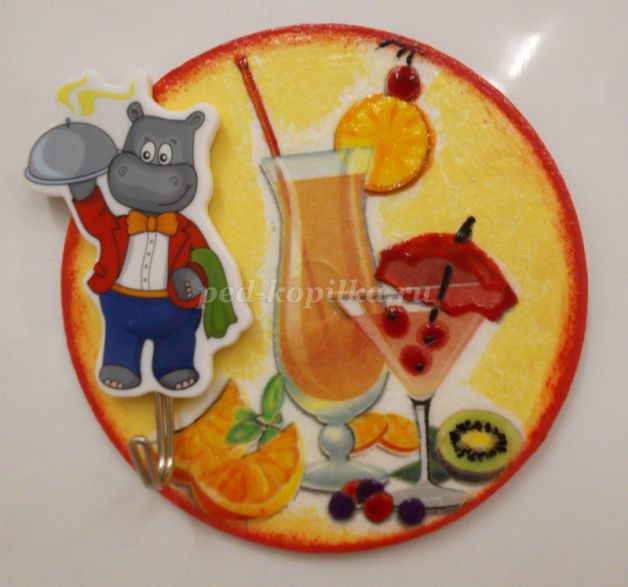
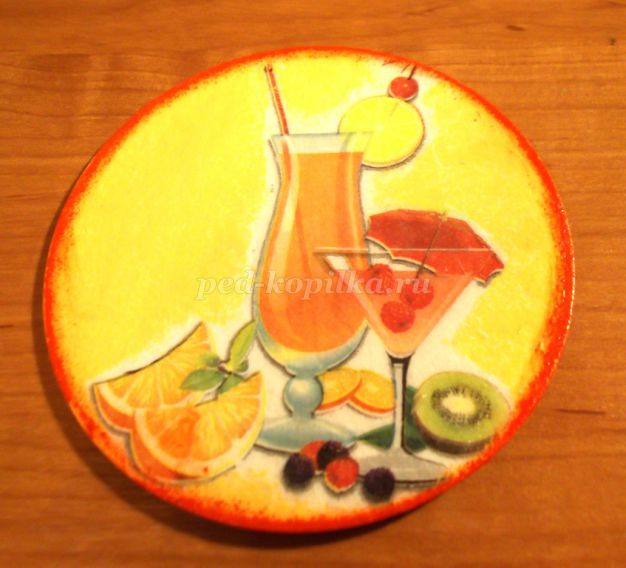
Option number 1 "Chef Hippo"
Required materials and tools:
* sd disk;
* acrylic paint (white, yellow, red);
* sponge for dyeing, flat brush No. 12 (bristles), sponge, scissors;
* napkin with a pattern;
* magnet, decorative hook with hippo;
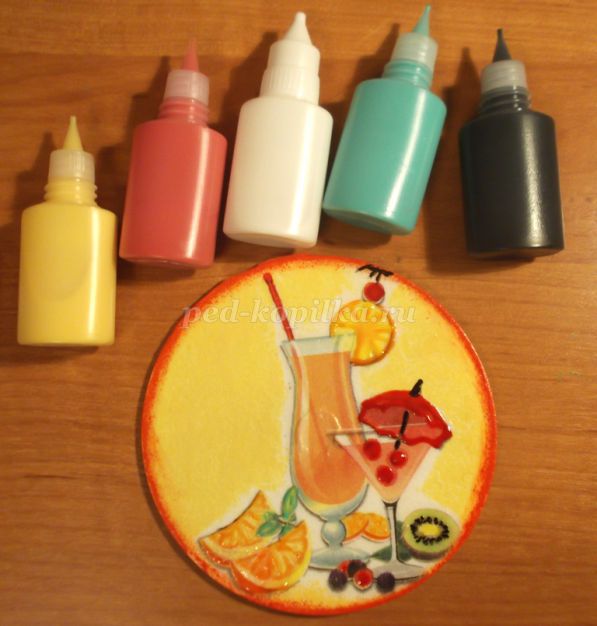
* stained paints;
* acrylic lacquer;
* PVA glue, Moment-Crystal glue.

Select the pattern we need on a napkin and cut it out.
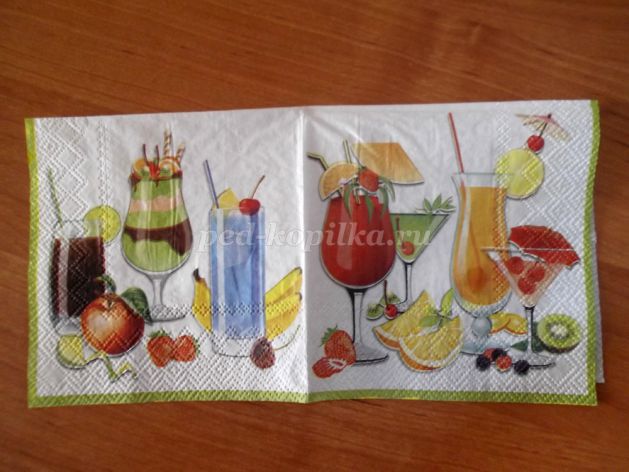
Do not forget to remove the extra layers. We leave only the top, with the image.

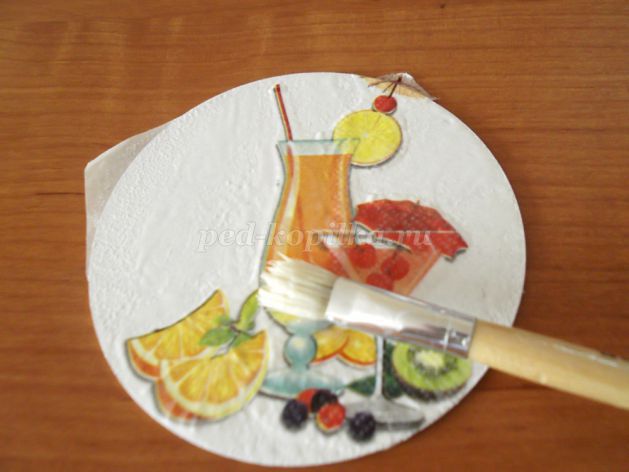
Glue it with white glue. First we apply glue to that part of the disk where the image will be.
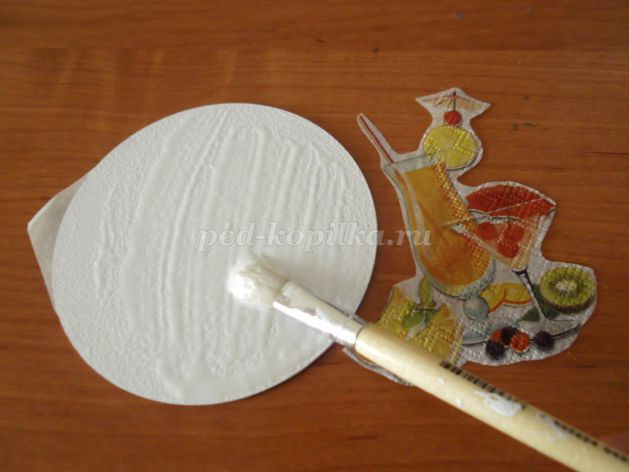
Place the cut piece of napkin on top.
We coat with a flat brush moistened with glue over the pattern, smoothing folds and removing air bubbles. At the same time we try not to tear the napkin.
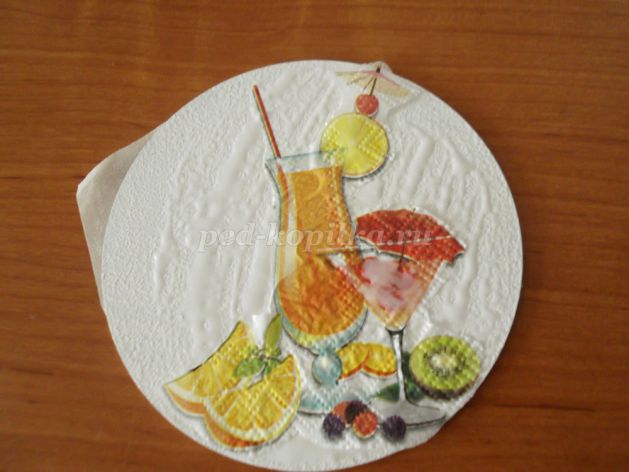
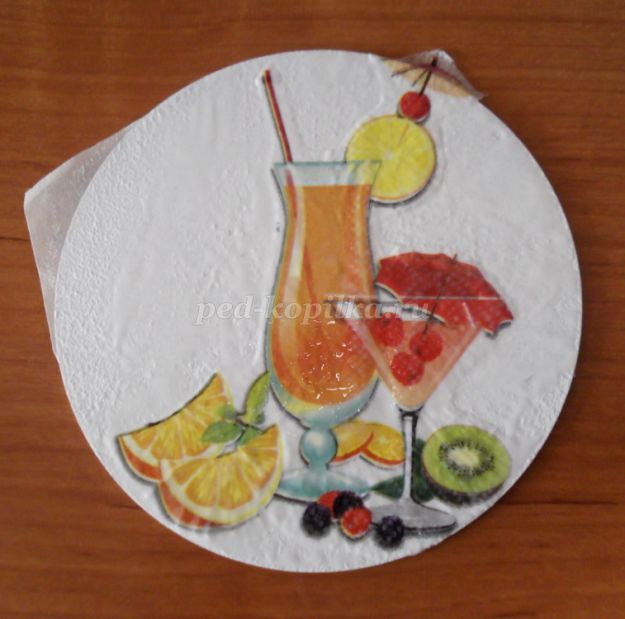
We wait for the image to dry. You can use a hairdryer for this purpose.
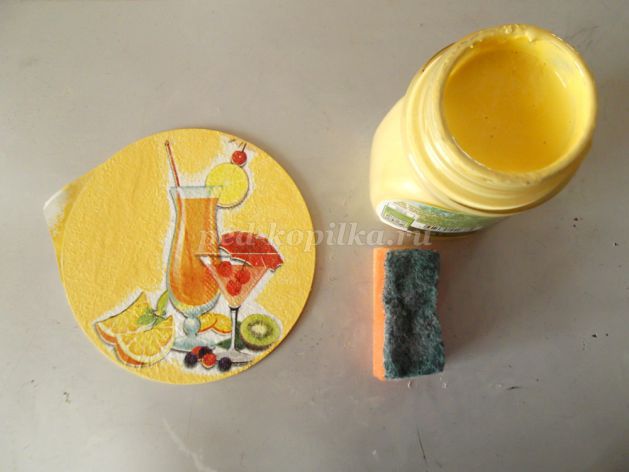
Getting to the background. Paint it with the help of a sponge around the picture with yellow blotting movements.
In the same way we apply a red paint border around the edge of the disc.
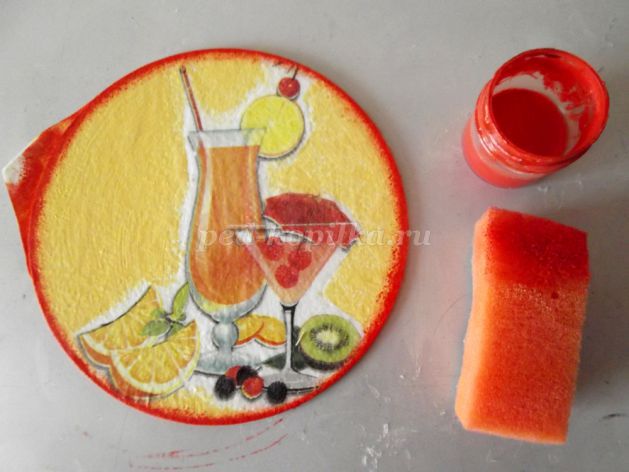
After drying:
We coat the craft with acrylic varnish (2-3 layers with intermediate drying) to protect the surface.
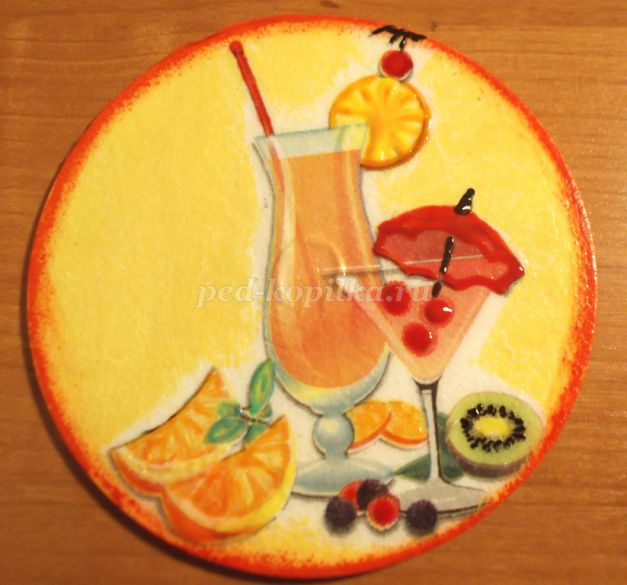
Then proceed to drawing the details of the picture with stained glass paints. Select the berries, orange slices, kiwi, leaves, an umbrella.
Result:
We remove the masking tape from the inside and glue a magnet to the “Moment” glue
![]()
We strengthen the decorative hook with hippo. The hook is attached to the adhesive tape, but if you want you can strengthen it with glue.