From what to make a frame for photos. How to make pictures for photos with your hands


Deaf subframe the simplest for manufacture:
For its manufacture, it is necessary to pick up wooden slats of universal size. Reiki can be purchased at any store. You will need: joinery, tape measure, stacker for processing, nails, corners.
Measure the rails. Horizontal and perpendicular. The size of the frame should be slightly less than the size of the canvas.
We do Spiles at an angle of 45 ° and process sandpaper.

 Staples put it with a hammer, drowning them into the frame. From the reverse side of the design to the corners you need to fasten metal fasteners.
How to make with your own hands baguette for painting
Baguette is a modular design of wood or polyurethane foam. Usually pulled out, attached with clamp or hot glue.
If you do not know how to make a frame for a baguette, look this video:
Making your own hand frames for painting from wood
Wooden frames for paintings are always in fashion and always look exquisite.


What you need in order to make a frame of wood with your own hands
Variations of a tree frame set from the easiest.


Up to more complex. For example, made of carved wood or plinths.
Instructions for making frame for painting from a wooden plinth

On each speech we applied glue and connect them with each other. It is here that clamps are useful to us, which will help to make fastening places very durable.
Making a hand frame for painting from polyurethane ceiling plinth
If you want to see on the wall a white frame for a picture, you can make a baguette from the ceiling. The most important thing is perfectly cut off the joints.


Tip!For gluing, we use glue titanium for ceiling tiles and plinths. From above, the product can be treated with acrylic paints.
How to make a cardboard frame
Simple, fast, cheapest way to make a frame for a picture using cardboard. You can decorate creation with fabric, pebbles, interesting decorative elements.
1 of 4.


Tip!It is best to choose a dense cardboard to work. The perfect way to fasten the elements will be a thermopystole.
An interesting video will tell you how to make a passecut for the photo with your own hands.
The following photos and schemes for creating a clip will help to create a layout properly.


How do it yourself make a frame for a picture of girlfriend
Production of frames for paintings with your own hands is not an easy, but exciting occupation. If you decide on such an exclusive product once, then for sure, you will never forget about your hobby.
Any picture is a story, a spectacular frame may emphasize this story and make it even brighter.
1 of 7.


Send the material to you on E-mail
The picture looks complete and laconic only in framework. Oh neither twist, but a unformed piece of canvas or just artistic on the sheet will not make a proper impression without a frame. The editors of the online magazine site believes that it is not necessary to buy a baguette, as it is not only interesting to make a frame for the picture, but also easy!
So for a short one to become a wizard for the manufacture of frames
What does the product design determines? The surrounding interior. Little simple wishes to see a blue fright frame in a picture in a room with a classic interior - so focusing strictly on the style of the room.


The size of the canvas and the image itself will prompt which dimensions are preferable. Agree, if the canvas is small, and the frame takes prests - this indicates problems with a taste of a person.
How do you make a subframe for the painting
The subframe serves to pull the canvas and there are two species: modular and deaf. Taking the manufacture of frames for paintings, people themselves are determined which subframe is more convenient - each model has its own characteristics. The deaf subframe is a solid design, the angles of which are fixed with each other with glue and wooden triangles. In the case of a canvas savage, it is necessary to deal with it with tightening.


Tell how to make a deaf subframe with dimensions of 100 × 180 cm.
To do this, we will prepare two-meter wooden rails, car joinery "moment", tape measure for measurements, sandpaper for processing the product, hammer, stapler for furniture with brackets, corners and screws.
Moment-stolar
- To the rake-length (180 cm) perpendicularly apply the rails and measure 100 cm.
- For stability, there are still a couple of vertical pods-supports.
- Spiel rails are made at an angle of 45 °. We pass sandpaper and remove the chips and sawdust.
- To connect vertical and horizontal rails, we need carbon black: we applied it onto a spike, press and immediately fasten the stapler on each side. If there are special vice in the house, it's time to use them.
- The hammer is knocking on the brackets, excluding their dupile.
From the reverse side of the design to the corners you need to fasten metal corners.
Article on the topic:
Frames for photos on the wall : varieties, how to choose to choose, the rules for compiling collages, selection of plots for different rooms, examples of photos of photos, original ideas for compositions - read in publications.
How to make with your own hands baguette for painting
Painting on canvas or paper can be made in a beautiful wooden or polyurethane foam baguette, simple or carved - as the soul will tell. There is a baguette from a wooden or polyurethane foam profile by a pubzik, a stapler and with a clamp. Let's tell me how to make a frame for a painting from the baguette.
Making your own hand frames for painting from wood
Wooden frames for paintings look exquisitely and fit into almost any style.


What you need to work
As already mentioned, get the finished wooden profile, finely sandpaper, prepare the jigsaw, joinery and roulette.

If the profile is fully finished, then no additional actions will be required, although, at will, the baguette is decorated with gilding, varnish crekylur, patina.
Instructions for making frame for painting from a wooden plinth
We make the measurements of the painting and correlate them on the profile. The task is to make a speech at an angle of 45 ° and perfectly clean it every sandpaper.

On each speech we applied glue and connect them with each other. It is here that clamps are useful to us, which will help to make fastening places very durable.

From the wrong side the picture you need to close the sheet of plywood or durable cardboard.
Making a hand frame for painting from polyurethane ceiling plinth
If you want to see on the wall a white frame for a picture, you can make a baguette from the ceiling plinth.


What you need to work
Ceiling plinths are sold in every construction store today, and the choice of products is great. For the first time we suggest try to make the easiest option from the profile of the average width without any special jewelry.
For gluing, we take the glue "Titan" for ceiling tiles and plinths, we also need a stationery knife, a ruler and transportation for measuring the angle. If you want to paint the whiteness of the plinth, we prepare the desired color of acrylic paints.
Glue Titan

Frame manufacturing instructions for painting polyurethane plinth
By making measurements horizontally and vertical, we prepare the base of the pattern of dense cardboard or ceiling tiles (if the size of the web allows). The base either coincides with the picture, or a little exceeds it.
We proceed to the creation of the frame:
- Memore on the plinths all the measurements made and labeled them with the help of the transporter (remember that we need an angle of 45 °).
- We make cuts by the stationery knife for the markup or with the help of a stouch cut off the finished elements immediately.
- Before starting the gluing process, all parties combine each other to make sure the accuracy of the coincidence of all edges.
- You can glue all parts of each other and leave them for a while alone.


How to make a cardboard frame
Frame for the picture with your hands from cardboard can be made by people without experience in applied creativity: it is cheap, beautiful and not at all difficult. So that everything turned out the first time, you need to immediately prepare all the elements necessary for creativity.


What you need to work
In the paper it will take a dense cardboard for the foundation and for the framing itself. Simple cardboard suitable here, and corrugated: it all depends on the desired thickness and strength of the product.

In addition to the main material, we prepare scissors, a stationery knife, a glue-gun with adhesive rods (or, for the absence of such, acquire carpentry or titanium glue for ceiling tiles). It will be left to choose everything for the exterior decor.


Cardboard products allow you to widely apply your own fantasy: there are no boundaries for a form or for decorating. You can decorate the product and textiles, and beads, and seashells, and scrap paper.
Instructions for making passecut
We begin the instructions how to make a frame of cardboard for the picture.
| Illustration | Description of action |
|---|---|
 | From the cardboard, cut out the frame taking into account the size of the photo. Scrap-paper placed the front side on the table and put the cardboard blank on it. While nothing glue. |
 | Scissors cut off the outer corners, and inside the diagonal cuts using the stationery knife. |
 | We begin the external borders. |
 | Gently cut off the extent inside the product and bend the inner boundaries. Nothing anywhere: everything should be smooth. Now we glue the internal boundaries on the frame, and then external. |
 | So the frame will look like. You can leave it simple without decoration, but the pair of decorations will not be superfluous. |
Video: Frame for photos from cardboard do it yourself
How do it yourself make a frame for a picture of girlfriend
The manufacture of frames for paintings with your own hands is your own fantasy that is embodied in practical use. Decorating the walls or tables with its own products has become fashionable, because this is the most direct inclusion in the design of your beloved dwelling. Why should you try to make frames with your own hands if a great set is sold? Well, who knows your preferences, better than you? Who is stronger than the warmth of the home the heart, except the owner of the apartment?


If you describe all methods of creating frames for paintings, there will not be enough all pages of our magazine, so we will focus on the two most affordable materials: newspapers and buttons.
How to make a frame for a picture of buttons
Beautiful frames for paintings are made of buttons! Many have keen deposits from grandmothers and mothers, and where to make them, not everyone knows. For creativity, we do not need tons of new butchers, anyone will rise!


What you need to work
Here we use the previous point of content and take care of the manufacture of a cardboard basis: cut out the desired frame shape from the cardboard.
Tip! Do not limit your imagination! Let the form be unexpected, throwing, angular, streamlined.
We prepare the framework, acrylic paints or paint-spray, glue moment or thermopystole. If the buttons themselves are very beautiful, chose in a harmonious combination with each other, they will only need to paint the foundation.
Now we include suitable music and proceed to creativity!
Instructions for manufacture
We choose the largest butt and with the help of glue are attacking them alternately on the framework. Do not hurry with the next layer - let the first grab as it should.
Then we are already starting to glue the medium-sized buttons, trying to cover all the cutters. Small buttons close the remaining cutters and are located over the entire surface of the frame.


The spray bottle will paint the entire frame at once, and you can create interesting color variations with acrylic paints.
Frame for painting from old newspapers
As soon as they are not used in everyday life and have become unnecessary newspapers! If you were soaping glass and mirrors before, today it is a fertile material for weaving baskets and a different kind of decor. Frame manufacturers also attracted the newspaper as a decorating material.


What you need to work
We will not explain here the basics of weaving, but tell me how it is easy and quick to make a wonderful framing for a picture or photos from. We take heavy newspapers, PVA glue, thermopystole, acrylic paints or a gouache of the color in which you want to see the frame and the actual framework (can be cardboard).
Nuance! The magazine pages are too bright for paintings in color, and for black and white fit perfectly. Newspaper tubes are better or painted or simply covered with varnish.
Instructions for manufacture
We cut the newspaper sheets in this way:

- Each strip is placed on a thin knitting needle (the electrode is suitable in its absence, which is predefined, or durable thin long wire, in length equal to the needle) at an angle of 45 ° and begin to wind almost until the end of the strip. The tip of the strip is lubricated with PVA glue and dotting it to the end. The tube is removed from the knitting of the knitting knitting knitting. Thus make several dozen tubes (if the scope of the frame is large). Once products dry from glue, you can paint them in any color.
Photo frames serve to preserve the integrity of the photo, but if you decorate the usual photo frame, it will become a beautiful interior decoration or even the original gift made by your own hands for your native person.
You can make a photo frame with your own hands from ordinary cardboard. And then decorate it, the fact that at hand.
You will need: An ordinary photo frame or cardboard for the manufacture of photo frames, glue or gun with hot glue (it holds more reliable), then it all depends on your imagination.
From unnecessary ordinary buttons, a beautiful photo frame is obtained. Even the jewelry will make a photo frame with a unique interior decoration.


The idea of \u200b\u200bdecorating the photo frames with a variety of thing. Or just wrapped the frame with twine or yarn for knitting like the color you need.


Another photo frame can be decorated with beads or simple beads. Looks very gently, almost magically.

For lover of knitting - the idea of \u200b\u200bthe photo frame of the lined yarn with a simple pattern and pompon.

Photos from the sea can be put in the photo frames decorated with beautiful seashells, beads, colored glass pebbles and marine stars.


Even a simple newspaper or a color magazine can be a decoration for the photo frame.


For coffee lovers - a photo frame from coffee beans. Little marine pebbles, brought from the sea will look very stylish. The main thing after gluing the pebbles, cover their layer of varnish.


If you decorate ordinary pasta, then they are also suitable for decorating the photo frames.

You can make a gift for men with your own hands, if you decorate the photo frame with coins or washers and nuts.

From simple cardboard - a simple photo frame for a small photo. In general, for young photos there is an idea of \u200b\u200bcreating a collage of covers. Thus, you can decorate the whole wall in the room.


Old unnecessary puzzles are also suitable for decoration, if you glue their white face up. If you do not throw away the broken dishes, it can be used and make a photo frame in the mosaic style.


Photo frame decorated with pumpkin seeds and dried lemon crusts. Such a fluffy and touching bunny is obtained from straw and ears.


In the fall, gathered the yellow leaves decorate the photo frame.

In the time of digital technology, the value of the paper medium of the image has dropped significantly. And in vain, the photo is first of all the memory from the past. People are accustomed to keeping the dear heart things next to them. But storage of photos in digital media is not always convenient, and the presence on the table of an attractive frame with your favorite image automatically attracts the look and, accordingly, returns pleasant memories. You can make a photo frame with your own hands from the girlfriend, using natural materials to decorate.
You can make a photo frame with your own hands from girlfriend
To be able to do photo frames yourself at home is quite useful - sometimes it takes a frame of non-standard sizes to hang on the wall, for example, poster from a favorite computer game, or a photo of large sizes, and the big frame is quite consistent, and comes with a photo in color And the invoice can not be found. The homemade frame will come to the aid if you decided to hang a picture on the wall with your own hands, or a diploma, or a page of the team handwritten text - at weddings and anniversaries, guests often write such congratulations and wishes to the memory of newlyweds or anniversaries. Photo from kindergarten, or from the school line on September 1, the wedding or just a good photo from the walk - you never know how to hang on the wall or put one of the happy moments on the table? Let's wonder step by step, how to make a suitable frame for them.
It will take:
- 2 tight paper sheets 30 by 35 cm;
- Old glossy magazine;
- PVA glue, a piece of cardboard;
- Multicolored threads, colorless nail polish;
- Stationery knife.

Such a photo frame will be very budget
How to do:
- Returning from the edges of the sheet to measure 5 cm. On the outlined points of the line. The resulting rectangle cut out of the middle of the paper sheet. It turned out the basis of the frame for photos.
- Twist tight into the tube one page of the magazine, edges fix glue.
- Cut the thread on the twisted page, fasten the ends of the thread at the bottom.
- Make such tubes a few pieces.
- Each blank is to glue from the inner corners of the product. To give the effect of volumetric bending bending the tube at the corners.
- Three sides of the second sheet of paper are glued to the inside of the frame. The fourth side is necessary for the room in the product photo.
- Frame leg form from a piece of cardboard.
After drying, the cracker is carefully covered with varnish.
Cool photo frame with your own hands in 5 minutes (video)
How to make a beautiful photo frame from cardboard
Need:
- Cardboard colored, colored paper;
- Stationery knife;
- Color pencils, stickers.
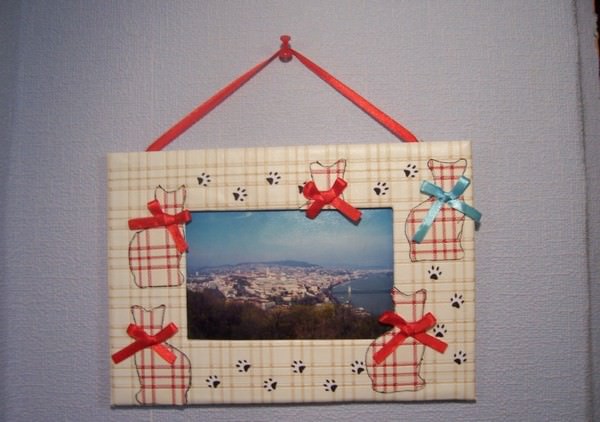
Photo frame from cardboard can be very simple
How to do:
- Cut a stationery knife a rectangle of a specified parameter.
- Mark the size of the photo from the wrong side of the figure, step from the designations of 1 cm, put the points of measurements of the window. Cut the inner rectangle.
- The inner side of the product cut out of less tight paper.
- To glue both sides of the frame, leaving one side to insert the photo.
- We draw the desired ornament with pencils, decorate stickers. The edges of the photo frame can be decorated with a golden wrapper from chocolate.
Frame foot-stand made from cardboard. Cut a thin rectangle, fold it in half, glue the base to the craft.
Original Design for Photo Frames: Master Class
Very gentle and beautiful frame turns out when designing with artificial colors, wallpaper, lace slices or braid.
Need:
- Wooden or plywood frame - base;
- Scissors, glue;
- Pieces of wallpapers, golden tape, lace, beads.
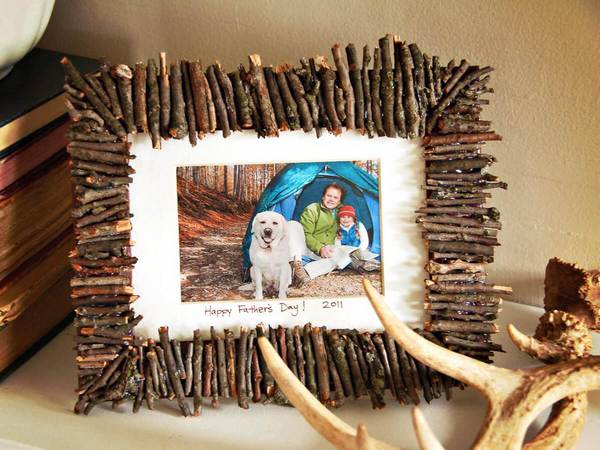
The photo frame can be decorated with even fragments of branches
How to do:
- Artificial lilacs or other flowers with small fluffy flowers are perfect for crafts. Each flower decompose on inflorescences.
- The foundation is placed by the wallpaper blade, give a completely dry.
- From the top corner on the height of the glue, put one inflorescence, slightly sweep up the petal and glue the second. Thus, fill the entire top corner of the frame with flowers.
- The lower opposite edge is made up with lace, gluing on glue.
- At the edges of the inner frame glue gold flames.
- Beads put on glue as the core of colors. On the lace ornament to shove the corresponding tone of the biserini.
- At the top of the flower corner, the crafts glue a piece of starchy lace.
How to decorate the usual photo frame
Photo frame design options:
- Falling discs. Since the material during the breakdown contains sharp corners, it is advisable to wrap the discs into an unnecessary towel. We break with a hammer. Minor pieces lay an interesting mosaic on the glue frame. After drying, on the intervals between fragments, apply ferrous acrylic paint under the gloss.
- Wallpaper. To decorate, the crafts are very organically suitable after repairing pieces of wallpaper, especially if they are with pictures. Cut the wallpaper or flower and glue it to the corner of the frame.
- Old buttons. Collect all the unpaired buttons. Decorate the product, gluing glue from external corners.
- Sea pebbles and shells. Very look complete with a seafrine decor from salt dough, cable filaments and marine anchor figures. This framework with a joint photo is a wonderful gift for a close man.
- Satin ribbons. By sticking the ribbon as a decor element, decorate it with the rest of the lace.
- Puzzles. Pieces of the picture, laid out by a swab in the frame, will become an amazing addition to the children's photo. For a variety, add to the decor cut from the paper figurines toys.
- New Year's Style Frame Decorate with Christmas Mishur and Sharov Sharov.
- Paints. For staining the framework details, it is better to take a gouache or acrylic paint.
- Pieces of fabric. Here you can come up with both the finishing of each piece of frame fabric base, and weaving from the tissue strips of decorations.
- Quilling and beads. Paper curls will make a photo frame very interesting. And the beads and beads give the fabulous appearance decoration.
- Colored threads. It is well harmonized as a decoration when creating a frame of magazine pages. Take each page with threads and glue the product.

Photo frame can be made as your heart
At the request of the crafts, you can make decorative small flowers, knitted threads, slices of wool, dry herbarium, tinted pasta or seeds.
What can I make a photo frame with your own hands
If you plan to hang a photo in the frame on the wall, it is better to take a lightweight material for making - ceiling plinth, cardboard, paper.
- Very simple frame layout can be made from the ceiling plinth. The smooth surface of the material will make sure not to be mistaken in size. The ruler gently measure the necessary measurements, cut off the stationery knife. Further on inspiration, the product can be frustrated by paints or decorate with natural materials: shells, branches and tree leaves. After complete drying of the dyeing decor, it's cautiously crawled with a colorless carpentry varnish.
- Wood frames are more durable in design. To craft to take two identical slats in size. Long with cloves or glue in the form of a rectangle, open lacquer.
- The photo frame from cardboard and yarn is very simple in the execution of the hand. Fold in the form of a rectangle or other geometric shape cardboard or dense paper in several layers. Carefully flaming the PVA glue, we consistently glue the frame with multi-colored yarn and buttons.
- Unusually looks a frame from the glossy magazine. Roll into the tube every magazine page, glue in the form of a geometric shape.
A child can be attracted to creating a frame from the test. A fascinating occupation will rave a little firm, and the product will be unusual.
- Mix flour, neural salt and water. Salt take half of the portion of flour, and water is half less than salt.
- Bending the dough, let him lie down, then tack the cradle. To keep the finished frame in the oven at a temperature of 80 degrees, until complete drying on both sides.
- The ornament to such a product can be loosened immediately with the frame.
After drying, the craft is painted with a gouache and opened with a colorless nail polish.