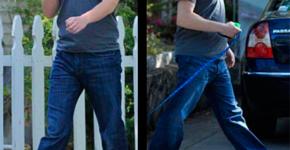
We make winter velelsein. Tags: bike, winter tires, studded tires do it yourself
It came in winter and I had to do something with a bicycle, so as not to fall on the ice. I could buy a finished studded Vellesein - it would cost me 4-5 thousand rubles. Not only because of the thirst to save, but also from the eternal desire to do something with your own hands, I decided to make winter cycle bumps myself.
It was bought: 2 budget plates for 250 rubles. each; 400 pcs. 13 mm. self-tapping screws (about 100 rubles).
Tires were chosen with large "teeth" so that the screws can be conveniently placed in them. Total tanks have 80 + 140 + 80. I did not want to screw 300 self-sneakers, so in the side rows I inserted the self-tapping screw through one. As a result, about 190-200 screws were inserted into each tire. It took the tires about 200 grams.
So, tires are bought, self-tapping screws - too. We must start work. First you need to do stinting holes in the tires. Without them, the screws will often go crookedly and get out of where necessary. It is very important that the screws "look out" from the center of "tooth" - it will extend the life of the tire. To do this, I took the drill and began to drill holes. It was, to put it mildly, hard, so I came up with a new way: I pushed the nail with pliers, heated it over fire and made it holes in the tires. It was no longer difficult, but still occupied a lot of time. And then a brilliant thought came to my head - to make holes with a selection! Sheltered at home did not turn out, so it was necessary to buy it. Dochil holes - the best option.
Holes are ready, it's time to screw the screws. Self-tapping screws I bought 13 mm with pressshaba. It is very important to buy precisely with presss, because Only they have a wide enough "hat." I screwed the screws into the tire with a conventional screwdriver. The tire inside out did not turn. The main thing is that the screws are screwed out exactly. You do not need to plant them with glue. Self-tapping screws should be screwed up so that at the exit he is a little fosplated thread rubber under him.
That's what I did:


In the last photo it is clear that on the side rows of the screws are inserted through one. In the center, too, there are sometimes empty teeth, the order is such: 1-2-1-1-2-1-1-2-1, etc.
Self-tapping screws, go on. Now they need to sharpen. I had no sharpened, so I asked a friend to treat the spikes. The self-tapping screws were dyeing strong and finally sharpened sharpening than they. But, nevertheless, they managed to apply. On one spike tire, there were slightly longer; I put it on the front wheel, because there is a smaller load on it and the quality of controllability depends on it. The side row of self-tapping screws can be turned on weaker (the main thing is that they are not sharp), because they will work only when turning. Tire with tireless self-sharp looks like this:

Self-tapping screws and sharpened, but it is not all. So that the hats of the screws did not damage the camera, you need to make a lining. For this, I have been brutally cut two cameras - one old and one, I will not beat this word, new. Now you can collect the wheel. When laying the camera, be careful - do not scratch it about the spikes.

Yesterday I tested my homemade winter bike breaks, while going about 25 km across the snow and about 35 km across asphalt. When driving on asphalt, quite loud noise is created, but it is impossible to call it a big disadvantage. When driving through the snow and ice, the tires showed themselves the best - while friends on ordinary tires were constantly falling on the ice, I drove absolutely not bothering, as if on asphalt if we compare crowded tires with usual, albeit with an evil tread, when Emergency braking The difference is just a monstrous. Sky and earth! With observed tires with a sharp braking at high speed on ice, absolutely does not contact, the spikes leave a deep mark on the ice.
The disadvantage is only one - it is difficult to maintain high speed driving and a little more difficult to drive in general. It is felt when driving on asphalt, but ride on ice / snow - solid pleasure.
Today we will talk about how to independently install spikes on the bike tire to make winter studded vocations. We will also consider the methods of installation of homemade spikes on the bike tires with their own hands to ride in winter on a bike
The bike, of course, more implies a ride in the warm season, however, some extreme widths do not leave their "iron horses" and winter, having arrange winter cruising in nature or simply using them as an ordinary vehicle.
The operation of the bike in the winter requires not only excellent physical training of a cyclist, but also presents special requirements for a bike. So, a few useful tips on the winter operation of the bicycle:
· Be sure to install winter studded rubber. With frequent movement on ice or rolling snow, tires are needed with a number of spikes of at least 200-350 pieces; For traffic on city streets, spikes can be smaller - from 50 to 200 pieces.
· If only tick brakes are on the bike, then at least one of them (in front) must be replaced with a disk. The thing is that the V-Brake brakes operating on the rim clamp significantly lose their efficiency in the cold due to the icon icing. The wheel can make up to 10 revolutions from the moment of pressing the brake. What kind of security can we talk about when a bike for 10 revolutions passing a distance of 20 meters? In the cold, disc brakes also work worse than in summer, but still much more efficiently than the brake V-Brake.

· When moving around the winter roads, the chain is necessarily clogged with mud and road reagents. After each trip, it is necessary to clean and lubricate the chain.
· When driving through the snow, the stars and speed switches are very quickly clogged with snow. It is recommended to periodically stop and clean the speed switching mechanism.
· In the presence of cracks or chips on the paint and varnish bike cover, squeeze the damaged places, otherwise the rust is a rust of the frame, and in the summer you have nothing to ride.
· Sloves sleeves and carriages "Dube" in the cold, passing inside dirt and other nasty. We recommend every two months to disassemble and replace the lubrication of the bushings and carriages.
· In winter, very quickly darkens, so be sure to install a red flasher and a cataphtus on the bike to designate your presence in the dark, and install a headlight, better than LED.
Many cyclists ask themselves the question in the winter - go to the studded tires, or not. One of the decisive factors against bike spikes is becoming a considerable price of high-quality winter rubber. Only one bike coating with spikes can cost five thousand rubles - so much on the veloresin is not always ready to spend.
But by the way, such rubber is worthwhile - the spikes are securely bite into ice areas, allowing the bike to keep the trajectory.

No desire to buy? You can do it yourself
Immediately, let's say, it is unlikely to be able to save on self-touching, but it is possible to achieve a worthy contact with the icy surface.
What we need for independent manufacture of studded veloresine:
Old tire with a high protector (it does not work completely);
- Shilo;
- A couple of hundreds of self-tapping screws with a press washer;
- silicone, or shoe glue;
- old cycler;
- pliers;
- screwdriver;
- Filed.
All necessary materials found? Begin!
Decide what kind of drawing you are going to do. Optimally for most cases - insert spikes in three rows - on the sides and in the center. It is possible to do without the center to maintain the rank and giving the properties of the winter holder for turns and in narrow ice kolas.
You can hiss in four rows - this is especially reasonable if the checkereds in the tread have an even amount.
Deciding with the drawings of spikes, take the punctures of the tires in the centers of the tires.
Remove the tire inside out and start screwing into the pinched hole. Self-tapping screw - a small part of it should go out directly in the center of the primer. The occupation is a vigorous and long.
At the next stage, we start to make a fur coat. To do this, we need an old cycle camera. Cut it, lay the inner side of the tire (not to the very edge of the cord), all right all over and align and start mounting it with glue. The task of the fur coats is to protect the working cycling chamber from the cuts of the hats of the screws.

The next stage implies the stratification of the screws to an acceptable level. The side can be left, but the radial spikes will have to cut. Leave the edges of radial screws protruding no more than 1-2 mm. Side - to taste.
What to cut? - pliers, pliers, file, grinding machine. Floors, or pliers you will produce a rough trimming, and with a file - align for a condition close to what we see on factory rubber.
That's all.
Features of independently made winter cyclocks
Not the most perfect rut;
- Pretty massive mass of design;
- archaic spike, inferior to what we see on factory rubber;
- cheap and angry!
Video instruction
Do I need all this?
Ship Women for those who drive downhill, or participate in cantry races, or in cycling.
Runs for downhill are customary to clean before skating, but the soil will not be softer - the spike increases the grip with the frozen earth, it is important and it is felt.
In winter cantry races without thorns, it is objectively more difficult to work for full force. While the snow is soft - good, but the plots on the tracks are different.
In cycling, spike is safety. When you drive along the tracks, think about how dangerous is the care of the wheel on a sudden icebreaker, and outside the tracks - in the forest, on the sitting snow areas, the cycle of winter bikes saves fans.
Buy good veloresin for winter, or make it yourself, as described above in the article. There will be less on the tackle, but its advantages is still more.
Cycling for many this pleasant pastime. But for those who like to ride a bike in the winter period there are other studded tires. Next, we need a tool: a good, suitable screwdriver for self-tapping screws, head at 7 (8 screwdriver or drill, drill (2-3mm chalk, sewer, strut for a tire. Place the tire, those places where spike can be sitting with a chalk or marker. . We place evenly. We take into account that the tire weight increases with a large number of spikes, and the necessary holder will not be provided with a creative approach. It also does not need a creative approach. It should also not forget about the weakening of the tire, due to the gap of the Cord to the drill and self-drawing. Drilling marked places Drill with a diameter of 2-3 mm. Between the sides insert.

Tires "made" in one evening with a screwdriver, eye. Between the chamber and the tire laying - the tape of the plaster in one layer. Self-tapping screws are the smallest, 2.5x10. Impressions: Tires are extremely inconvenient, new screws are sled. On ice and the rammed snow grip with dear very good. From the icy gauze, Motoval was driving under a very small angle without problems. When braking and turning the road holds. It is impossible to go along the loose snow - too much resistance strength. On the photo the wheel after 400 km. Half on ice, the second - on asphalt. #eleven.
We drip off the screwdriver screws in the slot, outside the head. Spin so that the first round of carving over the nut appears. Visually and manually control so that the tire is well compressed by the spike head from the inside and the washer with the nut outside. And so with each spike. Be careful, the ends of the screws are traumatic! May suffer: body and limbs, clothes, parquet, lacquered / polished items and especially impressionable animals! Do not forget that at speed and when rotating, such a wheel may not be inhibitably injured both its owner and others. When assembling the wheel between the chamber and the tire. Today I decided to update the sacred screws on the rear wheel of his bike. Why only in the back? Because they did not erase on the front :) Although the front wheel is responsible for controllability, I wanted to update the screws in the back to get rid of slipping and drifts on the ice.
So, on the front wheel of the self-tapping screw, though erased a little, but they still roll and roll, and I don't see the point of replacing them, they work well. In the back wheel, the screws erased almost completely and the effect of them is already very small: I began to slip hard on the ice, the rear wheel often demolines. There were no drops, but control over the road weakened.

I want to tell you more about how the self-wear is doing. Only the central row is stepping. The side rows work very rarely, so they are almost not wearing on both wheels. The front wheel is loaded weakly, so they practically do not wear out there. On the rear wheel is increasingly serious. Imagine that we have a wheel with new self-draws. After 10-20 km, the self-tailed ride on the asphalt is noticeable to apply. Then the wear rate will be reduced. After 40-60 km of the asphalt, the self-tapping screws will already perform from rubber quite a bit, but still will ensure good clutch with ice. After that, the wear rate will be reduced even more and only after 100-200 km asphalt they will erase so that they will stop working. Therefore, do not be afraid if you notice that after a few kilometers of the asphalt coating, new self-tapping screws were noticeably erased :) I drove for this winter yet, just over 400 km and only now I decided to progress the rubber again. Moreover, it must be remembered that winter 2011-2012 until mid-January was almost no bad and I had to ride almost only on asphalt. I think if winter was normal, my spikes would have enough to spring.
Mention and gaskets. After the camera was cut through 3 times the camera, I decided to go to extreme measures and made a gasket between the chamber and a tire of three old chambers in the rear wheel, and on the front - from the old tire of a half-color. The bike has become noticeably harder, but I'm used to and now I can maintain a fairly high speed.
So, here's what the old sobbing screws look like. They almost do not help:
And this looks like new, just screwed. They look scary, but you only need to be afraid for linoleum :)
Replace the screws are not difficult. I just twisted the old and screwed new ones. Side rows, of course, did not touch. On the twisting of old screws left less than an hour. A little more than an hour left for screwing new ones. Rubber, by the way, almost did not wear out and new self-tapping screws are sufficiently tight. I also want to draw attention to that although I use the most budget tires (250 rubles per piece), its condition can be assessed as excellent, despite the fact that I drove at least 300 km on asphalt and only a little more than a hundred - in the snow (winter , damn, miserable). Those. Self-tapping screws reduced rubber wear when driving on asphalt.
Last time I asked a friend to apply to me the screws to the required length. I don't want to disturb the second time and I decided not to complete the screws at all. As can be seen in the photo, they protrude from rubber by 0.5 cm
I was hoping that rushing a few km on asphalt and they would appreciate. Actually, almost this happened, only they did not finish, but they were over in the tips. After a couple (quite heavy, by the way), they were asphalt kilometers without acute ends, and through 10km asphalt and 20km snow (well, snow does not count) self-sufficiency are quite suitable, slightly hypertrophied spikes that are perfectly kept on ice and perform only 1.5-2 mm. Now, when they became shorter, their wear is noticeably reduced and it will be possible to calmly ride

Actually, the result is: new screws are not needed to negotiate, just ride just 2-3 km on asphalt.
The studded bike tires make it possible to enjoy the ride on a bike and in the ice and in the snow, without fear that he cannot cope when driving and falls on a bad road. After all, the road often happens simply not predictable in the winter ride.
Studded tires are a similarity of automotive analogs, with a solid metal tread, which is located on both sides of the tire. It makes it possible to ride without any problems on an ice surface, but provided that it is not a strong pumping of the wheels.
The spikes on the tire are of different shapes:
- pointed;
- flat.
In addition, seized tires are with a different number of spikes.
One view is the two-row tires. They are located on the sides. With a good pumping of the wheels, they practically do not come into contact with the surface, only when turning. This concerns the weather conditions when there is no ice on the surface of asphalt. But if necessary, driving on an ice surface, the wheel should be less pumped. And the weather will work exactly those side metal spikes that are necessary for contact with a slippery surface.
Another look is four-chain tires. They like the two-row tires, but the difference is that they still have additional two rows of spikes. That is, one and a half times increased the number of spikes on the bus. They are more powerful, make it possible to confortably move where there are no normal roads. But first of all, they are designed to ride on the ice surface, but at the same time it makes it possible to ride on the roads.
Important when using such a tire:
1.This do not carry out strong pumping. And then cool turns, and the descents will be a cyclist.
2. And then this makes it possible to have a good tire grip with a slippery surface.
3. Activities of harsh braking and studded tires will last long enough.

And after installing the studded tires, you need to pass the routing process. But it is necessary to do it very carefully. It is necessary to not harm the spike and tire itself. The routing process itself is based on asphalt and within an hour with a slow bike movement. This will provide a studded bus for a longer service life in good condition and without loss of spikes. And then any bike trip will be in joy even in winter.
It came in winter and I had to do something with a bicycle, so as not to fall on the ice. I could buy a finished studded Vellesein - it would cost me 4-5 thousand rubles. Not only because of the thirst to save, but also from the eternal desire to do something with your own hands, I decided to make winter cycle bumps myself.
It was bought: 2 budget plates for 250 rubles. each; 400 pcs. 13 mm. self-tapping screws (about 100 rubles).
Tires were chosen with large "teeth" so that they could comfortably fit the screws. Total tanks have 80 + 140 + 80. I did not want to screw 300 self-sneakers, so in the side rows I inserted the self-tapping screw through one. As a result, about 190-200 screws were inserted into each tire. It took the tires about 200 grams.
So, tires are bought, self-tapping screws - too. We must start work. First you need to do stinting holes in the tires. Without them, the screws will often go crookedly and get out of where necessary. It is very important that the screws "look out" from the center of "tooth" - this will prolong the service life of the tire. To do this, I took the drill and began to drill holes. It was, to put it mildly, hard, so I came up with a new way: I pushed the nail with pliers, heated it over fire and made it holes in the tires. It was no longer difficult, but still occupied a lot of time. And then a brilliant thought came to my head - to make holes with a selection! Sheltered at home did not turn out, so it was necessary to buy it. Dochil holes - the best option.
Holes are ready, it's time to screw the screws. Self-tapping screws I bought 13 mm with pressshaba. It is very important to buy precisely with presss, because Only they have a wide enough "hat." I screwed the screws into the tire with a conventional screwdriver. The tire inside out did not turn. The main thing is that the screws are screwed out exactly. You do not need to plant them with glue. Self-tapping screws should be screwed up so that at the exit he is a little fosplated thread rubber under him.
Self-tapping screws, go on. Now they need to sharpen. I had no sharpened, so I asked a friend to treat the spikes. The self-tapping screws were dyeing strong and finally sharpened sharpening than they. But, nevertheless, they managed to apply. On one spike tire, there were slightly longer; I put it on the front wheel, because there is a smaller load on it and the quality of controllability depends on it. The side row of self-tapping screws can be turned on weaker (the main thing is that they are not sharp), because they will work only when turning. Tire with rolled screws looks like
Self-tapping screws and sharpened, but it is not all. So that the hats of the screws did not damage the camera, you need to make a lining. For this, I have been brutally cut two cameras - one old and one, I will not beat this word, new. Now you can collect the wheel. When laying the camera, be careful - do not scratch it about the spikes.
Yesterday I tested my homemade winter bike breaks, while going about 25 km across the snow and about 35 km across asphalt. When driving on asphalt, quite loud noise is created, but it is impossible to call it a big disadvantage. When driving around the snow and ice, the tires showed themselves the best - while friends on ordinary tires were constantly falling on the ice, I drove absolutely not bothering, as if on asphalt :) If you compare crowded tires with usual, albeit with an evil tread With emergency braking, the difference is simply monstrous. Sky and earth! With observed tires with a sharp braking at high speed on ice, absolutely does not contact, the spikes leave a deep mark on the ice.
The disadvantage is only one - it is difficult to maintain high speed driving and a little more difficult to drive in general. It is felt when driving on asphalt, but ride on ice / snow - solid pleasure.
As I said, about 35 km Yesterday I had to drive on a naked asphalt. A friend who has a much greater experience, said that at the arrival home I will have to change the rubber, since the spikes from asphalt will erase. But it turned out that the screws practically did not eat. They only climbed and became not sharp, but the length remained the same. However, it is worth noting that it is not once at times - I was just lucky with the purchase of high-quality screws. In general, on asphalt on such rubber ride, although it is not desirable, but you can, if you keep not high speed.
The use of homemade winter studded vinezine. Pros and cons
I recently wrote how to make studded tires for a bike. Some time passed, I managed to ride on it and now I am ready to talk about the advantages and disadvantages of this voellesin.
First of advantages.
Although some say that they normally go in winter on ordinary rubber, but, no matter how cool, the difference is on the face. Especially when braking. But, it is the quality of braking that is most important when riding a bike in winter. Well, with advantages everything is clear, we turn to the shortcomings and difficulties.

disadvantages
Of course, on such rubber a little more difficult to ride. But this is not the main thing. When driving on asphalt spikes on the rear wheel are noticeably erased, so for the entire winter I will not have enough rear wheels (everything is OK) and have a new tire, or unscrew the sled screws and screw the new ones. But in this case, the tire rubber can quickly wear out, because The new portion of the self-samples is most likely not going on the existing thread, but will pave a new one. But this is not the main thing. When I decided to encourage a bike plate for the first time, then one of the main reasons was - the lack of winter cycle coats on sale, or rather rarity, and therefore without choosing options. But now there is on sale, and the choice of some and in online stores can be purchased, probably any.
But looking at the location of the spikes of metallic and rubber in cyclocks, and understanding how and where there is a desire to ride in winter, then the mood has not improved. As if, inventing products, workers of tire manufacturers, care about their products with too idealistic positions. Either asphalt and even ice, or the risen snow alternately with a honest road. And the spikes are how they are specifically made so that they are raised rather on solid coatings, and it was necessary to buy the next cycle bed.
As a result, reasoning is to spend money on what there is or do what is much cheaper, but just as you need, chose - to do.
Found selection - Tires
First, it was determined with the parameters - what should be the tire. And considering the previous experience of the adhesion of old, with a worn partially protector, decided that only a new and non-random, which is a gift (or almost for nothing), and the selected catalogs, or from those suitable on sale. As a last resort, he decided to expect the orderly ordered in the Internet, but it was the one that would be more appropriate.
1. - There must be a fildal, as to shoot and put on the cold, it is much easier than with a wire frame - tires with aramid frame softer, obedient. Yes, and pierced with a seboard, drill, holding the direction of puncture and drilling, it is easier at the right angle, like screwing the spike screw. If the tire can be deployed to the plane. Its and pressing the clamp to the plane of the workbench or plywood (boards) is easy.
2. - There must be with kevlar cord, as it is to pierce the tire on the cold, and then glue - the problem is not difficult because of the frost itself. And the experience of the tire break in the winter was already - drove along a broken section of a metal fence with a protruding rod, which is not visible under the snow. Then she put out not only the camera, but also the tire - the gap was one and a half centimeters. The cold procedure took more than two hours. The fire had to be breeded to glue at a positive temperature.
3. - The main point is the location of the rubber spikes of the tire, because they will have to install metal spikes. So that the height was not more than 4 mm - less than the branded winter on 1.0 - 1.5 mm, and the location and quantity would allow to drive on a hard coating with smaller losses. And so that when turning and passing inclined icy surfaces, the spikes turned out to be at the site of the highest application forces - holding abilities. And necessarily - so that the spikes were located more often along the contact trail, for smaller mechanical losses when driving on ice.
4. - Sizes of rubber tire spikes. So that there is no size from the spike, along or across, less than 8 per 8 mm, since it is impossible to hold the spike under load - the rubber spike will be overstated towards the operation of the load on the metal spike.

At found and favor, in all parameters, the tire was 444 spikes with sizes 9 by 11mm and 8 by 11 mm, 4 mm high, located well for planned winter cuffs on ice, asphalt and stony-brewed roads.
They turned out to be Kujo DH 2.25 K, for installation on the rear wheel, and Kujo DH 2.35 K, for installation on the front, by the condition of rotation, and hence at a large angle than the rear wheel, run (move) to ice obstacles.
Produced - IRC.
They had a pleasant eye face lettering - Made in Japan, and sidewalls made of red rubber, softer on frost, prettier than black tire.
Basically, as if all over the tires, now it is necessary to find what will then be metallic spikes.
Search for suitable screws - spikes
The trip on the shopping of the fasteners had to spend a long time, because what was offered to some, could be worse what could be found somewhere else. Only two vendors were visual stands, to choose the screws, but also on it for clarity, only one, two sizes, and not everything that can be on sale. Yes, and on sites I had to search for links to articles of self-dedicers who were ahead of me in such an idea.
In all read articles, screws were used with sharp ends of screws or washers with curved pointed edges (homemade or furniture with a threaded garbage - a washer-nut with horns), scanned with exhaust or ordinary ripples. And those and others have one peculiarity - to tear and tear everything that will be hurt and for anything will emit - clothes, wallpaper, linoleum, etc. Another reason for the refusal from the washers is needed those of them that are furnished, fasten with a screw with a flat washer, but even with a thread retainer, they can easily lose. But the main thing - it is impossible not to be injured, putting on or removing such a tire, even in gloves or mittens from strong, thick skin. Attribute that will definitely need to take with me with other tools if the spikes are so sharp. How to order them - the problem is also. Yes, and losses when moving with such washers big. In general, the pucks are not.

As a result, the choice stopped on screws-screws with a hat-washer, harvested, galvanized with a tip - drill.
Ends-rolled these screws do not scratch hands, do not cling to the fabric, fleece, carp. Do not stick into linoleum, do not fight wooden surfaces under a small load. But since the tips are made to drill metal, then harder (hard) than ordinary self-tapping screws. Tested, trying to scratch the glass with self-drawers with swirls and sharp usual. The cutters managed to scratch with a smaller pressure and immediately.
It was organized and dimensions - 7.5 mm, 9 mm, 13 mm, and 16 mm in length, and diameters - 3.8 mm and 4.0 mm, which were quite suitable for mounting in the tires with different thickness of rubber.
True 2 of the smallest size were with hats with a diameter of 7.75 mm and without succounted extensions. The rest with hats-washers with a diameter of 10.7 mm. Sellers call them for some reason with the tops.
Since the spikes found and bought, it was possible to buy and liked the tires that waited for me in the Trial-Sport store.
Combining the theory, guessing, someone else's and your experience in a single whole
At first I had to think about the installation method - screwing screws-spikes, how to drill and pierce the bus, so as not to damage the cord. Trying on a sliced \u200b\u200bpiece from the old tire, suturing over the drilled at different angles and with different revolutions, swelling of different diameters - from 1.0 mm to 4.0 mm, and changing sharpening, came to the output. The drill is needed with a diameter of 2.0 mm - 2.5 mm, sharpening at an angle of 45 or more degrees, with a zero or negative corner of the cutting edge, an attacing part of the drill. The best indicator was when drilled by such a prepared drill, but in the opposite, as when unscrewing, the side of rotation - the Nights of Cord were absolutely not damaged. But even with the right rotation, the results were quite good - the Cord was abandoned in isolated cases.
TECHNOLOGY is as follows - first shill to pierce the tire where the spike will be installed. At the corner of the spike installation. To prick outside so that inside the tire is sewn to 15-20 mm, so that the place is also visible - the direction of the opening. Take a drill with a drill and switched to the opposite, direction of rotation. Maximum borders are not more than 1000. It is more convenient if it is a battery drill with a launch cleaner speed. To notice the place and direction of drilling, pull out the sewer and immediately drilled into the resulting hole. To postpone the drill with a drill, take the second drill - the electrical card with a crossed chopper installed in the cartridge - pin, suitable by the number to the screw for the screw-drill. Place the screw-drill on the tip of the crossover pump (Pina) and screwed into the hole at the angle of drilling - spinning sewing. Check that the screw drill is spike, it came out exactly in the desired, shib place.

And just 443 times, and then for the second tires as much - exactly 444 the same procedures - "Chinese work". Little "trick" so as not to pierce the tire for each spike separately, he gave so many holes as they assumed to install spikes on a given day (slave). Then in the obtained holes pinched parquet nails, and took them out only before drilling one by one. Then she inserted nails into the resulting holes, but it is thicker - 3 mm thick, immediately after drilling. And when I supervised the rate of the day, then I took the three-millionth thickness of the nails one after the screw-spike screw. So the holes are not "disappeared" - they were not delayed, and faster and more accurate than all procedures with each spike repeat.
First, a number of extreme, under the appropriate angles, puck and inserted parquet nails (easily inserted) - it is immediately visible, evenly and correctly are the holes for the protruding row of nails. Then another extreme row, and then in the ranks and others. But not in a circle the whole, and the site - the sector to which the tire divided as on working days. Observing accuracy and attention, each stage of work is visually easily controlled by smoothly delivered cloves.
It took the listed works, about 30 working hours - two weeks in the evenings.
It is possible and faster, but after all I have worked out the control technology, already beautifully - visible and predict the result of the work.
Attention - to prick the tire with a seboard once for one spike, accurately by the place of the hole according to the drawing, taking into account the angle over the red dotted line - 3-5 degrees from the black dotted line, not more than.
Tire 26 per 2.25 inches, used spike screws of different sizes - the middle row is the smallest, blades, then it is slightly larger than galvanized, and on the extreme rows are the largest with the top-up hack.
Close-up - Tire 26 at 2.35 inches. It can be seen that in the extreme rows, the screws are screwed under advantageous for the holding for the ice, an angle. All spikes are the greatest, with the top hat.
I called a familiar trialer, asked: - "Are you left unnecessary, with a torn nipple, a chamber of thick rubber?" It turned out that there are already 3 pieces. Here is from these cameras and cut the strips. Cut the sidelines and used the outdoor part. Two chambers with a thick wall thickness of 1.5 mm and one with a wall thickness - 3.5 mm - heavy, the whole chamber weighed 600 grams, like a tire.

Tolstoyed chamber, sliced \u200b\u200bby middle sidewalls. To insert into the rear achepted tire - protects the velocamera from the screws-spikes hats. Loaded more in the middle rows of spikes, small diameter caps are more embossed.
I installed a thick-walled strip under the back tire, and the fantasy under the front. One persistent - spare. Pieckers inflated, used Swalba, at a price of 240 rubles - ordinary, but of high quality rubber. Bought in Leader Sport, on ul. K. Marks.
The rear tire from the inside, the camera is visible to the chamber with traces from the heads of the spikes. There were no breakthroughs, there was no hint on the blows - "gaskets" can be thin.
Test
This is the most exciting and interesting, there was a dark pair from the station and with the intersection of Baikal on Ice.
Initially, of course drove to the central passenger station on asphalt.
The first impression is the sound, as from a dog running on a linoleum or parquet with released claws, but more accurate. We are going with a friend who has any spikes on wheels. But since the ice is not, we are going fast and as if without stress, although carefully, so as not to slip and away from cars.
Samples of rolling on the rink were surprised, but only some moment - ordinary riding, turns and braking without problems. But there were no cars with pedestrians on the rink.
So there was no unusual impressions. I tried to slow down sharply, unfold - normally. It seemed that without spikes from a friend, it turns out less confident, but it did not seem some indicator. We are driving in the train to Dark Paddy. How will it be there?
We arrived, look at the trail down and ... drove. At first, it is not in a hurry, and then somehow inexplicably confident and risking more and more. Drinking with the rear wheel, helping and dragging sometimes one foot on the snow, like motocrossmen, and even accelerating and jumping on some sites. Horror. Slope for suicides.

I look around - my friend is not, his bike too. I had to be dismantled and wanted. It turns out that he is braking the rear wheel and finding that it does not act on the steep slopes of the track, began to slow down the front, but it did not help on a snow-covered trail. He began to accelerate and hit a piece of soil naked from the snow. The front wheel blocked by the brake, and he had rims, stopped them both and shocked one, through the wheel of another, down the slope. But somehow silently - did not have time to get scared and scream. Then the bike flew there. One lies downstairs, in deep snow silently, and the other, turning the wheels in an inexplicable position, in the top ten meters away. The one that without wheels speaks some kind of phrase out of a joke and is unprinting about a close relative. The drifts accepted both underdeeffectively - flew next to huge stones and lying trunks of trees.
Looking not the above-described action, first fascinated by his bike. After all, never slipped, although it was afraid.
Next below, on the river Angasolka, there was a super test. I go along the trail on the bridge, and from it to the hillous ice - on top of the snow, under it a layer of wet shuga, and at a depth of 5-10 cm. I drove to the tree, I looked around, and Comrade is bypassing this Icecrowzier on the slope with the bicycle on the shoulder. Shouts that it is impossible not only to go, but even go - slippery and wet. Once you fall and then go will have to be wet.

I let go of a tree and food, no sensations, ordinary ride, only splashes of ships to the sides. I also liked, rode in different directions, because the ice on the river is hijacked and under the tilt, like a slope. A strikingly, no uncertainty, go easily like a dry and solid gravius. I did not want to leave further, absolutely unusual feeling from ordinary confident skiing - you're easy, switch, accelerate, brake, and it is a very slippery and uneven place, more slippery than just ice. At such places I did not even go, but on the contrary, I was kept.
While drove to Baikal, of interest chose the opportunity to go on the ice of the river, where he is under a shigoy, wet, hill, and some kind of ride is absolutely ordinary, there is no voltage, so as not to slip. Easy to move on ice and drive back to the shore, where the trail goes there.
On the shore of the lake, several skiers took skis with sticks in their hands, and went to the snowy attorney, so that they were driving to Slyudyanka.

Looking at the absolutely smooth and smooth ice, a little confused - how will it go? But by moving on him, heard the noise from the spikes and everything ... no other feelings - like on a flat road. I accelerate, braking, turns, I do such that I almost fell a little, jumped - I scored as I could and ... never. Even strange, because it is for sure that you can ride and on a flat asphalt. He began to mock himself and the bike, but no maneuvers or braking could have slipped or make a drift on ice or a thin Nastya. True, it turned over several times through the steering wheel, and directly to the sob. On that day, the problems were only in a friend - I was not faster than 6-9 km / h, and then on the fixed tires. On normally inflated, even 3 km / hour the problem - fell, hooked every 5-10 meters. I can not imagine how many bruises and cones drove home. True and I brought - from flights through the steering wheel. One of the flights was from what sharply slowed down with one rear wheel.
The main impression is one thing - no impressions - ordinary skating without problems and insecurity. Self-jointing "hold" for a lot or a dense snowy road much better than new tires for summer pure asphalt.
Another time to the Awhast River, almost 20 km traveled along the highway and Gravichka - did not lag behind, even sometimes leaving forward on the descents, although everyone with whom a small "gang", except me, drove on branded ham.

Descended to Baikal past the village of Angasolka on frozen primer. I, in terms of curve and wet ice on the river of the Angassol, and those that on branded spikes, along the trail. The owners of the "firms" tried, one even fell, and stopped risking - to go through the wet ice, and they did not risk harsh maneuvers on Baikal, but in a straight line it was possible to chase firms on an equal footing. True on the "firm", they could afford to press sharply and highly rear brakes - entered a little toward the rear wheel, and I could fly through the steering wheel.
It is a pity that I did not take the camera and there are no pictures of those tests. Twice went to the company with a diamo (who knows) on his sipovka and on the highway and in the snow and on the ice of Baikal - for him and on the highway on the asphalt do not sneak, he goes on the usual branded doggings on ice under 35 km / h - monster.
In the train, when laying a bike, there was no concern that it was possible to break clothes or fleece gloves about homemade spikes, specially taken.
By the spring, it became noticeable as stupid - they become semi-circular ripped screws, but on the strength of holding about the ice and risen snow, it did not affect. True, due to the fact that the spikes began to be slightly shorter, on asphalt and ice ride as if it was easier. And more - the more stupid spikes-rolled, the slower the abrasion occurs - the surface area of \u200b\u200bthe contact increases. It becomes approximately equal to the area of \u200b\u200btempered spikes, like branded cycle coats, without winning inserts. He expected in the first winter with spikes about 700 km, more precisely I do not know, since the cycleospideometer "died" after 600 km. According to asphalt and concrete with ice, it turned out approximately 100 km, more about 250 km on gravel and dirt roads, the rest of about 400 km along the ice and dense snow.

I think that in my operation, enough ride before replacing some spikes, not less than 1500 km.
Theory confirmed by practice
The proposed corner of the spikes was obtained from reasoning that the greatest shift load on the spike during braking. And so that the spike is best "bought" in the ice, it should be installed under a negative angle to the plane of the support when moving forward.
Side spikes are also under a negative angle to the support plane with the corresponding side, as when driving down the slope or when turning at speed. And since when the shift load, the spikes will be deviated in the elastic tires of the tires, then this deviation will be smaller, due to the greater the thickness of the rubber over the spike and greater elasticity of the thicker layer of rubber.
I did not glue the gasket between the cycle cell and the hats-spikes hats, since the gluing will not be dense, and the water and dust will fall into the poor - the dirt in it, and insert and remove this gasket, it does not make it much special.

How will water get there?
Suppose it was necessary to ride on wet places, and then to remove the tire and the camera in the heat - water from the internal volume of the rim flow into the tire.
Yes, and glue needs a lot - 2-3 full tubes on the wheel. With a mediocrous result - poor quality of gluing. After all, relief caps will interfere with the possibilities to stick to the rubber of the cropped chamber to the inside of the tire. And with a thick layer of adhesive, the "magazine" sounds will be published, which happened when the leaks were glued to the highway cycles on an excessive thick layer of glue - not high-quality gluing. And once the high-quality gluing it is impossible to achieve, then why do it bad? After all, if you have to replace any thorn, you still have to tear down a gluing.
I hope what happened in the end, and that gave me the opportunity to make sure of his guess and attached labor, will help those who are not afraid to spend labor, accuracy and attention to the final result - cycling where it was impossible earlier, but with Such tires are safe and pleasant.

Recently, it was easier to go, I decided to pump the wheels more comfortable. Actually, I pumped them not much, and so, as usual, everyone pumped the wheels in the summer. I went on affairs, and on the way back I descended the rear wheel. At home, I pulled out the tire, discovered two strange holes on the camera, despite the fact that the camera lining was CCEL. I did not steal and just stuck the camera. The next day I went to the night cruising and on the way I went down the front wheel. Thoughts began to custody in the head that this is the work of the sams, or rather, the hats of self-tapping screws that could damage the camera. Disassembled the wheel, pulled out the camera and accurately - the whole chamber was in noticeable marks from the hats of selflessness, and the hole was exactly around the edge of the noted. In short, it was exactly seen that the cause of damage to the camera was a self-drawing hat.
Such damage at the chamber 3 or 4. And this is not a hole, i.e. Air camera does not miss. But you don't want to go with such a camera, you don't want to go, because the crack can break at any time. Let me remind you that in the role of gaskets I performed an old camera. As can be seen, it is clearly not enough.
On a note
After the inspection of both wheels, it turned out that the camera is damaged only on the front wheel. With the rear wheel chamber, everything is in order. This is most likely caused by the fact that the length of the screws on the front wheel is 2 times more than in the back. This is logical: when braking, 2-3 central self-pressing is bought in the asphalt / ice and, if they act strongly, then the head of the hat is dug into the chamber. It is almost the same when the curves on the borders. From here we can conclude that it is not desirable to leave the self-tapping screws more than 1.5 mm. In addition, if there will be a lot in the central series of self-samples, then there will be a larger number of self-samples when braking it will work, which means that a smaller impact will go to the chamber.

What to do?
It became clear that the laying chamber is not enough. There will also be enough gaskets from the leucoplasty. In several places in the network I saw that people used in the role of gaskets a piece of linoleum. I had no extra linoleum, but I remembered the old half-color tire, dusting on the balcony. I cut her sides and inserted into the front wheel tire. I had to cut her a little to fit. If you do the same, cut the tire very carefully, because If you decrease too much, there will be a gap between the end of the tires, which will damage the tire. To avoid this, I stuck the joint of the rubber from the bicycle.
The wheel became noticeably harmful and it is bad. On the other hand, if everything is done correctly, I will be almost completely protected from punctures and can hardly pump the wheels to go easier. Someone can say that in winter it is necessary to ride low pressure, but when there are spikes, it is simply no need to increase the area of \u200b\u200bthe working surface.
Because I have one extra camera laying, I decided to add it to the rear wheel. Gaskets of two cameras should be enough.
Honestly, I do not know what will come of it and however it will be harder to go to the desperate act: make a lining between the chamber and the tire from ... Tires. It sounds scary, but in fact, everything is so there is \u003d) The old tire has been found on the balcony, the sides were cut from it. The tire itself was also cut and a bit shorten, because She probably did not fit inside the working tire. I put the resulting place of the junction with a piece of rubber so that the corners of the tires did not damage the camera. The resulting gasket was installed on the front wheel. In the back I used three more (how old was old, so much stuck) cameras in the role of gaskets.
Naturally, the bike was noticeably swayed after such a bullying. Honestly, I assumed that I could not constantly maintain 20km / h. However, normally drove about 35km.
Driving about 100km on such wheels, I disassembled the rear wheel to see how the camera feels. In the rear wheel, remind, 3 old cameras perform in the role of gaskets. With a detailed inspection, no damage, supervisors or scratches were found. On the camera were only soft, not sharp imprints from the heads of the screws and nothing more. As I thought it was an impenetrable option. The wheels, although it fell noticeably, but it is quite possible to ride.
Separately, I want to say about wear of the screws. The fact that the rear wheel is not enough for the whole winter, that's for sure. On it central self-tapping screws erased very much.
In principle, what else to expect in such a honest winter? If it were snow, everything would be fine. But I think when the self-tapping screws will speak only 0.2-0.3 mm, the erasure process will slow down. When they erase finally, I plan to unscrew them and screw the new ones. I think to screw more, because The more self-tapping screws (and they weigh not much), the less their wear will be. In the front wheel, the self-tapping screws were sticking out for 2-2.5mm, and stick out. Not even central. It is very good, considering that it is the front wheel that is responsible for controlling the road.
The spindle of the spike is a carbide tip, filtered into the steel body of the spike. Bulb such spikes is impossible and, subject to several uncomplicated rules, branded tires can be used several winters in a row. The bike in such a "shoe" is confidently going on smooth ice, it is good on the simplifying and modeled tracks, it is perfectly controlled by a cyclist. At the same time, for beginners, riding the ice track may be veryuseful. All bicycle reactions become smooth and as if slow down, so it is very easy to master the skill controlled drift, learn to control the slip, properly dispense the brake efforts. Of course, without falling here, it does not do it, but the bike on the ice even falls smoothly, so it does not lead to serious injury.
But there are also restrictions, and significant. First of all, such tires are suitable for driving in the snow, drowning snow and ice. When driving in the freezing land and, moreover, on asphalt, care must be taken and avoid slipping. Otherwise, the spikes will quickly fly out, and the remaining "will lie" along the tread, and they will stop holding sharply. Deep snow is a difficult cover for a bike. Riding on it requires the same skills as in the sand, with that
only the difference that it is almost impossible to accelerate the speed of the "goiser" speed (the density is not the case) of why there is a lot of strength to overcome snow sections.
The maximum wide Rubber will help here much more than sports delets of other cyclerock.
There are branded cycling "riding" and another very significant minus - the price. Naturally, not everyone is ready to part with such a sum for the sake of several frills on the ice of the frozen pond at the cottage. Therefore, many spike the wheels of the bike independently. Someone, without being causing, screws ordinary self-tapping screws into the tire. However, they keep a maximum of a couple of hours, and on the manufacture of such a "riding" without a screwdriver takes the whole day. But the method of misappropriate by a construction dowel has not yet lost relevance. True, the patience for its implementation will need angel. Both described methods are suitable, mainly for ice tracks. For riding in a more diverse rough area with departures on asphalt, you can use automotive technologies.
There is at least two ways. The first is to install in the wheels of the bike of automotive spikes on glue. This procedure can be made in a specialized tireboard, and can be independently. At the same time, the choice of correct rubber is important - with a solid, wide and high enough checker. For the front wheel of the bicycle choose the spikes shorter, longer - back. In the beams of the tires are drilled (short-circuited!) Holes and insert the spikes smeared glue. The second option is to acquire special branded spikes with a special screwdriver. In this case, drill the wheel and smear the spikes are not needed. Just screw the spike, like a self-made, in a checker!.
Self-tapping screw - the worst of the self-defense options. Time leaves a lot, and keep short. Branded self-tapping screws with a threaded insert - a good alternative. Included there is a special screwdriver. Another fashionable direction of winter cycling is the installation of a speedwine spike on the bike coats. Speedweight spike is fundamentally different from the cross-length. 28 mm steel - not a joke. The spike is inserted into the pre-drilled hole in the bus from the inside, the outside is spinned with a flat washer. Such spikes are not sold in stores and it is possible to get them only through athletes engaged in ice spectional, or to order at the factory. Bought wonders in such rubber is able to work miracles on ice, but it is necessary to remember about the safety rules. First, the bicycle rubber is in no case so that hundreds of holes do in it. Its cord and the service life can be reduced to several high-speed sessions. Secondly, the spikes themselves are strongly moving in the body of the tire, which changes their nuts are gradually weaken and spinned. This is also followed by constantly. There is a good potential for new ideas. Nevertheless, the pleasure to rush with a speed on a bicycle on an ice stroy is difficult to compare with something.
Speedweight spikes require care when installing and regular care. And good equipment - after all, they can not cut the ice! As the only alternative to spikes, there are structures that make something like a snowmobile out of the bike. Instead of rear wheels, a small caterpillar is installed, and a ski is put in front. Such a system works mostly on deep snow and there, with a certain skill, you can have fun very well. However, on the rolled tracks, on ice and on the asphalt you will have to be disadvantaged.
But still what to do with the usual street ride? Why it is impossible to just encourage the tires with ordinary car spikes, you ask? This technology is known in most tire companies. Good car spikes is also not a problem. But everything turns out not so simple.
First, even compensated bicycle wheels cannot guarantee a reliable clutch with icing asphalt. If the ice is thin, the thorns will shift it through and strengthened into a solid surface, clinging for which he will not be able to. Secondly, in order for the spike well in the wheel,rubber must be very solid, and in order for the tire to keep the cold and slippery road well, it should be very soft.
For automotive tires manufactured by millionic circulations, there are technologies that unite these two qualities for our market. In addition, the area and the shape of the spots of the contact of the automotive or motorcycle tire, unlike the cycling, especially in the slope, to put it mildly, differ. Even if all cyclists
If you want to safely ride in winter (and not only) on a bicycle, then you need to take care of the good clutch of the wheels with snow, mud, sand, on ice. You can buy studded rubber, and you can make a studded rubber on the bike with your own hands.
In this article, let's consider a more affordable and cheap option to do.
How to beat rubber on a bike
Option number 1: Alteration of tires (large protector)
You will need:
- deep Protector Tire
- Small flat tapping screws (packaging), in this case, good suggests are well suited
1. Purchase in the construction store the packaging of screws.

2. Take the drill and drill 2-3 mm. In those places where you are going to install the spikes drill holes.

3. Try to screw the screws under the perpendicular angle (90 degrees) to the tire, it should not stick to the side.

- Complete the drilling of the opening and screwing the self-press. When you turn the holes first, and then you will screw the screws, then the search for holes will take you a lot of time.
4. After these works, the reinforced tape is pierced the inner surface of the tire (in 2 layers). You can also use special anti-precipol tapes in the tire, which are sold in a bicycle car. They will help protect the chamber from damage to the heads of screws.

5. Put the tire on the rim of the bike. Be careful during installation - you can face hands.

How to make studded tires on a bike
Option number 2: Alteration of tires (small protector)
You will need:
- cycling Tires with Small Protector
- Packaging of short bolts and appropriate thread set of nuts. Bolts must be short, not massive, nuts in height not more than 1 cm.
1. Remove the bike wheels, remove the tires from the wheels.

2. Determine the places in the tire where you can put the bolts (should be spinning between rubber protection spikes, be sure to centered and preferably at the edges, but not close to the rod).

3. Mark the selected holes with the marker. Drill holes with a smaller size than the thickness of the bolts (they will have to be twisted into the tire, but so the bolts do not fail).

4. Tighten the bolts into the tire on the outdoor side, then tighten the nuts on the bolts from the outdoor side of the tire. Then the nuts and tips of the bolts will work as spikes.

5. As in the first embodiment, to put the anti-precipolny tape inside the tires or proof the reinforced tape into a couple of layers.

6. Install the tires, lock the wheels on the bike.

Studded rubber on bike do it yourself
Option number 3: Use pieces of chains as spikes
You will need:
- Cycling or other small chain.
- Wire, fine bolts and wrenches, other metal clamps.
1. Such a simpler, but it is suitable exclusively for large disk brakes.
2. Purchase the necessary items.

3. Remove the wheels from the led, determine the size of the rim + tire with a flexible meter.

4. Be offset the chain obtained in the length of length.

5. Secure the cut chains around the rim and tires. This can be done with wire, bolts with nuts, other metal clamps.

6. Mount the wheels. If suddenly the wheels are not put in place - remove the plastic protection.

- WORKS FOR ISPORT RUNNIES DIY BIKE CIRCE MOUNT.
- Do not pump the chamber of the wheel very much, a slightly low wheel has a large clutch area with the surface of the road.
- For sustainable ice driving on the ice, the chain winding on the wheels (option number 3) is best suited. The wheel should not be wide.
- The old chain from the bike is enough to wind up one thin wheel 28 diameter. During work, use the squeeze chain.
- Even if you put the chain only before, and on the back - the tire with a high protector - the resulting design of the bike will be resistant to snow and ice, sand.
- Do not try to ride in studded rubber on the stones - the spikes will not save from such a road.
- To correctly put the chain on the wheel - first lower it, and how to fix the chain - pumped. Increased pressure in the chamber will be very good to keep the chain.
- Antiprocol ribbon can be made from the used tire with low (slick) with a protector (bald), cut off the strip of the required width with a used tire and put inside the used. If such a design is obtained by a cumbersome, you can cut the strip from the old chamber and put it on the rubber glue inside the tire used. Such a tape is better protecting the chamber from punctures than reinforced tape.
Warnings
- You should understand that cycling on a slippery road (snow, ice, dirt) even by bike with such a modification of wheels fraught with drops and injuries. Therefore, if the road is very slippery and it is difficult for it without falling off the bike, it is better to use another means of moving.
- Self-taps have enough sharp edges that can break through the camera with an incorrect or inattentive installation.
- The hissing of rubber is applicable to mountain bikes, it is not desirable to use narrow tires for this purpose.
- Do not patch the wheels, it can cause a drop from a bike.
- If you have chosen the 3rd variant of the hissing of the wheels, it should be understood that in the case of a puncture of the camera, you will have to remove pieces of chains and wear it after repair.
- The 1st and 2nd option are not suitable for dumbfounded, if you drill the tire, then break its tightness.
We hope the article helped the embodiment of rubber for a bicycle. Share in the comments that you have happened. Also look a useful video on this topic.
So, in the yard of winter ... (although, now, in the winter of 2006/07, sometimes it does not seem like that). Everything is actively (and not from the case) of the cyclist skiing in winter sooner or later a thought will visit: and whether studded rubber will be treated? And the more painful and the reasons will be more unpleasant, this thought was, the sooner it reaches it in the head of the cyclist ... The cycling culture slowly moves from the west to our dense steppes, and the merchants who are customized with the truth well known from school times are reached. "The demand gives birth to a sentence" - in pursuit of our, difficult work earned, dennaunas. Now it is no longer a problem to buy in Kazan factory studded rubber, unlike six-seven-year-old winters - you just need to be hungry. In the sports stores Kazan, it was even possible to see some variety of studded rubber: as many as 3-4 different models from 2-3 manufacturers. However, at the moment, some incompleteness of the problem of ensuring all the wishing bicycle rubber remained.
First, the studded rubber was delivered elementary little. What was in stores, for the season quickly got up - and some of those who want to buy a rubber, to do this, did not manage it ... Secondly, the choice of models is still small - they were brought mainly budget models, with A small number of spikes, as it seems to me, because of the adequacy of the winter cycling subculture. And finally - about the despicable metal. The cost of a set of factory rubber on both wheels could easily have the order of the monthly salary of the teacher of the university or other state budgets. Ce La Vi ...
So, the studded tires are needed - but they do not get them all. Conclusion - we will deal with it yourself. Presented here, the method of covering tires is not my invention, in addition, a network can be found in the network some of the descriptions of the obsection as presented by the method (using screws) and some others. However, it seems useful once again to describe the entire procedure in detail, accompanying the text with a sufficient number of illustrations.
1. The first task to be solved - search for a suitable tire. Requirements for the potential victim of vivisection:
Rigid rubber, since when braking on ice, they work, depending on the tread pattern, not more than 8-10 spikes - respectively, and the load will fall on 8-10 elements of the tread (hereinafter - "buns").
The "buns" themselves should be larger as possible, so that there is enough rubber around the screw, its holding.
The tread pattern should satisfy your ideas about the optimal spike location.
To illustrate the hissing process when writing this text, the following tire was selected (original appearance):
The tire was released by the world-known quality level by a Unnamed Chinese company producing its products under the trademark "Superdiamond":

The tread pattern of the purchased tire is as follows:

The following comments are available to it:
"buns" are somewhat fine and, as it becomes visible, in screws with a diameter of 4.2 mm, selected for misses, with a negligent adultery will remain quite small retaining their rubber "side";
The protector is asymmetrical relative to the plane of the tire, which can lead to the "lying" wheels when braking, however, the test drive is still to be.
Relatively close to the axis of the tire "Zigzag" is only 108 "buns" - and 108 closer to the sides. They may only work in turns ... Total - spikes may be not enough.
2 . Next task - choosing screws. Screws in the local markets and in stores - a break, and find something suitable is usually easy. Requirements for screws:
Flat from the outside (or at least without sharp edges) and, if possible, a larger hat area (to better distribute the load on the camera).
The length, on the one hand, exceeding the thickness of the "buns" is enough to hang out, and, on the other hand, not too big, since the surplus will have to trim / bite / grind - an additional difficult operation.
Hardness - spikes should not be on the asphalt in one day. "Metal Selflessness" is suitable.
In our case, the choice fell on the "universal screws with a press washer" size of 4.2x20. Length is vital, but I did not want to look for others. Having reached what was the first one. But the hats - the pounding! They look like this:

It should be noted that there are just 11 mm long slightly shorts, but they were not available where I took them. This option would be better.
3. We begin a hip. To do this, we will need a sewer and cross screwdriver. The process is obvious - they pierce the hole in the "bun" - if possible in the center:

If prick from the tread side - it is more convenient to aim, more accurately there are holes. Then, inside, screw the screw screw into the tire. To do this, it can be removed a little inside out. It turns out something:

"Wah-Wah-Wah! And so 216 times in a row." (from).
A little about how you can speed up this tedious process. It is clear that from punishing the holes and twisting the screws is not going anywhere. But the constant turning of the tire there is quite a long time. This can be avoided if you immediately turn the tire inside out. At the same time, since the thickness of the rubber in different places is significantly different (where the "buns" is located - noticeably thicker), then when turning out the exhaust looks inhomogeneous. Where "buns" are located on the reverse side - there is a small concavity surface. The following picture illustrates this moment:

The desired concavity is shown by arrows (although the photo still can be seen quite bad - turn your tire inside out and see what we are talking about). With some practice it is possible to pour holes for the screws directly from the inside, focusing on these shocks. After some practice, it turns out to be pricking quite accurately, while the tire does not need to be constantly turning there, which saves time, and the sharp ends of the screws are directed inward, which reduces the likelihood about them to scratch. However, wishes can perform this operation in gloves. It will look like this:

After a certain time sufficient to twist all the screws (in our case, 216 pcs.), The tire from the wrong side will look like this:

From the side of the tread at this stage, it resembles an exhausted hedgehog inside out:

Upte the tire to normal. Reliability with hedgehogs is becoming increasingly noticeable:

Side view:

Now it is time for the first time to wear a baked tire on the wheel. Naturally, the camera needs to be protected from contact with the heads of screws in order to avoid her rupture. For this, the most easy to use old, cut along, with a remote nipple, camera. As practice shows, for the front wheel, which accounts for a relatively small load, this is quite enough. For the rear, most likely, some more powerful protection may be required. There was a mention of the use for this purpose cut along the highway tube.
So, we take the old chamber, which is to work with a gasket:

The main chamber that is to be accepted is slightly inflated - so that it keeps the form, but not so much so that the wheel with it can then be harvested:

We dress the camera-gasket on a slightly rolled chamber in this way:

Then, as usual, we put on the rim of the wheel with one side of the achepted tire, insert the "chamber" sandbreaker, we are fully tated and pumped with a wheel. It turns out something like this:

Quite an evil hedgehog ...
4. And she came - the second part of the marlevion ballet. Screws need to shorten up to the desired length. Here are the following options:
The screws were taken short enough, and the protector, on the contrary, is quite fat - in this case, it will not be necessary to bite anything.
Too long ends can be drowning on the emery circle. But not everyone is in the farm, this subject is found, it is also noisy and dusty. But the option is quite worker ...
Finally, the ends of the screws can simply be covered with an unacter hand tool - all sorts of places, ticks and other things.
For example, we give a photo of a tire with short screws that were not bite at all:

Now suppose that the bite of ends is still necessary (as in our case). Talk about the instrument. It is quite clear that the tool is different, as, however, and screws too. The easiest option available in every home and promising difficult work is the usual passation or plugs with one axis. Mechanical gain in force is small, so they can be covered with only thin screws (or only the ends of thicker). Screws must be relatively soft - otherwise the nippers will quickly spoil - and there will be a little sense from them. More convenient option - nippers with additional levers (in the figure below; from above, for comparison, ordinary passas):

Such plugs in stores come across less often, but I managed to find them from a familiar motorist. Since in the case under consideration, the screws are thick and solid, even such powerful bodies are not particularly grabbed. Drinking screws should be so that the ends of about 1.5-2.5 mm remained. However, the special accuracy here seems to be needed. As a result, I still managed to cut down all 216 screws - but for 5 evenings, that is, on average, after 40 screws, this occupation was pretty bored me, and the fingers were no longer able to continue to harm on the knobs. When working it is useful to use safety glasses (I dressed the most common, in which I drive a bike) - Since the bruised ends of the screws tend to vigorously fly into all directions. Gloves also do not interfere - screws are now sticking out. As a result, we have the desired studded tire. 216 spikes located in two "curves" of a number. It still does not pull on the four-row.
Project costs:
Tire - 160r.
Screws - 216pcs x 35kop - 76r.
Camera-gasket of Russian production (rubber is thorough and costs cheaper) - 60p.
TOTAL 296R. Should I contact this option - everyone decides for himself. Possible alternatives - or riding without spikes (which can be skrenogenous), or the purchase of factory rubber (which may be impossible or for financial considerations - or simply due to the lack of such rubber in stores).
Appearance of the finished product from above: