How to make warm walls. Warm walls
Lavita LH-150 (film)
Heat Plus APN-510 Silver 220 W / m 0.4 mm (film)
Heat Plus SPN (film)
WarmTiles (sets)
Q-Term KH-220 (film)
"Warm wall" as a method of heating an apartment, it has become a regular feature, the principle of such heating is identical to the operation of a warm floor, only the heating cable is attached to the wall, and not under the floor covering.
Heating a room against a wall has many advantages.
- Warm walls consume less electricity than heating elements, radiators, heat guns.
- If it is not possible to raise the floor in the room to install the cable, electric heating on the wall is a saving way out of such difficult cases.
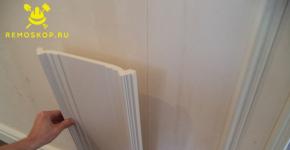
- Installation of infrared films does not require major repairs.
The most common material that is mounted on the wall is a film heat-insulated floor. Inexpensive infrared film works equally well on horizontal and vertical surfaces. The heat generated by the film warm floor on the wall is perceived by the human body as natural solar heat. The heating film heats up both the walls and objects in the room, including furniture, household appliances and the floor underfoot. Reflecting from objects, heat evenly spreads throughout the room, warming up the room temperature to a comfortable one.
The film heating system from the Avarit store is delivered to the buyer within 0-3 days. Infrared film isn't the only way to heat walls. A reliable and economical option for an apartment is heating with a cable or sections of heating mats. Recommended for wall mounting:
- Nelson EasyHeat WarmTiles (supplied with cable installation accessories);
- Devimat mats (used for heating walls to prevent fogging of mirrors in bathrooms and showers)
Modern cable heating systems are helpers in creating comfortable home heat; cold and dampness now has no chance to penetrate into the home. And cable warm walls are one of the clearest proofs of this.
The installation of an electric warm wall is quite simple, you can do it yourself. It is much more difficult to calculate the footage of a cable or film for heating. "Avarit" managers will help with the choice of the product, with the calculation of the heating system, will accept the order for the supply and installation.
Warm walls: Moscow, St. Petersburg, Orenburg
Sale of heating cables. See prices for "Avarit" for warm walls in stores: St. Petersburg, st. Ruzovskaya, 16. Moscow, st. Trading, p. 1. Orenburg, Sharlykskoe highway, 26.
Do-it-yourself warm walls
They began to make warm water walls in Europe, although this heating method was already introduced with our councils. The development and calculations were carried out not by anyone, but by entire research institutes (research institutes). You can still find houses where low-temperature heating systems are embedded in the walls. So the method is far from new.
Features of warm walls

Lateral heat radiation is most comfortable for people.
Warm walls are water and electric. For water pipes, pipes made of metal-plastic polyethylene with a degree of cross-linking from 70% are used. For electrical heating, it is allowed to use a single or two-core thick cable (5 mm) or a thin cable (2.5 mm) glued to a fiberglass mesh. Last type of warm floor available in rolls.
Warm walls are a great alternative when floor heating is impossible - in garages, workshops, warehouses, small bedrooms with a double bed, simply furnished rooms, etc. You can combine these two heating systems. Features of warm walls:
- the air does not overheat;
- you can save 3 to 6% energy;
- the room is heated in a radiant way;
- no convection - no dust.
Thanks to the radiant heating method, the room temperature can be 2 degrees lower. This will not affect comfort in any way, so you can save on energy.
You cannot force the walls with furniture in order to use thermal energy as efficiently as possible. Lateral heat radiation is the most comfortable for people, moreover, there are no strong temperature drops from the bottom and top of the room.
Warm walls as heating are more efficient than underfloor heating in rooms with high humidity, since energy is not consumed to evaporate water. For example, in the bathroom. The heating can be installed on both external walls and internal partitions. In the second case, one circuit can heat two rooms at once. It is more difficult to make warm water walls with your own hands than electric ones. But, despite this, they almost never resort to installing an electric cable on walls under plaster, preferring a low-temperature water heating system.
 Before insulating the pile foundation of a wooden house, it is necessary to make a basement.
Read about why to insulate the blind area in this article.
The need for insulation

In the bathroom, you can put electric heating mats directly under the tiles.
To make external warm water walls with your own hands, you need to insulate. Thermal insulation is laid on the outside. Although this will lead to an overconsumption of the energy carrier for heating the walls, the dew point will be shifted into the insulation, and condensation will not settle. About how to insulate walls outside we have already told in one of the articles. Depending on the insulation method (wet or ventilated facade), materials are selected:
Also need to be correct calculate the thickness of the insulation... For the Moscow region, the layer of thermal insulation should be 8-10 cm. In extreme cases, if external insulation is not possible, you can install thermal insulation from the inside. To do this, it is convenient to use warm wall panels with aluminum inserts, which are sewn up with plasterboard after the contour is routed.
 One type of foundation is an insulated Swedish plate. The technology is quite complicated, there are many nuances of installation.
Many do not understand whether it is necessary to insulate the basement of the house. In principle, this is not necessary, but without waterproofing in any way. Details here.
Layout of the contour of warm walls

A horizontal snake is preferable to a vertical one.
The distribution of warm water walls is carried out with a horizontal or vertical snake. The snail-laying method makes it difficult to remove air locks, so it is not used. The coolant moves from bottom to top, from floor to ceiling. With vertical wiring, there is a problem of air removal in the upper half rings. It is easier to expel air with horizontal distribution. Unlike underfloor heating, the pipe laying step is not limited, since temperature changes are allowed. Variable pitch can be used to achieve a room temperature distribution close to ideal conditions:
- from the floor to a height of 120 cm, pipes are laid in 10-15 cm increments;
- in the interval of 120-180 cm, the step is 20-25 cm;
- above 180 cm, the step can be 30-40 cm.
The contour is placed under the screed or under the drywall (wet and dry methods).
How to put a warm floor under a screed we have already told you. With the walls, everything happens the same way, so we will not repeat ourselves. When installing by dry method, to increase the heat exchange area, a sheet of galvanized corrugated board is attached to the wall. PEX pipe made by any of the sewing methods (a, b, c) is placed in the grooves. Drywall is screwed onto the corrugated board.
On warm water walls, according to reviews, it is imperative to put a separate electric pump... In a vertical low-temperature circuit, the speed of the heating medium must be at least 0.25 m / s. The water pressure must be strong enough to squeeze out any air that may accumulate in the system. By the way, underfloor heating is devoid of such a problem, although a pump is often needed for it too. Warm walls are connected to the main heating system through a manifold unit, in which thermostats and an automatic air vent are installed.
Installation of warm walls in wooden houses is allowed. In this case, only the dry finishing method is suitable. It is not necessary to use corrugated board. It is possible to lay the contour between the battens, having previously laid the reflective insulation with foil inside the room. At the same time, Penofol is not enough for normal insulation, it is just a screen for IR rays.
Warm walls, water and electric under the wallpaper do it yourself
Warm walls are a method of heating a room, when a water circuit or electrical heating elements are placed on the building envelope from the inside.
Warm walls: water, electric, infrared - which is better?
Advantages of wall insulation
Types of warm walls
Water systems

- collector cabinet;
- circular pump;
- temperature sensor;
- thermostat;
- automation.
Dry installation:
- Reinforce the mounting rails.
Infrared systems

- Prepare and clean the wall.
- Install the heat deflector.
- Check system operation.

- Protective device.
Areas of application of warm walls
Choosing warm walls for your home: water or electric?
Which warm walls are best? Installation technology for water, infrared and electric walls. Their advantages and disadvantages - read here!
Warm walls: water, electric, infrared - which is better?
Wall heating is considered an innovation today. Warm walls of the house and the floor are convenient, comfortable and economical. In this article, I will tell you about the advantages of warm walls, how water, infrared and electric differ, as well as give useful tips to help you make the right choice.
Advantages of wall insulation
Let's note a few main advantages that usually play an important role and affect the choice of certain materials for insulating your home.
- Sufficiently high efficiency. Wall heating provides high heat output. Radiators, for example, give 50-60 percent, but water walls are much higher - 85%. You can maintain a comfortable temperature by significantly reducing the use of thermal fluids. Result: 10% gas savings compared to radiator batteries.
- The convective flow is significantly reduced. The heating system of warm walls has a unique air flow pattern in the room. In this regard, the circulation of dust disappears, which makes it possible to breathe freely, which is important in a closed room during the cold season.
- It becomes possible to compensate for heat losses. Such walls can work for the concept of "smart home", reducing heat losses by the temperature difference between the main and return heating lines. This is achieved with a thermal barrier.
- Dryness that prevents mold from forming.
- A wide range of choices and the ability to create a new creative interior.
Ample opportunities are provided by the Knauf Warm Wall external insulation system.
Types of warm walls
The main types include walls:
What they are and how to mount them, I will tell you further.
Water systems
The essence of the work of such a system is as follows: the pipeline is placed and reinforced in the wall, then attached to the heat mixing unit. The water system is used in addition to the floor and radiator systems, therefore all its components are prepared and properly mounted.

- pipes made of metal-plastic or cross-linked polyethylene;
- collector cabinet;
- circular pump;
- temperature sensor;
- thermostat;
- automation.
The system is installed in two ways: dry and wet. The dry method allows the use of a coating (false panels), and the wet one - the process itself takes place inside the layers of plaster.
If you are using plastering (wet method), then you need to install water systems as follows:
- Clean, place wiring and electrical boxes.
- Install the heat mixing unit.
- Stick on polystyrene foam plates, on them a vapor barrier (use of thin foil insulation is allowed).
- Reinforce the mounting rails (or fastening straps).
- Place the piping in a zigzag pattern on the wall.
- Connect the pipes to the node through the manifolds.
- Carry out pressure testing of the pipes (the pressure should be one and a half times higher than the working time).
- Attach the reinforcing fiberglass mesh.
- Apply a thin layer of gypsum plaster.
- Attach a thermal sensor under the top layer of plaster.
- After the wall is dry, apply a lime-cement layer 2-3cm thick.
- Reinforce the thin mesh over the plaster. This will help avoid cracks.
Dry installation:
- Fasten polystyrene foam, vapor barrier and foam film on the cleaned wall.
- Reinforce the mounting rails.
- Install the piping on the wall, connect and check how it works.
- Install a bar or metal frame.
- Fasten the fibreboard (plasterboard, plastic, etc.) to the frame.
The water system can be used as cooling air (as an air conditioner) during the hot season.
Infrared systems
Infrared wall warm is the most advanced heating method in the house, with a very good reputation among customers and manufacturers. Easily and conveniently, you can assemble carbon mats (rod and film) without spending extra effort. Mats with special rods can be reinforced:

- under plaster,
- under the frame sheathing.
Foil mats can be easily glued onto thermal insulation using special glue.
When working with film systems, you do not need to use steam and thermal insulation, which have an aluminum coating. And do not apply glue and plaster to infrared canvases.
Proceed dry and according to the instructions that came with the equipment. The installation process is extremely simple and consists of the following stages:
- Prepare and clean the wall.
- Install the heat deflector.
- Install the battens so that drywall, fiberboard, etc. can be attached to them.
- Place and secure the mats with dowels or a construction stapler.
- Insulate the cut lines with special tape.
- Install the temperature sensor and thermostat.
- Check system operation.
Using an infrared heater, you can make not only a warm floor, but also a wall.
Electrical cable systems

This equipment is considered efficient and economical. The current flows through the cables and heats them up. The electrical system includes:
- Heating cable (or thin mats with a cable on them).
- Equipment for switching on, heating and switching off the entire system.
- Corrugated tube, mounting rails (tapes).
- Protective device.
When installing this system under plaster, we work in the same way as water. When making a wall for a cable (or heating mats), it is better to take foamed polyethylene foil.
Cut the mats clearly according to the markings. Place the temperature sensor away from the floor or in a corrugated pipe.
The cable system must be turned off when you cover it with plaster. You can use the system itself 28 days after everything dries out.
Otherwise, the installation is carried out in the same way as the installation of the water system.
- When you insulate walls in this way, you can use this trick. Cover the walls with warm wallpaper made of foamed polyethylene backing under any type of outdoor wallpaper. So you can use wall equipment much more efficiently.
- If a heating loop is installed between two rooms, you can heat two rooms at once.
Areas of application of warm walls
Warm walls are used not only in residential premises, but also suitable for swimming pools, baths, toilets and saunas. It is quite possible to place the above-described heating systems in office premises, as well as even workshops and garages.
Detailed description of the types of warm walls. Analysis of the advantages and disadvantages of each type.
Warm walls: water, electric, infrared
Warm walls: water, electric, infrared - which is better? Wall heating is considered an innovation today. Warm walls of the house and the floor are convenient, comfortable and economical. In this
Electric wall heating has not gained much popularity as a heating system for a house or apartment. This is due to the many disadvantages of this idea, as well as some difficulty in laying the heating cable (or film) on a vertical surface. Next, we will consider the technology of installing a warm floor on a wall and provide the main pros and cons of this option for heating rooms.
Weigh the pros and cons
So, of the disadvantages of wall insulation with an electric warm floor, the following can be distinguished:
- Poor heat transfer. Because the heating element will be in the wall, the heat must first pass through the finishing layer (plaster or gypsum board sheets), after which only get to the heated room. Here the following picture is formed - heating will capture only the first 15-20 cm from the surface and the heated air will rise to the ceiling. As a result, heating will be ineffective and others will have to be installed additionally.
- Furniture and household appliances must not be placed against the wall. Everything is also obvious here - any cabinets, refrigerators, TVs and shelves will interfere with the already weak heating of the room. In addition, direct exposure to heat can negatively affect both furniture (it will begin to dry out) and electrical appliances (overheating).
- Significant heat loss. Heat will be radiated not only to the inside of the house, but also to the outside (to the outside of the wall). It is impossible to underlay foil thermal insulation under the infrared film, so you yourself understand how this will reduce the heating efficiency.
- Reduced versatility of vertical surfaces. If at the time of installation of the warm floor you do not provide for special fasteners, then in the future, after finishing, it is unlikely that you will succeed without damaging the heating element or even the picture.
- Dew point displacement towards the inside. One of the biggest disadvantages of electric wall heating. Condensation usually collects between cold and warm surfaces. If under normal conditions this occurs on the outside of buildings, then when laying a heating cable or foil, the dew point will be approximately the middle of the wall. As a result, in winter it will freeze harder and collapse faster. In addition, the likelihood of mold and mildew will increase significantly.
- Increased energy costs. Electric warm walls are not the most economical heating system. Although the heating cable on a vertical surface can be laid with increased spacing, the electricity consumption will still be significant. And why is this necessary if the heating efficiency is rather low?
- Decorative wall decoration will last less. With electric heating of a vertical surface, there is no guarantee that the wallpaper will not come off in a few months. In addition, if you choose the wrong solution when (for example, in the bathroom), it may fall off after the first heating season. You can not worry only if the walls are sewn up with drywall.
As you can see, there are quite a few disadvantages of such a heating system and they are all significant. We read a lot of discussions on the forums and found only two main advantages of installing a warm floor on the wall:
- With vertical heating, dust will not spread around the room.
- Since the heating cable or infrared film is stacked in the wall, the rooms will become more spacious.
Now you yourself can conclude whether it is possible to install the warm floor on the wall. If, nevertheless, you decide to use such an electric heating system, read on to find out how to properly attach the heating cable and foil.
Installation technology
Cable heating
So, in order to make an electric heated floor on the wall with your own hands, you will need to complete the following steps:

We draw your attention to the fact that for laying tiles on top of a warm floor, you need to use special tile glue, otherwise after a while your decorative finish will simply begin to crumble.
If you decide to make a plasterboard finish on top of the cable heating of the walls, then the installation technology is even simpler. Instead of laying tiles, you will need to assemble a frame from profiles and sew it up with gypsum plasterboard sheets, having previously connected all the circuit elements and installing the thermostat in a suitable place.
Video instructions for laying thermomats:
Infrared film
Installing infrared floor heating on the wall is much easier. Usually this option is used on a balcony, which is finished with clapboard or plasterboard plates. In this case, you must take into account an important nuance - it is strictly forbidden to use foil-clad thermal insulation. If you want to additionally insulate the loggia, it is better to find an alternative heat reflector without the use of foil.


After installing the heat-reflecting layer, you need to make a frame for fixing the trim and fix the film covering in suitable places. Next, connect the wires and insulate the bare contacts. The last thing that remains to be done is to connect the temperature sensor and thermostat. After checking the heating system, you can switch it on immediately.
Consider an important nuance - tile glue cannot be applied over the film coating. performed only "dry"!
An old idea in a new incarnation
The idea of combining a heating device with a wall surface is not new: it was first implemented at the end of the 60s of the last century, in the midst of panel construction. For this, cavities for the circulation of the coolant were provided inside the reinforced concrete panels, and the heating distribution scheme was formed during the installation of the panels and the construction of the house.
The success of wall heating systems is the result of precise engineering design and impeccable construction quality. The coolant, passing inside the concrete wall, heated its surface to 50-60 C.
Heat spread over the entire area of the wall and was transmitted to the interior of the room by radiation. In this case, the convective component of heat transfer is completely excluded.
It should be noted that in houses built with conscience (and there were quite a few of them in the USSR), wall heating systems work to this day, delighting residents with a high level of comfort.
Unfortunately, wall heating has not become widespread. Probably, this was due to the complexity of installation and high quality requirements for concrete panels with built-in reservoirs for the movement of the coolant.
The idea of wall heating in a new, modern form returned with the advent of polypropylene pipes, the unique properties of which make it possible to install from them not only warm floors, but also warm walls.
How are warm walls arranged?

To ensure comfortable conditions in the room, it is enough to make only the outer wall facing the street warm enough to compensate for the heat loss to the surrounding space. If it is decided to heat 2 or more walls, then for each of them you need to make a separate heating circuit, connecting it in the same way as a heater.
The polypropylene pipe is laid on the wall surface in loops, the long side of which can be located vertically or horizontally. Both installation options are possible, but with the horizontal arrangement of the loops and the upper connection of the coolant supply, the water will move downward under the action of gravity or by gravity.
With the vertical arrangement of the loops, a circulation pump is indispensable: the coolant has little chance of overcoming the forces of internal friction in the system, especially if the pipe length is several tens of meters.

Laying of polypropylene pipes on the wall surface is carried out without the use of additional heat-insulating materials. There is no need to lay a layer of foil or vapor barrier under the pipes.
At the same time, it is desirable that the walls have minimal heat losses, and their thermal insulation is made outside the building. Otherwise, the location of the dew point can be shifted into the building, which will inevitably lead to the formation of dampness on the walls, and heat energy will be spent on drying the walls, and not on heating the room. Outside, the surface of the walls can be plastered or covered with panels.
The step of laying polypropylene pipes can be different: there are no restrictions on this. Typically, pipes are laid in smaller spacing at the bottom of the wall, and at larger spacing at the top of the wall.
Benefits of warm walls

The use of warm walls for heating a house allows you to significantly increase the area of \ u200b \ u200bthe heater in comparison with conventional heating radiators. And since the heating area increases, then it is possible, to obtain an equal amount of heat, to reduce the temperature of the coolant, for example, to 50-60 C, and this is already a low-temperature, more comfortable for humans, heating system.
In addition, with the help of warm walls, it is possible to reduce the proportion of convective heat transfer, replacing it with more comfortable thermal radiation.
If you have never heard of such a method of heating a house as warm walls before this moment, this is good. You can pass by and not pay attention to this article - it is intended for those who have thought hard about translating such an idea into reality. Yes, this is an "exotic" type of heating, which few people use, but it is practically useless - or rather, meaningless, since, in fact, it does not provide anything necessary for a person. He even heats the room with less efficiency than all other heating methods, or rather, heating devices. In this article, together with the site, we will study the advantages and disadvantages of warm walls, their varieties, and for those who still do not lose faith in warm walls, about the technology of their installation.
Warm walls photo
Warm walls: what are they made of
Anyone who is familiar with the manufacturing principle will quickly understand that the wall heating technology is completely identical to them - nothing new has been invented here. You can even say that on the contrary - warm walls, in comparison with the floors, are somewhat degraded. In most cases, such material is removed from the structure as - with this formulation of the question, the heating element heats the wall, and the heat goes out into the street. At least this is wrong - the heat insulator can be installed only in the case of wall cladding, which, you yourself understand, is not always advisable. Otherwise, this is the same surface heating technology, which can be carried out in three ways, or rather using three types of heating elements.

In principle, regarding the question of what the warm systems are made of, there is nothing more to add, except to mention the small materials, without which not a single installation of such systems can do. These are all kinds of fasteners, if their installation is possible, then the like.
Advantages and disadvantages of warm walls
Before proceeding to the direct listing of the shortcomings of such systems, I immediately want to clarify the situation with their principle of operation, which in itself is one big drawback. Most people know that heat in a room is distributed by convection or radiation. The essence of convection lies in the fact that warm air immediately rises upward, and thermal radiation spreads from the heater to a maximum of twenty centimeters, and then, again, the principle of air convection is turned on.
Now think about what will happen to the heat in the case when the wall is one large heating element - quite right, a twenty-centimeter section of space next to the wall will warm up, then the heat will go up and stay under the ceiling, warming up the neighbors. In general, the situation is something like this - it is cold above the floor, hot under the ceiling, and so-so in the middle. How do you think it will be comfortable to live in such a room? Naturally, not very much. You say, what else is there? Yes there is, but then the meaning of heating with a warm wall is lost as such - the only reasonable explanation that can be found for the application of this technology is self-indulgence. You can, of course, use it to dry wet walls, but, again, it will be cheaper and easier to properly seal interpanel or interblock seams.

Water warm walls photo
Now for all the other disadvantages that infrared warm walls and all other heating systems for vertical surfaces in the house have. There are many of them, but we will focus exclusively on the significant shortcomings.

In general, if you have not yet thought about installing warm walls, then at least do not rush with them - here you need to think carefully and weigh the pros and cons. Consult with experts, with people who have already managed to try this heating technology and, if after that you are still sure of the need to heat the walls, then you can act.
Do-it-yourself warm walls: installation technology
It does not matter which heating element we are talking about - the essence of the technology of warm walls does not change from this. The only difference between the various heating methods can only be in the intricacies of the heater mounting - otherwise, this technology has a standard scheme, which can be represented as the following sequence of work.

As you can see, warm walls are a fairly simple technology, and they practically do not differ from floor heating systems. Perhaps it would even have become widespread, if not for its uselessness - it is rarely possible to find a truly rational use for it.
Wall heating is an environmentally friendly, practical and aesthetic solution for your home.
A warm wall heating system is an alternative to traditional radiators. In our country, these systems are used quite recently, but in fact they are not a new invention. The idea of wall heating was actually known in antiquity.
Warm wall system - heating in a new way
Panel heating in the wall, as in the "underfloor heating" system, can be water or electric.
- the water system includes collectors connected by tubes through which water flows, giving off heat to the walls;
- in the case of an electrical system, electric heating cables are used.
Both methods of heating a room have both advantages and disadvantages. The heated walls radiate heat into the room very gently and do not cause dust to float. The disadvantage may be the high cost of installation and the inability to put tall furniture near the walls. A separate issue is the requirements for thermal insulation of vertical partitions.
Photo. Heating in the wall

Water heating in the wall
Installation of heating into a wall consists of connecting and fixing collectors interconnected with pipes. To implement such a project, multilayer pipes made of plastic or copper can be used. Copper wall heating pipes are not used very often due to their relatively high price.
The pipe is installed in the inner layer of the wall on a permanent basis, it is laid vertically, horizontally or wavy. The temperature of the water in the pipes should be less than 50 degrees Celsius, as stronger heat radiation can negatively affect the well-being of people in the room. The optimum water temperature range is 30-45 degrees Celsius. The thermal energy that can pass through a wall with water heating is about 200-280 W / m².
A warm water wall has an advantage over an electric one, since it is cheaper to operate, in addition, the heating system can be converted into a cooling system. When there is cold water in the pipes in the summer, the surface will give a pleasant coolness to the room, which will lower the air temperature.
After the pipes have been laid, the surface is covered with plaster or drywall sheets and then finished according to your preference. It should be borne in mind that water pipes have a relatively large cross-section, which will affect the thickness of the dividing wall and to some extent reduce the area of the room. An interesting offer are prefabricated drywall panels intended for installation of pipes in them. This solution is made in the form of two plates, between which the heating system is already built.
Advantages and disadvantages of the "warm walls" system in comparison with the "warm floor" system:
- the temperature distribution in the case of warm walls is more even in height; in the case of underfloor heating, the temperature decreases with increasing height above the floor level;
- most of the heat is transferred by radiation - 90%, and 10% by convection. In the case of a heated floor, these proportions are: 70% - by radiation, convection - 30%;
- there is no problem of thermal resistance of the floor covering, for example, the phenomenon of drying out of a wooden floor;
- the wall surface temperature can be up to 35 ° C, so you can get a higher thermal efficiency per 1 m²; for a room temperature of 20 ° C, the thermal efficiency is 140-160 W / m², and in the case of underfloor heating, this value is usually 80 W / m² (increasing only in wall areas up to 120 W / m²);
- in wall heating, you can also use a higher water supply temperature than in a floor heating system, even up to 55 ° C, while the water temperature in underfloor heating rarely reaches 45 ° C;
- in a warm wall system, the thickness of the plaster coating is less (about 1.5 cm) than a layer of concrete with floor heating (about 4.5 cm). As a result, wall heating has less thermal inertia, which makes it easier to control the room temperature;
- wall heating can be successfully used in summer for cooling rooms.
Disadvantages of a water heating system for walls:
- Often in a heated room, we have too little wall surface as the only source of heat, taking into account that it is most advisable to heat the outer wall as a "cold barrier". Its surface is usually small due to the presence of windows and balcony doors. Therefore, sometimes we have to install heating pipes in internal partitions (but they can be closed by tall cabinets), or we are forced to supplement the system with underfloor heating or another heater, for example, a fireplace.
- When mounting interior décor and electronics (such as paintings and TVs) on the wall, make sure the mounting brackets will not damage the pipes.
- External walls must satisfy the condition that the heat transfer coefficient is U ≤ 0.4 W / m². This condition is fulfilled in standard walls in new buildings, but in the case of old buildings it is necessary to insulate the wall.
Wet and dry installation systems
The most commonly used technical solutions for the installation of wall heating can be divided into two ways:
- "Wet" method (with coating of heating pipes with a layer of plaster);
- "Dry" method (with plasterboard coating).
"Wet" way
In this way, the installation of pipes in the outer walls is done. The pipes are laid in a meander, preferably horizontally, with a pipe distance of 15, 20 or 25 cm. This solution allows the most efficient heating and the use of the smallest bending radii of the pipes.
In cases where the distance between the pipes is from 5 to 10 cm, they should be located in the form of a double meander.

It is also possible to lay pipes in a winding vertical shape or even in a snail shape, but such solutions can cause problems in operation in the form of air pockets.

The most commonly used for warm walls are multilayer X-PE / Al / PE-X pipes and PE-X or PE-RT polyethylene pipes with a diameter of 14 mm, the length of the coil with the approach to the distributor should not exceed 80 m.
The distance from the pipe to adjacent walls, window and door openings, floor and ceiling must be at least 10 cm.The distance between the mounting profiles must be no more than 50 cm.
In the wet installation system, gypsum plaster with low thermal expansion is most often used, which is characterized by high thermal conductivity and resistance to temperature. The plaster is applied in layers. The first layer should cover the heating elements and have a thickness of about 20 mm. Then a plastic or fiberglass mesh with cells of at least 7 x 7 mm is pressed into the plaster. The mesh should be rolled onto an adjacent wall. The canvas is then covered with another layer of plaster having a thickness of 10-15 mm. The total plaster layer with pipes is about 40 mm.
A complete wet wall heating system is shown in the figure.

"Dry" method
The simplest version of the installation of a heating system "warm walls" is the dry method, when pipes are mounted between the profiles of the plasterboard wall. Alternatively, you can lay the heating pipes on the slopes of the attic roof. This method causes certain difficulties in implementation - for example, the need to cut grooves in the profile for installation in order to ensure the passage of vertical pipes. In addition, the calculation should take into account the low thermal conductivity of such a wall, since there is a layer of air between the pipes and the drywall plate.
Electric heating system in the walls
Although this system is more expensive to operate than a water system, it is often used. This is dictated primarily by the small size of the electrical cables and, therefore, the ability to avoid excessive thickening of the walls. Other advantages are the speed and simplicity of cable installation, as well as easy control of the resulting heating system.
However, this system has many disadvantages. This is, first of all, an increase in electricity bills, which are now quite expensive. The accident rate of the system should also be noted, since the electrical cable can burn out when the outflow of heat from the walls is blocked, for example, by a large furniture set located close to the wall. It is also worth considering the electromagnetic field arising in this case, which can adversely affect our mood.
Electric wall heating is created from two-core wires connected on one side or from solid wires connected on both sides. The wires are laid in loops of a certain wavelength. After installing the system, the walls are covered with plasterboard plates and finished in any way - for painting, for wallpaper, or laying ceramic tiles.

Heating "warm wall" - pros and cons
Interest in the wall heating system is growing from year to year, but the so-called underfloor heating still has an absolute superiority. At the same time, electric wall heating or warm water walls are very similar in principle to a warm floor and are not yet very popular due to the fact that they are little known.
Benefits of warm walls
- Environmental friendliness.
- High aesthetics (lack of visible radiators, which often limit the possibilities of interior design).
- Higher hygiene than with traditional heating and underfloor heating - as the indoor air is cleaner (it is not contaminated with dust from convection flows from the floor and less dry).
- In addition, contrary to popular belief, a "warm wall" heating system can be economical, as it allows the temperature to be reduced by one to two degrees without compromising thermal comfort. While when working with traditional radiators and heating a room with their help to a temperature of 18-20 degrees Celsius, we will feel cold, warm walls will help us feel absolutely comfortable, due to the transfer of a significant part of thermal energy in the form of infrared radiation.
The most serious disadvantages of warm walls were mentioned at the very beginning of the article, namely, their high cost. In addition, in this case, the problems associated with the thermal insulation of the building manifest themselves more negatively. If the walls have a heat transfer coefficient U greater than 0.3 W / m²K, the "warm walls" heating system will not be efficient. In this case, there are two solutions. The first is wall insulation from the outside. Another is the rejection of the warm wall system.