The procedure for performing work on finishing the walls with clapboard with your own hands. A tree on the wall with your own hands: a photo of how the wall looks like a tree and the process of finishing the walls with a laminate How to sheathe a brick wall with clapboard
Do not confuse wooden lining and veneered MDF panels. These materials, while similar in appearance, differ both in their behavior during operation and in installation. Today we will talk about solid wood lining, the features of its choice and installation on the walls of the house.
The choice of wood and lining format
The key indicator that determines the quality of wooden lining is its class. There are four varieties of this finishing material:
- Extra. This type of lining does not have the slightest signs of defects, such as roll, traction, knots, pitching, strands and the like. Thus, the surface of the wood has not only visual uniformity, but also physical integrity.
- Class A. The quality of such lining is somewhat lower than the previous class: there are small dense knots in a limited amount, irregularities in the pattern of fibers, formation of reduced density and similar defects are observed. However, wood has a solid structure.
- Class B. At this level of quality of the lining, the manifestation of pronounced defects is allowed, excluding the physical uniformity of the wood. Such defects include radial cracks, pitch, fallen knots, etc.
- Class C. This group includes lumber that has not passed quality control to obtain a higher class.

You should also pay attention to the geometry of the profile of the shoulder straps of the lining. The generally accepted standard is a thickness of 12.5 mm with a width of 88 mm without taking into account the protrusion of the spike. It is strongly recommended that when purchasing a lining, arm yourself with a caliper and check the basic dimensions. A deviation of more than 5% is a clear sign of low-quality products. It is also important that the lining profile is maintained along the entire length of the board, otherwise there are guaranteed to be problems with the alignment and docking of the locks.
The lining also differs in profile. In addition to the traditional shape with bevelled chamfers, there are Softline and Calm modifications with rounded edges. The lining of the Land House and Block House types is also popular: the first has a complex milled profile, the second has the shape of a slab, that is, in fact, imitates a rounded beam. There is only one criterion for choosing a profile shape and wood texture - aesthetic. We only note that lining made of hardwood is more preferable for use in wet rooms and with significant temperature fluctuations.

Be sure to pay attention to the quality of processing. For lining, the presence of pile on the front surface is unacceptable: this is a clear sign that the wood was not properly dried before processing. Additionally, check if the lining has so-called plugs: sometimes, to improve the quality class, knots cut out and jam holes with solid wood, which ultimately negatively affects the appearance.
Wall surface preparation
Before lining the walls with clapboard, you need to properly prepare the rough surfaces. Depending on the type of base, the preparation procedure may differ.
Wooden walls must be coated with bioprotective compounds and flame retardantsthat increase fire resistance. If we are talking about walls with the correct geometry and flatness, for example, frame walls, the wall paneling can be mounted directly on them without a crate. However, the joints between the sheet materials must first be hermetically sealed and a rough peeling should be carried out to remove protruding chips. If, according to the requirements of the calculation for the moisture accumulation of walls, a vapor barrier device is required, it is mounted at this stage. Also, a mandatory requirement when decorating walls with clapboard is to provide a ventilation gap, which in this case can be done using a plastic nodal mesh.

Walls made of brick or concrete for lining are usually insulated using mineral wool or foil isolon, facing the reflective surface into the room. Installation of insulation is best done by gluing onto mounting foam with careful sealing of all joints and junctions. After that, the subsystem is fastened through the thermal protection.

Internal partitions for lining with clapboard must be sheathed with sheet materials. In addition to OSB, for these purposes, you can use LSU, GVL or a thin edged board. Sheathing of the partition frame is necessary to give them monolithic strength, improve sound insulation, and also stabilize the behavior of inhomogeneous media. And, of course, ensuring the safety of the filler.
Enclosing structures made of hygroscopic materials, such as gas silicate or foam concrete, require waterproofing before lining. This is due to the fact that, due to its small thickness, wood is highly susceptible to shrinkage and warping. Therefore, the influence of high humidity on such a finish should be excluded by all means, up to the installation of a false wall with a ventilation gap.
Lathing installation
The frame subsystem for clapboard cladding is mainly made of pine planks with a section of 20-25x40 mm. This is a fairly cheap material, besides, it is well suited for reliable fastening. Before this, the material must be dried in room conditions, ideally the humidity should be about 12 ± 3%, that is, the same level of moisture accumulation as that of the lining.
The slats of the crate should be perpendicular to the direction of laying the lining. As a rule, the wooden sheathing is directed vertically to avoid joining shoulder straps, that is, the subsystem is located on the horizon. The installation step of the rails can be freely chosen in the range of 40-60 cm, it depends mostly on the weight of the finishing material, the expected operating conditions, including mechanical influences. Without fail, the lathing strips are mounted under all corner junctions, this is necessary to fix the overlays and skirting boards not to the finishing material, but to the subsystem element.

The most important stage in the installation of the crate is its alignment into a single plane and the removal of the geometry of the room. The process should be preceded by a measurement of the room, during which the most significant deviations are noted. Further, one of the walls is taken as the base one, for this purpose it is better to choose the most even plane with the least number of openings. On the walls adjacent to the base one, two vertical lines are marked, spaced from the draft plane by the thickness of the lathing laths, plus the tolerance for the original curvature. By connecting the markings on the floor and ceiling with the help of a coloring cord, four lines of a closed contour are obtained, forming a single plane. The marking of the remaining walls is carried out in a similar way, but now using the "Egyptian" triangle to form right angles.

Alignment of the rails into a single plane is carried out along the mooring cord due to wooden linings of different thicknesses or using pairs of plastic mounting wedges. The fixing of the lathing is carried out by through fasteners into the base material through the linings; for these purposes, both plastic dowels with a flush head and hardened self-tapping screws can be used. Please note that the system of galvanized profiles for the installation of lining is not suitable: both from the point of view of the uniformity of behavior, and from the standpoint of acceptable methods of fixing the finish.
Clapboard wall cladding
The set and fastening of the finishing material to the crate is carried out by analogy with plastic and MDF panels. The first board is fastened through from the junction side, the fasteners are subsequently covered with a plinth. On the reverse side, the fasteners are made obliquely into the groove, which is true for all intermediate boards. The last shoulder strap is also attached to both edges.


Fastening the lining to the crate can be done in two ways. For amateur hands, the most suitable fasteners will be self-tapping screws with a threaded body thickness of not more than 2.5 mm, a loose neck about 10 mm long and a cap with a diameter of 4.5 mm. This method eliminates damage to the front surface of the finish when finishing nails, and is also considered faster. A pre-thin body of the lining groove can be drilled along the pitch of the frame.

In the presence of a hairpin or nail gun, installation can be performed on driven fasteners. This solution is best suited for professional decorators. It is recommended to choose 18 gauge studs with a length of about 30-35 mm with a narrow head. First you need to adjust the energy of the shot: the hats must be quenched into the groove body by no more than 1 mm. You can also use brushed studs without hats in the format of a straight or inclined clip: the varnish that holds the pins together melts when the fastener passes through the wood and acts as glue.

When fastening the lining, it is extremely important to leave compensation gaps of 8-10 mm from the adjacent walls and between joined shoulder straps of the order of 1-1.5 mm. To prevent the migration of insects, the gaps at the junctions must be sealed with a plastic filler, such as liquid cork, silicone or acrylic sealant. It is important that at the straight joints of the lining, both edges are fastened to the crate, therefore, along the connection line, it is necessary to provide for the installation of a wide bar - about 60-70 mm.

Finishing
In most cases, lining processing is performed after installation. The exception is walls that are in conditions of high humidity or sudden changes in temperature. In these cases, the wood is preliminarily stabilized, for example, it is impregnated with hot drying oil. In all other cases, the processing of the back surface is not required, this is an unreasonable consumption of materials and efforts.
After fixing, the processing of the lining consists in additional fine grinding of problem areas and the elimination of dents that appeared during fastening, using putty to match the main coating. It is imperative to perform fire and bioprotection of wood with a colorless composition. Also, the firing of the lining with subsequent brushing would be an original solution, but this type of processing should be combined with the general style decision.
A wide range of coatings can be used as a finishing protective and decorative coating, up to oil impregnation. The decision on the choice of finishing method is always made individually, based on personal aesthetic considerations. For long-term operation in humid environments, a coating with polyurethane varnish or natural drying oil with a high wax content is recommended.
Today it is fashionable to replace plastic trim elements with wooden options, which gives the home comfort and warmth. The technology of wall cladding with wood has been known for a long time, but remains relevant to this day. Today we will figure out whether do-it-yourself clapboard wall cladding is so difficult, and whether it can be done without outside help.
What nuances should be considered when working with lining
Lining is a board of different thickness, which is made from different types of wood. This material got its name because of the place where it was first applied. These are wagons in trains, the inner walls of which were sheathed with small wooden slats. Today it is fashionable to sheathe the walls in the bath with clapboard, as well as in the sauna, or the gazebo.

It must be taken into account that the decoration of the walls with clapboard with one's own hands requires a thorough, balanced approach. Pay attention to the following details:
- Packed boards should be stored on a substrate in a horizontal position.
- The humidity of the storage room must be within the normal range.
- Storage should not be allowed when direct sunlight is directed at the packages.
- It is important to pay attention to the expiration dates indicated on the package.

- The cost of 1 m2 of distillation from linden, which perfectly tolerates temperature changes and high humidity, costs 500 rubles, and in order to sheathe walls in the main rooms at the dacha, on average, you can meet a smaller amount - 300 rubles per m2. Important! The price of the material directly depends on the quality of the wood.
On a note! Lining for walls is bought with a margin, which is equal to ten percent of the total area. It must be remembered that the width of each element is measured by the internal depth, so you need to subtract 10-12 mm of the groove depth.

Lining material processing
After the purchase, the question becomes, how to sheathe the walls with clapboard on your own, so that the coating turns out to be wear-resistant and beautiful? The primary task is the correct pre-treatment, because the manufacturer does not carry out any manipulations with the tree. You need to do the following:
- Needle products need degreasing. To do this, it is better to rinse the board with a 25% acetone solution. Then wipe with a cloth dampened with water and dry.

- All, even the most minor, damage should be repaired with a putty mixture for wood. You can buy it at any hardware store.

- If you need to change the shade, then you can use stain, or other professional impregnations that will preserve the beautiful texture of the wood.

What you need to prepare the walls for lining
There are two main options for how to make a wall clapboard: glue and frame. Note that the first one will require you to have a perfectly flat surface. That is why the second method is preferable, which involves the construction of a crate. Among the advantages of this method is the creation of additional space for warming the room.
In order to fix the lining on the wall, you need:
- Tools. In this particular case, you should prepare a drill with different nozzles, a plumb line (level), pliers, a hammer, a hand saw or a jigsaw.
- Reiki for the construction of the frame. For these purposes, solid wooden beams with a cross section of 30 * 60 mm are suitable. At the same stage, the substrates used to level the surfaces are prepared.
- Fastening materials: dowels, self-tapping screws, nails, kleimers, if necessary, then hangers for the frame.
Important! Even if the frame method of fastening is used, preliminary preparation of working surfaces is required. The procedure is simple, it consists in the fact that all decorative elements are removed from the wall, and the defects are overwritten. After that, an additional primer is carried out.

How to create a crate for lining fasteners
Preparing walls for lining is the most scrupulous process. You will have to tinker with creating a special design. General recommendations:
- Treat the beam with refractory impregnation and antifungal agents.
- Make sure that the slats are located strictly perpendicular to the decorative boards.

- Between the rails, it is necessary to observe a single distance, the step of which is 40-50 cm.

- It is necessary to leave a distance between the floor and the ceiling. This recommendation is especially relevant for wooden houses, which are constantly subject to shrinkage.
- The evenness in the installation of the frame is subject to careful check, for this, plumb lines and a level are used.

- If a space is formed between the rail and the wall, then it must be filled with prepared dies.
Important! The construction of the crate makes it possible to equip the walls with an additional insulating layer. The insulation is fixed between the formed racks.
Which fixation option to choose?
It is important to decide on the method of fixing plank materials. Sheathing a wall can be done in several ways:
- Through view of fasteners. This is the simplest solution that does not require much effort. The point is that the screws are screwed directly through the front side. This method involves marking so that the fastener points are located on the same line. In addition, holes are drilled in advance on the wagon board, which will not allow the tree to deteriorate and crack. When screwing in screws, make sure that their heads are completely recessed into the wood. This is easy to achieve if you pre-drill a place under the hat with a large-caliber drill. Formed holes are masked with special eraser plugs or rubbed with putty. Of the shortcomings, this method significantly violates the external aesthetic appeal of the coating.

- Fastening the lining to the wall can be carried out using decorative carnations. Their hats were originally decorated to match the color of the material.

- A great option would be hidden carnations without hats. The peculiarity is that such nails can only be hammered at an angle of 80 degrees. This will make it possible to hide those areas that have been violated.
- If you have a professional stapler on your farm, then staples can be used for fasteners.

Important! You should not buy a manual stapler, which is sold on every corner, as its use does not provide a secure fit.
- With the smallest thickness of the wagon board, kleimers are used. The main advantage is that the mounts are invisible.

The method of how to fix the lining to the wall is selected individually, based on the specific situation. But we note that recently the most popular are the kleimers.
The process of fastening the lining
Before sheathing the walls, the material is brought into the room and left for two days. This manipulation is essential for the tree to fully acclimatize.
Important! If you rush and skip this stage, then there is a high probability that the structure will warp.
All work must be carried out at positive air temperatures, and the optimum humidity is at least 60%.

The essence of the technique:
- Most often, laying is carried out in a horizontal position, so install the first bar at the bottom so that its pinch (groove) looks up.
- As with wallpapering, fixing should start from a corner that is away from the entrance to the room.

- Check the board carefully with a level, taking into account the horizontal and vertical surfaces.
- The first board is fastened, and the rest are then grooved, and then fixed with clamps. be careful with the first and last elements, it is better to fix them with screws.

- After finishing, you need to decorate the walls with skirting boards and corners, or you can paint the walls from the lining with stain or varnish the surface.

Experience guarantees completion of finishing work in a day, even including the installation of the frame. Natural materials will give the room comfort and warmth, last a long time, and retain beauty.
Video: Do-it-yourself lining installation
Interior decoration almost always begins with the alignment of the walls. This can be done in several ways, the most convenient of which is plasterboard sheathing. This material is easy to cut and fasten, does not require special skills and gives a perfectly flat surface. Due to the ease of installation, do-it-yourself wall cladding with drywall does not take much time and will save a little.

The room is freed from bulky items, everything superfluous is removed from the wall, wiring and communications are removed. The cladding covers all irregularities and defects, so it is not necessary to level the walls, it is enough to check their integrity. Wallpaper or peeling paint must be removed, all cracks and cracks should be sealed with putty. After that, the surface is cleaned of dust and primed.

For wall cladding you will need:


Step 1. Installing guide profiles


The floor along the walls should be flat and clean. Stepping back from the wall a few centimeters, draw a marking line for the guide profile. If all the walls in the room are sheathed, the markings are carried out parallel to each wall and connected at an angle of 90 degrees. Now a guide profile is applied along the line and screwed to the floor with screws. Holes for dowels are pre-drilled in the concrete screed.

The length of one profile is 3 m; for building use metal connectors and self-tapping screws 9.5 mm long. For a corner connection, the end of the profile is cut on both sides, the sides are bent and screwed with self-tapping screws to the side edge of the second profile.


Further, vertical guides are installed on the sides of the wall: the lower ends of the profiles are inserted into the floor profile, leveled vertically with a plumb line and screwed with self-tapping screws at the base and to the ceiling. The ends of the ceiling guide are inserted into the right and left wall profiles, aligned with the floor profile and screwed.
Step 2. Installation of supporting profiles


To fix the supporting profiles, you need to make markings on the wall: strictly vertical lines are drawn from the ceiling to the floor every 40 or 60 cm. U-shaped brackets are screwed to the wall along the markings with an interval of 60 cm in height. The brackets are fixed to a wooden wall with self-tapping screws, to a concrete or brick wall using dowel-nails. Now the carrier profiles are inserted into the lower and upper guides, the markings are set parallel and screwed on both sides with 3.5x9.5 mm self-tapping screws. Finally, each profile is reinforced vertically with brackets.
Step 3. Laying communications

After installing the frame between the profiles, the wiring is fixed, the communication pipes are laid. Both wires and pipes should not protrude beyond the guides along the entire plane. To fix communications to the wall surface, special clamps and brackets are used. Particular attention should be paid to insulating wires and sealing pipe joints so that drywall does not have to be dismantled to repair damage.
Step 4. Wall insulation


If the outer walls are insulated, you can do without internal thermal insulation, leaving free space between the drywall and the wall. But even in this case, a layer of insulation under the skin will not be superfluous: such materials have high soundproofing and properties. Before laying, the materials are cut into strips, the width of which is 2-3 cm greater than the distance between the profiles. Lay the insulation as tightly as possible so that gaps do not form.
Step 5. Sheathing the frame

Sheathing the frame with drywall

Drywall sheets are cut out sequentially. To cut the material evenly, you need to draw a line on the surface of the sheet and cut it with a sharp knife. Then the sheet is broken along the markup and cut through on the other side.

So, the skin starts from the corner:
take the first sheet and apply to the carrier profile;
align the material along the edges and screw it with self-tapping screws 25 mm long to the racks every 30 cm;
the next sheet is screwed side by side, aligning the joints on the carrier profile;
for the top row, the first sheet is cut by 40 or 60 cm so that the vertical seams move, since more than three fragments cannot be joined at one point;
before installing drywall, holes for communications are cut in the sheet at the exit points of the pipeline.
The heads of the self-tapping screws should go deeper into the skin by no more than 2 mm; also, they must not be allowed to protrude above the surface. To control the depth of immersion of self-tapping screws, it is recommended to use a bit with a limiter.
Step 6 Seam Sealing

Since drywall sheets have truncated or rounded edges, when joining adjacent fragments, grooves are necessarily formed at the seams. To close them, you will need putty, a spatula and a reinforcing tape - sickle. The starting putty is kneaded, a piece of sickle of the appropriate length is cut off, the putty mixture is applied to the seam and the sickle is applied on top. Carefully straightening the tape in the center of the joint, putty is applied again and carefully distributed with a spatula.

The putty layer should not be too thick, it is better to apply several layers until the seam is completely level with the drywall surface. When the putty dries, the joints are treated with the finest sandpaper. Qualitatively sealed seams do not have recesses and cracks and look like even white stripes on a gray wall background.

The joints on the outer corner sheathing are closed with perforated corner profiles. First, a solution is applied to the corner with a spatula, it is densely distributed in height, and then an aluminum corner is applied and pressed into the putty. Between themselves, the corners are overlapped by 5-7 cm. The putty mixture is again applied from above and a corner is formed with a spatula. Excess solution is immediately removed, and after drying, the surface is sanded with sandpaper.

Step 7. Finishing
To remove the smallest defects, drywall is covered with a thin layer of finishing putty. To do this, you need a wide metal spatula. They start from the edge of the wall: a spatula with a typed solution is placed against the wall at an angle of 10 degrees, pressed from below and with a sharp movement is led up. The more accurate and uniform the movements of the spatula, the smoother the putty will lie. If it doesn’t work out right away, you can try on a section of the wall. It is not necessary to press hard, otherwise scratches will appear on the surface, it is also impossible to release the spatula during movement in order to avoid the formation of sagging.
If the walls are planned to be painted, it is necessary to apply 2 layers of putty, then the seams will not show through the paint. After grinding, the surface is primed, and then the walls can be painted, wallpapered or covered with decorative plaster.
Video - Editing Secrets
Frameless wall cladding

There is another option for fixing drywall sheets - without the use of profiles. This method is suitable if:
- the height of the wall does not exceed 2.5 m;
- vertical deviation no more than 2 cm;
- walls do not need insulation;
- the room is dry and not subject to sudden changes in temperature.
Of course, it is impossible to glue drywall on wallpaper, decorative plaster or peeling paint, otherwise the skin will not last long.
If all conditions meet the requirements, you can start working.
Step 1. Preparing the walls
The concrete or wooden base is cleaned of dust, oil stains, and cracks are sealed. If the walls are painted and the paint is very strong, you do not need to remove it, it is enough to make small vertical and horizontal notches every 30 cm. Next, the surface is coated with a primer and dried.
Step 2. Fastening communications
Low-voltage wiring can be fixed directly on the surface, but for power electric cables and communication pipes, it is necessary to punch strobes in the wall. After laying the wires and pipes, the strobes are closed with special strips and the seams are sealed with putty.

Step 3. Cutting sheets
The lower edge of the sheathing should be 1-1.5 cm above the floor surface. If the height of the wall corresponds to the height of the drywall, the sheets are cut along the lower edge with a hacksaw. Further, if necessary, cut holes for switches, sockets, pipe outlets.
Step 4. Fixing drywall

According to the instructions, glue is diluted, applied with a notched trowel on the back of the sheet with a wide strip along the perimeter and two stripes in the center. Having placed mounting wedges from below, drywall is applied to the wall, leveled and carefully pressed. Using a level or a long ruler, check the sheet vertically and horizontally, if necessary, knocking with a rubber mallet. In the same way, an adjacent sheet is installed, trying to join it with the previous one as tightly as possible.
Step 5 Seam Sealing

Thin seams with a width of less than 4 mm are sealed with one putty; for wide seams, a sickle is additionally used. You can fill the joints with glue, removing excess with a clean cloth. The puttied areas must be sanded with fine sandpaper, and then cleaned of dust. The gap between the floor and drywall is best filled with waterproof sealant.
Now it remains to level the surface with a finishing putty, sand it and wipe it from dust. After priming, the walls can be painted, whitewashed or wallpapered - as you like.
Video - Do-it-yourself wall cladding with drywall
Sheathing with clapboard surfaces is carried out in several interrelated stages, each of which requires a special approach. Careful implementation of all technological procedures is a guarantee that it will be possible to obtain a reliable coating that is distinguished by excellent properties and environmental friendliness. The material is ideal for any kind of work.
Lining - is a board (of different thicknesses), which is made from various types of wood. The material got its name from the original place of use. Namely, train cars, the inner surfaces of which were sheathed with small wooden slats, which created an excellent microclimate. Currently, the wood product is returning to its former popularity, which decreased slightly when plastic and MDF options began to appear.
 The modern construction market offers a wide range of lining types
 It must be borne in mind that do-it-yourself wall cladding with clapboard requires a balanced approach. Therefore, it is important to pay attention to the product at the stage of its acquisition. Pay attention to the following points:
- Proper storage of purchased goods. Packages must be stored in a horizontal position on a support.
- The humidity level of the warehouse should be within the normal range.
- It is not allowed to find products in open space, under the rays of sunlight.
You should also pay attention to the expiration date on the label.
 All information about the storage and shelf life of the lining should be indicated on the packaging of the material.
Such a precaution is necessary in order to mitigate possible risks. The fact is that work with lining is carried out only after they are completely convinced that the material meets all standards.
On a note! The product should be purchased with the necessary margin, which is equal to ten percent. To get the exact number of elements, preliminary calculations are carried out, and a scheme is drawn up. It is important to consider that the size of the width of each fragment is measured by the internal depth. That is, it is necessary to subtract the depth of the groove (10-12 mm).
 It is necessary to buy material with a margin of 10%
 Material handling
After buying the right amount of products and fasteners, the question immediately arises: how to properly sheathe the walls with clapboard? But this is not a top priority. You need to know that the material needs pre-treatment, because in production, no actions are performed other than manufacturing. Therefore, the following manipulations are performed:
- Coniferous woods need complete degreasing. All resin stains are removed. The boards are well washed with acetone (25% solution is required). Further, they are carefully wiped with rags previously moistened with water. After all the steps - the products are dried.
- To obtain the same shade of the surface, each fragment is processed with a pre-prepared mixture. It consists of hydrogen peroxide and acid (oxalic). The solution is prepared based on the type of wood.
- All damages, even minor ones, are repaired with putty. It is better to choose a mixture of wood. You can buy it at the store or make your own.
- If you want to change the shade, then use stain or other special impregnations that preserve the texture of the wood.
 Processing lining allows you to extend its service life and change the color of the material
 Of course, you can find products that will be pre-finished, but their cost will be essentially yours.
On a note! You can't skip preprocessing. This will be a gross violation of the technology for lining surfaces with clapboard.
There are two main options for lining the surface with clapboard: glue and frame. The first requires a perfectly flat plane. Therefore, a method that involves the construction of a crate is preferable. In addition, it allows you to create additional space for warming the room.
 The construction of the frame provides additional opportunities for warming the room
 To attach the lining to the wall you will need:
- Tool. In this case, it is necessary to prepare: a drill with various nozzles, a level (plumb), a hammer, pliers, an electric jigsaw or a hand saw.
- Rails for the frame. For this purpose, a solid wooden beam with a cross section of 30 * 60 mm is excellent. Substrates are prepared immediately. They are used to level the racks.
On a note! If the surface has a significant slope, then setting the wooden beam will be a rather complicated procedure. In this case, a metal profile is used.
- Fasteners: self-tapping screws, dowels, carnations, kleimers; if required, then additional elements for the frame (suspensions).
You should be aware that before sheathing with clapboard, even if the frame method is used, preliminary surface preparation is required. The procedure is simple, it consists in the fact that the old decorative layer is removed, and all defects are well smeared. Additionally, priming is carried out.
Creating a crate
The crate is carefully attached to the wall. The order of placement of the rails is determined by the chosen scheme for laying the lining.
 Scheme for creating a crate for lining
- The beam is treated with refractory impregnation and mold protection. Wood paneling suggests that the wall will be dry.
- The slats should be perpendicular to the decorative boards.
- A single distance is established between the rails, the step of which is 40-50 cm.
- Be sure to leave a gap between the ceiling and the floor. This is especially important for wooden houses, which are subject to constant shrinkage.
- The evenness of the installation of the frame for cladding with wooden clapboard is carefully checked. To do this, use the building level and plumb lines.
- If an empty space is formed between the wall and the rail, then it is filled with prepared dies.
 The empty space between the rail and the wall is filled with wooden dies
 On a note! The crate makes it possible to finish the walls with an additional layer of insulation. It is fixed directly between the racks.
Choosing a Fixation Option
Immediately determined with the method of fixation. After all, clapboard lining can be done in different ways:

 Mounting the lining on the kleimers allows you to make the fasteners invisible
 The necessary fasteners are selected based on the specific situation. Currently, kleimers are becoming more and more popular.
Attachment of decorative material
Fastening the lining begins with the fact that the material is brought into the room and left for two days. This time is necessary for the product to fully acclimatize. If you carry out the installation immediately, then there is a high probability that the warping of the elements will begin - the structure will be deformed. Work is carried out only at a positive temperature and humidity, which is not less than 60%.
 Previously, the lining is brought into the room and left for two days
 The general technique is:
- Often the installation of boards is carried out in a horizontal manner. Therefore, the first element is installed at the bottom so that the spike looks up.
- Fixing starts from the corner, which is away from the main entrance to the room.
- The first board is well checked for level, the horizontal and vertical planes are taken into account. If even small deviations are allowed, they will become very noticeable when the top panel is attached.
- The first fragment is fixed. Once again, the possibility of deviations is checked.
- Next, the following elements are installed, which are first grooved, and then fixed.
But how to sheathe a wall with clapboard vertically? The procedure is the same as before:
- Elements are located from the far corner. The first fragment is exposed and fixed.
- The following elements are inserted into the groove and fixed. It is important to check that the joint is fully connected. To do this, lightly tap the rail along the edge.
- For this method, a wider rail is used. It creates a beautiful surface with fewer joints.
With experience, the walls can be finished in one day (even with the frame). When the installation is fully completed, decorative elements are attached: corners and skirting boards. The surface is well impregnated with stain and varnished.
House decoration outside
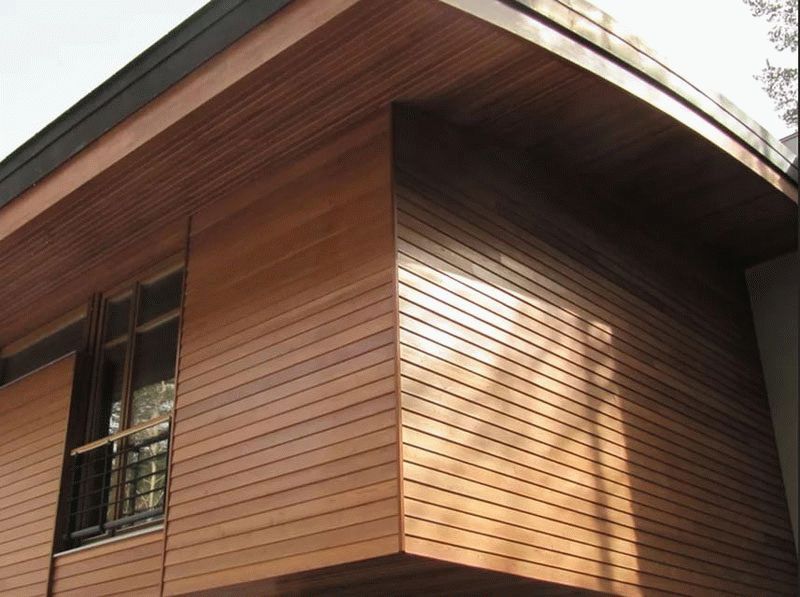 Finishing the house with clapboard outside
 Sheathing the house with clapboard on the outside - almost completely repeats the internal work. The procedure is divided into three stages: marking, installation of the crate and cladding. But there are some nuances:
- Two racks must be installed at each corner of the house.
- Window and door openings are framed with a profile (beam).
- For work, a high-quality board is used, which does not have falling knots.
- Fixation is carried out through.
- Elements are fastened with a groove down. This prevents the accumulation of precipitation.
If you understand the basic rules and study the chosen fixing method well, then the work is done quite quickly. The result will be a surface that will bring comfort and warmth of natural wood to the interior and will delight with its beauty for many years.
Finishing sheets are made from edged boards. The workpiece is planed on both sides, and then protrusions and grooves of the "thorn-groove" type are milled at the ends for articulation with adjacent boards. Board processing ends after obtaining the correct geometric shape. Thanks to the special design of the connecting surfaces, installation work is significantly reduced in cost, and the wall looks monolithic. The scope of the lining is huge; with its help, the outer and inner walls of cottages, gazebos, balconies, baths, etc. are trimmed.
Manufacturers of wooden lining for walls have developed several options for classifying finishing materials. The most important criteria by which lining is distinguished are the profile of the canvas, its dimensions, and the type of wood.
Classification of wall lining by type of profile
This parameter divides the lining into domestic and "euro lining". In the manufacture of goods, domestic and foreign companies adhere to the requirements of different standards, so the boards differ even visually.
The lining of domestic manufacturers is manufactured in accordance with GOST 8242-88. According to the standard, the thickness of the sheets can be from 12 to 25 mm, length - up to 6000 mm, width - 150 mm, tenon length - 4-6 mm.
Domestic products are produced with different profiles, which differ in the sections of the boards and the sizes of the spikes and grooves:
- The basic profile for domestic products is the "Standard" profile. The cross section of the board resembles a trapezoid, in which the edges are sawn at an angle of 30 degrees.
- The "Calm" profile is characterized by rounded corners.
- The profile "Europrofile" has a thickened spike, which increases the strength of the connection.
- Lining-American in cross-section of complex geometry, impregnated with a special composition and designed for external wall cladding. The main difference from other models is that it is mounted with an overlap and only horizontally.
- The block house is made in the form of a round tree, has a convex profile, but the docking points are similar to standard profiles.
- Boards can only be produced in certain sizes: thickness - 13, 16, 19 mm, width - 80, 100, 110, 120 mm, length - up to 6000 mm.
- The DIN 68126 standard strictly regulates the moisture content of wood (14-16%) in the manufacture of products.
- The presence of chips, notches, surface deformations means marriage.
- The length of the groove in the eurolining is 8 mm, it is somewhat larger than the protrusion of the adjacent board. The increased gap does not allow the skin to crack when the products are deformed.
- Air vents are provided on the draft side of the eurolining to prevent the formation of condensate and ventilate the space behind the skin.
- The front side is drawn up in two ways: "Standard" and "Soft line". Products in the latter version are made with rounded options.
Classification of lining for wall decoration by type of wood

The characteristic connects the quality of the lining with the properties of lumber. Boards are divided into 4 classes:
- Lining "Extra" is made of wood without any flaws, there are no core elements in the structure.
- Class "A" lining is also made from lumber without a core. Minor defects are allowed on the finished samples: at a length of 1.5 m there may be one knot (on the front side), two non-through cracks, two resin pockets.
- The canvas of class "B" and "C" allows the presence of defects of various types.
Classification of lining for walls by wood species

There is a wide range of tree species from which blanks for lining are cut. The choice of lumber is made according to the criterion "price-quality". The characteristics of the most popular types of lining from different tree species are given below.
Pine lining is considered the most purchased material for interior decoration due to the ease of wood processing and low price. The pattern on the pine boards is scattered and has a relaxing effect on the eyes. Products from the Scandinavian pine are especially appreciated. Boards from it are knotless, have a pink tint, annual rings of equal thickness and look very beautiful on the wall. Pine products are recommended for use at temperatures from -5 to +30 degrees and low humidity.
The larch panel belongs to the elite finishing materials due to its special strength. Wood does not rot, does not warp, is not afraid of pests, and retains an attractive appearance for a long time. Samples from larch are cheaper than products from other elite materials. The low price of larch is explained by the large number of trees of this species in Russia.
Oak lining belongs to the elite samples. Wall cladding with clapboard made of this material is durable, does not rot for a long time. The high cost of the material pays off with the reliability and durability of the coating.
Linden wood is soft and well processed. Samples from this material are light, strong, practically without knots. Linden in the house gives off a pleasant aroma, has a healing effect. Does not swell in damp areas. The lining made of white linden is distinguished by its purest white color, stains are not visible on the surface of the laths. Used to decorate the walls of the sauna.
Black alder lumber is soft, easy to process, and has a low density. Tolerates moisture well. The color of the alder panel is coffee with marble veins that add sophistication to the wall. The coating does not warp over time, does not change color. The boards are light and easy to work with. Alder cloth can be used in unheated rooms (dachas, attics), as well as for finishing steam bath rooms.
Advantages and disadvantages of wall lining

The number of objective advantages of lining is huge: this includes natural coating material, ease of installation of panels and many other characteristics. Due to numerous positive properties, lining successfully competes with artificial decorative materials:
- Lining is considered the cheapest facing material made from natural raw materials.
- The presence of special grooves significantly reduces the finishing work. The tenon-and-groove connection creates a barrier to dust and dirt.
- After work, the wall looks like a monolithic structure made of wood without visible cracks.
- Wooden lining visually aligns the walls.
- Wood has the ability to create a special indoor climate due to its ability to absorb and release moisture.
- The use of lining reduces the cost of work. Other cladding options associated with leveling surfaces in one plane and finishing are more expensive.
- The product is durable and long lasting without replacement or repair. If necessary, the replacement of individual elements is carried out very quickly.
- Sound and heat insulating materials can be placed between the panels and the wall of the room.
- The texture of the material allows you to combine it with any style of interior design.
Clapboard wall cladding technology
Sheathing of walls with clapboard is carried out in several stages. After removing the protruding elements from the surface, a base is assembled on the wall to which the panels will be attached, then the condition of the boards is checked and defects are eliminated. The last step is to fix the material on the wall. More details about the preliminary and main work during installation are written below.
Preparatory work before finishing the walls with clapboard

When buying a product, pay attention to the points that can reduce the life of the coating: check the storage conditions of the product, the material must be stored in its original packaging; the warehouse must maintain an acceptable level of humidity; storage of products in direct sunlight and at large temperature fluctuations is not allowed; make sure the product has not expired.
Buy material with a small margin, correctly performed calculations will reduce the number of scraps and save material. The number of sheets to cover depends on the width and length of the original web. When calculating, take into account the presence of spikes and grooves on the boards, which reduce the working surface of the canvas by 10-12 mm.
As an example, let's determine the number of boards with a width of 100 mm for finishing a wall of 2500x6000 mm:
- The working surface of the canvas: 100 - 10 = 90 mm.
- The number of boards is 6000:90=67 pieces, with a length of 2.5 m.
The processing method depends on the type of wood, but the list of works for all materials is the same:
- Softwood boards are degreased, resin stains are removed from them. The surface of the boards is washed with a 25% acetone solution, and then wiped with a clean cloth soaked in warm water. After the procedure, the samples are well dried.
- To get the same shade on the surface of the board, it is bleached with hydrogen peroxide and oxalic acid. The concentration of the solution depends on the type of wood.
- Cracks, chips and other defects on the canvas are sealed with putty or putty. Ready-made pastes for wooden surfaces are sold in stores, imitating shades of different types of wood.
- If necessary, mask the modified surfaces with paint carefully selected in color. On your own, paint for lining can be made from titanium or zinc white with the addition of watercolors - the components allow you to choose the right shade with high accuracy.
- You can also change the shade of the board while maintaining the natural structure. To do this, buy wood paint: stain based on organic solvents, synthetic resins, various stains and stains.
Crate for fastening lining on the walls

The technology for finishing walls with clapboard depends on the condition of the base wall. If the surface is flawless and located in a vertical plane, you can think about gluing sheets.
In most cases, the surfaces require leveling, so an even base is made in advance from the rails. For the frame, solid wooden slats with a section of at least 20x40 mm are suitable, the recommended size is 30x60 mm. Bars are easy to mount on the wall, but difficult to level, so metal drywall profiles are often used instead of slats. The design of metal profiles and the methods of their fastening are specially designed for leveling surfaces, which speeds up the installation of the frame.
When creating a crate, follow these recommendations:
- The slats should be placed vertically or horizontally on the wall, but always perpendicular to the boards.
- The distance between the base profiles is no more than 50 cm.
- In wooden houses, leave a margin of 2-3 cm between the vertical slats of the frame, floor and ceiling. This is due to the constant shrinkage of wooden buildings.
- The crate is attached to a wooden wall with self-tapping screws, to a concrete and brick wall - with dowels.
- The outer surfaces of the frame must be in the same vertical plane. Control the verticality with a plumb line, flatness - with the help of cords stretched between the extreme boards.
- After alignment, the gaps behind the profiles are filled with wooden spacers, which are made locally.
How to fix lining on the walls

Before sheathing, bring the lining into the room, lay out the samples on the floor and leave for two days. The boards will undergo "acclimatization" and will not be deformed after installation. Please note that finishing work is allowed to be carried out at a positive temperature and humidity less than 60%. Before attaching the lining to the wall, decide on the method of fixing the sheets.
The easiest method of fastening boards is with nails or self-tapping screws through the canvas into the crate. First, it is recommended to make holes in the boards about 10 mm deep for fasteners, otherwise the board may burst. Fastener heads must be recessed into the wood. After fixing all the boards, seal the remaining holes above the heads with putty or wooden plugs, followed by flush grinding.
For fastening, you can use nails with heads decorated to match the color of the lining. Also on sale you can find capless nails that are hammered at an angle of 70-80 degrees.
Fastening with brackets is used when laying down from the ceiling, in which case the stapler is more convenient than a hammer. The bracket is driven into the spike at an angle of 45 degrees, which allows you to install the next board without any problems.
Secret fastening with nails is similar to the previous fixing method, only carnations are used instead of staples. The heads of the screws are sunk into the wood with a hammer, and they are completely invisible.
Kleimers are used when attaching thin eurolining and to create a decorative finish. They are staples made of sheet steel, which are attached from the wrong side of the sheet. The first canvas is attached to the crate on self-tapping screws, which are then masked with dowels. The next board with clamps is installed in a regular place on the wall, then the clamps are attached to the base with self-tapping screws or a stapler.
Most often, the board is mounted on the wall horizontally. The first sheet is installed at the bottom of the ceiling with a spike up, fixing with fasteners starts from the corner farthest from the entrance doors. The canvas is carefully inserted in the vertical and horizontal planes, the quality of the finish of the entire wall depends on the first sample.
Fastening the board with a groove down is important for sheathing exterior walls, so rain water will not stagnate in the cavity of the board. The next board is installed with a groove on the spike, pressed along the edges and in the middle to the first sample with wooden wedges and fixed in this position.
Often the boards are arranged in a herringbone pattern, with an offset of 50 cm in a horizontal plane, or in a checkerboard pattern. The latest fastening options allow the use of small pieces of boards from 50 to 100 cm, including the remnants of the material.
With a vertical arrangement of the lining, wall decoration begins from the corner. The first rail is carefully set in a vertical plane and fastened with screws or clamps. Subsequent sheets are installed with spikes in the groove of the already fixed canvas, shifted to the stop and attached to the crate. For vertical cladding, it is recommended to use wide boards, more than 80 mm. A wall with narrow sheets will "part".
At the end of the work, close the gaps between the floor, ceiling and lining with a decorative plinth, which will not prevent air from penetrating behind the panels. The cracks in the corners of the room are closed with wooden corner elements.
After mounting the lining on the wall, the sheets are covered with a stain of any shade and varnished. Lacquer coating retains the texture of the lining and retains its color for a long time.
Watch a video about do-it-yourself clapboard wall decoration: