Fastening facade tiles with video. Decorative facade tiles - wall mounting Price for construction mixer
Hello! Thank you very much for the intelligible answer to my question about how to make facade tiles! It worked, though not the first time. Now the next question is ripe - how to lay facade tiles? It turns out that this is not as easy as it might seem at first glance. On the Internet of sensible advice, how to lay facade tiles on the wall, Have not found. I will be glad if you can tell me how to do it correctly. I am especially interested in the question - how to lay facade tiles from porcelain stoneware? Thanks in advance.
Hello Sergey! We are glad to see that our advice has really helped you. You are right, sensible advice on how how to install facade tiles, there are really few on the internet.
It all depends on how the facade tiles are attached. There are several ways:
- fixing to the wall surface with glue;
- mount on the frame using clamps (clamps);
- fastening with self-tapping screws.
How to fix facade tiles self-tapping screws? Self-tapping screws are used to mount tiles on a special frame (metal or wooden). Also, the tiles are fixed with self-tapping screws directly to the walls, if they are made of wood. It is important to remember that not every tile is suitable for this - ceramic or porcelain stoneware is attached in a different way.
For the installation of ceramic facade tiles, special metal fasteners are used. They can be mounted on any wall that can support the weight of the facade and the installation system.
Installation of facade tiles with glue will require some skill and construction skills from you, so before how to glue facade tiles you will need to soberly weigh your strengths and honestly answer to yourself, whether you pull this business or not.
Source: xn - 80abucji3abjli3c.xn - p1ai
Laying facade clinker tiles: DIY installation instructions
Among the wide variety of different building materials for finishing, clinker tiles stand out noticeably. The steady demand for this tile among consumers is due to its reliability, resistance to abrasion, ease of maintenance, low water absorption and a wide variety of different colors and textures.
Clinker tiles are thin natural clay slabs fired using a special technology. There are the following types of clinker tiles:
- Technical tiles are used for laying sidewalks, paths, pedestrian areas, and can also be used as flooring in public buildings.
- Facing tiles can be used for finishing both internal and external elements of buildings and for decorative and design work.
- Facade tiles are intended for exterior cladding of buildings.

Wall faced with facade clinker tiles
Laying facade clinker tiles on your own is not an easy, but quite doable task. In this case, it is important to choose the right materials and strictly follow the established work order.
What tools and materials will you need
- First of all, you will need to purchase the tile and cement itself. If you don't want to mess around with cement, you can purchase a special dry mix for laying clinker tiles or a universal adhesive mix, but their cost will be higher. Some additionally add special elastic emulsions to the mixture to improve the elasticity of the mixture and improve adhesion. Also, plasticizers can be added to the mixture, which provide a low viscosity and good plasticity of the solution. Their use is also justified economically, since when using plasticizers in concrete, it will be necessary to add less cement mixture.
- Tile grout;
- Grinder with a diamond disc;
- Master OK;
- Concrete trowel;
- Bricklayer's lacing, gun or rubber trowel for grouting;
- Rule;
- Notched trowel.
The technology of laying clinker tiles on the facade
In order for the tile to lay flat, hold well and maintain an attractive appearance for a long time, it is necessary to carefully carry out preparatory work. The tiles must be laid on a perfectly flat and clean surface. Therefore, any cracks and chips in the wall must be covered before laying the tiles, and then it is recommended to prime the entire surface.
If you want to additionally insulate the walls before cladding, you will need to prepare the surface of the insulation for laying clinker tiles.
- Clean and level the surface, then prime the wall and let it dry.
- Glue the insulation slabs to the walls.
- Cover the slabs on top with a reinforcing compound and a metal or fiberglass mesh.

- After the reinforcing mixture has dried, you can proceed with the installation of clinker tiles.
Installation instructions for clinker tiles
Facade clinker tiles are laid in stages:
1. Make sure that tiles from different boxes have the same texture and shade. Tiles from the same manufacturer from different batches may slightly differ in shade.
2. Prepare the cement or adhesive mixture according to the manufacturer's instructions.
3. Using a notched trowel, apply about one and a half centimeters thick of the mortar to the area of the wall where you plan to place the tiles.
4. Lay the tiles gradually, row by row. It is better to start from the corner of the building and move from the bottom up. The tile is pressed into the mortar with a slight pressure. It will be easier to lay the tiles evenly if you use the starting corner. The distance between the tiles is chosen arbitrarily depending on the type of tile used and the decorative features of the building. Usually the joint width is about 7-12 mm.
5. When all tiles are installed, grout the joints with a suitable color of grout, then remove excess mixture and clean the tile surface.
Features of laying clinker tiles "under a brick"
Brick effect tiles imitate masonry. When installing it, it is necessary to pay special attention to the width of the joints between the tiles, since not only the appearance of the building facade, but also its durability depends on this.
The rules for laying clinker tiles under a brick differ slightly from the rules for laying ordinary clinker tiles.
1. Before starting finishing work, the surface must also be made perfectly flat, smooth and clean. All cracks and chips are sealed with a cement mixture, the surface is covered with a primer.
2. They also start laying from the bottom, but usually not from the first, but from the second row. The bottom row is usually laid after laying and leveling the floor covering.
3. The adhesive solution is mixed according to the instructions on the package. It is applied in parts, on an area of no more than 1 square meter, as the solution dries quickly. The solution is applied with a spatula. The choice of a suitable trowel depends on the size of the facade clinker tiles - the wider it is, the larger the trowel teeth should be.
4. Since when laying tiles under a brick, it is important that all joints are perfectly straight, it is recommended to additionally use distance crosses for convenience and simplification of the installation process.
5. Sealing of the joints is carried out not less than a day after the completion of the laying of the tiles, not earlier than the complete drying of the mortar.
6. The rest of the putty can be removed with a damp hard sponge or a special float.
7. Expansion joints between individual parts of the building structure (near window frames, door frames, near the floor and ceiling, etc.) are treated with polyurethane or silicone sealants. Clinker tiles are protected from accidental ingress of sealant using a special self-adhesive tape, after which the surface is slightly moistened with water from a sprayer and the seams are carefully filled with sealant. After it has completely solidified, the tape and excess sealant are carefully removed.
How much will it cost to install clinker tiles?
The cost of laying clinker tiles must be calculated taking into account several factors. First of all, the price of laying clinker tiles directly depends on the cost of the materials used. The price of a tile is influenced by its type, quality, size, manufacturer, physical indicators, etc. The presence of decorative elements will increase the total cost of the work.
Also, when calculating the cost of laying tiles, it is necessary to take into account the cost of other finishing materials: adhesive mixtures, grouting, etc.
If you plan to order the laying of clinker tiles from specialists, the final cost of this service will be influenced by the amount of work and its external conditions such as season, altitude, terms in which the work must be completed, etc.
Source: vse-postroim-sami.ru
How to lay tiles on the wall
Tiling the facade wall is not the cheapest, but the most durable, beautiful and respectable type of decoration. Most often, for the decoration of facades, clinker tiles for a brick are used, perfectly imitating real brickwork. Suitable for all surfaces: wood, concrete, brick, plaster.
The laying process is energy-intensive and long, but the result is a reliable coating that will last for many years without losing its appearance and protective properties. How to lay tiles on the wall so that the result meets expectations?
Preparing the wall for tiling
You can lay the tiles on an unprepared surface, but it is better to first plaster the wall: this will eliminate irregularities, cracks, voids that can negatively affect the quality and durability of the tiled coating.
1. Inspect and tap the surface, remove peeling plaster, paint, dirt.
2. If the surface is concrete, first a plaster mesh is fixed to the surface with dowels, on which a rough layer of plaster is placed.
3. Prime the wall.
4. Prepare a mortar based on a conventional sand-cement mixture with the addition of tile adhesive. The proportion of cement and glue is 1: 1.
5. Install beacon profiles. They are attached to the mortar. It is better to start with the extreme lighthouses, level them up. Pull the line along the upper and lower cuts: these are the markings for the intermediate profiles. The intermediate ones during installation should also be measured with a level. The step between them is about 15 centimeters less than the length of the rule used by the installer.
6. Dry the lighthouses within 24 hours.
7. Plaster the wall over the lighthouses. You can not rub it with a grater.
Laying technology
The technology for laying tiles on the wall is quite simple, but it is mandatory. It is advisable to lay the tiles on the wall after the plaster layer is completely dry (about three weeks).
1.Use a spirit level and a paint line to mark the wall. The control line is marked at the level of the second row (the first row will be adjusted for the blind area). Along this line, fix the profile or flat board with dowels - the first row to be laid will rest on it.
Advice: in order for the solution to lay down better and not crack after drying, it is recommended to moisten the wall.
2. Laying tiles on the wall begins from window and door openings, from the corners of the house. For this, tiled corner elements are used.
3. Apply a layer of mortar to the wall using a comb with a tooth length of 1 centimeter. Put some glue on the back of the tile.
Important: the glue dries on average about 15 minutes, faster in the wind. The size of the area should be such that you have time to glue it during this time.
4. Laying tiles on the wall is necessary with a break. The width of the joint at the joint is different: for extruded clinker about a centimeter, for pressed clinker 0.5 is enough. During installation, construction crosses are used.
5. Dry the masonry. Rub either with grout or the same tile glue. There should be no voids: if water seeps into the masonry, the tiles may peel off. It is better to wash tiles stained with grout immediately.
There is a modification of the tile for self-tapping screws. It is most often used for ventilated facades, but it can also be used for conventional cladding. The marking and laying in this case is the same, only the installation of the coating itself is carried out in a dry way.
The main disadvantage of tiles for self-tapping screws is that they are even more expensive than usual. But it is easier to lay out such tiles on the wall, and it is more difficult to spoil the masonry.
Laying tiles on the wall with a wet method is possible only in good weather, dry - in any.
Source: fasadra.ru
How facade tiles are laid using glue and self-tapping screws
 The exterior decoration of the house can be done in various ways, from the application of plastering materials to various methods of installing cladding.
The choice of this or that type of finish depends on the owner's capabilities, his aesthetic preferences or the availability of a certain material.
In addition, the choice is often based on the possibility of independent work.
In this regard, facade tiles are the material with the widest range of possibilities.
Unlike siding or facade panels, which have a certain general technological sequence of installation, facade tiles are produced in many versions and do not have a single installation technique.
Depending on the design, it can be installed using traditional technology, or installed using methods similar to the siding installation technique. The main difference between facade tiles and other types of exterior decoration is the independent installation of each element, a wide variety of types, materials and appearance.
Types of facade tiles
Facade tiles are a material that has many different types of production and installation options.
Installation possible:
- On the glue. The method most similar to the methods of laying tile cladding.
- For fastening materials (screws, clamps, etc.).
For the manufacture of facade cladding can be used:
- Porcelain stoneware, artificial stone.
- Cement mortar.
- Plastic (polypropylene, vinyl, etc.).
- Fiber cement compositions.
- Polymer sand.
- Basalt.
- Asbestos cement, etc.
By types, it differs in:

The main task of the facade cladding is to form a protective coating of the house that can withstand external atmospheric manifestations and has high decorative qualities. There is a special attitude to the appearance of the finishing, since it is the external effect that is the first thing that catches the eye when looking at any house.
In this regard, the facade tile breaks all records - it has the largest number of types of imitation of a stone or wooden surface. All design options used in the production of siding, facade panels and other cladding are used in the manufacture of facade tiles.
Components for facade tiles
The presence of components is not typical for all types of facade tiles. Many types of material are stacked using conventional technology and do not need additional elements. This situation is typical for small material.
If the elements are rather large, then it will not be easy to do without specialized parts. Usually, corner profiles are made, making it possible to neatly veneer the outer (and in some cases, inner) corners of the house.
In addition, fasteners such as cleats, mounting brackets, etc. can be used as component materials. For some types of material, manufacturers provide for the creation of a subsystem - a supporting structure for installation with the formation of a ventilation facade.
At the same time, most types of tiles intended for dry installation do not have a strict reference to the type of subsystem and can be installed on any slats - wooden or metal.

Plaster and surface reinforcement
For tiles that are glued, an even and uniform base is required. The walls of a house, especially with a solid age of construction, can have a large number of various flaws - cracks, dents, delaminated or crumbling areas. In addition, an external insulation can be installed on the surface of the wall, requiring a dense layer to be applied over it for laying the tiles.
The best base is a layer of plaster. If it is applied to a rigid base, then reinforcement can be dispensed with, but if a relatively soft insulation is plastering, or the wall material is loose and prone to crumbling, then for the strength or resistance of the plaster to mechanical stress, you will need to use a reinforcing mesh.
A metal or fiberglass mesh is used, which is installed on a heater or on a wall and a layer of plaster is applied over it.
It must be understood that the presence of a mesh does not protect against cracks, does not strengthen the wall material. The mesh serves for greater strength of the plaster itself, without contributing to the strength of adhesion to wall materials. Therefore, on problem walls, before plastering, all fragile areas should be removed as much as possible, after which a layer of deep penetration primer should be applied.
When plastering on insulation, first of all, you need to apply a layer of mortar on it with a notched trowel, slightly press the mesh into it, then, on top of it, apply another layer. Then the mesh will be inside the layer, which will allow it to perform its functions to the maximum extent.

Surface preparation
The surface of the wall should be freed from all foreign objects fixed on it - remove all lights, disconnect platbands, gutters, brackets, air conditioners, etc. Then you should carefully examine the wall, determining the surface quality, the condition of the material and the number of problem areas.
Existing cracks should be opened with a spatula to ensure their depth and to facilitate access to the plaster material. Peeling or crumbling must be removed as much as possible, the entire wall must be strong, without problem areas, reliable.
After cleaning the wall, apply a double coat of primer with an intermediate hold to dry. It is recommended to pre-fill large potholes with mortar so that the subsequent layer is smoother.
Surface marking
If you plan to install tiles on a subsystem, then you will need a preliminary marking of the surface. It is necessary that the location of the battens match the fixing points of the tiles. To do this, measure the distance between adjacent fasteners vertically and horizontally and, taking into account the values obtained, mark the wall with the obtained step.
When performing the operation, it is necessary to control the horizontal and vertical with the help of a building level. If you plan to use corner profiles, then when marking, you should take into account the peculiarities of their installation and ensure the appropriate location of the strips.

Setting the initial (starting) bar
The tile starter strip serves as a reference line to ensure that the first (bottom) row is set evenly and horizontally. Since the structure of the facade tile does not have any lock connecting to the starting strip, a regular flat strip made of any material is enough to support the bottom row, subsequently it will still be removed.
Installation of the starting strip is carried out along a line drawn along the perimeter of the house strictly horizontally and corresponding to the lower cut of the first row of tiles.

Tile fixing methods
Depending on the design, the method of fastening the facade tiles may be different.:
- "Wet" method - with an adhesive composition. Specialized types of adhesives are used for the tile material (porcelain stoneware, fiber cement, clinker, etc.).
- Fastening with self-tapping screws. Possible hidden fastening (hidden seam), or open with visible fasteners location.
- The use of various mechanical clamps - for example, clamps. With this method, fixation is carried out on specialized devices that match the material used as much as possible in size and other indicators, but it will not be possible to achieve significant secrecy of the fastener - the cleats are noticeable on the surface of the tile. With a small size, this spoils the overall appearance of the cladding canvas.
- Facade tiles with metal fittings.
Usually, each tile type is designed for a specific installation method, which cannot be changed.


Adhesive preparation
For laying tiles, you should use specialized or, at least, the most suitable types of glue for the characteristics. It is sold in dry form, subject to dilution with water in a certain consistency.
The density of the finished solution should be such that the glue is freely applied, does not drip from the surface, but is not too viscous. There are a great many types of glue, to avoid possible errors, you should read the instructions for use on the package.
Accurate adherence to the instructions, adherence to the proportion of dilution and the holding time of the composition before use increases the strength of the adhesive and its adhesion to the tile and base.
Tiling technology
The tiles are laid from the bottom up in the direction corresponding to its construction (especially if there is a hidden seam). The glue is applied with a notched trowel on the wall surface and on the tile, and the direction of the glue stripes should be transverse - if the lines on the wall are horizontal, then on the tile they are vertical.
How to get around corners and openings with tiles
If there are corresponding corner profiles for the tile, then they are used to decorate the outer corners of the house and window or door openings. If such elements are not provided, then the corners are formed in the same way as when applying ordinary tiles - by exact fit of the material and accurate installation in the corners.
In any case, the outer corners are veneered first, then the window and door openings are made out. If there are corner profiles, then the openings are made out by them, but if only tiles are used, then the slopes should be veneered first, and the outer framing of the opening is made at the same time with the wall canvas.

Grouting
The joints between the tiles must be trowelled, i.e. filling gaps to prevent water from entering the wall materials. For grouting, the same types of glue are used that were used during installation, or special compounds for external use, the method of application depends on the type of tile and its design features.
At the same time, not all types of tiles need grouting, but only those that are installed on glue and have gaps. Care should be taken when applying the grout, as many types of material are difficult to remove from the tile surface. It is recommended to remove excess glue as soon as it has set.

Useful video
In this video, you will learn how the facade tiles are laid:
Conclusion
Using façade tiles is a more time-consuming outdoor option than, for example, installing siding, but as a result, you can get your own coating option. The many options for choosing both the material and the pattern or color of the tiles make it possible to embody many design ideas and create a strong decorative effect.
At the same time, the protective properties of the tiles, which provide cut-off from atmospheric moisture and temperature effects, make it possible to increase the service life of the walls of the house.
There are several common options for installing clinker tiles on the facade.
The base can be any: solid brick, ceramic hollow porous block, gas block, cinder block, monolithic frame filled with brick, etc.
1. Consider a situation in which additional insulation is not required.
In this case, we can glue the clinker tiles directly to the base, of course, if it is sufficiently flat. If the base requires additional alignment, then as you can apply, for example -,. Before applying it, you need to prime the surface well. Then, after waiting for the required time until the plaster is completely dry, we proceed to gluing the clinker tiles. For this we will use special deformative facade adhesives with appropriate frost resistance and adhesion. KLINKERS strongly recommends the use of adhesives that meet the minimum values. For example, etc.

After the tiles have been glued, after the time required for the glue to completely dry (here you need not only to withstand the manufacturer's requirements, but also to look at the reality: in what weather conditions does the drying take place - so that during the declared period the glue will completely dry and collect all its properties), proceed to jointing. It is very important to choose the right one - to carefully study the requirements of manufacturers for specific products. For example, a very popular joint filler that is applied in a semi-dry manner (“wet earth”) requires a joint depth of 15–20 mm and a joint width of approximately 12 mm. This means that the tiles must be at least 14 mm thick and the joint width must be at least 10-12 mm. On tiles 8-10 mm thick with the same joint width, we simply cannot use this aggregate. KLINKERS refers to the recommended joint fillers for facade clinker tiles: We do not recommend making flat joints recessed by more than 1 mm.IMPORTANT! The glue is applied both to the base and to the tile itself. On the base - with a combed trowel, and on the tile - flat, so we prime it with glue
2. In this version, we will consider the installation of clinker tiles with additional wall insulation.

You can insulate the facade with stone wool, quartz wool, PSBS slabs.
KLINKERS is an opponent of facade insulation with extruded polystyrene foam.
So, we figured out the material for insulation, and if not, then on the network you will find thousands of recommendations, reviews and expert opinions. Next, you need to select materials. And here, at first glance, an endless space for manufacturers opens up. But! In order to make the right choice, you need to understand that the product really meets the characteristics that will be required for this system. It must be certified and have test reports for a system in which ceramic tiles act as the top layer. It is better if this manufacturer has a Technical Certificate and a full-fledged Album of technical solutions with detailed instructions for the design and installation of this system.
3. Now we will consider the installation of clinker tiles, both with and without additional wall insulation.

This is one of the variations of the ventilated facade based on AQUAPANEL cement sheets. AQUAPANEL has a rectangular shape and consists of a core based on Portland cement and lightweight mineral aggregate. The slab surfaces (back and front) are reinforced with fiberglass. The end edges of the slab are additionally reinforced with fiberglass. This slab can be installed either on an aluminum or stainless steel sub-system or on a wooden frame. And we get a full-fledged ventilated facade with all its properties and advantages, which you can read about on the Internet and study their properties. The advantage of this system is also that we, thus, can level even uneven bases.
After we have mounted the Aquapanel on the facade, we can proceed with the installation of clinker tiles. In this case, the rules are the same as for installation on a load-bearing wall or plaster base. The same rules apply to the filling of joints and their joining.
4. Another option for installing clinker tiles is both with and without additional wall insulation.

With clinker tongue-and-groove tiles. This is a classic ventilated façade with clinker tiles, which does not require any joints, i.e. the entire facade can be assembled at any time of the year, since there are no wet processes at all.
Clinker tiles for this type of ventilated facade are presented in our catalog.
5. In this version, we will consider the installation of clinker tiles, both with and without additional wall insulation.

The seams between which, after installation, are filled with a special compound. This combination of IAF and clinker tiles allows you to achieve maximum resemblance to traditional brickwork. After installation and jointing, a facade made according to such a system is very difficult to distinguish from an ordinary brick one.
6. In this version, we get 2 in 1: cladding and insulation in one product - Thermopanel.

Is a finished product. It is created from polystyrene foam boards and clinker tiles. Clinker tiles are glued to the heat-insulating material with a multicomponent frost-resistant adhesive and - you're done! All that remains is to mount the panels on the facade or basement of the building. Let us dwell in a little more detail on the types of heat-insulating materials that are used in thermal panels. It can be traditional PSBS, extruded polystyrene foam and polyurethane foam. And if we are already accustomed to the PSBS and we know that it is stable and reliable enough, then the other two should be treated with great attention. KLINKERS does not recommend extrusion, as we wrote above, on building facades. We also think about polyurethane foam. These two types of insulation will do their job well in the basement of a building. Let them stay there. As for the installation process, it is extremely simple and looks like this - the panels, after breaking off all levels, are mounted on dowels to the supporting base or wooden frame, if the building needs a geometry correction. Further, only the facade grout remains.
Facade tiles are one of the most reliable and demanded options for outdoor decoration. It is made from a sand-cement mixture, so the material is environmentally friendly. Thanks to the simple technology of laying facade tiles, it can be used not only to decorate the facade. The material is also suitable for finishing basements and balconies. Among all the variety of types and textures, you can easily choose the right option.

This material is used only for the exterior decoration of buildings or their individual elements. Therefore, it has the following set of technical characteristics:
- Resistance to mechanical stress, pinpoint impacts, scratches.
- Wear resistance... Retains its original appearance for a long time, does not become moldy.
- Moisture proof... Due to the minimum number of pores, the material does not pass water through itself.
- Low temperature resistance.
- Not influenced by ultraviolet radiation, does not fade in the sun.
Average life time facade tiles - from 50 years and more.

Types of facing tiles
For facades, you can use any option. Each of them has its own distinctive properties.
Table 1. Classification of facade tiles.
| Name | Materials (edit) | Peculiarities |
|---|---|---|
| Natural stone | Natural materials are used as raw materials | It weighs a lot, therefore it requires special care during installation. It looks solid and has a unique pattern, but if it is necessary to replace one or more elements, it will not be easy to find a tile that is similar in color |
| Porcelain stoneware | A mixture of quartz, clay and spar | Looks like natural stone, but costs less. Easily withstands moisture and temperature extremes |
| Concrete | Made on the basis of concrete, covered with special paint | Imitates any surface - marble, stone, brick. Suitable only for warm climates, because it is not resistant to temperature extremes |
| Clinker | Clay, dyes | It is fired in a special oven at 1200 ° C. Differs in increased wear resistance |
| Agglomerate | A mixture of quartz and synthetic additives | It is obtained by plasma-vacuum sintering. It has increased strength, but at the same time it is lighter than brick and stone. Not suitable for carrying function |
Any of these varieties can be mounted do it yourself... For this, it is necessary to carry out preparatory work:
- clean the surface from debris and dust;
- level the walls - apply a layer of plaster up to 2 cm;
- wait for the plaster to dry and wipe the surface with a special brush.
Advice! For greater reliability, you can use a reinforcing mesh. It is mounted in the process of plastering the walls.
Decorative stone price
Decorative rock
Facade tile manufacturing options
It is not necessary to buy facade tiles. If there is special equipment and the necessary knowledge, the material can be made by hand... Then you can develop your own unique samples, experiment with the composition. But it is better not to violate the basic proportions and production technology, so that the product turns out with a good set of characteristics. There are two ways to make finishing material at home.

Vibration casting
For this, the most affordable raw material option is used - concrete... To prepare the composition, you will need:
- Portland cement;
- sand;
- fine crushed stone;
- slaked lime or synthetic plasticizer.
Important! If you do not add a plasticizer to the solution, it will not be frost-resistant and water-repellent.
Manufacturing procedure:
- Kneads concrete solution.
- Concrete mass flooded into forms. You can use plastic or wooden molds, but the most optimal material for this is polyurethane, with which you can convey the texture of the tile to the smallest detail.
- Blanks are established on the platform of the vibrating table, it is connected to the network.
- Air is removed from the molds, material rammed and put up for drying.
To give the tile the desired shade, you can add dye into concrete at the stage of mixing it. But there is a more economical option - coating the inner surface of the mold with paint before pouring it with a solution.
Vibrocompression
Suitable for all types of finishing materials, but most often used for the manufacture of clinker tiles. Allows you to increase the density of the material without using a large volume of liquid. Polyurethane molds are used for filling.

Clinker tiles are made as follows:
- Modifiers are added to the clay mass.
- The solution is put into a special machine with a vibrating press.
- In it, the mass is compressed under pressure, and blanks are formed from it.
- After the clay has dried, the workpieces are fired at a temperature 1300 degrees.
The result is a material with increased resistance to damage, so the need for repairs is minimized. After dismantling, such tiles can be used re.
Video - Production of facade tiles at home
Installation methods
There are two options for laying tiles - dry and wet.
Dry installation
Its second name is ventilated facade... With this mounting option, additional thermal insulation of the building is created. This method is considered the most costly and reliable... The dry version is more suitable for laying porcelain stoneware tiles, but it can also be used for installing other types of materials.

Its design includes the following elements:
- aluminum profile;
- brackets;
- membrane;
- insulation;
- facade tiles.
It is better to use non-combustible material as insulation - mineral wool... Installation is carried out in a certain order:
- With the help of the level, wall markings... You need to outline two vertical lines and one horizontal.
- Drill drilled holes for anchor bolts... Brackets are installed under the profile.
- On the wall the insulation is fixed... On top of it, a special membrane made of nonwoven materials is applied.
- The frame is installed from a metal profile. It is fixed with rivets. The distance between the profile should be equal to the length of the tile.
- In the profile holes are made under the clamps for tiles. With the help of rivets, they are attached to the frame.
- Mounted facing tiles. First the bottom row, and then the top rows.
Note! If there are already factory fixing plates on the facade tiles, they are attached to the profile using self-tapping screws.

Price for porcelain stoneware tiles
Porcelain stoneware tiles
Wet installation of tiles
A special mixture is used to fix the tiles. The glue mortar is made on a cement-sand base. It is better to take it from the same manufacturer as the tile. This method is more suitable for ceramic tiles.

Required tools:
- notched spatula;
- mallet;
- glue solution;
- Master OK;
- level;
- plumb line;
- cord mooring.
Important! Only sunny weather is suitable for wet styling. In this case, the air temperature should be within + 5-25 degrees.
The installation process consists of several stages:
- Alignment surfaces, elimination of defects.
- Wall covering primer.
- Kneading glue solution.
- Application mixture on the wall. To prevent the solution from drying out, the surface must be covered under 2-3 tiles, no more.
- Distribution glue on the back of the tile.
- Laying down tiles in the corners. Facing the main part of the wall. The rows should be horizontal. They are aligned with a mooring cord.
- Compliance joint width within 6-12 mm... Leveling the tiles by tapping them with a mallet.
Excess glue is wiped off with a piece of dry cloth. If you do all the work in accordance with the instructions, the tile will last a long time.

How is jointing performed - step by step instructions
They are filled with a solution to bind all the elements into a single whole. This also contributes to a reinforced sealing of the seams. After this procedure, the facade looks noble, and the finish is less exposed to the aggressive influence of the external environment. Grouting is carried out in several stages. Each of them has its own characteristics.
Step 1. Moistening the joints. Before starting work, you need to wait until the solution is completely dry - from 10 to 15 days... If you start grouting ahead of schedule, this will negatively affect the strength of the finish.
Attention! The water that is part of the adhesive mixture will not find a way out and will destroy facade from the inside. This is especially dangerous for regions with extremely low air temperatures in winter.
Working with seams begins with moistening them. For this, a sprayer is used. Moistening with water improves adhesion between surfaces. It is necessary to moisten the seams in all directions - both horizontally and vertically.

Step 2. Mixing the solution. A mixture based on lime and cement has good plasticity. It is easy to level and distribute over the work surface. Cement in its pure form is not suitable for this. It can only be used with the addition of plasticizers to ensure proper hardening of the mixture.

Construction mixer price
Construction mixer
To prepare the solution, you will need the following components:
- cement - 1 bucket;
- slaked lime - 1 bucket;
- sand - 5 buckets.
A liquid plasticizer can be used instead of lime. The solution is kneaded in a certain order:
- Water is poured in small portions. Plain tap water will do.
- Stir the composition continuously until it becomes homogeneous, and has a consistency similar to wet sand, which sticks well if crumpled.
- The finished mixture is used for 2 hours... Then the solution hardens and becomes unusable. Even thinning it with water will not improve adhesion between surfaces.
If you don't want to prepare the mixture yourself, you can buy a ready-made one. Then it is used in accordance with the instructions that are attached to it.

Note! The strength of the solution depends not only on compliance with the technology of mixing it. This is also influenced by the base to which the mixture is applied. It should be clean and even.
Step 3. Filling the joints. The moistened surface is filled with a ready-made solution. This is done as follows:
- The composition is taken on a spatula.
- Using a trowel, the mixture is brought into an open seam.
- The seam is tamped. To do this, iron it with a trowel with slight pressure.
Consumption of composition for tiles with a thickness from 8 to 12 mm will be within 4-5 kg per 1 sq. M... During work, part of the grouting mixture crumbles. In order to save on the floor, it is better to lay a clean plastic wrap. The spilled solution can be carefully collected and used as directed.

Sealant gun prices
Sealant gun
Step 4. Cleaning and moisturizing the seams. After tamping, the remaining mortar must be removed from the tile. To do this, the trim is neatly swept with a soft-bristled brush or a soft brush.
Advice! Movements are carried out diagonally. Then you can easily remove the excess mixture without damaging the seams.
After that, the seams are sprayed with water from the spray. This helps prevent premature mortar drying and cracking.

Video - How to grind the seams of hand-molded clinker tiles
Installation of clinker facade tiles
Clinker tiles are a material increased strength... But in order for it to serve for a long time, it is necessary to observe the technology of working with it. Installation of finishing material takes place in stages.
Preparatory activities
As a base for finishing, you can use plaster or reinforced concrete with increased frost resistance. There are special requirements for the base:
- perfect smoothness;
- good bearing capacity;
- absence of cracks, voids and poorly fixed parts;
- absolute cleanliness - no dirt, greasy stains, bitumen mastic.
There must be a layer waterproofing to prevent moisture penetration and deterioration of the façade. If there are fragile places on the base that crumble, they are removed. All irregularities are leveled with plaster no later than 3 days before laying.

Important! Additionally, you can install thermal insulation. Then the heat will not spread to the external environment, pathogenic microorganisms and fungus will not penetrate into the house. At the same time, heating costs in the cold season will be reduced by almost half.
Kneading the glue
For this purpose, it is most convenient to use a mechanical mixer. Prepare a mortar from cement M-500 and sand in the ratio 1:3 ... Water is added to this mixture in small portions and mixed until the mass becomes plastic and homogeneous.
You can also use a ready-made solution, but the scope of its application must correspond to the planned construction work. Such glue is most often applied to the tile itself, so you should not leave important notes or calculations on its inner side.

Attention! Do not apply too much glue mixture at once, otherwise the mass will weather or dry out. Excess mortar is removed immediately before it hardens.
Styling features
Before proceeding with the installation process, the materials must be taken out of the packaging and mixed so that there are no sharp deviations in color. Only slight differences in shade are allowed.
You can start styling only in good weather - at a temperature within +5-30 degrees and no rain. If it is too hot outside or the precipitation does not stop, and the work needs to be continued urgently, you can use to install a shelter in the form of an awning and background.

Advice! If clinker-coated thermal panels are used, they can be installed in all weather conditions. This will not affect the quality of the finish.
The process of laying clinker tiles takes place in a certain order:
- Wall surface moisturizes water from a spray bottle.
- On her building mixture is applied thick 3-4 cm... The solution is leveled with a rail.
- Approximate markup the location of the tiles.
- Above fits finishing material. In this case, the seam width should be no more than 12 mm.
- Tile installation begins with the design of the plots around windows and doors... After that, proceed to the corners of the building. To facilitate the installation process, you can use a special corner tile that emphasizes the lines of the walls and looks natural.
- Surface sprinkled water and covered with polyethylene for uniform drying of the mixture.
Note! For ease of installation, the walls can be divided into conditional squares with a side 1m... If the contours of the tiles do not fit into this shape, you can cut it off with a saw. "

To make the facade finish look harmonious and durable, it is recommended to adhere to the following tips:
- tiles of saturated and dark shades are laid out in the lower part of the facade - at a height up to 6 m from the foundation;
- dark colors increase the overheating of the building, so it should be no more than 20% from the total area of the tile;
- for grouting you can use a ready-made color mixture that matches the tone of the finishing material;
- before applying the mortar, the surface of the walls is better prime and wait until it dries completely;
- it is desirable to lay clinker in rows starting from the bottom of the facade;
- if attached to the walls insulation, from above it is covered with a reinforcing mixture or fiberglass;
- if after sealing the seams a lot of dirt remains, it is removed with a jet of water under high pressure, and for especially neglected cases it is used special substances.
Also, pay attention to our article on the topic - where we examined in detail the installation technology.
Facade tiles are becoming more and more popular, and the process of their installation is not very labor intensive. Even a beginner can cope with this, if he takes into account the laying technology. In order for the finish to look spectacular, perform a protective function and keep the heat inside the building longer, you need to carefully consider its installation.
Is a modern material based on fiberglass, improved bitumen and natural basalt granules. It is characterized by increased tightness, resistance to corrosion and temperature fluctuations, and also has exceptional durability. Facade tiles are used for cladding, renovation and decoration of the facade, its architectural elements (pediment, entrance lobby), fences and barriers. The material has great expressive possibilities: a combination of various colors and patterns can completely transform the appearance of a country house, make it stylish and original.
1. Device counter-lattice
To create a ventilated gap Between the wall and the finish, it is recommended to install a beam with a thickness of at least 25 mm vertically with a step of 300 mm. For capillary cutting off of wooden elements in contact with the wall, it is recommended to fix the self-adhesive underlay to the surface adjacent to the wall.


The counter-beam is initially installed under the size of the OSB sheet. And then intermediate bars are installed.


2. Solid base device
The basis for wooden surfaces with a thickness of at least 9 mm are used. The substrate must be dry, solid and hard. For buildings without a plinth, it is necessary to treat the lower part of the wooden base (up to a height of 150 mm) with special compounds based on copper oxide of the "NEOMID 430" type or its analogues to increase the service life of the structure.
Spreading the seams
OSB sheets are mounted with an offset between the rows, staggering, to ensure rigidity at the joints. A gap of 2-3 mm is left between the OSB sheets to compensate for thermal expansion.


Openings
To reduce the risk of damage for facade tiles at the corners of window and door openings (places of the highest stress concentration), it is recommended to cut sheets with the letter "G". Moreover, the cuttings do not go to waste - they will certainly be used between the main panels. Before installing the facade tiles, you should carefully inspect the facade surface and eliminate all visible defects.


3. Surface marking
Before laying facade tiles it is necessary to apply marking lines on the surface of the base, which play the role of guides and help to align the facade tiles horizontally and vertically.


4. Installation of facade tiles

For buildings and structures with a plinth it is necessary to provide for the ebb. Installing them begins from the corner of the house. First, the ebb element, previously cut at a right angle, is attached, then the rest of the basement of the building or structure is mounted with an overlap of 50 mm.
To minimize tonal imbalance before use, mix the contents of 5-6 packs in random order.


Setting up the starting strip
Installation of the first row of facade tiles starts from the corner of the house with an indent from the edge of 5-10 mm. The "petals" of the facade tiles used for the first row are cut off. Before installation, it is necessary to remove the silicone film from the facade tiles, which covers the adhesive layer.


Installation of the first and other rows
Each shingle of facade tiles nailed on 8 nails.


Using glue
The gluing of the facade tiles is ensured by heating the sticky layer with a building hairdryer and pressing it against the underlying row. If it was not possible to glue the tiles together, then each tile should be glued with two-component glue-adhesive "88 TECHNONICOL HAUBERK" or its analogue.
Installation of tiles around openings
Part of an ordinary tile that goes into the opening, trimmed with a roofing knife. Then they mount the outer metal corner and ebb.


Installation of the outer corner on top of the opening
To prevent water flowing under the metal corner at the top of the opening, the facade tiles are mounted over the corner. Tile petals are carefully trimmed.


Not all walls are suitable for external tile covering - it depends on the wall material and the insulation on it. For some exterior walls or insulation you may need, for example, facade tiles with metal fixings. In general, facade tiles for outdoor decoration can be attached in a few ways - either glued to the surface, or screwed to the wall, or mounted in clips on the frame.
And in any case, the defining moment at will be exactly which base is under it. Based on the base material, the method of fastening the external decorative material is chosen, and the very type of decorative coating is also.
This means that on weak bases you cannot, for example, mount precisely because of its weight. In the same way, you will not be able to equip a wet plaster facade on the walls of an old wooden house due to the fact that such a facade will collapse over time - the base for it will be too fragile.
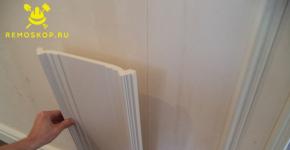
As usual, the tile is attached to the foam
Decorative facade tiles on foam plastic can be fixed in two ways - glued and fixed to the frame.
Let's focus on the wireframe version right away. Polyfoam is a combustible insulation, no matter what the foam manufacturers tell us. If the facade tile is on foam plastic with a gap, then there may be a ventilation gap between the outer decorative coating and the insulation.
In the event of a fire, which is possible with such a combination of "foam - ventilation gap", the fire will spread along the ventilation gap, covered with decorative tiles on top. It will be impossible to extinguish such a fire.
The only option when the facade tile on foam plastic can be attached to the frame is the full adhesion of the tile to the insulation and the possible gluing of the foam plastic - tile connection. In this version, there will be no air flow under the decorative coating along the insulation layer, the occurrence of fire and the maintenance of combustion is impossible.

In the case when the classic is used, the facade tiles on foam plastic are attached with glue, directly to the plaster reinforcing mesh.
Also, you will have to fix the clinker tiles with glue, since it is unlikely that it will be possible to fix it with clamps on the facade.
Fastening facade tiles with self-tapping screws
When the facade tiles are installed on a frame made of wood or metal, or when they are fastened to old wooden walls from a log or bar, self-tapping screws can be used.
Not all facade tiles on self-tapping screws will stick to the wall. For example, it will not be possible to fix porcelain stoneware tiles or ceramic tiles in this way. For their fastening, other methods are provided.
But any light options for decorative coating - plastic or wooden - can be attached in just this way. Metal or self-tapping screws can be fixed directly to the walls of an old wooden house, or you can use a crate for such an attachment.

If you need to fix heavy tiles - porcelain stoneware or ceramic facade - you will need metal fasteners.
Facade tiles with clamps
Porcelain stoneware facade tiles with metal fasteners - clamps - can be mounted on any walls capable of bearing the weight of the fastening system and the facade to be installed. That is, any brick, concrete or wooden walls can be clad with this material using a metal frame system and holding brackets.

Clamped ceramic façade tiles can also be attached to all types of walls. The only limitation here will be the ability of the load-bearing wall to support the weight of the cladding material being hung.
Independent production of facade tiles and fasteners
Can decorative facade tiles be made with their own hands and fastenings for it? Of course yes. In previous materials on the site, it has already been described how you can make. The technology for the production of facade tiles on their own will be about the same.

The technology for the production of tiles for outdoor work will be disclosed in the following materials on the site, but you can familiarize yourself with how the homemade facade tiles with metal fasteners will be mounted right now.
The diagram shows a facade tile with metal fasteners, arranged with, and fixed on the outer wall of the house - this will be the overall "pie" of the wall:

As you can see, it is the clamps that are used, or you can use their homemade likeness, but not the self-tapping screws. Why? Because such a facade tile on self-tapping screws will not be able to stick normally to the wall, even if self-tapping screws with wide hats. The material of the cladding panels itself will not withstand.
Due to a number of excellent qualities, extruded polystyrene foam is readily used in construction or during renovation work. The installation of expanded polystyrene on the walls is not the only thing for which it serves ...
Facade tiles are one of the most popular and demanded materials for home decoration. It consists of various sand-cement compositions and can be made of completely different ...
In modern construction, walls are still built of bricks. Despite the many positive aspects, a brick house needs additional insulation. Thermal insulation of external walls of a brick ...