How to upholster a door with insulation with dermantin. Upholstery of a metal door and an entrance door, how to make it yourself
Entrance doors are, of course, first of all, protection from unexpected guests, as well as from the penetration of cold air into the room, extraneous sounds, and so on. However, the functionality does not end there. The door leaf is also, one might say, a visiting card or the face of a house or apartment. After all, coming to visit someone, the first thing we see is, of course, the front door. That is why the appearance of the door leaf is quite an important aspect.
The most popular and cost-effective method of improving the appearance of a given element of a house is to cover it with materials intended for this purpose. The most commonly used of these is dermantin. How to sheathe a door with dermantine with your own hands will be discussed in this publication.
This cladding material has a number of advantages over other similar materials:
- High quality at low cost. Modern types of this covering material practically do not differ from natural types of leather. However, it is several times cheaper than natural leather. Therefore, upholstery of the door with dermantine is also economically beneficial;
- This upholstery does not shrink. Its dimensions do not change under the influence of ambient temperatures, and it is not afraid of the effects of moisture, while it does not lose its qualities;
- It is an excellent heat and sound insulator. The cloth sheathed with dermantine retains even more heat and prevents extraneous sounds from entering the room. Therefore, door insulation with dermantine is often used along with cladding;
- Easy to clean. To maintain a decent look of the door leaf sheathed with this material, it is enough to wipe the surface of the sheathing from time to time with a damp cloth, you can use degreasing detergents;
- Excellent decorative properties. Due to the variety of texture and color solutions, cladding of entrance doors with dermantine can give it a completely different, modern and stylish look.
How to choose material
When choosing the material that will be used for thermal insulation and upholstery of the front door with dermantine, you should pay special attention to its base, as well as the quality of its coating. Most preferred is a dense, slightly resilient material when stretched. The absence of stains from paint indicates the high quality of this material. Good and high quality dermantin is scratch resistant.
Most preferred is a dense, slightly resilient material when stretched.
When choosing the material that will be used for thermal insulation and upholstery of the front door with dermantine, you should pay special attention to its base, as well as the quality of its coating.
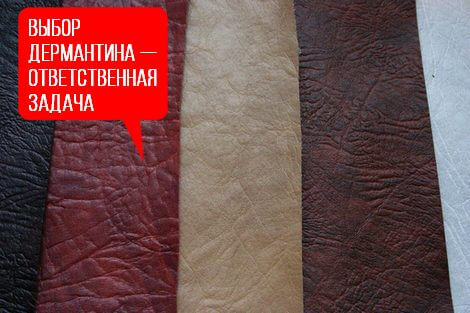
To check its quality, it is enough to draw a fingernail over its surface - there should be no traces on the high-quality material. And finally, about one more important nuance when choosing a high-quality dermantin: pay attention to the smell of this material. Cheap and low-quality, it tends to exude a specific "amber" with chemical shades. This can be a very serious problem, especially if the door is trimmed from the inside.
When buying cladding dermantin, remember that the dimensions of the material should be 10% larger than the dimensions of the door leaf.
Required tools
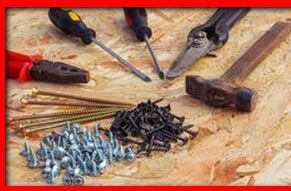 Before sheathe doors with dermantine, you need to prepare the necessary tools. This list is very small:
- Nails with wide (better decorated) heads;
- Sandpaper. Preferably fine-grained;
- Hammer;
- Scissors or a sharpened pocket knife;
- Ordinary and Phillips screwdriver (needed to dismantle existing fittings);
- Pliers and pliers. In case you have to remove old nails when cleaning the door leaf;
- Construction stapler.

Preparing for sheathing
In order for the upholstery to lay on the door leaf smoothly, beautifully, without distortions, the latter must be prepared for the upholstery process. Consider how to sheathe the door step by step:
Having removed the canvas from the hinges, we dismantle all the accessories available on it (latches, locks, handles, a peephole, and so on).
- We release it from the old casing, if any.
- If there are any significant irregularities on the canvas, for example, remnants of old paint, then, before sheathing the door with dermantine with our own hands, we clean it all with fine-grained sandpaper.
After all the preparatory operations done, you can, as an additional protection of the door leaf, degrease its surface with any degreasing agent and cover with some antiseptic. After that, the canvas should dry out a little.
Plating process

If it is planned to lay insulation and lining materials, they should be prepared and marked in advance. Further, in fact, the door upholstery with dermantine with your own hands begins.
- We measure the height and width of the door leaf.
- We mark and cut off the dermantin according to the measurements obtained, not forgetting to make 10-15 cm allowances for each side.
- On the pre-prepared door leaf, we evenly spread the marked and cut out cladding material.
- On one of the edges of the canvas, we turn it up and fasten it on the other side of the door with stapling brackets. It will not work to sheathe an iron door with such brackets, therefore such canvases are sheathed using special self-tapping screws.
- We smooth the upholstery by pulling it over the surface of the door leaf, starting from the fixed edge to the opposite end. After that, we perform step 4 on all other ends. As a result, we get a surface completely covered with dermantine.
- The final step of the cladding is the final fixing of the dermantine cladding with curly nails with wide heads.
At the final step of the cladding, when the finishing is almost complete, there is an opportunity to give free rein to your own imagination. To decorate a paneled door with dermantine with your own hands, you can use a variety of decorative corners, slats, curly elements, and so on. Everything is limited only by the imagination and financial capabilities of the owner. If you wish, by sheathing the door with your own hands with dermantine and decorating it, you can get your own exclusive design of the "gate" of your house.
How to sheathe a door with your own hands video, see below:
Of course, today, if the front door has lost its former attractiveness, the issue can be solved radically - just replace it. Fortunately, the days are gone when this procedure was really a problem due to the total deficit of absolutely everything. But ... Firstly, not everyone wants to part with their good-quality door, albeit already dried out and letting in all sounds and smells. Secondly, not everyone can afford installing a new one. What to do in this case? Breathe a second life into it - upholstery the door with dermantine! Do it yourself or invite a specialist. True, the first option is preferable at least because it will allow you to save a fairly significant amount. And this, you see, is a compelling argument. Therefore, arm yourself with materials, tools and knowledge on how to upholster a door with dermantine. And don't be alarmed. Even if you've only held the hammer in your hands a couple of times in your entire life, you will succeed! The process is very simple, you won't have any difficulties.
So let's get started. We offer you a master class on the topic: "How to upholster a door with dermantine." Study, and then get down to work with complete confidence in your abilities.
All about Dermantin
But first, you need to say a few words about the upholstery material itself, which, by the way, has been updating doors for a very long time. It is considered a type of artificial leather, but it is a more budgetary option. The seamy side of it is and the front side is a layer of nitrocellulose.
If we talk about its operational characteristics, it should be noted that dermantin is distinguished by its strength, durability, ease of maintenance, and more than affordable cost. In addition, there is such a variety of colors and textures on sale that if you decide to upholster the door with dermantine with your own hands, you will not have any problems with the choice. On the contrary, you can pick up such an interesting version of this material that your front door will look no worse, if not better than the expensive, custom-made neighbor's door.

What is needed
With the upholstery sorted out. But since it is necessary to upholster the door with dermantine using insulation - a special lining material, then you need to stock up on them. Usually, for these purposes, either foam rubber or special batting is used. As for the amount of material required, both insulation and dermantin need to be bought according to the size of your door (taking into account the seam allowances - ten to twelve centimeters on each side).
You will also need furniture nails. They are usually produced with metal hats, which can be made in various colors and stylized as silver, gold or bronze. If you wish, you can also find carnations, in which the caps are upholstered with dermantine. You also need to purchase metal corners (four pieces), PVA glue.
How to upholster a door with dermantine without a tool? No way! Therefore, stock up on a screwdriver, screwdriver, hammer, stapler and scissors. You can start.
Preparatory stage
The door, of course, will have to be removed from its hinges. Then remove - if present - all of the old upholstery from it. Along the way, get rid of anything that might interfere with the update process: remove the lock, remove the peephole, the hinges. If there are any defects on the door leaf, eliminate them. When the surface is fully prepared, you can proceed to the main stage.

How to upholster a door with dermantine
Free up space in the room or hallway, put two stools, mount the door on them. Screw on the corners They will strengthen your structure. Cut out the insulation in accordance with the glue and glue the foam or batting. To avoid waiting for the glue to dry, grab the material in several places with a stapler. Then spread a piece of dermantine on the insulation, and so that on each side there are the same allowances for the seams. And then tuck the edges inward, under the insulation, forming a kind of small roller and at the same time nailing them. Algorithm of actions: we start from the top edge, then we fix the left and right sides, the bottom - at the very end. When fixing the roller, be sure to ensure that its thickness is uniform. And be sure to drive in the studs at the same distance from each other, otherwise your door is unlikely to look neat.
That, perhaps, is all. At this, the master class "How to upholster a wooden door with dermantine" can be considered complete. But still it is necessary to mention one small detail, thanks to which the front door to your apartment will become truly exclusive.

Decorative finishing
To decorate the surface of the renovated door, you can use special braid or cords. A drawing is laid out in the center or over the entire surface of them, and then fixed with studs in the right places. And you can "depict" anything your heart desires: a grid, vignettes, rhombuses. This is as your fantasy tells you.
Now that's really all. You can not only teach everyone with a clear conscience how to properly cover the door with dermantine, but also demonstrate the result.
One of the most popular and effective ways of presenting an entrance is to upholster doors with special materials. Their correct selection allows you to get a completely new image of the "face" of a house or apartment. The event is not so difficult to master on your own. Sheathing is carried out not only in order to restore old doors, but also to change the design style of even new wooden and metal doors.
Why do door upholstery
 Front door upholstery has a multifunctional meaning:
- Changing the appearance not only in color, but in texture and even shape. Soft upholstery makes it possible to carry out a three-dimensional pattern and decoration. A real masterpiece can be made from a simple or old door.
- Insulation - materials with a low coefficient of thermal conductivity are used for cladding. Moreover, both soft and sheet heat-insulating materials are applicable.
- Soundproofing, because the materials used have excellent sound absorption characteristics. If necessary, specialized sound insulation can be applied.
- Vibration and noise isolation. Metal and wooden doors without upholstery resonate strongly from any pop in the staircase and vibrate when closed, which is very annoying. Upholstery helps to get rid of such manifestations. The material applied to the canvas perfectly absorbs vibrations and noise.
A layer-by-layer combination of sound insulation, insulation and decor allows you to get the maximum effect.
Features of upholstery for doors
 Door cladding is performed using many technologies, and a number of important features can be distinguished:
- Solid door cladding is made both with solid (MDF, plywood, veneer) and elastic materials (various vinyl films). A distinctive feature is the preservation of a solid surface with the main purpose of decoration, as well as insulation.
- Soft cladding is distinguished by the use of only elastic and sealing materials, which makes it possible not only to carry out insulation, soundproofing, but to create an original volumetric pattern of the door.
- The upholstery of a wooden door is somewhat different from the finish of a metal sheet. This is due to the peculiarity of the fastening, because it is impossible to drive a decorative furniture nail into the metal. Special self-tapping screws are used or the canvas is pasted over with durable glue with high adhesion capacity.
- The selection of materials, their required amount is based on a comprehensive idea, given that the overlaid layers of materials somewhat increase the area of the shelter. It is recommended that before performing door trimming, be sure to carefully study the technology, conditionally break down its stages and even draw up an operational map. This will allow you to get rid of alterations, damage to materials and, as a result, will simplify the achievement of the desired result.
- Nails for upholstery doors are selected special with a large, like a button, a head. The assortment usually includes hardware with decorative stamping and painting for gold, copper, black, white, which should also be taken into account when developing the design of an updated door leaf.
For the event, you will need a set of carpentry, measuring tools, super-strong glue "Liquid nails".
Features of upholstery door materials
 The upholstery for the door is made of two similar materials, although they are often confused and called leatherette or dermantine:
- The very first leatherette was dermantin, which is a woven base coated with nitrocellulose. The material has retained its popularity to the present day due to its relatively high resistance to ultraviolet radiation. Padding the door with dermantine is allowed even from the outside with a direct exit to the street. The material is resistant to chemical and biological effects, and also retains its properties at high temperature extremes.
- Vinyl leather is a modern material, competitive in quality and price. It is practically not inferior in its technical characteristics to expensive upholstery materials. It is a sheet multilayer material with a layer of polyvinyl chloride, which is also resistant to chemical and biological influences. Depending on the quality, it reveals signs of aging and cracking under active exposure to ultraviolet radiation. It is recommended that the vinyl-leather door upholstery should not be exposed to prolonged exposure to sunlight.
It is advisable, when selecting and purchasing, to specify precisely the characteristics of the material, and not its variety.
Dermantin is practically not produced using the old technology, and all leatherette is very similar in production method with differences in the chemical composition of the polymer and the base, which is the reason for the difference in the price category and technical characteristics:
- the surface can be glossy or matte, ideally smooth, with a different texture and even porous;
- the surface can imitate various skin of animals and reptiles;
- the base of the leatherette is completely different from knitted and felt to polymer foamed;
- upholstery is distinguished by the coefficient of thermal expansion, elasticity, elongation and resistance to chemical reagents;
- dermantin for door upholstery does not require special care and can be easily cleaned using ordinary laundry soap, but active solvents can negatively affect the polymer and leave traces of exposure.
Features of self-upholstery of doors with leatherette
 When preparing for independent door upholstery, you have to independently choose both material, insulation, and decorative elements.
Features of the selection of upholstery materials

Pay attention:
- For soft bulk upholstery, an elastic and "springy" material is advisable, then sagging and unwanted folds will not be detected during temperature fluctuations. For a flat rigid cladding, it is advisable to select a material with a lower coefficient of shrinkage and elasticity. This will ensure a snug fit of the leatherette during temperature changes, which means that the fastening will be less disturbed.
- Upholstery of wooden doors for a secure attachment of dermantin requires fairly frequent fixing points. You can only use nails with a special head (about 1 cm in diameter). In cases of hidden fixing methods, the use of mounting brackets is permissible. The fixation step is selected from the leatherette tension, the amount of lining and the design format - it ranges from 2 to 7 cm.
- In order to beautifully and neatly sheathe the door with dermantine, it is necessary to choose the right materials, position them precisely and fix them correctly. It is recommended to use only polymeric materials as a lining material. They do not lose their properties over time and do not support the development of any biological forms. Foam rubber sheets or synthetic winterizer are popular and suitable. The thickness of the layer is selected from 2 to 5 cm, and multilayer is allowed.
- To strengthen the fixation and form the original pattern, tapes or twine made of a similar polymer, as well as a stainless steel cable, are used. Reinforcing tapes can be made independently with long cuts with a hem in the edging.
- Simple drawings are formed by geometric shapes in strict compliance with the recommended step-by-step technology. The creation of a pattern can be carried out both with the help of ribbons, cords, and only with nails or by a combination of methods.
To create very complex patterns, some craftsmen use a special furniture technology of layered curly laying of the material.
The lower layers are stacked in segments, forming the bumps of the pattern, and on top a single “enveloping blanket” is created with a material with a thickness of about 1 cm.
Technological features of door upholstery
 Stages of work:

It is very difficult to perform all actions when the door is overhang. Therefore, to simplify and accurately form the pattern, the door leaf is dismantled and placed on chairs, stools.
Video instruction for upholstery of a wooden door
Sooner or later, but any apartment owner comes to the conclusion that the insulation of the front door is a necessity. Do-it-yourself door trim with leatherette will help solve several important problems - this is its thermal and sound insulation and decorative design.
To the fact that the door must be insulated, they usually come in the cold season, when, it would seem, in very small cracks, it begins to blow with a draft. But is it worth waiting for winter? Wouldn't it be better to carry out such work in advance?
When solving the issue of transforming the door leaf, you can turn to the simplest way of sheathing - even stretching the leatherette, or you can use more complex options when several pieces of material are used.
In any case, all the nuances need to be thought out in advance and the necessary tools and materials for work should be prepared.
Preparing for door trim
So that nothing distracts the master directly in the process of work, you need to do the following in advance:
1. Prepare a sketch of the future sheathing, if it will have any drawing. It can be a carefully checked drawing or, in case of emergency, even a regular pencil sketch.
2. Based on the drawn picture, you can make a list of the necessary materials that will be needed for work:
- Leatherette or imitation leather can be purchased in specialized stores, where a large selection of this material is presented. There you can choose it not only by thickness, but also by color and textured pattern on the surface. The standard width of the leatherette is 1100 ÷ 1400 mm - it is just suitable for the door leaf in the apartment. 200 ÷ 250 mm are added to the length of the door leaf.

If, however, a door in a private house is sheathed, which has two leaves, then to the dimensions obtained when measuring, you need to add 100 ÷ 150 mm, both in length and in width of the material.
Leatherette is also needed to make rollers that frame the door leaf. They are strips of material that have a length equal to the height of the door and a width of 130 ÷ 170 mm. You will need three of these elements.
If the door leaf is sheathed with separate leatherette elements, then more will be needed. When calculating the material in this case, it is necessary to take into account its bending inward on each individual element by 50 ÷ 100 mm from all sides.

Another option for lining with a pattern can be removing it with separate strips of leatherette. Their number is calculated depending on the chosen decoration.
- Insulation material will help to achieve thermal and noise insulation.
 For insulation and sound insulation, sheet foam rubber is well suited
 For these purposes, use a dense synthetic winterizer, felt or foam rubber. The material must have a thickness of at least 10 ÷ 25 mm, depending on its density and on the expected volume (relief) of the drawing, which will be removed using constrictions or decorative nails.

If it will be insulated, then it is necessary to purchase foam sheets of the required thickness.
- In the case when it is planned to use nails covered with leatherette or artificial leather for decorative design, then it is worth choosing the color of their hats so that the whole composition looks harmonious.

The cladding will look more presentable if the nail heads are large enough and the same color as the entire cladding canvas.
Another option would be nails with metal heads that match the color and texture of the material of the handles and locks.
- To finish the metal door, you will need glue, since the leatherette and a thin layer of insulation will be glued to its front side. For this purpose, the universal "Moment" or "88" glue is well suited.
- For the manufacture of sealing rollers, it is best to purchase a ready-made round insulation with a diameter of 10 ÷ 20 mm. It is sold by footage at hardware stores. This material will give the roller a neat, uniform, rounded shape.

3. To work, you also need to prepare some tools:

- Small hammer for driving in nails.
- Stapler with staples for fixing the material to the surface before driving decorative nails. The optimal size of staples is 8 ÷ 10 mm.
- Scissors and a construction knife for cutting and trimming materials.
- To dismantle the locks and handles and then install them back to their original place, you will need a screwdriver or screwdriver with different attachments (bits).
- It will be nice to have pliers and a nailer on hand, they can be useful for removing old casing and removing nails that have not entered the door leaf correctly.
4. Having bought all the necessary tools and materials, you can start preparatory work.
- First, you need to remove all installed on the door from the door. elements - locks, handles and peephole.
- If the door trim is going to be made, on which there is already an old finishing material, it must be removed. The nailed material can be bent with a nail puller, separating the leatherette from the surface, and then, hooking the nails with the tool, carefully remove the canvas completely.
If the insulation is not glued to the door, the old paneling can be easily removed. The thin layer of material remaining on the surface does not accommodate the new finish.
- Further, some craftsmen remove the door from its hinges and, for the convenience of further work, lay it on several chairs or on a sufficiently large table. Before removing the door from the hinges, it is imperative to make lines on the door leaf along the contour of the door frame.
- In most cases, the sheathing is carried out in its vertical position, without removing it from the hinges.
Leatherette door trimming process
As you know, the door is usually sheathed from two sides - from the outside and the inside; there are some differences in these processes that you need to know about when starting work. In addition, there is a significant difference in the technology of finishing wooden and metal doors.
And, of course, there are different ones that you also need to consider before starting work.
Sheathing from the inside of a wooden door
Getting started, you need to immediately pay attention to where the door opens - towards the entrance or into the apartment, since the location and size of the rollers will depend on this.
In this publication, an option will be considered when the door opens to the inside of the apartment.
- The first step is the installation of the sealing rollers. They are made from prepared strips of leatherette and ready-made foam rollers or strips of other insulation material.
The leatherette is folded in half and a strip of insulation is put inside. Then, a roller is placed along the perimeter of the door, so that it protrudes beyond the canvas by 4 ÷ 7 mm, since it must cover the gap between the jamb of the door frame and the door, which is formed after it is closed. On the hinge side, the roller must completely cover the door frame. The roller is fixed with stapler and staples starting at the top right corner. From there they go to the upper left corner, then frame the sides with it. It is fixed to the lower part last.

- The next step is to cut the insulation. The size of the cut strip should be 8 ÷ 10 mm less than the door leaf.

It is also fixed with brackets on the door plane, leaving 20 ÷ 30 mm at the edges free so that you can wrap a decorative one between the insulation and the door material - leatherette.
- Next, you need to correctly place the main leatherette canvas. The main thing is to avoid distortions, otherwise the work will look sloppy.
 When installing the main upholstery, it is very important not to be mistaken with the exact direction of the leatherette strip and its uniform tension
 First, the top of the canvas is fixed. It is folded under insulation and nailed with decorative nails, placing them at a distance of 80 ÷ 100 mm from each other.
After the top edge is secured and the direction is checked again, the left side is nailed and then the right side. In the course of fastening, the material is stretched. The bottom edge of the material is nailed down last.

- Then, it is very important to accurately mark and cut the holes for the locks and the peephole.
- If there is a desire to make a drawing on the surface, then you first need to mark it, and then fill decorative carnations along the marking, starting from the center of the canvas. In this case, you need to try not to stretch the leatherette too much so that sagging does not appear.
Video: a lesson on sheathing a wooden door from the inside
Wooden door - external cladding
The door sheathing, opening to the inside of the apartment, from the side of the entrance, is made as follows:
- Before starting work, you need to close the door and outline the opening of the door frame on the door leaf. This line will define the position of the trim on the door leaf. If the leatherette is nailed to the entire surface, then both the door and the lock will not close.
- The insulation is cut out 10 mm m less than the delineated area and fixed with staples.

- Further, with tucking behind the insulation, leatherette is stuffed along the marked line, in the same order as on the inside of the door - first from above, then along the sides. The bottom edge remains free for now - it will be attached later.

- In this case, the insulation roller is fixed on the outer side of the door frame from three sides, but it is not installed on the threshold. This element, in a fixed form, should close the cracks, finding it on the door leaf by 20 ÷ 25 mm. But the keyhole must be free, and this must be foreseen.
- The lower roller should not be made voluminous, as it will simply wear off over time and will look sloppy.

It is fixed along the bottom of the door itself, and its edge should not go beyond the marked line by a single millimeter, since the door in this case will not be able to close. This element, when closing the door, must adhere tightly to the sill from above, that is, as it were, to find on it.
- On the roller nailed to the door, the lower part of the main leatherette canvas is pulled and nailed, or, as shown in the photo, you can hide the lower edge in the fixed roller.
- Further, holes are made in the leatherette lining for door accessories - locks, a peephole and handles. They need to be cut very carefully, without expanding more than necessary.
Video: how to sheathe a wooden door with leatherette outside
Metal door - leatherette finish
In recent years, a second door made of metal, in addition to wood, has been increasingly installed in high-rise apartments. It is good if there is an opportunity to purchase immediately insulated and, but very often it consists only of a metal sheet and a frame from a corner or a shaped pipe. In this case, the landlord picks up the tools and independently brings the door into proper form.

The inner and outer sides of the metal door leaf also have their own characteristics in their cladding.
Inner side of a metal door
If an unsightly metal frame comes out into the room without insulation and decorative materials, this can be easily corrected by installing foam sheets of suitable thickness and covering it all with a decorative panel. For work, materials that are slightly different from the plating of a wooden door are required.

- Styrofoam with a thickness equal to the depth of the frame frame.
- The foam will be needed to seal the joints between the installed foam and the metal frame.
- Wooden slats for fastening to the inner sides of the frame - they will be needed as a basis for attaching the decorative panel.
- Self-tapping screws and drills for metal - they will drill holes in the corners (profile pipe) for screwing wooden slats to the metal frame.
- Decorative nails for fixing the leatherette on the plywood surface.
- Self-tapping screws for wood for screwing a plywood sheet to wood slats.
- Plywood sheet equal in shape and area to the door frame, no more than 10 mm thick.
- Decorative leatherette and a thin sheet of foam rubber, 10 ÷ 15 mm thick.
- Glue or double-sided tape to fix the insulation on the plywood.
The work on finishing the inner surface of the door is as follows:
- Wooden slats are screwed to the inner ribs of the metal frame. It is first necessary to drill through holes through the slats and metal frame elements.

- After fixing the rails between them and the metal sheet, gaps may form, which will become cold bridges, so they are sealed with polyurethane foam. In addition, it will contribute to the rigidity of the fastening of the rails.

- Further, between the fixed and insulated rails, foam plastic is installed, around which polyurethane foam is also passed. Such processing will also help to securely fix the foam in the cells and close the last paths of possible cold penetration.

- On a plywood sheet, you need to mark the location of the wooden slats in the frame, since you will have to screw it to them.
- If you need to hide the caps of the screws under the cladding, then the plywood must be screwed on before sheathing.
- First, the sheet is twisted to the middle slats, so that all the edges remain free for the establishment of leatherette behind them.
- Foam rubber is fixed to the installed plywood on glue, or better - on double-sided masking tape.
- The leatherette is stretched from above, tucked over the edges of the plywood, and at the corners and along the edges in the middle of the sheet it is screwed through with self-tapping screws, the heads of which are sunk into the plywood. The resulting holes can be carefully sealed with a piece of material, and a carnation with a decorative cap can be driven in next to it.
- Further, the leatherette is stretched and nailed around the entire perimeter with cloves. Since nails are hard enough to drive into plywood, you need to choose durable, made of high-quality metal that will not bend.
- Thus, the decorative panel will be well fixed to the frame.
- Then, on it you need to outline location lock, cut the leatherette and insulation, and then carefully drill holes in the plywood.

I must say that instead of plywood and leatherette, you can use laminated lining to decorate the inner surface of the door. It is installed from below and gradually rises to the top, and the sides of the lining are closed with a special corner.
Outer side of a metal door
When decorating the outer side of a metal door, you can use not too thick felt for laying under the leatherette, which is glued to the metal surface.

- Insulation is cut out less than the size of the door leaf by 7 ÷ 10 mm, and leatherette is larger than this size by 60 ÷ 80 mm. This extra area will go to fold the edge to the other side of the sheet.
- A polymer adhesive is applied to the surface of the metal sheet in strips.
- Further, a heater is applied to it and pressed against it. It is necessary to give time for the glue to set and dry.
- Leatherette is stretched on top of the insulation, folded over the edges of the metal panel of the door and glued on its other side. It is best to use a quick-drying all-purpose adhesive for this purpose.
The top edge of the material is glued first. Further, it is stretched and fixed to the side parts of the door. If excess material forms on the curls, it is best to cut it off, otherwise it may interfere with the free closing of the door leaf.
If the finishing material is very dense, and a fold is too thick at the corners, then it is better to cut off a part of the leatherette in these places.
- If you do all the work slowly, then the door will turn out to be neat and respectable.

- Finally, the door is installed and screwed onto the door. accessories - locks with handles and a peephole, if provided for installation.
Video: finishing a metal door with leatherette
"Carriage" plating
"Carriage" sheathing or screed is quite popular, since the door after it looks aesthetically pleasing and respectable. However, not every apartment owner can afford this, since the work on its implementation is quite painstaking and requires skill.
 "Carriage" sheathing looks very impressive
 Such a covering is performed in two different ways - from a solid material or from pre-cut pieces of leatherette. Both methods are risky, since in both the first and second versions, the material can be damaged, and the door is not sheathed, if there is no experience in performing such "filigree" work.
 ... however, not everyone can do such a difficult job.
 Therefore, for a start, you can practice and sheathe in this way, for example, the surface of a stool. You can use any fabric for training.
For all the work to be successful, you need to carry out a number of preparatory measures. It is very important not to neglect the careful marking - only in this case, geometrically even shapes of squares or rhombuses can be obtained.
- For marking, you need to take a sheet of thick plywood, the same size as the door leaf. It needs to be drawn into even squares or rectangles.
- At the intersections of the straight lines, round holes are marked and then drilled so that they form rhombuses or squares with their corners.
- Plywood is placed on a foam mat and through the holes there are marked the places where decorative nails will be hammered.
 Preliminary marking for "carriage" upholstery
 - Further, the marked foam rubber is transferred to a wooden base. If it is too thick, round holes may be cut in it to drive nails.
- Around the holes or drawn circles are traversed with a stapler, nailing the insulation to the base and marking the recesses.
- Dermatin is drawn from the seamy side into even squares, which should be 8 ÷ 10 mm larger on each side than the figures drawn on the foam rubber. These extra millimeters are needed to fold the edges of the material when nailing it.
- Then, the material is cut into lined fragments, and you can start fixing it on the door leaf.
- Pieces are applied to the foam rubber along the markings and nailed. You can first mark them with a stapler, and then nail them in with decorative carnations.
 Each piece is stacked and attached separately - you need the utmost care
 - It is necessary to ensure that the overlap of the other pieces of leatherette goes in one direction, otherwise the harmony of the pattern will be disturbed.
- Without proper experience, the work will seem quite difficult and long, however, if you have patience, you can gradually complete it successfully.
It is much more difficult to derive a carriage pattern from a solid canvas, since it is very difficult to accurately measure and capture identical strips, which will serve as a foam rubber tie between the nails.
Prices for different types of door upholstery kits
Door upholstery kit
Video: one of the options for "coach" door trim with leatherette
There are other ways to upholster the door using thin strips of leatherette or fishing line, but in order to achieve the desired success, in all cases, you first need to carefully mark the door leaf.
If this work is done independently, then not only will experience and skill in its implementation appear, but a significant amount will also be saved. Therefore, if there is a desire to try yourself in this kind of wallpaper art, then it is worth taking the risk of training for a start on small planes.
TOP-12 best manufacturers of entrance doors
| Photo | Name | Rating | Price | |||
|---|---|---|---|---|---|---|
| Best Budget Entrance Doors | ||||||
| #1 |
|
Became | ⭐ 100 / 100 | |||
| #2 |
|
Neman | ⭐ 99 / 100 | |||
| #3 |
|
Outpost | ⭐ 98 / 100 | |||
| #4 |
|
Bravo | ⭐ 97 / 100 | |||
| #5 |
|
Groff | ⭐ 96 / 100 | |||
| The best luxury entrance doors | ||||||
| #1 |
|
Torex | ⭐ 99 / 100 | |||
| #2 |
|
Elbor | ⭐ 98 / 100 | |||
| #3 |
|
Dierre | ⭐ 97 / 100 | |||
| #4 |
|
Fortus | ⭐ 96 / 100 | |||
| #5 |
|
Legrand | ⭐ 95 / 100 | |||
| #6 |
|
Bastion | ⭐ 94 / 100 | |||
| #7 |
|
Guardian | ⭐ 93 / 100 | |||


Became
Entrance doors under the Stal brand perfectly combine affordability and excellent quality. The manufacturer managed to achieve balance in different parameters due to the complex design, which provides high strength. Reinforced doors with armored inserts are made to order. System protection is provided to prevent unauthorized opening. The Steel lineup is constantly being updated. Buyers can choose from powder-coated doors with wood, veneer or laminated panel finishes. The catalog contains both classic design models and exclusive design developments.
- wide range of;
- value for money.
budget doors are rather weak.
Outpost
To successfully compete in the domestic market, the Russian company Forpost had to launch the production of doors in China. Since 2009, the products have become in great demand among Russians, and sales volumes have reached 500,000 doors per year. In general, ordinary users are also satisfied with the products. They note a good build quality, a rich model range, and a well-developed service network. The doors are not devoid of some shortcomings. The most unpleasant of them is the appearance on the market of low-quality fakes.
- affordable price for prestigious models;
- wide service network;
- rich model range.
- counterfeit products appeared;
- weak noise insulation in budget models;
- fittings only fit original.
Bravo
Today the manufacturer boasts a range of 350 units. Here the buyer has a lot to choose from. The catalog contains the most modern types of doors, from veneered models to 3D-Graf finishing. Doors also differ structurally; the assortment includes sliding, folding and special models. Door leaves under such brands as Bravo, Bravo Lux, Groff and Belarusian doors are also widely represented on the market. All products are made from environmentally friendly materials and meet stringent international standards.
- a wide range of products;
- affordable price;
- a wide variety of designs and finishes.
- thin metal;
- poor insulation.
Bravo entrance door
Groff
Groff entrance doors are produced by the domestic manufacturer Bravo. They represent a premium line. For the manufacture of canvases, thick steel, Knauf fire-resistant mineral wool is used as a heater. Structurally, the doors are reinforced with stiffening ribs, equipped with reliable locks. As a result, the products correspond to the fourth class of burglary resistance. Entrance doors in this series are not only robust and durable. They have extremely high aesthetic properties. The manufacturer used a wide range of decorative panels for finishing.
- massiveness and good quality;
- good heat and sound insulation;
- anti-removable pins.
- warped after six months of operation;
- high price.
Groff entrance door
Torex
Torex entrance doors are made in accordance with the most advanced developments. Today the company can boast of a wide distribution network in the vastness of the CIS. Production facilities are currently fully loaded, and the annual production of doors has reached 10 thousand units. The manufacturer does not stop there, new developments appear on the market with enviable consistency. It is possible to ensure maximum strength and reliability of products by using two steel sheets. The base is played by a one-piece bent profile with a thickness of 2 mm. Designers from Italy are often involved in the design of doors.
Dierre
The Italian door manufacturer Dierre needs no special introduction. The products of this company are known in different countries of the world, as evidenced by the annual sales of 200 thousand items. Production facilities have been created in Russia to provide the domestic market with products bearing the Dierre trademark. The company independently develops new designs, introducing the latest advances in the field of locking. So, "smart" entrance doors are equipped with a remote control system, the role of the key is played by a chip with 128-bit encryption. Solid design is considered a feature of Italians. Unique fittings are made for the chosen style.
- innovative approach;
- unique design;
- a large assortment.
- there is no choice of fittings;
- high price.
Fortus
Fortus door blocks stand out from the competition by their design. They resemble the famous Lego toy, allowing the buyer to assemble a suitable model on their own. There is a choice of door type (single or double-leaf, combined), fittings, locking mechanism. The consumer determines the number of locks, the degree of secrecy, the color of the canvas, the shape of the handles, the method of finishing. With Fortus' extensive catalog, the total number of variants reaches four digits. The manufacturer meets its customers halfway by making entrance doors of non-standard sizes in accordance with the proposed project. When creating door blocks, only high-quality materials are used, as well as reliable locks from Cisa, Esety, Mul-T-Lock and Mottura.
- high-quality assembly;
- you can implement any idea;
- smooth running.
- there is no choice of fittings.
Legrand
The original quality of the Legrand entrance door finishing was to the taste of domestic consumers. As a finishing material, the manufacturer used MDF panels, which are processed on modern CNC machines. To increase the service life, a polymer coating is used that protects the canvas from weathering. A wide range of colors brings variety to the model range. Some collections are finished with natural wood, which gives the doors aristocracy and exclusivity. Buyers are provided with a wide choice, from basic equipment to modified equipment. The door hinges are equipped with bearings for easy movement.
- original finish;
- diverse lineup;
- bearing hinges.
- unreliable corrosion protection;
- poor sound insulation.
Bastion
One of the flagships in the production of entrance doors is the Bastion brand. The products are made according to the standard scheme, first a frame is formed from a square metal profile. Then steel sheets are welded to it. The void is filled with basalt wool, which, in addition to good insulating properties, is fire resistant. When choosing a model, the buyer is given the opportunity to independently determine the type of anti-burglar system and anti-detachable hinges. Finishing can also be changed according to client's requests. Glass or wooden elements, as well as forged inserts are capable of decorating the door.
- high build quality;
- wide range in different price segments;
- beautiful finish.
- unreliable fittings;
- not the most efficient service.
Both wooden and metal entrance doors require periodic maintenance. Otherwise, their appearance will not meet aesthetic requirements. In order not to regularly spend money on painting and finishing materials, you can finish the structure with leatherette.
Such a peculiar decoration will allow not only to give the proper appearance to the entrance doors, but also to improve the heat and sound insulation of the room several times. In addition, dermantin is characterized by special strength, endurance and sophistication. It will serve for many years without losing its original aesthetic and quality properties.
How to upholstery doors with dermantine with your own hands? What nuances should you pay attention to? Why is it that dermantin is considered the most suitable material for decorating wooden and metal doors? More about this.
Properties, features and disadvantages of the material
Dermantin is one of the finishing materials endowed with special properties. It does not fade in the sun, does not crumple or wrinkle, it is quite difficult to damage it. Upholstery of an interior wooden or metal entrance door with dermantine looks beautiful, elegant, expensive and stylish.
The advantages of the material include the following features:
- Moisture resistance. The material is not inclined to accumulate moisture, it perfectly repels it, thereby preventing damage to insulation and waterproofing materials used in the production of door structures.
- Long service life. Dermantin retains its original properties for 7-10 years.
- Simplicity and ease of maintenance. To give the leatherette upholstery a presentable look, it is enough to thoroughly wash it with plain water and periodically lubricate it with a special cream.
- UV resistant. Dermantin does not fade in the sun, therefore it can be used to decorate not only interior structures or doors inside premises, but also entrance groups.
- Resistance to the effects of microflora. The material does not rot and prevents the reproduction of mites or other microorganisms. It does not bloom and mold does not form on it.
- Frost resistance. Even at subzero temperatures, dermantin retains its declared properties and original decorative features.
- Wide variety of colors. The material is offered for sale in several shades. Door trim can be made from brown, gray, black, burgundy, green dermantine - it all depends on the taste of the buyer.
- Chemical cleaning capability. Dermantin is one of the few finishing materials that stably reacts to the effects of non-aggressive chemical compounds. It can be cleaned using a variety of detergents and formulations.
- Excellent aesthetic appearance. Dermantine door upholstery is presentable, beautiful, elegant and tasteful.
- Affordability. The cost of the material varies within the available limits, so everyone can afford to decorate the doors.
Finishing the entrance and interior door structures with the material in question allows you to solve another major problem that so often worries everyone without exception - the problem of heat and sound insulation.
Dermantin prevents the penetration of cold and noise from the street into the room, which is also important.
Disadvantages of the material:
- Low fire safety. Dermantin spreads fire easily, it is flammable, therefore it increases the risk of fire.
- Unsuitable for repair. If the material has been cut, it cannot be repaired so that it does not spoil the aesthetic appearance of the canvas. The only correct solution in this case would be to replace the dermantin.
- Immunity to mechanical damage. Cutting or tearing the finishing material can be done with little effort.
- Firstly, the material improves the sound and heat insulation of the room.
- Secondly, it allows you to decorate doors without special financial costs.
- Thirdly, it makes the door leaf presentable and original in appearance.
- Fourthly, it serves for many years and is characterized by increased resistance to natural, chemical and mechanical influences.
Dermantin for upholstering metal entrance or interior wooden doors is the best solution for a limited budget.
Technology for decorating door structures
It is very simple to upholster doors with dermantine, therefore, if desired, each of us can cope with this task without resorting to the services of professionals. Do-it-yourself upholstery is performed in several stages:

First stage: preparation of tools. In the course of work, you will need staples equipped with 10 mm legs, a stapler, a knife, a screwdriver, scissors, a glue brush, and a hammer.
Second stage: preparation of materials. To decorate the door with dermantine with your own hands, you will need a lining material, upholstery nails of a certain color, glue (if the door leaves are supposed to be upholstered in metal) and the dermantin itself.
Stage three: dismantling the locks. Silent locks are very often installed on interior doors. They are much more difficult to remove than ordinary ones. It is very important during dismantling work to adhere to the instructions attached to the mechanism.

Otherwise, the lock after subsequent installation will not work properly or completely fail. To facilitate the task, experts recommend first removing the door from the hinges.
First of all, the locks are dismantled, then the old paneling and the door peephole. During work, safety rules must be observed.
The fourth stage: do-it-yourself upholstery on the inside of the doors. A roller will help to upholster the canvas beautifully with the selected material. It minimizes cracks to honey with the door frame and the door itself. Using a stapler, you need to nail the dermantin to the canvas with the front side.

At the same time, it is important to observe the three-dimensional approach. If the door structure is equipped with overhead locks, the roller is nailed, starting from them, if with mortise locks, the roller is nailed below the middle of the side.
The lining material must be cut into strips, carefully laid and fixed with a stapler on the canvas so that the roller protrudes a few centimeters, based on the location of the door and platbands. After the roller is fixed, you can start finishing the surface with dermantine.
The upper edge of the material is tucked in, laid in the corner of the door structure and nailed down with a decorative nail. All other edges of the material are nailed in the same way. It is necessary not to forget to tighten the dermantin in the process of work.

The fifth stage: finishing with the material of the outer side of the door leaf. The outer side is trimmed a little differently. A projection of the door frame is drawn on the canvas with a pencil. It allows you to get an accurate contour of the skin.
First, the lining material is fixed with a stapler with an indent of 1 cm, then the main piece of dermantin is nailed with a decorative nail and an insulating roller is made, which is preliminarily fixed to the door frame.
It is undesirable to nail the bottom roller to the threshold. Over time, constantly touching it will lead to abrasions. The bottom edge of the trim is nailed last and all accessories are mounted.
Step-by-step plan for metal door trim
Using a brush, the perimeter of the door leaf is coated with glue, the lining material is evenly glued to its surface, then dermantin is fixed with glue from the hinge side over the lining material.

