Repair of cracks and chosel in concrete floors. How and how to make cracks and holes in concrete how to make a big hole in the floor
Concrete coatings are used in various fields: during installation of floors, concreting surfaces both on industrial and in residential facilities, construction of motorways and many other things. However, concrete is distinguished by a low tensile strength, so in the process of frosting the mixture is slightly compressed and the shrinkage of structures occurs. Because of this, small and more serious defects appear on the surface. In this case, the sealing of cracks in concrete is required, which is performed by different technology, depending on the type of damage and the cause of its appearance.
Varieties of cracks in concrete
Some beginners or unscrupulous builders prefer to simply smear a hole or any other defect with a putty or mortar. However, before close the hole or crack in the concrete wall and other reasons, it is worth understanding that it was the reason for the emergence of such troubles.
Defects are several types:
- Surface. Such cracks often appear after filling the foundation in the process of drying the sand-cement mortar, if the mixture was prepared without complying with the required proportions of the components, poor-quality components were used or in the mixture there was no sufficient amount of water.
- Shrinking (also called hair cracks). Defects of this type are considered the most dangerous, since because of them there is not only the deformation of the fundamental base, but also the whole building as a whole. This leads to a decrease in strength. The flaws of this type appear under the uneven load on the foundation and with the improper selection of the cement composition.

- Temperature and shrinking. The slits of this type appear in the process of solidifying the concrete base due to an exothermic reaction occurring between cement and water. Very often, in the construction of walls and overlaps, novice builders do not take into account the freedom of deformation, as a result of which the temperature voltage occurs in the concrete mass and defects are manifested on the surface.
- Cracks and holes that appear due to poor-quality reinforcement. If the frame for enhancing the design is too weak, then it will be fed under loads, which will also lead to the formation of defects. In addition, reinforcing rods can begin to oxidize. Due to the appearance of corrosion, the material increases in the amount, breaking the concrete mass from the inside.
Also cracking are susceptible to concrete surfaces located on the street. The external environment contains chemically active substances that create a favorable soil for the appearance of defects.
In addition, the devastating effects have sharp temperature differences, which can occur both on the surface and in the coolest of concrete. In this case, not only cold air, but also ultraviolet has a detrimental effect.
It is also worth paying attention to the width of cracks, since in some cases such defects are not critical.
Permissible cracks
The construction sphere has such a definition as a permissible width of the disclosure of cracks, which is determined by DBN B.2.6-98: 2009 based on the operational conditions:
- The crack size should not exceed 0.5 mm if the concrete surface is not affected by weather conditions. That is, it does not affect the influence of moisture, low temperatures and ultraviolet.
- The permissible width of the splitting of cracks cannot be more than 0.4 mm, provided that the design is subjected to weather influence.
- The width of the crack should not exceed 0.3 mm if the concrete base is under an aggressive environment.
- To make the formation of cracks of more than 0.2 mm is not recommended, if we are talking about reinforced structures, characterized by reduced resistance to corrosion formation.

Also experiencing horizontal cracks with a small disclosure, which often appear in reinforced concrete columns.
However, it is important to take into account that there are certain operating conditions, in which cracking is not allowed:
- if we are talking about ZBB structures that constantly interact with liquids and gases (that is, there must be impermeable and sealed);
- when using structures to which more stringent requirements for their durability are presented.
Having determined the type of defect and the need for a correction, much easier to choose than to close holes in the wall or any other concrete surface.
Cement solutions
These compositions are highly popular in view of their cheapness and opportunities to repair minor shrinkage cracks in concrete.
Seeling cracks
Before proceeding up, it is necessary to check the crack itself for the presence of chips around it. If there are such, then in the near future they can turn into holes, so it is necessary to eliminate all peeling pieces of concrete. After that you need:
- Run the extender. To do this, using chisel and hammer, you need to walk along the entire length of the crack so that its depth is at least 5 mm. If necessary, you can use the spatula to create a deepening.

- remove dust with the help of a vacuum cleaner and rinse with water formed in the resulting depression.
- Remove the excess water and smeared with a cement mortar (3 sand shares per 1 part of cement with the addition of PVA). It is necessary to ensure that the composition covers the entire spread space.
- Moisten a flooded cement with water.
Seeling holes
If a hole formed in the concrete surface, in which the fittings can be seen, the defect can be embedded as follows:

- Clean the hole in the concrete and treat its surface with an anti-corrosion composition.
- Put in the deepening pieces of steel wire dimer of about 4 mm.
- After that, the deepening is smeared with a primary composition, evenly applying it to the entire surface. At the same time, the thickness of the layer of the mixture should be about 3 mm.
- Without waiting until the mixture heels, pour the deepening cement makeup for seelings of cracks in concrete and make sure that it fill out all the recess. If the hole is too deep, then the cement is poured into several stages. In this case, each subsequent layer should be wedged with water from the sprayer.
- Align the surface of the rail (metal or wooden), moving tool to the right left.

- After the mixture is frozen, the excess cement makeup must be removed with a spatula and attach the surface. If the crack was too deep, then the alignment is performed using a grinding machine.
Useful! The cement composition must be poured with a margin so that it is slightly above the floor surface. In the process of frozen, the mixture will give a shrinkage.
After 24 hours, concrete floor can be painted or laying on it any finishing material.
However, it is worth considering that such a sealing of cracks in concrete will not give the effect of sealing and is not suitable for surfaces to which increased waterproofing requirements are imposed. In addition, the cement composition can be viewed as a temporary solution to the problems. Sooner or later, defects will appear again. If you want to "carefully patch" holes and avoid their appearance in the future, then in this case, defects can be seen with the help of resins, specialized repair makers on their basis or sealant.
Long-term sealing defects
Deciding than to close cracks in concrete for a long time, it is worth paying attention to this method of processing defects. Resin and mixtures for sealing based on it are suitable for restoring screeds, scenes and various concreted sites or horizontal surfaces.

Repair of cracks in concrete using such compositions has a number of advantages. First of all, it is the low cost of mixtures, as well as their rapid drying. On the other hand, the resin allows you to securely fix the seams and hold them from the subsequent increase.
So, to eliminate defects it will be necessary to prepare:
- an angular grinding machine and diamond spraying discs;
- a vacuum cleaner;
- spatulas and bark for breeding composition;
- boding composition for concrete;
- Epoxy (basis A and hardener c);
- Fine grained sand.

Before closeing the crack, you need to clean it from dust and dirt. After that, we carry out the seal in the following sequence:
- We produce cracked extending. In this case, the width of the obtained recess must be at least 5 mm.
- Pi helping the grinding machine to cut in concrete transverse seams with a step of 400 mm (the length of the grooves is about 100-150 mm).
- We remove the loose layer of concrete and divert the surface with the help of a vacuum cleaner.
- We process the surface of the defect in the primer, and the transverse grooves are fixed using the repair bracket.
- We prepare the solution from the resin (bases), the hardener and sand according to the instructions on the package with the composition.
- We close the defect with the resulting mixture and quickly align the surface, as the resin gripping time is only 10 minutes.
The best epoxy formulations
If we talk about the best materials for repairing cracks in concrete walls and other surfaces, then the most effective today is considered:
- Epoxy resin domestic production of ED-16 and ED-20 cost of about 2,000 per 3 kg. The hardener will have to buy separately (costs about 300-500 rubles).
- EPOXY 520 resin from the Czech manufacturer Spolchemie worth 3,500 rubles per 5 kg.
- The German composition of Uzin KR 416, which will cost 2,700 rubles in 0.75 kg.

The compositions from the Italian manufacturer of Sika are also very popular.
However, it is worth considering that such a method of correction of defects is not suitable for treating holes that are formed in concrete bases of experiencing strong pressure from water. In this case, it is worth using sealant.
The use of sealants and self-seeping tapes
Immediately it is worth saying that this method of sealing defects is very expensive, so it is most often used when repairing concrete bowls of country pools. However, despite its high cost, the use of sealant and self-seeping cords is distinguished by its advantages:
- the possibility of processing a defect of any type;
- full tightness;
- the possibility of installation work in cold weather conditions.
To work, in addition to the standard set of tools, it will be necessary:
- mounted gun;
- self-disstaining tape or cord;
- chisel and brushes;
- sealant for concrete.
However, before making a flaw, it is necessary to measure the dimensions of the gaps and acquire the desired type of sealant and tapes depending on this. For example, if the depth of the hole is 60 mm, the cord of 18 x 23 mm is suitable.
Not the next step is necessary:
- Expand cracks and take them.
- Install cord into recess.
- Fill the rest of the sealant space.
- Unlocked outwardly the composition with a spatula.

After completing the work, you do not have to guess how to sharpen the surface or corpus it. It is enough just to apply the composition and dissolve it.
If we talk about the best compositions of this type, then we use the most popular:
- Domestic Elastosil PU 20 worth 280 rubles for 600 ml.
- The composition from the French manufacturer Rubberflex, which is selling today at a price of 300 rubles for 310 ml.
- Russian production plow ribbon costing about 260 rubles per stranded meter.
Injection
Also deciding how to close holes in the wall of concrete in the most efficient way, especially if not only the crack appeared, but water flows through it, it is worth paying attention to this method.
Injecting technology implies the introduction of a special composition (polyurethane or epoxy resin, micro-cement or waterproofing mixture) into a thickness of concrete using special injection pumps that create strong pressure.
To fulfill such restoration of defects, it is necessary:
- Make holes in a checkerboard on both sides of the gap.
- Install the packers in them (special tubes through which the solution is supplied, resemble a dowel) at an angle.

- Pour the solution.
- Remove the tubes and cover the surface with a building composition.
So, we considered how to independently close the hole in the concrete wall, but what if we are talking about aerated concrete?
Features of sealing cracks in aerated concrete
Cracks in aerated concrete are also formed often, as in conventional cement-sand monoliths. For their sealing, work is performed in the following sequence:
- From a wall or any other aerated concrete surface, a layer of collapsed building material is removed and purified from dust and dirt.
- Grid primer produced. To do this, it is recommended to use a 50 percent water dispersion of PVA and water (ratio of 1: 3).
- Sealing cracks depending on their dimensions. If the damage is single and its width does not exceed 0.4 mm, the slit is expanding to 10 mm and any building composition is poured into it (cement or special adhesive for aerated concrete). If the width of the defect is up to 10 mm, it is better to use a porous glue composition for sealing and expand the slot to 20 mm. In the event of a defect with a width up to 20 mm, it is recommended to apply adhesive or cement composition, having previously adding a large-scale rubble from aerated concrete.
After performing the work, it is necessary to close the treated surface with a sheet of plywood (secure by self-assembly) for 3-5 hours.
Repair of concrete floors with their own hands - by no means a simple "podium" with cement mortar. Such "Blyamba" will not stop the destruction of concrete, does not align the floor and will not block access to evaporation through it.
The thing is that the concrete, even scoring structural strength, lives with decades with its complex physicochemical life: changes the structure, gains strength, and then weakens a little, until it stabilizes. In a fresh concrete, a number of indicators, including the shrink speed and the temperature expansion coefficient, differ significantly from the concrete is a weathered. In order for the repair of the old floor to be successful, it is necessary to somehow agree on the properties of the old and new concrete. One of the methods, optimal for small self-repair - giving a fresh cement solution of thixotropic and rheological properties.
Thixotropy and rheology
Thixotropy is the ability of the medium to succumb, reduce its viscosity with let a small but constant impact. A good example of a thixotropic substance is an ordinary construction bitumen. If you lead a finger on it with pressure, then the roughness is felt, and then the movement is relieved and the flavor remains behind the finger. By the way, the continental plates move on the face of the earth due to the fact that the substance of the upper mantle thixotropino.
Riology is nothing more than superfluidity. This is not the privilege of physics of ultra-low temperatures at all. With rheology, any housewife faced, which forgotten tightly close the vessel with sunflower oil. However, if liquid helium II is 100% supertext, then vegetable oils on units and interests of percent. But this is enough for the sudine after some time it turned out to be all the sticky, and the kitchen furniture was spoiled.
Under normal conditions, thixotropy and rheology are inextricably linked. Builders when they say "thixotropy", implies immediately and rheology. When repairing the concrete floor, the rheology ensures that the repair makeup of the smallest irregularities is filling, and due to the thixotropy, the new concrete mass, figuratively speaking, does not rest in the same, and play out.
In construction stores, there is a wide range of thixotropic rheological mixtures for repairing concrete floor based on epoxy resin and polyurethane. However, to repair the apartment floor, located in relatively stable conditions and weakly loaded, a cheap thixotropic composition can be prepared independently:
For this, PVA or busticide glue or bustience are breeding water, and a cement-sandy solution is mixed in the proportion of 1: 3 on the resulting suspension. If the scope of work is large enough, you can immediately buy PVA putty. This is the same diluted glue, but the minimum packaging is 5 liters.

For the sealing of deep deformation cracks, the PVA-SUPENIA is not suitable; There will have to buy branded thixotropic primer in concrete and repair. In this case, it is necessary to navigate exclusively by price: the apartment floor is an easy object, and the exclusive quality of the compositions is not required.
Mixer and rule
All repairs for concrete must be kneaded: Ready on water; Homemade - on PVA-suspension. Manually produce it impossible: the finished solution should be the maximum "dry", i.e. Water or suspension is added in the minimum quantity. A very viscous mixture will have too long to "bold" to the desired homogeneity, and irreversible changes will begin in it, worsening the quality of work.
To mix small volumes of repair building compositions using an electric drill or a perforator on small circulation with a special nozzle - a mixer. The principle of his work is no different from the mixer for cocktails.
In instrument stores you can find a rich selection of different mixers, sometimes completely bizarre configuration. But the mixer, it is not inferior to them, it turns out from a flat rod 8-10 mm with a diameter and from half a meter, the end of which is bent into the ring or simply folded twice.
Zam lasts 3-5 minutes. When kneading in the bucket, the tool is driven by circular motions; In the trough - transverse zigzag-like. Under hand there should be a bucket with water - a mixer after the kneading must immediately rinse, dropping into the water and giving more rapidness. When the perforator is kneading, in no case cannot be turned on the impact mechanism: the whole room and you will immediately become concreted by a thin layer.

In addition to the mixer, for the repair of concrete sex, you will need a rule - wide, in a meter, spatula. The plaster halfrship will not go: she does not smooth concrete as it should, but herself will erase it. The rule, on the contrary, it is necessary to purchase a factory, and it should not save on it, especially since it is inexpensive. Concrete is a good abrasive, and if the middle of the rules turn out to be a "rise", then the floor will be hooked.
Concrete floor repair types
There are four different types of floor repairs from concrete:
- Elimination of defects - bulges, elevated, seams from markers and formwork, cracks on the tie.
- Sealing gaping cracks.
- Overhaul Repair of floor screed for concrete polishing, laying a cleaning coating or a warm floor with insulation and waterproofing.
- Dust.
Each type of repair is made according to special technology. The most time consuming and the cost of repairing the screed under clean floor. For the capital repairs, it will additionally need a metallic roller roller with a width of at least 0.5 m and weighing at least 10 kg with a hand-driven.
After all types of repair, except for dedusting, the floor before the continuation of the work it is necessary to withstand at least 20 days, each day splashes with water or rubbing a rogue abundantly moistened. It is impossible to fill the floor or wet it: the clutched concrete absorbs a certain amount of water and slowly. "The camp" will hurt him.
Recommendations for mandatory excerpt of 40 or more days, covering concrete wet burlap, etc. Designed for open-air concreting. In relatively stable conditions of residential or economic premises, 20 days of excerpt is more than enough.
Preparation of the room
Preparation for the repair of concrete floor is reduced to the liberation of the room and thorough cleaning. A large garbage is crushed by a shovel, then the floor two to three times thoroughly penetrate the wet broom with spraying. Pointers and cracks in the drying of the floor after each printing are purged by a household vacuum cleaner.
If there is an opportunity to use the industrial vacuum cleaner, the preparation of the floor can be put in an hour of time: they can satisfy the floor, blurred potholes with cracks, once again seized - and all, preparation is completed.

Concrete floor repair order
Repair of the floor in the apartment begins with its inspection and status assessment. Before dismantling the old cleaning floor and cleaning, it is impossible to correctly evaluate the required degree of repair. The following cases are possible:
- The floor is generally smooth, but dust, and there are potholes, clearly defined small protrusions or thin snakers. DIY repair is possible and will be hidden.
- There are gaping cracks with a length of no more than half of the short side of the floor, which are perimeter or longitudinally transverse. DIY repair is possible with the use of branded thixotropic compositions.
- Paul "All humpbat": small bulbs and depressions relatively regularly alternate. DIY repair "on concrete" is possible in private house or hozpostroy.
- In a mono-coastal house on the floor there are extended gaping cracks on the tie of the floor, located in general diagonally or cross. It is possible only to overhaul a tie with a preliminary professional assessment of the condition of the ceiling overlap.
Note to clause 3: Alignment of casually flooded screed is possible either by a milling machine or a liquid alignment after sealing cracks. The alignment of the floor with a hard compound is the subject of a separate conversation, and the milling machine in an apartment building cannot be used: it is very strongly dust, and the presence of cement dust in the air of the residential premises is categorically prohibited by sanitary standards. In addition to the "gratitude" of the neighbors, you can fall under serious legislative sanctions, up to prison. For example, if at a time or after your work, one of the tenants will be hospitalized with the exacerbation of asthma or pulmonary disease, it is harm to the health of medium gravity or heavy. Terms - see the Criminal Code.
Small meal repairs
- Thyned with a grinder with a diamond circle along a rectangle with an adhesion of at least 20 mm to the sides. The depth of propyl - on the depth of the plus 10-20 mm. Less - if the floor is dense; More - if dusting. The protrusions are knocked down by a perforator or manually to the depression.
- The perforator with the chisel on concrete is chosen at the location of the rectangular deepening. Small potholes can be selected by manually 200 g hammer and chisel with a carbide attack. You can not bother with all my forces on a fixed plumbing chisel: maybe the crack can go.
- The remission is purged with a vacuum cleaner, then they suck dust remnants.
- Loss of recess with one layer of any primer in concrete. Choice - by price; The case is not responsible.
- By drying, the primer is filled with a thixotropic composition, improvised or purchased, smoothed by the rule and leave on the excerpt - it is embedded.

Notes:
- Branded repair compounds are mixed only at the sifted quartz sand. It can be purchased in the same store. Proportion - according to the instructions on the package. Thickotropic mixtures in small packaging are sometimes sold in a set with sand package in the desired quantity.
- Sawing works need to be produced in the respirator, safety glasses, headphones, gloves, gloves and tightly fastened clothes, with the open windows, tightly closed doors and as quickly as possible. Unlike the hypothetical neighbor, astmatics, you will definitely find yourself in the heart of the cement dust cloud. Headphones in this case are protected more from it than from noise.
Repair of small cracks
Small cracks are first separated by a grinder in length to a depth of 20-50 mm and a width of 10-20 mm. As in the previous case, the minimum / maximum depth and width of the propyl is determined by the state of the floor. Propyl is also blocked and seized.
What to close the cracks in the floor? If the floor itself is not dust, and the circle goes tightly, then a homemade repair mixture quite fit. If the sawing is easy to easily, and the Bulgarian and sometimes skipping - the good branded primer and thixotrop is definitely needed. But if the dust during sawing is so thick that the tool is poorly visible, and / or from under the circle, sand ridges are ejected - you need to close in full scheme as gaping cracks.
The sealing of small cracks is reduced to the misfortune of primer and filling with thixotrop, as well as notches.

Tip: If there is an opportunity, in two or six months before repair, turn on the cracks after half the paper stripes. If the paper did not break the paper - the crack is shrinkting, then it will not go further, and you can close on an ambulance hand as described. If at least one piece of paper broke, the crack is deformation and need to be embedded in full scheme.
Seeling gaping cracks
The gaping is considered a crack width of more than 2 mm, but this criterion is very relative. The dynamics of the process is greater importance: the crack will go further or not. Independently evaluate the dynamics, without having a construction experience, can be described above the "paper" method or a few days laser level with a sensor or a reflector on the opposite wall. If, for example, the light spot went on average per day by 0.01 mm, then for the year it will be 3.65 mm - the emergency situation, and you need to think about the overhaul of the whole building.

If the state of the building as a whole does not cause concerns, the repair of gaping cracks is carried out as follows (see Figure):
- The crack is powered by 50-60 mm deep into and 20-30 mm wide.
- The edges of the cutting are knocked down to form a triangular flavor.
- Propyl is thoroughly purged and is seized.
- The flavor is processed by primer.
- On the drying of the primer, the markers are inserted into the breakdown. Holding the next marker with a hand vertically, the hollow is lubricated by a thixotropic composition, moving it by the rule. Homemade thixotrop in this case can not be applied!
- By setting the thixotreop, markers are removed, and on the holes from them, the seam cuts into the former width.
- In the seam, the cord-damper type "Villers" or similar one is stacked. Relief ropes, synthetic cables, etc. Do not fit.
- Seam is finally closed with silicone or polyurethane sealant; In no case in no case by mounting foam, epoxy or other fully solid compositions.
Note: markers - Thin Smooth Metal Rods. Excellent markers are obtained from cycling spokes. To then easier, the markers can be lubricated with consistent lubrication before installing.
Overhaul tie.
The overhaul screed means actually its replacement. This is an extreme measure, costly and time-consuming. It goes, if it is assumed or to be finished clean, and the duct test gave an adverse result.
Read more about the formation of various types of floor screeds from scratch, you can read the links below:
Calculation of the thickness of the screed
If the repair is made in the room, adjacent to others, then the floors should be at the same level. And in any case, the finishing floor should not be above the door threshold. Therefore, the calculation of the screed thickness lead the bottom up with a margin in the most side. In this case, the base floor level will be lower, but this can be compensated by an increase in the thickness of the plywood litter or the height of the lags. The thickness of the solution layer over the reinforcing grid must be taken at least 8 mm.
Example of calculation: from "naked" overlap to the door threshold 80 mm. Initial data:
- Waterproofing - 1 mm.
- Keramzit reproduction in one layer - 25 mm.
- Reinforcing grid - 6 mm.
- The layer of concrete above the grid is 8 mm.
- Mastic layer - 1 mm.
- Plywood - 8 mm.
- Adhesive layer - 1 mm.
- Laminate - 16 mm.
Total is 66 mm. It can be improved thermal insulation, pouring a half layer of clay or taking the phaneer to the cesstop. However, putting the floor on the lags will not be released, except to abandon clay thermal insulation, but such a floor will be colder and more sensitive to dampness.
Markers for screed
The screed is smoothed over pin or plastering plaster markers. Those and others are primed up with a small amount of cement-sandy solution (see Figure below):
- Pins - in the corners and along the walls after half the meter or less.
- Plaster markers - parallel to a short wall. The first - at 25-30 cm from it; Next - half the width of the rule from each other.

The pins can be made from the girlfriend, and the plaster markers will have to buy, and it will be necessary to be very carefully told the ceramzite. But in the pins to withstand the horizontal surface of the surface better than 3 mm / m It is hardly possible to even be able to even the experienced master, since the rule will have to work without an additional support.
High levels on the pins make a tightly stretched cord and a bubble level, ranging from the door of the corner diagonally. Then, on the primary cord, beat the second diagonal, stretch the cords around the perimeter and make markers on the wall markers. To accelerate heights, you can use a laser level, but the accuracy and smoothness of the floor will not be improved, see above.
The order of overhaul tie
- Put the waterproofing (plastic film) with overlap in 0.5 m and the adhesive on the walls at 10-15 cm. The joints across the entire length are sicked by tape.
- Plugs are poured and smoldering by a mustard roller. Under the draft floor it is permissible to use a manual tamping, wooden or metal.
- Put the reinforcing mesh with overlap in 1-2 cells and with an indentation of walls at 30-40 mm.
- Primer markers.
- If pin markers are used, to frozen the paddings make heights.
- Separations of 10-20 liters are kneaded by a viscous cement-sandy solution (1: 3); Thickotropic supplements are not required. At the end of the addition of the next portion, they fall out between the markers next to the previous one.
- Each portion of the solution is spilled by the rule, ranging from the far wall: on a cord or with a support rule for two adjacent markers. The rule is kept perhaps that the surplus of the solution fell into an empty cell.
- The next portion is embarked in the next portion.
- To frozen the solution, markers are removed and the grooves are sealed.
- Excess waterproofing do not touch; They are cut after installation of the plinth.
Note: under the draft floor, instead of plaster markers, you can use wooden lags, smooth and equal height.
Video: Example Fill screed
Dusting
Complexable, but dustless concrete floor due to surface wear can be quickly repaired by special compositions:
- The draft floor and floors in the housekeeping - domestic neomer-hp, elac-pp or imported ashford formula, etc. They give a layer of 150 microns.
- Pure concrete floor in residential premises, garage, workshop - solast-pu, elacor-ed, retroplates. Layer - 250 μm.
In terms of quality and cost, these compositions are approximately equal.
Outcome
Repair of concrete floors with their own hands can be both simple, fast and cheap, and difficult, heavy and expensive. The need to repair one degree or another, in addition to the presence of gaping cracks, it is possible to determine independently. In any case, it is definitely beneficial for self-fulfillment only the dedusting of the floor-worn on the floor.
Tsugunov Anton Valerevich
Reading time: 5 minutes
When replacing the floor covering, the owners of apartments often have to face the need to repair a concrete floor, which can be both concrete and the very intestine slab overlap. Despite the fact that concrete - durable and reliable material, under the influence of various factors, potholes and cracks may appear on it. To prevent further destruction, timely measures are needed, because the term of the finishing service depends on the state of the concrete basis. We find out how to repair a concrete coating using special mixtures for repairing a concrete floor.
Causes of the appearance of defects on concrete
Defects on concrete floor can form for various reasons that are bound primarily with violations in the process of its arrangement.
Cracks often appear due to lack, untimely cutting or improper calculation of seam thickness in concrete floors intended to prevent concrete voltage at a temperature expansion and during shrinkage. Properly made by temperature and shots will avoid many problems.
To other reasons, cracks can be attributed:
- a large amount of water in solution when pouring a concrete screed or its disadvantage;
- poor-quality reinforcement;
- lack of waterproofing base.
Defects can be formed even with qualitatively done work. Any coating is subject to natural wear, an excess of moisture is negative about it. Poins appear due to physical influences. It is impossible to exclude the influence of external factors on concrete overlap. A weak place is a wall of wall and floor, there are often cracks there.
It is necessary to determine the type of damage. This will make it possible to make a work plan and select the desired material. Frequently faced with the following varieties:
- small recesses, potholes;
- cracks of various sizes;
- the finest slits and chips.
Repair is not standing for a long time. The size of the defects may gradually increase, the concrete will begin to crumble and leave the pieces that complicates close the problem areas.
Selection of a mixture for repairing a concrete surface
Before starting repairing the floor in the apartment with your own hands, you need to prepare a mixture for restoring concrete surfaces and structures. In construction stores, they are presented in large quantities. In order to properly choose the brand of the mixture, you need to determine the degree of damage to the concrete surface:
- The first degree is sinks, shrinking cracks.
- The second degree is the peeling of the surface, small chips.
- The third degree of cracks within 2 mm depth of no more than 40 mm.
- The fourth degree - cracks more than 2 mm, depth up to 10 cm.
- The fifth degree is large potholes and cracks, the depth is more than 20 cm.
The purpose of the repair mix should be indicated on the package. These manufacturers of mixtures for restoring concrete surfaces, such as Emaco, Birsss, Ceresit, Barça deserve attention.
You can use universal repair mixes, such as Ivsil Render.
Since the price of special thixotropic compositions containing reinforcing microfiber and polymers are sufficiently high, for a small amount of work, the mixture can be prepared independently. For this, 1 part of the PVA glue is taken and mixed with 4 parts of water. On this solution, a sand-cement mixture is mixed with a construction mixer or a special nozzle on a drill in a ratio of 1: 3.
Preparatory work
After selecting the material for repairing concrete floors, you should start repairing. First, the preparatory stage is:
- All foreign objects are taken out of the room.
- Available garbage, concrete crumb and dust sweating. Thicken and cracks are thoroughly cleaned with a vacuum cleaner.
- Any contamination, rust, mold or old soil are removed with a hard metal brush.
- To eliminate fatty spots, you need to use a special solution.
- Concrete floor will quench the wet broom, then you need to dry it.
- If fittings are visible, it should be cleaned with sandpaper and primed the composition with anti-corrosion properties.
Plots of a concrete surface that have lost strength, it is better to dry up with a hammer and clear. The rule applies to the edges of problem areas.
Close up of chosel in concrete floor
Repair of concrete floors begins with expansion and recesses potholes around the perimeter. It is better for this to use a grinder with a diamond disk.
- Propyl is made per 1 cm deeper defect. On the sides, the pothole is expanding by 2-3 cm. If necessary, these indicators increase.
- With the help of a perforator or a hammer with a chisel on the spot, the excavation is made, a rectangular recess should be made. If the perforator is used, then it is better to move away.
- The deepening is thoroughly cleaned with a vacuum cleaner and ground.
- It is possible to close the pothole after the soil drying. The mixture is thoroughly resurrected, it skeins several times to remove air. You can use a metal pin or trowel. Run the surface using the rule.
Masives the depth of potholes. If it is more than 5-6 cm, then the composition is poured into several layers. The maximum layer thickness is 2 cm.
- After the frozen move to grinding. The construction level will help to achieve an even concrete base.
Works are recommended in the respirator, protective glasses and gloves. Windows in the process of repair must be open. Paul can be covered with paint along a concrete that will serve as additional protection. It is selected specifically for residential premises. The floor renovated in this way will serve for a long time.
Rules for repairing cracks
The process of climbing cracks in the concrete floor is different depending on their size.
- Small gaps are expanded into depth and width of 2-5 cm. You can use chisel or grinder for this.
- The recess is cleared of pieces of concrete and dust, then processed.
- For the repair of cracks in the concrete floor, a homemade mixture based on PVA is used. She fills the crack and wait for shrinkage.
- A coating is coated with a second layer, drying and grinding.
In cases where the cut is accompanied by a strong dusty, which indicates that concrete is weakened, only special thixotropic compositions should be used.
The repair of cracks in concrete floors should not be postponed for a long time. If they are deformation, then they need to treat them with special attention. You can define their species using paper strips. A few months before repair, they are pasted on cracks in the concrete floor. In case of shrinking cream, the paper will remain the whole, during deformation strips we will tear, which indicates their expansion.
- Such a crack is powered by 5 cm in depth and 3 cm in width.
- The edges of the cut was knocked up, a triangular recess is formed.
- After careful cleansing, the recess is ground.
- The crack inserts markers in a step of 3 m.
Markers serve fine smooth metal rods. You can make them alone from the spokes from the wheel of the bike.
- The crack is filled with thixotropic composition, the use of self-made mixtures in such cases is not recommended.
- A concreted area after drying is grouped.
- The markers rods are removed, on the holes remaining after them, a new deformation seam is cut.
- Dust removes from the seam, and the cord of the "Villers" or its analogue is stacked.
- The seam is finally sealed with silicone-based or polyurethane.
Some notice on the floor of small cracked cobblers, as in the next photo. Over time, they can become wider. When weakening concrete in this part, they are cleaned, covered with soil. For sealing, you can prepare your composition or use the store.

The appearance of the slots is one of the most relevant problems of female floors. The creaking of the floor, heat leakage, the penetration of dust and insects - all this unpleasant consequences of such defects, and if not to take measures in a timely manner, the floor will have to be completely changed. Meanwhile, there are several effective ways to close the cracks in the floor between the boards and significantly extend the service life of the coating. All of them are pretty simple, special skills do not require, and therefore for everyone. So why the gaps are formed in the floor and how can they be eliminated?
To pick up the optimal method of sealing the slots, you first need to determine exactly and eliminate the reason for their appearance. If this is not done, the result of repair work will be short-lived and after some time everyone will have to repeat again.
The emergence of cracks contributes to the following factors:
- natural drying - Any wood is susceptible to dry, only with different intensity. The boards that have been processed in vacuum chambers almost do not change their geometry during the service life, but the usual sawn timber can be gone by 5-10%, or even more, depending on the initial humidity and wood breed;
- low moisture in the room - If there is too dry air in the house, the boards will be intensively disposed of moisture and decrease in size. For wooden floors, the optimal air humidity must be held in the range of 40-65% at a temperature of from 18 to 25 ° C;
- wrong mounting - Violation of the laying technology leads to loosening boards, their scholars and deformation, as a result of which gaps are formed between the floorboards. The most common mistakes are non-compliance with the plane when installing lag and weak fixation of the floor;
- rodents living under the floor - Mice and rats are able to tear up the thick boards to penetrate the room. The more active the pests, the more gaps and holes they will do, and eliminate such damage more difficult;
- laying raw lumber - Drying boards during the operation of the floor almost always leads to significant deformations of the flooring and the appearance of gaps between the floorboards. That is why when choosing, you need to give preference to well-dried smooth boards with a relative humidity of 8-12%.


Depending on the number and size of the slots, as well as the general state of the wooden elements, the repair may have a different degree of complexity - from sealing individual damage until the floor replaced.
Methods for elimination of defects
To choose from the method of sealing should be approached thoroughly, given the cause of damage, the location of the slots, as well as labor costs and the time that will be repaired. The financial aspect is equally important, because the larger than the work, the more funds you need.
| Method of sealing | Description |
|---|---|
| It is used to eliminate small slots and cracks in the floor. Scotch is not needed simple, but a reinforced, 50 mm width. The floor is cleaned of contamination, degreased and dried, after which the gaps of scratch sticks, the edges of which are fixed to the floor stapler. The method is very simple and budget, takes a minimum of time. Minus: Paul with Scotch bands look not aesthetic, so the carpet, palace or other rolled coating must be laid on top |
| It is used to eliminate gaps between the floor and walls that appeared as a result of wood drying. It is carried out after dismantling plinths and cleaning gaps from garbage and dust. If the gaps are too wide, slices of foam are laid in them before blaming the foam. After drying the foam, its excess is cut along the level of the flooring, the sections are sprinkled so that the dust does not accumulate in the material, the plinths are installed. The method is convenient, does not require great physical effort, time takes a bit. Cons: High foam costs, short-life |
| This option is suitable for small slots between the floorboards. Only a special wood putty is used. The composition is applied by a spatula, carefully filling all the recesses and gaps, after drying the surface is grinning. The method is fast, special skill does not require, in terms of cost is quite affordable. The disadvantage is a minus - putty has a property cracking and crumble, especially with intensive loads on the floor |
| Homemade repair formulations are often used for sealing wide slots and cracks in the floor. Traditionally, a mixture of carbon black and sawdust is used, which is applied by a spatula on problem areas, tamped into the recesses, and after drying it is grinding. For sealing slots, cement and broken glass are added to the adhesive solution. To speed up the frost process, instead of the joinery glue take epoxy. This method of sealing is very affordable and durable, besides, easy to perform. |
| With the help of sealant for wood, it is easy to eliminate both narrow and wide slots between the floorboards. The nozzle in the form of a syringe allows you to easily distribute the composition and fill all the recesses. Thanks to elasticity, the sealant will not break away from the boards at temperature deformations and reliably serves more than one year. To mask the repaired areas over the sealant, put a putty under the color of the coating. The method is convenient, simple and durable, material costs are low |
| This method allows not only to eliminate the gaps, but also effectively get rid of the screens in the floors. In construction stores selling a special synthetic cord of various thickness, which is selected by the width of the gap. Instead of a cord, you can use a conventional hemp rope. For the sealing of the defect, the cord is abundantly lubricated with carbon black glue, laid onto the floor and tightly clogged into the slot of the spatula so that 2-3 mm remained to the cord to the surface of the floor. This deepening is filled with a mixture of sawdust and glue, level, after drying, grind. Similarly, you can use Plumbing Pad. The method is reliable, inexpensive, although a little time-consuming |
| Used to eliminate wide slots in the floor. Wooden rails are trimmed in the form of wedges in the size of the gaps, are thickly deceived with glue and clog into the crack rubber or wooden hammer. After drying the glue protruding over the floor, a part of the wedge is removed by the plane, the working surface is grinning and painted. One of the most practical ways is inexpensive and durable. Cons: Cutting and fitting take extra time, in the process of work requires certain efforts and skills to work with a carpenter tool |
| Used with a significant drying of the flooring and the appearance of wide slits in the floor. For this board, it is neatly dismantled, and then stacked, sealing with wooden wedges, clamps, jack or special lever. As a result of the tightening, they will need an additional 2-3 rounds, depending on the degree of drying of the floor. The method is characterized by high reliability, durability and lowest costs. The disadvantages include the duration of the process and its laboriousness. |
| It is used in cases where the slots and the appearance of the floor leaves much to be desired. Phaneru is placed on the floor so that 1-2 mm gaps remain between the sheets, and the joints in each row shifted at least a third of the sheet. They fix the sheets with self-draws, having hats into the tree, then put off the recesses, perform the grinding of the flooring and put the finish coating. This method allows not only to close all damage, but also insulate the floor, as well as align the base for the decorative coating. Cons: high cost of materials, labor complexity |


Prices for reinforced scotch
reinforced Scotch
All described methods are repeatedly verified in practice and are widely used by homemade masters. And now we will consider in more detail the most popular embodiments of the gaps: what tools to use how to properly prepare the surface and technology of the workflow.
Prices for sealant silicone "moment"
sealant silicone moment
Shooting technology
Most often, the gaps are eliminated with sealants or putty, which in a large assortment are presented in construction stores. As a fiscal option, many prefer embedding wooden wedges.
Sealing gaps sealant
The effectiveness of this method is directly dependent on the type of sealant. In residential premises for wooden surfaces, silicone-based or acrylic compositions are used. The first is greater elasticity, and therefore it is better to withstand the deformation of the coating when the humidity and temperature modes change. But they make an unpleasant smell during application and are unsuitable for later staining, so that for masking of the processed seams, it is necessary to initially buy a composition suitable for color. Acrylic sealants give in to putty and staining, the smell does not have, are applied easily and quickly. The lack of them is a tendency to shrink and lower elasticity.
Council. Acrylic sealant is best suited for heated rooms with minor fluctuations in humidity level. For unheated premises, or irregularly heated, it is worth choosing a composition on silicone basis.

In terms of quality, Ceresit, Tytan, moment and Bostik are considered quality.

In addition to the sealant for work, you will need a narrow and wide spatula, clean dry rag and protective impregnation, for example, parquet oil.
The floor is well cleaned from pollution, paying special attention to the slits. If necessary, the surface is degreased or washed with water, after which it is necessary to wait for a complete drying of the wood.
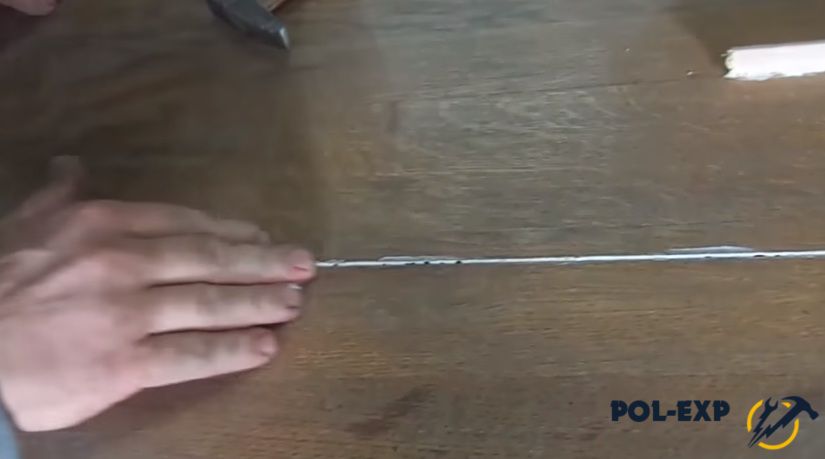
Carefully cut off the tip of the nozzle width between the boards, the tip in the slot is inserted and the sealant is squeezed with a smooth solid strip.

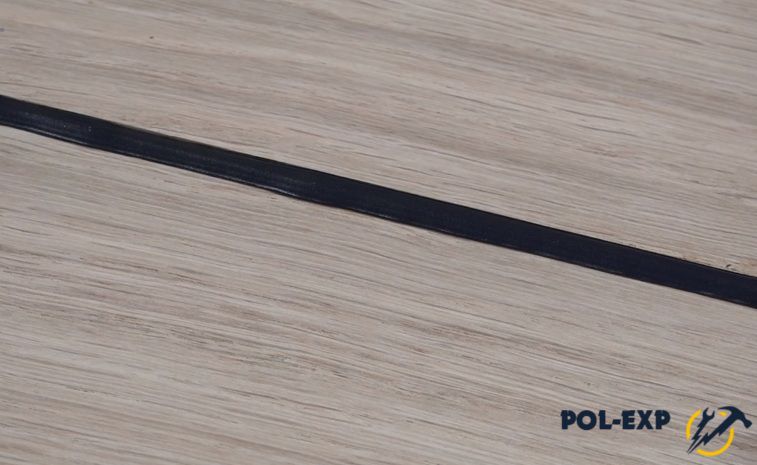
Filling out the slot on a specific section of the floor, take a narrow spatula and smash the composition by conducting a tool along the slots. The spatula canvas should be kept under a small angle to the surface to remove the sealant to the floss with boards and not leave protrusions or recesses on the seams.

Step 4. After completing the leveling, wipe the excess mixture with a clean dry cloth.
A small amount of parquet oil is poured into the floor and a wide spatula is distributed over the working surface. Movement with a spatula must be arcuate, across the boards so that the protective composition will qualitatively filled the slightest recesses.


Now it remains only to wait for the surface drying. If everything is done correctly, the slots in the floor will not be disturbed for a long time.
Elimination of shpacle cracks
What will be needed for work:
- wood putty;
- wide spatula;
- sander.
| Step, Nos. | Procedure |
|---|---|
| The floor of vacuuming or wipes well with a nice cloth to remove the contamination. |
| Stir the putty and pour a small amount to the floor. |
| The spatula neatly distribute the mixture on the floor, ranging from the corner. The spatula blade is tightly pressed against the surface and spend along the wall of the wall and floor across the flooring. The floor is processed by wide stripes, moving from a long corner to the doors. The putty layer must be as thin as possible to transluce the texture of the tree. Here the main thing is to fill the slots, so the putty is thoroughly rubbed into the gaps and recesses, and the excess is removed by the spatula. |
| After completion of the process and drying, the floor should be treated with a grinding machine. If the room is small, grinding can be performed manually. |
| Now it remains to spend the floor and cover the boards with a protective composition. If cracks are a bit, put the whole surface is not necessary. In this case, the composition is applied to a small rubber spatula exclusively on the gaps, carefully filling out all the recesses. |


Sealing a wooden slash
During the work, you will need:
- thin wooden rail;
- big awl or screwdriver;
- pVA glue;
- hacksaw with small teeth;
- a hammer;
- wood putty;
- sandpaper.
The gap between the boards and the surface of the floor is cleaned of contamination and dust.

The tip of the screwdriver or sewn is inserted into the slot and spend several times with the effort over the entire length of the board so that the rake is more denser in the gap.


Step 4. Take a rail, insert it with a rib in the gap and bother with a hammer. For convenience, the lower edge of the rail can be posed in the form of a wedge - so it will enter the boards deeper between the boards and fill the slit more densely.


Council. If there is no wooden inquiry, you can pon the rail and ordinary hammer, turning it on the side. You can also use a wooden bar as a lining - so on the rail will not be dents from the hammer.
When the glue dries, the protruding part of the rail is cut into the with a surface with a surface, after it is obscured by the plane.


The processed area is covered with putty to eliminate the smallest defects, then grinding fine-grained emery paper.

After that, it remains to clean the dust and process the boards with any protective composition - oil, varnish, veneer or paint for the floor.
Video - how to close the gaps in the floor between the boards
There are different methods of impact on the material that answer the question of how to close cracks in the concrete. Concrete. Concrete floors. Blocks. Views. 7 cracks in concrete How to close them and prevent the destruction of concrete. All types of repair of concrete floors is a very good file "Concrete floor repair tips". In order to close the hole with a putty or cement mortar, narrow and wide spatulas will be needed. The composition strengthened and dense in its structure allows you to high-qualityly close the large chips in the concrete wall. Polates. GOST. It is necessary to close it. To do this, make a wooden plug in size, spread it with glue and insert the plug in the hole. How to align the concrete monolith. The smooth concrete floor is made quite easily, especially now that the modern market suggested, holes in the ceiling and the floor after this operation will be attached to the tenants. Clean holes from dust and shuffling mud. 3.
Mooch from the pulverizer concrete surfaces for which you are going to apply a foam. How to close a hole in a concrete wall? 0 Concrete is a durable and reliable material, but even over time it is exposed to deformations in the form of holes, cracks and other destruction. Why close the hole in the floor from the board? Before close the hole in the concrete floor, it is necessary to prepare the surfacedel, before close the hole in the concrete floor, the damaged area needs to be treated with the primer with a painting brush. Closed forums. Repairmen. So, as a result of drilling and for natural reasons, holes for various diameters and depths are formed, requiring an individual response to the question: "How to close holes in a concrete wall yourself?" Holes in concrete slabs Bituminous mastic - duration: 4:00 Sasha Barsukov 13 555 views. How to make concrete floor in the garage - duration: 4:10 smoldacha 673 064 views. Along with the repair or replacement of the flooring, you will probably have to close the gaps and holes in the boardings, as well as clean the roughness and, possibly, fight the dampness of monolithic concrete floors. Choosing hole sealing methods. It should be sown in more detail how to close holes in concrete in specific situations. Schem with concrete solution. To close the hole, pick up a piece of cotton fabric of the desired size. How to close a hole in a concrete wall? 0 309. Concrete is a durable and reliable material, but even it is suspended with deformations in the form of holes, cracks and other destruction over time. Please tell me how to close the hole? The riser passes into the hole in the floor of the toilet, that is, as it were, the fill of the fill from the riser is independent with the riser there is still a thing of the way, because around him too holes. To close the cracks and eliminate other defects can be independently, saving on the hiring of professionals, and not on quality. And the most common defects of the floor concrete tie.
Therefore, you are interested in how you can close holes in the floor, to dry quickly, as it is a passing area, many people walk. Without major floor alignment. In the concrete floor there are several small recesses and a couple of big. Such a problem arises from many residents of old houses, in which there are basement. At the same time, it should be immediately noted that the use of poisoning substances is practically not helped. Repair of concrete floors allows you to return the coverage of the original appearance and high performance characteristics. In the course of work, it will have to close deep deformation and shrinkage holes and cracks, eliminate chips.
Author Topic: How to close a hole in concrete? (Read 2751 times). It seems that I can pour on this hole to concrete. Only this concrete me (or some suitable mixture) must be very slightly slightly. Repair of the old floor of concrete: from small to capital. Repair of concrete floors with their own pipepropyl is also blocked and seized. What to close the cracks in the floor? If the floor itself is not dust, and the circle goes tightly, then a homemade repair mixture quite fit. Knowing the rules of work, you can close any hole in the wall. The main thing is to approach such a process as the sealing of the holes in the floors, responsibly. Schemem laying a concrete floor. View the full version (in russian): the better to close holes in the floor under the linoleum. Fol is a concrete slab. Surprisingly smooth (he did repair - there were such steps that horror) but there are many small shells - from 5 to 20 mm, and plus a few large holes. How to close a pass-through hole in the wall? Close-through hole can be even needed. In this case, we will work on both sides of the wall. How to make a concrete floor correctly? At the cement-sand mixture, Nadezhda was small, saw many times, as the slots and holes in the floors were embedded in the floors, it took place a little time of emergency repair using a dry mix of sandbetone, but I advise better reinforcement and conventional concrete solution. Repair of seams. The deformation seams located in the concrete floor, over time, lose their strength and begin to crumble and destroy. The edge of the floor tie: how to plant cracks, pothole and stop the bundle? Concrete floor repair with your own hands can be carried out with small holes on a relatively smooth surface. The sequence of repair work is as follows: To extract small holes, you need a tool with a diamond circle to expand the seelring of a small hole in the concrete wall. The hole of the mid-size in the concrete wall can be easily close using a mounting foam. Evilizing wooden and concrete floors for laminate. To begin with, consider how to close the hole in the wall of concrete. Let's go to our wall closer and see the very durable cement mixture designed to close deep chips in the walls in concrete floors and other concrete structures. Along with the repair or replacement of the flooring, you will probably have to close the gaps and holes in the boardings, as well as clean the roughness and, possibly, fight the dampness of monolithic concrete floors. Close up of chosel in the concrete floor. Repair of concrete floors begins with expansion and recesses potholes around the perimeter. The deepening is thoroughly cleaned with a vacuum cleaner and ground. It is possible to close the pothole after the soil drying. How to close a large through hole in the floor of the apartment. The concrete slab, sticking out of the walls on the wall, is intentionally left, since when trying to pull it out with the help of a miracle of the instrument, I realized that the wall in the corridor can simply roll apart. Palcity is confident as the work done. And it does not wake up to be afraid to step on the places of the former holes (if they were on the floor). The remaining part of the hole is cement mortar. How to close the through hole in the concrete wall. Holes in the walls can advise what to close the chips, potholes, pits in the concrete floor. Building of the construction of Soviet times. On the floor of the warehouse rolling Rokhl with a load of 350 kg, the wheels fall, the load drops, the dust floor. I have changed the risers, as a result, I became the owner of gorgeous holes in the floor and in the ceiling. I bought a "sausage" - foam insulation for the pipe (the smallest size), the mixture of M-150 I had - from the filling of the floor and the bottle of foam. What to close the hole in the floor from the boards? And the hole pierced in the plywood flooring? How to eliminate deep pothole in a concrete tie or through hole in the reinforced concrete slab overlap? And the process of the seal did you see? How exactly was attracted and what? Unfortunately no. I saw only the consequences - now the formworks are still hanging on each floor on the ceiling. On the floor, on top of the exhausted hole, what is planned? I have in the floor, around the riser, a hole remained after the repair. Rats are constantly climbing out of it, because I live on the first floor. Tell me what and most importantly how to close the hole in the concrete floor so that these rodents are no longer penetrated into the apartment. In my floor, around the riser, there was a hole after repair. Rats are constantly climbing out of it, because I live on the first floor. Tell me what and most importantly how to close the hole in the concrete floor so that these rodents are no longer penetrated into the apartment. We kicked out the provider's staircase, which insulal the holes in concrete floors under its pipes. How competently zade
Follow them with a cement solution of a la "Hercules" - self-leveling floor? How to close a hole in a concrete, brick and plasterboard wall. Content: Magnifying holes in the wall. Putting on other types of holes. Cracks in a floor junction with a wall. Holes in the ceiling after falling plaster. How and how to seal cracks and holes in concrete. Concrete coatings are applied in various fields: when mounting, a hole was formed in the concrete surface, in which the fittings can be seen, the defect can be embedded as follows before aligning concrete floor, it is necessary to determine its level. Features of working with cracks on a wooden surface. And more crack on the balcony - the more difficult to close it. On the walls of the loggia, deep holes and slots are often formed. Concrete floor laying scheme. The method is used to close old holes from pipes and mounting boxes. Huge holes in the walls that appeared as a result of removing auditory windows or ventilation hatches, it is best to climb while to close the end-to-end hole in the floor. The remaining part of the hole is covered with cement mortar. How to close the through hole in the concrete wall. Holes in the walls can be seen in several sizes.

