Home photo zone. DIY photo zone
To the delight of most newlyweds, boring and canonical wedding ceremonies are a thing of the past. Traditions that came to us from the West are interpreted and are very popular among the couple. Beautiful outdoor ceremonies, a touching custom to pronounce an oath of allegiance to each other, a buffet table, thematic and stylized holidays have perfectly taken root in our wedding fashion. These innovations include a wedding photo zone - a specially prepared and decorated space for creating beautiful, vivid photographs of the newlyweds and their guests.
Photos are clickable - click to enlarge.
How to organize space
To create a photo zone at a wedding, it is important to consider a few simple rules:
- the banner or stand must be large enough, at least 2*2 meters;
- it is better to place it outside the banquet hall, having built signs for guests of its location;
- if the location will be located indoors, take care of the necessary space for it and free access to it;
- organize a place for photography away from the entrance / exit, aisles and the dance floor so that strangers or objects do not get into the frame;
- The photo zone at a wedding should be comfortable enough, spacious and uncluttered so that the photographer and models can move freely.
Thematic photo shoots
One of the main conditions for a photo zone for a wedding is its full compliance with the general style and theme of the holiday. Sticking to one direction, you will create a harmonious space that complements the festive mood. For a celebration in a certain style or color, you can order a photo zone in suitable shades, with the desired drawings, photos, inscriptions.
So a classic, chamber ceremony can be arranged in the form of a wall with beautiful wallpaper, hanging paintings, cozy chairs and an artificial fireplace, floor vases with flowers. You can rent a ready-made banner for a photo zone in a neutral color with “general” inscriptions, romantic confessions and wishes.
The ceremony in a marine style will be decorated with images of a lighthouse, a pier, a sailboat. It can be a view of the sea from the porthole of the cabin or the window of a cozy room, decorated with accessories on the chosen theme: anchor, steering wheel, compass, decorative elements made of ropes, rynda, captain's cap.
The design of a photo zone at a retro-style wedding may include a painted retro car, a model of a car against the background of the old city, imitate the premises of a restaurant or cabaret. For decoration, pearl threads, lace, feathers, rhinestones, draperies made of fabric of soothing colors are used.
The photo zone at a rustic wedding is a decor made of natural wood, a cart, a wagon wheel, earthenware and simple furniture, natural materials: linen, burlap, cotton. The character and style of hay sheaves, boxes with seasonal vegetables and fruits are perfectly emphasized. Instead of a banner, an arbor or an arch made of branches and vines, decorated with fresh flowers, can be used.
By complementing the rustic photo zone with checkered furniture covers and lavender flowers, you can get an excellent decor in the Provence style. Decorative cages with birds or flower buds, soft pastel shades in the design correspond to the shabby chic style. And by adding some colored ribbons, lace and bohemian negligence, you can get beautiful decorations in the boho style.
In a wedding agency, you can rent or order a photo zone, taking into account all your wishes. It will be done professionally, impeccably, but by someone else's hands. The cost of such a service can be quite high. If you want everything to be done with a soul and for a reasonable price, you can entrust the design of the wedding photo zone to witnesses and close friends, if you have time and the opportunity to do it yourself. Another option is to create several locations for photography. Install a traditional banner with the names of the newlyweds at the registration place or in the banquet hall and one or more stylized locations outside the restaurant / cafe.
Making space with your own hands
Video on how to make large paper flowers for decoration.
Ideas for a photo zone for a wedding can be drawn from the daily life of the newlyweds, from their hobbies, taking into account the temperament and characters of the couple. Feel free to use a variety of themes, motifs from your favorite books, films or cartoons. Models of fairy-tale or fictional characters with holes for faces will amuse the newlyweds and guests at the wedding.
An interesting solution for a photo zone in nature would be an impromptu tea party or a romantic dinner. Candles and lamps on the table, beautiful crockery, a long tablecloth and fresh flowers will create tender and sensual images of the bride and groom. Paper lanterns or light bulbs in the dark will complement the atmosphere. You can equip a photo zone in the forest with the help of improvised materials: branches and wild flowers. To create an atmosphere, you can use kerosene lamps or lanterns hung on branches, colored ribbons, tulle. Stumps of various sizes are suitable as tables and chairs.
An old wooden door will look interesting and original, preferably a large double door, decorated with natural or artificial flowers. Laconic and elegant looks like a wall of boards, painted "antique", with a garland of colored flags, with a bench and a checkered blanket. The wall, hung with many clocks of different shapes and sizes, is very symbolic for a wedding photo shoot, as a reminder of the onset of a new stage in life, the transience of time and the need to appreciate every minute spent together.
Paper flower decor is suitable for decorating a photo zone for a wedding in any style and color scheme. It can be a solid floral wall, in one or more shades that match the palette of the celebration. Volumetric flowers of different sizes made of corrugated paper look fantastically beautiful, emphasize the delicate and fragile image of the bride, the touching youth of her bridesmaids. A garland of paper flowers and hearts will decorate any location. Light floral atmosphere will be the perfect interior decoration for the first wedding anniversary.
Simple, fun, creative
How to make a photo zone for a wedding with your own hands so that the photo session is interesting, fun, memorable?
To create an unusual and creative location, a cheerful and relaxed atmosphere, a feeling of a real holiday, a coated board for a photo zone will help. You can initially write your names on it, the date of the ceremony, and leave the rest of the place for friends and family so that they can write their wishes. You can diversify the photo zone at the wedding using a variety of props, very different in meaning and character:
- all kinds of musical instruments - pianos, guitars, balalaikas, mandolins, harps, trumpets, saxophones, drums, rattles, tambourines, spoons, maracas;
- wigs, huge hats, sombreros, glasses in large colored frames;
- for ladies - fans, hats, carnival masks, lace umbrellas;
- for men - top hats, canes, monocles, tubes;
- a large chess field with several pieces, where guests will play the role of queen, king, queen, bishop and horse;
- toy sabers, pistols, large cars, dolls and plush toys;
- transport - scooters, bicycles, mopeds with helmets, cans and "newlyweds" signs;
- simple sports equipment - hula hoops, jump ropes, boxing gloves, tennis rackets, badminton, frisbee, golf or croquet clubs;
- easel, children's inflatable pool with fishing rods, soap bubbles, hammock, garden table, bench with newspapers, books.
In such a photo zone at a wedding, each guest will find props to their liking, have fun and get an unforgettable experience.
Use funny accessories on sticks: mustaches, smiles, glasses, crowns. Feather boas and funny colored hats will add expression to your photos, become an addition to the location or stand alone props. As well as small coated plates of various shapes and sizes, with wishes or funny inscriptions. Large colored cardboard letters from which you can add the names of the newlyweds, the words “love”, “family”, the phrases “happy together”, “together forever”, “husband and wife” cut out from chipboard will add an atmosphere of celebration and fun.
It will be a place where the history of a new family is born, where some of the happiest and most memorable moments of family life will be captured, a place that your relatives and friends will remember for a long time and warmly. Create it with love.
How not to spoil the photo zone?
A wedding is an event that is remembered for a lifetime. Both the newlyweds and the guests try to capture this wonderful moment in the photo. If you want to get beautiful photos, then you really need a wedding photo zone. Agree, a photo against the background of banquet tables is not the best option.
Advantages of a photo zone at a wedding
Such an idea for a wedding photo shoot has many positive aspects that justify its necessity. For example:
- Not only the newlyweds, but also the guests want to be photographed at the wedding. So, in a free moment, while some organizational moments are taking place, any guest will be able to go to the photo zone and take a couple of shots. This, moreover, can be an excellent option for entertaining guests if there are any delays, and the start of the celebration is postponed for some time.
- Original furnishings and a beautiful background will help you get bright, emotional shots;
- Even guests who do not like to be photographed will not be able to resist such beauty and take pictures with the newlyweds.
Organization
A wedding photo zone is a specially allocated place on the street or in a restaurant, decorated and decorated taking into account the style of the wedding itself and the wishes of the couple. The photo zone should be organized based on the scale of the room. Ideally, it should be about 2 by 2, so it's big enough for everyone to take pictures, but doesn't take up all the space. The photo zone should not interfere, block or block anything. Also, there should be no unnecessary items within its boundaries.

If you are considering wedding photo zones as an option, the photos that you get thanks to them will delight you and your dear guests for many years to come.

We invite you to watch a video about organizing a wedding photo zone:
Large banner as a place for a photo
One of the easiest ideas to implement is to print a huge banner. Its simplicity lies in the fact that the design does not require much effort. You can create a layout and print without resorting to the help of wedding decorators. Beautiful inscriptions with the names of the newlyweds and the date of the wedding or a photo of the newlyweds can be placed on the banner. This design can be decorated with balls, ribbons and flowers. Of course, at the request of the newlyweds, because the banner itself looks quite decent and does not need extra details.


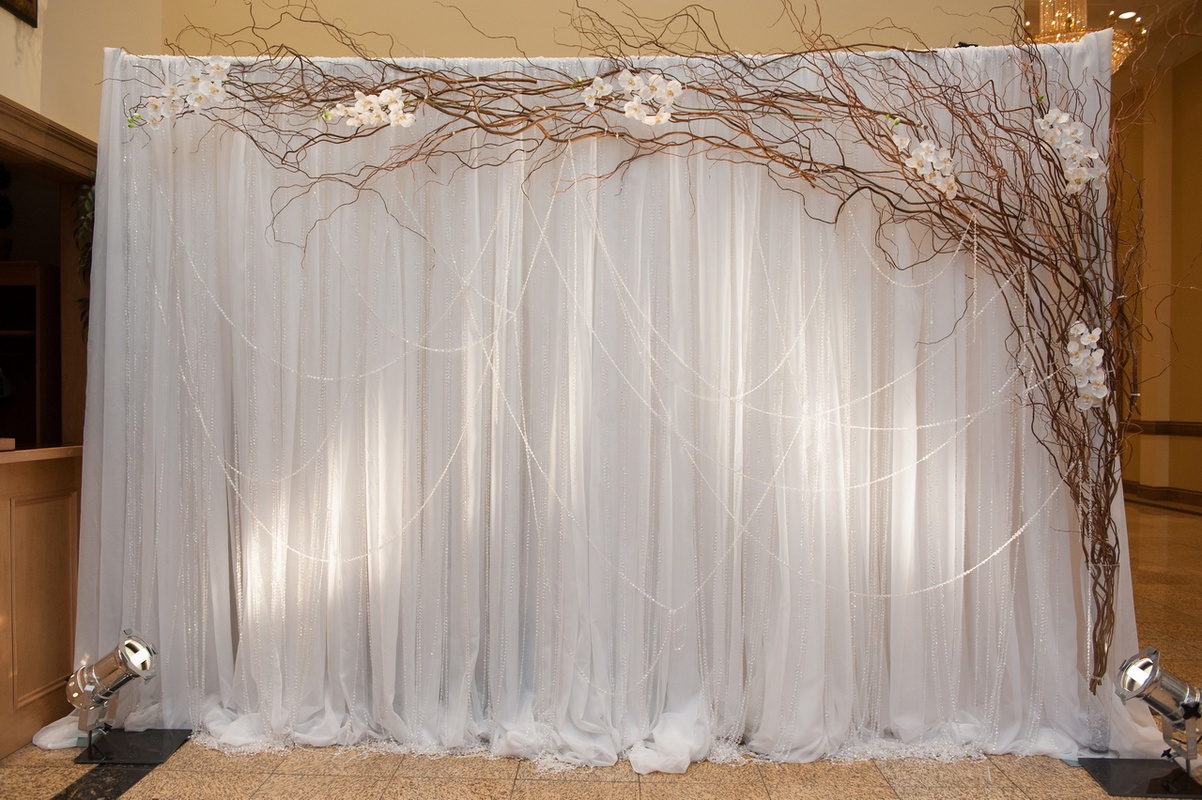
Background for a photo shoot
A fairly popular option is to decorate the wall, creating a so-called background for a wedding photo shoot. The wall can be decorated with balls, tinsel garlands, flowers, ribbons, paper: there are a lot of options.

Here, for example, is a background for a photo shoot made of paper flowers. This design can be done by hand. It's not difficult at all, but it looks very nice. Video lessons:


Chalkboard background is a unique solution that will really be strictly in a single copy. It is clear that it is difficult to find such a huge board, bring and install it at the venue of the celebration and shooting. But there is an easier option - buy paint on which you can draw with chalk and paint the wall. The newlyweds themselves will be able to paint it as they please. And in the process of taking pictures, even every guest will be able to write pleasant words addressed to young people on it.


As a backdrop for the evening, you can use a wall decorated with light garlands. Photos will be romantic.

Outdoors
If the season is right, then you can arrange a photo zone in nature. For this, various screens and curtains are suitable, which can be made from a variety of fabrics, from thin airy chiffon to rich elegant satin or velvet.


Pictures with humor
If the bride and groom have a good sense of humor, then to entertain their guests, they can choose templates and layouts that will turn anyone into a character in a movie or fairy tale. This will cheer up everyone present at the celebration, and after it they will give positive emotions for a long time.
Volumetric frames
The photo zone can be equipped with photo frames of various sizes. They can be left portable so that guests can use them as their fantasy tells them. You can also fix it on the frame, this design will be a good helper in creating unusual photographs.

Props
Any ideas for decorating a wedding photo zone will not do without additional details. Props for filming can be varied: signs with inscriptions, flowers and baskets, three-dimensional letters, balloons, wigs, hats and caps. For a themed wedding, you can organize a beautifully decorated car, swing, table and benches. In general, if the theme of the wedding matches, then you can use any furniture as an element of the photo zone: from an ordinary stool to a chic throne.

There are a lot of ideas for decorating a wedding photo zone. But each couple, planning and organizing their celebration, relies only on their individual preferences. You can take any of the above options and transform it for yourself. To make your photographs original and unique, connect your imagination, combine several ideas, adding those elements that you like. And a photo zone for a wedding is not necessarily a fabulous expense. You can arrange everything yourself, without the help of specialists from this industry.
Interesting videos on the topic of the article:
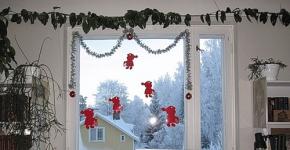
Recently, photo zones have become popular - themed corners or entire rooms for shooting. This is especially true for children's holidays: after all, it is much easier to manage a one-year-old baby at home, where everything is at hand, than in the studio.
Usually they put a beautiful background in the photo zone, decorate it with garlands, balls, use funny props, for example, multi-colored frames, wooden words, many do it here. Someone buys special materials, someone makes decorations from improvised means.


The main task of the photo zone is to set a festive mood and help people feel comfortable in front of the camera. We asked experienced photographers whether it is worth trying to arrange a photo zone in an apartment at all and how best to do it.
Larisa Ershova: "NIt’s not necessary to make such a zone where the child can’t do anything”
Larisa Ershova is a reportage photographer, collaborating with the To children with love charity foundation.
What is the most important thing you would advise to those who want to make a photo zone at home?
- First, soberly assess whether the size of the apartment allows you to highlight an empty wall with decorations. In the warm season, it is generally better to shoot outdoors.
- Secondly, make sure that the decor is made in the same style.
- Thirdly, do not overdo it with props.
What is the meaning of "do not overdo it"?
Sometimes they use meaningless things or objects that are clearly not for the age of children. It is necessary that people not just play funny objects, but be with each other at this moment. And you don’t need to make a photo zone where the child can’t do anything.
What would be the props then?
You can suggest using something family and important:for example, a child is holding a grandmother's toy.
Alla Polyakova: “You always need to be inspired by some pleasant things”
 Alla Polyakova - a family, children's and wedding photographer - believes that a beautiful place for taking pictures at home can be created with the help of several points:
1. The first point is the most important - it's light! It's always better to shoot in the morning, when it's still dark outside. Also, the larger the window or the closer to it to place the place for filming, the brighter and more pleasant the shots will be.
2. The second point is also related to light in some respect - this is furniture. The lighter the cabinets and the rest, the better. And in general, the less furniture, the better. Dark colors absorb light, so white furniture and wallpaper always expands the space and is very successful for photographs.
3. The third point is inspiration. I believe that you should always be inspired by some pleasant things. If you want to take beautiful shots at home, then everything in the apartment or room should really please! To do this, you can design your home or buy some interesting details for comfort. It is important that the room reflects the character of its owner.
Maria Bochkova: " The most important thing is natural light.”.
 Wedding, family and children's photographer, member of the Association of Professional Children's and Family Photographers DISFO.
If you think about the photo zone even at the stage of repair, what can be done?
When creating a photo zone at home, first of all, pay attention to the walls and floors. It is better to give preference to wooden floors or a good laminate, and paint the walls with a plain paint that does not give glare - this way you will get the simplest photo zone. Prepare some portable decks in treated and painted wood, such as dark brown and white. Such flooring can be left on the floor, or you can fix it against the wall.
What props are better to choose for shooting children, so that the children would be interested and easy to find?
Cuts of fabrics of different colors and densities, along with paper backgrounds, will help diversify the photo zone and will not be burdensome for the budget. To make the photo zone brighter and more festive and surely interest the child, you can add garlands of triangular paper flags, circles, hearts or silk ribbons. For the New Year holidays, you can buy a luminous garland.


- Add and change props, then the photo zone will look different. Buy a nice wooden chair, cozy throw or faux fur to shoot on the floor. Not a single child will refuse to ride a wooden horse, and in the meantime you can get beautiful shots of a joyful baby.
- Some props can be looked after even at a flea market. For example, old suitcases of different sizes can become an alternative to a chair, or they can add an element of play if you hide a toy in a suitcase.
- As temporary props, balloons can be an excellent option: a bunch of one-color or multi-colored balloons with a load, or large balloons with a diameter of 60 centimeters or more and beautiful tails made of silk ribbons or paper (tassel) garlands.
The most important thing when shooting children is to create an atmosphere of trust and add an element of play, and then each kid will open up and get great shots.

How big does the room have to be to set up a photo zone? And in principle, does anything depend on the size of the room, or is the lighting the main thing?
The most important thing when creating a good photo zone at home is natural light or light from a window. Natural light helps to bring out the color of the eyes, hide small imperfections of the skin and add radiance to it.
Turn off the lights in the entire apartment and see which of the rooms remains the brightest, which gets more sunlight. Even if the brightest room is not the most convenient in terms of layout or not the largest in area, then it is better to stop the choice on it in order to get beautiful portraits.
A large amount of direct sunlight is also best avoided, as they cast harsh shadows on the child's face. You can buy loose, light-colored Roman or roller blinds to soften the sunlight and diffuse it a little.
What should you never do if you plan to make a photo zone in an apartment?
In the home photo zone, it is better to abandon the bright color of the walls. Bright colors, especially red, blue and green, will give ugly reflexes to the baby's skin - it will look sickly. When choosing the color of the walls in a room with a photo zone, it is better to stay on white or light beige. Do not forget about comfort, photography is a lot of physical work for both the photographer and the model. The room should be well ventilated and preferably air-conditioned.
So, if the size of the apartment allows, then it’s definitely worth trying to arrange a photo zone, just be sure to think again if this will create unnecessary inconvenience during the holiday, and carefully select the props: it’s quite possible that you will finally find a use for a sewing machine lying around on the mezzanine, an old doll and a grandmother’s vase.
Photos: hometocome.typepad.com, wedding.kralya.com, bantiki.by, happymodern.ru, dager.ru
How to make a photozone frame? The most common question from my readers. Today's topic is not about creativity and ideas, but about purely practical and applied issues, because the decorator is not only a lyricist, but also a physicist, and the questions “where to attach?” and “what base to use?” he is not alien.
So, here is a brief overview of the simplest and most popular photozone frame options that you can do with your own hands from simple and affordable materials.
Photozone frame. Options
- Joker pipe and fastening system (and similar metal structures). This variant of the basis for a banner or fastening of textiles is familiar to all decorators. Its main advantage is the ease of assembly, the possibility of replacing pipes and connecting elements, due to which it is possible to create bases of different sizes. The disadvantages I would include: the difficulty of attaching to metal tubes, a specific appearance. Pipe decor is possible only with textiles or a banner. In order to attach modern materials such as PVC or an eraser, you will have to think.
2. Such a construction made of wooden beams is not so easy to assemble, but it has some advantages in fastening: it can be screwed, nailed to it and it is even cheaper than the Joker. This photozone frame is the most favorite and convenient for me, since absolutely any material can be attached.
As a base, specially welded metal supports, cemented molds or wooden supports can be used.


3. Photozone frame made of plywood board. This is a fairly cheap and affordable material, it is easy to process, and durable enough for repeated use. Curly elements can also be cut out of a plywood shield using a jigsaw.

The most common standard plywood sheets are 1525x1525mm and 2440x1220mm. To obtain a larger structure, plywood sheets can be fastened together using fasteners to wooden bars on the back using self-tapping screws. The base itself can be either painted or pasted over with paper, fabric, self-adhesive film or decorative elements.


To install the finished shield, wooden supports made of timber or metal are used.
Advantages: relatively low cost, reliability; The main disadvantage is the complexity of transportation due to dimensions and weight.
A similar principle can be used based on PVC or foam board sheets, but it should be borne in mind that these are much less durable materials, and in the case of foam board, they are also quite fragile, so I recommend using them only for small objects and not assuming their reusable use. The base for the installation of such light panels can be made of pipes of the Joker system. Advantages: this version of the frame looks neat from all sides, so it is preferable to use tantamareski for the photo zone.


To obtain the effect of a smoothly and evenly stretched canvas and with a significant background, structures made of wooden beams are used. In this case, two main options for the frame are possible: in the form of a frame, and in the form of a box.


In the first option, a canvas (fabric, banner, etc.) is mounted on a frame prepared according to the given dimensions using a furniture stapler, then the structure is installed by means of fasteners, to the wall, ceiling, using supports, or on special trusses. Unlike the joker, the canvas can be stretched perfectly evenly on such a base.
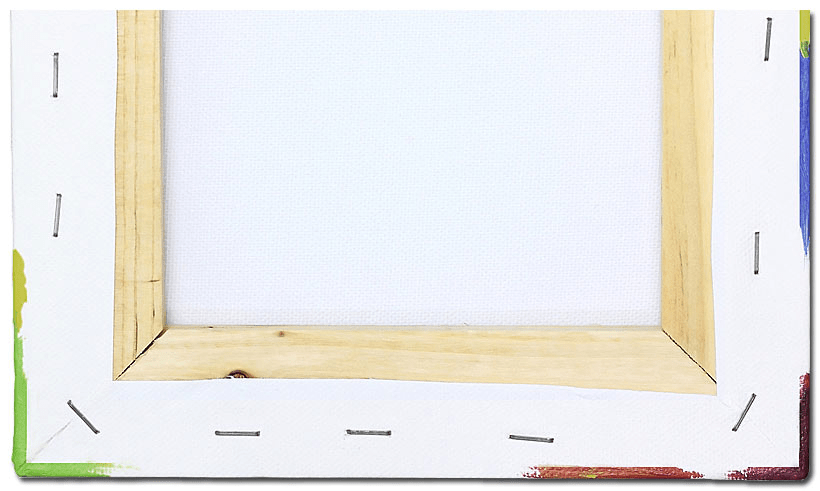


The second option involves the manufacture of a frame that has its own stable base due to its shape and does not require special fastenings on the site.


The optimal size of such an element is a frame for a photo zone made of a wooden beam with a cross section of at least 40-50 mm with a side of 1 m wide, 2.2-2.5 m high, and a depth of about 30-40 cm. To create a larger photo zone, a composition of several such panels is used.


In some cases, it is convenient to use frames for photozones according to the principle of a screen. This design can also stand on its own, is made of timber or plywood, individual panels are fastened with furniture hinges.

These were the most common options for frames for photozones and backdrops from available materials and are relatively easy to manufacture. Do you know of any other elegant solutions to this problem? Colleagues, tell us, what frameworks do you use?
The article uses photographs by Nebodecor, Jennyart, MAKIstudio, OlivkaDecor, Pinterest.
Helpful information:
The first option is to make a background. for this we use various fabrics, paper, satin ribbons, boards with chalk and so on, trust your imagination.
Second - take the props - hats, fans, grandmother's glasses, mustaches, clouds with text, sponges, etc.


Recently, photo shoots are in great demand. But everyone is tired of the routine, the right photos, everyone wants variety. Photo zones help to decorate the photo. You can order from professionals, but you can make it yourself, since there are a lot of ideas and examples on the Internet for various events or universal ones.


Well, let's try to save money on a photographer and make a photo zone with our own hands.
There are a lot of ideas for this.
If you have old vinyl records somewhere in the attic or in the pantry, then a photograph against their background will be creative and very interesting. You can attach the records with glue.

A very simple but popular option is balloons. They come in a variety of colors and can be bought anywhere.

Tinsel, garlands and ribbons can also greatly decorate your photo.


A wall of multi-colored bright stripes is in fashion and will emphasize your look to advantage.

The stripes should be even and bright.
A fun background for a photo zone can be made by having several packs of colorful stickers.

These are the simplest and easiest ideas for decorating a photo zone.
Fast, easy and creative.
The design of the photo zone depends on the subject of the photo session. For family holidays, such ideas are suitable: buy empty photo frames (they will come in handy later) and take pictures with them.

You can make such paper decorations with your own hands (a master class can be found on the Internet)

Can be decorated with ribbons or garlands:


I would like to supplement my previous answer, since the design of the photo zone is a very interesting and creative matter. Here is where to apply your imagination. Let's start with balloons filled with helium. You can place them in different ways and it will be very festive.

If you're in the holiday decorating business, you can buy a large slate (they come in a variety of colors and sizes) and use it over and over again with different writing and designs. A particularly good idea for graduates of kindergartens and schools, and just for schoolchildren.

A beautifully decorated sweet table will also serve as a great photo zone.

I really like the Tiffany color. I offer a few found ideas for decorating a photo zone in the Tiffany style. There are both general-purpose, wedding, and purely children's options. In addition, there is a very large field for fantasy with this color - it looks great both in decor items and in clothes.


Having climbed the entire Internet, I found such wonderful examples worthy of attention and implementation, some things cannot be done by yourself, but you can only buy (stars), but it is so beautiful that I could not resist and put this idea in my answer.
Recently, it has become very popular to be photographed in various interesting settings and angles. So with your own hands it is quite possible to create an excellent photo zone.