Design of window slopes. Finishing plastic windows from the outside - types and methods, necessary components and work technology
Tsugunov Anton Valerievich
Reading time: 12 minutes
The final stage of the process of installing modern windows is finishing the slopes. A thick profile, multi-chamber double-glazed windows and reliable fittings provide excellent thermal insulation, but the interface between the window frame and the apartment wall remains a cold and unattractive place. If you do not provide due attention to this area, then condensation, mold and wall destruction may occur. Therefore, let's find out which slopes are best suited for plastic windows.
What requirements must slopes meet?
Before considering window framing options, their advantages and disadvantages, let's decide what is required of these elements.
Tsugunov Anton Valerievich
Hello, friends!
First, I will talk about all types of slopes, as well as their pros and cons. I will describe the subtleties and share my experience. At the end of the article, I will give recommendations on which slopes are the best choice, and in which cases one or another material and finishing method should be preferred.
Enjoy reading!
Slopes should:
- Not inferior in terms of window design durability. Modern double-glazed windows are designed for at least 15-20 years of operation. Slopes are required to withstand no less time without loss of basic qualities. Few people like to redo them every two or three years.
- Correspond to the general style of the window, to form a single whole with it.
- Maintain or even improve the performance of plastic windows.
- Withstand mechanical loads and impacts of the sashes.
- Be repairable if possible.
Olga returned 21,024 rubles, while the cost of windows was 43,800 rubles

Hello! I ordered the installation of 2 plastic windows: one in the kitchen and the second large window with a door to the balcony in the room. Price for both windows amounted to 43 800 rubles. The company is quite reliable and well-known, I read a lot of good reviews about it, it has been working for a long time. As a result, the order shook my nerves!
Firstly, at first the window to the balcony was brought larger than necessary. Fortunately, the master first measured the old window and the one that was brought, and did not immediately break the old window.
We agreed to move the installation. They said they would call and say when they could deliver. The next day I was informed that they had some problems with production, the profile had ended, they were waiting for delivery from day to day (the manager explained this to me by phone).
All this took 2 weeks. And every day they called me and "feed me breakfast."
I called the window company, but they explained to me that the team was busy and could only come in 10 days to fix the deficiencies. And they didn’t say a word about the delay at all, as if this was the way it should be. They didn't even apologize!
I studied a lot of information on the Internet, how to act in such a situation. On legal aid websites, I was immediately charged for a consultation ( 1 500 rubles), then for representing my interests and for compiling each piece of paper. They said that if necessary, they would bring this case to court ( the cost of filing a lawsuit from 20,000 rubles). I did not want to contact lawyers and pay them that kind of money.
Then I remembered that along with advice on how to save on repairs, I received letters about. I went through and bought it in a couple of minutes, paid with a card. Downloaded immediately. By the table of contents in the Instructions, I found a description of my case.
Everything is clearly written and examples are given of how to write a claim. And it also says in which folder the empty and filled .
There are many documents there, they are all arranged in folders and the folders are signed.
Finishing a window opening with plaster has the following advantages:
- Versatility. This material is used in rooms with different indicators of humidity and temperature.
- Democratic price. Plaster is an inexpensive material, and it is also possible to save money by doing the work yourself.
- Strength. Plaster slopes are more resistant to mechanical stress compared to other types of finishes.
- No seams. Perhaps the main argument of the supporters of such a coating: it is not necessary to additionally process the joints and interfaces of the opening planes.
- Possibility of renewal and repair.
Tsugunov Anton Valerievich
Master wagon. Businessman. 15 years experience. Over 100 completed objects.
To date, this is the most "dirty" and long way to finish. In order not to encounter condensate and mold, I recommend choosing this method only in warm rooms, for example, when a window is installed between a heated balcony and a living room, then freezing of the slopes is excluded. And also if there was no place left for the installation of sheet material.
Drywall slopes
For their manufacture, pieces of plasterboard of the required size are used, which are screwed to the profile frame or glued to the sides of the opening. Then the surface of the drywall is primed, puttied and painted. In the case of laminated GKL, further finishing is not required. The space between the wall and the new slopes is insulated with mounting foam and insulation.
It is easier and faster to fix the GKL than to display a flat plane with plaster. But do not forget that after installation, a fine finish is required, which will take several days. If you use laminated GKL, then the installation of slopes is done in one day.
To avoid the stage of fine finishing, you can take laminated plasterboard instead of the usual one. But in this case, you will have to use special corners to close the ends of the sheets.
Gypsum fiber slopes (GVL)
The technology for mounting slopes from gypsum-fiber sheets is practically the same as mounting drywall, the advantages will be the same. At the same time, GVL is devoid of the disadvantages of GKL: it is much stronger and tougher, and its moisture-resistant variety is not at all afraid of a wet environment.
Mr. Build believes that, when properly installed, GVL slopes outperform other options in terms of performance and appearance.
It is not recommended to use single-sided sandwich panels and decorative wall panels made of thin cellular plastic for finishing the window opening. They do not have the necessary strength, wear resistance and thermal insulation qualities.
- Installation speed. Plastic slopes are mounted faster than drywall and even more plaster.
- The minimum amount of dirt and dust when facing with plastic.
- 100% moisture resistance.
- It is possible to replace part of the slope in case of damage.
- The frame covering the outer contour reliably protects the junction of the wallpaper and the window opening.
- Interior incompatibility. Glossy plastic will look unnatural in a classic-style room, as well as in any other design direction that uses natural materials.
Place mirrors there. This technique will visually expand the window opening, and reflect the composition on the windowsill. Isn't it a nice bonus for such a simple design solution?
Design: IKEA
2 color
Another way to decorate slopes is to paint them in a bright, contrasting color. Painting in the color of windows will look especially advantageous if the walls in the room are decorated in other colors.
The reception is especially relevant for and in cases where there was no place for the room: a bright, eye-catching window unit will successfully perform this function.

3 decorative panels
Modern manufacturers offer special panels for decorating window slopes. They can be made of various materials, in a certain style, have a textured pattern.

Photo: Instagram mariekerusticusstyling
There is a very wide range of such decorative panels for children's rooms - with colorful patterns, drawings of animals or fairy-tale characters, take note.

4 Curtains
Slopes can be completely visually hidden from view by curtains. It looks especially impressive if the cornice is placed directly above the frame, and the length of the curtains corresponds to the height of the window opening (note that for such a reception the room must have very large windows and fairly high ceilings).
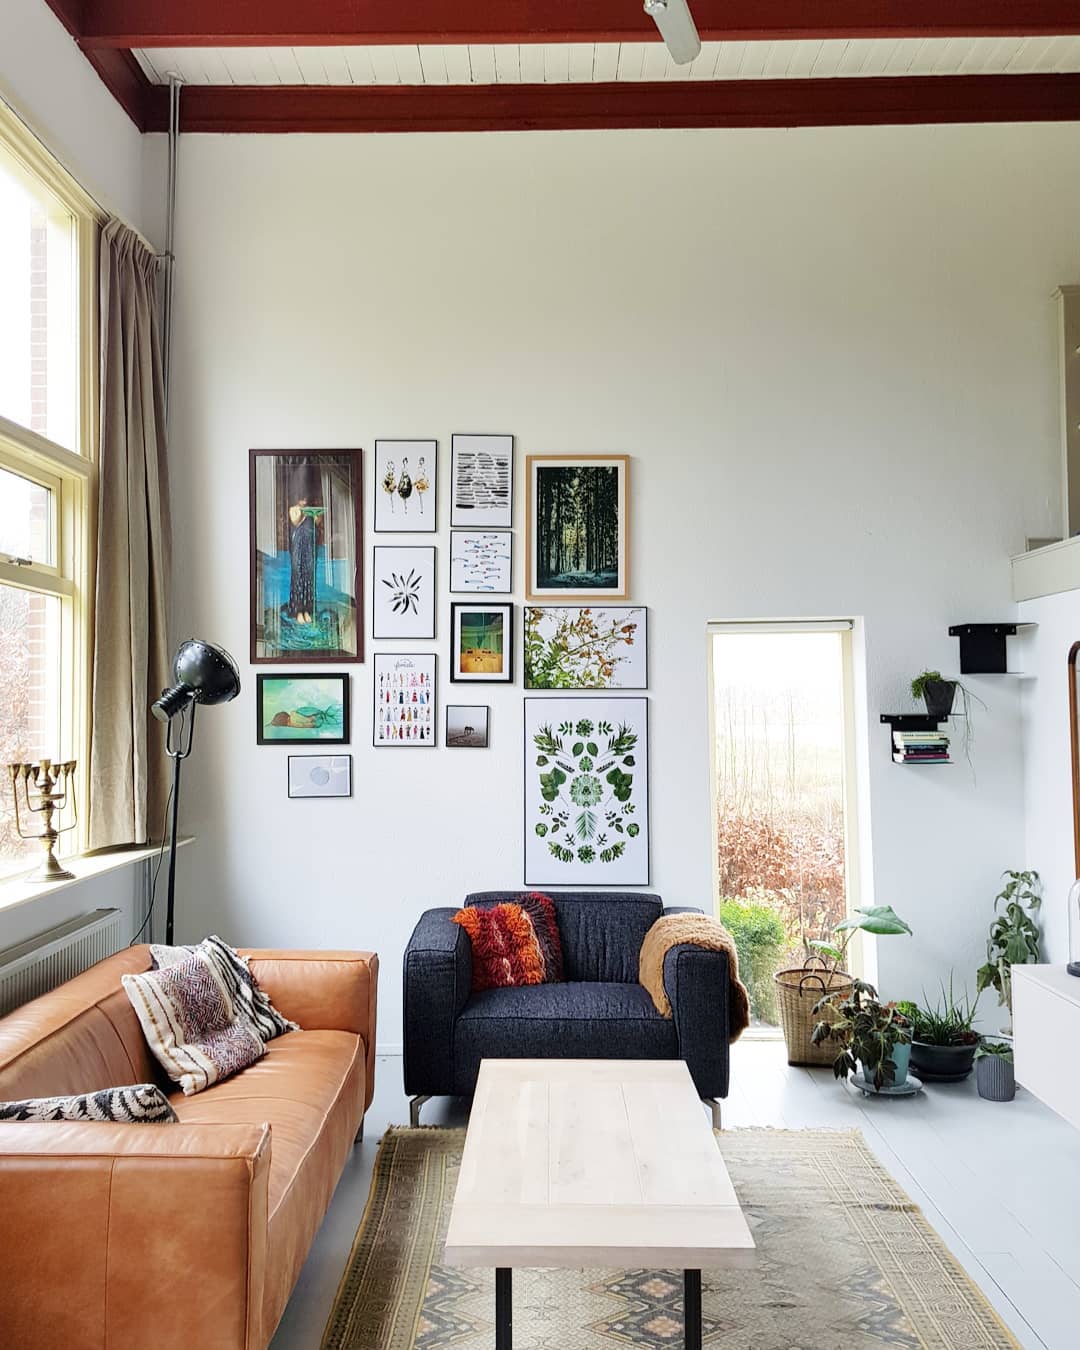
Photo: Instagram mariekerusticusstyling
5 Wood
Slopes can also be decorated with wood (both in a contrasting shade and in the color of the walls). The option is not the most budgetary, but it is environmentally friendly, durable and effective.

Design: Jordan Parnass Digital Architecture
6 Art painting
You can turn a window opening into a real element of art - and decorate the slopes with artistic painting. In many styles (classical, ethnic, neoclassical, eclectic and others), this unusual solution will be very appropriate.

7 Ceramic tiles
You can also lay out slopes or mosaics (in whole or in part).

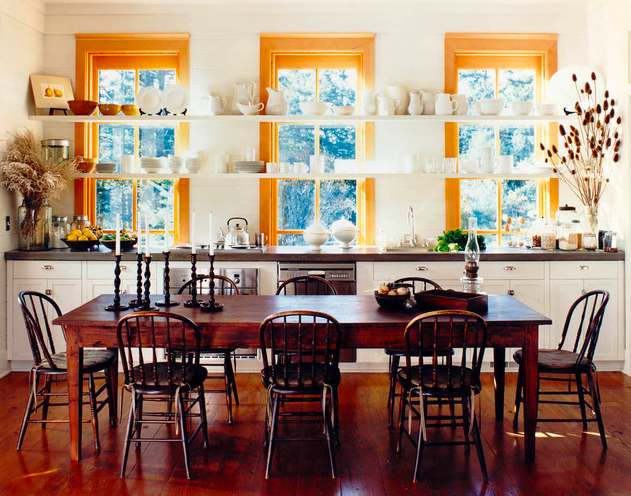
8 Pictures, posters, photos
If your slopes are very wide, why not place photo frames, posters or? Such a solution will add coziness and individuality to the interior and will be especially appropriate if the window unit is not hidden by thick curtains, but is in plain sight.

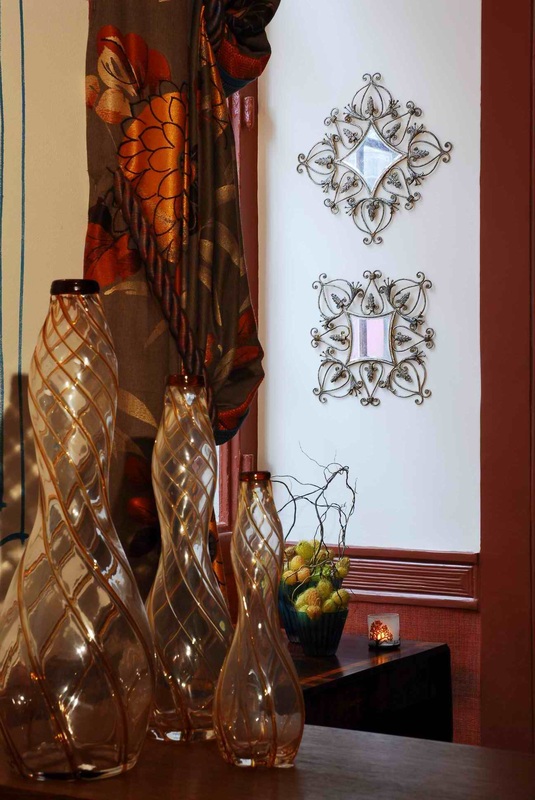
9 Any Neat Wall Decor
In general, you can use almost any wall decor to decorate wide window slopes. See how elegant small decorative mirrors look in the example below. The main thing is to focus on the width of the slope and the general style of the situation, take into account the composition on the windowsill and not overdo it.
Installation of slopes is carried out after they are installed in the room. From the competent performance of these works depends on how good the thermal insulation will be and how comfortable it will be inside. There are many materials that can be used for slopes.
In contact with
Why trim the slopes
Interior decoration is an element that not only protects, but also becomes an interior decoration. Proper functioning of the window system means that provide protection for the installation seam fully. First of all, you need to avoid the following problems:
- the appearance of condensate;
- freezing;
- The internal parts just allow you to avoid such problems.
Outside, the mounting seam also needs to be reliably protected so that precipitation does not adversely affect it.
Wind and sun rays should also not destroy the structure. Installing metal slopes will effectively solve this problem. The same function is performed by the so-called platbands.
Internal finishing of slopes of plastic windows can be done with different materials. Each owner chooses what and when to use and what parts are made of, from, or from other materials.
Materials for internal slopes
The material is usually chosen based on the purpose of the room inside which the structure is located. There are many options. Let's consider some feasible solutions.
Decorative plaster
 It is often used as one of the interior finishing materials. Thanks to its use, the details are very unusual.
The plaster usually includes fillers with different textures and technical characteristics. For example, they use artificial granules of different sizes, stone chips, natural wood fibers.
Decorative plaster usually becomes, contributes to the appearance of patterns with unusual shapes, surfaces with a beautiful texture. The main thing is to figure out in a timely manner how to align the slopes on the windows.
It is distinguished by the following set of characteristics:
- Easy repair if needed.
- Breathability.
- Creation of a moisture-repellent layer.
- No need to carry out repairs when small defects are detected.
- Soundproofing qualities.
- Safety, environmental friendliness, resistance to combustible materials.
- Lack of ability to absorb odors.
- Can be applied to any surface.
- Effective camouflage for the base.
Fillers along with base substances allow you to select the following types of material:
- Textural. With pre-known drawings, pronounced.
- Structural. In this case, the relief does not have such an explicit display on the surface, but the pattern cannot be predicted in advance.
- Venetian. Has a lot of layers. Those who choose this method will easily understand how to align the slopes on the windows.

The quality of this stage depends on how durable the finished material will be. Therefore, the preparation of the foundation should be the first step in the performance of work:
- The surface of the slopes must be dust-free, cleared of excess building materials. Cracks are embroidered and puttied when the need arises.
- After that, the base is coated with a primer. The starting layer of plaster is applied. The surface is levelled. Perforated metal corners are fixed separately.
- The layer of plaster is rubbed, and then it is allowed to dry a little. After that, the primer is applied again.
- The last layer is applied with a decorative purpose.
We figured out how to level the slopes on the windows using decorative plaster. Consider other options:
Drywall
 This finishing is done at high speed. The owner does not need special building skills. Mounting foam or putty will become indispensable assistants when doing work.
Fastening is carried out on metal frames, you can use conventional adhesives.
GKLV - this is how drywall for windows is marked.
The qualities of drywall will be as follows:
- the ability to arrange an arched opening;
- long service life;
- surfaces with a flat base;
- attractive appearance when using any material options;
- lack of difficulties during installation;
- availability of cost level;
- environmental friendliness.
You can immediately figure out how to properly make slopes on work surfaces. They are prepared by doing the following:
- First, remove the foam.
- We take the dimensions of future products.
- We manufacture parts according to specific dimensions.
- We close the defects of the base, level the surface.
- We prime the surface.
Important! Mounting foam allows you to complete the work, even if the novice master has practically no skills. The main thing is to remember the fragility of drywall as a building material. Therefore, you should not make additional efforts, accuracy is important.
It is necessary to get smooth edges in the places of the cut. notch carried out with the utmost care, when using a ruler. The top paper layer is cut first, only after it there is a little work with the inner one. After that, it remains to knock a little along the notch line, and the material will break on its own. You can sheathe the structure, or you can leave it like that.

The procedure will be as follows when it is decided to make slopes on the windows using foam:
- Applying foam to the detail and walls.
- Applying a fragment to the surface for a short time. Then the part is removed until the foam expands again. Then everything is put in place.
- The scheme is used when attaching all fragments. Using masking tape to fix, the rest is also installed in place.
- Joints putty after a day.
- The decorative corner is attached separately. We managed to make slopes on the windows.
Plastic panels
 For finishing, you can also use plastic panels, as for ceilings. Multilayer sandwich type panels are also suitable to get the job done. Such a process is easy to perform on your own, because it is as simple as possible. And the slopes of the windows with plastic look beautiful.
Compared to ceiling panels, sandwich panels are better, because they have an additional insulating layer inside. But ordinary products also have heat-shielding qualities. They are supplied with their own internal ribs, air chambers.
The following qualities will appeal to almost all buyers, without exception, when plastic window slopes are purchased:
- Protection against fogging and freezing.
- Increasing energy efficiency.
- Ease of care.
- Easy processing.
- Easy installation.
- Easy repair, any plastic products have this advantage.
- Possibility of installation on arched structures.
- Color solutions in a wide range.
- Attractive, neat appearance.
- Durability. These are economical window slopes.
Below we describe how the installation process is carried out:
- We use a clerical or construction knife to remove excess material.
- The wooden bar is fixed along the perimeter of the window opening, near the frame, with self-tapping screws.
- The starting profile is connected to the bar.
- The rail is mounted around the perimeter from the outside.
- It is recommended to start installation from the side elements.
- After that, the panel is inserted at the top. It must be bent, foamed a little, then fixed in the appropriate position.
- The side parts are fixed in the same way.
- Decorative elements are mounted when the previous stages are completed, and when it has already been decided how to finish the slopes on the windows inside.
Advice! Installation also allows options when start profiles are not used. The panel is placed simply in a groove that is cut inside the mounting foam. This is an actual method if there is no possibility for mounting a wooden block.
platbands
Various materials are also used here. But the purpose remains the same - protection against destruction for the assembly seam. In addition, such designs give an aesthetic appearance to the product. It doesn't matter what slopes are used from.

Appearance and functionality allow dividing platbands into groups:
- Flat.
- profiled.
- Shaped.
- Carved.
Profiled and shaped architraves are the cheapest option, but it cannot boast of reliability. During installation, fasteners are most often used that are connected to a frame or wall. Removable architraves are known for their ability to simplify installation the most.
Finishing the outside with metal and stone
 This option is found on buildings in which the facade itself is lined with a metal colored profile. Metal slopes for plastic windows are produced by specialized companies. You can simply create an individual order, specifying the required parameters in all directions.
The Z-shape is the standard version in such cases. The presence of polymer coatings made of polyester is also characteristic. Products differ in small thickness, so that installation is not so difficult. Sealant will fill the seams. Slopes of any material allow this finish option.
Decorative stone is suitable if some of the other elements in the room are made of the same material. Then the interior will receive an original addition and continuation. In this case, the surface does not require additional actions in terms of preparation. It is enough to plaster the base, or close it with drywall.
What slopes are best? Such a variant of the question cannot be called completely correct. It is better to ask for which room which material is ideal. The answer to the question depends on what materials are originally used for decoration. Which are present first, those must be continued.
Important! Slopes from any material can look beautiful if installed carefully and in compliance with the characteristics of the material.
Useful video: how to finish slopes
The technology for finishing slopes inside is not as complicated as it might seem. The main thing is not to choose materials at the lowest price. Otherwise, the probability of defects in the early stages is high. Even artificial material options cannot be too cheap. And it is recommended to trust manufacturers who already have a certain reputation. Their representatives will help you figure out how to finish the slopes on the windows inside. No less attention should be paid to the measurement stage. This will avoid unpleasant consequences such as a loose fit of materials to the base.
No matter how excellent specialists install windows in your house, traces of replacement will still remain. In any case, after installing a plastic window around it, unaesthetically looking gaps with polyurethane foam coming out of them will be visible. In addition, the foam is destroyed after a few years under the influence of direct sunlight. To give your windows a decent look, you will need to arrange slopes for internal windows.
Why do you need window trim?
Qualitatively made slopes not only ennoble the appearance of the window, but also improve its heat and sound insulation. Moreover, they protect the foam layer from sunlight, from impregnation with moisture, which, with temperature changes, will destroy this layer.
Preparation for work
Before starting work, it is required to cut off the excess mounting foam with a sharp knife so that the foam does not go beyond the plane of the window profile. Mounting polyurethane foam, which seals the gaps, is a vapor-permeable material, because of this, condensation may appear on the windows in the future. Therefore, a thin layer of sealant must be applied to the foam on the inside of the window and allowed to dry.
Then the surface of the window opening itself is prepared directly. The remains of the old mortar, plaster are removed from it, debris and dust are removed. If further work is planned with a sand-cement mixture or tile adhesive, then the surface must be treated with a deep penetration primer, preferably with an antifungal effect.
During the USSR slopes were plastered, sometimes after that the window openings were pasted over with wallpaper. Hardware stores could not offer the buyer any more finishing materials. Now the range of materials that can be used for window decoration is much wider, this allows you to choose a finish option for every taste. The most affordable and common finishes are:

When using any of these options for finishing the slopes of windows inside the room, you need to calculate in advance the required angle of dawn - this is the name of the angle between the slope plane and window plane. Experts advise taking 1 cm of dawn for every 10 cm of wall thickness; with a wall thickness of 25 cm, the dawn should be 2.5 cm. Each method has its own advantages and disadvantages.
Plastering
 This method can also serve as a basis for other methods. The easiest, but not the easiest and fastest way. You can use both ready-made mixtures and a self-prepared mixture of M400 Portland cement with sand in a ratio of 1: 3.
A plaster mixture is applied to the prepared surface. If you need to apply a thick layer of plaster, it is recommended to reduce the layer first by gluing on the starting plaster or tile adhesive pre-cut to size foam sheet (or expanded polystyrene or any other insulation of sufficient rigidity). From above, the foam is again plastered with a layer about 5 mm thick, perforated aluminum corners are installed along the outer contour of the slope. This will help to protect the slope from damage later.
To increase the strength, you need to put a reinforcing plastic mesh on the plaster.
After the starting plaster has dried, the finishing plaster is applied. For best results, it is recommended to apply two coats of finishing plaster. The surface should be as even and smooth as possible, without various flaws. After complete drying of the surface, it is polished with a grout mesh or sandpaper. The surface prepared in this way is treated with a primer, now it is ready for painting or gluing wallpaper on it.
Disadvantages of slopes made by plastering. Works with plaster mixtures are not very difficult, but still require certain skills. Slopes made in this way have rather weak thermal insulation properties, which ultimately can lead to the formation of condensation and mold.
Frame installation - frame method
It is not always convenient to restore the destroyed surface of the window slope with the help of plaster, sometimes it is more convenient to make slopes from plasterboard, plastic, parquet boards, which are attached to the frame. This method is suitable in case when you need to make a slope of great thickness.
The work is being carried out in three stages:
- Surface preparation.
- Installation of the frame (sheathing).
- Fastening the selected material to the frame.
 The frame is assembled from appropriate metal UD and CD profiles. It is not recommended to use wooden bars for the manufacture of the frame. Profile windows are fastened to the opening with screws and dowels, fastened together with self-tapping screws with a drill tip. Next, the material of your choice is attached to the finished frame, soft insulation is placed under it, mineral or glass wool is suitable. And also, if you have a sufficiently rigid material, you can fill the space with mounting foam.
If it is drywall, then special self-tapping screws for fixing drywall (it is most convenient to take self-tapping screws with a size of 3.5 × 25 mm) drywall strips cut to size are attached to the profile. To give the corners strength along the edge of the drywall, perforated metal corners are glued to the putty. After that, one or two layers of putty are applied, after drying, you can paint the surface with acrylic or oil paint.
Since slopes are located at windows where condensation can form, the drywall used for their manufacture must be moisture resistant. Such types of drywall as GKLV (moisture resistant) and GKLVO (moisture fire resistant) are suitable.
Plastic or MDF lining, laminate or parquet boards are best glued to the frame using liquid nails. If you nevertheless made a frame from wooden bars, then the lining sheet along the edges can be attached with a construction stapler, and the laminate or parquet board can be screwed with self-tapping screws. Places where staples and screws are visible will have to be hidden using a plastic corner for this. The same corner will cover the gap between the wall and the surface of the plastic, you get a kind of cashing the window.
With a small slope thickness, it is better to do without a frame, attaching the material directly to the surface of the window opening prepared in advance. For this method, materials such as drywall, sandwich panels, laminate are suitable. All these materials can be attached to an adhesive base, which can be polyurethane foam or liquid nails. It must be remembered that the mounting foam increases in volume when dried, so the possibility of deformation of the material glued with foam should be taken into account.
Decorative rock
 Artificial decorative stone or tile is attached to the window opening using a special tile adhesive. If necessary, the surface is pre-leveled with one or two layers of plaster, after drying, the surface of the slopes is laid out directly.
When choosing a method for finishing the materials from which your slope will be made, many factors should be taken into account: the thickness of the walls, the humidity in the apartment, what strength is needed, what funds you are willing to invest, whether you are able to do this work yourself or have to hire specialists. Of these methods, the most inexpensive is the plastering method, it is also the simplest and most durable.
Mounting the slope on the frame includes quite a few operations, the result will depend on the properties of the selected material and the quality of the work. Mounting the slope material on glue or polyurethane foam, among other options, looks the most attractive in terms of price and complexity of implementation.
Slopes made of decorative stone or tile will cost you the most, but they have a rich appearance, are easy to clean and are more durable than slopes made of plastic, MDF panels and even drywall. In terms of strength, this finishing method corresponds to plastering.
There are several materials for facing openings, but PVC panels are very popular. Finishing the slopes of windows with plastic with your own hands is particularly simple. Let's talk about this technique next.
The popularity of this material is due to many of its advantages.
- Affordable price (from 100 rubles per linear meter).
- Absolute (the highest among all serial materials) moisture resistance.
- Mounting speed. Finishing windows with plastic is done in a matter of hours.
- UV resistant.
Important: Not all panels are UV resistant. Therefore, pay attention to this property when buying - ask the seller about it.
- No dirt during installation. This eliminates the need to free up space before repair.
- Ease of installation.
These properties make other materials fade into the background.
We study installation technology
Self-finishing window slopes with plastic is not difficult, so anyone can handle it. Next, consider all the nuances.
What you need to purchase
First of all, we prepare such a set of tools and materials:
- Plastic panels. Usually they are sold in a strip 6 meters long - it is just enough for one opening. In large stores, you can ask them to be cut to your size. Therefore, before buying, make careful measurements.
- U-shaped strip. It will act as a starting element.
- The rail is 1-1.5 cm thick.
- Level (ideally laser).
- F-band.
- A construction stapler with appropriate staples (not stationery - they are completely fragile).
- Powerful hand drill (or puncher). If the house is wooden - a good screwdriver is enough.
- Thermal insulation material (for example, basalt wool).
- Knife and scissors for metal.
- Self-tapping screws of two types - 95 mm and 4.5 mm (they are also called bedbugs).
- Silicone sealant white.

Preparatory procedures
In order for the installation of slopes on plastic windows to be successful, it will be necessary to prepare the initial surface. To do this, it needs to be leveled by removing the remnants of old materials. First, we glue the double-glazed window with newspapers (film) and masking tape - so as not to stain it. It is advisable to cover the window sill with something - quite a lot of debris will fall on it.
Tip: to make old plaster easier to clean - moisten it with water.
We go through the sandpaper, and knock down the large protrusions with a spatula. If they do not give in, you can walk with a screwdriver with a “brush” nozzle. At the end, we remove all debris and dust.

Main front of work
We proceed to the most responsible procedures in this order:

This completes the window trim. If there is no need for additional thermal insulation, then everything can be made even easier: just glue the panel to the surface with liquid nails. If we are talking about a wooden house, then you can use self-tapping screws: we screw them around the edges (do not forget to sink the hats), which will subsequently close with a corner.

