How to make a bench with your own hands from the table. Beautiful do-it-yourself banquette in the hallway - step by step instructions
Beautiful and functional furniture is expensive - an axiom that is relevant in the 21st century. If there is no money to buy, why not do something useful and creative with your own hands? Below is a step-by-step instruction on how to make a bench for the hallway with your own hands. We are talking about several successive steps that require the utmost attention to detail.
Preparatory stage
The most simple in terms of manufacturing are considered wooden pieces of furniture. The following materials should be prepared in advance:
- wooden beam - 30x50 mm;
- corners for furniture;
- plywood sheets;
- self-tapping screws, glue, fixing pins;
- several decorative legs from an old table.

It is better to fill the seat with foam rubber, as it perfectly retains its original shape. A softer analogue is a synthetic winterizer. To assemble and fit individual parts, you will need several tools that almost every owner has:
- jigsaw;
- level;
- screwdriver and drill;
- a set of threads and a set of needles;
- hammer;
- sandpaper;
- construction stapler;
- stain, paint and other decorative solutions.
Deciding on a project
The task of paramount importance is to determine the optimal project. Under it, a drawing is prepared not only of the product, but also of its individual elements.
It is very important that the furniture in its size corresponds to the parameters of the room.
Each person has an area of 45x55 cm (average value). If you have certain skills, you can stop at the option with a back, in all other cases it is advisable to make models with drawers, shelves.

The drawings indicate the dimensions of all elements. If it is assumed that the bench will consist of a large number of small parts, it is better to make a pattern, and then cut plywood sheets on it. The edges of the workpieces are rubbed with sandpaper “zero” or “micron”.
Construction assembly
In the absence of practical experience with wood in general and furniture in particular, you should not prepare all the elements of the product in one go. There are always certain defects, certain deviations.
First of all, a full-size seat is cut out of plywood, since the rest of the details will depend on its size. Obviously, it is much easier to fit smaller elements under the largest surface.
The second stage is the manufacture of legs for a bench. We are talking about a time-consuming process, so it makes sense to use ready-made solutions from old furniture (as an option, you can buy them at a furniture store, commission shop). An analogue is to take 4 large bars, process them with a manual cutter, and then fix them with self-tapping screws to 4 planks. Wooden legs are treated with 2-3 layers of stain or painted to match the color of the interior.

The third stage is the preparation of the supporting sidewalls. They are pre-cut and sanded. Then they are opened with paint or stain. After that, the structure is assembled together with pins (blind holes must be prepared at the ends).
The fourth stage is furniture upholstery. For a do-it-yourself banquette in the hallway, foam rubber is cut to the size of the seat. Soft material is most effectively fixed with a construction stapler. For small loads, construction adhesive is quite suitable. Under the base of the foam rubber, it is worth preparing a layer of coarser material; burlap is quite suitable.
The fifth stage is the fabric pattern. Taking into account the style of the interior and the intensity of the load, the optimal fabric is selected. It is very important to cut it in such a way that the piece lies with an allowance on the structure. The cut fabric is tucked up and fixed with a construction stapler.

Making a banquette with your own hands is a simple matter. When deciding on a drawing and selecting material, one should focus not only on the design and dimensions, but also on how successfully the furniture will complement the interior of the hallway. Remember that we are talking about a functional item, not an exhibition item. From the first time and without experience behind you, few people can create beautiful and comfortable furniture, so soberly assess your skills and abilities.
Every corner of an apartment or house can be transformed with additional furniture. Banquettes with a back in the hallway can bring a special charm and comfort. Such furniture is comfortable, beautiful and functional. Comfort will provide a competent selection of colors and shapes of this interior detail. Before considering how to make such a piece of furniture with your own hands, let's learn more about the shapes, colors, purpose, so that it would be easier for you to decide on the model.
This is probably the first question that arises in the head with this word. Visually demonstrates what a bench with a back in the hallway is, the photo below.
This attribute of furniture became popular in the 18th century. A luxury item was often combined with a place to perform several functions. Bench, in fact, is a stool with soft upholstery.
Most often it is made:
- round;
- rectangular;
- square.
This piece of furniture can be used in various rooms:
- bathroom, near the table;
- hallway;
- bedroom;
- office (serves as an additional reading corner);
- living room;
- kitchen (addition to the soft corner).
The bench can perform several functional tasks. It can become a comfortable sofa where you can take off your shoes. But at the same time, it can be a great place to store things. In this case, you will need a banquette in the hallway with a back and a drawer.

Let's make life comfortable!
Many people wonder why overload their living space with additional furniture. At first glance, it may seem that banquettes with a back in the hallway are easily excluded and replaceable elements.
Having considered its advantages, you will understand the reasons for returning this option to the interior:
- in its design it is a very cozy element;
- she is able to "balance" any set of furniture;
- this furniture is indispensable, because you can sit on it reclining;
- the correct combination of the shape and height of the object allows you to seat several guests;
- The banquette is universal, therefore it can be used for various premises.
Fans of needlework can appreciate all the delights of this household item.
All the colors of the rainbow
The upholstery of a banquette with a back in the hallway can be made of various materials. These include:
- leatherette;
- upholstery fabrics;
- leather;
- polymer compounds.
Since this type of furniture has come to us from time immemorial, its external design may be reminiscent of fashion trends in palace chambers.

Soft rounded surfaces, designed in classic colors and ornaments, look cozy:
- shades of a beige palette in small or medium stripes;
- tea rose and almond color with a large floral pattern;
- blue and lilac gentle overflows with a soft ombre;
- dark green or purple overprinted with gold prints.
Agree, such an addition will transform any room.
Form dictates atmosphere
You can find a wide variety of banquet models. And, of course, the actual question will arise: which one to choose?
The standard form of the banquet looked like this:
- high thin legs;
- rectangular seating area;
- rounded edges;
- comfortable armrests;
- back on some models.
Which option is needed, it is quite simple to decide. Start from the general direction of the room design trend.
The style of your banquette with a back in the hallway should be fully combined with the interior design. You can choose from areas such as:
- demonstrative severity;
- emphasized minimalism;
- explosion of avant-garde emotions;
- soft lines of the palace style;
- nautical moods of Mediterranean design;
- solid outlines of Italian directions;
- playful shabby;
- mysterious fusion;
- creative modern;
- controversial pop art;
- restless kitsch.

The versatility of this furniture lies in its easy transformation to any external shape.
Which place to choose?
It is quite easy to determine where to place upholstered furniture.
Pay attention to:
- location in relation to light sources;
- room geometry;
- the presence of corners or protrusions that may not be used;
- remoteness from blown places (drafts);
- operating conditions requirements.
Every square centimeter of your area should go "in business". Check out the hallway. There are always a couple of hard-to-reach corners. The banquette will universally fit into their complex geometry.
Do-it-yourself banquette from the table
A much-needed piece of furniture can be purchased at the store. But why not make it yourself?
If you are thinking of creating a banquette with a back, then put in quite a bit of effort, and you will easily realize your idea. Initially, consider a simple manufacturing option.
For work you will need:
- sustainable ;
- plywood 1.5 cm thick;
- upholstery materials (high-density foam rubber, synthetic winterizer, leatherette);
- glue;
- hammer;
- screwdriver;
- primer;
- dye;
- grinding materials;
- stapler for furniture, staples.

Work order:
- Detach the cover from the table legs.
- Sand the surface of all wooden parts (sanding paper 120).
- Cut out the seat from plywood of the desired shape.
- We glue the foam.
- We fasten the layers of skin (synthetic winterizer).
- Attach the upholstery to the seat.
- Covered with upholstery material.
- We fix the fabric with staples using a stapler.
- We cover the wooden parts with a primer.
- We open with paint, varnish.
- Attach the seat cover to the legs.
Thus, very comfortable furniture for the hallway is obtained.
Bench with back
It is possible to slightly improve the model described above. A banquette in the hallway, soft with a back, will make your stay in this room as comfortable as possible.
Above was a description of how to make this furniture from a table. You can continue with variations on a given theme.
Or do everything from scratch:
- Using a sheet of MDF, we make the bottom of the bench.
- We dissolve wooden slats (width 5 cm) into 4 strips along the length of the base.
- We attach the strips with glue along the ends of the bottom.
- We use furniture corners with screws, mounting the planks on the base.
- We clean and paint the structure.
- We make legs from a bar of wood.
- The seat is stitched according to the size of the base, stuffed with filler.
- We cut out the back from an MDF sheet, attach it to the bottom, upholster it, as in the example above.
With your own hands, you can ennoble any interior by introducing a new fresh note. The banquette will become your faithful assistant for rest and pleasant pastime.
A soft stool, ottoman, or bench is a good addition to the interior of the bedroom, living room and hallway. When we talk about a classic-style bench, we often imagine a soft seat with curved legs. Differences can be in size and in the presence of a low back.
You can make such a little thing with your own hands, having a set of the most popular electric tools at hand. You will need an electric jigsaw, hand mill, grinder or drill with a grinding nozzle, glue, clamps, varnishes.
The design of the classical type, the assembly of parts on spikes, is the most reliable connection for joinery. The banquette consists of four legs, four tsargs and a soft seat. The most difficult to manufacture bent legs, so it is better to start working with them.
Curved legs.
First, we make a full-size fiberboard leg template. Template length 410 mm. , the maximum width of the part is 60-65 mm. . The upper ends of the legs should end up with a section of 45/45 mm. . Lower section 30/30 mm. or so.
A template is drawn by hand, but first we mark the lower and upper ends along the ruler and outline the sectors along the curve of the figure.

Four blanks for the legs are glued from planed boards, bars with a section of 65/65 mm should be obtained. and clear length 410 mm. . It is better to leave the upper end with a margin, the “tails” are sawn off after gluing the product, the lower part of the legs is immediately trimmed at a right angle.

We impose a template on the edge, combining the lower ends and draw a contour with a pencil.
From this edge of the bar, draw a contour on the other edge. The edge from which the leg is marked during assembly will be inside.
Now you need to immediately hammer out the sockets for the spikes, this can be done on a drilling machine or using a manual milling cutter. In this version, the sockets are 80 mm long. , 10 mm wide. , 35 mm deep. , they meet inside the stem. Job options in the article.

Now we need to carry out the most intricate part of the work. We file the legs along the markings on both sides, leaving a small margin of 1-2 mm. for sanding.

Then we lay the flights in their place and nail them with thin carnations so that the hats do not fall on the cut line. Next, turn the workpiece over to another edge under 90 * and file the part according to the second markup.

Bent legs are made only from durable wood, at least from birch, otherwise strength will not be enough. Saw with a jigsaw birch bar 65 mm thick. It doesn't happen quickly, you have to be ready for it. A band saw is certainly better, but not everyone has it at hand.

After sawing, the curly edges remain uneven, so they must be sanded well. Doing grinding by hand is too long, it is better to use a grinding drum, a grinder, or at least a nozzle on a drill.
Tsargi banquettes.
Drawers, horizontal bars between the legs, we prepare taking into account the overall dimensions of the product.
Bench base size 400/400 mm. along the extreme edges of the legs. The cross section of the legs at the top is 45/45 mm. , hence the length of the drawer is 310 mm. Plus, add the length of two spikes of 35 mm. and we get the length of the blanks 380 mm. .
Drawer width 90 mm. , thickness 25 mm. , with such strong drawers, there is no need to install additional reinforcing cuts inside.

We assemble the product dry, without glue, adjust the spikes if necessary.
We disassemble, apply glue to the spikes and always inside the nests, assemble and compress with clamps.

After the glue has completely set, we saw off the tails in the upper part and, if necessary, adjust the legs in height. The base is obtained with a height of 410 mm. , size 400/400 mm. along the top of the legs.
The base of the seat is furniture plywood 12 mm thick. , size 450/450 mm. .
When assembling, the overhangs of the seat from the legs will be 25 mm each. from all sides. Approximately the projection of the seat can be at the level of the protruding parts of the curly legs, although this is not necessary.

We take foam rubber with a thickness of 30-40-50 mm. according to your desire, put the base of the seat on top and cut along the contour. It is advisable to first stretch a thin synthetic winterizer over the foam rubber
or batting.
Then we stretch the wallpaper fabric on the seat and nail it with a stapler from below.
Try to carefully align the material at the folds and corners so that there are no hard wrinkles.

We fasten the seat to the bench from below, using 4 small furniture corners on self-tapping screws.
In its classic form, the seat is mounted on dowels, round plug-in spikes. This is also not too difficult to do if you have round dowels and metal "dowel centers" on hand to mark the oncoming holes.
Painted, varnished, bench without seat. The final assembly is carried out already fully finished parts.
(Visited 562 times, 1 visits today)
A banquette can be called a universal piece of furniture. Over the decades, its form and purpose have not changed. The banquette is located in various rooms of the apartment - in the hallway, bedroom, living room. This piece of furniture is a practical pouffe that is comfortable to sit on and put on shoes.
In modern stores you can find a fairly wide selection of banquettes that differ in shape and design. Each manufacturer performs this piece of furniture in such a way as to make it more convenient and attractive. However, it is not always possible to find an option for your hallway. A do-it-yourself banquette is a way to get a piece of furniture that fits perfectly into the interior of the room. The work will not take much time, and it is always pleasant to look at the fruits of your efforts.
Benefits of creating a do-it-yourself banquette
A popular piece of furniture can be designed with your own hands, even if you have minimal skills in carpentry tools. At the heart of the banquette is most often a stool. This product has some decorative features, and is very simple.
Benefits of DIY hallway furniture:


Even a large banquette, which will be installed in a spacious hallway, will not require much time and effort to create. From the fabric that is selected to create the banquette, you need to cut a piece of the required size. In this case, you should remember about the allowance.
Before work begins, you should consider the design of the finished pouffe and familiarize yourself with the popular product options. It is important to decide on the size and color palette. Only a master with minimal carpentry skills can avoid mistakes.
Burlap or similar material should be laid first, and then the foam rubber should be fixed. The material is fixed with a stapler.

Types of banquettes
There are several common types of banquettes. They differ in shape and strength, but each has its own undeniable advantages that deserve attention:


Such banquets are the most popular. With the independent creation of any of these models, you can supplement the pouffe with your original details.
materials
The soft seat is stuffed with foam rubber. To do this, a suitable piece should be cut from a large piece of material. To perform a bench, it is enough to familiarize yourself with the types of existing upholstery used for such work.
The fabric that will be covered with a pouffe can be made of linen or cotton. Textile models are quite unpretentious in care. Such upholstery is often chosen due to the large selection of material shades.
Other cladding materials:

Forged products or puffs with a steel frame should be made only with full confidence in their skills in working with metal. The easiest way to make a bench is made of wood. The pouffe is usually filled with foam rubber. This material is durable and practical. It is able to hold its shape for a long time and is quite elastic. To make the legs of the pouffe more attractive, it is worth decorating them with hand carvings.

To design a bench in the hallway, you will need to prepare the following materials:
- For a pouffe that will have legs, you should find wooden bars of different sections - 30x40 and 30x50 mm. You can find and use old legs that used to support the stool.
- Plywood sheets.
- Various fasteners - brackets, screws.
- Paint or stain.
- Thick foam.
- The fabric that will be covered with a banquette.
If desired, you can sew a cover that will cover the pouffe. This will make it much easier to take care of him. The fabric for the pouffe should look organically with the textiles of the hallway. When constructing a soft seat, in addition to foam rubber, a synthetic winterizer should be used. If a bench with legs is being created, 4 wooden planks must be attached to its bottom so that they protrude 2 cm beyond the edges of the product.

Tools
To create a high-quality and durable bench, you will need to use the following tools:
- Screwdriver and drill - with the help of these tools various holes for fasteners will be made.
- A hammer and a screwdriver are indispensable helpers for every carpenter.
- Construction stapler.
- Level - to determine the vertical position of the legs of the bench.
- Sandpaper - it should be of different hardness.
- Manual cutter - in the case when the base of the bench is made of beams.
- Sewing machine - for sewing upholstery and covers. For such work, you will also need scissors and a tape measure.

First you need to cut out the seat. This is necessary, since the creation of other structural elements depends on its size. They are subsequently adjusted under the seat. In the absence of sufficient experience in creating pieces of furniture, it is necessary to divide all the work into several days. So every detail will be done with due attention.
Instructions for making a banquette
When the seat is completed, you can proceed to the rest of the steps. They include the manufacture of legs or their finishing, marking and cutting out foam rubber and plywood, assembling and finishing the product.
Leg trim
In the absence of ready-made legs, they must be built from prepared bars. However, in the case of using existing parts, they can simply be restored. The surface must be clean. After it is covered with stain or varnish.
The legs will be attached to the seat with self-tapping screws. If you have your own tool, you can process the timber with a manual cutter. Thanks to this, you can get the original protrusions of the product. Such a do-it-yourself banquette in the hallway turns out to be quite interesting.

Foam rubber and plywood
It is necessary to prepare foam rubber of the desired size. The prepared piece of material should protrude 3 cm from the edges of the plywood for the seat on all sides. Dimensions can be selected independently.
Now you can glue the foam to the plywood. Glue is best applied closer to the edges. Using a tape measure and chalk, markings are made, along which buttons will then be sewn. Make a few holes in the plywood. They should be at the same distance from each other. It is better not to touch the foam when performing such work.
Product assembly
Then you should cut the seat of the desired shape from the upholstery fabric. Upholstery sizes are carefully selected in advance. Then it is adjusted under the seat. On each side, it leaves a margin of 2-3 cm. Then the fabric is carefully wrapped and fixed with a stapler.
Now you can start installing buttons. With a needle, the thread is threaded first into the button, and then into the hole in the plywood. The rough finish, located at the bottom of the seat, is covered with a textile cloth. The cut piece must be sewn along the edge of the bottom.

In the case of using legs from another product, you should choose the location for their placement, and then fix their bases on self-tapping screws. The legs, made of timber, are attached to the seat with self-tapping screws and corners.
Banquet decoration
Buttons should be selected in accordance with the shade of the upholstery of the banquette seat. Their number depends on personal desires. The banquette can be diversified with a decorative cover. It is usually performed in the same style with upholstery. Such work is not difficult. You just need to be able to work on a sewing machine.
In the absence of cutting skills, you should choose a finished pattern. You can learn how to create it according to certain master classes. They calculate in advance what capacity the bench will have. For one person, an area of 45x50 cm is required.

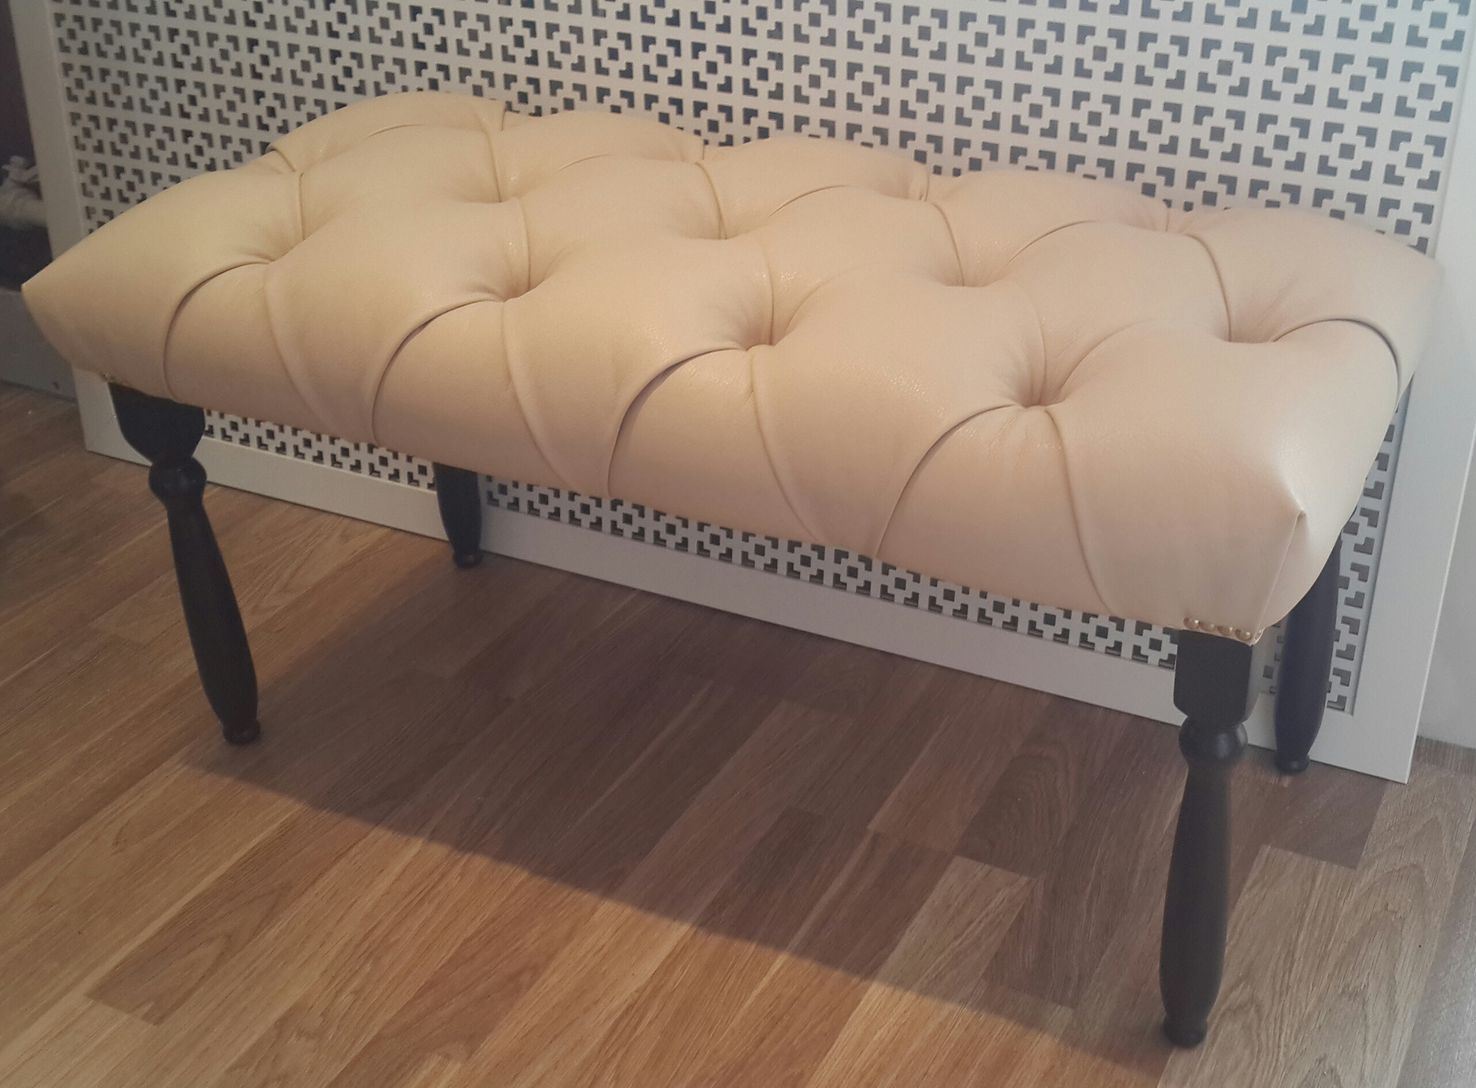
The elements of the banquette are cut out using a jigsaw. Their edges should be sanded. When installing a pouffe in an Empire style hallway, a carriage screed can be made. Such products look presentable and original.

It is important to determine the dimensions of the hallway and the dimensions of the manufactured banquette. In the case of a large number of parts, you should first make a pattern, and then start cutting plywood.
conclusions
Making a bench in the hallway with your own hands is quite simple, if you know the sequence of work and accurately determine the shape of the product. Materials are selected based on the style of the room and the intended purpose of the banquette. Do not rush while working. This will help you avoid serious mistakes. As a result, you can get a beautiful and practical structure. Such furniture is not only useful for guests to relax, but can also serve as a place to store various little things. With the right choice of banquet style, it becomes a decoration of the hallway.
Installing a banquette is one of the best ways to decorate the hallway. This multifunctional piece of furniture will replace several items at once, being compactly placed in a small room or decorating a spacious hall. On the modern market there is an unimaginable variety of options for pouffes, benches with shoe dryers, drawers, shelves and niches for storing small items, constructed from a variety of materials. However, it is not always possible to choose an option that fits perfectly in style and under the selected dimensions. In this case, the best solution would be to make a bench in the hallway with your own hands, which will not only be in harmony with other items, but will also combine all your tastes and preferences.
A popular piece of furniture is easy to make at home, even for a person who does not have rich experience in carpentry. The accessory is based on a bench, which is subsequently complemented by a soft seat, decorated with curls, accessories and other details.
The main advantages of such an independent product will be:

And besides, the creator will be proud of his invention, every day receiving a portion of positive emotions.
What materials will be needed
You can make a pouffe or bench forged, wooden, plastic. The wood is malleable and easy to process, so this option is best suited for a beginner amateur. Use MDF, chipboard or plywood, if the legs are planned to be wooden - then you will still need a bar. The base for the seat, as a rule, is made of foam rubber, upholstered with synthetic fabrics, leather, eco-leather, velor or other available textiles.
So, the raw materials that you need to have available to start work:

Please note that it is better to choose a fabric that is not easily soiled, dense and resistant to mechanical damage, so that with intensive use you do not have to constantly change it, wash it or patch holes.
Required Tools
In order to implement the idea, you need to have:
- Hammer, building level, screwdrivers;
- Screwdriver and drill, as well as a jigsaw;
- To process a wooden surface, you need sandpaper;
- Stapler for mounting fabric elements;
- Sewing kit, decorative accessories.
Just in case, prepare a stain or paintwork materials.

How to make a bench for the hallway with your own hands
When implementing an idea, the main thing is careful preparation, adherence to the sequence of execution and advice. You need to be extremely careful when using electrical appliances and sharp parts.
Instruction
There are no clear instructions on how to make a bench with your own hands. This is a creative process, and everyone approaches it from a different angle. But the general steps and rules of creation still exist - this is planning, preparing all the necessary tools, implementing the assembly and decorating. All steps are described in more detail below.
Training
At the preparatory stage, a drawing or sketch of the future product is created, where all the optimal dimensions are indicated. When planning the length and width, please note that the seat per person is calculated as 45x55 cm. And also:

Think about the availability of space for drawers or opening the doors of the bedside table, if any are assumed in the project.
Product assembly
The manufacturing process includes the following steps:

Do-it-yourself furniture upholstery
The technology described above allows you to design an ottoman with a perfectly flat surface. And if it is long and wide it will look strictly and neatly, then the small one will look insipid and cheap. Think carriage tie - this is one of the easiest and most profitable options to decorate a "dull" surface.
To create such a sheathing, you will need all the same materials and tools as when constructing a bench, with the difference that it is better to take a thin fabric so that it is convenient to form folds from it, and you will also need buttons covered with the same fabric.

Such a product looks very original, and making it with your own hands is not difficult.

decoration
The main thing in creating decor is that the end result should be in harmony with the overall picture in the hallway, not be sticky, easily soiled and be made of practical material.
A model with a soft seat can always be updated, additionally decorated or remade, thereby making the banquette almost new, with a “fresh” interesting appearance.
For example, frame a model without a wall and armrests with a chic ruffled cover. They will make a piece of furniture delicate and unusual. At the seams and joints, attach a burlap bow or a stylish decorative ribbon.
Tie the cover with your own hands - then your furniture accessory will become completely copyrighted.

Tie the cover yourself.
If the hallway is made in country or Provence style - age the legs and wooden ends, make the effect of peeling paint or scuffs with silver or bronze stains

There is a huge variety of options for how to decorate a banquette, everything is limited only by your imagination. However, if it is not there, use the Internet resources. There you can always find interesting solutions.
Unusual ideas
Creative and talented people have long been using old, worn-out furniture that has become irrelevant, out of fashion or completely unusable to create furniture accessories. Therefore, having a developed imagination, it is not necessary to design an interior item from scratch. It is enough to use the ready-made solution, having restored and added some notes to it, emphasizing the modern style and design. So, as a banquette, you can use an old, unnecessary wooden box, modifying it a little. Remove all unnecessary components (hinges, rivets, locks, etc.), sand, prime, apply varnish or a layer of paint, cover the cover with leather or decorative fabric, placing foam rubber to size. You can also decorate it with decorative elements: inserts, drawings, bows. Old chairs connected by bars, old bedside table elements, wire products, etc. look original as a banquette. The main thing is that all your fantasies fit into the overall interior.
Making a bench with your own hands is not difficult. Use the materials available, or use an old bench or coffee table. Follow the detailed instructions and carefully consider the decor that will complement the already created style in your hallway. Take measurements carefully so that the banquette fits perfectly into the room. Be creative with decorating, and then you will get a real masterpiece that will meet and see off guests, become a practical and indispensable part of the hall.
Video: Do-it-yourself banquette in the hallway
Photo gallery: Do-it-yourself banquettes in the hallway


