Sliding interior doors: installation features and scope. Self-installation of sliding interior doors - compartment Install sliding interior doors
Installing sliding interior doors can save space in an apartment and a private house when the owners are trying to expand the living space. You can install the structure yourself if the owner of the house has the skills of carpentry and the necessary tools.
There are several types of construction:
- sliding;
- cascading;
- folding;
- radius sliding.


Making sliding doors with your own hands is easier than other types of partitions. This is due to the simplicity of the design, shape, installation of the canvas and the installation of accessories. Depending on the width of the opening, the device of sliding doors provides 1 or 2 canvases that move along special rails along the wall. Partitions can be independently made from different materials.
Advantages and disadvantages
An interior single-leaf or multi-leaf door has the following advantages:
- saves room space;
- visually increases the size of the room;
- there is no threshold;
- you can divide a large room into zones.
The disadvantages include:
- poor sound insulation;
- the need to monitor the cleanliness of the rail;
- easy penetration of odors between rooms;
- the need for precise fit of all structural elements.
Before you learn how to make a sliding door, you need to prepare materials and tools.
Materials and tools
You will need the following tools:
- tape measure, ruler, square and pencil;
- jigsaw or circular saw;
- screwdriver;
- drill;
- drills of different diameters for wood and concrete;
- self-tapping screws;
- roller mechanisms;
- construction plumb line and level;
- milling machine;
- sandpaper or sander;
- chisel and hammer.

Canvases can be made from the following materials:
- plain or laminated chipboard;
- strained glass;
- solid wood;
- combination of several materials.
The weight of the structure depends on the material of manufacture. To mount sliding doors with your own hands, you need to select mechanisms based on this indicator. The material for the leaf is chosen based on the budget of the owners and the functional purpose of the door.
How to make your own sliding doors?
For the manufacture of glass partitions, skills are required to work with this material. If they are missing, you should contact the professionals. Working with glass requires special tools that are expensive.
It is necessary to consider how to assemble a sliding door from wood. This material is easy to process, stronger and more reliable, has better sound insulation, frame products weigh less than solid wood, and panels can be made if desired.
Design features

Before starting work, you should draw up a diagram or a design drawing and indicate all the parameters. The design of sliding doors can have one or more leaves, depending on the size of the opening. You can make a solid canvas or with panels of various materials. Depending on the weight of the structure, the door can be suspended or on roller mechanisms.
Sometimes a product is installed that is pushed deep into the wall. To do this, dismantle part of the partition and make a niche of plasterboard.
Preparatory work
Before making a sliding door with your own hands, you should prepare the material. Boards or blocks must be treated with a plane and sanded with sandpaper or a sander. You should also prepare a shield if you plan to have a hollow door inside. It is worth deciding in advance on the method of fixing the boards. Common compounds are:
- half a tree;
- thorn groove.
Measurements and markings
When making a door on rollers with your own hands, it must be borne in mind that the canvas should be several centimeters larger than the opening on each side. If the passage does not exceed 80 cm in width, then a single-leaf door is made. When the width of the opening exceeds 1 m, 2 canvases are made. All sizes are transferred to beams or boards.
Manufacturing
To make frame sliding doors with your own hands, you need to make a frame. Prepared beams are cut according to the drawing. If the structure includes infills, recesses are made in the inner part of the frame and lintels with a milling machine, into which the inserts will be mounted.
The joints of the boards or beams are coated with wood glue or PVA. The wood should be treated with an antiseptic to protect the material from rotting and the harmful effects of insects. Additionally, the structure is covered with fire retardants, which prevent the wood from burning quickly.
To make a sliding door mechanism with your own hands, you will need:
- upper and lower guides along which the canvas will move;
- a wooden beam to which the upper rail is attached;
- rollers and fasteners appropriate for the weight of the structure;
- clamps to prevent the web from leaving the rail.
Paneled
First, a frame is made from solid boards or glued beams. Crossbars and a centerpiece are made of this material. From the inside, the timber is processed with a milling cutter, making a groove for the panels. If you make a curly cut, you don't need to use glazing beads. When the installation of the latter is planned, the surface near the groove is made even.

Vertical and horizontal elements are interconnected by means of a spike and a groove. The thorn is cut in the transverse parts. It should fit into the groove up to half the width of the bar. The recess is adjusted to the size of the spike so that the parts fit tightly into each other.
The panels can be:
- glass;
- plywood;
- thin boards, etc.
The inserts can be flat or have a relief surface. In the second case, plywood or boards are used, which are processed with a milling machine. The edges of the product should be 1-2 mm less than the groove in the frame. This will allow the panels to move freely. When all the elements are ready, they are treated with antiseptics.
Collect the entire structure on the table to avoid distortions. The joints are coated with glue. First, all the crossbars and panels are inserted into one longitudinal bar, then the second vertical bar is glued in. Glazing beads are installed after assembling the entire structure and fixed with glue.
Shield
This structure can be solid, shallow or hollow. The first type consists of a frame and planks that fit between vertical elements. Hollow and shallow hollows contain transverse elements that give rigidity to the entire structure.
First, a frame is made according to the size of the canvas. To do this, cut a bar with a section of 30x120 mm according to the drawing. The elements are connected to each other by fastening in a half-tree or in a paw. The surfaces are coated with glue and clamped with clamps. Make sure that the internal corners are 90 °.

After the glue dries, the joints are additionally fastened with pins. For this, holes of 7-9 mm are made and pins, pre-treated with glue, are inserted into them. Then one side of the frame should be lined. Plywood or fiberboard is chosen as the material, which is cut to the size of the frame. The facing material is fixed with glue.
If the structure is solid, then the frame is filled with a bar, pieces of MDF or other low quality wood. All parts are glued together and additionally glued to the facing sheet. In the frame of hollow or small-hollow doors, crossbars are installed, which are fixed with glue to the sidewalls and facing material. The second sheet is installed only after the glue has completely dried.
How to install a sliding door?
Installation of sliding doors may vary depending on design features. Installation includes the following steps:
- preparation of the doorway;
- fastening of guide elements;
- installation of the canvas;
- insert of handles.
In order to properly install, it is necessary to carefully follow the installation instructions for sliding doors.
Preparation of an interior opening
First of all, you need to prepare the opening. If the canvas moves along the wall, remove all protruding elements, level the surface, fill the cracks. The belt should move without obstacles. Since the construction does not provide for a patch, the walls are plastered. The opening should be as flat and smooth as possible.
If you plan to install a sliding door inside the partition, you should dismantle part of the wall. To do this, increase the opening to the width of the door leaf, and then mount a plasterboard niche. The partition should go into the wall so that only a small part of the canvas remains, on which the handle is located.
Installation of guides
If the canvas is light, hang it only on the top guide. If the sash is made of wood and has a large weight, it must be fixed in the lower runners. Since the installation of a sliding door can be done on 1 or 2 rails, both options must be considered.
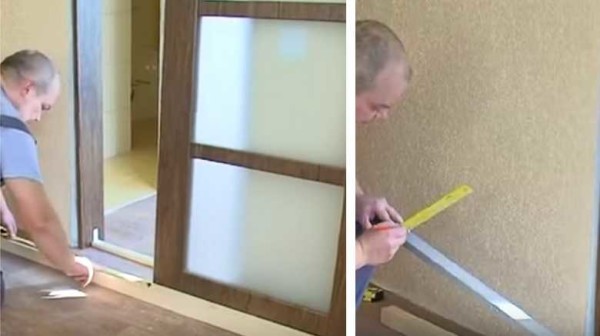
To mount the upper guide, a canvas is placed to the opening. Measure the position of the door in the closed and open state. From the resulting line, they retreat upward 7 cm and draw a horizontal line. It determines the position of the rail to which the rail is attached.

The length of the bar must match the guide. It is placed so that the middle is exactly above the upper corner of the opening from the side of the open door. Then the guide profile is fastened.
The upper runners are fixed with self-tapping screws. Then the carriage with rollers is assembled and inserted into the guides. It is necessary to check if the mechanism moves freely in the rail. Limiters are installed along the edges of the guides so that the web does not jump out of the track.
The bottom groove is made using a milling machine. It should be 1 to 2 mm larger than the guide knife and the depth should be 18 mm. If the design does not provide for a lower rail, then a flag guide stopper is installed on the floor. It must fit into the groove in the door leaf. Its task is to limit the movement of the leaf and exclude lateral vibrations of the sash from below.
Installation of canvas
Installation of sliding doors is carried out after installing all the guides. First you need to install the mounting brackets. They are fixed with self-tapping screws to the upper end of the door, having previously made holes with a thin drill. The canvas is hung on the upper rail, and then led into the lower guide. Carriages with rollers are connected to the brackets so that the nut and washer are on top. Then the fasteners are tightened with a wrench. After checking the movement along the upper guide, the blade can be installed in the lower groove.

Fittings
Installation of sliding interior doors will be incomplete without installing fittings. For such structures, mortise handles are used, as well as special locks. Locking devices are rarely installed, since the level of protection of such mechanisms is low. To make pens, you will need:
- ruler and pencil;
- milling machine;
- chisel and hammer;
- screws and screwdriver.
First, the position of the handles is marked. They are placed at the level of the belt at a distance of 4-5 cm from the vertical edge of the canvas. Handles are applied to the door and outlined with a pencil. In size, a recess is made for the thickness of the fittings with a milling machine or chisel. You can also use a drill with a core drill of the required diameter. A hole should be made at the bottom and top of the handle. The wood between the grooves is removed with a chisel or a router.

To install sliding doors with a mortise lock, you need to make a recess in the end of the door with a drill. A locking mechanism is mounted in the groove and closed with a special bar. The handle in this case is not a mortise, but a bracket. A recess is made in the opening for the striker. If the lock is padlock, it is screwed to the door leaf with self-tapping screws.
To prevent dust from entering the room, special brush seals are attached to the lower end of the canvas. If the design of the partition provides for 2 sashes, special seals are additionally installed at the ends of the adjacent canvases.
Installation of sliding doors should be carried out on high-quality roller carriages. Despite the high cost of the mechanisms, they significantly save money in the future. Cheap rollers quickly fail with frequent use, they need to be changed. High quality carriages will last a long time.
The cheapest way to make a door leaf is from a simple or laminated chipboard, MDF. This material can be decorated to your taste. This can be done with varnish, paint, self-adhesive tape, wallpaper, or in any other way.
For wooden doors, you should choose a material dried in special cabinets. Otherwise, the structure may deform in the first months of operation, then the frame will have to be redone.
Repairs
Sometimes it may be necessary to repair sliding doors. A common breakdown is poor blade movement in the guides. To do this, you need to either adjust the roller, or replace it. Sometimes debris gets into the guides, dust and dirt accumulate, which over time does not allow the mechanisms to move freely. To avoid this, the rails should be cleaned in time.
There is an opinion that it is not realistic to make sliding doors with your own hands at home, but this is not so. A sliding door is not such a complicated thing, and then we will talk about what sliding doors are, go through the pros and cons of compartment doors, and most importantly, we will give step-by-step instructions on how to make a sliding door with your own hands, and in 2 versions.
Sliding structures in houses are not only beautiful, but also convenient.
The question of how to make sliding doors just right is when you know what you want, so first, let's figure out what they are like:

The accordion looks original, but it is not very convenient to use.
An accordion sliding interior door consists of a certain number of sections connected by hinges, which are folded according to the accordion principle. It makes no sense to assemble this structure by hand, firstly, there is a lot of small and precise work, and secondly, the system is inconvenient in operation, plus, a package that has been completely shifted takes away part of the doorway.

Cascade sliding structures.
A cascade sliding structure refers to several door leaves sliding in and hiding behind each other. The whole trick is that the canvases, no matter how many there are, move apart synchronously, and you cannot make such a sliding door mechanism with your own hands, and the installation there is far from simple.

Retractable radius design.
The retractable radius design is aerobatics in this niche. You should not even try to make such sliding doors with your own hands, because almost all the details of radius doors will have to be ordered individually. Agree, it will be a shame to pay money for the order, and then break the doors, trying to install them yourself.

It is quite possible to make interior doors of a compartment with your own hands.
Sliding compartment doors are the best option for a home craftsman. Such a door can be single-leaf and double-leaf. The mechanism for sliding doors of a coupe is simple, but reliable, in short, guides are installed on the wall along which the doors travel.
- Hidden doors that hide in the wall;
- A door that slides along the wall.
But this is in principle not true, because the drawings, diagrams and the device of the structure itself are identical in both cases, the door slides in the same way, the roller mechanism is the same. The only difference is that a plasterboard box is mounted next to the door leaf, in which the leaf is hidden.

General scheme of hidden sliding doors.
Interior doors differ from similar designs in wardrobes only in a more powerful mechanism, because the canvas is much heavier here. Therefore, it is not so important whether you will mount the sliding door with your own hands on a cabinet or on a doorway, the technology is almost the same.
We figured out the main differences and the choice of design, now let's talk specifically about how to make compartment doors with our own hands.
Two options for self-arrangement of sliding doors
Do-it-yourself sliding interior doors can be made in different ways, more precisely, for different rooms. Plus, the size of the budget plays a significant role, it is one thing to assemble doors for a small summer cottage with seasonal living, and quite another to make sliding interior doors for a city apartment.
Option number 1. Solid door for an apartment
In this case, we will learn how to properly install sliding doors on rollers with our own hands.
You need to forget about self-made mechanisms right away, we are talking only about the installation of ready-made systems. Of course, such designs are sold with a description, but there are nuances that are not in the description.
To install sliding interior doors with your own hands, you need a tool:
- Hammer drill or electric drill with impact function;
- Hydro level;
- Bubble level;
- Screwdriver;
- Roulette;
- Open-end wrench set (from No. 5 and higher);
- Manual frezer;
- Hacksaw for wood;
- Hacksaw for metal;
- Pencil;
- A hammer.

We proceed from the fact that the door is made from ready-made units, that is, we have a door leaf, guides, rollers, stops and other door accessories. The only thing that you will need to buy additionally is a wooden block 50x50 or 50x70 mm.
Even before assembling a sliding door and even before going to the store for accessories, you need to make sure of the fundamental things:
- Check how smooth your opening is, if there is a skew, take a wide canvas (with a margin);
- Make sure the wall can support the load. It is better for an amateur to work with a brick or concrete wall, leave foam concrete and plasterboard false walls to professionals;
- Absolutely all finishing must be completed. The door assembly is done at the very end.
How to make a coupe door with your own hands:
There are many roller models, we are interested in mechanisms on a supporting platform with the ability to adjust the gap between the web and the guide profile.
Wide platforms are mounted on the edge of the door leaf, but if the door leaf is more than 80 cm, then you can step back from the corner by 1/6 of the door width.
Using a tape measure, we calculate the center and, attaching a roller platform to the end of the canvas, mark the entry points of the screws.

It is not worth driving the self-tapping screws on the markings right away, you do not know what quality the stove is, when screwing the self-tapping screw "alive" it can crack. Therefore, first drill the holes, the drill diameter is about 2 mm. Then apply the bar and screw in the screws.

Now insert the carrier plate itself, equipped with a rod under the roller, into the grooves of the roller strip. In this case, the plate is fixed on the bar by screwing the stem a couple of turns (here open-end wrenches will come in handy for you).

As you can see in the photo, the rod is equipped with a thread; we need to screw rollers onto this thread. There is, of course, the possibility of adjustment, but the thread must enter the roller at least 3 - 4 turns. It is better to count the revolutions, so that on all rollers they are approximately equal.

In order not to work then overhang, it is better to cut in handles and locks right away, especially when it comes to secret handles, as in the photo. All such grooves in the canvas are cut with a hand mill.

With the rollers and fittings finished, now we turn to the installation of the guide bar. The guide bar itself is metal, we will attach it to a wooden block. It is important here how to calculate the cross-section and length of the bar.
Do not be alarmed, for the calculation we only need a tape measure and a pencil. If your doorway is simply plastered, without platbands, then you can take a block of 50x50 mm. Platbands will be taken away at least 10 - 15 mm, so you need to take a block of 50x70 mm for them.
As for the length of the bar, it is calculated as 2 widths of the door leaf, plus another 50 mm for stoppers.
Now we put the guide on the bar and fasten it with self-tapping screws in increments of about 200 mm. The holes in the guide are drilled in a melt, that is, so that the screw cap does not protrude from above, otherwise the roller will begin to cling to it when moving.

Then we suspend the structure. It is enough for a professional to make a measurement once, after which the craftsmen attach the timber separately, and then hook the doors onto it. It is better for an amateur to try on the assembled doors, for this we put the rollers into the guide.

To make the measurement more accurate, you need to insert a wedge between the door and the guide bar, preferably more than one.

Above the bar, you need to put a mark on the wall and already from this mark you should step up at least 7 mm, plus the thickness of the carpets, if any
The holes in the block must be drilled immediately. The step depends on what exactly you will hang the structure on. For anchor bolts with a cross section of 6 - 8 mm, a step of 50 - 70 cm is sufficient, and for long self-tapping screws with plastic dowels, holes are drilled at a distance of no more than 25 cm.
We make the markings on the wall through the block. The photo below shows how the masters drill the wall without removing the door, we do not advise you to do this. We have the markup, now you can remove the door, attach the block to the wall, set it on a level and outline the future holes with a drill. Then remove the block and drill it out.

To prevent the rollers from jumping out, you need to install stoppers along the edges of the guide, but they are installed after the doors are hung. The stopper is inserted into the groove and the clamping screw is tightened. The mounting point is determined empirically by the position of the rollers.

Our doors hang on the rail, but so that they do not dangle, they need to be somehow fixed from below. To do this, a groove is cut from the bottom end along the entire length by a router, if the door is factory, then the groove should already be there.
The blade will be controlled by a flag pinch roller, which is attached to the floor directly next to the door jamb.

In order for the door to rub less against the roller, it must be set strictly along a plumb line. The checkbox technology is shown in the photo below.

Control flag setting technology.
In principle, the sliding door has been installed with your own hands, it will work, but you still need to bring beauty. To do this, buy a platband to match the door leaf and nail or screw it to a supporting wooden bar. Such a bar will hide both the bar itself and the suspension mechanism.

Option number 2. Homemade for a summer residence
Sliding doors are a good thing and they have a lot of advantages, but all these advantages fade into the background when a person finds out the price of such accessories. Do not get upset with a creative approach, you can solve this problem. The design is not the most beautiful, but it is quite suitable for a summer residence.
So, let's take a step-by-step look at how to make sliding doors for a summer residence yourself and at the same time not spend much money.
The door leaf will cost the most. Although there are options here, for example, you can restore an old door and hang it.

Old doors can find new uses.
Then we go to the store with furniture fittings and buy the simplest furniture wheels there. Do not take pivoting mechanisms on a hinge, it will only get worse with them. Such wheels are attached to the doors with a pair of self-tapping screws. There are 2 anchor points for each canvas.

We fasten steel rings from the upper end of the canvas, above the wheels. The thickness of the metal in such rings should be at least 3 - 4 mm, otherwise they will quickly fray.

As a guide, we will use a three-quarter inch steel pipe, although this is not essential, you can take any pipe, as long as the rings fit into it normally. We calculate the length in the same way as in the case of a wooden block.
We install, as shown in the photo below, the knee and the fastening "penny" can be found on any construction market, however, like the pipe itself.

Fastening the pipe to the wall.

Output
As you can see, it is not so difficult to install sliding doors with your own hands, but for those readers who thought this information was not enough, there is also a video on this topic.

An option for a homemade design on the upper suspension.
Installing an interior compartment door is a problem that can be solved even for a non-specialist. This article will focus on the types of sliding doors, their advantages and disadvantages and, of course, how to install an interior compartment door yourself.
Buying interior doors is a responsible business; there is a huge selection of sliding structures on the market that can fit favorably into any interior.
According to the form and method of fastening the guides, they are divided into the following types:
- Straight and semicircular, which are used both for cabinets and for rooms. They can be quite original in design.
- Compartment interior doors mounted in the upper part of the opening, on the ceiling, floor or wall. Such a variety of mounts allows them to be used in almost any room.
You can buy any of the listed options. Installation is done without problems with your own hands, and the price will depend on the finishing materials and the complexity of the mobile mechanisms.
Attention: The use of compartment doors with lower guides is fraught with a violation of the aesthetics of the room and the occurrence of some inconveniences associated with the accumulation of dust and dirt in the slats. Because of this, some time after the start of operation, the structure acquires an untidy appearance, to which is added the difficult movement of the rollers.
The use of compartment doors for the arrangement of small apartments or studios, for which separation of zones is necessary, is difficult due to the violation of the integrity of the interior. In order to conceal this disadvantage, it is recommended to mount the rail system flush with the floor.
To do this, you must first prepare a recess in it, into which the lower slats will be inserted.

To give the structure strength and stability, it is recommended to install a row of upper rails together with the lower guides. This requirement is mandatory if the owner decided to use not light chipboard sheets, but heavy wood and glass doors (see). The main load in this structure is borne by the bottom row.
For mounting such heavy models, stronger and more durable casters are provided. Often, compartment doors with rollers only on the top panel are used to arrange the space.
Depending on the attachment point, these partitions are divided into 2 categories:
- Mountedthat are mounted along the ceiling or wall;
- Suspended models, panels of which are attached to the top of the doorway.

The first type of partitions is similar to curtains. The movement system of the hinged doors of the compartment is hidden in decorative panels. Their flaw is the loose fit of the doors to the wall, which excludes the soundproofing of the room.
Such a system of fastening partitions also prevents the placement of furniture along the movement area of \u200b\u200bthe doors, which reduces the possibilities of interior furnishing.
Suspended models of compartment doors are more practical. Their use allows not only dividing the space into zones, but also making a certain contribution to the decor of the room. Suspended structures adhere more tightly to the wall, and therefore have greater sound insulation.
Sliding models are a special type of compartment doors. A distinctive feature of such structures is that they do not move along the walls, but slide into them.
This is due to the installation of a special cassette inside the wall. Sliding models compare favorably with their counterparts due to the possibility of the best organization of space. Their disadvantage is the high labor intensity and cost of the installation process.
Interior doors of a compartment video will also help you choose the desired design option. Pay special attention to the mounting base and the wall, because the choice of the mechanism itself will depend on this.
Required materials for self-fabrication of the structure
For the self-design of compartment doors, you will need to purchase a minimum amount of materials. When creating a simple model at home, no more than 3-4 components are used.

Laminated chipboard used as doors.
Attention: When choosing this or that canvas, it is important to pay attention not only to the quality of the material itself, but also to its thickness. When self-designing compartment doors, experts recommend using chipboard with a thickness of at least 16 mm.
- This is due to the need to maintain a presentable appearance of the structure during its continuous operation. The use of thin sheets requires the installation of a fastening system similar to that used to model a glass door.
- For this reason, experts recommend staying on standard chipboard sheets with a thickness of 16 mm, which can be framed with aluminum profiles to protect them from deformation with constant collision with an opening or other door.
| Roller system of guide panels
|
Their use makes it possible to design compartment doors that slide silently and easily along the walls. There are a huge number of roller systems on the market, designed for structures of all sizes and shapes. The use of this type of guide differs from similar systems in the principle of operation - the doors are fixed on a solid rail, and do not hang on it like standard models. In this case, the entire load falls on the lower profile. |
| We select fittings
|
When designing compartment doors, mortise handles and, if necessary, a lock are used (see). In this case, fittings of non-standard shapes are used. So, the handles look like holders recessed into the surface of the door. At the same time, the locks are equipped not with standard latches, but with hooks. |
| Self-tapping screws
|
With the help of which guide systems are attached to the surface of the floor, walls or ceiling. |


For the installation of compartment doors, in addition to the standard set of building materials and elements, tools are required, including: an electric jigsaw or circular saw, a screwdriver, a router, a working level and a set of screwdrivers, pliers, screwdrivers and a hammer.
Materials and tools required for installation
Preliminary measurements

Before buying everything you need for installation, carefully measure the doorway with a regular tape measure:
- The canvas should be 5-6 centimeters wider and higher than the opening, if it is one.
- If interior doors of a compartment are planned - installation of two or more canvases, their total width is calculated based on whether they will go to the sides or go behind each other.
So, we decided on the size.
What else is required for their installation and decorative finishing:
- Door fittings and fasteners.
When purchasing ready-made compartment doors, fasteners and sliding elements are usually included in the delivery set. These are metal guides, rollers, screws, etc. They can be bought separately at any large store of building and finishing materials.
- Wooden beam with a section of 50x50 mm.
This structural element is necessary if you will install doors with your own hands with the rail fastening to the wall. Its length should be equal to double the width of the door leaf. If there is no doorway and doors are installed up to the ceiling, the rail can be attached directly to the ceiling.
- , addons and platbands.
A frame is a frame that frames a doorway, to which the closed door canvases will adjoin. Completions and platbands (see) are necessary to mask fasteners and decorative framing of the opening.
- Anchors for attaching the timber to the wall, as well as additional self-tapping screws, finishing nails.
- Tools: tape measure, level, plumb line, screwdriver, pencil, milling machine or chisel.
Preparing to install compartment doors

About how to install the doors of the compartment, a little later, but first you need to talk about the preparatory work. At the stage of rough finishing of the premises, only the sliding systems themselves can be mounted, if it is planned that the door will "leave" when opened into a niche in the wall.
In all other cases, installation is carried out at the stage of finishing work. Before starting the installation, make sure that the contour of the opening is correct. Its walls must be strictly vertical and parallel to each other. If not, try to fix the opening.
Attention! If the compartment door is to be installed on an opening in a plasterboard partition, it is necessary to install a mortgage from a bar above it during its construction.
The order and features of the work
Now consider, below is the instruction on this matter. A strict requirement for installing compartment doors is their installation on a perfectly flat surface.
Regardless of the place of fastening of the structure, be it an opening or a cabinet, the first step is to check the floor or the bottom of the furniture using a building level for a violation of the general line.

So:
- The presence of small deviations is permissible, which will not interfere with the installation of compartment doors. Disturbance of the horizontal surface up to 5 mm is normal. It is impossible to install the structure with deviations of a larger value. Therefore, it is important to avoid the presence of hollows and bumps on the floor. If necessary, you need to eliminate such shortcomings.
- Experts recommend carrying out all construction work before the direct installation of the compartment. It is necessary to pre-sheathe the opening with wood or drywall, treat it with putty, apply paint or stick wallpaper. Following this recommendation eliminates the risk of damage to already installed doors with these finishing materials.
The process of designing and installing compartment doors is a sequential process that should be considered point by point.
Assembling the guide system
It is the most important stage of work, which includes several nuances.

So:
- Before installing the frame for the compartment doors, it is necessary to carry out the markings in advance, along which the strips will be attached. It is important to maintain an exact parallel between the floor and ceiling slats. For this purpose, using the building level, clear lines are drawn along the entire perimeter of the opening.
- After that, following the markings, the guides are attached. To achieve greater aesthetics and structural strength, it is necessary to use guides of the same length.
Attention: It is important to cut the upper and lower planks exactly to millimeters. At the same time, one should not forget about the reliability of the frame, carefully fixing it with self-tapping screws.
Door assembly
After installing the guide system, they begin to manufacture doors for the structure. At this stage of work, certain difficulties may arise due to the small size of a standard apartment. But it is possible to organize the manufacture of doors in a small room.

- Before starting work, you need to decide on the size of the future product. So, having an opening with a width of 1800 mm, it is necessary to make 2 doors with a width of 900 mm. To these values, you must also add 50 mm to overlap one panel on another.
- Having decided on the dimensions of the doors, they proceed to trimming the chipboard sheets. Before that, using a pencil and a long ruler, lines are drawn on the panels, outlining the products of the required sizes. After drawing the contours with a saw or jigsaw, the doors are cut along the lines.
- Despite the accuracy of the master, chips often appear along the edges of the plates. This disadvantage must be hidden with aluminum profiles.
- The edging of the doors is the next stage of work. Its features depend on the type of fastening of aluminum profiles. So, some are connected to the doors using self-tapping screws, others are glued into the groove cut in the chipboard panel. Having little experience with a router, it is recommended to stay with the first option. To hide the screws, caps are used to match the chipboard.
- You cannot do without the use of a router at the next stage of work - installation of rollers. It is necessary to attach the roller to the lower area of \u200b\u200bthe panel at a distance of 100 mm from the edge and outline its contours. After that, a groove for placing a roller in it is cut out along the outline, which is firmly fastened with a self-tapping screw. Fittings are cut into the compartment door in a similar way. A handle is applied to the selected area on the door, the contours are outlined with a pencil, along which a through hole is cut. Half of the holders are installed in the passages and fastened with a screw.
Installation of doors
This stage is not difficult and consists in installing the panels on the rail system.

So:
- The assembled doors are alternately wound up the structure, then, lifting, they are placed on the lower rail. The installation phase of the panels can be facilitated by using special rollers with latches, with which, if necessary, they can be lowered before installing the doors in the structure or raised to engage the panels with the lower strip.
- After installing the doors on the track system, it is necessary to adjust the movement system. Correction is carried out by rotating the mechanism along the offset center.
- The process of designing and installing compartment doors is not difficult. But for a person who does not have the skill to work with building materials and tools, it may seem impracticable. If there are such doubts, it is recommended not even to start independent work on the manufacture of doors, but entrust it to professionals.
Interior compartment doors will serve you faithfully for many years, the main thing is to choose the right installation mechanism for your version. Therefore, analyze everything before making a choice.
It will take 2 people to install interior doorsDoors play a huge role in the arrangement of an apartment. Interior aisles are closed with such structures for a clearer division of the house into functional areas. Since the construction industry does not stand still, new options for finishing doorways are constantly being invented. Sliding doors are one of the most popular ways to decorate entrance blocks. How to install them yourself - read on.
What is included in the set of interior doors
Installing sliding interior doors is a responsible business. It is very important that the door kit you purchased contains all the necessary components. If it turns out that the set lacked some element, then you will not be able to put the structure in the doorway yourself, and it will be very difficult to prove to the seller that he sold you without important fittings. Therefore, it is so important to know what is included in the sliding door kit.
Before installing interior doors, you should study the purpose of its components.
What's included in the sliding door kit:
- Door leaf an obligatory component of any sliding set. It can be made of wood, aluminum, plastic or glass. Do not forget to check this item when purchasing, it must be intact, without damage or marriage.
- Guides... Depending on the design of the door, there can be two or one of them in a set. They are usually made of metal. The best material is the guides, which have a built-in tongue preventing the rollers from jumping out.
- Videos, thrust mechanisms and lower leash. On rollers, the door travels on guides, they can have bearings or do without them. Thrust mechanisms limit the position of the open door to the desired point. The lower leash provides a softer glide to the canvas, preventing it from shaking and wobbling.
- Fittings not always included in the kit. It happens that handles and locks have to be bought separately.
- Door frame usually made of the same material as the canvas.
When buying a kit for installing sliding doors, be sure to check that you have all the necessary items. If something is missing, you can point it out to the seller in time. To check the correct filling of a set of sliding doors from a particular manufacturer, you will be helped by the instructions that should be attached to your purchase.
Guides for doors
Before proceeding directly to the installation of the sliding door, it is worth talking about the guides separately. It is their location that dictates how the doors will open.
There are a lot of ways to install the guides. You can choose one of them depending on your own preferences and on the size of the room where such a system will be installed.
Door runners may vary in design, size and quality
So the guide installed above the doorway allows the canvas to travel along the wall. If the rail is mounted in the box, then you will get a hidden door system, which, when opened, will drive along the rail, like on a slide, into the box.
There are three main types of guide installation:
- Most often, the guides are attached from the top. This installation method reduces the risk of accidental system breakdown.
- The guide underneath can be broken by stepping on it. Therefore, this method is used very rarely, in individual design projects.
- The combined rail mount is considered the most reliable. In this case, the rails are attached from the top and bottom. This design is able to withstand a canvas with a fairly large weight.
If you are installing your own sliding interior doors for the first time, then we advise you to choose one of three ways to arrange the doors. In this case, the guide should run as a continuous canvas. In this case, you will be able to avoid many mistakes, and you will definitely not ruin an expensive door system.
Installation of sliding doors
When all the materials have been purchased, you can begin to install the door in its place. However, first it is necessary to prepare the doorway. For this, the old door structure is dismantled and the opening is restored to its proper appearance.
To install interior doors was easy, and the finished work pleased you for many years, choose materials from only trusted manufacturers. One of the best sliding door manufacturers is the Italian company LOID.
Sliding doors should be chosen based on the design of the room and its size.
You also need to immediately mount the door frame. It should be one cm away from the clean floor.
How to correctly install a sliding interior door yourself:
- From the top edge of the box, a distance is measured upwards equal to the width of the guide. At this height, a bar is attached, the length of which is equal to the length of the guide. In this case, the middle of the bar should be located at the level of that border of the door frame, where the canvas will move when opening.
- A guide is attached to the timber with the help of hardware. It should run strictly in the center of the timber.
- If necessary, you can mount the bottom rail on the floor. In order not to damage the floor, the non-sliding system, the lower guide is fenced with a nut.
- The assembly of the door leaf involves hanging rollers on its upper end, on which the structure will move. A groove is knocked out at the bottom end of the door (usually it is already in the door).
- To limit the opening of the door, special flags are attached to the floor with self-tapping screws. They will not let the canvas go beyond the extreme point.
- A handle and a lock mechanism are installed on a door that has not yet been hung. This must be done so carefully so as not to damage the canvas.
- The door rollers are inserted into the guides. The door travel is checked. If everything is in order, rubber stoppers are inserted into the guides.
- At the last stage, all structural components are decorated. They close the door frame and the beam from the upper guide.
The described door installation option is quite simple. Unlike the installation of the system, even a non-professional who enters the pencil case can handle the assembly of such a structure.
Self-installation of a double interior door
Installation of a double interior door does not take much longer. Of course, there are different options for installing such structures, but if you are not a professional, then it is better to choose the simplest of them.
Before installing interior doors, you should watch a training video with a master class
Double sliding doors only work well in large rooms where a wide doorway can be made.
Double sliding doors are installed using the same technology as a conventional compartment structure. However, you will have to install the rollers on not one, but two canvases. The doorway for this design option should be slightly less than the width of two canvases. The track must also be at least twice the width of the two doors.
Professional installation of sliding interior doors (video)
Installation of sliding doors has its own nuances and difficulties. However, if you approach the installation responsibly, you can do it yourself.
Similar materials


What motivates you when you equip your cozy nest? Striving to stand out, follow fashion trends, or just a desire to make practical use of space? If everything together matters to you, then installing sliding doors is the optimal design solution. By choosing the type of product suitable for your interior, you will create a real oasis of home comfort, where you will want to return again and again.
Types of sliding doors
Thanks to the ingenuity and ingenuity of manufacturers, the range of sliding products is so large that even the most picky buyer will find a suitable option for himself. Products are not similar to each other in shape, design, dimensions and raw materials from which they are made.
When choosing a design, consumers pay special attention to the last distinctive feature - the material. For the production of products used:
- wood;
- glass;
- mirror;
- plastic;
- metal.
Products made of natural wood are, as they say, classics of the genre. They are able to give a sophisticated look to even the simplest interior.... Good wood has been a symbol of wealth and luxury from time immemorial. The high cost of the product is justified by its durability, practicality, and beauty.
Wooden sliding doors are durable and reliable in operation
Doors made of glass, mirrors are preferable for small rooms... They visually enlarge the room, allowing you to feel much more spacious in it. When choosing these types of products, there is no need to worry about their fragility. They are made of high-strength materials that are not subject to mechanical stress.


MDF products are a budget alternative to wood... For many years, they do not lose their presentable appearance and captivate with their low weight, ease of installation. A significant disadvantage is their instability to moisture. Therefore, such products are not recommended to be installed in the bathroom or toilet.
 Door systems made of MDF - an affordable analogue of wooden products
 Plastic sliding structures are no less popular among consumers. They are resistant to deformation, temperature extremes, moisture, and ultraviolet rays. Doors with a protective decorative coating will serve for many years without requiring any special maintenance.
Sliding systems are also made of metal... This kind of device can be found in pawnshops, banks, jewelry stores. However, the imagination of designers is limitless, so they found ways to use such products in country houses and even apartments. At the request of customers, the metal can be decorated with drawings that give the product lightness and texture.
 Metal sliding doors can be installed in private houses
 Installation methods
Sliding systems are divided into two large classes: sliding-folding and parallel-sliding. For folding structures, the sashes do not run along the wall, but move to the side and fold in the form of an accordion or book.
In parallel-sliding systems, the canvases move along a vertical surface. The installation methods are distinguished:
- compartment doors;
- cassette or built-in;
- cascading.
Sliding doors can be single-leaf and double-leaf. The canvases move along a vertical surface along rails in one or different directions. Sliding structures are perfect for bedrooms, living rooms, kitchens, balconies, wardrobes.
 You can install sliding doors yourself
 Installation of this type of product is quite simple and quite within the power of a novice master. They can be installed both during repair work and after. The main requirements are a smooth opening, the ability of the wall to withstand the expected load.
Along with a huge number of advantages, this system has negative points. Given that the canvases move tightly along the wall, it is impossible to put furniture near it.
In addition, compartment products do not protect the room from sounds and smells. This is due to the design features. To prevent the flaps from touching the vertical surface, small gaps are provided on both sides.
Cassette products, like compartment ones, can be of one or two doors. The peculiarity of this model lies in the presence of a niche in the wall where the canvases are rolled. The cassette design provides a high degree of sound insulation due to the fact that it is possible to put seals around the perimeter of the opening.
 Cassette sliding door provides high sound insulation
 If we talk about the disadvantages of cassette doors, then the most significant of them is the installation of the structure only during the repair.... The second disadvantage of the model is the installation of a false wall under the pencil case to the detriment of additional centimeters of area.
Cascade structures consist of one or more leaves and are considered a type of compartment doors. The number of guides corresponds to the number of canvases that, when opened, are collected from one side of the vertical surface.
 Cascade door - a kind of compartment doors
 The installation of this model is not easy. It includes many parts that require high precision assembly. Only experienced craftsmen can cope with this work, because there is practically no room for error.
Classification by type of mechanism
There are two large groups of devices.
Suspension system
A suspension device is called a supporting beam, to which a U-shaped guide is fixed... It is along it that the canvas or, in technical terms, the suspended door moves on rollers.
Installation of such a door assumes that the flooring remains intact. Only on the right or left side of the opening is the roller mounted from below. He drives along a groove made in the lower end of the blade. The main function of the roller is to prevent the vertical deviation of the product during movement.
 Suspension system device
 Installing the harness is easy. Installation is carried out in several steps:
- fixing the upper guide;
- installation of the roller device from above in the end part of the door;
- installation of the sash in the guide;
- fixing the stops designed to prevent the web from going off the rails.
- making a groove in the lower end of the product, fixing the roller.
Suspended structures perform a purely symbolic role of an interior partition. They do not protect the room from odors and do not provide adequate insulation from noise.
Rail Sliding System
Rail structures are used in wardrobes, dressing rooms, bedrooms, living rooms. This type of mechanism is represented by two rails located at the top and bottom.
 The rail system is highly durable
 This design is robust. The door is firmly fixed in a vertical plane and does not let in smells and noises. The imperfection of the system is that it is difficult to clean, since the bottom rail is periodically clogged.
Having weighed all the pros and cons of each of the systems, choose the most suitable one for yourself and start the process of step-by-step installation.
Required tools and materials
When starting the assembly of sliding structures, make sure you have the required tools and materials. To work, you need a whole set:
- electric drill or screwdriver;
- perforator, if necessary, to extract the inner layer of the wall;
- phillips screwdriver;
- overhead strips - 2 pcs. One of them is mounted at the top, and the other is opposite the side to which the sashes open.
- anchors;
- self-tapping screws;
- handles on the canvas - 2 units;
- finishing nails;
- two additions;
- a rack to which the sash adjoins, being in the closed position;
- accessories: rollers that make up the fasteners, aluminum rails;
- canvas. To determine its dimensions, measure the height and width of the opening and add 70 mm to them from above;
- timber made of wood with a section of 50x70 mm. The length of the beam is equal to the doubled width of the sash plus 5 centimeters.
Armed with everything you need, proceed to the next block of work.
Installation instructions for sliding doors
Only a true professional can supply a multi-leaf structure, mirrored doors or large-weight products. A novice master, taking on such responsibility, is able to perform many rash actions that will subsequently cost dearly.
Therefore, if this is your first time with sliding structures, start with the simplest option - assembling compartment doors. If you purchase a ready-made kit, you will save a lot of time and effort. The kit contains all the components for installing the sliding system, including fittings.
When you get down to work, you should be extremely careful and accurate. The whole process begins with the preparation of the opening. The quality of the installation depends on how accurately it was measured.
The height of the opening is determined in several places: measure the right, middle and left sides. Its width is measured in the same way. Then check how perpendicular and straight all sides are. In the case of installing platbands, the thickness of the vertical surface is measured in several places and in the corners of the opening.
 The opening height is measured in several places
 To avoid misses when installing do-it-yourself compartment doors, follow these instructions exactly. Break the whole process into blocks and gradually move from one to the next.
Dismantling the old door
Free the box from cashing, remove the old door leaf and door hinges, and then dismantle the box itself. However, you can leave it alone if it holds well and does not interfere with the flaps to move freely on the rails.
 At the first stage, dismantle the old door frame
 Opening preparation
If necessary, remove the curvature of the walls, seal cracks and cracks with putty.
The contours of the opening should be even, so make sure that no brick or drywall sticks out anywhere.
Check how parallel and horizontal is the top of the opening to the floor. The maximum limit deviation is permissible up to 5 mm. This is also mandatory for the sides of the opening. Here the tolerance is maximum 0.5 cm by 2 m.
After dismantling the old box, a new one is installed. It is leveled with small wedges. Adjust the angle of the structure relative to the flooring and vertical surface by moving or pressing the wedges.
 Use wooden wedges to align the door frame
 Secure the box with screws. When working with a screwdriver, you must be extremely careful not to damage the product.
Installation of the upper rails
After placing the box, attach the door to the opening and mark its upper border. Repeat this action again, placing the product in the opening. This is only necessary if the floor is not very even.
 Installing the top rail
 If the straight line is horizontal, measure 0.7 cm from it and draw another line. A wooden beam will subsequently be installed on it. To fasten the beam, take such a number of self-tapping screws so that it fits snugly against the vertical surface.
The rail is fixed to the bottom end of the beam. At first, it is screwed on slightly on one side. To accurately determine the location of the self-tapping screw, the thickness of the canvas is divided by two and added from 0.3 to 0.5 cm, which are needed for the unhindered movement of the flaps... Follow the same principle on the other side.
 Make sure the rail is straight before locking it
 Before final fixing the rail, make sure that there is sufficient clearance between the curtain and the wall. Also pay attention to the straightness of the guide. Kinks and curvatures must not be allowed, otherwise the structure will not work properly.
Assembling carriages and installing stops
Going on to installing the rollers for sliding doors, insert the bolts into the carriages so that they protrude slightly from the hole. Run the carriages into the prepared rails and make sure they move smoothly.
 The next step is to install the carriages.
 At both ends of the guides, limiters should be installed that will not allow the web to go off the rails. When doing this, make sure that the rubber shock absorbers point inward.
We make a groove in the lower part of the door leaf
To make a recess in the bottom end of the sash, step back from its edge 1.5 cm on both sides and drill one hole each with a radius of 3.5 mm and a depth of 2 cm. Between them in the center, select a groove for the guide.
 A groove for the guide is selected in the center of the sash
 The depth of the recess should be 1.8 cm, and the width should be 0.3 cm more than the width of the guide, which is a flag or a knife. Considering that it is not easy to make a perfectly even groove, it is recommended to mount two strips or a profile in the shape of the letter "P".
Fasteners to carriages
Moving two millimeters away from the side borders of the sash, fix the fasteners to the carriages exactly in the middle. An important point: the cutouts on the brackets in the form of a semicircle must be directed towards the wall.
We hang the door leaf
Putting the door down alone won't work, so call someone for help. Having found yourself an assistant, start performing the following actions:
- Attach the product to the rail and connect the carriage bolt on the right with the cutout on the bracket, while lifting the blade.
- Insert the end of the bolt into the adjusting nut hole with washer.
- Lightly fasten the brackets to the carriage bolts.
- We proceed to the installation of the lower rail in the groove. To do this, slide the bottom away from the vertical surface, place the blade horizontally and slide it open.
- Measure the maximum opening length and mark with a simple pencil.
- Set the gap between the flaps and the vertical surface. To do this, move the bottom of the blade and mark the location of the knife. The distance should be no more than 0.5 cm.
- Remove the blade and tighten the guide to the floor from below with two self-tapping screws.
- Align the groove in the end of the curtain with the rail and hang the products without screwing the nuts all the way in.
- Adjust the clearance between the flooring and the product by tightening or loosening the adjustment bolts on the carriages.
- Lock the nuts without turning the bolts.
Decoration
To hide the rails at the top of the opening, platbands are used for decorative purposes. The lock and handle are installed at the end.
Features of installing cassette-type doors
The above instructions can be used as a guide for installing the guide blades. When installing this model, there is no need for decorative finishes. Instead, an additional false wall is installed.
 When installing cassette doors, a false wall is mounted
 The distance between the false wall and the vertical surface is approximately 10 cm. It is calculated based on the thickness of the sash, the gaps on both sides and the profile size.
The frame made of profiles does not require reinforcement, since most of the load falls on the wall. But if you want to give rigidity to the structure, then install wooden bars inside and fix them with self-tapping screws.
Installation of sliding doors is not a very difficult process, but it requires certain skills in the construction business. If you are not confident in your abilities, invite a better master. This way you can avoid double work in case of a mistake or save an extra pretty penny.

