Tables and chairs from a bar with their own hands. How to make a table from a tree - the specificity of the material and techniques of work with it
A great way to supplement the interior of the house or giving is to make the original and stylish piece of furniture. About how to make the table with your own hands, we speak this article. Such a piece of furniture will be a real decoration of the living room, a kitchen or a working office. It can be collected at home from specially ordered boards and bars or from remnants of materials. For this, the wizard will need drawings, tools and a little fantasy. But the experience of making homemade furniture may be absent. We offer you a very simple project for assembling a strong and sustainable table. Making furniture on this scheme even newcomer.
Everything starts with ideas
How to make the table? It is necessary to start work with the selection of a ready-made furniture project for the living room or with compiling your own scheme of the future product. You can not limit your fantasy, however, it should be remembered that the drawings according to the degree of complexity should correspond to your skill level. In the absence of sufficient experience, it is better not to try to collect a very complicated design itself.
The table for the house can be depicted with a pencil on paper. First, you need to draw the design of the desired form, and only then designate its size. Most often, the table is made with their own hands for the living room square or round, but for the kitchen or the work office (and any small room) is suitable for a compact corner or adjustable table.

The size of the table with their own hands can be absolutely any, when choosing the dimensions of the product, it is recommended to take into account, first of all, the size of the room in which it will stand. Then, using drawings, you can count the amount of material to buy. Acquire materials recommended with a small margin (just in case).
If you are a novice that first collects furniture at home, then you better give preference to soft wood (for example, pine).
Such materials are very compatible and not split during the assembly. If you make the living room furniture and aesthetics are important to you, choose a poplar. If the homemade table is used outside the house, it is recommended to choose a treated wood or a red tree.

Durability will also be distinguished by a wrought table with a wooden countertop. Charm Your yard will add a wood product decorated with wrought-iron elements.
To collect a simple table at home, you will need:
- edged or tipped boards, a square cross section (for legs) and with a rectangular cross section (for frame);
- white or yellow wood glue;
- screws (preferably taking sammes of 4x60);
- screwdriver;
- drill;
- clip set;
- sandpaper or grinding machine.

We make a countertop right
Work is starting with the description of the process of manufacture of table top. There are several ways with which you can solve this task. What does the choice of this or that way depends? First of all, from the skill of the furniture maker and the intended appearance of the table for a living room or a country house. So, here are the main ways of making homemade countertops:
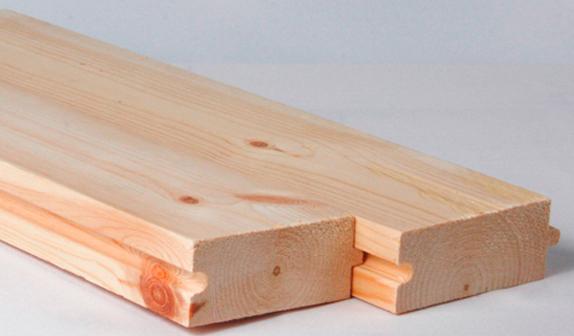
- Production from boards. This material is relatively low cost, excellent appearance and environmental friendliness. If you are a beginner master, you can make a table with your own hands from t-shut-off boards (that is, blanks with crests and grooves.
An experienced master can collect furniture for the living room of their edged boards. To do this, he will need a dowel or primeros small length. They will be used to connect boards with each other.
- Making from a single piece of wood. In this case, you can generally do not break your head over how to make a table with your own hands with a sufficiently durable and beautiful countertop. The optimal option is to purchase plywood from hard wood. However, such a product will cost quite expensive.
- Assembly of products from remnants of materials. This is a very cheapest way to make furniture for the house, but quite complicated performed. It will be necessary to choose fragments of wood, which will harmoniously combine with each other and do not create problems in the process of installation and further use of the product. Connect the remnants is also not easy. In this case, you will have to use screws and a large amount of glue or create a substole (rigidity edges).
In the first case, the boards lay down on each other, connecting with the help of screws and glue. Because all the boards of different sizes, on the finished product it will be necessary to trim the protruding elements and spend thorough grinding. As a result, it turns out the original and comfortable table.

The second method provides for the fastening of the material residues by any convenient way (with the help of glue, screws), followed by strengthening the structure by means of the installation of the podstoly or rigidity. Such a table will be distinguished by stability and durability.

If the table is located in the yard near the house or in a stylized living room, then you can order for it a wrought-made frame with legs. This will add a product of a special color and identity.

When the countertop is ready, it can be left overnight for the night so that it should be drunk. The technology of manufacturing this part of the table is approximately the same, regardless of the selected shape of the product. The main differences in projects in this case are in the form that you need to give the edges of the boards or a solid sheet of wood.
If you make an original corner table, then the edges of the boards will have to do at an angle. It is very important to correctly calculate degrees of each cut, so that the edges of the product are smooth.
However, if as a result, unevenness was formed, the edges of the table will need to be collected. You can also first bore the boards, and then draw a triangle on the workpiece and cut the finished product.

If you make a round table in a living room or a product with rounded edges, it is recommended to bore the boards of the future product, after which it is on the workpiece to draw a pencil or chalk of the future cuts.

The finished countertop on such a project will look like this:

Frame as a basis for a reliable table
The next step is to make a frame of a table for the living room. The frame is a wooden square (for a square or rectangular table) or a polygon (for a round item), which is fastened with the worktop and ensures the fixation of the legs.

Make a frame for an ordinary table will not be difficult even for beginner. To do this, turn the tabletop to the bottom up, measure the canvas, count several centimeters deep into and make a mark. Then, by marks, you can draw a rectangle or square.
After that, you need to cut off four pieces of wood of such sizes that correspond to the drawings on the table top. For the manufacture of a frame, it is recommended to take a rectangular timber. The frame of the boards may not be durable enough. Then the frame must be attached to the tabletop with the help of glue or screws. The second option provides a higher reliability of the design, but the hats of the screws will be visible on the surface of the table top in this case.
We make durable and reliable legs
At the next stage of the realization of an unusual project, you need to make the feet of the table. You can first cut off one leg of the desired height (for the production of legs it is recommended to use a square sections ram), and then using it as a sample, cut off the remaining 3. If you make an angular table, then the legs will not be 4, and 3. After completing the cutting process, Click all the legs together and cut them off in such a way that they were the same length.

At the next stage of the work, the legs need to be pasted with a grinding machine or sandpaper. But the top and bottom of the products should not be grinding, as you can spoil the correct cutting angle. Then you need to attach the legs. For this, the table can be turned upside down.
The first leg should be put into one of the corners of the frame in such a way that the top slice touch the countertops, and the two sides of the legs were adjacent to the frame. Then the parts of the contact details must be abundantly lubricated with glue and connect using fastening screws that are screwed through the table frame. Holes for the screws are preferably made in advance so that the screws do not split a tree in the process of screwing.
From the use of nails and hammer in the manufacture of a standard or corner table, it is better to abandon how nails can split the wood, and the use of the hammer requires the manufacturer of special skills. In addition, the screws are better holding a tree than nails, and if necessary, they can be turned out of the product.
Be sure to trace the legs attached to the table at the right angle. One of the advantages of screws is that they are easily adjustable. If necessary, their position can be easily changed. Then the same operations should be carried out with the rest of the legs. You can also scout legs through the worktop, but in this case there is a risk of splitting the legs. Yes, and the aesthetics of the table for the living room will suffer from this.

When the glue is completely dry, it is necessary to check the product for stability, strongly loosening it. However, if you made an angular table, then this stage can be skipped. It will come in contact with two walls of the living room or office, and it will give him extra strength. Then it remains only to polish the surface of the finished product and cover it with a varnish for wood or special paint. On this work is completed. Now you can supplement the interior of an apartment or garden with a beautiful product.
As in the bedroom without a bed, and in almost any other room, be it a living room, a kitchen, or even an entrance hall, can not do without a table. Actually, in the bedroom it will not be superfluous. And it is better to have several of them at once - for different purposes. To make where to put a night lamp, where to decompose the records and books, install a laptop, or even a snack or at all do something more piquant.

Buy the "office" is easy, the choice is now big, but to make it yourself - the case of a special iza. Such a homemade item of the apartment "wardrobe" will be valued much higher than the owner and guests, and they will use it more pleasant.

The case is not easy, but also a simple, requiring, however, a certain aesthetic taste, and carpentry skills. But you should not be afraid and immediately retreat. Certain with this task is quite real, the main thing is to represent what you want.

Pros and cons
The homemade product has both their advantages and disadvantages. Among the advantages:
- Variability.You can do it with your own hands what, indeed, you need. In all aspects. This is complete freedom in choosing a form, material, texture, size, design.
- Saving. Purchase in furniture stores will cost significantly more expensive. In fact, for the same or even the worst quality will have to pay sometimes more money.
- Uniqueness.What is done with your own hands, no one else will do. This will create a stylish and original, and most importantly the unique interior is almost anywhere - in the country, in the apartment, a private house.
- Improving skills.Work on the table is the ability to practice your locksmith and carpentry skills, learn a whole series of new things. These skills will be useful and when repairing ready-made shopping products in the future.

It is better to solve the design of the tables, it will be possible to more professionally approach the selection of such products in the outlets, and even open the source of additional earnings at all. And in general, it will always be possible to help close and friends to fix something, bring a fresh idea in the design.

However, the independent manufacture of tables is fraught with certain difficulties. Among them:
- Time. Be prepared to spend on work one or a few days, and in the case of a large item - even a week. Maximum, as the masters are recognized, - 10 days spent on the big table. In fact, it is possible for all vacation to be made with the material and achieve very scarce results. Therefore, it is better to have psychological readiness for difficulties in the first experience.

- Trampling. Work, especially with a tree, is fraught with the reference. When working with the old material (beams, boards from fences), you need to maintain maximum care. But in some cases, even working gloves may not be saved from small cuts. Too gentle handles are better not to do similar things.

- Production defects. The house is still not a workshop, and some calculations do not make easy - from here the roughness and irregularities on, it would seem ready and designed to the smallest items of the product. Salary, if the table is done for the cottage, but in a standardized room the result can be the subject of offensive jokes And just look inappropriate. For the manufacture of an improvised "bureau" or other more complex than the usual table, the designs still need skills and a certain experience. It would be time to work it.

- Need a tool.If it is not - everything is simple - you have to buy and master. Time - already money, and there are also additional costs at the first stage. However, in the long run, such an approach will lead to economies - the next table will be done in almost the vigoros, especially if there are reserves of material in the country.

- It is not suitable for all styles. Carefully need to experiment with self-made products in modern interiors, for example, high-tec, where the "ball rules" metal and technological materials. It is difficult to work with them, and wooden products can disrupt the harmony of the room.

Small council. If you decide to make the table, and this is the first experience, - try to find a good adviser who psychologically and with the help of their skills will support the undertaking. The first steps can be done together, and then go to the free "flight".
Features assembly
Types of tables a lot. The most common written, computer, toilet (with mirror or without a mirror). Working tables vary depending on whether they are designed for a laptop or are made for a stationary computer. In the latter case, a special space will be required for the system unit - it can be installed both under the legs and the eye level.


Each options have their own advantages affecting the design of the table. In the first case, the system unit will not be interpreted at hand, but it will not be very convenient to connect the USB ports at the rear. When designing, leaving a significant open space from behind the table, not to put it near the wall. If the system unit is located on top - the bureau must be as stable as possible, and the countertop is better made from a durable reliable material.

If there is a goal to construct the desktop for a schoolboy, including the collapsible structure, it is reasonable to quickly embed boxes for notebooks, textbooks and CDs. Alternative - separate shelf over construction. Boxes can be both retractable and present an open shelf. Relevant and backlight.

Tables can also be angular, transformers; Adjustable in height, collapsible, on wheels.
All this is not a saint, but practical design elements. Among the more complex options are popular, for example, river tables with beautiful, often transparent material embedded in the middle part. Their manufacturing will take more time and will require higher locksmith skills, but will allow not only to pump up their workshop "skills", but also to make a real artifact of the interior. Each of the types of tables has its own characteristics of the assembly and the specifics. Consider several of the most popular, simple and affordable options for creating a table that do not require vertices of technical training, but allowing you to create high-quality and interesting products that do not look awkward or poorly even in a modest interior.

Instruments
But before starting joinery manipulations, you need to decide what and with what you plan to work. It is necessary to start a business in full "instrumental" readiness. Do not be afraid, nothing rare and especially difficult is required - only the usual worker arsenal, which is always under the hand of a real man. So, we will list the main. Do not do without the "classic of the genre" - nails, screws, screwdriver, planer, hammer, glue (come true and instant), knife. In some cases, you can use the saw (in nature). Do not forget about working gloves and disinfectants. Be sure to have iodine and cotton wands with you, if, of course, the goal is to make the table, and not to pass a tetanus.

The fact is that wood with grinding (emery paper or other adaptation) can be very "unfriendly" and just stand up. When working with the metal, there are still plumbing tools. And in any case, it is better to acquire a means of protection for the eyes - a special working mask. For subsequent processing of the material and its cleaning, a brush and disinfectants are also useful, including against insects, especially when using old wood. Clean the table can be emery paper.

And, of course, we need lacquer or paint for final processing. To handle the tabletop varnish, perhaps will have several times (after the first one will simply rise), and therefore it is better to buy it with a margin.
Popular Materials
One tool is obviously not enough. There is something, but so far nothing to work. The main thing is, of course, the material. Theoretically, the table can be made of anything, but there are its subtleties. The most popular is wood, but it must be dry! If it is not dry - dry; It will take time, but it is better for the quality of the quality of the product in this case is not in a hurry.

Dry tree table, logs, timber - beautiful and reliable element of the interior. Beautiful, functional and inexpensive. In this option, it will be possible to save significantly if there is inexpensive bars or brica under hand - stored, say, in the country. In stores good wooden tables exactly do not belong to the category of the cheapest.

Tree is now in trend. This is the main eco-material. Without it, do not do in the interiors, sharpened under the natural stylist. In fact, it is a tree that, in one or another, he beats in all classic interior styles, up to colonial or modern.

You can make a bureau and chipboard. The material is composite and sufficiently affordable. But he has a lot of minuses. The chipboard is afraid of moisture - no longer an option for the kitchen. He poorly holds nails and screws - extra difficulty in work. Yes, and is generally not too safe - in the apartment too many products from DSP is better not to keep. However, such a table can be put, for example, in a house or on a veranda in the country - as an inexpensive, temporary option - for the season, for the adoption of guests. Inexpensive, simple and moderately aesthetic, and most importantly - functionally.

We will specify that LDSP is also found on sale - also wood and chips, only in specially laminated with polymer film at high temperatures, or even a special varnish providing increased water resistance. LDSP is more expensive, but these plates are practically deprived of all the shortcomings of the chipboard.

However, no less practical use of plywood. Her species are a lot - there are moisture resistant. So, the spectrum of application is wider. In Russia, this material is gaining popularity and also massively goes to export, which indirectly speaks of his quality. Plywood is quite convenient in processing and not too expensive. Of the minuses - its chance, boring texture and the feeling of unprofiturable. In addition, when working with plywood, it is necessary to fit very carefully to the preparatory stage. Without a sketch, the drawing here is not to do. You can use both ready-made projects and make it yourself.

It is easier to make the table from the furniture shield, for example, ash. This is a little more expensive, but at the same time will provide reliability of the main part of the table - countertops. Less concerns with grinding, but at the same time somewhat less naturalness and textures.

An extreme alternative is the use of natural wood: Stumps (they, by the way, can be used in themselves, but this is already designer chic) \u200b\u200bor sleep. With them, everything is exactly the opposite. We'll have to grind, and several times on their own varnish, but as a result, it will turn out a completely unique unique product, which will be able to appreciate all lovers of "natural" design, unless, of course, after the gatherings, will leave without a few bypass in a wide variety of places.

Often, glass or special optical glue, adhesive glue, replacing it is used in the design of the table. You can buy and just shockproof glass - although it will be more expensive. It is stylish, spectacular and safe. This material is optimal for small oval coffee tables, but recently is increasingly used by designers and in models with straight corners.

Also add that the legs and the base can be metallic. It should not be afraid of the combination of wood and metal - it may not be simply harmonious with competent design, but also very interesting. In modern interiors, loft and high-tec without it sometimes nothing. In addition, the metal is effectively combined with glass or its analogs.

Table for kitchen
This is an absolutely necessary element of the interior. It must be comfortable, comfortable and stable. The surface of the table-top often does not have a fundamental value - it is usually covered with a tablecloth or a glued. With independent manufacture, it is important to pay attention to the lower parts of the structure, so that you can sit at the table, and you have always had the opportunity to place your feet with convenience.

A good dining table with your own hands can be done in just a few days. According to homemade "masters," even on very beautiful large models, they left no more than 7-10 days. From the material you can use any - the easiest way to work with chipboard, plywood and wood. The main thing is that the beams and boards are smooth and well polished.

Carefully examine their size, bring it to normal if necessary - the kitchen table is hardly advisable to do more than 80 cm in height. The shape and size of the countertops will depend on the interior and the availability of free space in the kitchen.

A table, although the main element of the interior in such a room, should not occupy all the place. Therefore, especially in small kitchens, it is practical to do it square - you can come from all sides, and more than four people after him is still hardly placed. In large dining rooms, on the contrary, it is better to stay on a classic rectangular format.

Oval or round table top will also look interesting, especially if you choose a beautiful curly legs under it - this will, however, will require good carpentry skills.
When working on a standard wooden model, fasten the beam or board using the planks at the bottom under the table top. Practical option with plywood. DSP is better not to use - in the kitchen there is always an increased humidity, and something regularly sheds something, and this material is known to be poorly withstanding the influence of the aquatic element.
An interesting idea will be the creation of a sliding table.In this case, the attachments should be flexible. But you can proceed easier. Still, make a sliding table in the format of one design with your own hands - the task is nontrivial.

Therefore, make two small rectangular products of the same dimensions. During the day, they can be transferred to different parts of the kitchen or even an apartment, and before coaching food to shift, thereby forming the large table. Very practical option for small kitchens. In the manufacture, pay attention to the lower parts - partitions and beams should not interfere with each other when connecting tables.

If the kitchen is very small, you can make a folding table. Collect the table top and attach a special bracket on the wall. This "Bureau", as a rule, only two legs, which means that they should be placed so that at the same time at the same time a person can be placed at the same time. Another option is instead of one of the legs to build a small cabinet for storing dishes and products. This is the perfect way to save space.

When designing a table with a sink, it is better to apply for help professionals. Make outline and basic elements of labor structures will not be, but the main thing is that they do not interfere with the pipes under it. So without a locksmith and plumber do not do here.

At the final stage, any table is better to process. What to cover it and how to decorate is a matter of taste. It is possible to cover with varnish and set to the tablecloth, or even separate with a special tile or even a stone. The field for experiments is large.

Many color palettes will fit into the kitchen interior, including bright. Do not be afraid to make the table with red, yellow or green - it is fashionable, pleasant and aesthetic, will make it possible to create a good mood when cooking, eating and communicating with households and guests.

And one more council for the kitchen tables. If there is a desire to construct a product with a drawer, make the design of the last maximum and sealed so that there is no moisture. Collect it from several boards or slats and securely secure them with special glue or nails. When using plywood, it ideally should not be thicker than 20 mm.

It is important high-quality grinding and processing, including against insects. Remember that the kitchen, as a place of storage of products and cooking, is a favorite environment not only for cockroaches, but also for different wood and loving hyperships of insect species, especially in a hot climate.
For computer
The table for the computer must be compact and functional. It is always better to design it with a reserve. The main concepts are two:
- Table for a stationary computer.If the technique is powerful, let's say, the game will have to make the table long enough and wide. Many space on it will occupy the monitor. Diagonal from 20 inches and the wide screen speeds imply the user's mobility at the table, which means there should always be a place where to put hands. Separate measurement should be made taking into account the size of the keyboard.

On the table should also be placed other devices - mouse, joysticks, gamepads, and even a gaming role. Part of the place will also take the system unit. It can be installed at the bottom of the table - for this you will have to do special overlaps, so as not to put the technique on the floor. The table should not be closed - high-quality cooling is very important for a powerful computer, and the open space will provide the necessary air circulation.


At the same time, the design of the desk has no fundamental importance - it will in any case be forced by appliances. The main thing is to use high-quality varnish and paint so that the surface is flat, it was easy to wipe it and a lot of dust hazardous for the equipment did not accumulate.
- For laptop. At the measure, note that it should fit both the computer itself and the hands of a person working or playing him. Often, a full-fledged keyboard is often connected to portable computers, so it is better to use a material with a margin. Leave the place and for the mouse.

We add that the form of a computer table can be made almost any. It previously told the view that it should be rectangular, but practical experience has shown that oval tables, in particular, for laptops are a very interesting solution. If you attach wheels to them, turning into an analogue of the coffee table, you can easily move with a computer around the room - to show the rollers to friends in comfortable angles or, on the contrary, if necessary, quickly and quickly immerse yourself in work or correspondence away from strange eyes.

However, there are some specific advantages in the table with straight corners. It is easier to equip boxes and shelves for storing books and disks. Do not forget about the reliability of fastening these structures, as the weight of the musical or game collection can reach 7-10 kg.

Night table
The night table is better made extremely compact. Dimensions - not his "horse", the main thing is the convenience of form. First of all, pon the size of the materials under the height of the bed. It is better to make it in short with a mattress level, but nothing terrible if he gets lower. The tall night table is not too impracticious, although it is found as an example in some design schools. If it is more important for you to experiment aesthetic qualities in this direction. At the same time, the form can be selected any - from oval to rectangular and square.


The designer concept should be entered into the interior composition of the bedroom. For classic styles from materials it is better to choose wood. Moreover, in the case of retro and historical styles than it will be authentic - the better. If there are skills in an artistic thread, then in this case, it's time to use them. In modern interiors, the wood product will also be relevant - the texture, if necessary, hits with varnishes, paint or tablecloth. Color range depends on the placing color. Color should be harmonized with bed, bed linen, and ideally with floor and ceiling. Radical contrasts are inappropriate here.

Special attention when working on a night table should be given to its sustainability. The leg can be done big. If there are several of them - they should get absolutely identical. Please note that the night table is not only put an alarm clock or desktop book, but sometimes they are based on hands - such loads it should easily withstand. The table can also be equipped with several drawers, or, if it does not allow the level of technical skills or the specificity of the material - an open shelf.


Coffee table
Many houses and apartments have already gone into the past, the habit of launching newspapers and magazines on the coffee table. They were replaced by new means of communication - various gadgets - from iPhone to laptop. But they also need to be placed somewhere, even if they simply put for charging. Before making such an interior item, it is better to immediately decide on its functionality.

The main thing is to assimilate one simple truth: no one works for the journal bureau - at best, worries, so they should be low, aesthetic and comfortable for relaxed pastime. And it is aesthetics - in the first place. Your guests will be remembered, first of all, design and material of the table. Another point is functionality. Well, if such a table will have a space under the table top, where you can put something.

So, as materials, it is better to take a chipboard or board. It should be assembled on the wizards with the utmost, maximum accuracy - so that the locations of the elements are not visible.
Additional crossing will make the table more resistant and reliable. If the design has a metal (legs) in its composition, the welding machine will be required. In the base, you can put a rectangular metal element. Do not forget to strengthen the same sidewalls. A variant with glass (or transparent glue) is very common. Such tables are often found in offices, waiting rooms and other guest sites. However, he, as the experience of many designers shows, fits well into home interiors.

In making it is important to pay attention to the wooden or metal base - it will be visible under the glass! Conducting forms are well suitable. Do not forget that the glass can be used and simply as an additional component. For example, close them part of the classic wooden table. The resulting and without that light interior object is advisable to equip wheels. Such "mini-transport" will be especially relevant in a large living room, as well as in an apartment, where there are always many children (then, however, do not once again experiment with glass). This is a good and useful subject for fun and relaxation.

But the mobile table should be easy. Massive - it is better not to equip it with this "bonus", but to make from durable heavy overall boards. He will land the interior, make it more collected.
There is another option with a transformer table. It is practical, but not always aesthetic. However, if you make a double (highest) base, it can be used even as a conditional easel. We add that the coffee tables are usually small and usually designed for one, maximum, four people. Selection of size is purely individual. Only an altitude is only a height - it can be varied from 40 to 60-80 cm. Do not forget that in some situations a part-time product can be used as a bookcase - for this it will be necessary to make the appropriate shelf needs and compartments.

With regard to the color range, you will admit the contrast of the countertop and legs. The combination of metal and wood looks good. You can apply a drawing to the surface or make an unusual ornament, but it's easier to get it anything easier every time you change the mood and taste to repaint products. And one more point - about the form. The magazine furniture can be both rounded and a rectangular-square - a matter of taste. Round products are used slightly more often, since more secure and democratic.

King Arthur King, in the end, also sat at the round table, so in the living room, the place of reception and the meeting of guests, each of which often wants to show their individuality and initiative, it is better to do without places at the head of the table and other patriarchal delights, and for Children are safer - once again will not hit.

Furniture for cottages
The holiday in nature is a wonderful pastime, however, to really relax and sit in the company, - you need a high-quality and comfortable desk. Such furniture is very specific. On the one hand, it must withstand high humidity - if it is in the open air in the rain, on the other, it is very unpretentious about the aesthetic qualities and always to naturalness. In nature, the glass table or an expensive metal product will be inappropriate.

So, before doing the manufacture of such furniture, you need to decide on an important point: where it will stand and how much should be mobile. Option, in fact, two:
- Still-air outdoor table. Typically, such structures are set near the garden house or in removal from it in comfortable places for recreation - under the apple tree or other fruit trees. The main thing is that such a subject of exterior is durable and reliable, as fast as possible on the "legs". The legs are reasonably in some cases even insert into the ground. The surface can be any, but preferably a tree.

The main thing is to remove the pile and chips from it, as they can lead to an unpleasant and deep injury or simply bypass. Please note that the surface must be moisture-resistant - the table will be regularly stamped in the rain. In cases of storm sediments or just a long lack of in the country, it is better to cover it with anything, say, the glued. It will not save from high humidity, but protects against direct contact with water.

- A moving table in the country house. As a rule, this is a more compact option. It can be used indoors, endure on the veranda or outdoor air. The main focus with independent making is best done on the use of lightweight materials so that it can be transferred.

The wheels are unlikely to help strongly (the landscape in the country is not always smooth), although they can also be attached, but it will make the design less stable. A good bonus will be able to push or collect the table. At the winter season, such a table can be addressed at all and remove the attic to not spoil.


What is the best table for giving? Pallets, boards, old logs can be useful, let's say, from the already unnecessary or dilapidated fence, partitions from the boxes, the old car stall, and anything. It is better not to use glass and not abuse metal. The latter has a rust property: it's not so scary, but aesthetically can spoil all the natural harmony, if not, of course, the desire to create an entourage of the postpocalypse.

Boards for tabletops at the cottage is better to fasten from the bottom using the planks. There is also an option with gluing - this is more time-of-time technology, after processing it is necessary to pull the boards and hold them in this state about a day. If the material is old, it is better to compose it in color, align stylistically by color.

Light - to a light, dark - to dark, with the interweaving of color contrasts closer to the center. Do not seek to ideal with constant leveling - naturalness should not be symmetric. The next step is to polish the surface. It is better to make it sandpaper.

When working with legs, the main thing is to make them the same length - otherwise the food is pleasant in the reception at this table will be little. It is important that their surfaces are not mowed, and even. However, if you dig legs into the ground, and at hand there is no saw, a couple of centimeters can always be compensated, but only as a last resort.

Then after the design, the countertop must be covered with varnish. After the first time, it is likely that the pile will rise, so you process twice. For reliability at the bottom of the final stage, you can make an additional backup-mount. It will make the design more stable and allows you to conveniently place your legs.

In continuation of work, you can attach the benches to the table - to make them part of a single design. Connect a bench with a table better with special wooden straps with nails or long studs. For reliability, the washers and nuts will also need. The seats themselves are made along the similar principle, only their height, naturally, below the table, and fasteners should be more reliable - it is better to make cruciform.

Final stage - Painting. It looks good gray, brown, natural tones. Bright colors look too eclectically, unless you do not have the modern design of the country house, and instead of trees - artificial vegetation.

And a few more words about the sizes. As a rule, summer tables are long, but not too wide - it is easier to approach them easier and more convenient. Do not install them too close to the bushes, especially prickly, gooseberry or cherry, will be painful to them.

The distance from the fruit should also be reasonable, otherwise you can repeat the experience of Newton, but it is unsuccessful. The height of summer tables is usually done average, as they are usually sitting as adults and children. So, with the built-in seats, it is better not overgrown with the design.
How to organize lighting
This question is relevant for both small night tables and for work products that a computer is installed. On the night "Bureau" you can put a small floor lamp, the wire with the switch is reasonably stretched to bed so that each time does not pull to the table and do not drop the lamp in the floor. On the desktop also reasonably use the desktop lamp, but since we experiment with homemade structures, other more interesting features appear.

If you make a small "superstructure" above the table from several panels - plywood and chipboard, securely attach them to nails, then you can install a conventional light bulb under them, and better - LED. It will be more efficient to use two or three small point LEDs. They will provide high-quality and uniform lighting.

A child who studies at the table, and an adult will be able to read at any time at any time. To work at the computer (so that the light does not hold down the screen) it will be possible to include only one point of the lighting, which is reasonably accomplished slightly away - it will become a source of muted light.

Among the modern design concepts there are also options for lighting tables from below, through the design of the countertop, however, it will be difficult to deal with such a complex "technical task" without a qualified electrician, and the practical benefits of such structures leaves much to be desired.

The choice of light temperature is almost for any design designs purely individual and depends rather from the site of use. In classic small bedrooms, warm color combinations will be relevant.

In the interior of the kitchen, on the contrary, cold shades will fit harmonious. Much depends on style. High-tech, for example, is sharpened often precisely under the cool gamut. Accents in the classics, colonial style and some variations of the loft, on the contrary, it is better to put on a warm segment.

Forms
The table can be made absolutely any, completely carved, but the design has already developed several classic and practical ideas of the form. Among them:
- Rectangular.It is such tables that were popular in almost all historical epochs. In Russia, the boyars were gathered behind them, they served as a place of mead of peasants in the outstands and the basis of the innovative life.

In Soviet times, they are slightly sweating other forms - square, designed to minimize residential space as such. Now rectangular tables are no longer associated with the ideas of dominance and patriarchalness, but preserved the immanent massiveness and hardness. More often used in large rooms. Suitable for giving, living room, spacious cuisine.

- Square.Products such a form allow you to perfectly organize space. Their use is reasonably and economically. In addition, there is always the opportunity to move such tables. Foreign models are often found, which are converted into rectangular from square.

Alone to make such a product is not easy. However, you can simply make two identical tables. We clarify that in terms of the homemade approach, it is square and rectangular tables for "sample pen" of beginner masters. And make it easy, and the field for experiments is wide.
- Rounded The round or oval object of the interior will suit the magazine or night table. This is the perfect form for apartments in which families with children live, as it avoids unpleasant collisions with sharp corners. Technically make them more difficult, but the most unexpected objects can always come to the rescue, for example, automotive tires.

- Designer forms. The edges of the tables do not have to be smooth. Sometimes they are made curvilinear. Products can be rounded on the one hand, having on other straight corners. Extremely distribution is obtained triangular models.

For example, the kitchen will find a rectangular table with respect to seating and rounded to the sink and cabinets. Guests can comfortably chat, and the hostess or owner, treating them, will not constantly hit the corners. Naturally, more high technical skills will be required to make such models. The main complexity will be to cut the appropriate form. This imposes some restrictions on the materials used - beams, boards and bricn in many similar designs are technically not applicable.

How to make from girlfriend
Sometimes it is difficult to restrain the fantasy, then very interesting options for improvised "desktops" are born, which can be used both in nature and in modern high-tech interiors and not only - even at work. It is not difficult for example, make a table from a car wheel, more precisely - tires. Fake it on one side of the chipboard - a little less than the radius, and on the other - the legs. You can decorate the side surfaces and the lid on your taste.

If you drag the table with fibers or ropes, it turns out and the emblem - immediately two in one. To create more efficient fasteners, we bask liquid nails. The lid of such furniture can be made removable and subsequently stored in the "wheel" everything that your heart. With a competent approach, such ailepture will become a mini-safe, where it will be possible to protect things at least from children, and not every unlucky thief, bursting into your home, guess such a little trick.

No one bothers to assemble the useful design and old drawers: it will be a kind of interesting table-labyrinth. However, here you need to be very attentive - many craftsmen who posted their creations from the boxes on the Internet, it turned out something rather reminiscent of the urn. To avoid this, do not leave too much free space in the center of the structure.

Another, perhaps, even more extreme option - designing a table based on an old suitcase. Such Soviet Mahina is waiting for an hour of their disposal at many balconies of the country, and, perhaps, it was now that their starry hour has come. Just do not rely in the literal sense of the word to exclusive Soviet quality - it is better to strengthen the product with sheets, let's say plywood. There will be more legs and wheels.

Before starting work, disinfect the product. At the final stage, it can be covered with varnish, paint or plane cloth. This option is suitable for colonial and various retro styles, and indeed in any room will look at at least original. With benefit in work on a table, you can use old frames - the main thing is to strengthen well. With adequate design, you can achieve all the advantages of the effect of pop art style.

Loft style pallets will decorate almost any interior of the modern living room. You can also make an interior object from pallets, from the old window sill or countertops (with an antique effect), from ceramic tiles, proftrube. A table made of profile or tap pipes is at all a fashionable idea. And in general, it will be suitable for creative furniture to create creative furniture: from old chests and barrels to mirrors, rolls of wallpaper and batteries - the main thing is to trust your fantasy, feeling of style and technical skills of working with material and tool.

Beautiful placement ideas in the interior
And finally, consider some interesting examples of homemade tables in various interiors. Let's start with the cottage. At a distance of several meters from the landing, a large table made of lacquered boards will be fitted. It will be perfectly harmony with greens will be light or dark brown. The tabletop is separated by five parts along a narrow part (by the number of boards). Creaping them from below, keep the effect of naturalness and naturalness.

On the bottom, the table will also be bonded by two overlaps, which will be convenient to put legs. Benches are also attached to the table (consist of three boards each). Favorable design is emphasized with additional neat threads on the sidewalls. As a result, before us is hardly a sample of the most pre-revolutionary royal Russian style of the middle of the XIX century or even modern (how to see).

It was in such an entourage that the connoisseurs of rural idylls met guests at the beginning of the 20th century, organized creative meetings, exhibitions and even theatrical performances. Such a table does not look old-fashioned, he seems to continue the interior of a classic country house, where, minimum, glass and metal.

Another example. Table river for the living room. The transformer is the easiest way to do, making it imitation, that is, not to use a plug-in design, but to paint the product accordingly. In essence, it is a classic wooden table with a relief surface that will successfully stand next to the sofa or seating.

The color is better to select depending on the stylistics of the room. Light wood will be harmonized with light light tones and vice versa. The scratched part (blue or its shades) should be harmonized with a chandelier or ceiling. On this table, there will be a nice vase with flowers or greens. The more simpler the design of such a table, the better it can be used as a journal, and as a dining.

The following idea is for an angular computer table, is also quite real for exercising with your own hands. Corner parts we will make rectangular, and protruding on us an arbitrary but wide and comfortable form, so that you can put a hand on it, put the keyboard. Materials use Faneur or LDSP.

The usual wood is suitable, as well as old table tops, but it will be somewhat more complicated to work with the form. If still chosen "difficult" material, pay attention to the varnishing and painting, these stages work is better to pay increased attention.

Color gammas We use homogeneous, not by abusing light shades. In our example, the table will be brown. However, for the perfection of the designer idea, the color of the table with the color of the monitor, keyboard and system unit should be harmonized.

Among the night tables, the two-level option will be practical and uncomplicated. It is easier to make it rectangular, but if you allow skills, it is better to do it all the same round. The lower overlap is placed at 10-15 cm from the floor, the top is at the level of the mattress height.

For the bedroom, decorated in dark colors, is suitable for soft dark texture. The table can be painted even into black paint. It will thus become a color spot in a room that attach an additional contrast of the bed and the floor. A pleasant visual effect will appear if you place a decanter with water and a glass on it.

And the last example is a compact small night bureau with two drawers. In this case, we will pick up dark colors. Wood will need to be well treated and covered with varnish. The design of drawers - the most simple.
Kitchen restaurant kitchen table as such. Probably, even over it: large flat stones at the foci, served by cutting, handouts and dining tables, were found in parking and in settlements of primitive people; They preserved the remnants of products and food. In this article we will see how to make a kitchen table with your own hands completely at home. This will not only save the enynu amount (in general, it is not a ruinous), but also will provide an opportunity to purchase the initial joinery skills, which may continue to be much more significant. In the kitchen tables, the most common types of furniture compounds are used, but its design forgives rather coarse flaws in the work. There are perfectly looking types of kitchen tables, for the manufacture of which is enough to be able to saw a piece of the board and complete the screw.

The table in the kitchen gives considerable possibilities of creative expression: the skills here you need a lot less than fantasy, but failure will not spoil the whole interior. Samples of original kitchen tables in the photo are below are quite available for making with your own hands, but before you need to feel the design and material at the base level in what we will try to help the reader.

Make a kitchen table can be at least 15 different ways., including artistic forging and casting from homemade artificial marble. However, we, firstly, limit ourselves to kitchen tables from a tree, as a material that allows you to get the desired result with the lowest labor costs, cash and time.
Secondly, we will deal with table tops with rectangular or rounded corners. Round table requires 1.6-2.2 times more useful area than rectangular to the same amount of consumers. Moreover, the first value refers to the case when the hostess is deprived of a free approach to it and it is necessary to serve on the table through the shoulder of the seated. This is already refer to the category of parodies on the rules of good tone. Like, how to tilt the plate, coming soup: to yourself or from ourselves? Answer: Depending on what you want to pour, yourself or a tablecloth. In addition, the round table in a small kitchen is stronger than the rectangular of the same capacity in T. Naz. Triangle functionality, see below.
Dimensions and ergonomics
The height of the kitchen table is ordinary, 700-780 mm, Considering from the floor to the top surface of the countertop. For people of medium growth optimal, the height of the table is 750-760 mm. But with the size of the kitchen table in terms of the situation is more complicated.
The essence is in the triangle of functionality: refrigerator-washing plate. Ideally, it should be rectangular to be chaled with customers of 1.2-1.6 m. However, the ergonomics of the kitchen is much stronger than some deviation from these proportions, spoils the injection of the dining area in the hypotenuse. Simply: the hostess bent over washing or stove was bent, and rested in seductive forms in the worst cheek just when that spoon to the mouth was raised. Therefore, the table is in the kitchen, especially economical layouts, it is advisable to do smaller, if only consistently it was convenient.
The minimum allowable sizes of the family kitchen table in the plan is considered to be 600x900 mm. For loners, let's say a table of 450x750 mm, as in the railway carriages. In this case, it in the "microcouphne" or the kitchen zone of small-sized odnushki is also allowed to also make a wall folding, see below. But the optimal sizes of the kitchen table countertops are considered (650-800) x (1100-1400) mm, depending on the cashier and user complex.
What to do
Traditional kitchen table - on a prestole pos. 1 in fig. Podstoli is the carrier frame of their placard placed on the edge of the head. Tsargi can be tightly bonded with the feet of the table, and the table top is freely imposed on them; those. Its fasteners prevent only horizontal offset. Such a table of kitchen sizes is simpler constructively and stronger, but to bring it harder, especially if the passage to the kitchen is narrow. The second option - the kings are tightly fastened with the worktop, and the legs are removable. The countertop in this case is needed durable and not from any, suitable in pre. case, material, and the design is harder. But there are no problems with drift / removal. Both of these variants of the classic kitchen table will be described in more detail below.

The table on the prestole can be artistically decorated, pos. 2. Make a kitchen table of artistic appearance at all is not so difficult as it may seem. The basis of its design - the accurate shaped legs - perfectly obtained from the available balasine for the rail (see below). Figure washed the Tsarg for a novice wizard who knows how to handle the electrolovik, the problems are not present. Calewing remains - a shaped chamfer on the lower edges of the CARG. For her, you can rent a manual milling machine with a cut-off profile with a cutting profile, the work itself, the work on the vehicle pickup takes less than an hour plus 10-15 minutes of workout on some trimming.
No less common tables of beam construction, pos. 3. They are in the simplest performance (2 options see below) looks like tables with understand. However, to fulfill them in the design of a high class (pos. 4), a well-equipped carpentry and solid production skills are necessary. The beam tables require more material consumption, but their indisputable advantage - they can be fulfilled completely collapsible without tools (also see below).
Tables with a bearing tabletop without a podstoly (pos. 5) are also very often found in the kitchens. In factory execution, this is perhaps the cheapest view of good quality kitchen tables. A set of legs for such a table + a tabletop of post-standing (see below) will cost somewhere in 2500 rubles, and the assembly will take from the force of the Pole. But with a completely independent manufacture of such a table, a beginner will face some essential nuances, see below.
Tables books, they are tables-stands, pos. 6, initially produced a furyor due to their compactness in the folded form and the possibility of using half-version, but then there was a period of some disappointment. First, as for such a table, nourish the legs are inconvenient. Secondly, in the first samples, the ficker of the swivel support was the simplest, from the pair of 50x20 bars attached with a gap, equal to the thickness of the support, to the top of the table top. The external plastic of the bars was often shot on a wedge so that the support for them was not cling when laying up the table. However, if you accidentally pry the tabletop with a knee, the latch is immediately released. Therefore, without a soyanka with cutlets and mashed potatoes on trousers and semi with such tables it was not necessary, but a reliable and easy-to-use mechanical retainer went out very complex and expensive. Nevertheless, both amateur masters, and serious manufacturers improve this, in principle very promising, the design, which in this publication will further be devoted to a special section.
Wall folding tables, (pos. 7), occasionally occasionally in very tiny kitchers. Most often - busy bachelors who are accustomed to do everything standing, even sleep on the carpet before the bosses, because They have all the shortcomings of the books-books almost without the possibility of improving. Serving tables (pos. 8) The farm is used much more often, but this is a separate class of furniture objects with their specific qualities and features of manufacturing technology, so here we will limit ourselves to mention.
Technological subtleties and innovations
The kitchen table, firstly, is made of wood or materials, few or not at all exposed to shrinkage while drying: oak, ramp, housing, wenps, LDSP, MDF. The usual business wood in the kitchen atmosphere with its leaks of temperature, moisture and the organic pairs in the air in the air in 5-7 years starts to breed and even impregnated and under varnish. On the other hand, the size of the kitchen table is small. It follows some of the features of its manufacture, ultimately allowing to simplify work.
Table top
This is the main detail of any table. For a homemade table in the kitchen, the optimal option is to buy a ready-made tabletop from post-forming, they are produced in a wide range of colors, textures and sizes. Postforming is a profiled stove from LDSP with rounded ribs, trimmed under a tree or other material. The advantages of post-forming applied to the table for the kitchen are as follows:

Postforming is good technologically, for simplicity and speed. But not as an example, countertops are solid, complicated from the board, etc. Array of wood or furniture shields. Rapidating boards in an array - work is quite thin and painstaking, for this, special devices are used - Viima. If you have a desire to try yourself in the manufacture of furniture from the massif, we offer a selection of video:
How do you collect the furniture shield with your own hands:
How to make a boiler table top of a kitchen table:
How to make a countertop from the end spikes of a tree:
In the last video, the material is a throttle, but the species can be achieved - the sharp oligarchs are dried.
Sucks, Confirmates and Sucks
Traditionally wooden furniture is going on the wizards. The duct connection is invisible and cheap; Just in case we will remind you what it is and how is done, see fig. For the connection of wooden parts, the wooden droplets, drying together with the connected parts are used; Practically does not dry LDSP connected by plastic waders. Corner plastic ducts are little used, because often break. Connections with wooden wanks, as a rule, are sampled.

Beginner craftsmen are often difficult to achieve accurate markup under the dust connection. Tricks, like marking of blurred nails (pos. 4 in Fig.), It is not always helped, and it is impossible to remake the wrong dummy connection, both parts go to the departure. Therefore, newcomers are better to collect their first products on furniture Evromba - confirmates. It is more expensive, but no special skill requires, because The well under the confirmation in both parts, compressed clamp, drills into one occasion, see fig.

Details from LDSP or dense small-layer wood connected by configmatics, keep long years. All designs described below can be assembled both on the sews and confirm. However, in the latter case, the following rules must be followed:
- Use precisely furniture for wood, and not plumbing configmatics for plastic. They differ at first glance: the furniture slot under the hexagon, and at the plumbing under the Cross screwdriver.
- The diameter of the body of the confirmation without a thread when attaching to the end should be no more than 1/5-1 / 3 (extreme case) of the thickness of the attached part.
- The height of the cervates must match the thickness of the main part.
- Blowing the threaded part of the confirmation in the attached part must be at least 5-6 complete confine diameters.
- The well (deaf hole) under the confirmation is drilled on its full length of its head.
- The main drill to use only spiral wood.
- The main drill is necessarily filled with a mandrel, exactly corresponding to its diameter and the screw siza.
- The wells for confirmates drill the main drill of the diameter equal to the diameter of the thread confinal.
In practice, to fulfill these conditions, even the perfect "teapot" is easy:
- In the thickness of the part, we determine the diameter of the body of the confirmation without thread;
- On the Internet about confirmates of the information, which can, know the diameter of the screw body, the thickness of the main part and the depth of drilling, determine the desired size. It is better to immediately open pictures on request "furniture screw (or confirm) drawings sizes";
- We are looking for a trading point where the seller on the request to show furniture configmatics shows themselves;
- We say: "I need so much of such a size and drill with a mandrel for them." They can offer one-piece drill to such confirmation, it will be cheaper.

And a little more about the wanks. It is best to put a taking place (freely pronounced) table top of the classic kitchen table. Including And for such purposes, plastic waders with a rounded head or a woven widths and a different type of ripples on a long swallowed and short protruding parts are available, see fig. on right. The first fasten table tops are thick, approx. from 20 mm; Secondly - which are fond.
Different tables
Classic
Classic tables on the prestole at the same time with legs (pos. 1 in Fig.) Traditionally bind (collected) on spike-groove compounds, which is quite difficult and time consuming. A modern tool - a drill with a spiral drill on a tree and a screwdriver - in combination with legs, whose ledge cross-section is not less than 60x60 mm (the balasine is usually from 100x100 mm), allows for a kitchen table with dimensions in terms of approach. 750х1500 mm to do with the joint of the tree by self-drawing, pos. 3. In any case, the external CARG CARD must defend from the outer surfaces of the legs of the legs of 1.5 cm, so it is necessary for total strength. The minimum permissible height of the Kitchen table kitchen table is 120 mm; Thickness - 30 mm.

The compound by self-drawing is extremely desirable to reinforce the diagonal ties in the corners (pos. 4, at the top) from the same board as the tsargi. If the countertop is not expected to be removed without extreme need, then it is possible to refuse it from the time consultation. Then, at the corners of the finished carrier frame in the kings, trimming of the same boards - crackers are cut - and a countertop will be attached to them with self-draws, pos. 4 below.
Table top of the classic table with removable legs should be thick of 24 mm (LDSP, plywood) or from 30 mm (wood massif). Countertops from dr. Materials, eg Artificial stone, suitable for tables on the substole, at the same time with the legs here are not applicable. Due to the large difference in the thermal expansion modules and the tree, the table will soon be overwhelmed.
Further, the kings are attached to the tabletop with long confirmation through the end, on the left in Fig., With the sizing joinery and pva. With the help of conventional wood screws, it is difficult to achieve an accurate assembly, because They are without a cervix holding the joint from the offset.

The next moment is driven in the corners (in the same place in Fig.) It is necessary necessary, wooden mortise or ready-made steel overheads. The legs in the corners are attached by conventional ways, on the right in fig.
Table box
Retractable box is a classic classic kitchen table constructive module. The guides for the table drawer are the same as for the bedside tables, chest, cabinet. Since a large weight load in this case is not expected, and the smoothness of the drawer and the possibility of its complete extension of great importance does not have, you can use inexpensive roller guides on which keyboard boards of computer tables.

The furniture drawer device is shown to the left in Fig. Collect his tray on the old manner on the drawn spike (right in Fig.) It is not necessary, you can self-strain in the ends of the boards. The thickness of the boards for the king box is 12-20 mm. The plywood bottom is often fixed with a furniture stapler, but not quite reliable. It is better to attach with self-drawing through the cranial bars along the bottom contour. The facade of the box can lean on the facial tsard of the table or enter it flush, it does not matter.
To install the box, the table in the longitudinal facial targe is cut out the opening of the cross section of the drawer tray, plus letters on the sides on the guides (indicated in the specification on them), plus 3 mm in the contour. Then the side support boards for fastening the guides are installed. They are fixed to the longitudinal tsargam from the inside with the help of lining bars. It is not necessary to fix with the countertop. Next, collect the box, attach to it and to the supporting boards of acc. Details of the guides, pushing the box in place, that's all.

Very simple
A completely simple, but well-looking kitchen table of classic appearance can be made on the carrier frame from the boards, see fig. on right. Its length, if the cross section of the Tsarg is at least 120x20 mm, can be increased to 1100 mm. Countertop - any weight of up to 15 kg. The angle of inclination of the legs from the vertical is 15-20 degrees, it is one principal moment in this design. The second is transverse screeds from a bar 50x15, they give the whole design the desired stiffness. So, although this table looks classic, in fact he is already a beam.
Beam
Drawings of pairs of kitchen tables of the beam design are given in fig. At the top - completely collapsible without tools. The countertop is structurally any, put on the wanks, although the style of this table (Rustic) fully corresponds to only the table top from the wood array. The option of its fastening from the ultra without a wizard on the cranial bars is shown on the insertion in the center of the right.

In this product, the lower stumbling block may appear the lower bandage (longitudinal screed) with a beveled through groove under the wedge. In fact, everything is very simple: the lower gleaming is assembled on glue from 3-layers of 10-mm plywood or boards. How the beam kitchen tables of this type are made, you can see the following video:
Video: do-it-yourself table by components
The table, the drawings of which at the bottom in fig., Has 2 features. The first, all material is a board with a width of 120 mm, the bar is not used. The second - under the tabletop is provided only by the tray, and it can be glass, plywood with a mosaic of tiles or her debris and others. The gap between the countertop board and the tray of the tray is prone to clogging, but also to remove the tabletop for cleaning too easy. So Rustic is or modern, the kitchen is a table, the future or magazine, you decide.
Without a substoller
Factory kitchen tables without sheets are usually produced with post-standing countertops, pos. 1 in fig. Those who wish to make something similar on their own under the wooden countertop will face the following trowes.

The first, the substolenik is still needed, from a wooden bar from 50x50, pos. 2. The fact is that mechanical stresses in the boards always flock to the corners, where they are distributed very unevenly. But the wood under all the 3rd dots of mounting the feet should be strained about the same, otherwise the fastening is separated by itself. The blocking from the bar is expanding the fan of stresses in this place to an acceptable value, but it is impossible to replace the solid strapping of the corner linings, there will be no sense from them.
The second is the table top. Full-handed threaded nests for mounting row of legs (pos. 3) are designed for LDSP or dense small-layer wood. If the tabletop is pine, etc. The layered sufficiently soft tree, then the sockets can, breaking the layers, get out back to the installation time. And the likelihood that it will happen when someone is an intense pushing the table close to 100%
And the third is the feet of the legs themselves. In cheap sets of parts for tables without sheets from "alternative" manufacturers, they are most often sympathetic, pos. 4. And silumin, as you know, very and very fragile. In general, if you like such tables, it will be easier to buy ready with a guarantee. Most likely, and cheaper than typing a set under self-assembly in retail.
Books and Cheburashka

On the disadvantages of the table of the original design (see fig. Right) above already mentioned. In fig. Below is the drawing of the desktop design (only one swivel support without wings of the table top), eliminating their amateur, but efficiently. Simply, the width of the swivel support is reduced compared to the wing of the table-tops more than twice (350 and 720 mm, respectively). Now the support turns 90 degrees, it became convenient to sit as you want. The support, located in the working position along the longitudinal axis of the table, keeps it even better than oblique, and to raise the worktop to the exit of the top plank of the support from the simplest retainer (see above), the knees need to shove so that it will be very uncomfortable. The overall stability is provided by the legs of the table section, which should be done as long as possible, but not less than 600 mm. Otherwise, swivel supports must be brought down to the floor level.

A fundamentally similar solution was also applied in a wall folding table (pos. 1 and 2 on the next. Fig.), But here it works on the operational reliability of the hanging corner of the support. What is quite applicable in before Case: no contraindications for the execution of the support in the form of a convergent metering a trapezium.

The proprietary solution of the problems of the desk books is the removable legs stored in the end. Put them not much stuck than catch the swivel ficker on the table top. Such a table book turns out, of course, more expensive, but its operational reliability is complete: there is no lock, because He is simply not needed.
The next step of the evolution of the desk books is a design with a big width table and a 1st leg for each tabletop wing. The legs twice smaller than the table is cheaper. Its stability due to the extension of the stands only increased, it is generally convenient to sit, and places in the end (which is always lacking in the kitchen) it became more.
Such kitchen tables had to taste to consumers that they had already been assigned the nickname - a table-Cheburashka. Probably remembering from the cartoon: "Here, we built, built, and finally built." Folding kitchen table, how should he be.
Alternative
If your kitchen is combined with a living room or you plan to combine them, then think about the kitchen table and do not need to replace it on the column. On the bar is not only drinking, it can also be on it. The meaning of such a replacement is that at least half of the dining area goes outside the kitchen, and the remaining is used episodically and does not embed into the functional triangle. Result? See fig. In a 5-dimensional kitchenette in the bar - the apartments separator to work and dinner more convenient than 8-9 meter cuisine of Brezhnev. Will not believe? Calculate.

The kitchen table is not worth it in itself. To plant consumers, you need to add 400 mm by contour, and another 300-350 for approach. As a result, the 900x600 mm table is required approx. 2.5 square meters. m "living space", and table 1200х700 mm and all 3.5 square meters. m. Drink such a thick chunk in the kitchen of ordinary sizes, without leaning the functional triangle schochka, very, very difficult. It is also here even if two will sit behind the counter side of the kitchen, the functional triangle is not disturbed, and to file the hostess before everything.
Some of the famous culinary culinary culinary one day: "Kitchen is conservative, like a digestive tract." Here he, of course, begged and leaving. Something like a plate, refrigerator, kitchen combine and microwaves in our stomach is not detected, although the kitchen is really conservative. But in the most conservative sphere, sometime, there comes a moment that requires indigenous changes.
The kitchen table is your own hands - this is the opportunity to save, and the way to ensure the kitchen with unique furniture, perfectly fit into the available space. However, it is important to correctly identify the dimensions and the form of a future design.
How to make a wooden dining table
The table from the wood array is beautiful, naturally and, as a rule, expensive. But it is not necessary to buy such a table, because you can make it with your own hands no less qualitatively and for much smaller money.
So, to make a dining table with your own hands you need:
- 4 things. leg legs for a table, 73 cm high and not too thin;
- For table top: 4 Dry cutting wooden boards with a length of 1 m (for a table with a width of 60 cm);

- For frame: 2 boards 80 cm long and 2 40 cm long boards.
Prepare the tools: the planer, the grinder or grinding machine, the electrolovka to circumcise the boards, circular saw, drill (with a 8 mm drill), a screwdriver, sandpaper, self-tapping screw (30 mm), carp and carbon black, wrenches, clamps (preferably). And, of course, you will use a pencil, roulette, gloves and safety glasses.


For the finishing of the table, it will take a varnish, a simulation or paint along with the primer. First make a worktop. To do this, you need to easily adjust all 4 boards for one length - 100 cm. If your boards were not cut onto the panel, then they need to be overwhelmed along width and thickness. Then they need to carefully polish the plane. The better you get excited wood, the more smooth the tabletop will turn out. Well process edges so that the boards can easily fit to each other.
You will not connect the boards with self-testers and nails, but glue and ducks (choppers). To do this, on the edges of all boards, we make the same marks in 10-15 cm increments and drill holes for the drill of 8 mm drill. Then he sanding the edges and put on them and in the holes made joinery. Now the choppers are processed by the same glue, we drive into the holes and in turn connect all 4 bars. Excess glue on the surface remove the sandpaper and grind it, as well as all the edges of the plane. At this stage, you can walk on the tabletop with a metal sponge to give the wood texture.

So, the countertop is ready. Now you need to make the legs and make the base for it.

To do this, it is necessary to smoothly bore balusters with short transverse boards with glue and screws. The glue dries at least 12 hours.


Fresh legs to long crossbars and drill holes in them in order to set the table top later.

After the glue in the frame will dry, you can start installing the countertops on it (frame).

If you want to make the table longer and wider, then you need to strengthen the table with two additional transverse strips, as shown in the photo.

So, the table is almost ready, it remains only to be treated with a varnish or a verse or paint, pre-trunking.

What color to paint the table? Relieve yourself from personal preferences and colors of the rest of the furniture. Below is the most universal option - the table top and the legs are covered with verses.

We can see the main errors of the wood of the tree in this video.
If you like the gloss, then the surface of the table can be covered with a veil, and from above - varnish (an example in the photo below), or just cover with varnish.

You can paint the legs into white, and the worktop is covered with a verse to make such a design, as the next photo.

How to make a kitchen table from chipboard
The kitchen table with their own hands from the laminated chipboard is a practical and budget decision. Such countertops are covered with decorative plastic, stable during abrasion. In a typical version, the size of the table top can make up 3000x600x36 (26) mm, but today it is not difficult to purchase a DSP sheet, painted to the necessary dimensions or agree on the furniture workshop for the sale of a suitable trimming.
You will also need:
- Connecting and end planks;
- End edges;
- Shrews.
Even if you acquire a tabletop of suitable sizes, you will need to additionally process ends - it will make the result more attractive, and will also protect the base from moisture. For these purposes, you can use a special furniture Cant based on polyvinyl chloride or glue the edge tape. An option with Kant is considered more practical for the dining table and suitable for home masters.
For the kitchen table, the corresponding supports will be needed - you can buy legs individually or give preference to the finished base. It all depends on what option your drawings provide. The most common option is the round legs d \u003d 60 mm and a height of 71 cm. They can be collapsible, with adjustable height, and also differ in design - matte, painted, shiny.
In our case, it will be chrome-plated shiny legs-rods with a diameter of 60 mm, as well as a tabletop of white bricks with a thickness of 36 mm, and a white plastic liner T-shaped cant with girths is selected.

So, how to make a dining table with a tabletop from chipboard:
- The markup is applied to the material according to the drawing. At the angles of rounding should be a radius of 60 mm.

- The countertop is attached to the form with the help of an electric bike.

We should use a saw with reversible teeth, because otherwise the chips of plastic coating are possible. At first, the angle of the chipboard is trimmed with a labzik with a margin of 2 mm, and then finally spinning the grinding machine.
- Milling grooves for furniture Cant.

- Cant is stuffed. Before this, the ends of the product are necessarily covered with silicone sealant. The sealant is laid in Kant, and to the top side of the table top. For packing edge used rubber Cyans. After that, the excess sealant is removed.

- Fasten legs. To do this, on the reverse side of the table, the markup is performed by a pencil. In most cases, the legs are placed 100 mm from the edge.

For attaching holders, self-tapping screws with a secret head of about 20 mm are used. After that, the legs are put on holders and fix the hexagon key - all, your new table is ready.

How to define dimensions
According to the principles described above, you can make tables more or less in length and width. How to choose an optimal size for your family?
If we are talking about standard kitchen with dimensions from 6 to 8 squares, then the drawings will demonstrate a typical structure with a height of 750 mm and a perimeter of 800 * 500 ... 1200 * 600 mm.

The dining table must be calculated on a certain number of people. Usually it corresponds to the number of tenants - 3-9, but a pair of free seats is still added for guests. For large companies, there will be a good solution.

Calculations are carried out as follows: the number of persons multiply by 60 ("working" perimeter per person). As for the collar width, here we follow the recommendations of the specialists - its optimal values \u200b\u200b- from 800 to 1100 mm. Narrow tables are complex in serving, and wide - uncomfortable for sitting.
If you decide to make a kitchen table with your own hands oval (round), you will have to calculate the circumference length - diameter * 3.14.
Form choices

The shape of the kitchen table plays a significant role in the perception of space. Universal design - rectangle or square with straight corners. It is distilled and can be installed close to the wall or in the center of the room, saving space.

Oval models are quite comfortable and beautiful, but they do not have a lot of capacity - not more than 8 people will place the overall product. In addition, they require large areas - more than 8 square meters. meters, because they won't put them on the wall.

You can also be called a universal and traditional option suitable for both very and large cuisine. But it has a smaller capacity than a rectangular table.
The optimal option is a rectangular table with rounded corners. How to make your own hands just such a table from the chipboard we have already told above.
Furniture Care Rules
After the dining table is made, you will need to take care of the long operational period of the product.
So, wood furniture, polished and varnished, needs careful care, because it can easily be scratched. In addition, there are traces of contact with hot. A universal polishing composition is selected as basic wood care.
If we are talking about a tabletop from MDF or chipboard with a plastic coating, then the care is not complicated and lies in regular washing detergents.
Do not forget that kitchen furniture needs to be moved away from the heating devices and from the walls bordering the street. The straight sunlight is harmful to wooden furniture.
Without furniture, it is impossible to present the dwelling of each modern person. The usual subject in the interior is the table.
Proper motivation
About how to make the table with your own hands, is very written in specialized magazines and books. However, read them, and even more so learn the skill of a busy person once.
The table performs several functions - complements the interior decor, the working area. This furniture design is found in the kitchen, offices, cottage, industrial premises. A similar interior element is sold in a wide range of different sizes and configurations. With proper design, you can make good options with your own hands.
At the same time, the desire to make a self-made thing is persecuted not to comprehend the universal quality of carpentry skills, and in order to save on the elementary household item with their own efforts. Those who can keep the tools in their hands, you can skip numerous lectures on the safety and purpose of screw and hacksaw.
As a council, you can recommend: replace conventional attachments on special screws - furniture. Work with them goes much faster, and the product is much stronger. It's a shame when after so much effort the table "spread" as a toy.
For the assembly of furniture will always be useful: roulette, drill (better electrical or battery), drills, screws, hexagons.
A homemade design is much more profitable at cost than an industrial model. In addition, individual design can as much as possible to solve the issue of interior.
Preparatory work
To start experimenting, you need to at least approximate how to make the table with your own hands. The first thing is made up sketch. It reflects the detailed features of the future product, its dimensions. The basis of any design is a tabletop and legs.
It is worth disturbing about the presence of tools, with which work will be carried out. It is more expedient to disassemble the task to the steps: the manufacture of parts and the assembly of all components of the elements. After the main work, you can start finishing events. These include protective coating with varnish or other composition.
Table for giving and gazebo
Newcomers worth starting with the simplest option. In this case, samples are ideally suited, followed by using in the country or in a gazebo.
Start work from the table top. Our homemade furniture will be rectangular. To create it, boards will be needed. Of the ten wooden grinded boards, the width of which is 10 cm, it will be completely spacious. With such furniture you can find guests and celebrate holidays. The material thickness must be at least 3 cm. A thinner base will be fed.
The most "running" counters are 1 to 1.5 m.
Fastening details
The boards fold into the order conceived by the sketch, from the bottom side there is a transverse bar. Details will be required in the amount of two pieces of 100 * 5 * 2 cm. The whole design is tightened with self-draws. Diagonal grip will help to avoid chaotic movement during operation.
Self-tapping screws are selected for wood work, with a diameter of 20 mm. The glued boards are drilled at several points. The drill size is sufficient so that the tapping screws passed into the holes. Thirdly drill on top of the holes are made of recesses for landing screws of the screws.
For strength and durability, you can make a table from a double row of boards. For this, the surface of contacting materials is lubricated with glue. Rubber or PVA glue is the most reliable.
Fastening of support legs
On the back of the corners, mark the location of the support legs. For convenience, you can display template parameters.
Options of legs are of different complexity - sliding and on wheels. At home, the most convenient way is the manufacture of legs of a wooden bar. For this purpose, the details are taken in size: length 1 m, thickness 5 * 5 cm.
In a specialized store you need to purchase furniture corners. With them fastening the support will be more reliable. Armed with self-drawing and screwdriver, fix the details in the intended place.

This technique is appropriate for a very simple table. If it comes to the manifestation of the initial skill, the option is very relevant. This project can be taken as a basis when performing all subsequent work by adding additional details.
Create for kitchen
If it is planned to operate this object of furniture in the kitchen, you need to decide on its location. Geometric proportions may be different, for this room, suitable as a square and round table.
To eat food, holidays took place in a cozy and comfortable setting, much depends on the environment. The table occupies a special place. Practical advice on how to make the table with your own hands, will help to arrange a dining area in the best possible way.
The classic option provides a wooden countertop.
The tree has the ability to look noble in solo execution. There is a more complex manufacturing option. Those who want to get a beautiful table, need to be stocking material and, of course, patience.
Wooden bar with a cross section of 35 * 35 mm will replace purchased legs. After all, not all can be purchased in a specialized store.
The design is assembled by mounting the countertops to the bars (legs) around the perimeter.
Option for miniature territories
The tabletop, mounted with loops to the wall, can also be considered a desktop for small apartments to consider how to make a desktop on the kitchen with a folding table. The space beats the free zone for movement in the kitchen. At the same time, the beauty of the interior will not suffer.
Additionally, the support leg is attached in the middle. Many find in this version the only salvation from narrow apartment meters.
We comprehend the perfection of aesthetics
Today, dining glass tables are gaining great popularity. Wooden tables create a feeling of comfort and landed life. Create a feeling of lightness, freshness, weightlessness and not losing homemade comfort with glass furniture.

For such interior items, special durable raw materials are produced. The source material is not at all similar to the usual glass installed in the window frames.
Manufacturers take into account the future weight of gravity, which will fall on the surface. By the way, when buying a finished glass table, pay attention to the manufacturer's recommendations or ask the seller-consultant about the permissible load on the table.
In the case of a wooden table, a working tool is coarse fasteners - self-tapping screws, screwdrivers. Super loyal furnace fits here.
If the student is in the house
Written table is an indispensable subject of the house, an apartment where there is a student. This attribute of the interior over many years has taken a plurality of forms and has been made from various materials. However, it is important for convenient operation to leave free workspace.

From the simplest girlfriend - chipboard panels - you can perform a completely decent table for a schoolboy. The panel is taken at the same time on the table cover, side and rear walls.

Such details are attached using metal furniture corners on the self-tapping screw. Holding the future table in a strict fixed position, the screwdriver you easily connect the panels with each other.

If you show a little fantasy, the children's table can be transformed with additional niches, shelves. The child will be very convenient to have the necessary book or pencils at hand. Future shelves are attached to the remnants of the chipboard on the side panels. For more reliable fixation, screw the metal bracket at the bottom or the corner.
Universally. Individually
Having at least some experience in working with carpentry tools, you can make a transformer table. This unique furniture is capable of taking unusual forms other than the positions specified initially. Many remember the table of book when a wide table for meeting guests can be laid out of a folded bedside table.

Without prior calculation and the plan can not do. The drawing indicates the places of future bend, fastening the loops, mounting the support legs and other tools, with which the table is assembled: a jigsaw, screwdriver, hacksaw, corners, furniture rollers, edging plastic, film, wooden bars, glue.
In the folded state, everything looks like a narrow table. But if necessary, he "lifts" his "wings" and turns into a wide, welcoming table. The middle always remains unchanged. Two halves on the sides are fixed to it on the furniture loops. They serve as an additional area for hosting.
From the MDF always turns out good countertops. The material is used as a familiar option, however, you can apply any healthy raw material.
For this, two parts are cut out, which are flown by the film, are processed by plastic. Also, the jigscription is useful when smoothing the corners, turning them into semicircular forms.
Racks are manufactured from bars. Fixed all with self-draws and glue. To minimize the load on the floor covering and not damage it, the furniture roller is mounted in the rack. Then the assembly and extension of the table will not entail the scratching of the linoleum, parquet, laminate.
There would be skillful hands ...
It doesn't matter that the conceived sketch did not embody in the expected result. The main thing is that you have a thing that will benefit and aesthetic pleasure. Sometimes for a long time, drunk trash turns into a masterpiece. The main thing is that not the opposite.
If there is a huge desire to express yourself in useful work, but there is no skill, you can start with simple designs. Miniature models are no less interesting and relevant in the house. For example, coffee tables. The material is consumed in smaller quantity, which means that the fear of spoiling in inexperience the good-free raw materials is minimized.

The principle of operation is similar to what was used in previous versions. Here you can show all the creative potential - carved legs, openwork countertop, decorated elements. The answer to the question of how to make the table with your own hands, depends on personal imagination, courage and desire.