Baby cot by your own. Do-it-yourself children's bed with drawers
It is important for parents that their children grow up in a comfortable atmosphere, and nothing threatens their sleep. If a person has a minimum set of tools and basic knowledge, then DIY baby bed it will not be difficult to do, provided that you have Photo, product sketch, blueprints... The device of such furniture is simple.
Scheme and dimensions of a crib for a newborn
Parents know that a crib for a baby, especially between the ages of one and four, is especially important because the baby sleeps a lot. The right furniture is the key to a comfortable sleep. For small apartments, such a crib in the nursery can also replace the playpen.
It is easy to make it in two or three days and provide for all the subtleties and nuances for the comfort of the child.

The right furniture is the key to a comfortable sleep.
The first step is to figure out what elements this structure will consist of.
- Mattress. It is chosen based on the weight and age of the baby, therefore it is better not to do it yourself, but simply buy it in the store. The purchased mattress was developed in cooperation with orthopedists and takes into account all the body's needs for a comfortable sleep and the correct formation of the child's spine. Mattresses are divided into two main types: on a spring block and without springs. The version with springs can be on an independent spring block (each spring is placed in a separate bag of non-woven material and the load on such a mattress is distributed pointwise) and on a dependent spring block (the springs are united by a metal frame, and the weight of the sleeper is distributed evenly over the entire area of the product).

Comfortable hanging crib
These mattresses are best purchased for children over 5 years old. And for babies with low weight, products on a springless block are recommended, where the frame itself, as a rule, consists of polyurethane foam or foam rubber and, depending on the degree of rigidity, may be supplemented with coconut coir or other materials.
- Frame. This element is made based on the size assumed by the bed mattress. The material for it is most often a planed board.
- Lamels. These parts of the product are designed to support the mattress from below and are slats inserted into the furniture frame. They form a lattice with a distance of about 5 cm between each other (for ventilation of the mattress).

Making a crib with your own hands master class with drawings and photos
- Sidewalls. They are a fence so that the child does not fall out of the crib. Depending on the wishes of the parent, they can be high or low, solid or carved. At the headboard, their height will be higher than at the legs.

Drawings and photos of a crib for a master class
- Legs. This element can be made by hand or purchased at a specialized furniture hardware store. They can be initially planed on the sides of the crib, or they can be screwed to it.

Crib drawing
Determining the model
In the children's room, several types of beds are most often used:
- With drawers
- Loft bed
- Bunk bed (if there are two babies in the room)
If the premise of the children's room does not allow putting a large bed in the room, but a compact model is needed that can save square meters, then it is better to choose a design with drawers. Drawers are used to store bed linen, toys, children's items and everything that does not fit in a child's chest of drawers or cabinets.

Baby cot on two levels for small children
In order for the furniture to be of high quality, it is necessary to select environmentally friendly materials for its manufacture. Thick plywood or wood is ideal. Popular in the furniture industry, MDF or chipboard is not worth purchasing for the manufacture of structures because of the adhesives used in the manufacture of materials. Chemicals can negatively affect the baby's body, causing allergies.

An original bed for a stylish interior of a children's room
Advice: It is not recommended to make a crib smaller than 1.5 * 0.6 meters, but you should also not make it huge more than 1.8 * 0.7 meters. A child will quickly grow out of a small crib, and if you make it too big, the baby will not feel comfortable in it.
The base for such furniture is made solid, it can be purchased ready-made, or you can simply use a sheet of plywood instead.
Its dimensions should be based on the size of the purchased mattress. A grille can be purchased as a base, but plywood can be used as an option, since the child's weight is not so great.

Thick plywood or wood is ideal.
Wood shield. It is better to use wood with a low resin content, such as birch, linden. The size of the shield is recommended to be taken with a length of two meters, a width of 60 centimeters and a thickness of about 3 centimeters.

On the furniture board, the future outline of the workpiece is drawn with chalk according to the dimensions of the sketch. If it is necessary to make holes on the sides of the structure, then they are drawn by attaching a champagne glass or using an ordinary glass.
Furniture board and plywood can be sawn by purchasing at a store. As a rule, most stores have such services, but it is necessary to provide dimensions in millimeters and patterns. It is recommended to cut the saw on your own with a jigsaw, but if you do not have a jigsaw at hand, you can cut the materials with an ordinary saw.

Furniture board and plywood can be sawn by purchasing at a store.
After cutting, all wood elements are sanded with sandpaper so that the materials from which the crib is made do not scratch the baby's delicate skin.
If it was not possible to find corners made of aluminum, then they are cut from an aluminum profile. The details of the bed must correspond to the sketch drawings. And the length of the corner from the profile must match the length of the side back of the furniture. Holes are made on these fasteners for threading self-tapping screws. The sides are attached with corners to a bed grate or plywood base, and this structure is tightened with eight self-tapping screws.

Original baby car bed for a boy
Initially, the parts are fixed on one side, then the future workpiece is turned over to the side. According to the diagram, the order of fastening the elements and the location of the parts should be checked from time to time. To make the product stable and strong, watch out for distortions and displacements of parts relative to each other. The bed walls are attached to each other and pulled together, if there are no holes in the walls, then they are made using a drill.

The frame part of the product is ready, it's time to assemble the backrest, which will be located above the child's head. If desired, it can be made in any shape, the main thing is that this piece of furniture fully fulfills its function, that is, it protects the baby from injury.

Carved wooden crib for a newborn baby
Very often, small children in a dream raise their heads up, so the sides here should be at least 10 centimeters high. Another benefit of high headboards and headboards is that it prevents toys and bedding from being thrown out of bed.

Original baby cot for a boy
We make a headboard: we take a furniture board, from it, if desired, you can make a carved back that looks beautiful and noble or decorate. The design of the headboard and backrest in the legs must match for the design to look organic.

We make a headboard: we take a furniture board, from it, if desired, you can make a carved back that looks beautiful and noble or decorate.
We fasten the legs to the very body of the bed, which we purchase in a furniture accessories store. We do this using long-length self-tapping screws.

All elements of the bed frame are additionally carefully polished, right down to the slots and cutouts, so that the child does not get hurt by putting his fingers in the slot.
Tip: A smooth sanded surface can be obtained with a drill with an attachment or a sander.

Decorated, polished backrests are attached to the frame frame. So that the fasteners are not visible, they are drilled from below, directing the drill upward. Cutting holes should be as accurate as possible, because this part is easy to damage. We make the hole for the screed ourselves; it will be difficult to make it with a drill in this place. If the wood for making the crib is soft, then the hole will easily break through.

So that the fasteners are not visible, they are drilled from below, directing the drill upward
The configuration of the crib assumes that the storage boxes are not attached to the bed frame, but look like roll-out pedestals. The drawers must be supplemented with wheels in order to roll out the storage container.

Stylish wooden crib for toddler
If the landlord decided to change the configuration of the crib so that the drawers slide out, then a transverse rail is attached to the bottom of the workpiece, and the product itself will stand on the side slats. In this case, the sidewalls are made higher than previously conceived by a few centimeters, equal to the height of the boxes. The pull-out box (drawer) itself is placed on the guides.

Wooden crib for a bright and spacious room
For the boxes, we take plywood with a thickness of 1.2 cm, cut out the bottom and walls of the box, tighten them together with self-tapping screws. Additionally, the box is glued, because the things in the box bear the load on the structure. We attach the wheels to the bottom of the assembled box.

Bright spacious room with a cot
The legs on the bed, if it is decided to make them independently, are made from the remains of a furniture board or from scraps of square-shaped timber. Fix the legs to the furniture frame with self-tapping screws.

For the boxes, we take plywood with a thickness of 1.2 cm, cut out the bottom and walls of the box, tighten them together with self-tapping screws.
Bed decoration
When the work is completed, it is recommended to give the product a finished look. It is recommended to go through it with upholstery fabric for furniture. Previously, parts are cut out of the fabric by 2-3 centimeters more than the main parts and are overlocked so that they do not crumble. The fabric is fastened with a furniture stapler, and its cuts are hidden inside the crib so as not to spoil the aesthetic appearance of the structure. During decoration, the fabric is stretched so that no creases, folds and bubbles appear.

Baby cot for the smallest family member and small bedroom
Another finishing option would be varnishing the crib frame, headboard, backrests at the legs. For this it is recommended to use a quick-drying water-based varnish. More environmentally friendly furniture in the children's room will be stained. Previously, it is recommended to sand and polish all parts with a drill with a nozzle.
19.09.2017
The furniture made at the enterprise, although beautiful, is devoid of warmth. And so you want your own baby to have a cozy bed made with love and care. That is why many fathers create children's beds with their own hands. The child will remember the furniture made by the father for the rest of his life.
Material options
The material plays a special role in the manufacture of the crib. Today, store shelves are overflowing with children's furniture from ...
- natural wood;
- Chipboard and MDF;
- metal;
- plastic and synthetic materials.
Natural wood furniture is considered the safest from an environmental point of view - this fact has long been scientifically proven. Wood does not have that specific smell that artificial materials have. She is able to create a favorable, warm and cozy atmosphere for the baby, which has a positive effect on his health. It is worth noting that natural wood will always look expensive and soundly. Products from this material will perfectly fit into any interior.

MDF is a board made of finely dispersed wood shavings pressed under high pressure. In terms of environmental performance, it is close to that of natural wood. Furniture made from MDF is considered safe for children's health.


In the production of chipboard, formaldehyde resins are used, therefore, during operation, they can emit substances harmful to health. But for many, the price is the deciding factor. Chipboard models have the lowest cost.
Plastic and synthetic products can be bright, very beautiful and stylish. But are they good for the child? Young parents often do not think that toxic substances are used in the production of these materials. Therefore, it is important to remember that during operation, harmful components will be released and harm the baby's health.
Structural elements
The main elements of a baby bed are:
- bottom;
- sidewalls;
- backs;
- frame strips (frame);
- legs.
Baby cots are also available on casters. In models of this design, it is convenient to rock the baby, such cribs are easy to move around the room, if necessary. Some have rocker skids. There are also combined legs: the wheels can be changed to runners, or you can unscrew them completely. There are also cribs, in which the swing is provided by a hinge.
Children's beds can be made in the classic style familiar to everyone. However, wooden models based on the plots of fairy tales and cartoons are gaining more and more popularity today. Undoubtedly, both the one and the other model will look good in the nursery.
However, themed beds often take up too much space.


This is their main drawback, because not everyone can boast of a large living space. Often times the crib has to be pushed into a very confined space. Therefore, sometimes, in order to save free space, homemade beds of the required dimensions are made:
- bunk;
- transformers;
- attics or houses;
- with drawers and shelves.

This piece of children's furniture can be anything you want. The main thing is to comply with the basic requirements: the bed must be:
- safe;
- comfortable;
- beautiful.
Sketches and drawings
If you decide to make a bed with your own hands, then it is advisable to draw a sketch yourself, complete a drawing or diagram showing the future "nest" for your child. In such a drawing, all dimensions should be accurately maintained, down to every millimeter. The strength and reliability of the structure will depend on this. 

A drawing or sketch of the future structure will greatly facilitate the entire process of manufacturing parts and subsequent assembly. The exceptions are. These are quite complex projects for self-production. It is better to take a sketch made by a professional designer as a work plan: 

Manufacturing and assembling the elements of a crib is a complex process. It requires special attention and great responsibility. Even a slight error in work can lead to sad consequences: the bed can break and injure the child.
Required accessories
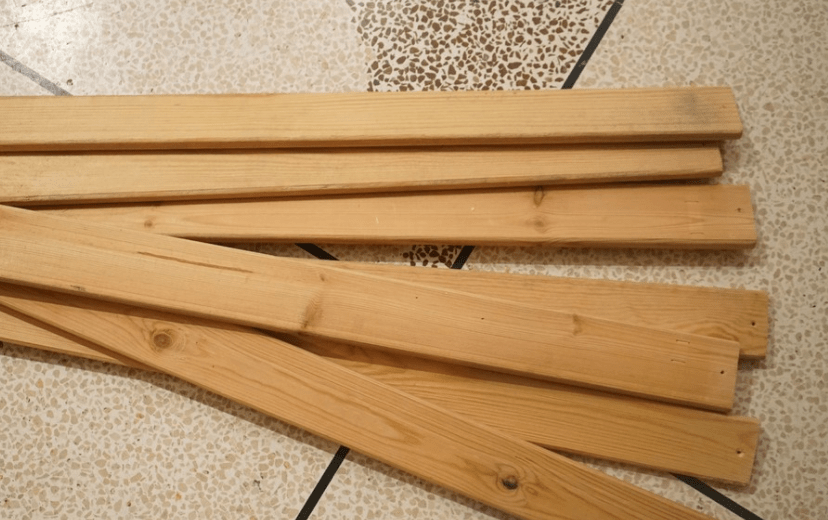
Before starting work, you need to stock up on material. Purchase:
- Edged boards.
- Bars, the cross-sectional size of which must be at least 50x50 mm (needed to complete the main frames of the structure).
- Slats with a cross-sectional size of 20x20 mm (will be used for filling, for example, for making logs).
- Self-tapping screws and bolts.
It is worth going to large stores that have building materials in their assortment. Here it immediately becomes clear that the offered wood is of different quality. You need to choose straight boards with the least number of knots. This will greatly simplify and speed up the grinding process of all elements.


Important! Whatever bed is made (the most ordinary, classic or made for a specific theme), you need to remember the rule - bars and slats must be made of extra strong wood... The quality and further life of the product depends on this.
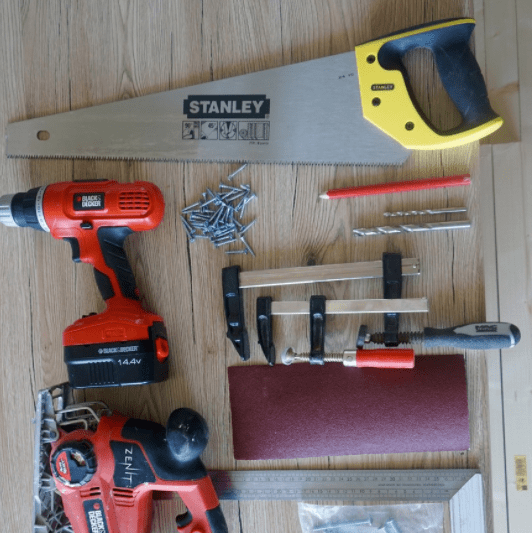
Tool
Despite the fact that the baby bed has a simple structure and can be assembled by anyone, it is still necessary to prepare. Before starting work, prepare:
- roulette;
- drill;
- circular saw;
- Kreg Jig set (special tool for drilling holes at an angle);
- adjustable measuring angle;
- glue for wood;
- self-tapping screws 30, 50, 60 mm;
- water-based varnish;
- stain;
- brush;
- sandpaper;
- putty for wood.
Step-by-step photo report
Let's take the following model as an example:

First you need to choose the right mattress. All the elements of the future design will be made. Then purchase the required building material - edged boards, a bar, slats, water-based varnish, stain, sandpaper and a brush:

Prepare the necessary tools: tape measure, drill, drills, circular saw, Kreg Jig set, measuring angle, bolts and screws of various lengths. These things should always be at hand.
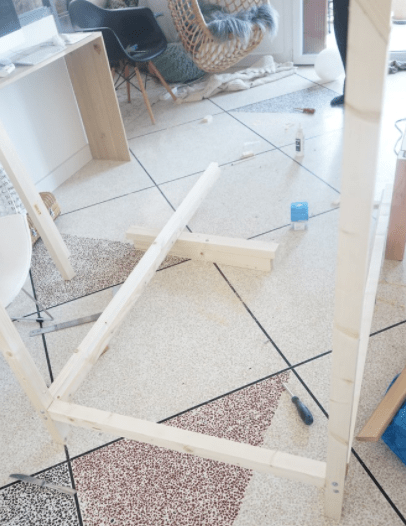
The work begins with the assembly of the side racks:

Make sure all corners of the assembled structure are straight using a square. Mark the places where the sides will be fixed:

After the parts have been sanded and all holes drilled, a little wood glue can be applied to the joints. Without waiting for the glue to dry, the excess must be removed with a napkin.
Fasteners of boards with racks:

If necessary, you need to fasten the boards from the inside at an angle. Use the indispensable Kreg Jig to drill pilot holes. It is a handy and easy-to-use tool.
Fasten the sides of the future bed to the racks:

The crib frame is almost ready:

Now fasten the sides of the second tier:

Then prepare the places where the joists will be attached under the mattress:

First fill irregularities and knots in the frame, then sand. Next, you need to make a ladder to the second tier.

Cover with the first coat of water-based varnish. In this case, Oak Lacra is selected. One of its advantages is that it hardly smells. This is important as there are small children in the house. However, it also has a very unpleasant drawback - it is almost impossible to sand it, and even after drying, a sticky layer remains:

Staircase view:

The ladder in this form is not entirely convenient - it "cuts" the legs, so it will need to be slightly modernized. But more on that later.
The top floor is already ready:

It can be seen that it is necessary to build up the sides. You don't need to add anything from the side of the wall. The bed will stand close to the wall, so there is nowhere to fall. On the other hand, this will have to be done.

Now about the stairs. To go down it was not awkward and painful, slightly process the edges of the crossbars with a hand plow or a sander. This procedure will give them a neat look:

The result of the labors:

The end result is a robust and stable design. Now we can say with confidence that making such a bed yourself, with the abundance of materials and necessary tools that fill the shelves of hardware stores, is not at all difficult.
You will find more ideas and tips for making a two-tier structure.
Decorating
Canopy

Bedding
To sew a pillowcase, sheet and duvet cover, it is best to use natural, breathable and beautiful fabrics. Perfect here: flannel, calico, satin, poplin.

Mattress topper
To protect the mattress from moisture, a waterproof mattress topper is usually used. Moreover, it is easy to do it yourself. For this, a structure is made, consisting of oilcloth (inner part) and knitted, flannel or chintz fabric (outer part). To prevent the mattress topper from slipping, an elastic band is sewn around the perimeter of the product.
The appearance of a child is a new stage in the life of a young family. They prepare for it in advance, at this moment the parents become closer, jointly showing care for their child. The necessary things from the first days appear in the house: oilcloths, diapers, diapers, a bath, special hygiene products, a personal sleeping place. The cost of all the items required can be very onerous for young couples, sometimes overwhelming. Many are trying to save money, for example, they make toys on their own, make a crib with their own hands.
If you draw up a drawing correctly, plan the design of the bed, then the furniture can be used for a long time, from the moment the child is born to his four- or five-year-old. It is extremely important to teach your baby to sleep separately from the first day. It is unacceptable to put him in his parents' bed. Although most mothers sleep very lightly, irreparable things can happen in a dream. In addition, it is difficult to wean a child from the parental bed.
Advantages and features of making a bed with your own hands
Furniture stores sell many models of cribs made from various materials. Mostly wood and its derivatives are used, but plastic options are also found. It is not always possible to find furniture for a newborn that meets all the requirements, and suitable products are very expensive. In this case, homemade designs will be an excellent alternative, they have a number of advantages, expressed in the following:
- Price. Hand-made furniture will be much cheaper than purchased counterparts, which will help save the family budget.
- Reliability. In the process of preparation and assembly, at each stage, the strength of all components is checked.
- Environmental friendliness. The bed for your son or daughter is made only from natural wood, which does not emit harmful substances.
- Exclusivity. An independently drawn up drawing will be the key to an individual, unique product.
- Experience gain. During work, a person acquires new skills that can later be applied in the production of such items.
- Compatible with the interior and style of the room.
When making a bed, you should adhere to certain rules:
- for work, it is necessary to use exclusively environmentally friendly materials, which include natural wood;
- the surface should not have sharp corners, roughness, chips, protrusions;
- the product must correspond to the height, weight, physiological parameters of the baby.
- it is necessary to provide protection against falling, rolling of the child.
- for small apartments or houses, multifunctional structures are suitable, for this you can use the free space under them, install additional boxes, make a play area.
Designs and sizes of a baby bed
The easiest way is to make standard furniture, which consists of four legs, a frame, a mattress and a headboard. The model is used exclusively for baby sleep. If the sleeping place is fenced around the perimeter with walls with lattices, then you get a classic bed for a newborn. Although for such a category, you can use a cradle, arena, rocking chair, attached options.
In small rooms, it is more practical to install multifunctional items. To do this, they are equipped with drawers, a chest of drawers, and other useful items. A very functional bed with an attic, where the sleeping place is placed on the second tier. Below you can organize a playground, install lockers for storing items.
Furniture made in the shape of a typewriter looks unusual. This is an option for older children under adolescence. Non-standard design will allow you to make inconspicuous cabinets inside, hidden under the hood or behind the door. You will have to tinker with many elements, which will require certain carpentry skills.
Among the non-standard designs, you can choose a lodge bed. This model is suitable for children over 3 years old. There are all the elements of a standard item, as well as doors and windows, a gable roof. Decorative items will adorn any interior, will delight every kid.
What material to make beds
When constructing children's furniture on your own, you need to decide on the materials that will be used in the process. The main requirement is that the raw materials used must be environmentally friendly, not harm the development of the baby. Let us dwell on this issue in more detail, consider the best option for all the constituent parts of the structure:
- Mattress. It is recommended to purchase it in a specialized store, since purchased models are produced taking into account the recommendations developed by orthopedic doctors. If the bed is planned to be used for more than one year, then it is better to choose two-sided products with varying degrees of rigidity. For children under three years old, a hard, rigid coating is required, which contributes to fixing the back, and the correct development of the body. The filler should be woolen; you should not take models that include cotton wool and foam rubber. The upholstery should also be made of natural fabric and have an antiseptic coating.
- Frame, slats, legs, sidewalls. For a beloved child, only a tree should be chosen. Conifers are suitable for work: pine, spruce. Natural wood breathes, it is strong enough to suit any interior. Those who decide to use MDF or chipboard should remember that the boards contain phenol and formaldehyde resins, therefore, it is necessary to take only models with emission class E-0.
- Protective equipment. To extend the service life, wooden surfaces are treated with special compounds, they are painted, varnished. For these purposes, nitroenamel, acrylic, water-based paint for children's rooms is used. Wax is a great option. To preserve the texture of the wood, you can use acrylic varnish, other options are highly toxic.
If you have free money, you can buy dense wood species: solid oak, larch. This is the most durable material, the products look rich, but it is rather difficult to process the raw materials.
We make a bed with our own hands
Having firmly decided to independently build a structure, you should understand all the nuances associated with its creation. Initially, a drawing is developed in which all the constituent elements are displayed. Then they acquire the materials necessary for the work, prepare the tools, in the absence of any of them, they buy it in addition.
On the basis of the scheme, the raw materials are marked for component parts. They are cut out, combined into a single structure, treated with special compounds, painted, varnished, decorated. For clarity, we will consider in detail the main stages that include the process of making a classic crib.
Drawings and diagram
The creation of any object is impossible without a drawing. In a graphic image, made at a certain scale, the sizes of the nodes are indicated. To draw it up, you will need minimal drawing skills; you can also use special programs. When developing a project, you should consider:
- The dimensions of the room where the product will be installed. A larger bed can be placed in a spacious room.
- The dimensions of standard products for children under three years old are 120x60 cm.If you plan to use the structure in the future, you should give preference to the larger models 150x60 cm, 180x70 cm.
- At the bottom of the crib, you can equip lockers in which baby things will be stored.
- For preschoolers, it is worthwhile to provide removable bumpers that will protect them from rolling and falling.
- The design and decoration are chosen according to the preferences of the parents.
Required tools and materials
To make and assemble the bed, you will need the following materials:
- board;
- MDF sheet;
- varnishes and paints;
- self-tapping screws, fasteners, rubber heels on the legs.
Instruments:
- saw for wood, jigsaw;
- hammer, screwdriver, screwdriver;
- drill, drill;
- measuring instruments, a simple pencil.
Basic parts and their preparation
A standard bed consists of 4 legs, 2 backs, sides, removable sides, frame, slats, mattress. The last item from the list is purchased ready-made, the rest are made by hand. The process looks like this:
- In accordance with the drawing, the marking of all component parts is applied to the tree. This can be done with a tape measure and a pencil.
- The elements are cut with an electric jigsaw, a saw.
- Component parts are sanded with sandpaper.
- Depending on the length of the sidewalls, metal corners used to install the mattress are cut with a grinder. Holes are drilled in them for self-tapping screws to fix them to the tree.
- All components are painted and varnished.
The main stages of assembly
The work on assembling the bed is carried out in the following sequence:
- Collect the backs located at the head and foot. They are connected to the legs.
- Prepare the base for the mattress. To do this, metal corners are attached to the wooden sidewalls using self-tapping screws. Lamellas are fixed to them from above, perpendicular to the side walls.
- The backs and base for the mattress are connected with furniture fittings; for reliability, it is better to use corners.
- A mattress is installed on the frame.
- On the sides, removable protective bumpers are added, fixed on special metal or wooden fittings.
- If necessary, the finished product is decorated.
Making and assembling a car bed
Children will be delighted with this design. Everyone can make it. To do this, you need to draw up a drawing or download it online. Then you can start cutting out the components and assembling. The work consists of the following stages:
- Side and front walls are made of furniture board.
- On the side surfaces, cutouts are made to simulate the doors of a car, through which it will be convenient for a child to get inside.
- On one of the end parts, using a jigsaw, holes are carefully cut out for the headlights and a radiator.
- Then a few more planks are cut out, imitating the hood of the car, the windshield.
- Wheels are being prepared.
- Wooden corners are attached to the side walls, on which the base for the mattress is laid.
- A rectangular frame is assembled from the prepared parts, which is installed on the wheels.
- The resulting workpiece is painted or varnished.
- The base is fixed inside the frame, the mattress is laid.
Features of assembling a bed for newborns
For newborns, the design of the bed should be slightly different. Its standard size is 120x60 cm; when the baby reaches 3 years old, it will become cramped for him. When planning, it is worth considering the possibility of adjusting the height of the bed. When the child is small, it is convenient to place it higher, and as soon as he learns to get up, the bottom will have to be lowered for safety.
For a comfortable sleep of the crumbs, parents, neighbors, one removable side or end wall should be provided in the crib, which will allow it to be placed near the parent. The distance between the rods along the entire perimeter is made within 2.5 - 6 cm. These are the optimal dimensions at which the child cannot pinch his fingers or stick his head. Do not forget about the strength of the product, good fixation of removable elements.
In addition to the listed features, the legs of the bed are often installed on casters, making it mobile. Pendulum mechanisms or rockers are also equipped. Their use is recommended by pediatricians. This makes it easy to lull the child to sleep. It is advisable to use the bumper only in the first months, then it should be removed to increase the view of a child who learns the world.
Decor of the bed with soft sides of our own tailoring
Dad is not the only one who can contribute to the family budget by building a ready-made crib. Mom can also join this process by decorating the product with soft sides. Outwardly, the craft resembles covers filled with filler. In addition to the decorative function, they also perform a practical one, protect the baby from accidental hits on the rods, do not give him the opportunity to stick his hand between them. When sewing them, certain requirements must be observed:
- The fabric should be only natural, flax, calico, cotton are suitable. Wool must be used as a filler.
- It is better to choose the material in light, pastel shades that have a good effect on the psyche of the child.
- If a drawing is provided, then it should be done in medium size, a small one will annoy him.
Bunk bed making workshop
It is ideal for a family with two children of the same age, whether it be a boy and a girl or same-sex toddlers. The design of the bunk bed is the same as the single-tier one. A slight difference lies only in the presence of a ladder, the height of the product, the fastening of two boxes on the same supports. For safety, a side is provided on top, located along the entire perimeter. To understand all the intricacies of the model, consider a master class on making such a bed:
- We prepare boards with a section of 3.5x10 cm.According to the selected scheme, we cut out 4 blanks of 190 cm each, 4 - 180 cm each, 4 - 80 cm each.
- On 190 cm boards, stepping back 30 cm from each edge, we make grooves on both end sides from above and below for the width of the beams 3.5x10 mm.
- We collect the side backs. To do this, using segments of 80 cm, two support legs are connected.
- The finished backrests are connected using 4 pieces of 180 cm, installed in the outer end grooves.
- Above and below we make a base for the mattress. To do this, lamellas are nailed along the perimeter of both tiers over the sidewalls. Here they can not be recessed, thanks to the rims located in a circle.
- We mount the stairs. Its length should be the distance from the lower edge of the side partition to the upper edge of the support.
- We install the sides, lay the mattress.
Self-made bed with storage boxes
As a basis for the manufacture of such a structure, you can take any drawing of a standard bed. The only difference will be in the presence of full-fledged side walls and drawers. First of all, it is necessary to determine their number. It can be one element that takes up the entire space under the bed, two, or even three. It is also worth considering the type of sliding parts. There are two radically different options: independent from the main body, fixed to the frame, sliding out on guides.
The process of constructing the product will be similar to the preparation and assembly of a regular single bed for children. Here it is necessary to provide not legs, but side walls and intermediate partitions on which the guides will be attached. It is also worth considering the fact that the gap between the floor and the bottom of the tray must be at least 1 cm.
To make the box itself, you will need to prepare four pieces of wood, their dimensions depend on the size of the space under the bed. Then they are connected in a rectangular or square box, a chipboard sheet, plywood is nailed from below. To strengthen the structure from the inside from below, 4 support strips are installed around the entire perimeter, an insert bottom is made, which allows you to store heavier items.
Decorating methods
Comfortable conditions and practical design are equally important for a baby bed. To improve the conditions for the baby, auxiliary decorative elements are used, which, moreover, have a number of useful functions. Consider the most popular options for decorating this item:
- Canopy. An elegant canopy that is sewn from any natural fabric. It is recommended to use this element up to 4-5 months.
In addition to decoration, the product serves as protection against insects. A lot of dust settles on it, so it needs to be washed frequently.
- Canopy. Unlike the previous version, only light, transparent materials are used: tulle, organza, veil. Fastening is done with a bar.
- Valance. This is the framing of the lower edge of the bed. It covers the lower part of the furniture, which will perfectly mask some of the mistakes made when making your own crib.
- Hanging toys. They are often suspended in a pair with a musical mobile. This type of decor is made from cardboard or fabric. Contributes to the development of the child. They can have the most varied appearance, be it snowflakes, animals, flowers or others.
- Stickers. You can buy them at any furniture store. When fixing them, it is worth taking care that the child cannot reach them.
Painting the bed - what paint is better to use
In the industrial production of baby beds, oil paints are used. They improve the appearance, protect the surface from damage, and are easy to clean from dirt. With an independent choice of coloring agents, you should study their composition, make sure that there are no toxic, poisonous elements in it. These requirements are met:
- Water based acrylic paints. They are distinguished by their high cost and good performance.
- Nitro paints. They do not have a pronounced odor, are inexpensive, dry quickly.
- Water-based. They are characterized by a long service life. With their help, you can hide shallow cracks.
- Wax. The most expensive option. It is a flawless, high-quality coating with water-repellent properties.
A person cannot do without a pillow. This is due to the structure of the human body. The element supports the bending of the cervical spine, promotes blood flow to the brain. The child begins to put this object at the age of 1-2 years, depending on his physical development. The product should have a rectangular shape from 30x40 to 40x60 cm.Its thickness must be: for children under three years old - 3-4 cm, after - 5-6 cm.An important place is occupied by its elasticity, too soft a pillow will lead to pain in the cervical vertebra, rapid fatigue.
Bird fluff, natural wool, buckwheat husk, holofiber, latex are used as a filler. The last three options are the best in terms of elasticity. When choosing fabric material, preference should be given to natural fiber treated with antiseptics. It is better to choose models in which the cover is fastened with a zipper, then you can control the condition of the filler.
Unlike a pillow, a mattress is necessary from the first days of the child. It must be hypoallergenic, safe, absorb and evaporate liquids without any problems. For babies, elasticity is also of great importance, so it is necessary to take only orthopedic products. Otherwise, the requirements for filler and upholstery are almost the same as for pillows.
Choice of bed linen
Any person gains strength during sleep, and babies are still growing and developing. Every parent wants to make this moment calm. In this matter, they are helped by bed linen, which should be of high quality, made from natural materials. For these purposes, the following types of fabric are used:
- cotton,
- chintz,
- satin,
- coarse calico,
- bamboo.
The color of the selected canvas should be neutral, it is better to use pastel, light colors that are conducive to sleep. For newborns, a product without a pattern is suitable, for older children, but not for adolescents - underwear with a print of your favorite characters from cartoon series. Also, when choosing bedding, you should pay attention to:
- the material should not lose its structure and color from frequent washes;
- do not take linen with buttons, ribbons, lace;
Conclusion
Having studied the ready-made schemes, having considered all the positive and negative aspects associated with the independent manufacture of a crib for their baby, any parent will build a similar structure. At the same time, all family members can participate in the process. Dad will prepare and assemble the frame, and mom will pick up a mattress, pillow, bedding, make decorative elements with her own hands. This will not only save the family budget, but also show the child that they are being cared for and loved.
The Scandinavian style for children's rooms is gaining more and more popularity, and a do-it-yourself bed-house is a real manifestation of parental care, skill and imagination. The original design of the bed, made taking into account the size of the room and the age of the child, is beautiful, safe and economical. Adults can be confident in the reliability of the bed structure, and for children - in the availability of a place to rest, like the heroes of fairy tales.
There are a lot of options on how to make a bed-house. In terms of construction work, everything is more standard, it is important to draw up a diagram of the proposed product by preparing the necessary materials.
Instruments
The walls of the house
First of all, drawings are made for the bed-house, using a simple pencil and a square. To build the walls of the described bed, four beams of wood are taken, each of which is 1 m 20 cm. These will be supporting parts for the vertical structure of the bed of the house. To give aesthetics to the gable roof, the edge of all supports is sawn off from above to form an angle of 45 degrees.

Markup

Details of the walls of the house

The edges are sawn off at the supports at an angle of 45 degrees
Roof
This part of the lodge bed will also require four bars and the same steps, including finishing the edges at a 45 degree angle. All processed bars are collected, while the upper ridge is attached with wood glue. Parts can also be fixed with a self-tapping screw, which should be screwed in at a distance of 3 mm from the junction of two wooden parts. We advise you to follow some rules when working:
- it is recommended to clean all sections with sandpaper;
- the self-tapping screw must be screwed in slowly so as not to delaminate the tree;
- during drilling, it is recommended to use a vice to secure the product;
- optimal modern drills and a slow process are the key to quality work.
When two slats are fixed to the two supports of the future bed, the frame of the house eventually comes out. The repeated procedure will lead to the appearance of two equal frames - the end walls of the bed.


Gluing parts

Connecting parts

End frame fixing
To complete the manufacture of the end frame of the bed, a 8.2 cm bar is screwed at the bottom to support the uprights and stabilize the entire structure. For bed assembly, an eccentric side member is preferred. It is very important to make an accurate design for the desired hit. Self-tapping screws will help to facilitate the task. Also, the structure is attached to simplify assembly and save time with flat corners - squares with a side of 3 cm. All accessories for the procedure are available in the hardware store.
When doing this tie, drill holes in the bar with a 10mm drill bit. They should be on its midline, not through and have a depth of 12.5 cm. The diagram shows how to fix their outer edges 3.5 cm from the edge of the crossbar.
A 6mm drill helps to create a hole in the side. It is fixed exactly in the middle and falls into a pre-prepared recess. The eccentric then secures the desired screw appearance tightly. It is also possible to use wooden parts on long self-tapping screws with preliminary gluing. Do not forget only to stabilize the connection with the corner brackets.

End bar attachment


End frame ready-made
Collecting the base of the structure
Two thick bars are harvested as side bed sides. The inner side of the timber accommodates thin strips using self-tapping screws and involves screwing in screws at an equal distance from each other. These details will be the support for the frame of the future bed of the house, which will make it possible to fix the bed slatted bottom.
For accurate work, it is important to make a 6 cm template with holes for self-tapping screws - 2.5 cm. The positions of the holes on all posts are marked with a pencil to completely match the upper edges with the crossbar. A 6 mm drill is an assistant in organizing through holes in marks. The procedure is four times: in this way, all the racks are connected to the sides of the bed.
Next, the place of the hole for the eccentric is prepared on the longitudinal rack inside. Long self-tapping screws are screwed on the outside, which should smoothly connect the side components of the bed and the vertical support with possible gluing of the docking point. The eccentric is inserted into the holes from below and then the bolts are tightened. Repeat the procedure to connect both frames to the sides of the bed.
After fastening the sides of the product to the ends of the bed of the house, it is supposed to fix the frame, thanks to the three longitudinal components of the roof. Three beams according to the size of the sides are attached using an eccentric or self-tapping screws and glue. When choosing the latter, the bed-house must be reinforced with corner fasteners.

For assembly, you need two thick beams.

Thin slats will support the frame


The frame is assembled with an eccentric buckle

Connection of side supports with crossbeams
Slatted bottom
The slats are screwed to flat strips, which, in turn, are fixed to the side frame sides. It is important to carry out the correct tightening to hide the screws. The interplanar spacing is 7 cm on average, 13 parts go to the bottom. The rest of the sipes will fit the roll bar assembled with the corner brackets, but this is not necessary.
These slats can be borrowed from other berths. There are new types of bed slats on sale. There are also ready-made models that are inserted directly into the bed frame. This option is suitable for standard bed sizes.

Fastening the rails

Decorating
The home-made bed has an indisputable plus - it includes the author's proportions, colors and sizes. For the boy's version, you can use a nautical canvas or blackout curtains to organize a military headquarters, and for girls - decor with flags and a canopy made of organza or tulle.
Is there not enough space in the nursery for separate cots? Build your own children's wooden bunk bed. We have prepared design options for you, accompanied them with diagrams and drawings, we will show the algorithm for making such a bed with our own hands, illustrating with photo and video materials.
A bunk bed for children or adolescents can also be made of metal, but not everyone will get a neat welded structure, and the appearance of such sleeping places is not too childish. Therefore, we will consider making beds from wood and lumber, since these are inexpensive and easy-to-use materials, warm, beautiful and homely cozy.
Bed frame materials
The list of wood materials from which a bed can be made is quite long. Let's highlight the most common ones.
1. Array. Expensive material and rather difficult to prepare and manufacture if you have no experience with it. Experience is important here. Although solid wood products are the most beautiful and durable, they still do not use a baby bed for a very long time - children grow up and begin to need other sleeping places.

2. Lumber - edged or planed board, timber - the most common and easy-to-use materials, provided that you are sure of proper drying, otherwise the supporting structure may "lead".

3. MDF - fiberboard. The formaldehyde emission of the material is at the same level as that of ordinary wood. When drilling, it is dusty without forming shavings. Laminated MDF looks very attractive. An uncoated slab requires additional finishing, such as varnishing. You can order individual elements of the bed in a furniture workshop or a sawing workshop: everything will be neatly cut there, the edges will be glued.

4. Chipboard - particle board. Formaldehyde emission is increased without a sealed coating, except for the E1 class board. It is easy to saw, but does not hold the screws well. Suitable for non-stressed parts such as under-bed drawers. Backrests can be made from laminated chipboard (Laminated chipboard), decorative panels - the film coating does not allow formaldehyde to evaporate, but it is important that the ends of the plates are covered with a film.

5. Furniture board - a board glued from individual pieces of natural wood. It is beautiful, durable, even allows threading, but it requires skill in work, since it has internal stresses that must be taken into account.

When buying accessories, you should give preference to steel hardware. Aluminum is much less durable and tough.
Ways to connect wooden knots
When making a bed, you may need various horizontal and vertical connections, and the formation of corners. This can be done in a variety of ways. We present some of them for reference.
 1 - half-tree connection; 2 - connection "in the paw"
 1 - complete felling; 2 - the felling is not complete; 3 - steel corner
 1 - connection on rectangular keys; 2 - dovetail key connection; 3 - connection in a root spine
Design options (drawings and decor)
Bunk beds can be different constructively and be differently decorated. So, the upper tier can be located exactly above the lower one, be located with an offset, leaving room for the cabinet, or be perpendicular to it. The ladder can be composed of drawers. Another option is steps, which are hinged drawer lids. The bed frame can also be supplemented with drawers located under the lower mattress. To do this, you will need guides - runners. Sometimes something else is added to the bed: a table, shelves, a pencil case or accessories for sports.
Below are drawings of some of the beds with basic dimensions.


 Now, here are some design ideas that might inspire an original bunk bed. Pay attention to how absolutely "waste" materials are used in some models - slabs, branches, trunks, driftwood.
 A bed for the real Mowgli and the Robinsons Crusoe
 Hand made fairy tale
 Bed - sports corner
 Bed - playground
 Bed - house
 Bed-compartment
 Bed for teenagers. Material - laminated MDF
Method for making a bunk bed
Some of the most inexpensive materials are pine boards and beams. It is from them that we will make a bunk bed.
Calculation of materials
When making a bed, it must be borne in mind that not only a child can sit on the lower bed, therefore the distance to the lower part of the upper bed should not be less than 85 cm. The size of sleeping places in the case of purchased mattresses is determined by their width and length. If you make your own mattresses from two layers of foam rubber in a cover made of dense fabric, then the sizes are taken based on personal preferences.
The figure below indicates the individual elements of the bed, and the table gives the purpose, dimensions and number of blanks.
 1 - vertical racks (legs); 2 - external pads on the racks; 3 - boards of the supporting frame; 4 - upper and lower headboard strips; 5 - headboard center bar; 6 - side barriers; 7 - stair railings; 8 - stairs
| Qty | Size, mm | Name |
| 4 | 38x76x1730 | Vertical racks |
| 4 | 38x76x1730 | Blanks for external overlays on vertical posts |
| 4 | 38x140x2030 | Boards of the supporting frame of the bed |
| 4 | 32x44x1850 | Longitudinal mattress support slats (not shown in the figure) |
| 24 | 20x76x1000 | Mattress support crossbars (not shown), cut in place |
| 8 | 20x140x914 | Upper and lower headboard / footboards |
| 4 | 20x90x914 | Headboard / footboard center planks |
| 1 | 20x90x1510 | Stair railing |
| 3 | 20x64x482 | Stair steps |
| 2 | 20x90x1800 | Railing railing, cut to size during installation |
Assembly units
A bed is a piece of furniture that consists of several assembly units, which are then assembled into a single whole. Identical parts can be cut by fastening them with a vice or a clamp, so they will turn out to be absolutely identical. Before assembling, make sure that all wooden parts are clean, smooth and free from burrs. It is better to work with a special sander for wood or a grinder.
1. Headboard and footboard
These are two almost mirror-like elements. The difference lies in the incorporation of the railing into the foot, as shown in the pictures below.
 Headboard and footboard
 Detailed layout with the dimensions of the headboard and footboard
 Installation procedure: 1 - dowel 8 mm; 2 - the rack and the backrest slats are drilled at the same time; 3 - this part is attached after assembling all the other parts of the headboard
2. Elements of the supporting frame
To assemble two supporting frames, you will need four prepared boards - the longitudinal components of the frame. For structural reliability, the longitudinal bar must be glued to the board and additionally screwed with screws to the middle of the board thickness. Between the bars glued to the longitudinal strip of the mattress support, transverse slats will be laid - the base for the mattress.
 Construction and dimensions of the supporting frame board
3. Details of stairs and railings
The railing of the fence is just a processed board, the railing of the stairs is a board with a sample for mounting on the frame. The fastening points of the steps must be marked in advance, and make sure that the screws for fixing them do not fall on the screws of the frame.
 1 - notches 38 mm; 2 - places of fastening of steps; 3 - ladder steps, 3 pcs.; 4 - fence
4. Assembling the frame
The footboard and headboard are connected at the bottom to the planks of the supporting frame using screws. After that, the transverse slats, mattress holders are laid, and the outermost of them are sawn off in the corners for tight installation. You do not need to fix them. The assembly of the second tier is carried out in the same way.

5. Assembling stairs and railings
The ladder and the railing are simply fixed to the frame with screws. If desired, the fence can be made from the side of the wall - for the lower and upper bed. Then you need four more planks.

Now the wood can be painted and varnished, the mattresses can be laid - and the bed is ready!
In conclusion, we suggest watching a video about making a bunk crib for real princesses.
Video. Part one
Video. Part two

