Cut out of cardboard. Cardboard (all that can be made of cardboard)
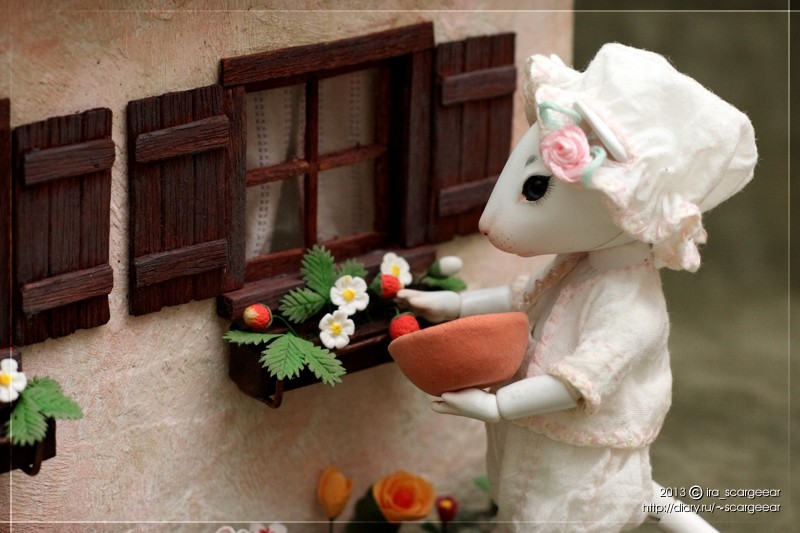
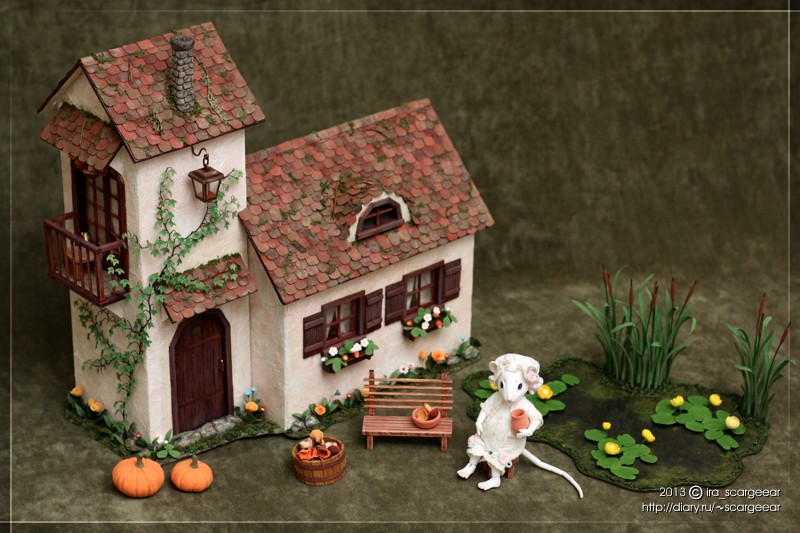
Master class on making a house-teremka for mouse-nurushki Manyuni
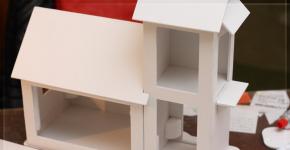
PVC was chosen as the base material. The reasons: lighter plywood, stronger cardboard, well cut and glued.
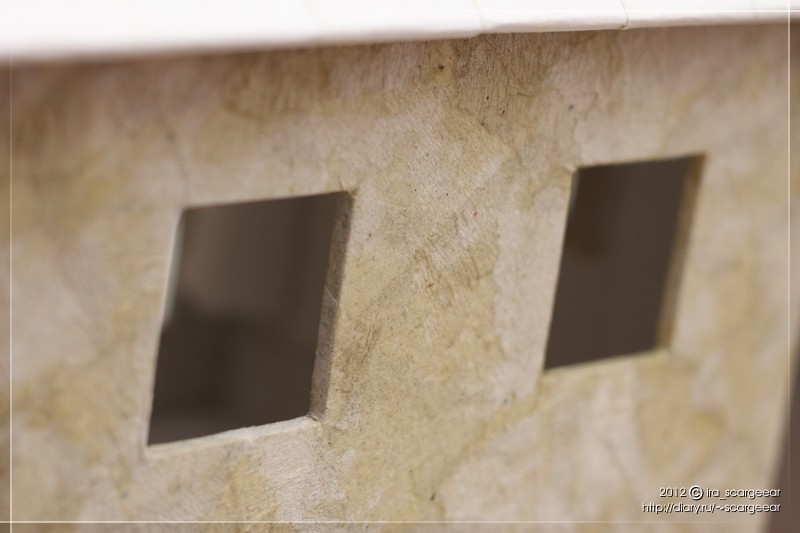
I want to make a house with a dull facade and glass windows, in this case, the interior of the furniture I do not care. Therefore, in the rear walls of the hole, so that when transporting the house there you can put stuff and dolls, and the insides are not decorated in any way.
The design consists of two separate parts, also for ease of transport.
In the future, it is planned to pick up such materials so that the decor does not break or scratch during transportation and so that I do not have to carry the house as a "crystal vase". I always think about convenience and some sacrifices on the altar of beauty are not ready.
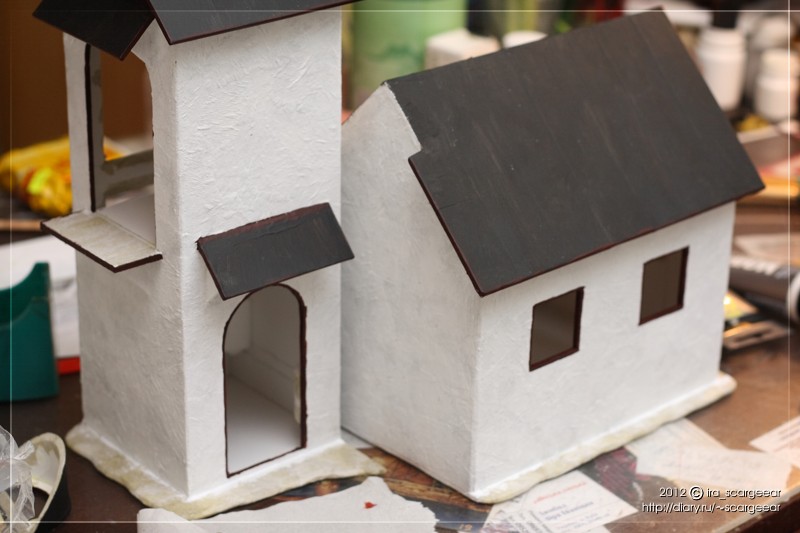
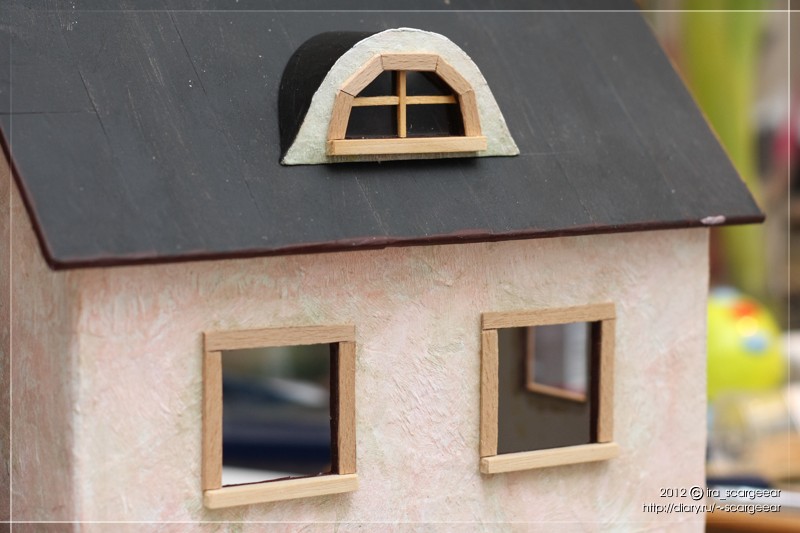
Front view.
Back view.
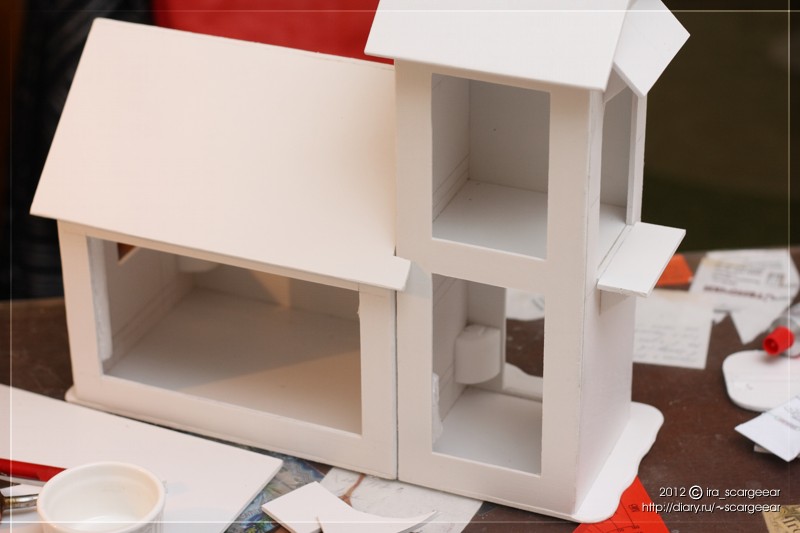
Before painting, tests were carried out on a piece of plastic; it turned out that even with otkkurennogo PVC acrylic slazit if it is scratched. Therefore, I decided to glue the house with textured paper (toilet, as you understood, but you can buy a corrugated one, the only difference is in the show). Torn it into small pieces and pasted in random order so that the texture lay in different directions.
Glue - carpentry "Moment": since the guy introduced me to this glue, I look a bit down on PVA. Joiner's is about the same, but it dries many times faster.
Invoice closer:
Pasting the walls of the house took me three evenings. Painstaking and dreary work. All ends are also sealed, with a bend inside.
I pasted over the roof with plain office paper and stripes, which saved me a lot of time. There will be a tile on top, so this paper will not be visible.
Now we paint. Paints - Maimeri Acrilico in tubes, they have excellent hiding power, good color mixing, a little pasty consistency, and most importantly - the price "src =" http://static.diary.ru/picture/1135.gif "/\u003e I liked with them work, and I bought a basic set of colors.
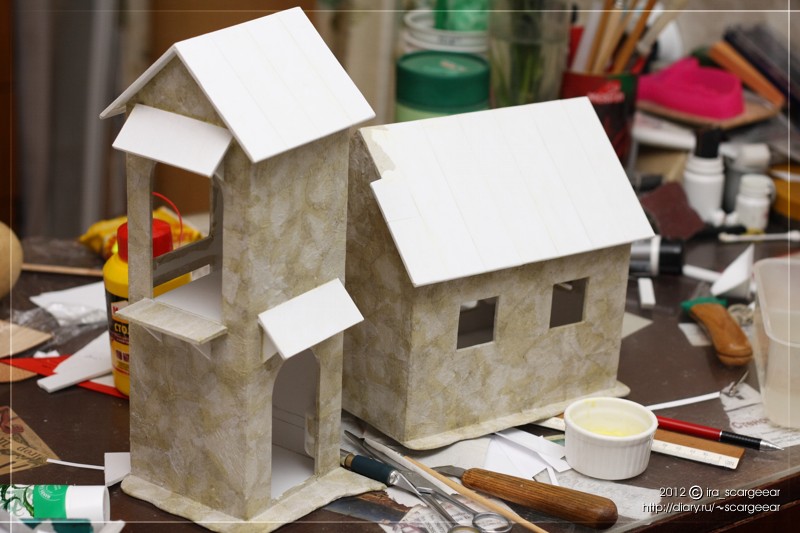
The walls of the house are painted with white acrylic, the roof is painted black. I already wrote that I was digging hard on the sites of dioramshchik, and they give a black base for all sorts of textures, so I decided not to reinvent the wheel and do as I said.
White color even in combination with the texture turned out to be too flat, so I decided to add shades. Made completely random)))
The first shade is pinkish-brick, acrylic is diluted to the consistency of thick cream, applied a brush to a couple of strokes on the surface and quickly rubbed with a cotton pad (not losing a second, because acrylic dries instantly!) I also see no sense in butter. As a result, we have painted protruding sections of the texture.
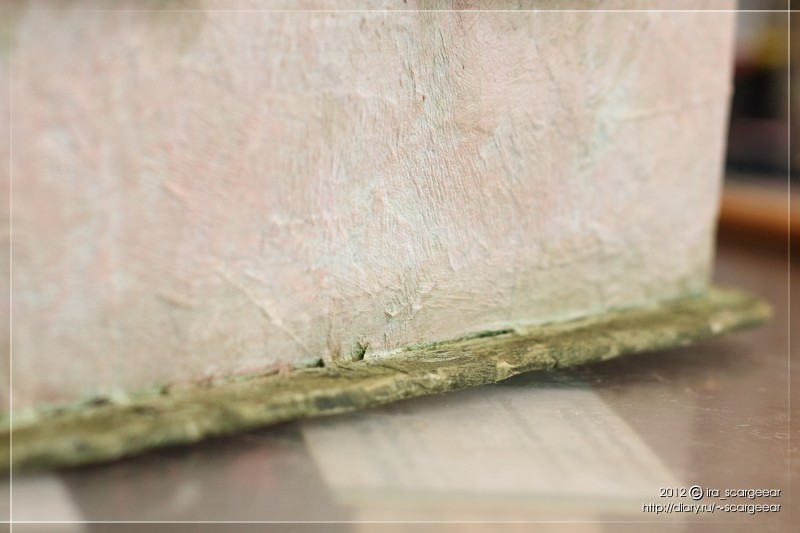
The second shade was selected already in a pair of the first, diluted a liquid-liquid greenish-brown color and washed up the surface. Wiped the excess with a cotton pad. Places around the frames, under the roof and on the ground are more powerful. My house on the quent stands in the woods, near the swamp, so it is assumed that he became green from moisture, overgrown with moss and all that.
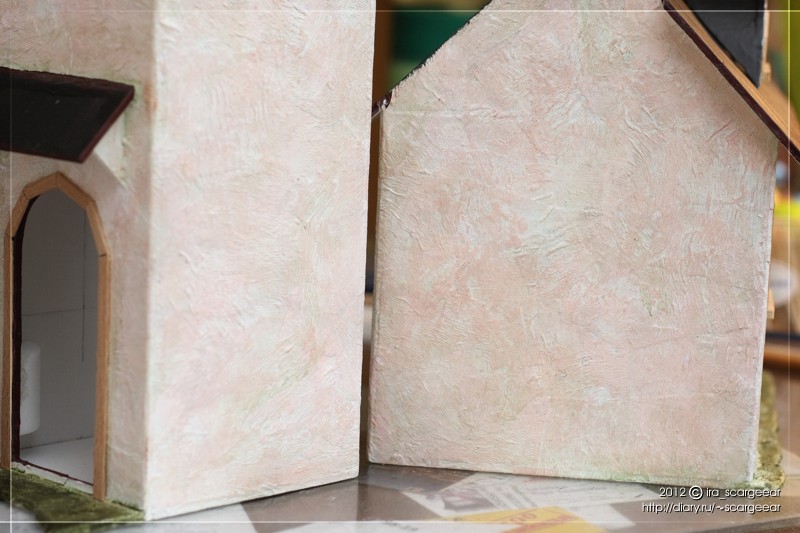
Both colors are clearly visible here.
Now we glue the wooden frames. I got the veneer on the pull, but in general it is bought in stores for modellers. Lime rail 5x5 I bought it there.
Glue - all the same joinery "Moment", glues perfectly.
The little guy offered to cut on the laser, which would save me a lot of energy, but in this case the more kryavye - the better
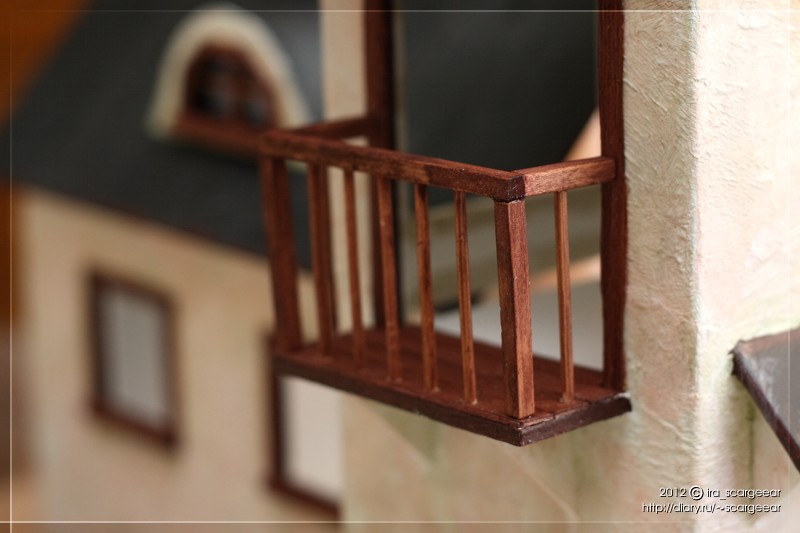
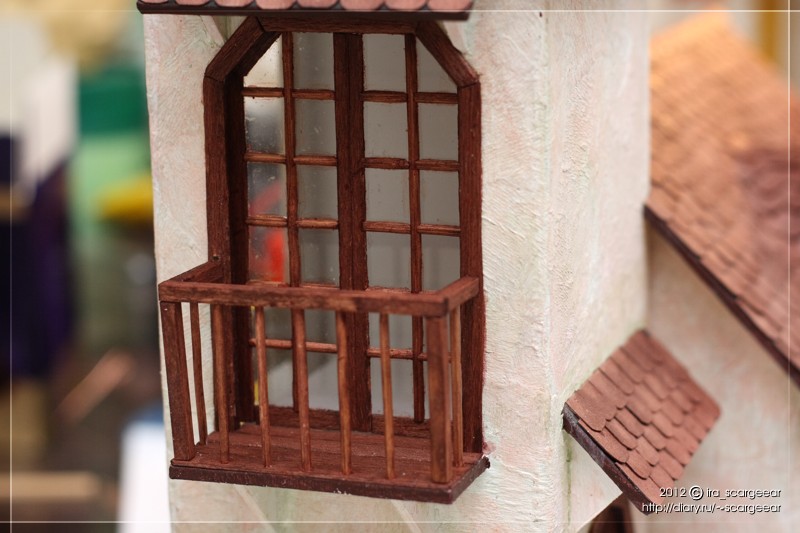
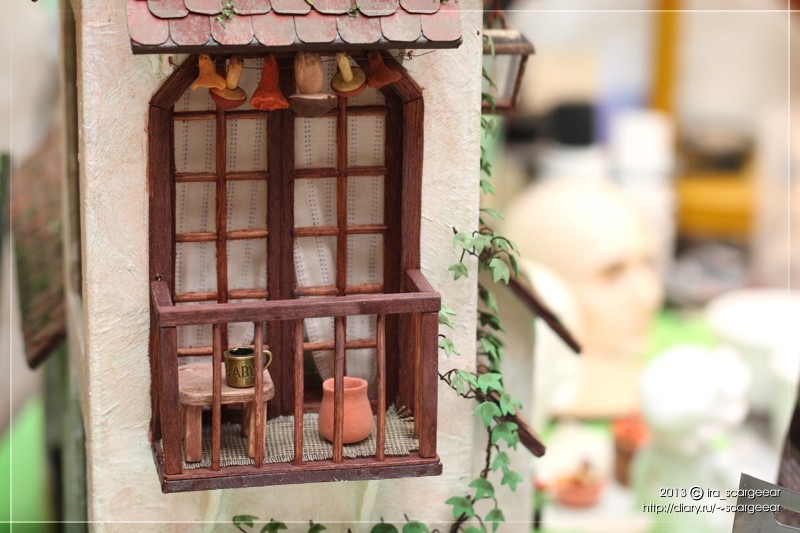
Here we will have a balcony. Sticking while the frame and wooden floor.

PART 2
Balcony pokleen. It consists of planochek square section (linden) and toothpicks (bamboo). The planks drilled holes for the pins of toothpicks, and all this was going to the carpenter's glue.
The floor of the balcony is glued with veneer.
All wooden parts are opened with a cherry stain. The alcohol stain, the darkest that was (specifically asked not the most stinky, they are on a different basis). I really liked working with her: she perfectly permeates the material and flows into the cracks.
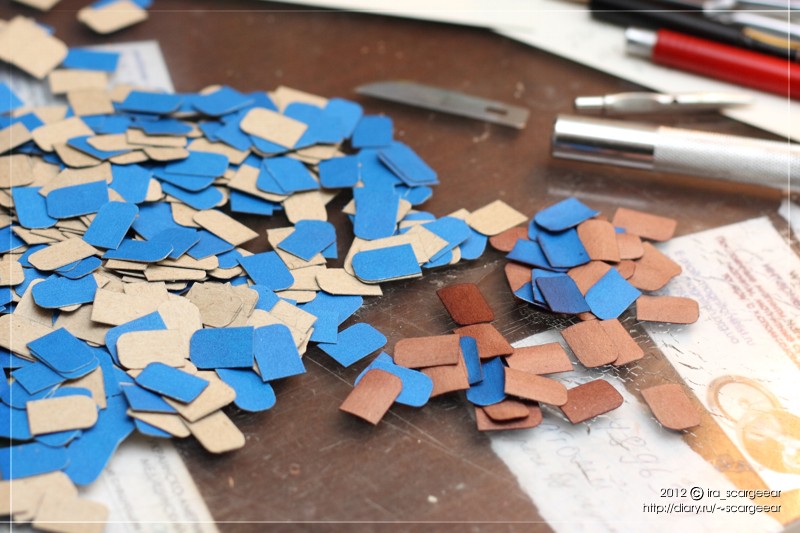
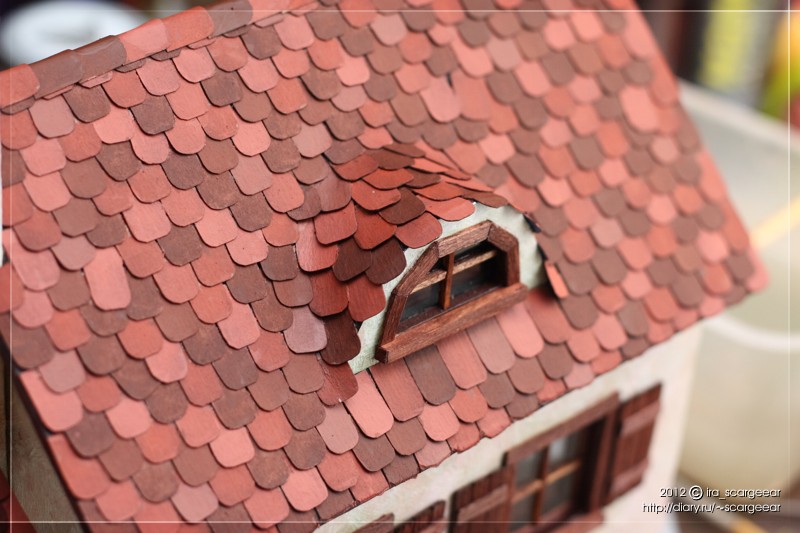
Getting down to shingles. Pieces of cardboard 1x1.5 cm, rounded on one side. Spent a lot of time cutting this good by hand
I thought about how long it would take to paint all of this with acrylics, especially the ends of each tile. Horrified. I tried to paint cardboard with wood stain - I suddenly got an excellent imitation of pine bark. And occasional glue stains resemble traces of tar.
I glue the tiles in rows, each next soak stain.
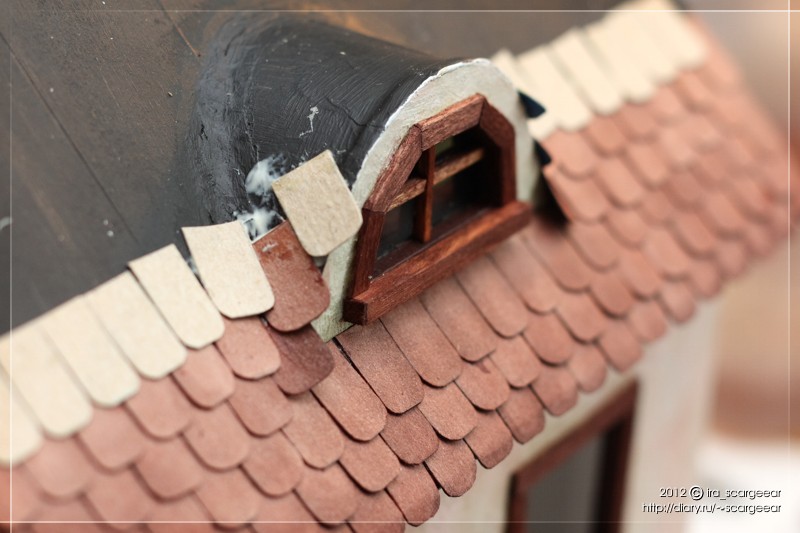
All pokleeno. She also spent a lot of time - but not as much as she could))
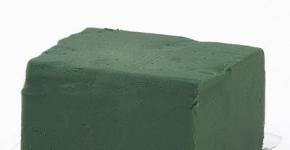
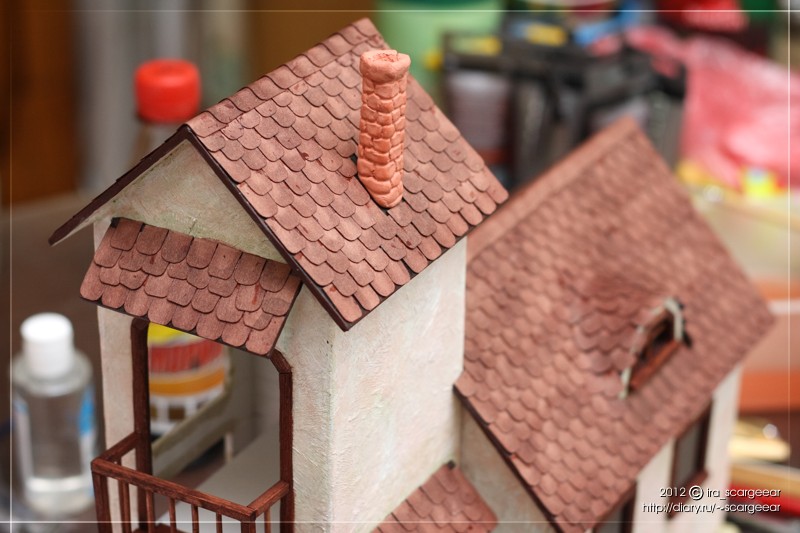
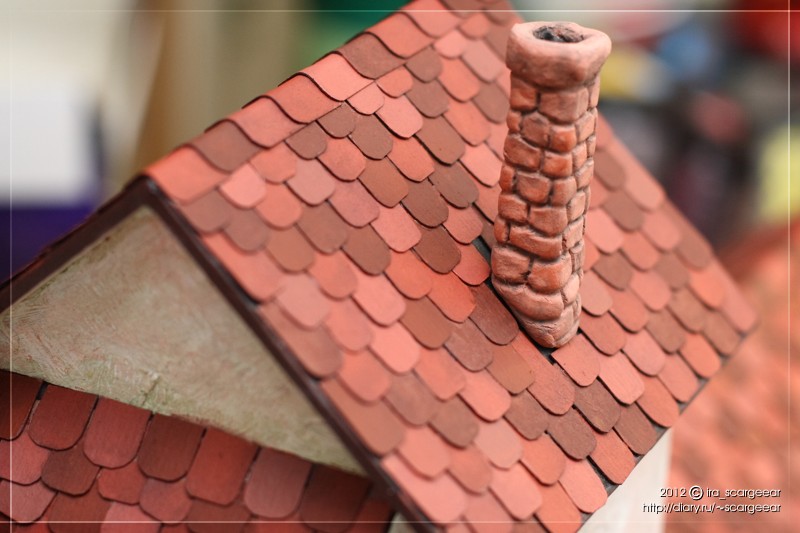
The pipe is made of terracotta Mungyo Sculpt Dry, grooves are applied over the wet. Somewhere crooked, somewhere a little cracked - it's all on our hands. The tile is also glued unevenly. In order to more clearly reveal all these nuances, the roof and chimney will have to be additionally painted.
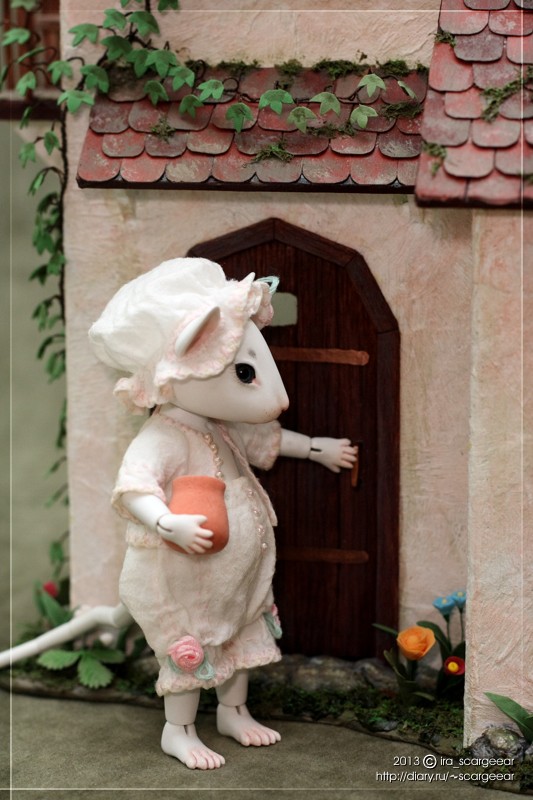
The doors are also of veneer, glued to a cardboard base (painted black, like the roof). I additionally applied relief with a needle.
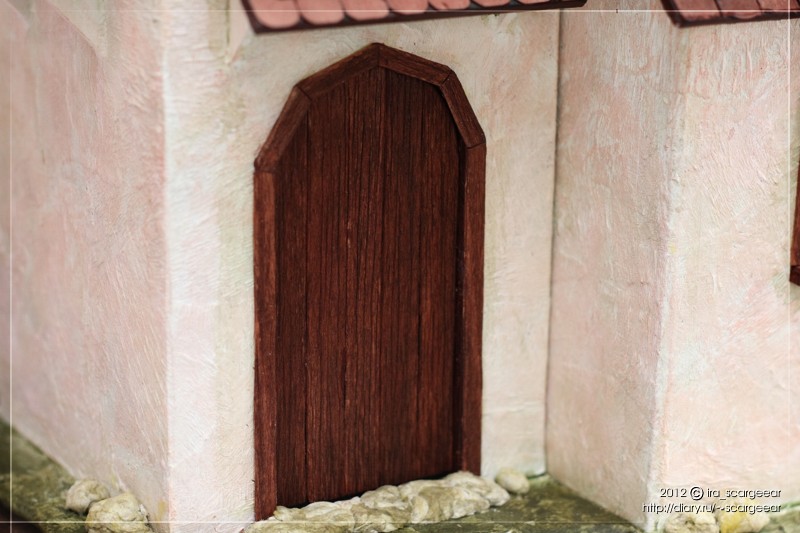
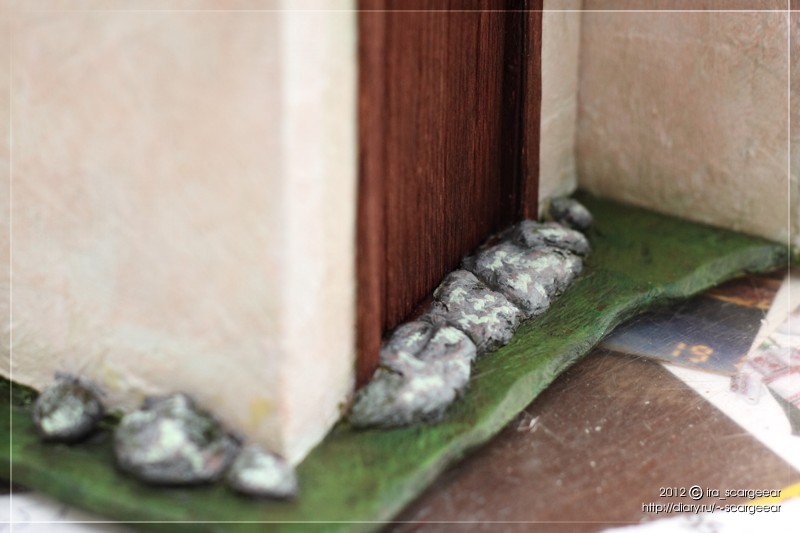
Blanks for stones - from the lumps of toilet paper. Although I have real pebbles, it will be easier by weight.
PART 3
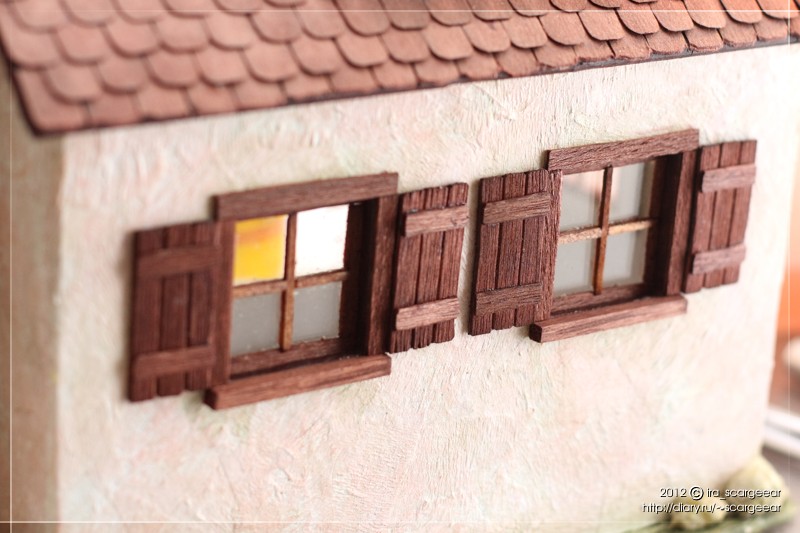
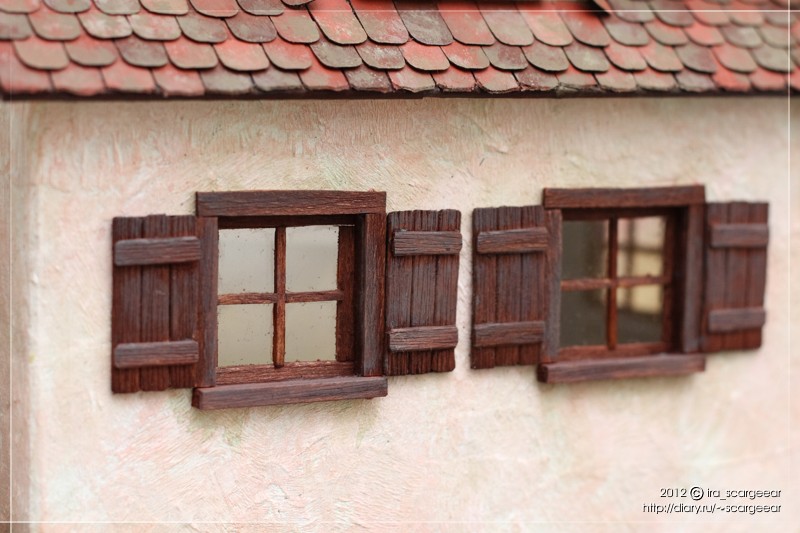
I make the shutters. I cut pieces of cardboard, plane under the shutter I paint with black, plane against the wall - white.
I cut the boards out of the veneer, apply a relief with a needle.
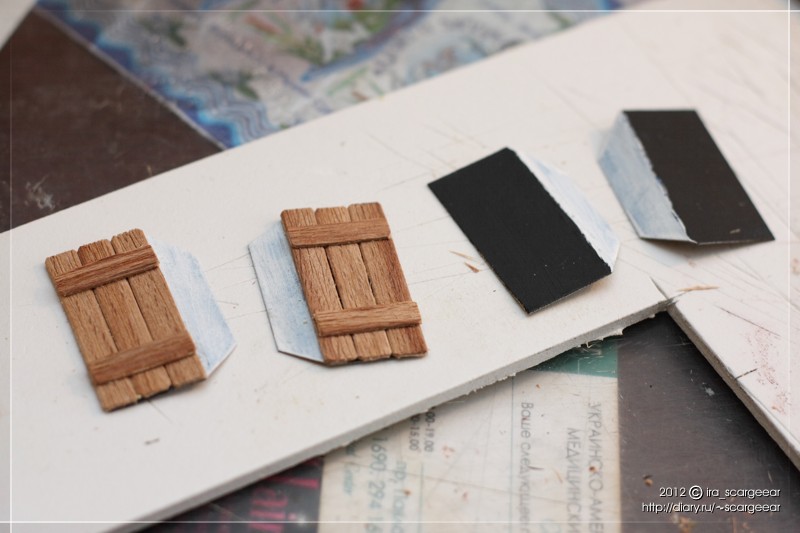
The shutters are painted with stain and then glued.
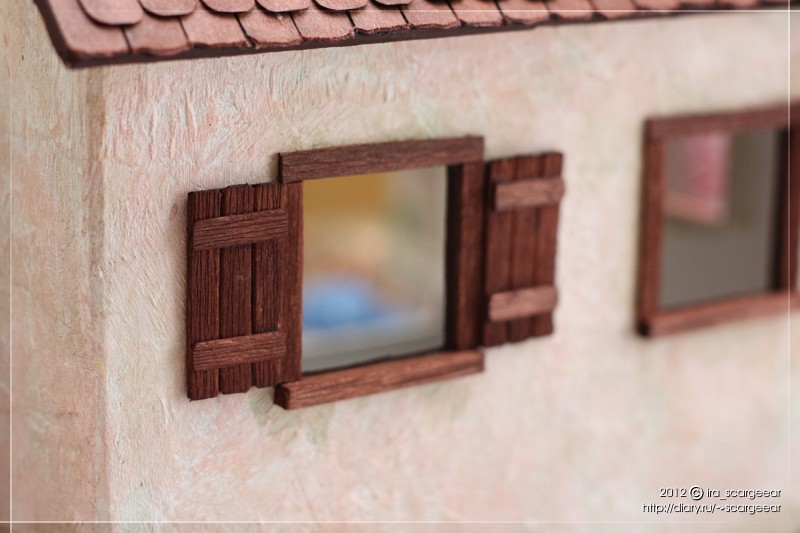
I build frames. Pieces of transparent acrylic are pasted over with a strip of paper along the end, so that everything else can be glued to them more reliably. Then again I cut the veneer and stick it.
The slats on the small windows were made of matches, and on the balcony window I had to take a thin round stick (I tore it out of a bamboo napkin) and cut off half of it to make a flat side.
She carried a lot with shutters and windows, only frames with slats made the day.

The windows are glued to the house from the inside.
I paint tiles. The principle is this: I mixed the terracotta color and I paint each tile separately in a chaotic manner - about a quarter of the total. I mixed white to make the tone lighter - again I paint a quarter of the whole tile. I mixed up a darker color - I paint the rest.
Due to the fact that some tiles are painted more densely, others are thinner, and four colors, such an artistic mess is obtained.
Some tiles were painted with about the same batch, but less brown, and more white and black — a grayer shade.
I also painted a black pipe with a liquid-diluted black one - it immediately got a wheeled look.
The opening of the chimney is painted black.
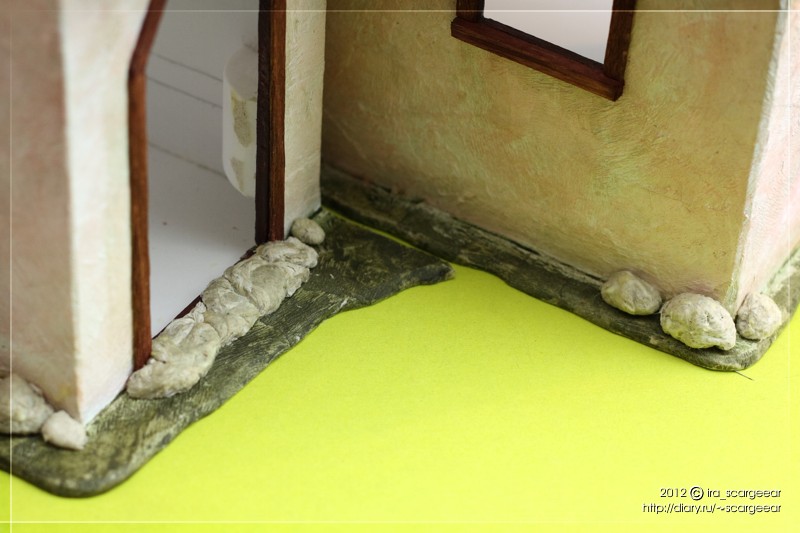
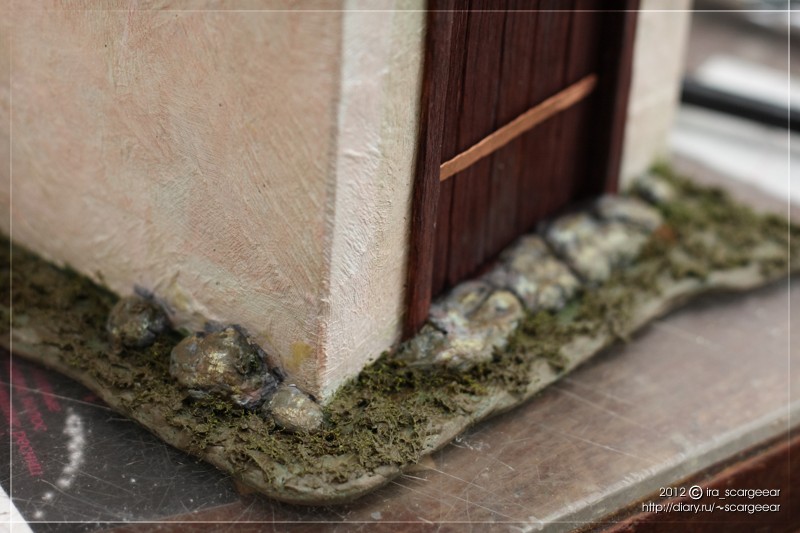
Painted the ground more thickly, several shades of green. Also painted the stones. Dark tone is the base, lighter up: gray, brown, green, light gray spots of lichen. Toilet pellets now do not know))
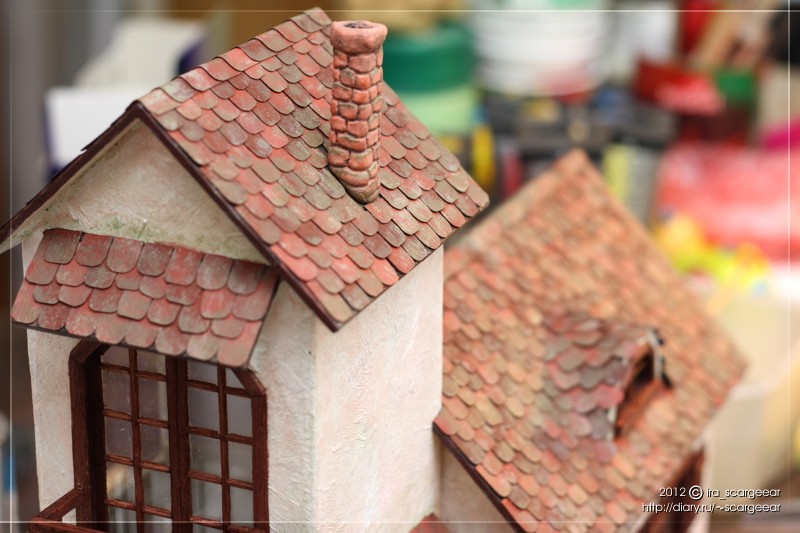
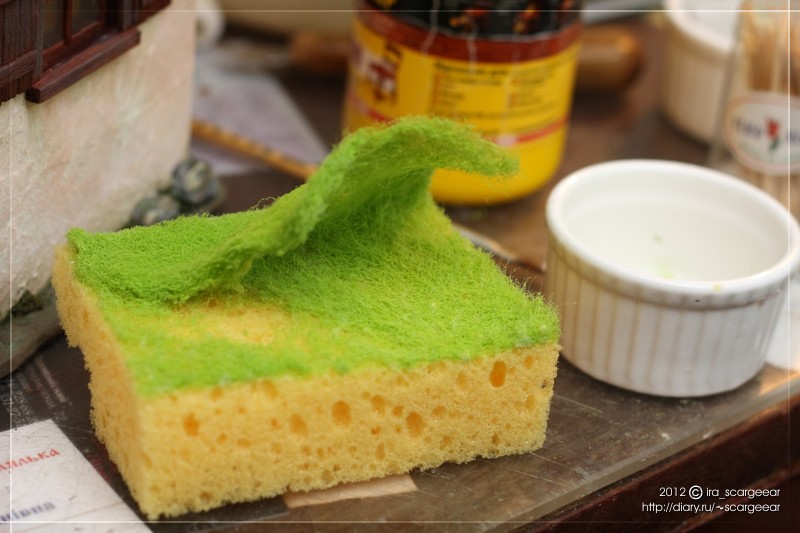
So, we have a beautiful new tile. The house is in a wet area, so I will do lichen not only on stones, but also on the roof.
I take an ordinary kitchen sponge, I dilute the light-gray with a green tint paint and randomly poke a sponge into the tiles. It turns out not bad.
Please pay attention to the absence of a pipe. I put her on two pin of a toothpick, in the roof - two holes. Roman advised so and leave it removable - for ease of transportation))

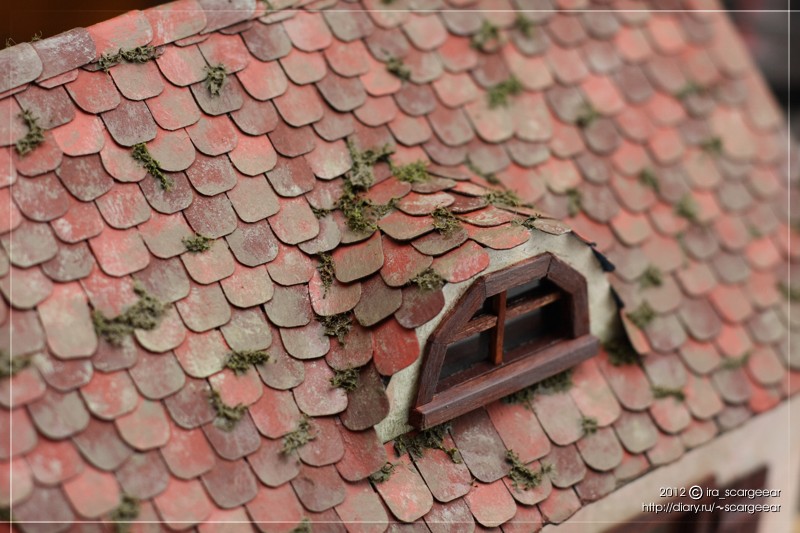
The shingles are still too new, and the lichen stains would do well to muffle. I interfere with the gray-brown-green color and poke a washcloth, even thicker than before.
The roof is a bomb! Compare with reference.
I painted the pipe with the same colors as the tile.
Now the shutters and frames are too new compared to the roof. Damage and their. The tree is gray from the sun and water, so I spread gray paint and smear all the wooden elements on the protruding parts; I don’t touch the recesses.
The same with the balcony and the door.
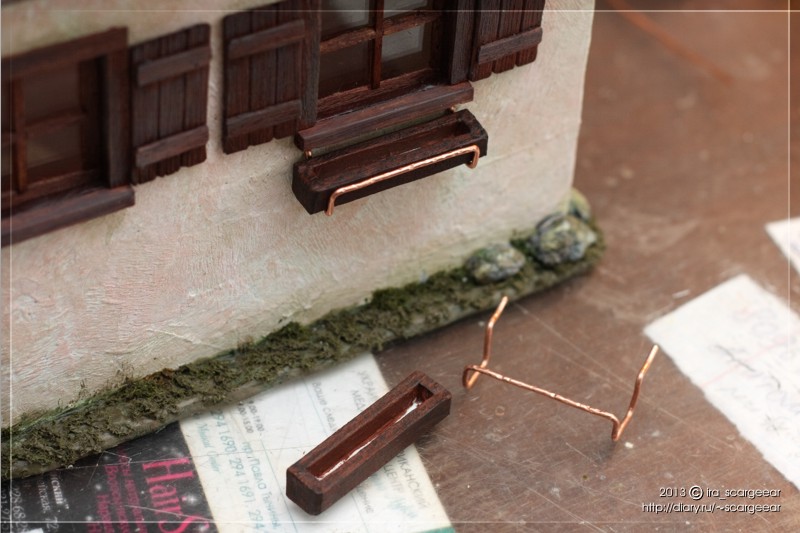
Here you see copper rails, hinges and a handle. Everything is done using standard methods of wirework, slats - strongly flattened wire.
Copper must be aged, I will deal with this later, so the elements are hanging on an honest word.
![]()
PART 4
I think moss deserves a separate post.
Dioramschiki often find materials for their compositions in the most unexpected places. It happened with me. One video tutorial pushed me to this idea, in which trees with a crown of wood shavings were made (this happens if the floors are looped, very small).
Here is a kitchen sponge, with which I applied texture to the roof. The green abrasive part consists of fibers that perfectly imitated moss (as it turned out). I hoped that something would work out for me, but I did not count on such a good result.
It is better to still take a green washcloth, because acrylic does not paint over absolutely everything.
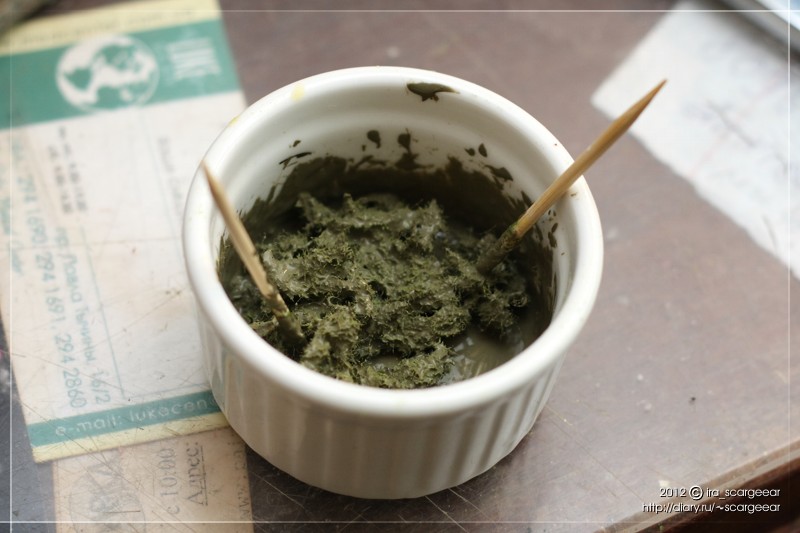
Torn off this part, cut it into small pieces with scissors.
I mix the paint of the desired color in a jar - this is all the same acrylic Maimeri. I added about a teaspoon of Moment moment wood glue. Poured out all the pieces and mix well.
The term of work with such a batch, until it began to set - up to half an hour for sure. No retarder in acrylic, its role is played by glue. I had two such mixes. And I interfere, and separate the fibers, and I stick them - everything is very convenient for me with these two toothpicks.
Result:
Roof. Live even better, I'm still a photographer.
Moss holds very well thanks to a large amount of high-quality adhesive with a plasticizer. You can grab hands, etc.
PART 5
Flower boxes are glued together in PVC, as is the frame of the house, and glued in with toilet paper. Painted with acrylic on top: brown paint in a continuous layer, and then black paint with a “dry” brush. It turned out such a multi-colored texture, and thanks to the relief of toilet paper in general it looks like a tree))
Copper holders are inserted into holes in the wall. They hold tight and will not fall out on the exposition, but I will take them off for transportation.
Repainted the pipe in the color of the stone, not clay.
Pieces of Iceland moss, pine needles, etc. are pasted on the roof.
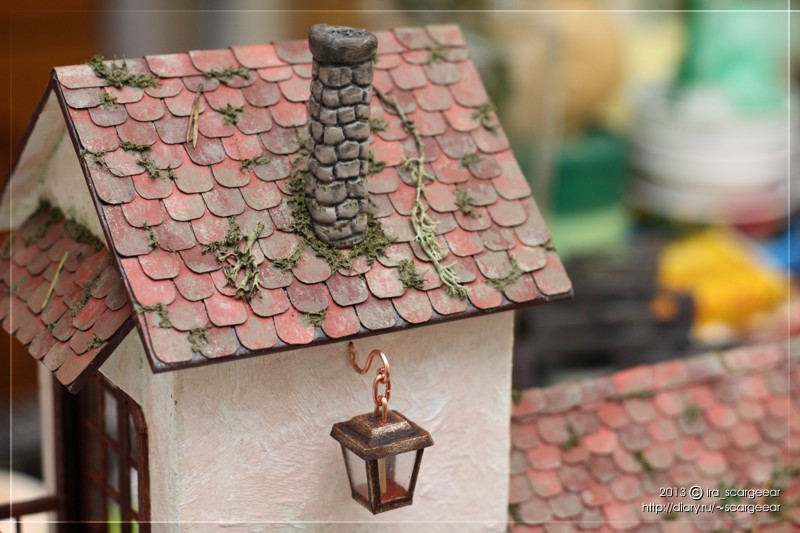
Flashlight: glass - thin acrylic film (it was a badge from the exhibition), vertical slats - ordinary office paper, the bottom and cover - PVC. All collected on the superglue, because otherwise the acrylic is peeled off. Inside a piece of toothpick instead of a candle. Everything is beautiful with various acrylics: the base is dark brown, accents of gold and black colors.
The flashlight also holds in the wall on the hole. At first, I wanted to hang it on the right side of the house above the window, but since that facade will hardly be visible on the exposition, I changed my mind.
I'm still not in a hurry to patinate the copper elements: what if I want to do something else?
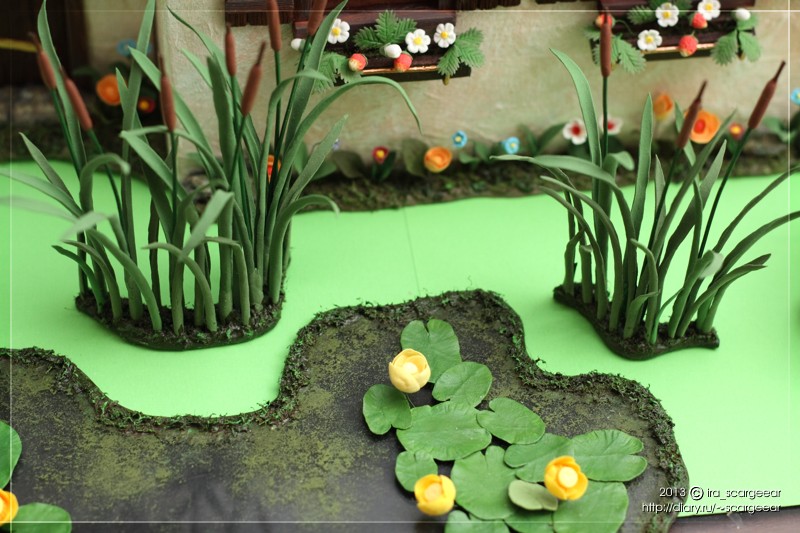
Getting down to the swamp. A piece of acrylic 3 mm thick (which was) Roman cut me on the laser. You could cut it out with your hands, but less of the risk of ditching a good piece of acrylic.
Under the acrylic is covered with cardboard. I only had green, so I had to paint black.
The edges of the swamp are covered with toilet paper to keep the whole structure together. Next, paint the edges: a dark brown-green tone as the base, lighter ones are applied with a washcloth. Also the washcloth is tamped with the surface of the bog to imitate duckweed.

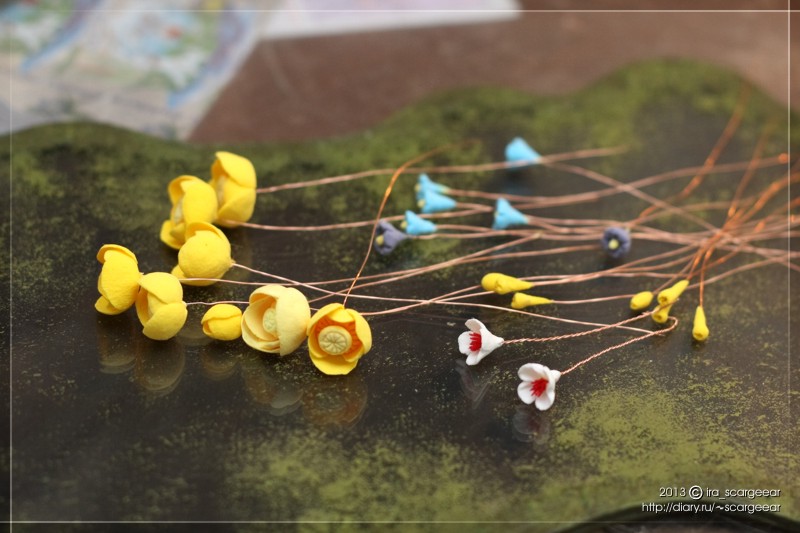
My first experience of modeling flowers from Claycraft Deco)) I bought it in Handmade Studio. The scale for such work is slightly abnormal, the diameter of lily pads is 1 cm, which is approximately 1/6 format. Blue flowers - 4 mm in diameter. Even my fine motor skills are not always enough for the desired result, but I try. There is something yellow - blank center for the following flowers, has not yet come up with what.
There are a lot of courses in Deco, because both material and technology are patented, but we are not looking for hard ways))
PART 6
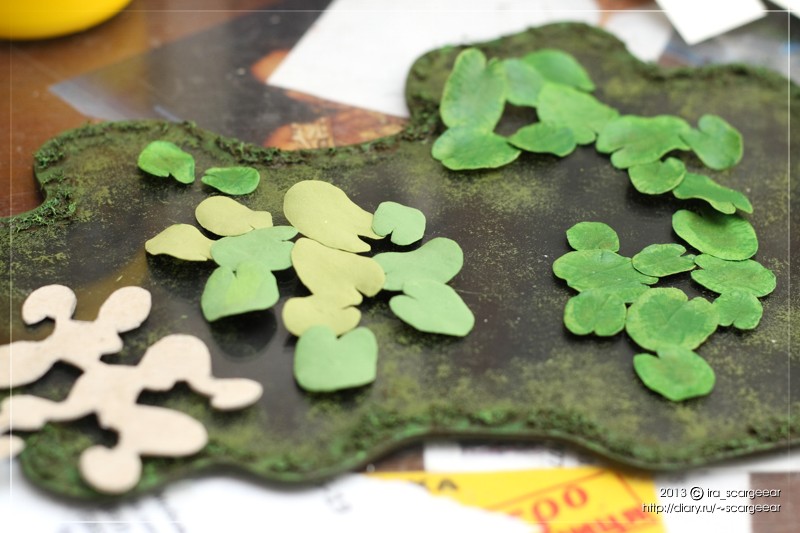
Nalepila lily pads. They turned out the second time: I wanted to make it so that you could just put groups of leaves on the swamp, and not stick them tightly, it is necessary for easy transportation. So, the bottom side should be flat. The first version of the leaves was quite thick, but it was jarred (I did not throw the leaves away - maybe it will still come in handy, they lie on the sides of the marsh). Googled the properties of Deco: they still write that it is jarred when drying (((I had to think of a workaround: what if the leaves are thinner and pasted on a piece of cardboard? It is said - done.
This is the limit of paint mixing, in which the clay does not fall apart into pieces during modeling.
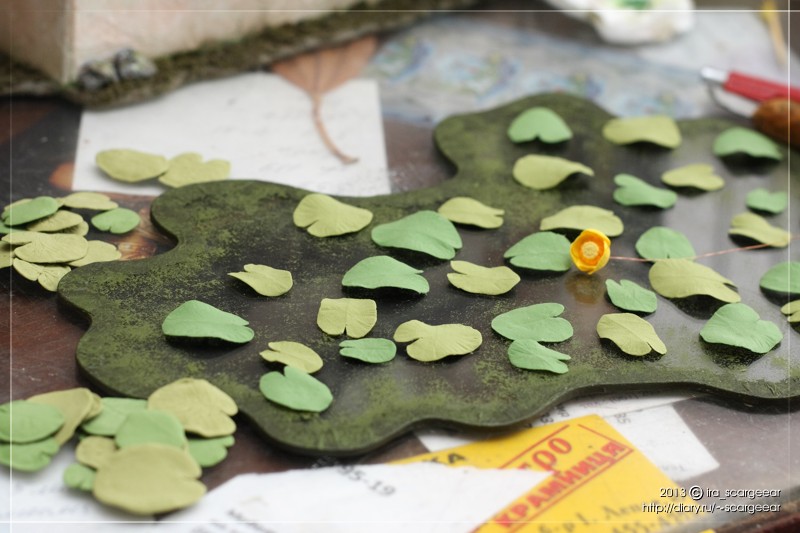
Here you can see different stages of the process: on the left - a cardboard template under the leaves, in the center - a glued islet from the inside, on the upper right - another one on the front side, on the lower right - a finished islet of leaves already glued onto the cardboard. As you can see, it is quite flat.
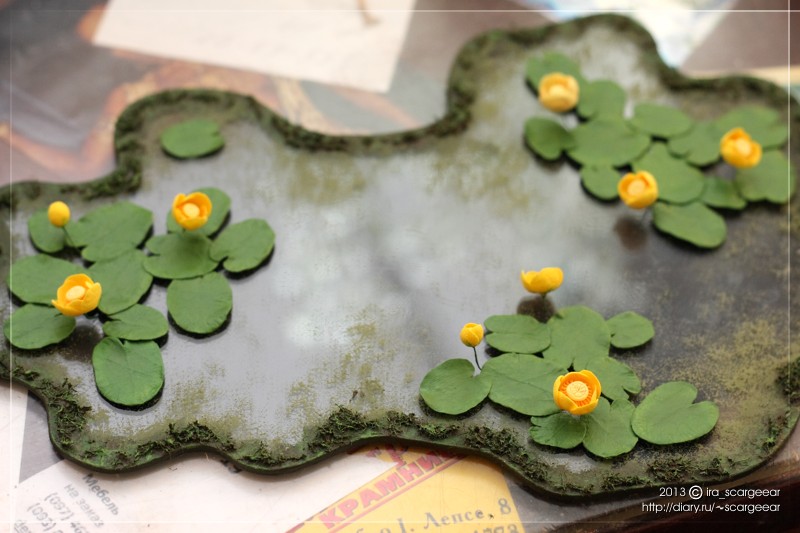
She painted the leaves in a deaf color, because in lily pads they are very uniform (I don’t know why I molded different colors?), I stuck water lilies. At the edges of the bog added moss, tinted it with different colors.
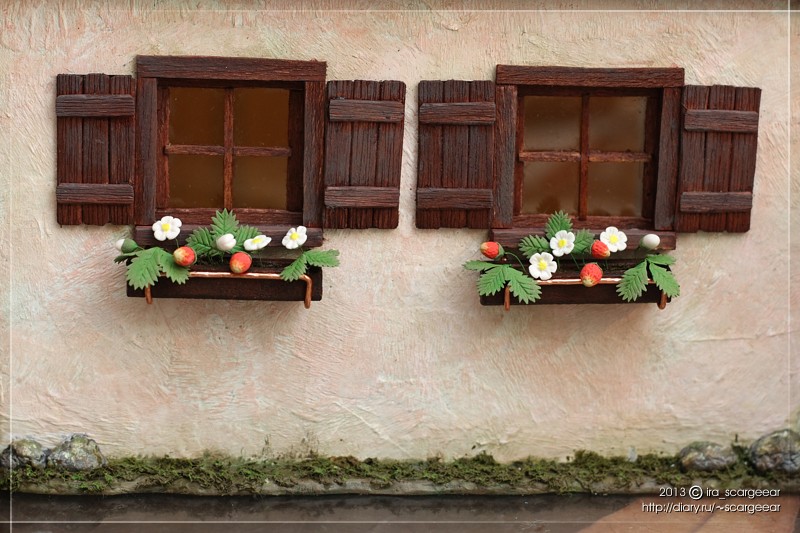
And this is a strawberry in boxes. She took me a lot of time, because the flowers are molded in stages. Successfully adapted the needle eye to form the middle of the petals, and generally learned a lot of new))
The process looks like this:
1. Sculpt flowers. Knead the green paint in clay, sculpt the leaves.
Details dry.
2. I cut the wires, one bends the loop at the end - this is under the buds and berries, the other - the circle, bent perpendicularly, under the flowers, and leave some of the wires so - this is under the leaves.
3. I stick the flowers and leaves on the wires, I stick the buds raw on the wires with a loop. Knead the red paint. I form berries, poke needles with an eyelet to give texture, I put them on wires.
The glue dries. Waiting for complete drying. Freshly molded parts also dry.
4. I tear off the buds and berries from the wires, dip the wires in the glue, stick it back.
The glue dries.
5. Again I knead green clay. On flowers, berries and buds form blanks for sepals.
6. While the sepals dry, on already dried leaves I cut out cloves with a knife-maker. I collect blanks of leaves of three, twisting the wires.
7. Carefully tear off sepals, cut out teeth, paste them back.
8. I paint the middle of the leaves in green, trying to make a gradient to the edges. I paint all the stems and legs with acrylic, it fits perfectly on the wire and does not crack when bent. I paint the noses of berries in light green and the middle of flowers in yellow.
In short, I was busy with all this more than one day)))
It's time to plant our strawberries! Glued the leaves to the bottom of the boxes. In the boxes, instead of the earth, I stuffed all the same moss on glue and poked the flowers and berries. Beautifully arranged everything and wait until the glue dries.
Done!
PART 7
Nalepila different leaves and flowers, stalks, wires, painted with acrylic, glued leaves.
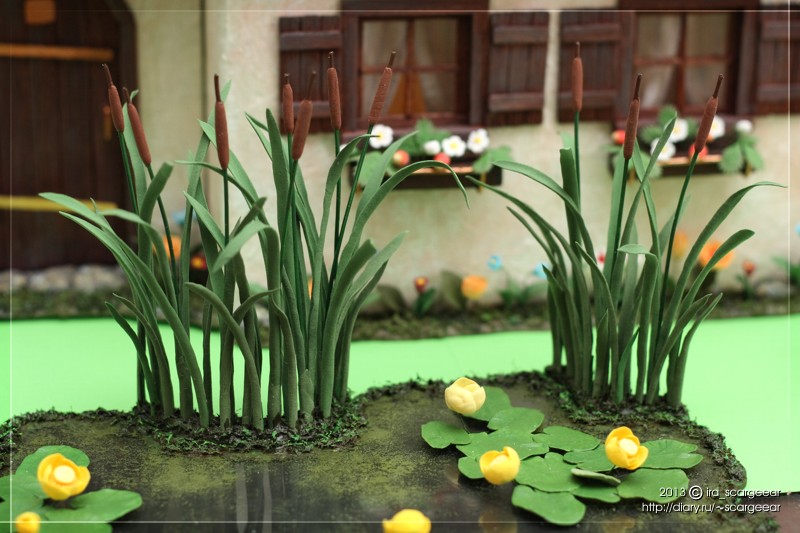
Stems for reeds - the same wire, but with the insulation removed (green), extracted from a twisted pair. Above crash acrylic, then stuck stalk reed.
The reed leaves were made like this: a sausage rolls on a flat surface, then flattens on the handle of the brush - this is how we get a semicircular shape in cross section, it bends as needed and is put to dry. The bottom of the sheet is made more prominent, the top is more flat.
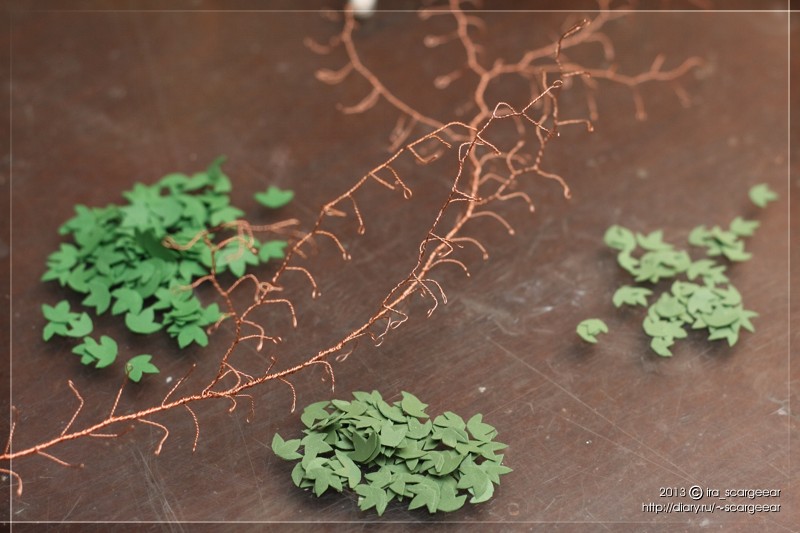
Leaves for ivy leaves you see on the left, on tubes of paint)) After drying, they will not be flat, but semi-circular. From the blank you get two leaves.
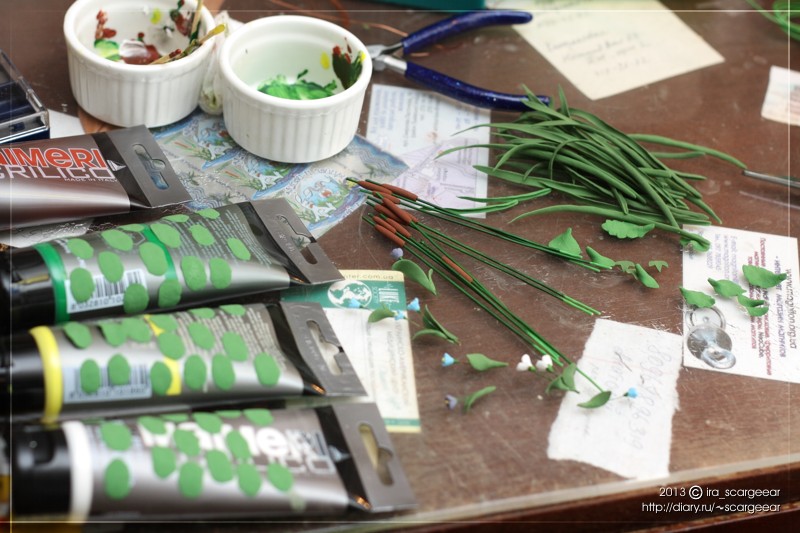
The stalk of ivy was made of very thin wire, the leaves, after drying the blanks, were cut by the mock-up. There are three piles of different colors: the brightest leaves will be at the ends of the branches, darker - at the base.
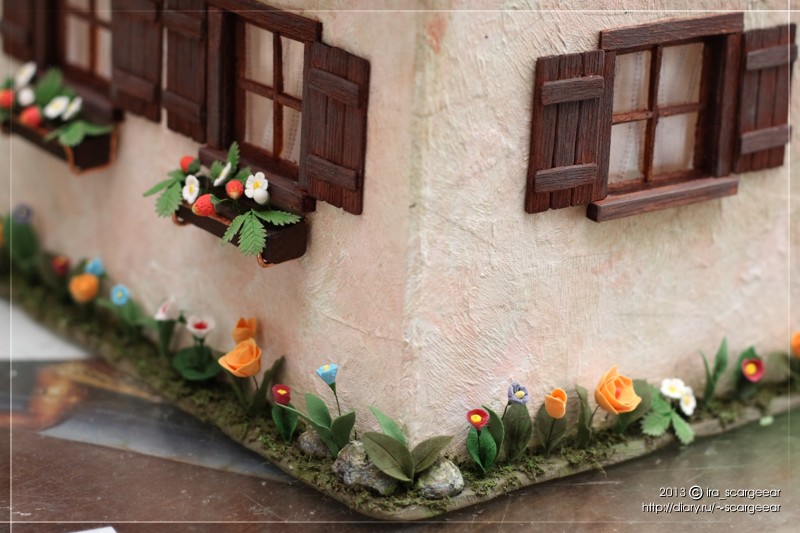
Flowers of different varieties and species were planted under the house)) For leaves, too, I mixed clay of different colors, some were also painted.
The curtains were made on the windows and the balcony door, since the interior was not made - in general, so that it would not be very conspicuous))
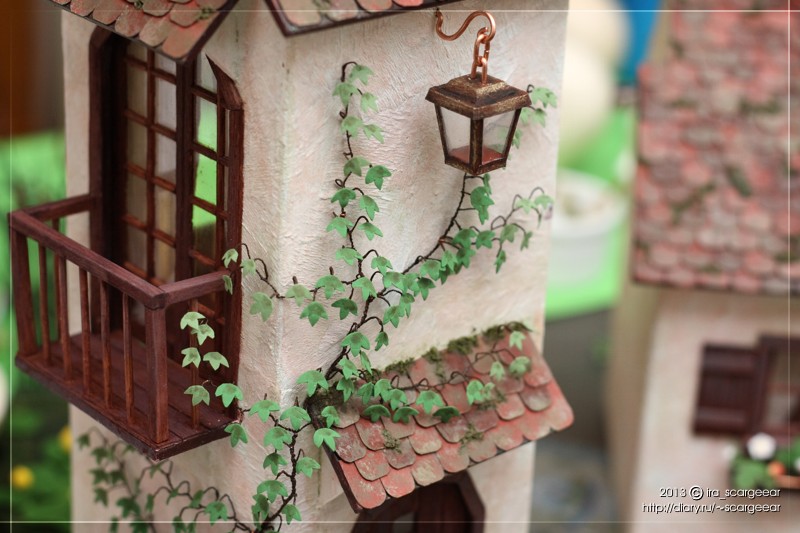
Ivy on the house.
The technology is still the same: paint the branches with acrylic, let it dry, glue each sheet on the PVA. Small wire clips are fastened to the wall, holes are pierced by a needle under them in the wall. I walked a little along the leaves with a brush to make it non-uniform.
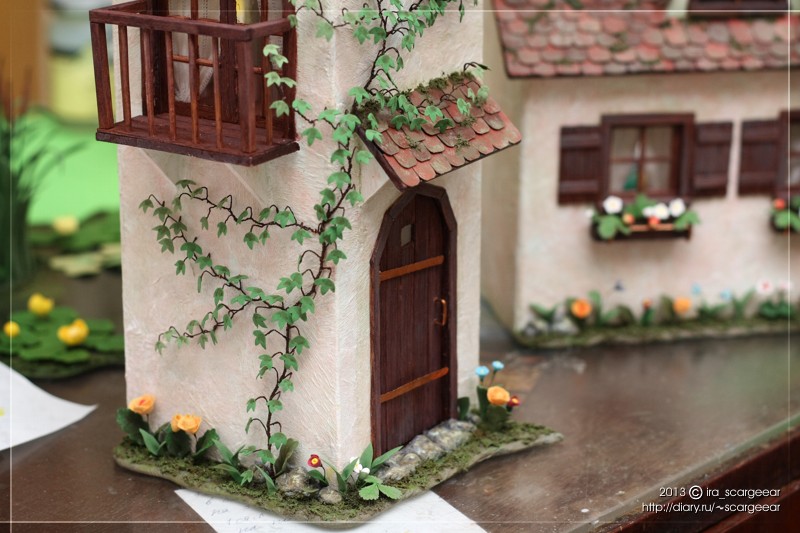
Slightly more general plan.
Reeds decided to also make separate elements for ease of transportation. The bases are cut out of PVC, plastered with toilet paper, painted, then filled with an awl, holes, and wire stems are glued into them. Individual wire pins are also glued to individual leaves.
Inserted with minimal gaps.
The bottom of the "islands" with reeds is decorated with grass from a washcloth, as well as the shores of the lake.
This is almost everything)) It is necessary to finish literally some trifles, add household items to the location to give the house a residential impression.
PART 8
Stools. Made of veneer and slats of square section (the same ones from which the balcony fencing is made in 2 parts), stain on, subsequent sanding. I tried to paint them with acrylic, but it didn't work out.
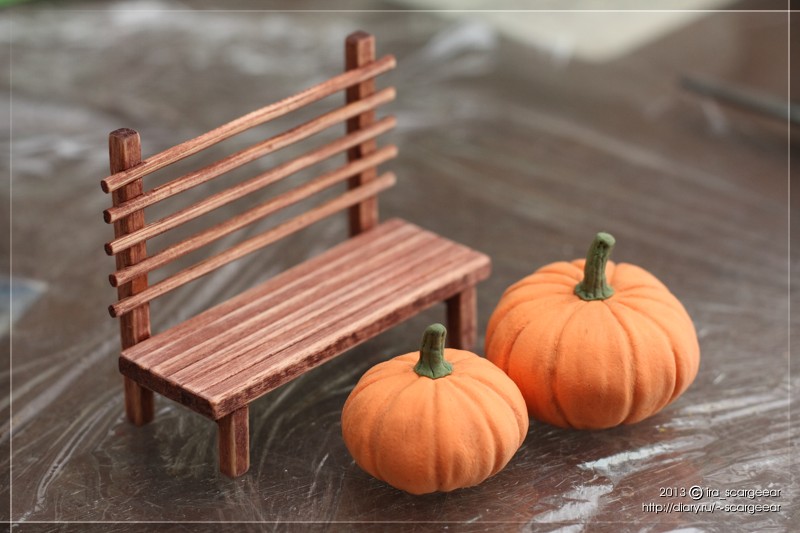
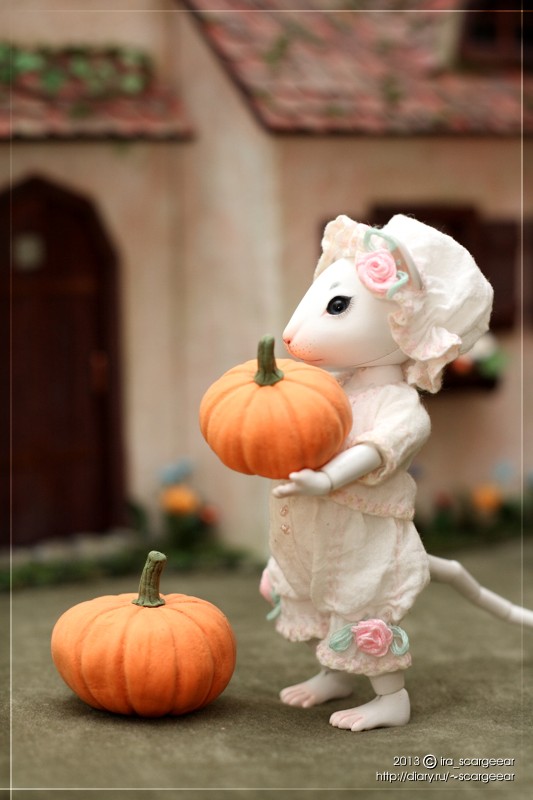
Two gray byaki are blanks for pumpkins: toilet paper, thread, glue. Made for the sake of saving material, although they could be molded entirely from Deco.

Pumpkins are ready. I tinted a little bit of tints with brown paint for a more lively look.
A bench made of the same materials as the balcony: there were still a lot of these square slats, it was a pity)) Thin crossbars - from a loose bamboo mat.
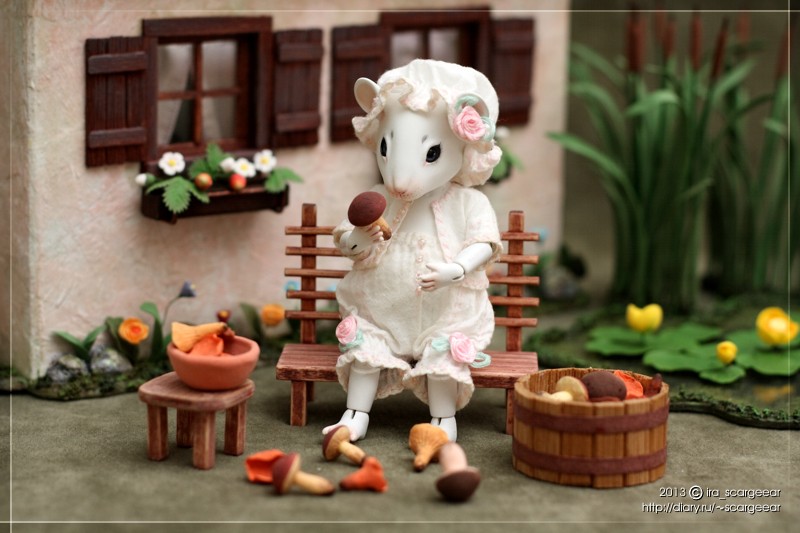
Mushrooms! I did several evenings: I stuck together a bunch, walked around and around - it seemed a little, still stuck, and so several times)))
The container for mushrooms is also made of bamboo mat: there were two types of strips. Paper hoops assembled with glue. The bottom is triple, rack-carton-rack, sits in a barrel on the glue.
Bowl of Deco.
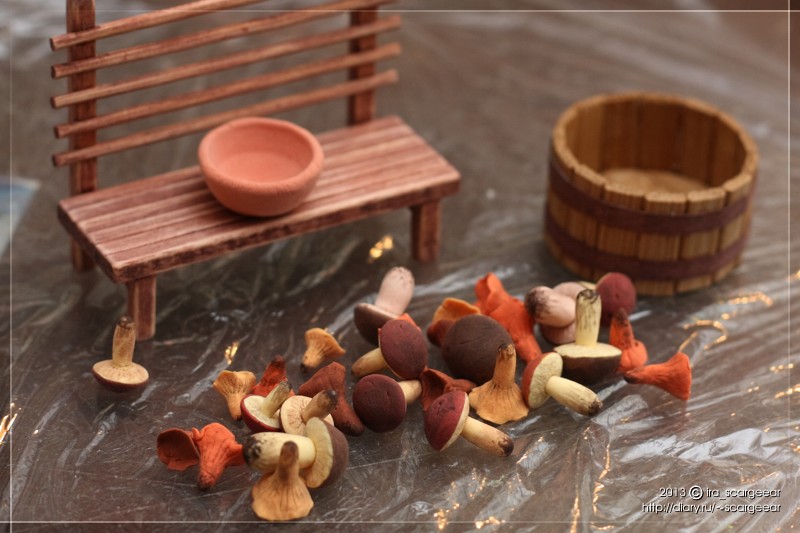
On the balcony under the roof of them, too, mushrooms. She made a linen rug, made another Deco jug, and bought a mug in a monpacier bead shop.
Yes, I know that the exhibition is in the spring, and we have mushrooms and pumpkins here - but my mice are tightly associated with houseiness and thriftiness, so the theme of the harvest was revealed.
In the composition will be another car and a bag of sugar from the very same photo shoot - why should the good be lost))
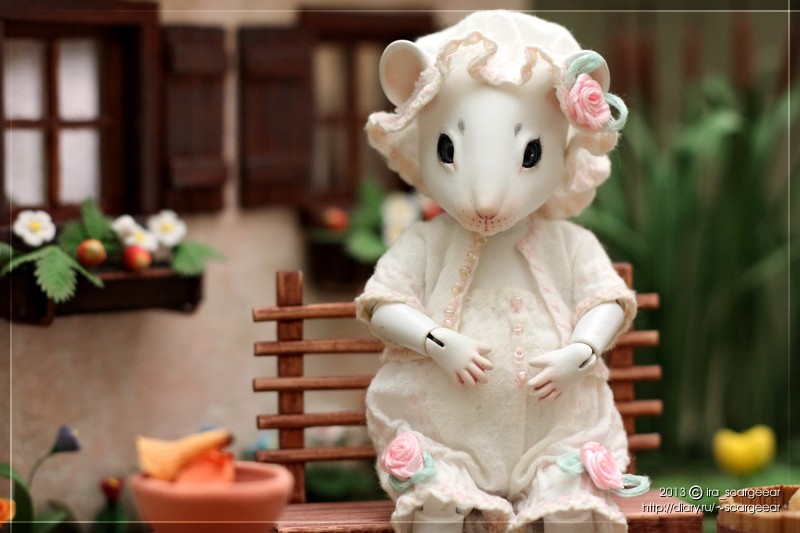
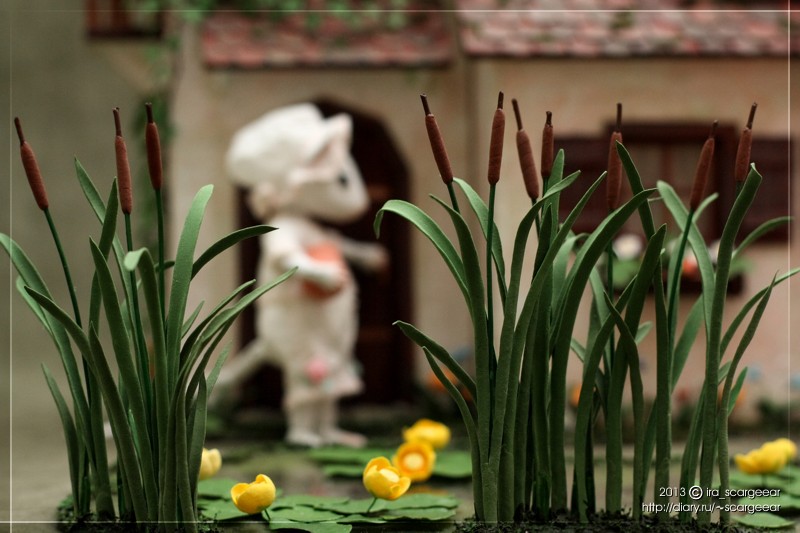
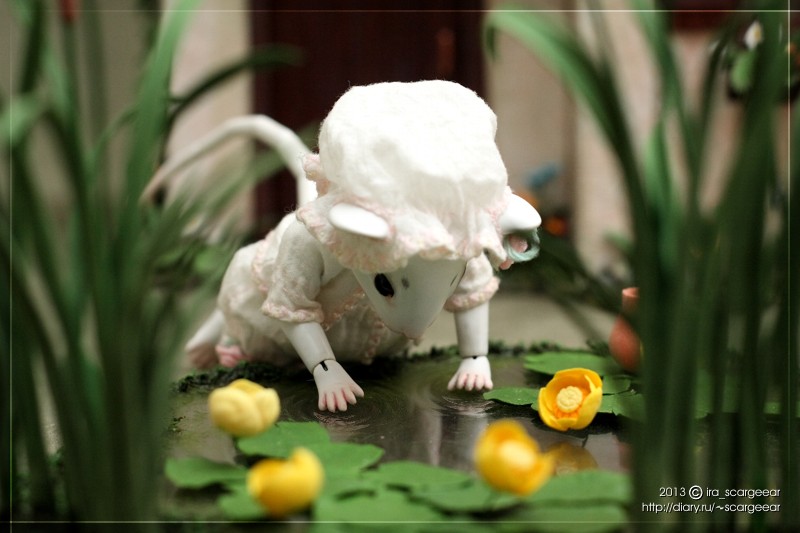
Well, that's it, the work is finished. See photo of Manyuni in entourage 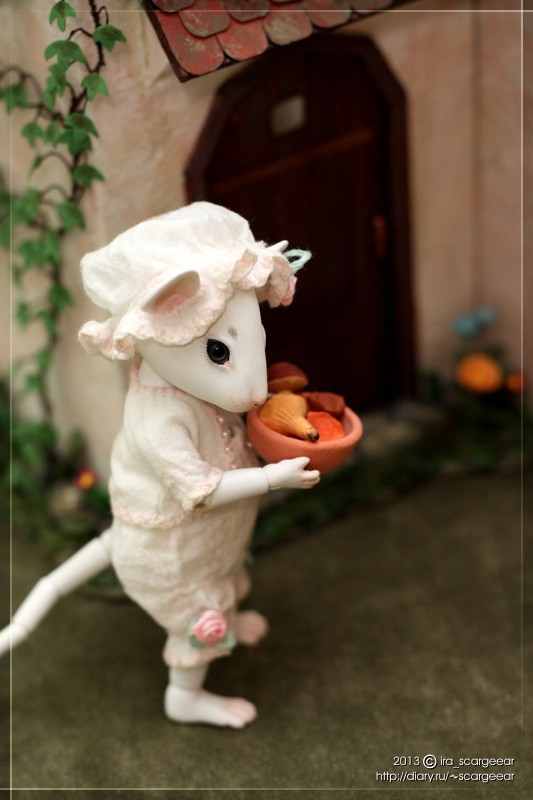


Crafts made of cardboard is not only useful for developing the creative abilities of your child, but also a very fun and exciting way to pass the time. And so, we offer you 20 ideas, each of which can be made of cardboard.
And so, what can be made of cardboard?
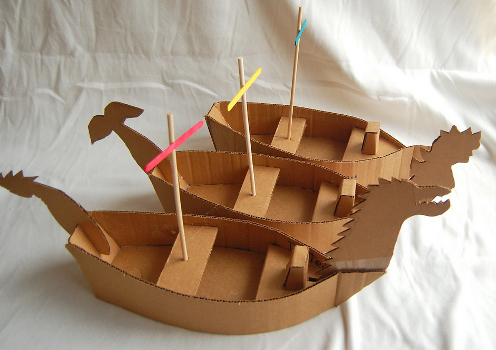
You can make a ship of cardboard
To make a similar boat from cardboard, you will need: Cardboard, any rope or thread, and a piece of cloth for the sail. Well, and of course the mast. You can use any branch you like as a mast.
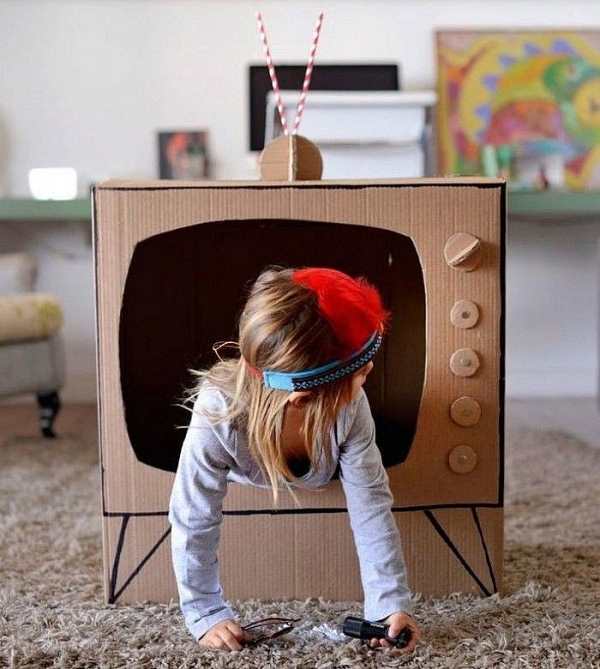
Does your child want to be "like that aunt or uncle from the TV!"? There is nothing easier. Again we use cardboard and fantasy. But in this case it is best to take a whole box of cardboard.
Handbag
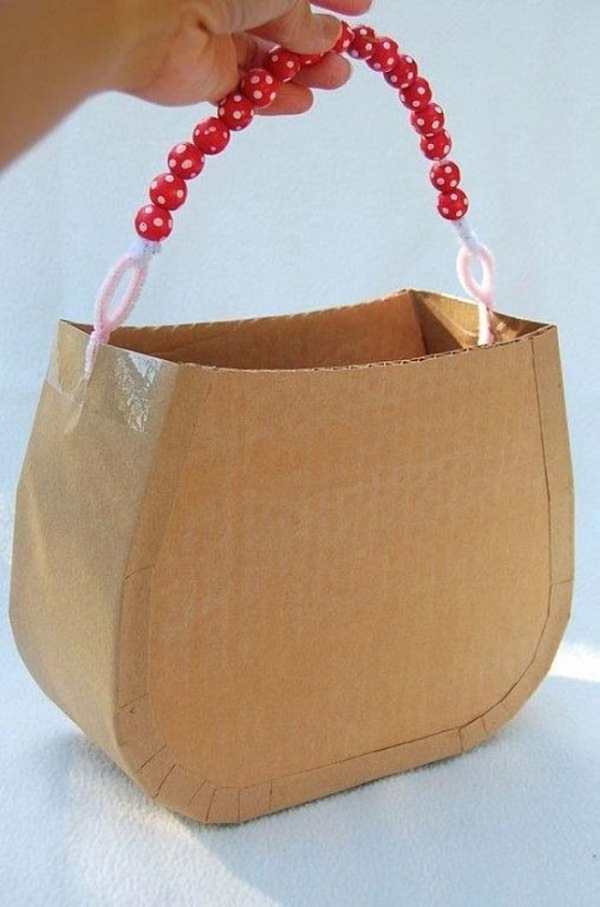
Teach your daughter how to make your own handbags. And who knows? Maybe in 20-30 years, half of the women on the planet will be walking with fashionable bags with a logo that is not LOUIS VUITTON, but your last name ...
Cat house
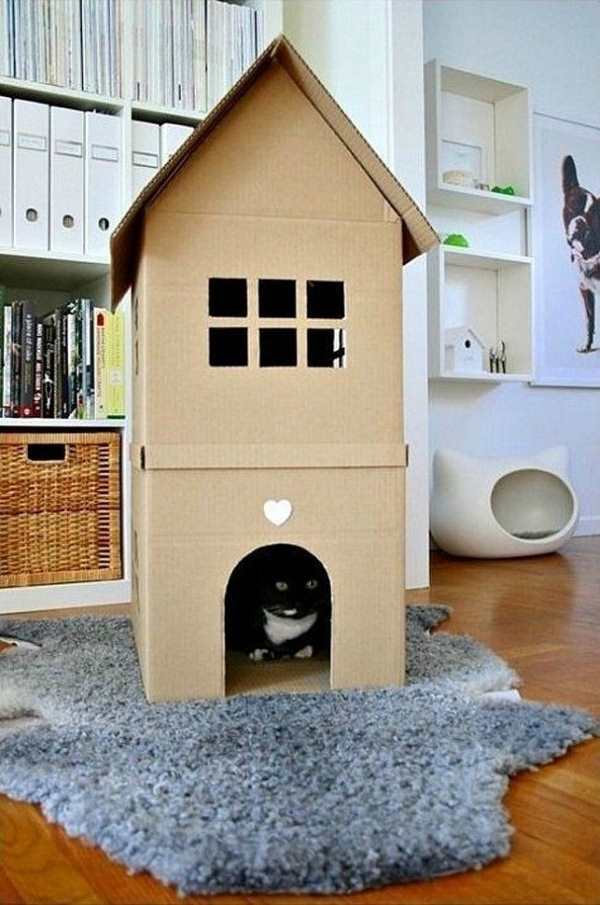
Do not forget about our smaller brothers. You can make a roomy and cozy cat house out of cardboard.
Make a mockup of cardboard
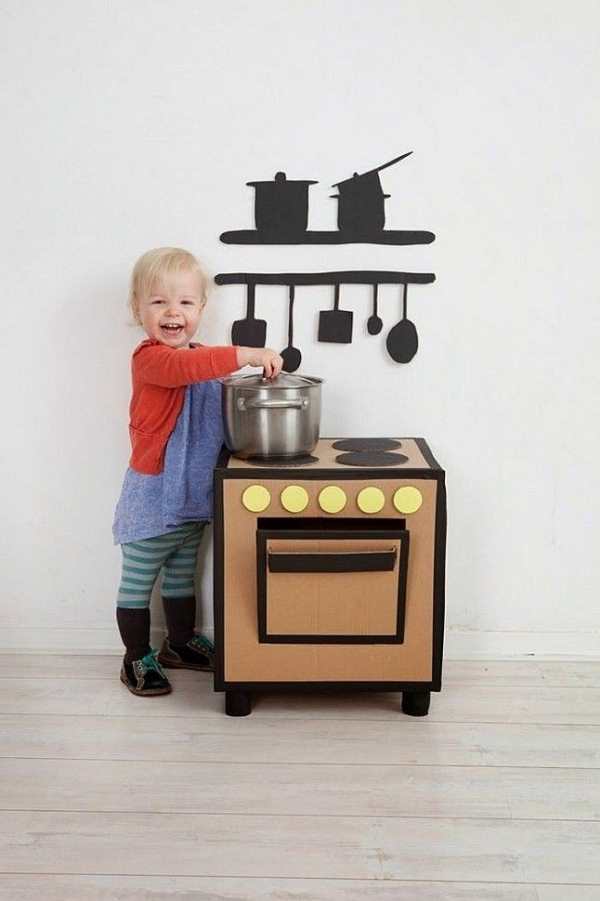
It doesn't matter who you are, boy or girl. And so and so it will be useful to practice cooking first on a mockup of an electric stove. Not only will you have fun making this kitchen device out of paper, so besides you can play in the Kitchen every day
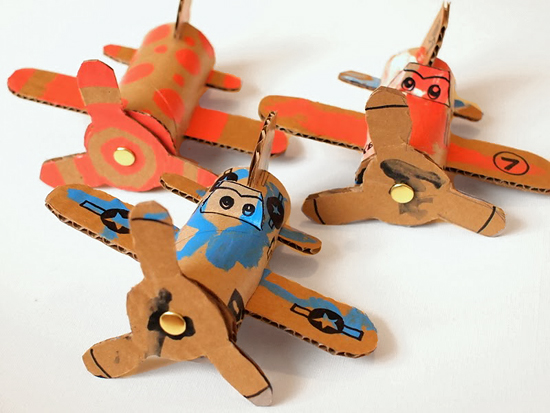
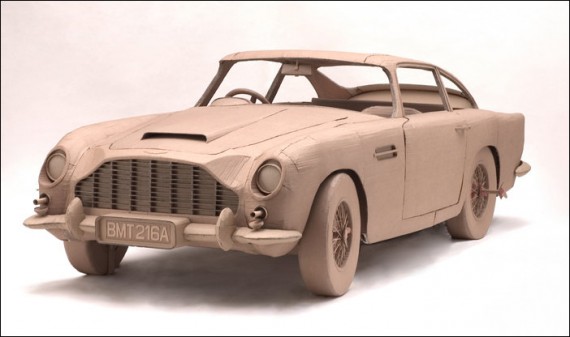
You can make any car out of cardboard
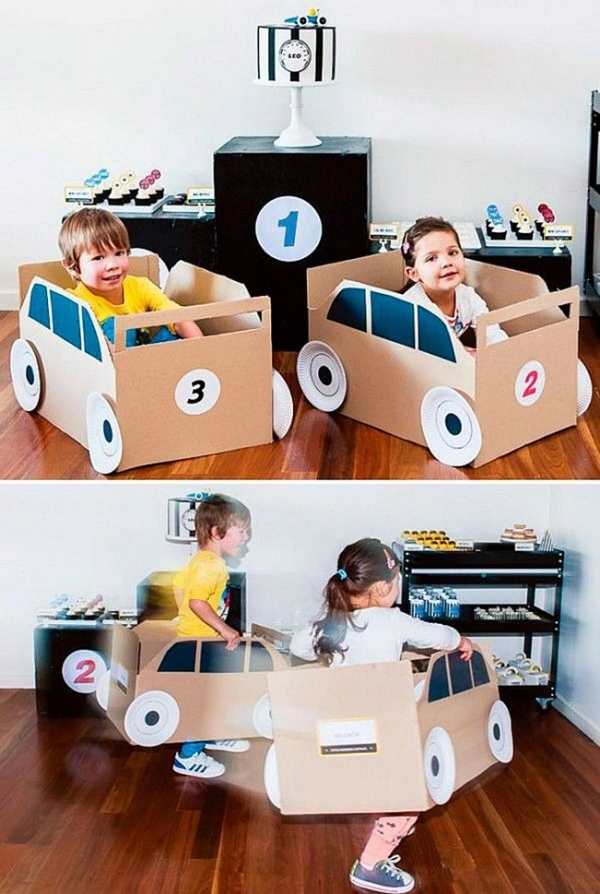
While our girls are cooking dinner in the kitchen, you can go to the garage and pick your car. Unfortunately, the car will also be made of cardboard.
Two-level parking
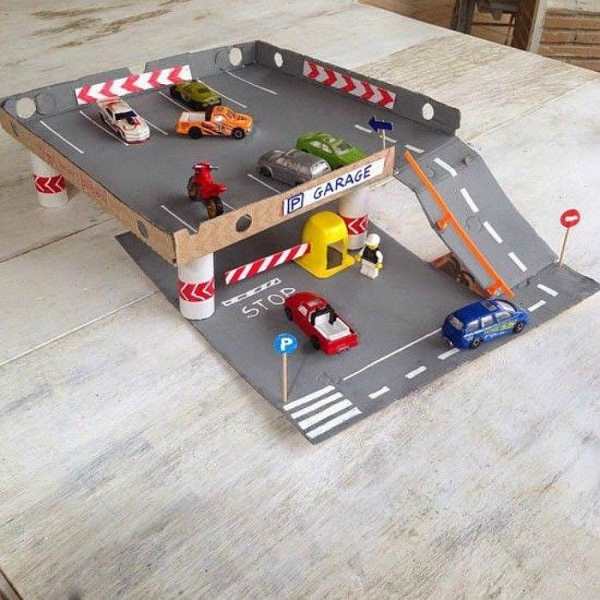
Surely you have accumulated more than a dozen small cars. So make them a big parking lot.
Home theater with moving cardboard figures
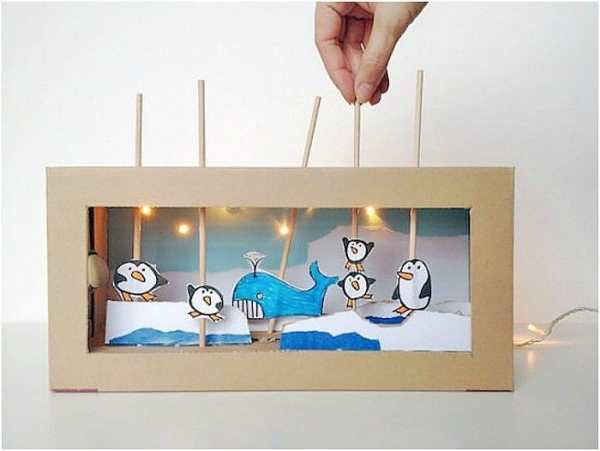
But more complex, but also more interesting version of what can be made of cardboard. Home Children's Theater. Here we need not only cardboard, but also to make friends with the electrician to create lighting in the theater.
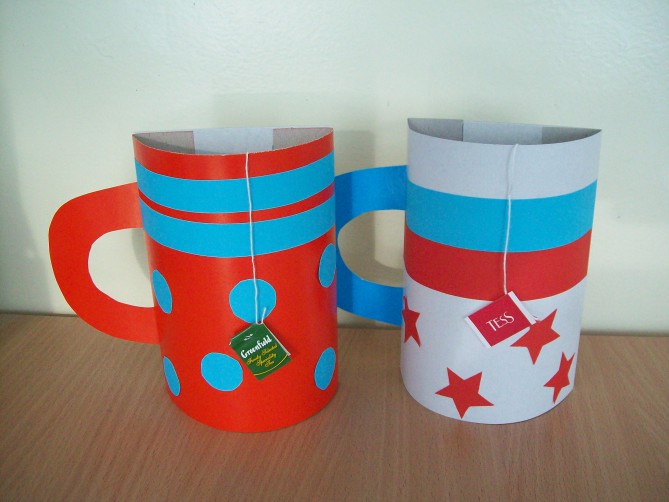
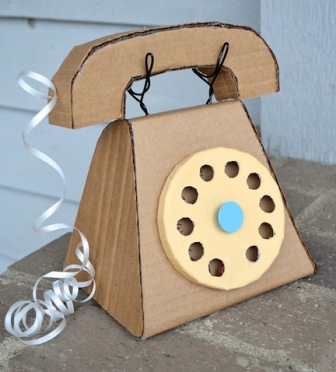
Phone
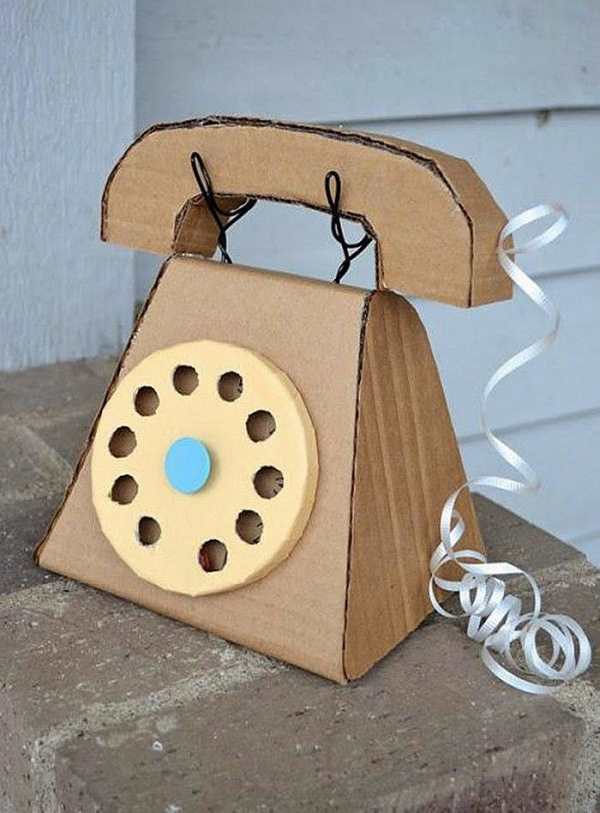
Everyone will be glad to telephone. Now you can place telephones in each room and talk with your child constantly.
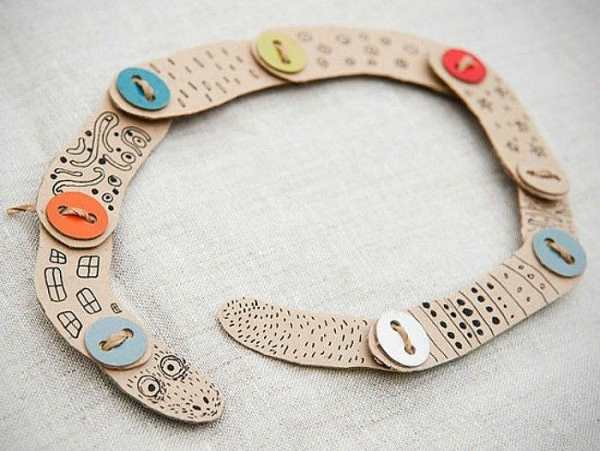
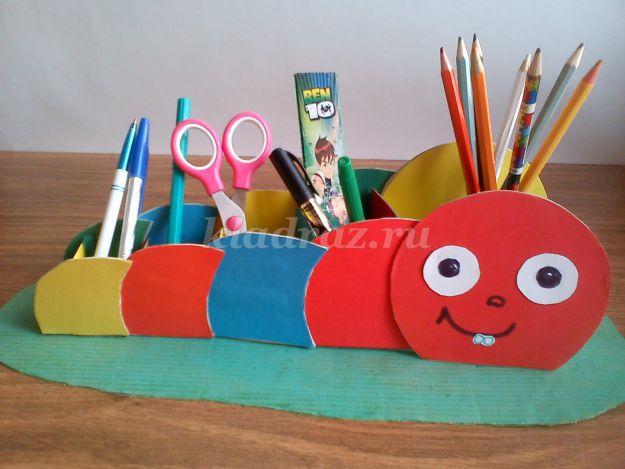
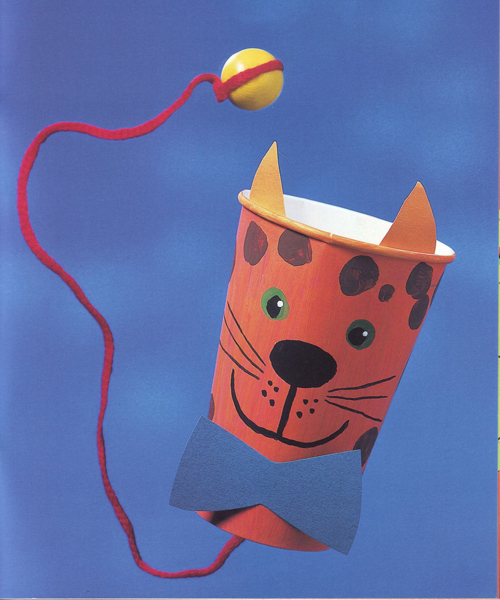
The cardboard snake is already there. Think and make other animals. And the main thing is not any alert.
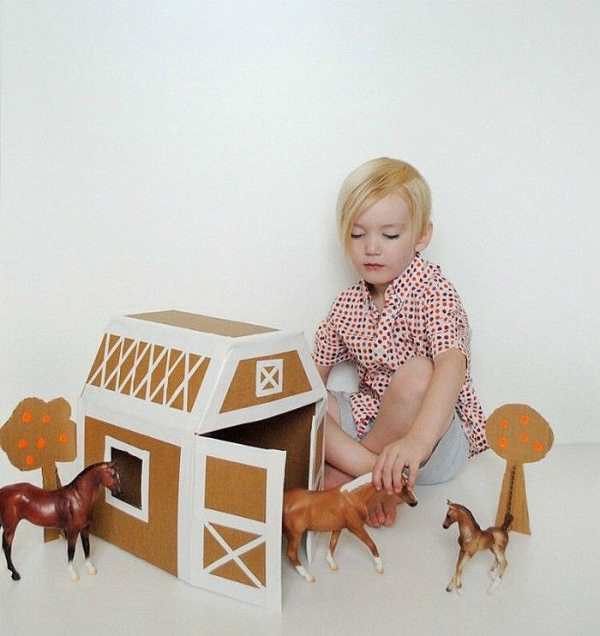
Well, since we managed to make a parking lot out of cardboard for cars, then we can stand the stable.
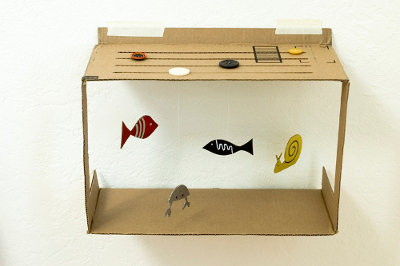
Aquarium

Make an aquarium with your child. Using the sliders on the top of the fish you can move. And you can paint the background in the spirit of any coral reef.
Horses, dinosaur, anything.
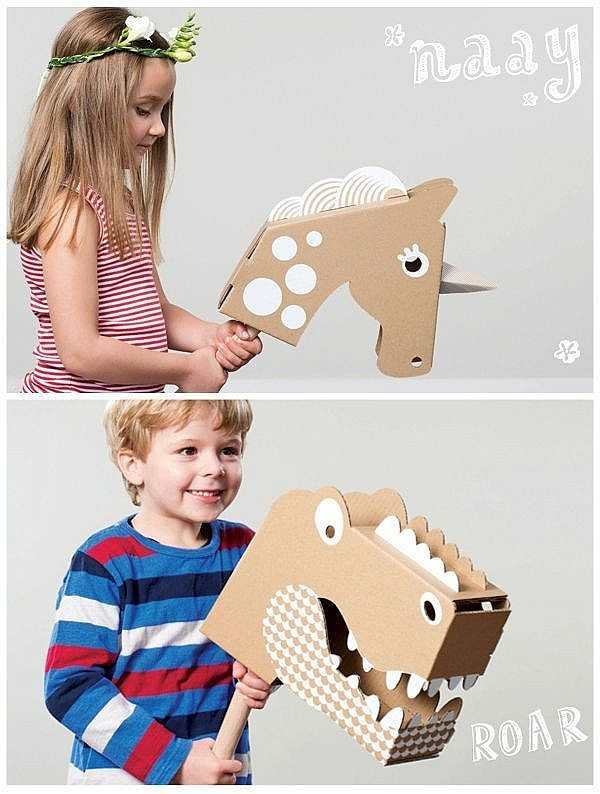
In a fairy tale you can ride a dinosaur. Welcome to the fairy tale.
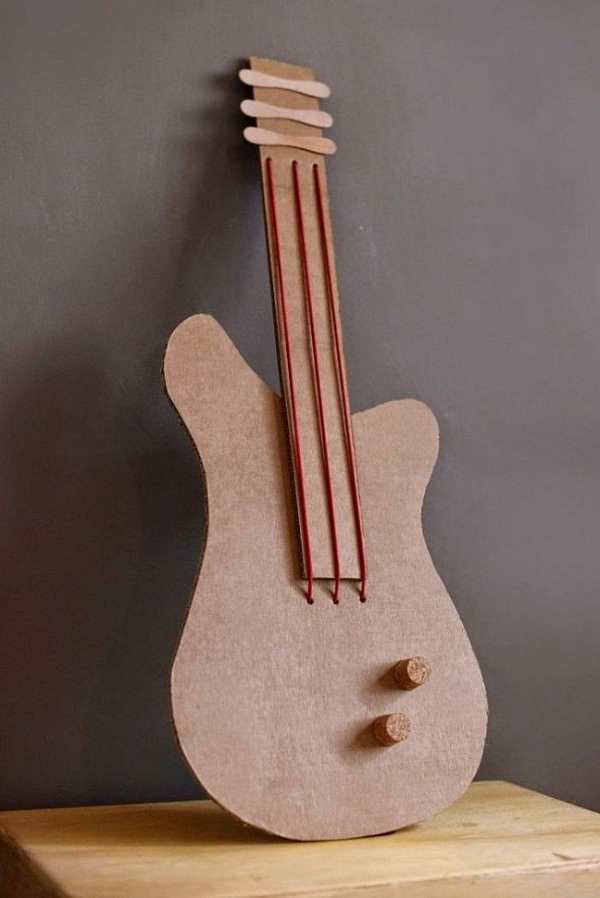
Now your child can feel like a real guitar hero and play along with his favorite performers, standing in front of the TV.
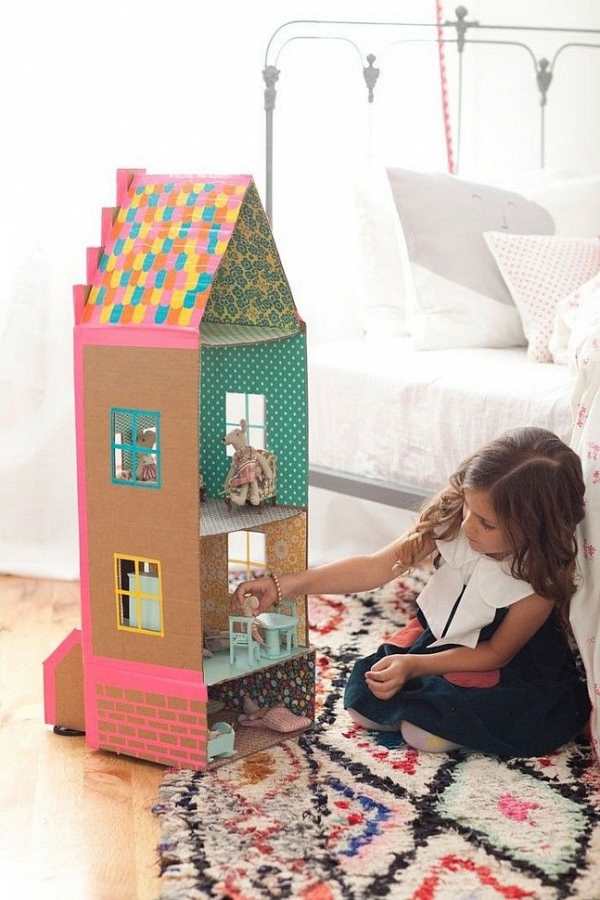
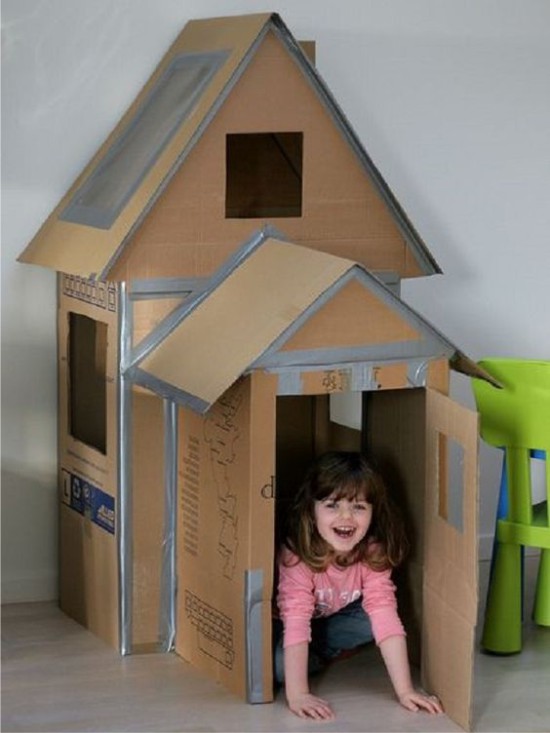
For dolls, you can build a house of a million floors and even with a pool. In this house everyone will be happy.
Washing machine
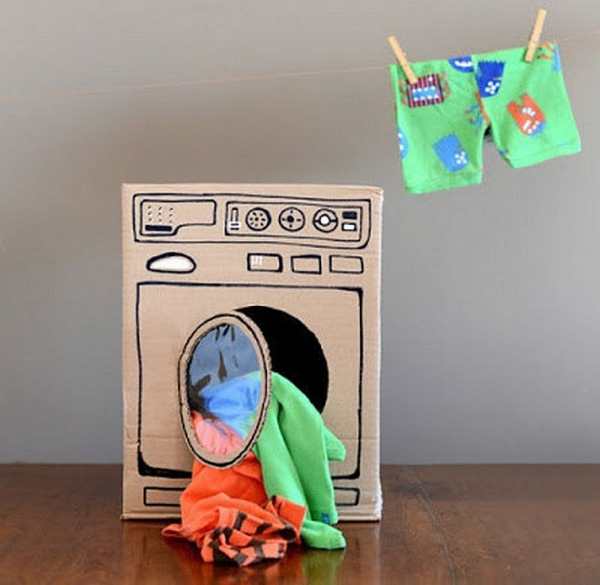
And you can force this house with any household appliances made of cardboard. It is much cheaper than this. Surely, you already have it.
Bed for toys
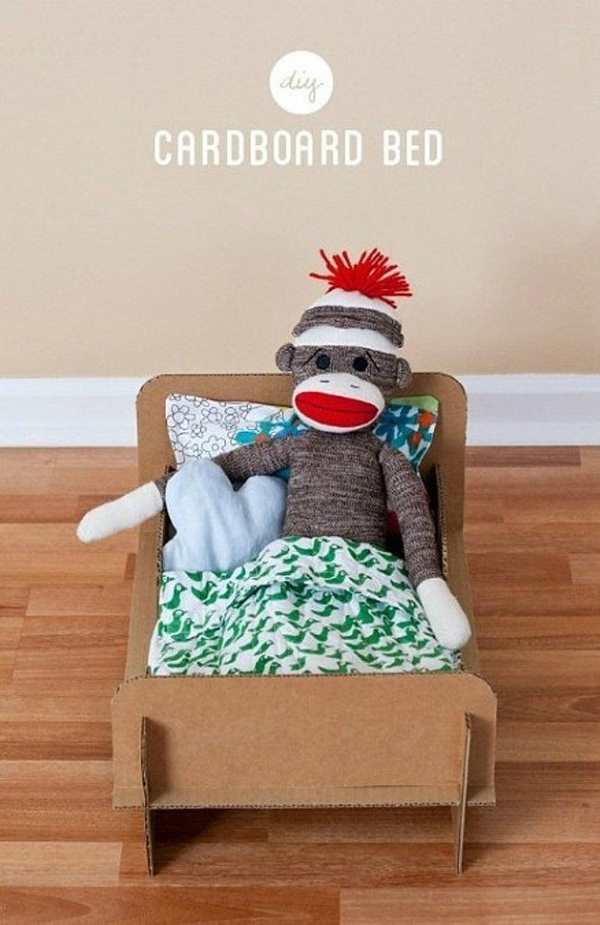
The bed will also perfectly fit into the interior of the cardboard house.
Ice Cream Counter or Ice Maker
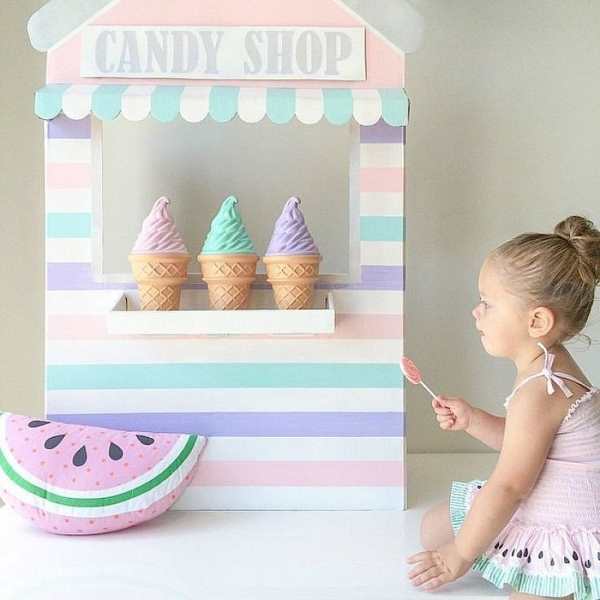
All of us in childhood dreamed of becoming an ice cream seller and just giving it to children. Now our dream has become closer) Such a counter will decorate the birthday and your child will feel really the most important thing on this holiday. Just replace the cardboard ice cream on the present.
Cake

Cardboard cake will never go bad. And you can play with him. But do not forget to pamper your miracle with real sweets. If you have ideas, write in the comments what else can be made of cardboard.
When buying large household appliances, food, shoes and other goods in the house there are packages that must be stored until the warranty period expires. Then they can be taken to the dustbin, but there is also a more constructive solution - to make of them interesting decorations for the interior of the children's room, gifts. Ideas that can be made of cardboard come spontaneously. The forms of packaging materials are pushing them, the need to supplement a gift with an unusual form of packaging or an interesting postcard.
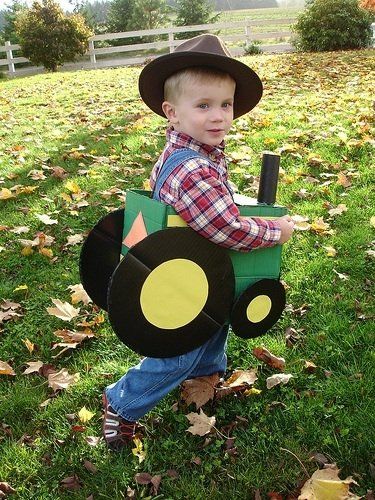
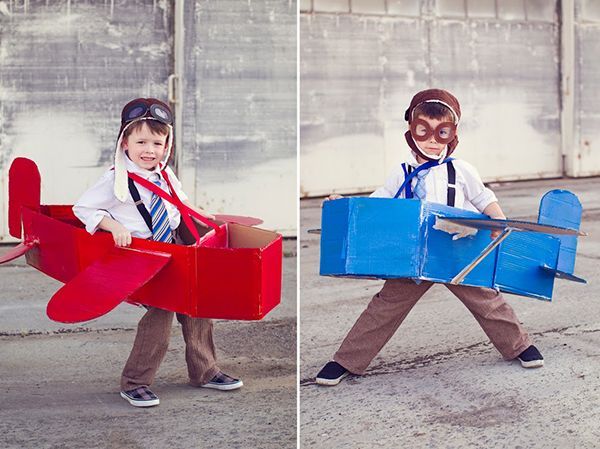
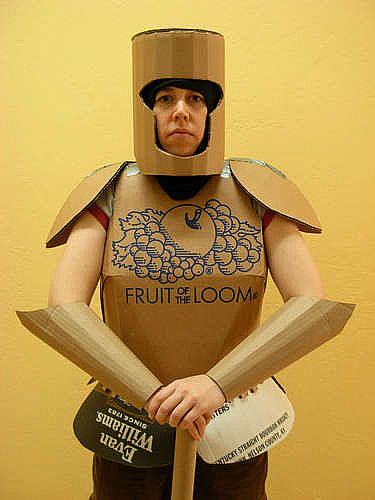
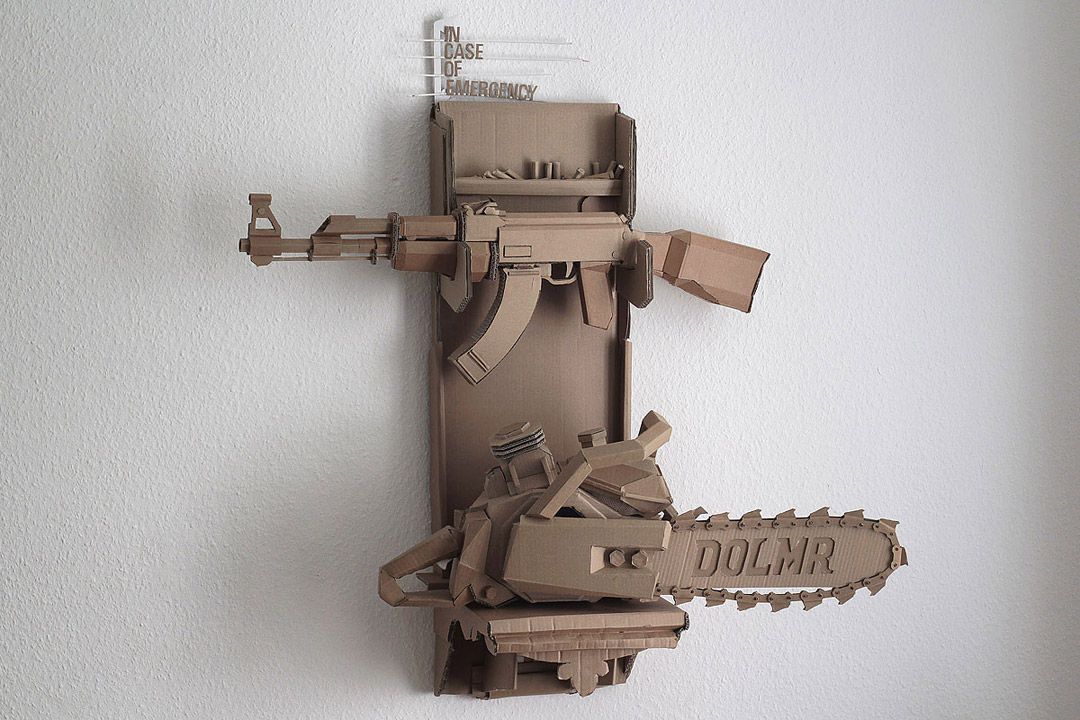
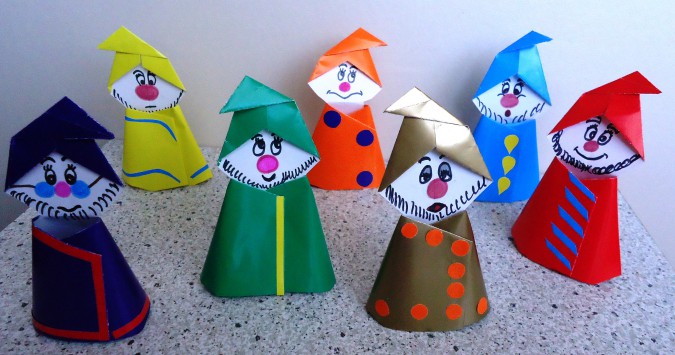
As a rule, cardboard is remembered when it comes to making a carnival costume, which must keep its shape.
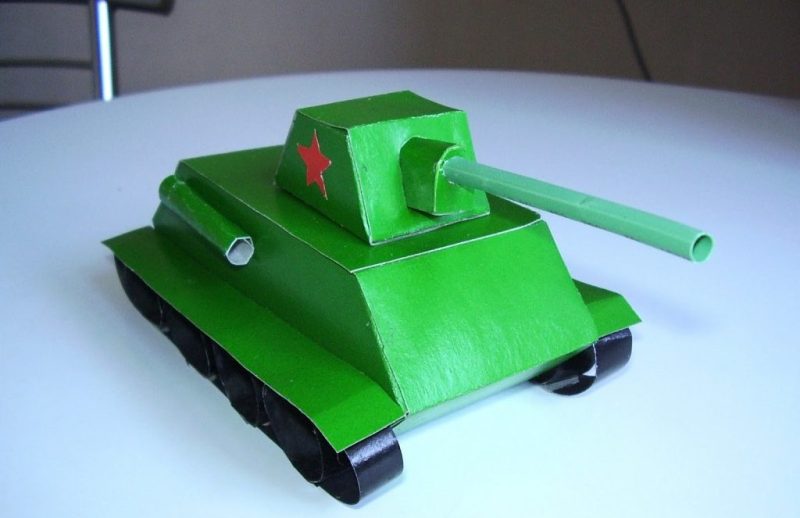
Dinosaurs, tractors, corn dusters, robots, cell phones - such growth and symbolically made costumes will delight the little ones. They are necessary not for carnivals, but for playing. With the help of such costumes, children can be carried away by the new game, they can learn new livers and poems with them. All that the children do not succeed in learning under the strict supervision of their parents, they will remember better in the form of a game.
 As a rule, cardboard is remembered when it comes to making a carnival costume, which must keep its shape.
 ![]()
Costumes of knights, gladiators and historical personalities are more suitable for studying history. True, such costumes are more complex in execution. Cardboard can be painted with gouache. The only drawback of this paint is that it gets dirty even after drying. Better boxes of corrugated cardboard, from which volumetric suits are made, pasted over with colored paper.
For decoration, you can use large buttons, badges and other lightweight elements made of wood or plastic.
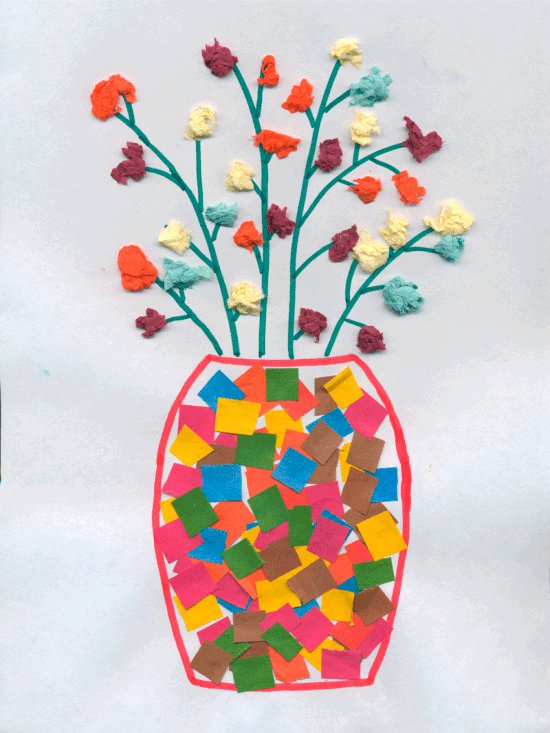
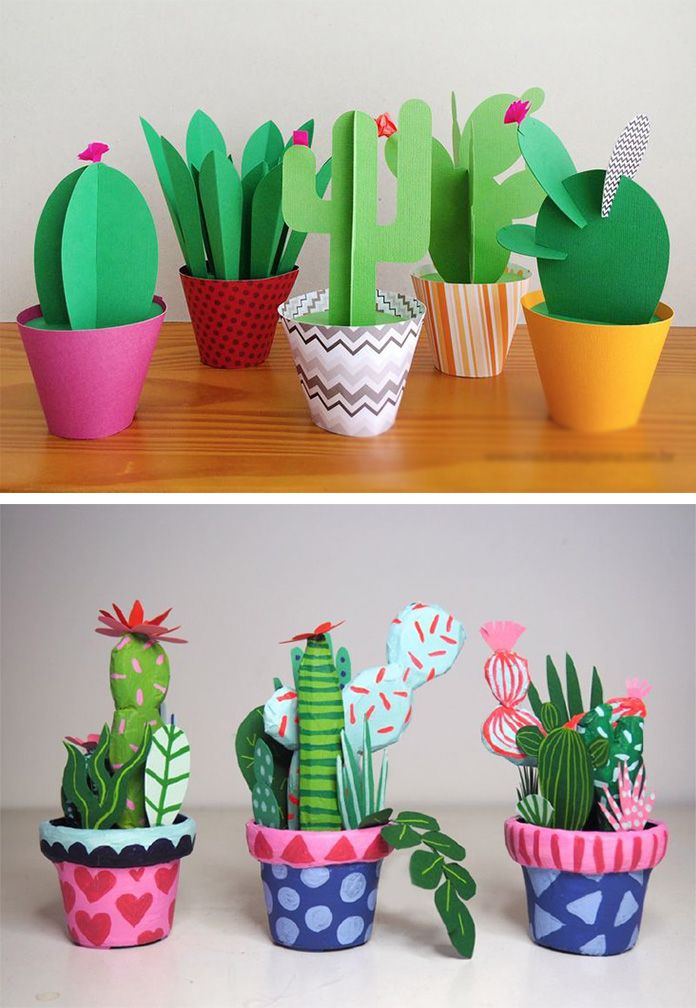
What can be made from colored cardboard with your own hands
Colored cardboard is not very strong, it is better to use it for making cards, gift boxes.
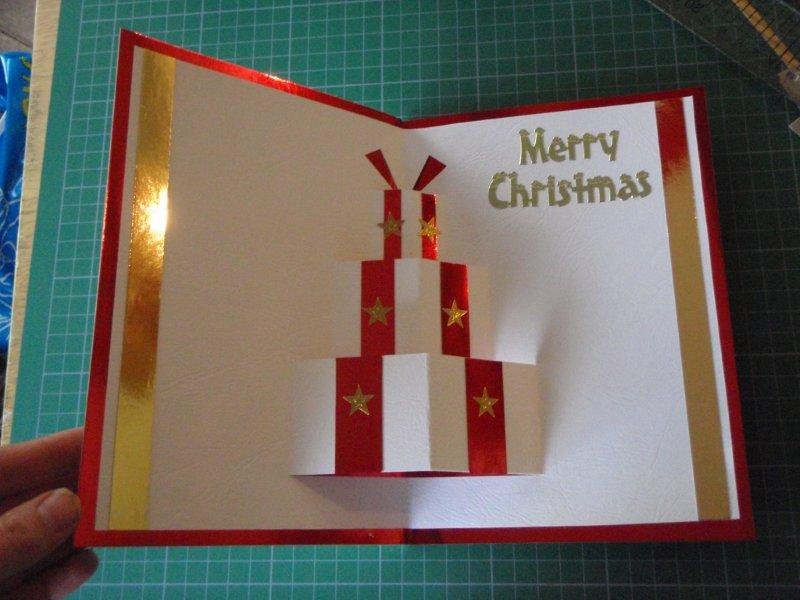
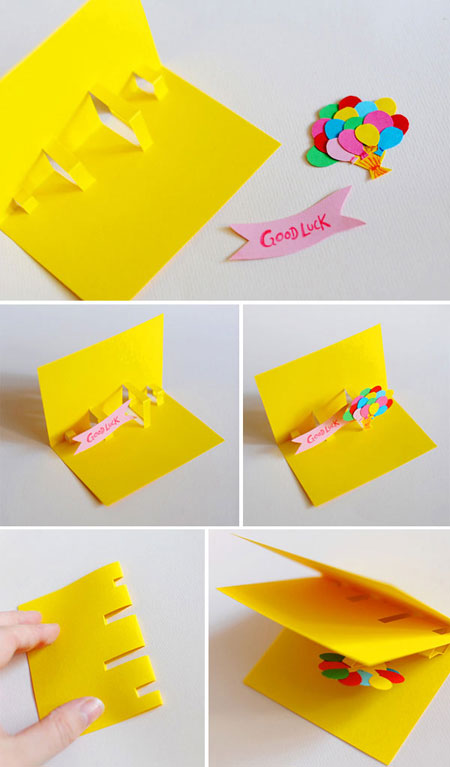
DIY Cardboard Card
The card for this sketch is made from two sheets of contrast cardboard. Lighter cardboard should be less bright on each side.
 The card for this sketch is made from two sheets of contrast cardboard
 - The light sheet is folded in half.
- Having retreated from the edge of 2 cm, on the outer side of the sheet it is necessary to draw a line 6 cm long. At a height of 3 cm from the first line a strip parallel to it is drawn, of the same length.
- Above it, after 2.5 cm, the next line is 4 cm wide.
- The third and final line will be at a height of 2 cm from the previous one. Its length is 2.5 cm. All intended lines are cut.
- Now they need to turn inside. To make them resemble a pile of gift boxes, they need to be decorated with longitudinal strips of contrast paper with glued small elements made of foil.
- The edges of the postcard are also made using shiny stripes.
- Letters with the name of the holiday, to which the card is timed, are cut out of foil or velvet paper and pasted on a cardboard base.
- It remains only to glue the decorated light sheet of cardboard to color. They are folded backs.
- The corner elements of a larger sheet are cut out in small squares, so that when the edges of the sheet are bent on the outside of the decorated one, a neat frame is obtained.
On the outside of the resulting address, you can stick a holiday symbol (tree, date) or the word "congratulations."
Gallery: crafts made of cardboard (25 photos)
![]()
![]()
Book-toy for the child, made by parents
When using cardboard painted on both sides, it is possible for a child to make a little book with three-dimensional elements. For the manufacture of the basis of protruding elements using the same technique of cutting strips, as when creating a postcard.
 When using cardboard painted on both sides, it is possible to make a book for a child with a volume element.
 Handicrafts made of cardboard tubes
Dense cardboard tubes are the most beneficial material for creating home decorations. They can be cut with a construction knife, into elements of the same length. This allows you to create with the help of a glue gun furniture that can serve a person in everyday life. For an open pavilion of cardboard tubes, you can make a table and chairs without special expenses.
- For sitting, you will need 64 pipe lengths, with a height of 38-40 cm - this is the standard height of chairs.
- The tubes are glued together in 8 pieces in a row. There are also 8 such plates. They need to be glued together.
- For the formation of armrests will require pipes with increased by 20 cm in height. They are also among 8 pieces. Each armrest consists of two rows. 58-centimeter elements will need 32 pieces.
- Of the 15 80-centimeter elements glued back seat.
- From the tubes glued together, the base of the table is formed. It is glued to the tabletop of laminated thin fiberboard or glass.
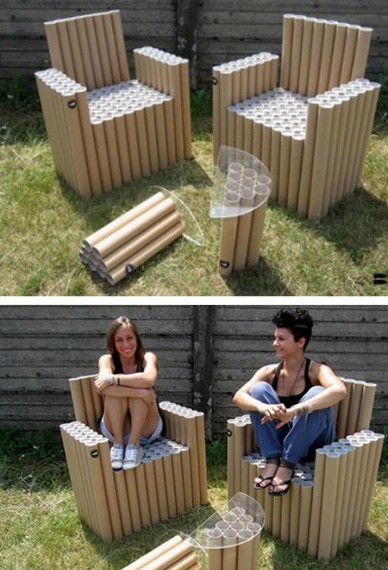 For an open gazebo of cardboard tubes, you can make a table and chairs
 Curved bench
For the manufacture of this type of furniture will require not only cardboard, but also pressed wood.
- Two identical parts are cut from the tree. They will serve as legs benches.
- When using tubes of different diameters, the corresponding holes must be drilled for them in the legs. Their height varies depending on the idea. To make the seat comfortable, the line of holes must be smooth.
- The length of the tubes is chosen arbitrarily.
- Lubricated with assembly or wood glue the ends of the tubes are inserted into the holes.
- Wooden bases are strung on tubes. More interestingly, this bench will look if the edges of the tubes protrude slightly outwards.
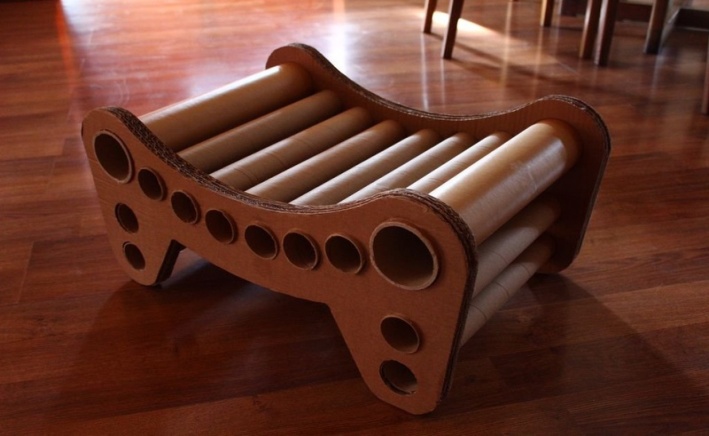 For the manufacture of this type of furniture will require not only cardboard, but also pressed wood
 Such a shop will decorate not only a gazebo in the garden, it will become indispensable in the hallway of an apartment and even in the living room. It can be used in the kitchen when cleaning potatoes.
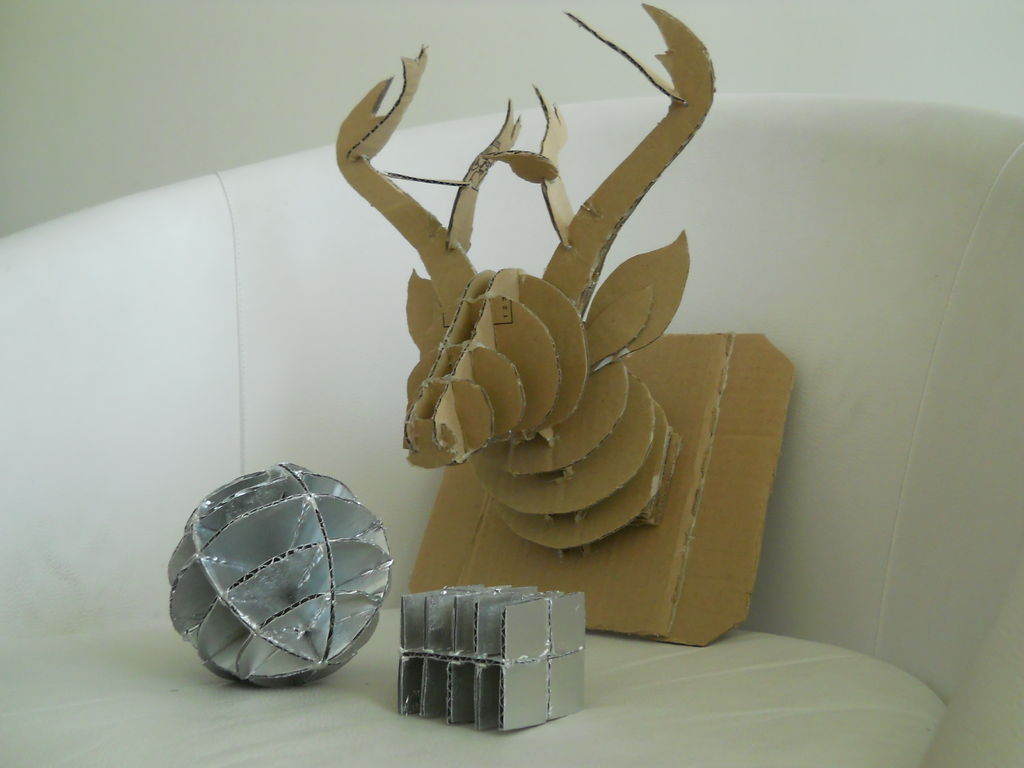
Glowing openwork hemisphere
You can use such decoration in landscape design by setting it in front of a makeshift waterfall or a fountain with light or under a streetlight. Thanks to the mirror used for the base of the structure, the light will be reflected, creating a glow effect from inside the ball. In the absence of external light sources, the hemisphere can be used as a candlestick.
For the manufacture of required cardboard thick-walled tubes, a round large mirror, glue and varnish that protects against moisture.
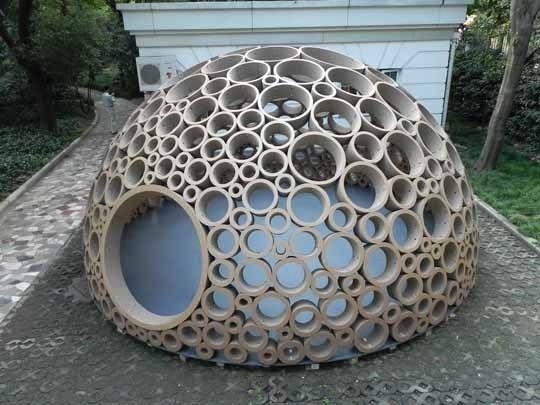 You can use such decoration in landscape design by setting it in front of a makeshift waterfall or a fountain with light.
 Preparation method:
- Tubes of different diameter are cut into circles with a width of 3 cm.
- Before installation, each element is varnished in several layers from all sides. This training can take a lot of time.
- The assembly of the hemisphere begins with gluing the elements of the lower row to the mirror surface.
- At the end of the first row, a single, largest in diameter element is glued.
- A frame is created around it from the alternation of narrow and medium elements with a slight displacement inward.
- Further work continues in a circle. The first few rows have a slight deviation from the vertical inside the sphere.
- When the wall is equal in height to the largest structural element framed by the frame, the bevel will be steeper.
- Last set upper center ring.
This openwork decoration will glow not only in the evening, the sun's rays will also enliven it.
Teremok for baby
Smooth cardboard tubes are very similar to logs. Of these, it is much easier than to make a teremok for a child out of wood. It will be much more interesting than a cloth tent, which commercials impose on parents.
- In order for the “log house” to be spacious, it’s enough to take tubes 120 cm long.
- In the tubes it is necessary to make slots, at both ends, equal in diameter to the width. From the depth of the holes depends on the density of the fit of the tubes to each other.
- It remains to fold the house and decorate it with a roof made of thick corrugated cardboard.
- The door and windows can be cut through after assembling the house, and in the process of folding elements can be formed to form openings of shortened pipes.
 Smooth cardboard tubes are very similar to logs.
 By the same principle, you can assemble a fabulous tower for dolls and other toys. Only the diameter of the pipes must be chosen smaller. And the material may not be so dense.
A few more ideas for using cardboard tubes in the interior
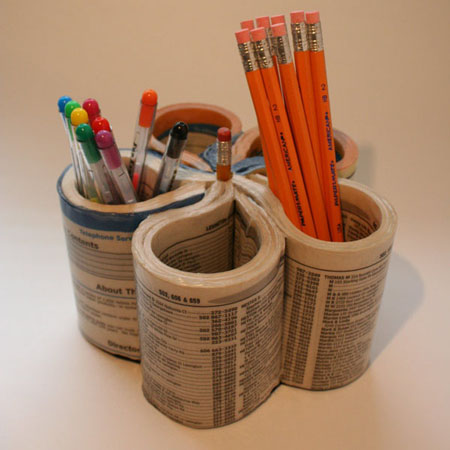
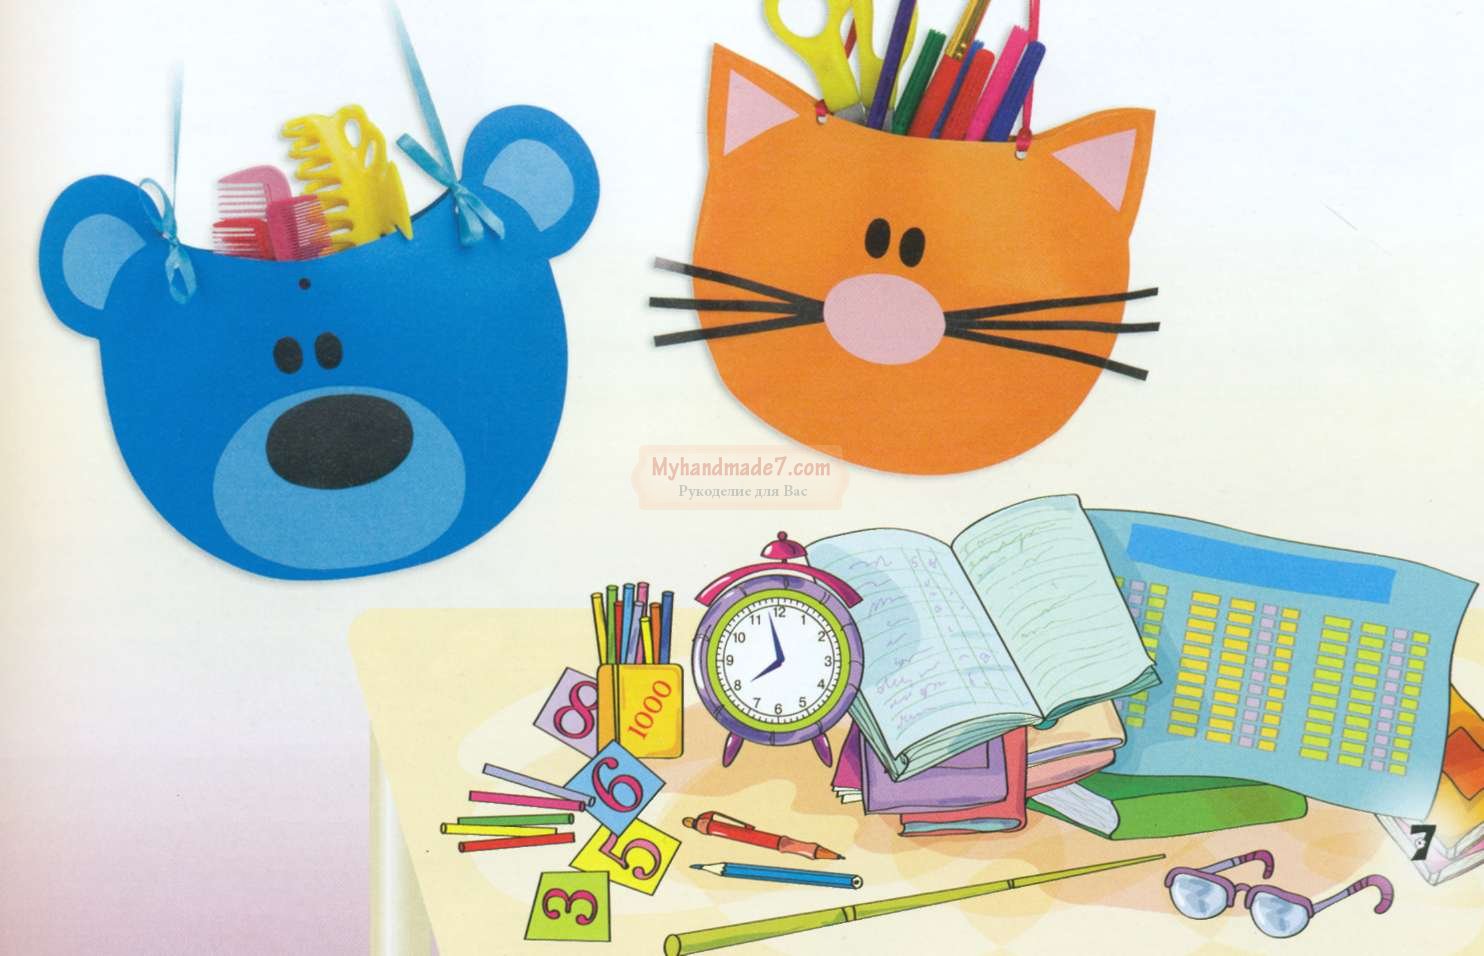
Many practical applications for cardboard tubes with thick walls. They are used as organizers for pencils, pens and other necessary items. They make shelves of them for equipment, for storing clothes and soft toys.
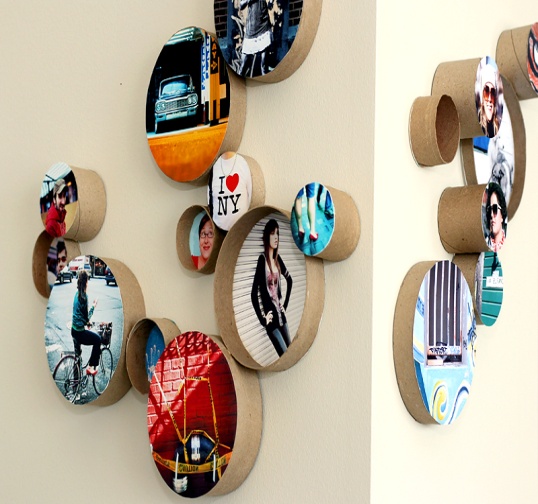 Many practical applications for thick-walled cardboard tubes
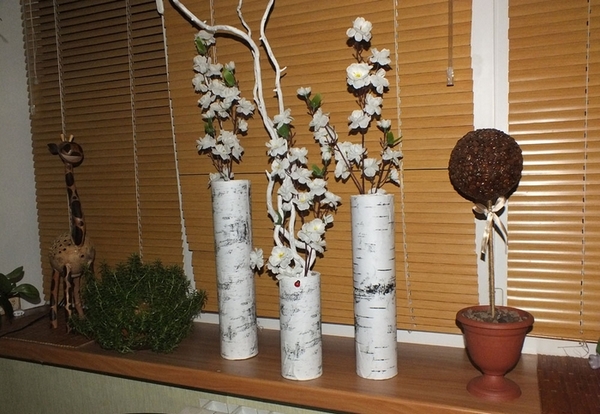

Crafts from white cardboard
The most simple white-cardboard crafts are applications. To make them you need a sheet of white cardboard and a colored base. Cutting the silhouettes of white material, they must be pasted on a colored sheet. When depicting a white poodle, a bear, a swan, additional materials will be required, which will give the image texture. It can be: cotton wool, scraps of napkins, wool fibers.
 The most simple white cardboard crafts are applications.
 It is a little harder to make the application convex without the use of additional means of expressiveness.
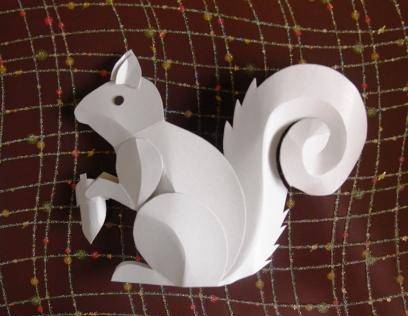 A little harder to make a convex appliqué.
 On the example of a squirrel, it is clear that in order to obtain a volumetric figure, it is necessary to cut out individual elements, bend them and join them together with glue.
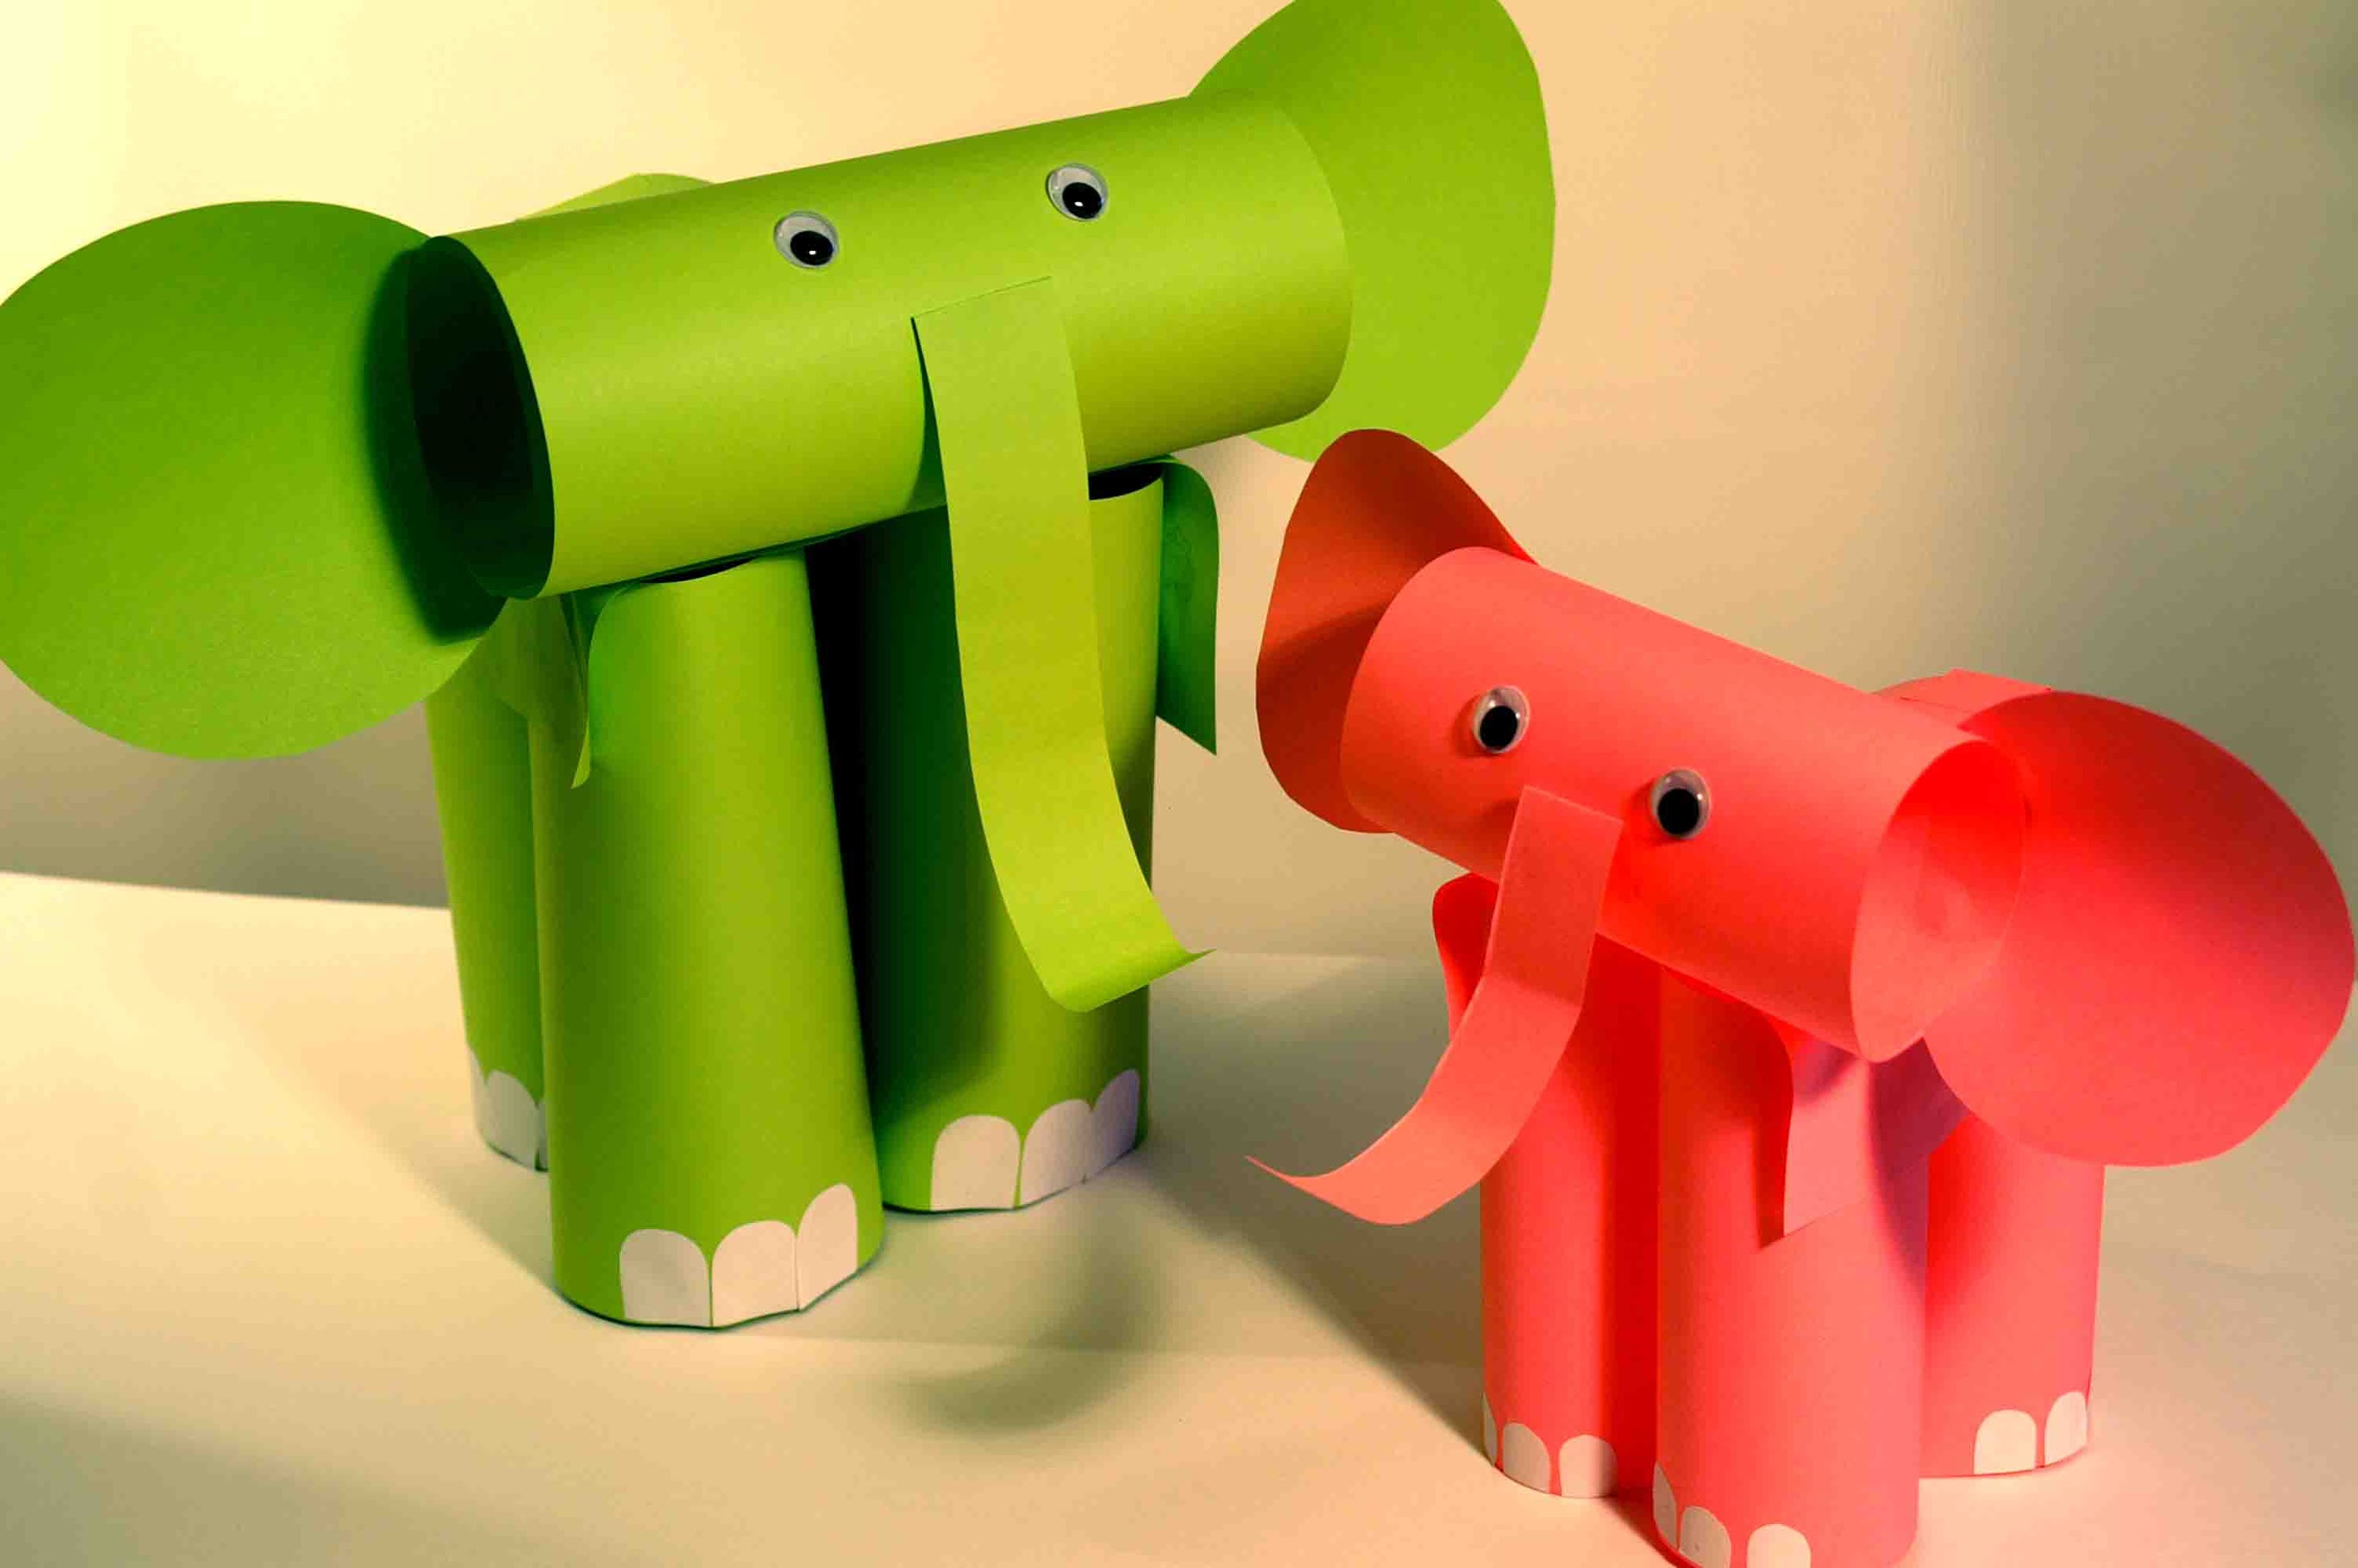
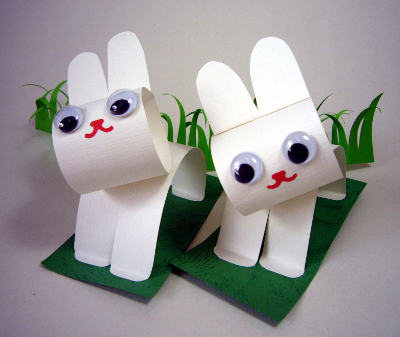
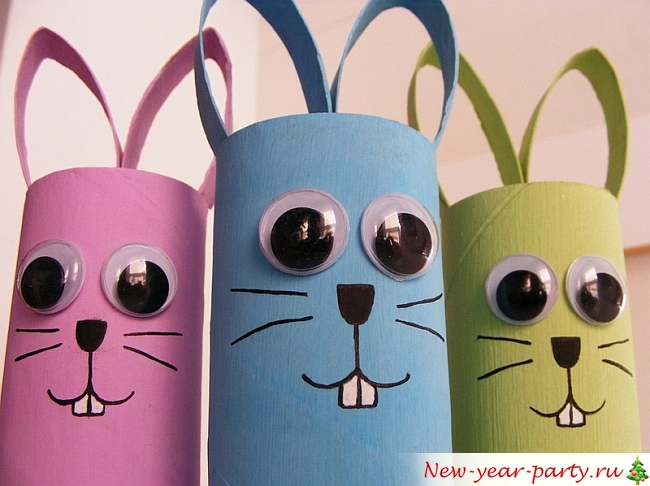
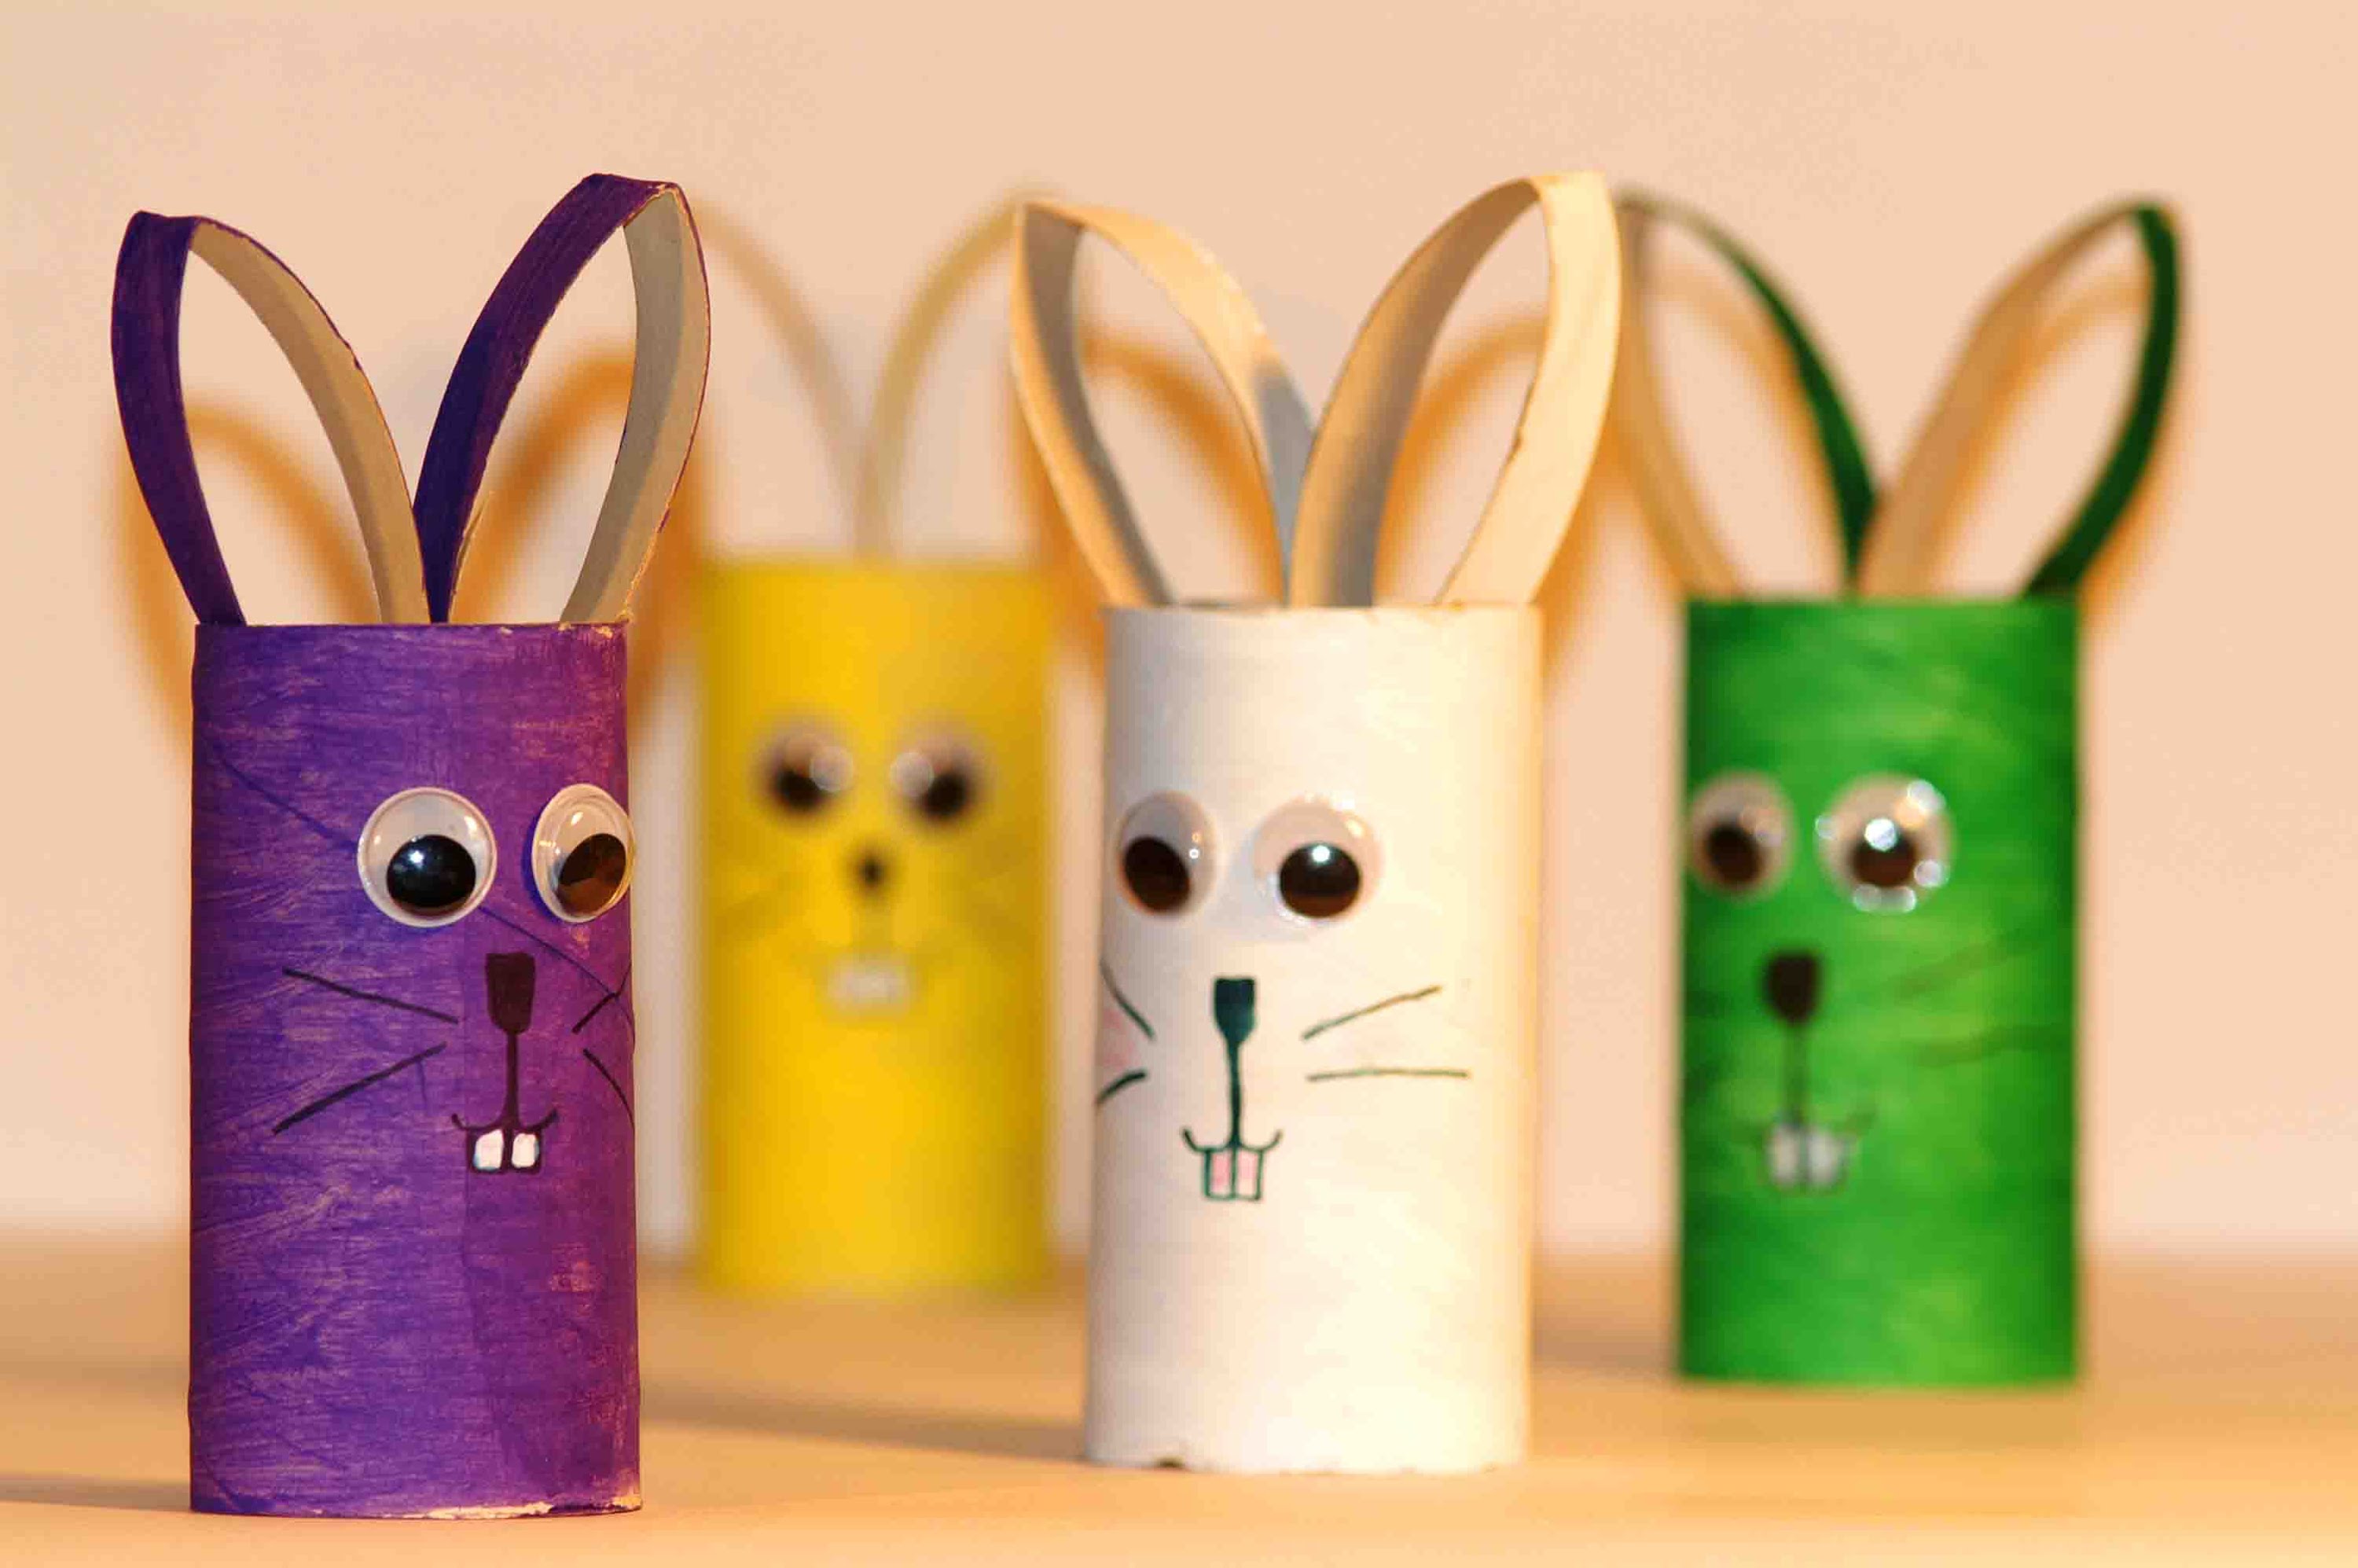
From white cardboard you can make a volume figure of a hare of a white bear, cat, dog.
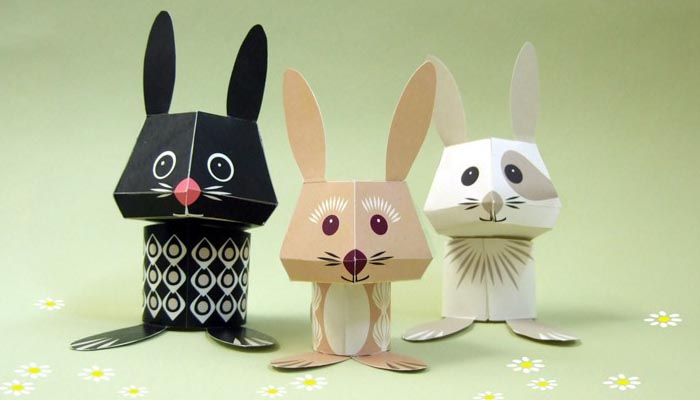 From white cardboard you can make a volume figure of a hare of a white bear, cat, dog
 For the manufacture of the body from the sheet is cut a strip of paper, it is glued together with a tube. Below are attached to the details of the legs, and on top of the head. She cuts out with the ears. To face the animal turned out convex, the workpiece is folded along and across. Fold lines converge at the point forming the hare's nose. It remains to draw his eyes, nose, mustache.
Silhouette pictures look very impressive.
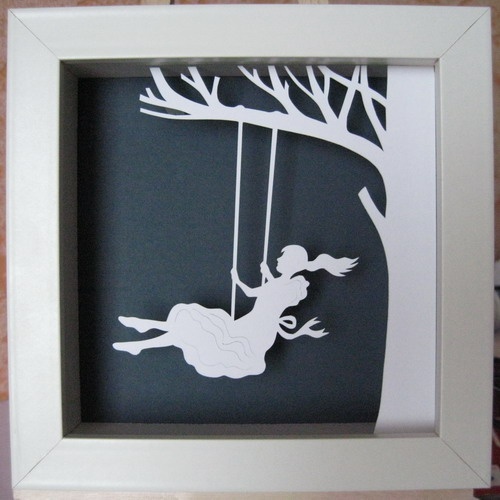 Silhouette pictures look very impressive.
 The parts cut by the blade are not glued to the background sheet. They are attached to the volume frame, which can serve as a box of candy. The peculiarity of such an interior decoration is that when the angle of illumination changes, shadows will appear on elements not adjacent to the sheet, the picture will come to life, filled with new colors. If you look at a girl on a swing, it may seem that she is really swinging. This effect will be enhanced by the flames of a candle burning on the side of the image.
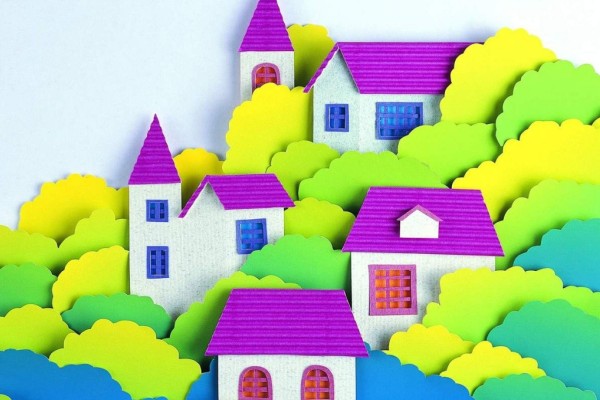
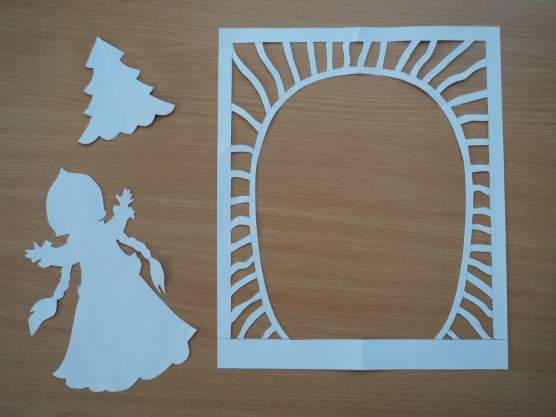
A white openwork house carved from seven sheets of cardboard will be a spectacular decoration of the mantel shelf. For its manufacture will require two patterns with pictures.
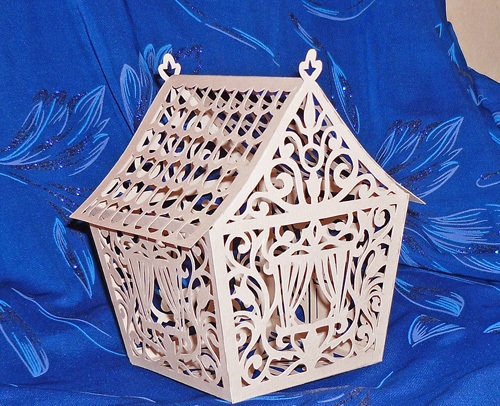 The white openwork house will be a spectacular decoration of the mantelpiece
 One with the image of the decor of the walls, the second with the ornament of the roof and the bottom. Edges are added to the side walls with a gable for gluing with details from all sides. To them, after cutting openwork elements, the remaining parts of the product are attached.
What can be made of thick cardboard
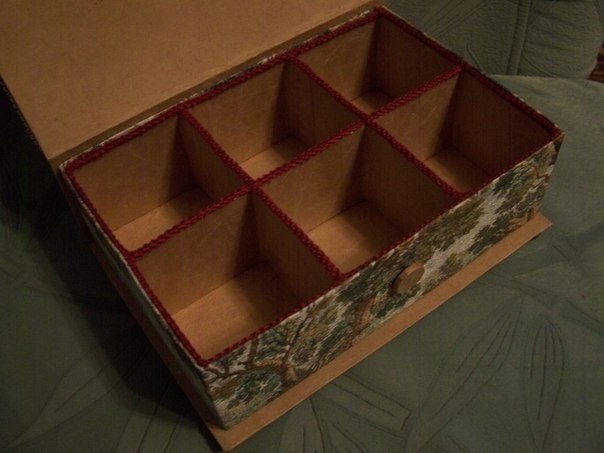
Using several layers of thick cardboard, connected by glue, and on top decorated with a stitching seam made with a thick thread, it is possible to make partitions for a box with an attached lid.
It is also easy to make from thick cardboard:
- The longitudinal partition is cut from above to the middle.
- Transverse cut from the bottom to the same distance.
- The resulting grooves are a lock, it will securely hold tight parts.
- Upholstery fabric - tapestry - is used as a decorative outer layer. Until its sticking on the cardboard, a beautiful button is sewn to the front of the slat.
On the cover is glued a loop of thin elastic. Treasury is ready.
This woven vase for small things is made on the basis of a dense cardboard blank.
- Having drawn a heart or a circle for the bottom, you need to cut two identical parts.
- Visually dividing the perimeter of the workpiece into equal segments, it is necessary to determine the weaving step.
- In accordance with this parameter, strips of 5-7 cm in height are cut out of cardboard.
- In the upper part, in the middle, round holes are made using a hole punch. They will be needed at the end of the weave to decorate the upper edge.
- The lower ends of the slats are glued between the bottom blanks.
- Weaving is made from the bottom up.
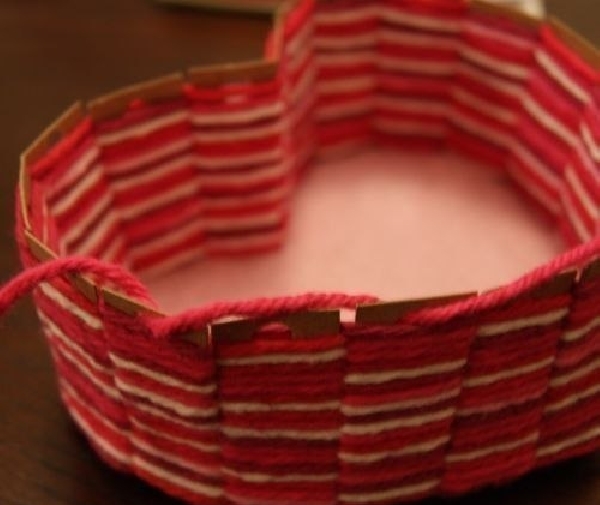 Wicker vase for small things
 What is corrugated cardboard and what can be made of it
Corrugated cardboard is a dense packing material consisting of at least three layers - two flat outer and sinuous inner, creating cells. The second type of corrugated cardboard is specially made for needlework.
Large practical items can be made from packaging cardboard. For example, a house for dolls.
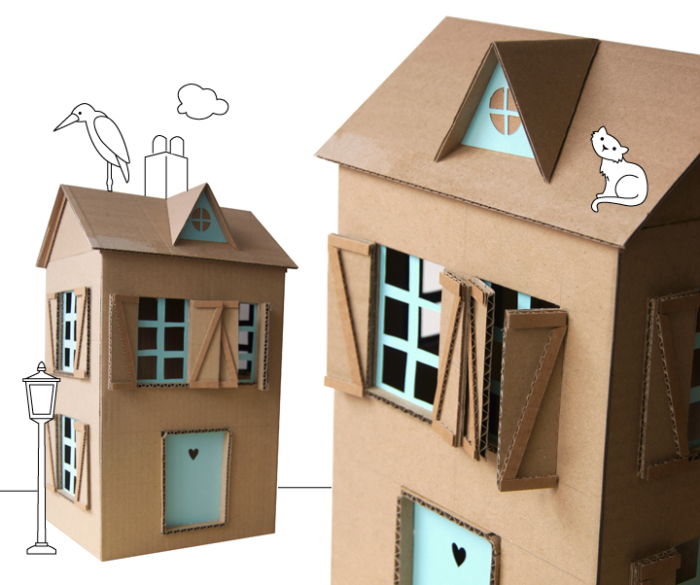 Large practical items can be made from packaging cardboard.
 As a basis, you can take a box from under the weight of cookies. To model the dwelling of the dolls, it is enough to cut window and door openings in the housing. The window elements are not cut out to the end; they can be decorated with shutters. Grid window frames are glued on the inside.
The door can also be left, pasting it with colored paper. The roof is formed from the remains of cardboard.
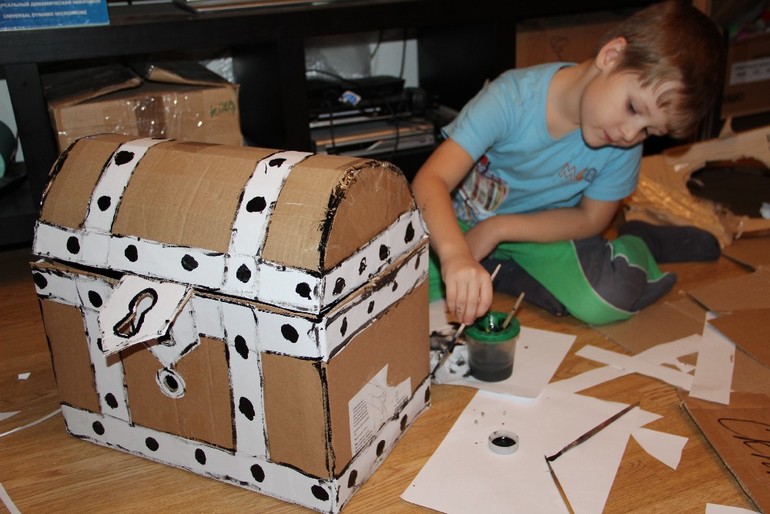
Chest for gifts of Santa Claus - fabulous casket
- It is made of two equally long packing boxes.
- The bottom almost does not change.
- The upper part is cut out of three parts - two semicircles and one straight part.
- It is better to make halves of a circle from one circle. It is drawn with a diameter of 2-3 centimeters more than is necessary for the side parts.
- The required part size is marked on the workpiece. Triangles with a base width of 1-1.5 cm are cut from the “extra” strip.
- The teeth remaining on the blank are bent. The top part of the casket cover will be attached to them.
- Corrugated cardboard paint better after conducting double priming. Otherwise, the colors will appear bleached.
Piggy bank
Corrugated cardboard moneybox runs without glue. It folds and fastens at the corners from the inside with a decorative cord. At the bottom of the piggy bank, the hole is sealed with paper or mail tape.
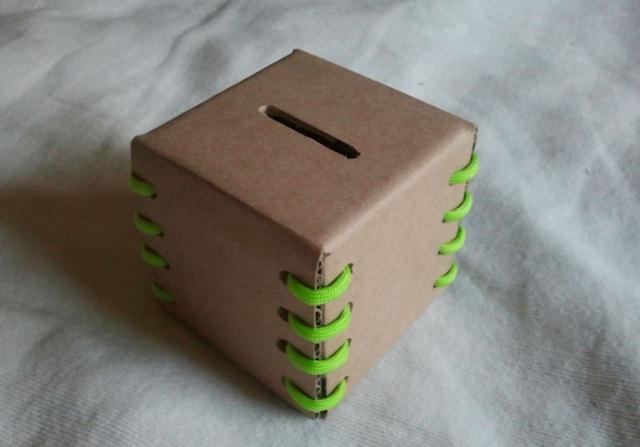 Corrugated cardboard moneybox runs without glue
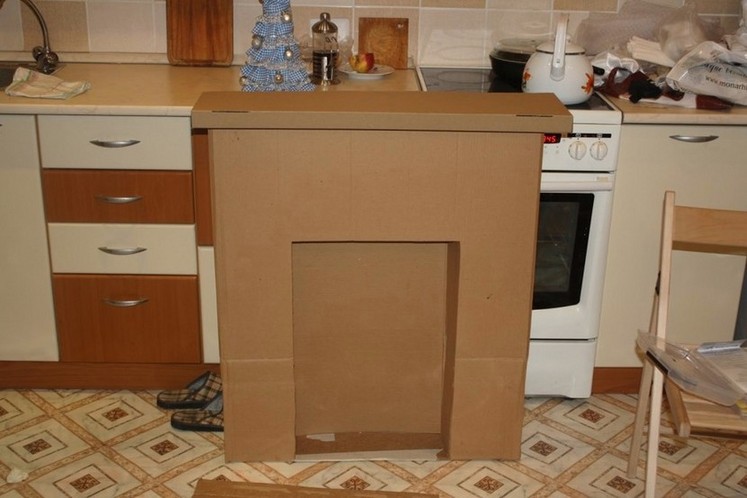
 Fake fireplace corrugated cardboard
A fireplace made of cardboard is not just a decorative item. It is intended to support the tale of Santa Claus. It is made before New Year. He's hardy enough to withstand a fancy Christmas tree.
- The portal is assembled from a former packaging box;
- Strengthens the inside with slats;
- The outer part is decorated with elements of foam;
- The slats fasten falshkamina on a foam pedestal;
- It is painted together with decorative elements in white with blue tint or ivory.
 A fireplace made of cardboard is not just a decorative item.
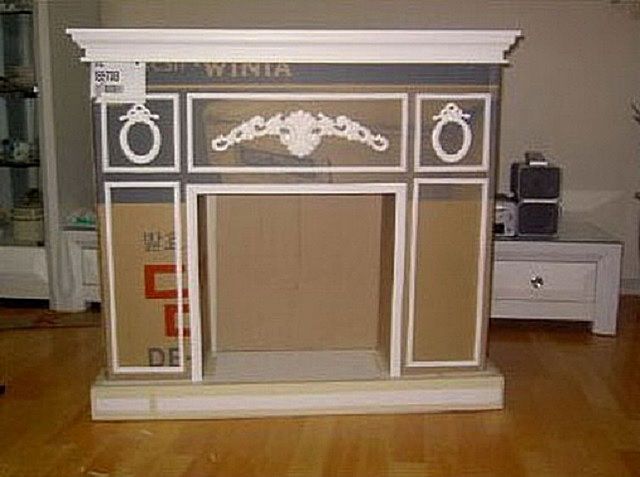

Toys made of corrugated cardboard will be a great decoration for a New Year's fireplace. Only for their manufacture uses a special - handmade material, created specifically for quilling.
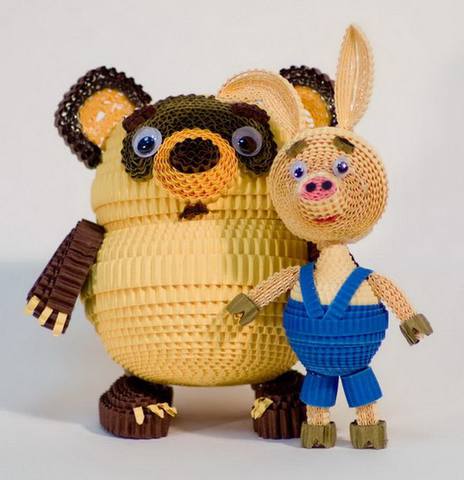 Corrugated cardboard toys will be a great decoration for a New Year's fireplace.
 Many types of cardboard can be used for the manufacture of handicrafts. Thin cardboard is suitable for making applications, cards, books, babies. More dense it is more expedient to use for the manufacture of sustainable toys. Corrugated cardboard is suitable for the manufacture of scenery for amateur theaters, including home theaters. Quilled corrugated cardboard allows you to create absolutely fantastic crafts.
Bright DIY desktop organizer cardboard (video)
DIY Spinner Cardboard (video)
Attention, only TODAY!