Installation of crates under the MDF. Installation of MDF panels on the walls with their own hands
The walls of the MDF panels are a way that has many advantages over other types of construction work. The fact is that the technology allows installation in a fairly short time. Essential advantage is that there is no need to carry out additional coating processing. Facing is carried out in different ways: adhesive and frame. It is the last method that is considered the most time consuming.
This material has numerous advantages that make it indispensable at. These include the following indicators:
- Easy installation work. Even if you use the longest frame method, then work will be much smaller than when laying drywall.
- Large selection of shades and textures. MDF wall panels allow you to choose this option that you have to do with any person, will be able to create a completely unique interior.
- The ability to get several results at once. Namely - to build a crate that will hide numerous communications and serve as the basis for the insulation, as well as create a smooth decorative surface.
- Durability and reliability. MDF plate density exceeds some breeds of natural wood, and the decorative surface is manufactured in such a way that it is very difficult to damage it.
- Easy to care. Indeed, cleaning is carried out with a damp cloth. Any spot is removed by alcohol solutions (except for cosmetics).
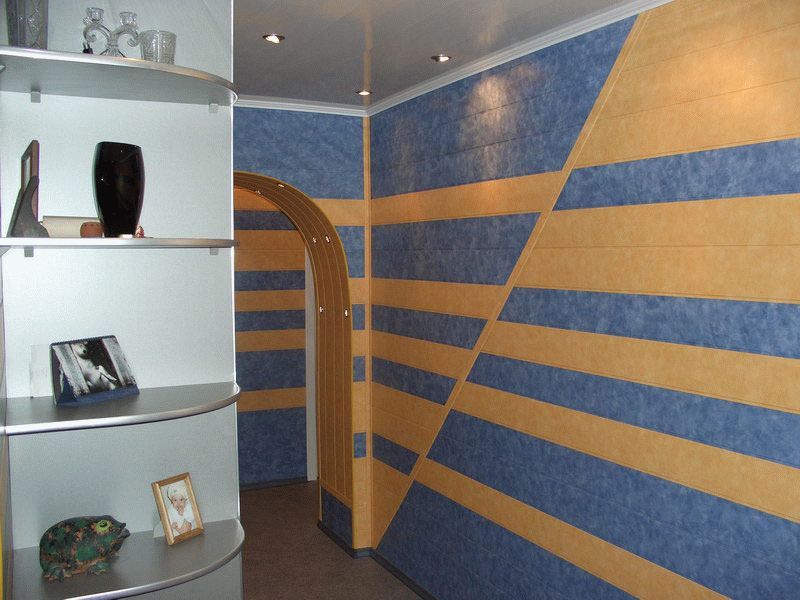 MDF panels allow you to create a unique interior design, besides, it is easy to care for them
 On a note! Warfather material is covered with a decorative layer due to lamination or veneering. And often the problem arises that after removing stains with alcohol mixtures, numerous divorces remain on the surface. Get rid of them by re-applying the solution. The main thing is to continue rubbing - until the fluid is completely evaporated.
Naturally, such positive properties suggest that the MDF panels on the wall is a great option. But it is impossible to forget about some drawbacks:
- Get the perfect smooth coverage is simply impossible. Between the adjacent elements there will always be a small junction. If desired, it can serve as an excellent decorative component.
- Incorrectly erected framework - a threat to human health. The resulting gap is a great place to breed mold and fungi. The adhesive method has the same drawback.
- Wet room creates a threat to the coating material and frame. The risk of warping is large enough.
Thus, it can be concluded that the finishing of MDF panels is advisable when it is planned to comply with the laying technology.
 Despite the simplicity of installation, MDF panels have their drawbacks
 Preparation of instruments and material
For quick and comfortable work, you need to prepare a tool in advance and purchase materials. The event is performed using the following devices:
- Lobsik electric with a set of pylons, which must be seen specifically on the tree.
- Reference and level. Well established a laser instrument.
- Pencil and roulette. It is better to have a flat rack or profile for accurate markup.
- Screwdriver. A drill is suitable, which can switch to small turns.
- Stapler. A simple option for homework is used.
- A hammer.
 Installation of MDF panels requires a special tool
 The frame method of fastening the panels on the wall requires more materials than glue, for which only a special mixture and self-tapping screw is necessary (for mounting the first element from MDF).
For cladding, the framework method will take:
- Bar wooden, pre-impregnated with antiseptic. It is better to choose options with a cross section of 20 * 40 and 20 * 50. If there is an opportunity, a metal profile is used - select the same as for laying plates of GCL.
- Insulation, which passes directly on the wall. You can use options stacked in cells. They must be pre-fixed.
- Metal suspensions.
- Kleimers - to fix panels.
- Dowel. It is necessary to take into account the state of the base.
- Panels and additional items that are used to create beautiful corners and transitions.
- Consumables.
In principle, the MDF panels will require a limited amount of funds. Of course, if you do not pay attention to products that are covered with veneer of valuable wood wood.

Stages of surface preparation
Before weching the walls, you need to prepare the surface. It consists of several stages, each of which begins only after the previous one was performed. The most important rule, the observance of which makes it possible to get the desired result, it is completely dry wall.
Work should not be carried out in the following cases:
- There are even minor raw plots.
- The surface is covered with frost.
- There are traces of mold and fungus.
- The upper layer is destroyed.
If there are no such troubles, you can begin preliminary training. It is completely identical to all ways to install wall panels MDF.
Full cleaning
Often one rough mistake is performed - pasted wallpaper remains on the walls. This categorically cannot be allowed. They serve as an excellent nutritional medium for breeding bacteria. And in the adhesive method - you will not be able to securely secure the elements.
 Should be completely getting rid of old wallpaper and bliss
 The plain layer is also removed, although many masters claim that such a procedure is not obligatory. In fact, when the need to apply primer, it is the old layer that will interfere with it. Therefore, it is better to clean the wall completely.
Fighting mold and fungus
Unfortunately, such a problem occurs everywhere, especially in new buildings and old wooden houses. It's quite difficult to fight her. There are recommendations that indicate that it is enough to treat damaged areas with special solutions. Many manufacturers even produce them in the form of spray.
 After removing the old coating, it is necessary to remove the fungus and mold
 Immediately it is worth a reservation that you can only defeat the fungus with all his fungouncing. Therefore, the output is only alone - removal of plaster to the base, careful impregnation with special solutions. Of course, the amount of work increases, but the likelihood of complete elimination of the threat to health appears.
On a note! Fighting with mold (fungus) is a very long event. It is necessary to eliminate the sources of constant penetration of moisture, as well as carry out the processing of all infected apartments in an apartment building. This will allow the MDF high-quality casing panels.
This procedure is necessary even in the case when the framework is planned. The fact is that any cracks are able to reduce the thermal insulation effect. Works are carried out on the following technology:
- A shuttle mixture is prepared. It is better to choose gypsum or acrylic compositions.
- Seams and cracks must be pre-expanded. They are thoroughly cleaned from the residues of the old solution.
- The plot is well soaked with primer compositions.
- Next, when the soil dries - the mixture is emptied. It is necessary to fill all empties.
 Installation of MDF panels requires full tightness of the wall
 Coating primer
This event makes it possible to increase the adhesion of materials, as well as carry out the installation with your own hands better. For work, formulations that have deep penetration are selected. In order to further protect the surface - the mixture should contain antiseptics. The soil is applied in two layers, each of which successes well. Especially carefully impregnate walls before mounting MDF panels on glue.
On a note! Treatment of wooden surfaces should be carried out according to similar technology. But in the composition of the mixture should contain anti-airpoints, which will give lumber refractoriness.
 Surface Surface - Mandatory Stage of Preparatory Work
 Construction of the carcass
Change the walls with MDF panels without well erected frame. You must create a reliable design that will withstand the load. Installation is made in several stages.
Application markup
Before starting marking, you need to decide on the layout of the elements. They can be mounted: horizontally, vertically and diagonally. All positions can be combined, but for this you need to install separation decorative elements. For the horizontal location of the fragments - the lamp is stacked on the wall with their own hands vertically. Accordingly, for vertical cladding - on the contrary.
Marking is performed by this principle:
- To obtain vertical marking, a plumb is used. According to its location, points are marked, between which lines are conducted.
- If you want to perform horizontal marking, the level is applied.
 To apply vertical marking, a construction plumb will need
 Fastening guides
The walls of the walls of the MDF panels on the crate is made by two methods. The choice of a particular method depends on the basis of the basis.
- Playing guides is carried out directly on the wall:
- This option is suitable for a wooden bar in which the holes are drilled in a step of 30-40 cm.
- Guides are applied to the markup lines and the velocked holes are marked.
- An abuser and installation of dowels is performed.
- Racks are securely fixed with screws. Next, you can install MDF panels.
- The framework is erected using additional suspensions:
- Technology applies in cases where the surface has significant irregularities and differences.
- Suspensions are installed on the existing markup. Mounting step 40-50 cm.
- The upper and lower guide is fixed around the perimeter.
- Installed and fixed racks.
Installation of panels on the frame
Facing the walls of the MDF panels begin after full preparation. The shapper is once again checked for strength, the connection points are stretched. If necessary, communications are carried out, the locations and switches and switches are immediately marked. The cable is stacked into the cable channels, which are corrugated hollow tubes. They are fixed on the walls with their own hands.
Facing work begins with cutting products. But if there is a significant curvature of the ceiling and flooring, which was not previously corrected, then each element is cut after a thorough measure.
On a note! The facing material has a decorative front side, which can be significantly damaged when circumcised superfluous. Therefore, it is necessary to take into account the location of the teeth on the pubsika beer.
Installation of MDF panels on the wall has the following technology:

- From the first fragment, the comb, which is used to install in the grooves.
- The element is installed in the angle and is screwed by self-edges along the edge, which is located directly in the corner.
- Next, the installation of MDF occurs quickly and simple. Swimmers are installed in the groove of the first part, which are fixed on the crate using a stapler or self-tapping screws (carnations).
- The following fragment is set exactly in the groove. If required, the location of the kleimer is cut (from one or both of both sides), it is necessary so that the fixation is reliable.
- The last element is cut with a small gap to the wall. If this is not done, then insert it will be difficult. It is fixed with self-drawing.
- To close the corners and locations of the screws, decorative elements are pasted.
- Facing the walls of MDF elements requires the preparation of holes for outlets and switches. Such an abuser is carried out before installing each part. For this, the crowns for the drill are applied.
From the foregoing, it can be concluded that laying material from MDF - the procedure is unemployed, but requiring compliance with certain rules.
Today, one of the most simple and not time-consuming methods for the implementation of beautiful and smooth wall cladding is the installation of MDF panels. This material has won the location due to low cost and non-toxicity, as well as the ease of fastening. It takes only accuracy and accuracy.
Frame method for fastening panels
In practice, three methods apply to the base: on a wooden frame, a crate of metal products and a glue composition.
Wall insulation
During the cladding of walls, the panels will not be superfluously insulated by filling the chambers with thermal insulating material. In addition to insulation, protection is ensured from the appearance of condensate in space between the base and the trim.
In the summer, the flow of heat indoors will significantly decrease significantly, and in winter - heat loss will decrease accordingly, thereby allowing to significantly save on payment for the consumption of heat.
Installation of a wooden crate
Frame mounting technology from wooden plates Unlike metal crates easier. It uses a smaller amount of fasteners, however, the doomer requires special antiseptic processing and the cost of wooden boards above the value of the metal profile.
The process of installing the framework consists of several stages:

- Marking point of fixation of the first strip of the crate. It should be perpendicular to the length of the recorded panels of panels. That is, if the panel railings are mounted horizontally, the labels of the crates must be located vertically, and if the reshetins are attached vertically, then the lattice is horizontally.
- Fastening lattice starting parts. The place is determined on the basis of the greatest protrusion, all other framework planks will be equalized on this bearing. Starting the installation of rails follows from a series passing through the foundation found on the basis. On the bar, the holes for the screws are drilled in 50-60 cm increments. It should be noted that the more the wall of the bug meter, the less should be a step. The holes on the wall exactly horizontally applied the rail and outlines the locations of the holes for the dowels (it is advisable to use the level). The bar is then removed from the wall and with the help of a perforator drill holes at the base and plastic dowels placed. Subsequent strips of a row of a frame are fixed in the same way. To facilitate alignment, the reshetin row can be pulled along the initial strip the bright thread, the ends of which are fixed with dowels in opposite corners of the room.
- Production of subsequent rows of crates. The first plank of the next row should be located in a single vertical plane with a previous row plank. To check, you can use the level applied to the reshetnes of the near rows. If necessary, you can adjust the attachment of the plank, laying under it small wedges. Then again stretch the thread that performs the role of the beacon. In such a sequence, all rows of crates are performed. The distance between adjacent rows should not be less than half a meter. Installation of horizontal planks is carried out in the same sequence, with a step of 40-60 cmIn this way, the lifting will not be fed. For the subsequent installation of the ceiling and floor plinths, the rows of slats should be placed along the feature of the ceiling and flooring.
- In all the corners of the room on each adjacent one to another wall fasten at the right angle vertical strips.
- Installing wooden plates around the perimeter of openings for windows and doors.
Mounting metal carcass
Metal profile and connecting fasteners are used for mounting the metal crate. Fixing products to the base is carried out by means of self-tapping screws, their length depends on the strength of the base. For frames, two types of metal products are used: narrow (UD) and wide (CD).
The metal frame is performed in the same way as wooden: racks in the corners and openings, as well as crossbars.
The frame of the frame is similar to the footage of a wooden crate.
Technology for performing a metal frame is:
- Installation of narrow profiles in the corners, around the perimeter of the door and window openings, as well as every three meters. This length corresponds to the length of the support rack. All intermediate components will be placed in these racks. Fixation should be carried out firmly in 15-25 cm increments.
- Horizontal racks are connected to a horizontal profile by means of longitudinal CD connectors.
- Key profiles place the ends on the edge into the guide profiles and strengthen the self-tapping screws.
- If the length of the base on which the casing will be attached, more than two meters, then in order to avoid the deflection of profiles from the load of its own weight, it is necessary to additionally fix the fastening brackets. The edges of the bracket are bend at right angles and in this form are placed at the site of installation of the profile. After fixing the profile in the guides, the brackets bent parts are fixed to it, and their extra part is cut off. Before finishing the consolidation of horizontal racks, on no compulsory, the level is checked horizontal. If there are any errors, then at this stage of installation can be corrected.
Fastening panels
Installation of finishing on the frame is significantly easier than preliminary work. Installing panels can be made from any angle of the room.
Molding MDF coating is carried out in this order:

- Marking and slicing start panel. Using the roulette, measure the required panel length, placing the appropriate mark on it. Using the electrolybiz, divert the excess part and spike, which passes over the entire length of the panel.
- Cutting holes in the trim under the lighting appliances.
- Fastening the source panel. To the place of attachment, the canvas are applied in such a way that it lifted it to the crate of close. The side adjacent to the corner at a distance of 1 cm from its edge, to all frames of the frame of the frame are fixed with self-draws. From the side of the groove panel, the panel is fixed with metal clips (kleimers) so that its protopa placed in the sinus panel, firmly fixing it. On the frames of the frame of the frame clips are attached through nails.
- Installation of subsequent crafts. Cut off the required coating length, then placed its spike in the groove of the previous panel and fasten on the frame using the clip. In the same way, all subsequent panels mounted to the opposite wall angle are attached. Often, the last canvas does not fully fit, so it is customized to the desired size. Only that segment is needed, which is from the spike side, so the segment of the canvas with the groove is cut off. Next, the spike is inserted into the groove of the previous panel, and the part of the panel resting in the frame of the adjacent wall is fixed with nails to the laminations of the crate. In such a sequence, it is finished with the canvas of all walls of the room.
- Installation of ceiling and floor plinths. The attachment of the plinths can be performed in several ways: with the help of fasteners, by means of self-tapping screws and with glue.
- The final stage of the installation of panels is the installation of the finish corner, which closes all the corner coating compounds. To do this, an adhesive mixture is applied with a thin layer with a thin layer, applied into the angular part of the walls and gently, but it is tightly pressed. For uniform glue distribution using a rag, the length of the corner can be walking several times in the direction from the bottom up and back.
Installation on glue
This method of fastening is suitable in the case when the surface of the walls does not have irregularities or the task is to carefully align them. Also, installing panels for glue is necessary when the surface of the walls are finished with a cafeter.
Installation in this way does not require the arrangement of any framework.
First of all, we will define the type of glue, which is suitable for performing this type of work. Any glue in this case will not suit, a composition with certain properties is needed:

- plasticity not only during operation, but also after frozen (the composition should withstand temperature fluctuations);
- a thick texture to apply it not only to a thin, but also a thick layer (in this case, the construction glue is perfect - liquid nails).
Installation technology includes several stages:
- Cleaning the surface of the base from the old coating, dust, dirt and layers, followed by processing the primer mixture.
- While the primer layer dries, you can cut the panel of the required size.
- After drying the soil, you can start installing panels. To do this, it is applied to it in checkered by large drops of glue. Then the web is tightly pressed against the wall, after which they are torn, they are done with the goal of the tempering of glue, as well as to ensure that the covering does not lag behind the ground under the severity of their weight. After 5-7 minutes, the canvas are applied to the wall and tightly pressed.
This method of installation has several drawbacks:
- from the effects of temperature drops when changing the seasons of the year, the facing can appear in the worst case;
- when changing the finish, it will be necessary to clean the base from glue residues, as well as the absence of the ability to use dismantled panels again.
- If the room in which the MDF finishing is planned, has traces of dampness, swelling, or depletion of putty, before facing it is necessary to remove the old coating to the capital base.
- The lowest horizontal cutting rack should be located on the floor, it will provide a solid fastening of the plinths.
- Specialists recommend fixing the coating on the frame, even though the profile reduces the room space. This is due to the fact that the facing has additional ventilation and is less susceptible to seasonal fluctuations in temperature and humidity compared to the adhesive method.
- During the installation of the crates, two types of materials can be used, building the basis around the perimeter from metal products, and the transverse elements from wooden plates.
- Wooden rails for the frame must be good and smooth.
- Due to the fact that the MDF is easy to focus material, it is necessary to take care so that all the outer wiring is removed into the corrugated pipe for the cable, and the sockets and the electrically switches in the box.
- MDF Facing, in fact, a thick pressed cardboard, and, accordingly, susceptible to the effects of moisture. Therefore, the prolonged impact of moisture on the surface will lead to a bundle and swelling of the coating.
- Professionals are advised in the process of installing the crate to transfer the layout location on the paper based on the accurate observance of coordinates. This will provide an opportunity to place any interior items on the wall at the site of the decks, and not on the skin, on the surface of which is strictly forbidden to fix something.
The use of MDF panels is the easiest way to finish the walls of the room, especially if you need an additional layer of thermal insulation. At the same time, the installation of MDF panels to do with their own hands is quite realistic for a very short period of time.

To mount the panels you will need:
- roulette and pencil - with their help, you will place places for fastening the bars of the crate and the required length of the panels;
- metal corner and level - to test the incidence of angles, horizontal and verticality of the mounted elements;
- electrolovik - to trim panels for the desired length or width;
- building stapler or nails with a hammer - to secure panels on the crate;
- drill and self-tapping screws (dowel-nails) - to attach the bars of the crate to the wall;
- screwdriver or screwdriver.
Surface preparation

One of the main advantages of the MDF panels is the lack of the need to complete the surface alignment to which you are going to secure them. It does not matter whether the wall has been pre-painted or not, and what material it is made (brick, concrete, blocks, wood). It is enough just to cover the plastered or wooden surface (by 2 times) by the primer (or special composition to protect the wood), and then either fix the crate to mount the MDF panels immediately, or first fix on the wall (with the "liquid nails" adhesive) layer of thin heat insulation (such as pholoisol).
Ceiling

If desired, MDF panels can be easily fixed on the ceiling. It is better to be guided by the rule that MDF panels should be perpendicular to the wall with the window. The principle of installation of the MDF panels on the ceiling and the walls are the same, with one small exception: for the ceiling cladding you, most likely you will need an assistant who will support the panel and feed the tool.
Montaja technology

The process of mounting MDF panels with their own hands means that it will be attached to the wooden crate, which is fixed with a certain step (in the direction perpendicular to the installation of panels) of the bars of any section. In this case, the size of the bar (its width and thickness) does not matter much (that is, any, the same in thickness).
If under the MDF panels you are going to pave a layer of insulation (mineral wool or glass wool), the thickness of the bar must correspond to the thickness of the heat insulation layer.
After preparing bars for the crate, the installation of MDF panels will be performed as follows:
- Choose Mount Mounting MDF Panels.
- In the perpendicular direction to the installed panels, fasten the crate: the bottom bar at a distance from 3 to 5 centimeters from the floor, the upper timber - 2-3 cm from the ceiling, secure between them with the help of brushing screws with a step of no more than 45-50 centimeters.
- Check the verticality of the surface. If necessary, put the crates of plywesters, fiberboard or laminate under the bars.

- Around (around the perimeter) windows and doors, as well as in the corners, fasten the vertical bars of the crates.
- If you decide to mount panels vertically, you should start the installation of MDF panels with your own hands from the angle, moving on the right left. The first panel attach (from the edge with the ridge) to the bars all over the height with the help of self-tapping screws, which should be located as close as possible to the corner of the room.
- The second edge of the panel will fasten with specially created to work with MDF brackets, which can be attached to the bar with a construction staple or small nails.
- All other panels on the wall are installed in the same way, inserting the ridge in the groove.
- The latter (on each wall) the MDF panel must be cut to the desired size, and then insert the previous one in the groove, securing the cropped side by self-draws to the bars.

- Having finished the installation of MDF panels with their own hands, do not forget to close the corners of the room with special MDF corners, which are simply glued on top of the panel. Under these corners, self-tapping screws that keep extreme panels should be hid.
- Similarly, make MDF corners on the edges of the panels near the windows and doors.
Advantages and disadvantages of MDF panels

Not only the simplicity of installation can be attributed to the undoubted advantages of MDF panels (they can be fixed both vertically and horizontally), but also a beautiful appearance, which, thanks to a wide variety of colors, allows you to choose a panel to almost any interior. In addition, the MDF panels are easy to care for, as they do not require special cleaning (it is enough to wipe a slightly damp cloth). And, of course, the MDF panels refer to relatively cheap finishing materials.
But MDF panels have disadvantages:
- First, the walls of such panels, due to the fact that they are attached to the crate, remain hollow.
If you decide to hang something on such a wall, you will have to take advantage of special long dowel-nails. In addition, MDF panels do badly hold shock with pointed objects (although the damaged finish can be disassembled and replaced by the panel).
- Secondly, a wooden lamp under the MDF panels belongs to flammable materials (like the panels themselves), so they cannot be used to finish the evacuation paths - corridors, stair cells, etc. (On individual residential buildings and apartments, this rule does not apply).
- Thirdly, MDF panels do not form a solid smooth smooth surface (that is, you will always be seen in the places of their docking), which imposes certain restrictions on the design of the design of the room with their use.
- Fourth, if you make a pitch of the crates more recommended (45-50 cm), the panels can start "play" under the external influence on the side of the room (for example, if you have been involved).
However, even looking at the disadvantages of MDF panels, there are still a competition of plasterboard, which requires much more skills and a person (at least two), while working with MDF panels can be alone.
Video
This video demonstrates the process of installing MDF panels.
MDF panels were widespread not only thanks to their cheapness and ecology. Installation of MDF panels with their own hands is simple; It requires only elementary accuracy and accuracy. Create a coating of MDF with good decorative qualities may not be a joiner or finishing, sufficiently skills of a home master.
What is MDF?
MDF (MDF - Medium Density Fibreboard - Eng., HDF - it.) It is made from woodworking waste. But it is impossible to confuse them with fiberboard or chipboard. The MDF is manufactured by dry hot pressing wood, without a binder. The essence of this method is that the microscopic tubes and fibers of the lignin, of which the wood consists, under high pressure and temperature become plastic, as during breaking, are connected and blinded. The MDF structure is similar to felt, only not from wool, but from wood fibers.
MDFs are not distinguished by special mechanical properties, but, due to the absence of a chemical binder, absolutely eco-friendly. For the interior trim, MDF is the perfect option. Treatments of work with MDF are the same as on wood. MDF is glued with any glue for wood. Especially for the MDF, the Liquid Nails (Liquid Nails) adhesive is developed - construction glue with wood sawdust filler, allowing both glued and put the slots and close the holes with the heads of the screws.
Note: The MDF panels are manufactured with a decorative outer coating. When buying liquid nails, make sure that the tone of the frozen composition coincides with the tone of the MDF panels used. A sample is a frozen drop on the lid of cans, or from the seller.
Tool for work
In addition to the usual home instrument, you will need a plumb (it is easy to make it from the nut no line or thread), the roulette, the construction level and the nozzle to the drill to wrap the screws. Without a special screwdriver, it is quite possible to do. Also need a locksmith square (metallic, with different thickness catetes). It will be convenient for it to cut pieces for slopes: thick catat is used as focus, and leaning on thin, drive cut.
For sawing MDF, an electrolovka is needed or a manual disk saw. The saw is good for its compactness, convenience - it is the size and shape similar to a hair clipper - and versatility. Changing complete circles, you can cut a tree, metal, stone. But saw with a depth of cutting more than 12 mm and more costs more than the jigsaw; The thickness of the MDF is 16 mm.

Installation technology
Important: If the premises for the MDF finishing at least once again sent if the tracks of the hoist, swelling or detecting plaster are noticeable if the plaster is littering, uneven or its layer is more than 12 mm, then before finishing the MDF, plaster must be removed to the capital wall. In any case, the plaster is desired - it will reduce the costs of fasteners and will allow to identify hidden wall defects. Of course, you need to remove the plinths.
Two technologies of mounting wall panels from MDF are used:
- On a wooden crate;
- On the frame of special galvanized profiles.
It's easier to make a wooden crate, it requires a smaller number of hardware for fasteners, but wooden slats, or even a porridge, are expensive than a metal frame. In addition, a wooden cutter requires pre-impregnation against fungus, rot and mold. In the rawrooms and in brick houses, it is uniquely not recommended to apply a wooden crate: moisture and disputes of fungi can penetrate outside just through the pores of the brick, and the cavities between the facing and the wall are the ideal environment for the development of pests.
For a metal frame, UD profiles (guides) and CD will be needed. Both of the P-shaped and differ only in the configuration in the context. To the CD profile, sellers often offer fasteners ("ears") and connectors. Their application makes sense when performing a large amount of work limited. With an independent finish of one or two rooms without them, it is quite possible to do. How - will be described below.
Read more about the crate and its methods here.
About thermal insulation
In the process of finishing the room, the MDF panels makes sense to further insulate it by filling out the cell of the crate of foam on the construction foam or silicone. The protrusions of the foam are cut by the mounting knife.
In addition to insulation itself, it will give additional protection against condensate accumulation in the voids and the development of pest pests. MDF is the same wood, and also exposed to them, albeit to a lesser extent.
In the summer, when the building is heating, the influx of heat into the room will significantly decrease. Just MDF on the frame - a single thermal screen with a reflective ability of about 0.25. With a layer of foam - double screen. Foam reflection coefficient of more than 0.7; Accordingly, it will fall into the room through the walls of no more (1 - 0.7) x (1 - 0.25) \u003d 0.225 heat against the previous one. The heat outflow will be reduced as much as the Winter Walls.
Considering that heat exchange through the walls is at least 0.15 from the total heat flow, you can count on reduced heating / air conditioning costs of at least 10%, and this is a value with the existing tariffs in the budget.
If more serious internal thermal insulation is planned - read more about the link.

Okeekhet
Fasteners for the crate
A wooden crate is fixed to the wall or self-drawing, or by mounting nails (dowel-nails). A dowel-nail looks like a self-sufficiency with a smooth asymmetric thread profile. It is driven into a plastic cloth-nest hammer. On the head of the dowel-nail there is a slot under a screwdriver, so if necessary it can be turned out. Metal crate is fixed only by self-draws.
For fastening the crates, a fastener with a diameter of 4-6 mm is used. The stronger the basic wall, the smaller the required diameter. Each self-tapping screw or dowel-nail is equipped with a plastic socket. Holes in the wall under fasteners are needed to drill in the diameter of the body's body; Elastic protrusions are not taken into account. The nest into the hole is clogged with light blows of the hammer.
The body of the fastening element (nail, self-press) should sit in the capital wall at least by 30-40 mm. For example, if the thickness of the layer of plaster 12 mm and the latch is used or a 40 mm thick profile, the MDF thickness is 16 mm, then the length of the metric must be at least 12 + 40 + 16 \u003d 68 mm. Those. Fasteners are needed with a length of 70-80 mm. The depth of the holes for the socket is equal to the length of the socket + 15-20 mm on dust and crumb. In this case, 100 mm. If drill is longer, it should be put on the stopper tube. But do not drill very deeply: the thickness of the walls between the rooms can be in the poly-brick, it is less than 200 mm with two layers of plaster.
Wooden doom
Wooden crate begin with setting vertical racks. Racks put on all corners, couples, so that they form an angle, and along the edges of window and door openings from the floor to the ceiling. The verticality of the racks impose a plumb.
Having attached a rack, outlawing it on one side with a pencil on the wall and chose a drill on concrete or a stone hole under fastening with a step of 500-700 mm. We heat the nests under fasteners in them, mark their position on the pencil rack. Then drills in the opening rack with a diameter of 2/3 of the fastener diameter and attach to the place. For more experienced masters - openings in the racks are drilled in advance, and the markup of the holes in the wall is done directly through them.
Further, in the same way in the way horizontal lags with the same step. Each piece of lag is fixed with the same step as the rack. At the top of the openings and under the windows, we definitely install lags, regardless of whether they are "per step" or not. Disposses of openings also make up the rails, internal and outer edges, without cross. The final stage is the ledges at the joints of the rails with a planer.
Note: When the ceiling mustache, keep in mind that the MDF panels are located along the racks and across the lags. Those. If the casing panels on the ceiling will be located along its short side, then the ceiling lamp must be made parallel to its long side, and vice versa.
Metal obsechtka
The metal case is made in the same way: racks at corners and openings, then cross. The shaft step is the same as wooden. Racks are performed from the UD profile, they are inserted into them and moved to the location of the CD profiles. Then CD, after reconciling the level and tape measure horizontally and step, are attached to UD, and then to the wall, in advance the holes in it.
Parts of the metal crates are connected by short self-drawing. The CD wall is also attached by self-draws. Dowel-nails can not be applied: fasteners will either do not finish, or the profile is fed. CD profile pieces are connected in advance to the desired length.
Note: Work on the metal crate is better to produce with the use of a small grinder or hand saw. Electrolzik, even with a metal saw, the work is delayed and a lot of marriage is obtained.

"Ears" and connectors
The "ears" of CD are done like this: at the ends of the mounting pieces of the sticks "P" we cut on the width of UD to the crossbar plus 2-3 mm. The cut should be made a little form, so that from the ends of the "sticks" to the edge of the profile, it was also 2-3 mm more than from the cross. With direct or with a reverse disc, CD cut during installation can be stuck. "Ears" will be needed if the lamp is done only from the CD. If the racks are made of UD, then the CD is simply rushing into them.
For CD connectors, we measure its piece of desired length in advance. One connector requires 100-120 mm profile. If, for example, you need 10 connectors, they will leave 1 - 1.2 m CD. Wands "P" in CD are not straight, but with a bend inside. Here is the bend and you need to cut into the same 2-3 mm. Then cut the workpiece to the desired number of pieces.
Connect the CD so: a slice connector pushes up to half into one of the combined pieces of profile, and another piece is coming to the residue. The connector, of course, will go to the space; There may be a small gap between the connected pieces. It is not scary, work on the trim from this will not stall and will not complicate.
Sometimes they are advised to additionally fasten the compound by self-draws; This is too. When installing it, it still keeps quite tight due to friction. In the future, the connector will not fall - the wall will not give - and does not slip the sideways, because Inserted with space.
Note: Under Communication - Pipes, wiring in wooden slats or metal profiles of the crates cut through the grooves. Before the crate, it is necessary to measure the height on which communication protrudes over the wall, and the thickness of the clamp elements to choose 5-10 mm more.
Painting panels MDF.
Middle and adhesives
The MDF panels are connected between themselves with a symmetric tongue lock in the form of a crest and the corresponding grooves. You can be mounted in the corner of the groove to the wooden crate of the MDF panel. Until the end of the carnations, they finish a metal fool and hammer. He looks like a kerner for metal, only at its narrow end instead of the tip - a small varnish along the nail heap. Machine for nails can be made from Kerner, removing the edge on the sandpaper and gently chopped the deepening on the drilling machine.
For fastening to a metal crate (and to wooden when working on a standard scheme), adhesives are used. The adhesive is a small metal bracket to a hole under fasteners and cloth, pressing the shelf of the tongue groove. The adhesive is inserted into the groove of the MDF panel until it stops, and fastened with a screw. Mounting with honeycombs is more expensive and requires large labor costs, but more reliable, and cladding can be disassembled if necessary, without damaging MDF.
Installing panels
Installing MDF panels on the crate is much easier than the preparatory work:
- We start from the corner. Cut into the size of the desired number of MDF panels to cover the mounting plane to the nearest rack. In the corners of the cuts we take place once ("shirkay") emery paper.
- On the first panel, we cut off the tongue rowing, and fix it in the corner of the nails (on a wooden crate) or small self-draws (for metallic). From the side of the groove of the castle, we fix cloves or chalters.
- We assign the next panel, by moving the ridge into the groove, fix it through the groove, etc. until the two last panels remain.
- The last panel is cut in length in size, with grab in 2-5 mm, depending on which corner or plinth will go final finish.
- The comb of the last panel is cut off half and spin.
- The last two panels insert into the place "house", press up to the "snatching".
- The last panel is coming to the stop on the penultimate; At the free edge, fix the self-drawing.
Note 5: "The two last" - the operation is responsible and requires some skills. It is advisable to pre-train on the samples of MDF. If the training "house" commutes, it can be hurried for a screwdriver.
Finishing of slopes
The finishing panels of MDF slopes are made in the same way, but two options are possible: pieces of MDF panels along and across the slope. If the slope is narrow, less than 1.8 width of the MDF panel, then unambiguously need to be stitching across. With broad slopes, the choice of the method of trim is a matter of taste. The slopes, covered across alternately with chunks of dark and light tone, look good. In general, at the discretion of the master and his home.
Corners and gaps
There are no difficulties here: there are many corners and plinths for MDF of different profiles, sizes and tones. Installation is reduced to trimming in size, rounding the corners, grinding cuts with a skin and gluing with liquid nails or any glue for wood.
Video: Mounting MDF panels on the walls with their own hands
In contact with
Wall decoration by natural materials, for example, panels made of wooden array gives nobility and style interior, but it is expensive and impractical. An excellent solution in this case is the choice of material that combines the decorative type of natural wood and the durability and strength of artificial binding. The MDF panels won well-deserved popularity from the builders, they are separated by both residential rooms and commercial and public premises. They are easy to put on the wall, and they look neat and stylish.
Advantages and disadvantages of MDF panels for wall decoration
MDF is obtained from wood fibers treated with high pressure and temperature compressable in the stove.
Binders and useful additives give MDF special properties and advantages, indispensable for wall cladding:
Disadvantages of material:
- low elasticity;
- in conditions of high humidity through untreated ends, the slab penetrates the dampness, which deforms and destroys the structure of MDF;
- fire hazard.
How to fix the MDF to the wall
There are several types of MDFs that are suitable for use in various operating conditions:
- all-paced products have a smooth facial surface, medium density, from these sheets produce furniture;
- laminated panels are covered on top of a protective film, they are distinguished by increased strength and decorative effects;
- moisture-resistant plates are more expensive than ordinary, they are denser and can be used in wet rooms: bathrooms and kitchens.
Assessing the features of each species, it is possible to make an optimal choice to create a durable finishing coating. Before starting repair, you need to draw a room with marking of sheets and calculate the consumption of materials and fasteners.
 To work it was more convenient, make the room drawn and calculate the amount of consumables
 For the correct calculation, it is necessary to subtract the area of \u200b\u200bwindow and doorways from the total area of \u200b\u200bthe walls. The resulting result should add 10% for possible trimming.
There are several ways to fasten the MDF panels to the wall, each of them has its own technological features, having studied which can be selected the most suitable option.
Fastening
This method has a lot of advantages:
- the frame hides defects and the height of the base, does not require careful preparation of the walls;
- the space for laying communications and wiring is formed;
- under the panels can be placed insulation;
- simplifies the replacement of a separate MDF plate.
There are cons:
- the space of the room is reduced, which is especially relevant for small rooms;
- the attachment of the mounted elements of the decor and furniture will require long anchors and mortgages.
The surface under trim in wet premises can accumulate condensate and become a favorable environment for the development of mold and fungus harmful to health. To solve this problem, it is necessary to treat the surface of the wall by fungicidal anti-grapple impregnation, and to reduce the possibility of fire - with flame retardant. For the root, the lump of 30x30 mm is suitable.
 MDF panels - modern and eco-friendly material
 In addition to the MDF panels themselves, the next list of instruments and materials will need:
- level, plumb, ruler and pencil;
- stepladder, wooden bars for doom;
- drill, perforator, screwdriver;
- dowel or selflessness, you can use kleimers, carnations with a reduced hat;
- antipiren and fungicidal impregnation;
- liquid nails for fixing the angular elements of the finish;
- brush, spatula, bars, hacksaw with a large teeth or saw.
Preparatory work:

The frame is ready, you can now mount the MDF panels:

For thin plates, you can make a reliable mounting to the grocery straps with glue. Liquid nails are perfect for this purpose.
On metal
This method uses a special aluminum or galvanized metal-plastic. Such a frame is more expensive, but devoid of wood flaws and will serve much longer. This method is optimal for decoration of rooms with high humidity.
The following materials and tools should be prepared:
- guides and carrier bar sheets, suspensions, small screws "seeds" for connecting profiles among themselves;
- screwdriver and self-tapping screws, perforator and dowel;
- ruler and level marker;
- staircase, plinth and corners;
- nozzle for punching chisel;
- kleimers, just one box out of 100 pcs.;
- plaster and splashing.
Preparation of the foundation:
- For this method, it is not necessary to align or carefully prepare the wall, it is enough to remove the old tile or wallpaper and walk the flame-proof composition so that in the conditions of increased dampness, the mold and fungus did not rise under the decoration.
- Place the wall, plates to place in 45-50 pages. Mark lines on the floor, walls and ceiling. Before installation, you can stick foil foam for thermal insulation.
 The correctly installed doome will make it possible for a long time, and the MDF panels will not be swam in time.
 - Attach direct suspensions that subsequently bend to strengthen the framework of the frame and setting the decoration plane at the desired distance from the main wall.
 On the wall fasten the honey
 - Guide strips fix on the ceiling, floor and side walls of dowels. In the suspensions and guides to insert carriers of the main planks, to bore the design with small self-draws, called the "seeds" masters. It is convenient to use screwdriver with a magnetic nozzle for this work. The mount is carried out in 15-25 cm increments.
 Secure guides on the floor, ceiling, walls
 - Check for the level of correct position of the planks, pave the necessary communications. Wiring to remove in the corrugation and fill the gaps of the insulation, sticking the edges of the suspension to heat out.
 Fill the gaps between profiles insulation
Mounting stages MDF panels:

Without carcass
If the basis is smooth and does not have defects, the mount can be carried out without installing the frame.
This method has its own advantages:
- significantly reduces work time;
- the precious centimeters of the room are not reduced, the wall fuses only 10 mm.
For fastening you will need:
- glue composition Liquid nails, mounting gun;
- hacksaw with a fine tooth, brush;
- stepladder for work at height;
- universal corners of fiberboard, plinth, insulation;
- firebi-protected impregnation, soil.
Stages of preparatory work:

After complete drying of the walls, we proceed to the installation of MDF-plates:

Video: Installation of MDF panels on the wall
The competent installation of MDF panels is completely simple, they do not require special care, and the walls look like a natural tree or leather, granite. Practical and inexpensive facing will give the interior of the gloss and neat fresh look.