How to make a window-sill table your own lessons: consider in detail. Do-it-yourself window sill, ideas for using a window sill How to make a window sill from improvised materials
The role of the windowsill cannot be overestimated. After all, this is not only a decorative element of the window and room. The window sill is involved in thermal insulation, preventing the penetration of cold air from the street. Therefore, the installation of this window element is a process that requires accuracy and strict adherence to the rules. Installation of window sills is devoted to this article.
The materials from which window sills are made today can be different. The type of window sill determines how it is mounted.

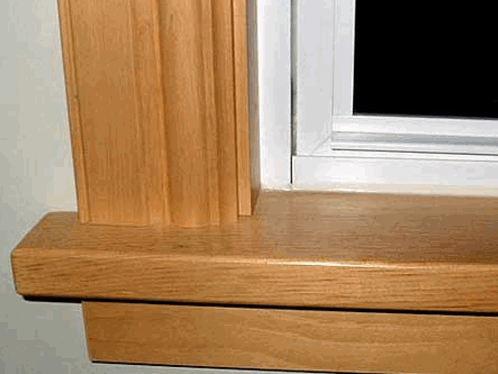
Wood, for example, oak, cherry, pine, has long been the most familiar material from which the window sill was made. Wooden window sills do not lose their connoisseurs to this day. The wood is pre-dried and treated with antiseptic solutions and varnish.


The main advantage of a wooden window sill is its natural origin and noble appearance. But such material is expensive, and solid products are subject to deformation. To save the window sill, you need to protect it from the effects of abrasives, water and aggressive chemicals, as well as periodically update the coating.

Less cost and more resistance to external influences have glued timber boards, if they are made in compliance with the technology.
Particleboard and MDF
As a cheaper alternative to wood, many companies produce window sills from particle board or fiber board. Products on top are covered with a special film. MDF is a more durable and moisture resistant material compared to particleboard. If the integrity of the film is violated, water that has fallen onto the plate from the chips can lead to swelling and significant deformation. MDF is more expensive but more sustainable.
Window shavings made of wood shavings or fiber are very easy to clean. The main thing is not to use abrasives.
Stone Products

Connoisseurs of natural materials often prefer stone window sills. Most often it is granite or marble. Stone products are beautiful, each window sill has a unique pattern. But this pleasure is not cheap.
In addition, it is easy to leave a scratch on the polished surfaces of natural stone. Stone window sills easily absorb dirt, such as coffee, wine or tea stains. And their thermal insulation is weak. Due to the high cost and high weight, it is better to invite professionals to install a stone window sill.

An alternative to a natural stone window sill is an acrylic-based artificial stone board. Such products are not inferior in strength, heat resistance and beauty, but at the same time they are cheaper and do not scratch.

PVC products in construction are becoming more and more popular every year. This also applies to plastic window sills, which have a whole list of advantages.

PVC window sill has its disadvantages:
- non-natural origin of the material;
- the laminating film, which plays a decorative role, can peel off and be easily scratched;
- high temperatures, such as a hot pan, can lead to deformation of the windowsill.
However, plastic window sills are most often used for installation on their own.

How to mount a windowsill
All window sills are mounted as a general principle. Since plastic window sills are more often used for do-it-yourself installation, we will describe in detail step-by-step instructions specifically for PVC window sills, noting at the end the installation features of structures made of other materials.

Before buying materials, it is necessary to correctly measure the place where the windowsill will stand. The length of the window sill is determined as follows:

To determine the width of the windowsill, you need to measure the width of the wall to the window. 1.5 to 2 cm are added to the result to deepen the board into the groove of the window. This width is enough if you plan to install flush with the wall, which is feasible for flat walls.

Note! When the walls are uneven, it is recommended to measure them on both sides of the window. This will allow you to adjust the windowsill and install it evenly.
You can provide a ledge, the value of which should not exceed 8 cm, so as not to interfere with convection of air from the battery. After all, this will not only violate the uniform distribution of heat in the room, but also in cold weather will lead to damage to the window as a result of the formation of ice.
In accordance with the measurements obtained, the window sill is adjusted to the desired length and width. Now you can proceed with the installation.


Window sill mounting
Step 1. Try on the future window sill at the installation site. If necessary, trim the board.
Note! Cutting plastic and stone is recommended by a grinder, an electric jigsaw is more suitable for wood, MDF and particleboard.
Step 2. Punch grooves in the walls, if necessary. The edges of the window sill will go into these recesses.


Step 3. Clean the installation surface from dust and debris.
Step 4

Step 5. Wooden wedges are placed under the windowsill, starting from the extreme and ending with the central ones. Substrates should not protrude beyond the walls and inner edges of the windowsill. The maximum distance between the wedges should be 40 cm.


Step 6. Level the windowsill according to the spirit level. If there are deviations from the horizon, then rule with the help of additional wedges.


Note! The board should have a slope from the window to the inner edge of about 0.2 cm. This measure will prevent the accumulation of liquid near the window: the water will simply drain.

Step 7. Set the load on the windowsill. The total load should be 10-20 kg.

Step 8. After additionally checking the horizontal arrangement of the window sill, proceed to securing it. To do this, use mounting foam. It is better to take professional foam and a special spray gun. Additional fixation to the window profile is carried out externally using self-tapping screws.

Note! When the foam gets to where it should not be, it is removed immediately with a rag. If it has already hardened, then you can wipe the foam with the help of special solvents.
Step 9. After 24 hours, remove the load and cut off the excess foam.
Now you can install plugs from the ends, and remove the protective film.
If a decision has been made to install a wooden window sill, then on the inside of the board it is necessary to attach felt, which has undergone antiseptic processing, with the help of a rip. The ends of the stone window sills before installation are also protected with a felt layer. The rest of the installation takes place on the same principle as for plastic products.

Thus, the installation of the windowsill is not difficult, especially when it comes to a plastic board. The main thing is to observe alignment accuracy during operation and not to overdo it with mounting foam.
Video - Window sill mounting
The window in the apartment, whether plastic or wooden, without such an element as a window sill, looks unattractive and bad. Therefore, in each house, this element is provided by architects. When replacing a window, there is always a replacement of the board under it.
As a rule, the installation of the windowsill is done by specialists, but the work can be done by yourself. The main thing is to do everything according to the rules. Before installing a plastic window sill, you should familiarize yourself with the instructions for the entire process.
Preparatory work
First you need to prepare the tool and material. Here's what you need to have:
- Hacksaw or electric jigsaw;
- Building level;
- Tape measure and pencil;
- Hammer with a set of drills and chisels;
- Foam mounting.
In addition, wood bars or special PVC linings, as well as a gun for polyurethane foam, can come in handy. Based on the condition of the window opening, these elements may not be enough. In this case, perforated plates should be stored for fastening the window sill.
Fit to Size
When all the tools and materials are prepared, you can proceed to the next stage of work. It consists in carrying out a measurement with the transfer of marking on a PVC board. To do this, add 10 cm to the length of the opening. This measure is needed to create an attractive appearance for the entire window opening.
 At the first stage, measurements of the windowsill
 As soon as the marking is done, you need to cut the PVC window sill. This process is easily carried out with a jigsaw, but in its absence you can use a conventional hacksaw. But the slopes require a lot of effort. Where the installation of the plastic window sill will be made, it is necessary to make the strobes. Their depth should be 5 mm greater than the length of the installed part.
 To insert a window sill in the slopes, grooves are made
 The grooves in the slopes are best done with the chisel, which we install in the hammer drill. They should have a uniform shape that will not impede the entry of window sills. After chiselling, the opening must be cleaned of debris. And then proceed to the next step.
Setting the window sill level
The base and slopes are prepared, so you can go to the fitting. This will require a building level. Before installing the plastic window sill correctly, put linings on the base. On small windows, two props will be sufficient, and at least three should be used for balcony. This operation is easy to perform on your own.
 The plastic panel is padded
 The linings should lie strictly at the window level, which will allow you to qualitatively expose the window sill from plastic before changing it. When everything is ready, you should try on the part in a new place. To do this, we insert a plastic board into the slots of the slopes. Next, we move it all the way. Nothing should interfere with this process.
Next, the installation of the windowsill continues to set the optimal slope. This is necessary to remove condensate naturally. It should not accumulate at the base of plastic windows. To do this, lower the edge of the plate, looking inside the room, a couple of degrees. The construction level will show how much the slope has changed. To keep the opening level, check the position at the edges and middle.
 The slope of the front edge of the window sill is 2-3 mm
 Level adjustment is made by linings. Without them, installing a new windowsill will be very problematic. It is recommended to purchase special plastic elements, but they can be replaced with wooden linings. For work, you should use an ax or a chisel.
It is necessary to install a plastic windowsill with your own hands so that there is no gap between it and the window frame. This is a very important point that should be given close attention. The gap is eliminated by chips placed under the product. It is recommended to fix the edges of the panel when the position matches the desired one. Each change must be checked with a building level so that the PVC window sill does not change its position.
Fixing the structure in place
After trying on, when the correct position is reached, proceed to the fastening step. This action is performed with a mounting foam that uniformly fills the space. But before installing the window sill, the cylinder needs to be heated a little. Temperature can increase the effectiveness of the foam, which better fills the empty seats.

The best way to heat a cylinder is to place it in warm water. But you can use the heating system if the installation of a plastic window sill takes place from autumn to spring. The heated cylinder is shaken well, mixing its contents. Next begins the filling of the space under the stove. Void should not remain.
 The space under the windowsill is carefully blown with foam
 The work does not end there. The fact is that polyurethane foam has a huge expansion. This fact has a negative effect on the position of the board between the slopes. In order not to spoil the work, it is necessary to strengthen the element. Many for this purpose use ordinary bricks, which are installed on the surface of the slab.
Do not worry about the product, as there are stiffening ribs inside the product. They withstand heavy loads, allowing an adult to stand freely on a window opening.
Window sill installation on the balcony
Modern loggias and balconies today are actively glazed. This is not surprising, because the additional usable area will not be superfluous to anyone. And how much is such a pleasure, everyone knows firsthand. Therefore, the windowsill on the balcony is no longer a curiosity.
Basically, the installation of a plastic window sill on the balcony is carried out at the time of glazing. But if this was not done, then mount this element of the interior is on its own.
Before replacing the window sill, prepare the metal brackets. This is necessary provided that it is not possible to bring it under existing windows. In most cases, metal elements are required, which greatly simplifies the process. Brackets are attached to the parapet using anchors. They also allow you to strengthen the windowsill, which helps to increase the payload on it.

The fixed brackets should stand no more than 1 meter apart. The building level checks the horizontal slope. Before attaching the holders, tension the thread. This will allow you to achieve evenness in the horizon and simplify the work.
When the brackets are fully secured, do-it-yourself PVC window sill installation begins. It is fixed with self-tapping screws, which are twisted at the bottom of the element. This operation is best done with a screwdriver, because it significantly speeds up the process.
 Fix the window sill using screws
 After installation, the window sill on the balcony must be treated with sealant. This measure is needed to get rid of a possible gap, which is formed due to irregularities in the edges. Unlike installation in a window opening, the balcony window sill does not need to be reinforced with polyurethane foam. All plastic elements quickly occupy their places where they sit firmly, performing assigned tasks.
Window sill replacement in a wooden house
The installation diagram of a plastic window sill in a wooden house is very similar to the process performed in the apartment. First, the old wooden window sill is dismantled, the foundation is being prepared. The side slopes must be put in order so that the plastic part freely takes its place.
In order not to cut and freely fix the plastic window sill, it is better to cut the sides from the tree. For this work you will need a chisel, a hammer. So grooves where fastening will be made turn out. It happens that they can already be ready and they had a wooden window sill.
 Window sill mounted in grooves
 As soon as the grooves are ready, pads are placed on the base of the opening. Do-it-yourself installation of a plastic windowsill in the doorway is done only on them. The position of the stands can be fixed so that they do not move under the mounted element. Before attaching the product, you need to check the position of the plate. After it is fixed and the voids under it are filled with mounting foam. Many people ask how to put the windowsill in another way. But foam is the best and most effective option.
Plastic windows in recent years have become an integral element of any interior. Regardless of the style solution of the room, they put energy-efficient plastic windows and window sills from the same material in it. It is durable, and thanks to a wide range of decorative films, and a very beautiful material has firmly entered our lives. The article will discuss how to properly fix a plastic window sill.
The advantages of a plastic window sill
The most popular materials for window sills: wood, plastic and stone.
- Wooden window sills are too finicky and require constant care. In addition, over time, they dry out or are damaged by frequent staining.
- Stone window sills, of course, are durable and beautiful, but they are very expensive and cannot be installed on their own.
- Plastic window sills are not just durable, light and beautiful, according to their technical characteristics they best match windows made of PVC profiles, which will make maintenance easier.

- In addition, the service life will be the same, therefore, having mounted the window, slopes and window sills, you will not have to replace or restore any one element.
- If the window frame has a lamination, then the same film is selected for the window sill.
- Due to its properties, plastic is resistant to moisture, so even with possible condensation on the windows, it will not begin to rot. With regular care, mold does not form on it, since the surface does not have microcracks.
- Lower price than a wooden or stone window sill of the same size.
- Resistant to aggressive chemical environment.
- Due to the light weight and plasticity of the material, it is easy to cut and install independently without special tools.
- A plastic window sill is not a cast plate. It consists of transverse chambers. This not only reduces weight, but also serves as additional thermal insulation.
- The more expensive PVC windowsill models have a special coating that makes it resistant to high temperatures and mechanical damage.
They have only one drawback - low strength.
How to make plastic window sills
There is no official classification of plastic window sills, but they are conditionally divided into several types.
- Standard plastic window sills. They are the most popular. They are made in white, the width is from 20 to 100 cm in increments of 5 cm. It has the lowest resistance to mechanical damage.

- Thermo and shockproof plastic window sills. It is rational to mount them in wide openings that perform the function of a work surface. For example, when the kitchen window sill is used as a table. Particular strength is given to the product by lamination with a special film.
- Laminated window sills. They are more beautiful, but their characteristics remain the same. Films not only give color to the windowsill, but can also imitate natural materials (stone, wood). Despite the fact that the lamination method is reliable, a number of manufacturers offer window sills that have an acrylic layer on top of the lamination. In this case, the surface strength increases several times (however, as the cost and weight, too, which negate its advantages).
- Panels are made by extruding extruder PVC blanks. The surface is laminated with a film that gives the window sill smoothness and further protects its surface from damage. The thickness of the windowsill varies from 1.8 to 2.2 cm.
How to choose a plastic window sill
At first glance, all window sills are the same and there is a desire to purchase the cheapest. But professionals know several nuances that will help you choose the best quality product.
- The plastic window sill should be made of high-quality raw materials, which have passed the quality check for safety for humans. This can only be traced by the product certificate.
- Also in the store must provide detailed material specifications. They include UV resistance (especially important for non-ferrous products), mechanical strength and resistance to condensation.
Having received all the necessary information, choose a model that is suitable in design and size.

- It is best to choose a white window sill. This is due to the fact that it is guaranteed not to fade under the influence of direct sunlight. And small scratches on it will be almost invisible, unlike color models.
Tip: cheap plastic may turn yellow in a few years, so it is recommended to choose white window sills from the middle price segment.
- A plastic window sill, regardless of price and manufacturer, is a panel, inside which stiffeners are 1.5-3 mm thick and air chambers between them. It is the number of stiffeners that is responsible for the strength of the window sill. The higher their number, the more load he can withstand.
- The panels have a standard length of 600 cm. You can buy and cut them yourself, or order ready-made ones according to individual sizes.
Tip: in order not to make a mistake in the preliminary calculations, it is recommended to call a measurer.
- The width of the panels is from 20 to 100 cm. First, the increase step is 5 cm, after 60 cm - 10 cm. Based on this, the internal size of the window opening (depth) is measured. Since the window sill should protrude forward (but not completely cover the radiator), add another 10 cm.
- For example, the depth of the window sill in a panel house is 15 cm, add another 10, and you get 25 cm - the required width of the panel.
Preparing walls before installing a plastic window sill
Before you install plastic window sills with your own hands, you need to prepare the walls.
- First, all debris is removed from the window opening and dedusted so that subsequently the mounting foam has the best adhesion. It is especially important to do this if the installation is done to replace the old wooden window sill.
- The side walls of the window opening are called slopes. Often, the windowsill is laid simply from edge to edge, but this is wrong. The secrets of installing a window sill is to deepen it on the sides of the wall by 2-4 cm. For this, recesses are made with a puncher.
What you need to install pvc windowsill
If the work is done in a wooden house, then the number of tools will be required to a minimum, in concrete and brick houses everything is more complicated.
- Hammer drill;
- bulgarian;
- level 1 m long;
- polyurethane foam and a gun for it;
- stationery knife;
- wedges (from MDF, laminate or wood).
How to put a window sill on a plastic window with your own hands
Important: the window sill should not close the battery. Impaired air circulation will cause condensation to form on the windows.
- Having the exact dimensions, the window sill is cut with a grinder to the required parameters, taking into account the protrusions along the walls by 2-4 cm on each side. If the window opening has a complex configuration, first cut out a layout on cardboard and make a fitting. If everything fits, then the circuit is transferred to the panel.
- If the house is not new, and the opening is much lower than the groove under the frame of the plastic window, which is provided for the window sill, first put wood to the desired height. Then, the prepared window sill is inserted into the groove between the window profile and the foam to a depth of 2 cm.
- After that, with the help of the level, they begin to regulate its evenness. You can do it higher or lower by means of thin wooden wedges that either raise or lower the window sill to the desired height. They are located at a distance of 30-40 cm from each other. In the future, they will remain inside the structure and will play the role of retaining elements.

Tip: you need to install the window sill with a slight slope towards the room, literally 5 mm. This will allow condensation to roll, and not remain in the frame.
- Then you need to foam the space under the windowsill. It is best to use a two-component foam that does not expand. When using the usual, you have to fill the surface of the window sill with heavy loads. To do this, put heavy bags with building mixtures, large cans of water, etc.
- After a day, the cargo can be removed, and excess foam cut off with an office knife.
- As a final stage, decorative caps are put on the sides of the windowsills.

- The places where the window sill adjoins the internal slopes of the plastic windows are closed with corners.
How a window sill is attached to a plastic window photo

DIY Tips for Installing a Plastic Window Sill
- The polymerization (hardening) process of the mounting foam is much faster in a humid environment. Therefore, before filling the space under the windowsill with foam, it is wetted from a spray bottle or any other spray bottle.
- It is not recommended to fill in too much foam. Since it has the properties to expand several times and can push the window sill up, despite the load. To avoid this, small gaps are left between the freshly squeezed foam strips, which are guaranteed to close upon expansion.
- If it is not possible to bring the panel of the window sill into the slopes and under the window profile, then it is adjusted perfectly precisely. All joints are treated with a colorless silicone sealant.
DIY plastic window sill installation video
In the struggle for quality of life, all means are good. Even the rejection of a standard windowsill.
A window sill in a small kitchen is like a bicycle path for a motorist in traffic jam. In ordinary life and in a spacious kitchen, he has every right to be empty, but every centimeter counts on a tiny one. How to use the windowsill in the kitchen? What nuances can arise during the “reorientation” of the windowsill? And what non-standard ideas for the re-arrangement of the windowsill exist?
1. Window sill in the kitchen as a working area
How to make a countertop instead of a windowsill in the kitchen depends on the repair budget and the dimensions of the kitchen. Let's start with the last one.
The standard height of the headset (and its countertops) is 85 cm. But sometimes it is made taller due to the height-adjustable legs and an enlarged base. The correct height of the working area is 15 cm from the bent elbow. Keep this in mind when ordering a kitchen.
So, if the height of the window sill is approximately equal to the height of the countertop, plus or minus a couple of centimeters, we just continue the working area along the window. The battery below can be left open.
Tip: Consider the width of the slopes when choosing a countertop that you plan to mount instead of the windowsill. And pay particular attention to their material.
It is important that the countertop does not get wet from condensation on the window, the end must be protected from moisture. But if the wall is “wet” and besides freezes, do not use a particleboard made of chipboard as a window sill. Better take an artificial stone.

If the windowsill is above the countertop
In this case, the “riser” between the upper and lower countertops is usually decorated with tiles or covered with a baseboard, depending on the design of the kitchen.
They make a wide window sill from the same material as the countertop, and use it as an additional shelf.
If the window sill is left in the original version, it is cut to the slope width.
In the example in the photo, the height difference was used to insert ventilation grilles for the circulation of warm air from radiators.


If the windowsill is below the countertop
The most obvious thing is to lay a part of the window opening with a brick and order a smaller window. But this solution is only suitable for a private home. If the house is multi-unit, you break the law by changing the architectural appearance of the building.
Of course, if the kitchen window opens onto a glazed balcony, changes in the facade will be invisible. But in any case, agreeing on such changes will not be easy, which means that in the future there may be problems with updating the registration certificate and selling the apartment. In addition, you worsen the insolation of the room.

The easiest option from the technical side is to build a kitchen line on top of the windowsill, leaving 10-15 cm, so that you can open the sash for ventilation. The “groove” between the kitchen furniture and the window pane can be filled with potted plants. This may not be the most ergonomic option, but the most economical one. Do not have to change the glass and go on tricks with furniture. However, in this case, the window will not fully open. This will make it difficult to wash, plus will reduce fire safety.
If you were still going to change windows, you can order a double-glazed window with a horizontal impost (frame element) at the tabletop level. The window will look like in this photo, only the horizontal jumper and the edge of the countertop will coincide. Part of the glazing will be under the countertop. If you have cabinets there - it's okay, but you can also organize open shelves with natural lighting.
The advantages of this decision - you do not interfere with the facade, the window opens, no gaps. Minus - the amount of sunlight decreases.

Finally, you can beat the elevation difference, as the project did in the photo. The working area at the window is lowered to the level of the windowsill. Cooking there is not too inconvenient, but arranging storage areas and some kitchen appliances is quite possible. At what height are the microwave, toaster and kettle, it is not so important, and they occupy a lot of space. The difference in heights is beaten by a colored tabletop.

In this project, only a part of the working area with a sink and cabinets was organized by the window. The other part was combined with a stove and brought to the island (or you could just put it in a line to the opposite wall). Since the surfaces do not meet, the difference in height is not noticeable. Of course, the location of the sink far from the stove is not too ergonomic, but in this case the distance is small.

What to do with the battery
A full-fledged countertop instead of a window sill in the kitchen implies the arrangement of cabinets under it. In this case, you need to figure out what to do with the battery. It is not recommended to close it - it is harmful for nearby furniture, in addition, it affects the temperature in the kitchen.
Around the battery, free air circulation is required. So, you need to provide holes in the countertop, basement and / or in the doors. Cold air should flow to the battery, and warm air should rise quietly. The sill-countertop in the kitchen with a photo has a convection grate.

Tip: if the pipes and batteries remain in sight, you can not hide or transfer them, but rather highlight them with color - make them an accent detail.

A popular solution to the problem with the battery is lattice or louvered doors that do not interfere with air exchange. However, keep in mind that even a half-closed battery will make heating the kitchen worse. If you have trouble with heating, consider moving the battery to another wall, an additional radiator, or underfloor heating.
Formally, battery transfer is an operation that requires a project and even thermal calculation. In fact, if you do not change the number of sections, the consent of the management company will be sufficient. Without it, nothing can be done anyway - they will have to turn off the riser and drain the water. Therefore, batteries are usually changed in the summer. Do not transfer the battery to an adjacent loggia - this is prohibited. Moving the battery from under the window automatically implies the insulation of the window sill. Especially if there is a refrigerator.

In the photo there is another window-sill in the kitchen of a small area, where the problem with the distribution of warm air is elegantly solved. Plywood facades with large perforations close the storage area and do not interfere with air circulation.

Owners of small apartments are well aware of how important each cm of usable area is, but what happens to the creative approach when it comes to the windowsill? In most cases, it is limited to the fact that the window sill becomes a place for flowers, and few think about how to make a table from the window sill, which is able to perfectly perform the function of a work area in the kitchen or a workplace in a room.
A window sill table is suitable for a room with a small area.
Do not neglect the opportunity to optimize living space, in addition, this will require a minimum list of tools and materials:
- a beam for installing legs and reinforcing a window sill;
- chromed metal racks;
- plastic caps and holders for racks;
- perforated mounting profiles;
- self-tapping screws;
- pVA glue;
- antiseptic impregnation;
- polyurethane foam;
- glossy or matte enamel;
- wood putty;
- emery cloth;
- pencil, ruler, cord, tape measure;
- electric jigsaw;
- hacksaw;
- bulgarian;
- drill;
- plane;
- paint brush, putty knife.
The most successful moment to make a table from the windowsill is to replace the old window with a plastic one (if it has not been replaced before). The work of specialists is suspended until the installation of the window sill and slopes.
The basis of the design of the future table will be a pine furniture panel measuring 38x600x2000 mm, and the base will be a window opening 1800 mm wide.
The thickness of the beam for each case is individual and should allow the sash windows to move freely without touching the table top.
Work sequence

Before proceeding with any installation work, it is necessary to determine the dimensions of the future structure so that it is convenient in operation and does not interfere with the passage. Be sure to note that in most cases, heating radiators are located under the windowsill. It will be difficult to call a comfortable stay at the table, when the knees rest against the batteries, and the elbows hang. After all measurements, you can proceed to the layout of the main sheet.
The front edge of the window sill runs along an arc of large radius. Take a long twine, fix one end securely against the wall, and tie a pencil to the other. Lay the furniture board against the opposite wall. Pull the cord, draw a pencil arc on the surface of the shield, which is equal to the radius of the length of the room.
The bottom of the lid requires reinforcement with a beam, since a table stand will be attached to it with the help of long screws in the future. Saturate the sawn timber with an antiseptic and dry. Glue the bars to the shield using PVA glue.

The table from the windowsill should be painted with paint, and then varnished.
After setting the glue, use a jigsaw to cut the countertop to a certain radius. In addition, screw long self-tapping screws into the bars, thereby strengthening the glue connection of the bar with the shield. Select the length of the screws so that when screwing in, they do not damage the table top. Next, treat the edge of the countertop with a planer, sand it with sandpaper (grain size 60). For convenience, glue the skin to a small wooden block.
When considering how to make a table out of the windowsill, it is worth considering the fact that the radiators located under the window perform the function of heating not only the room, but also the glass packet, thereby protecting it from freezing and fogging. Therefore, in the countertop, directly above the radiator, make several ventilation holes so that warm air can rise unhindered upward. If this recommendation is ignored, the room’s microclimate will be disturbed by dampness, and the window sill will gradually become unusable. When drilling, experts recommend using a pen drill that can form holes with a diameter of at least 3.5 cm.
At the next stage, the manufactured countertops are installed in the opening. On the side of the window, the structure will be supported by bars, on the opposite side, metal connectors having perforation. Bend the profile at an angle of 90 °, screw one strip to the wall, the other to the shield. After installing the shield, fill the entire space with foam. Let her grab and fill the seams between the slopes and the windowsill.

A properly installed window sill can withstand loads of up to 50 kg.
Spat the surface of the table. After drying, paint the countertop in the selected color using enamel marked “For interior use”. After that, plaster the gap under the table and lay the flooring.
The design of the table requires additional support, the role of which will be performed by chrome tubes. The length of the tube should allow the legs to abut against the floor. Insert the plastic plug into the legs from the bottom edge. Attach the flange with holes to the upper end of the stand. On the bottom of the countertop, outline and drill the holes for the screws. Screw the legs to the table.
Secrets of the windowsill table
- The worktop to be installed must go at least a few millimeters under the window frame. The filled gap between the frame and the countertop will have an untidy appearance and will quickly crack.
- Be sure to seal the joint with the frame. Remember that during the off-season, in the absence of heating, the window will fog up and moisture will fall under the countertop.
- The plywood worktop must be soaked twice with linseed oil. If the countertop has a sawed-off trailing edge made of MDF or HDF, it must also be protected from moisture.
The design that we managed to manufacture is able to support the weight of a laptop, folders with papers, books, flower pots. Such an unconventional solution is able to bring its own zest to the atmosphere and make the interior original and special.
Desk-windowsill - how to properly design it? 80 photos of the best ideas
An excellent stylistic solution for owners of small-sized apartments is to turn the windowsill into a usable area.

This helps to rationally use the space, as well as solve the issue of the location of a convenient workplace for all family members.


In addition, the installation of the table - window sill does not require long time costs and large financial investments.

What is the convenience of a window sill
The idea to turn a window sill into a working area is applicable for any room: kitchen, bedroom, study, nursery.

Such a table will find active application not only among schoolchildren or students, but also other people whose work requires direct sitting at the table.

This interior item has a number of undeniable advantages:

High light. The use of a table lamp is required much less often, mainly in the dark. However, if the windows face the sunny side, it will be necessary to equip their blinds.

A heat source that is comfortable for the feet. The radiator of the heating system located under the window space does not interfere with the location of the legs, while warming in the cold season. For convenience, you can build a special stand.

Saving free space, which, as a rule, in modern apartments is already too small.

With the help of your own ideas or design solutions, you can translate into reality the most unconventional ideas, with the result is not just a window sill, but a functional object, which is a kind of interior decoration and at the same time preserves its intended purpose.

Materials for the manufacture of table-windowsill
To create the countertops, they mainly use the same materials as for a regular window sill. They differ only in size: a wider plate is required for the table.

For the manufacture of multifunctional windowsill fit:
- laminated particleboard / MDF panels;
- natural wood or stone;
- acrylic.


Each of the materials has its own characteristics.

Laminated boards (particleboard or MDF) are the most budget option, are very diverse, simulating a variety of materials. In addition, they can be easily processed, providing the opportunity to create a table-window-sill with your own hands in an absolutely diverse form.

Most preferred is a sheet of material, the thickness of which varies between 15-19 mm. The disadvantage is the low moisture resistance. In this case, the use of additional processing in the form of plastering and further staining is recommended.

Wood (an array of oak, pine, ash, beech) looks more aesthetically pleasing, and at the same time it will be expensive, and also needs antiseptic treatment against pests and moisture.

Natural stone is quite heavy, so when mounting such a countertop, additional support will be required. To preserve the natural shade longer, such a window sill is treated with a polymer.

Artificial stone (cast marble, acrylic, quartz) is a practical choice: inexpensive, durable and simple, does not need special care.

All of the above materials, providing a rigid and durable structure, are perfect for a table-window sill. Weigh the pros and cons when choosing the basis for the interior item, since its functionality and durability of use depend on this.

Window sill desk manufacturing technology
The creation process includes compliance with several requirements and consists of the following steps:

Preparatory work. First of all, it implies, if necessary, replacing the window cloth. If this is not necessary, then carefully dismantle the existing window sill.

In the absence of this skill, you should resort to the help of qualified specialists. If you do not want to perform such labor-intensive work, you can fix the new part on the old version of the window sill using liquid nails.

Decide on the most suitable value and color scheme. Do not forget about the necessary set of tools for further work.

The next step involves calculating the size and shape. The most convenient way is to use a stencil.

You should determine the location of the battery in order to properly cut openings for air intake and the process of heating the glass.

Direct installation of the product itself. The support should be carried out on bars and perforated connectors. Product flatness is recommended to be determined using a special level.

Existing empty space should be filled with foam. After thorough drying, the joints should be treated with helium sealant.

The installation process is completed by the installation of legs.

Care for this product should be appropriate and depend on the type of material. It is better to abandon the use of hard brushes and alkaline detergents to extend the life of the table-window sill.

A window sill - a table - is a profitable and original choice that allows you to create a convenient workplace without serious material investments.

Photo of a sill desk